Note:
The new version of Alarm Center is now available. This document only describes operations for the previous version of Alarm Center. If you are currently using the previous version, click Switch to New Version in the upper-right corner of Alarm Center. For content related to the new Alarm Center, see Viewing and Handling of Attack Alarm Events. The Attack Interception Statistics module is an integration by the firewall based on all set rules, threat intelligence, and other interception records. It facilitates statistical analysis and handling of all intercepted events, with the statistical data updated every 20 minutes.
Visualization of Interception Statistics
1. Log in to CFW console, in the left navigation, click Alarm Center > Blocked attacks. 2. On the Blocked Attacks page, visual analysis of existing security alarm events is supported based on ① personal assets and their regions, ② time.
The left side of the page displays a trend curve of recent blocked interception events after filtering, showing the number of interceptions at different times. It also presents statistics on blocking for malicious outbound connections, blocking for blocklists, blocking for brute-force attacks, and blocking for exploit attacks.
On the right side of the page, you can view the ranking list of intercepted events by attack-blocking IPs, geographic locations, and destination ports.
Quickly Locate Intercepted Information
Provides multiple filtering features to support quick filtering and locating of existing information of attack interception.
1. In the event list on the Blocked attacks page, two views are provided to display interception information. Click Asset View or Event View in the diagram to switch between views. 1.1 The Asset View takes the attacker's assets as the perspective, aggregating and displaying interception events from the same access source.
1.2 The Event View takes individual interception events as the perspective, with each interception event displayed individually.
2. Locate existing events of attack interception based on ① traffic direction and ② filter criteria.
Traffic Direction: Click the button at ① in the diagram to view details of intercepted information under different traffic directions, including inbound, lateral movement, and outbound.
Filter Criteria: Click the icon at ② in the diagram to filter attack alarm events by criteria. Supports display by policy of Intrusion Defense and handling status.
Supports sorting by interception time, interception statistics, and average interception frequency.
Supports frequency statistics in minutes, hours, and days.
Supports filtering for keyword search, including access source, access destination, destination port, and geographic location.
View Location Information Details
On the Blocked Attacks page, directly view details of intercepted events in the event list. Clicking Asset Name will redirect you to the Asset Center to view details of the attacked asset. Quick Handle Intercepted Information
Handle a Single Blocked Item
On the Blocked Attacks page, handling of individual intercepted events is supported. In the right-hand sidebar of the event, perform Pin to top, Block, Allow, Ignore, and Quarantine operations. Note:
Due to varying asset statuses, the actionable buttons available on the right differ. The quarantine operation specifically applies to lateral movement and outbound interception events, isolating compromised hosts to prevent further impact.
The following operations apply to both batch processing and operations under the Event View.
Pin to top: In the Asset View, risky assets with interception events can be pinned to the top with one click, allowing users to focus on the status of real-time interception of their assets.
Note:
The number of pinned items for both inbound and outbound directions cannot exceed a maximum of 5.
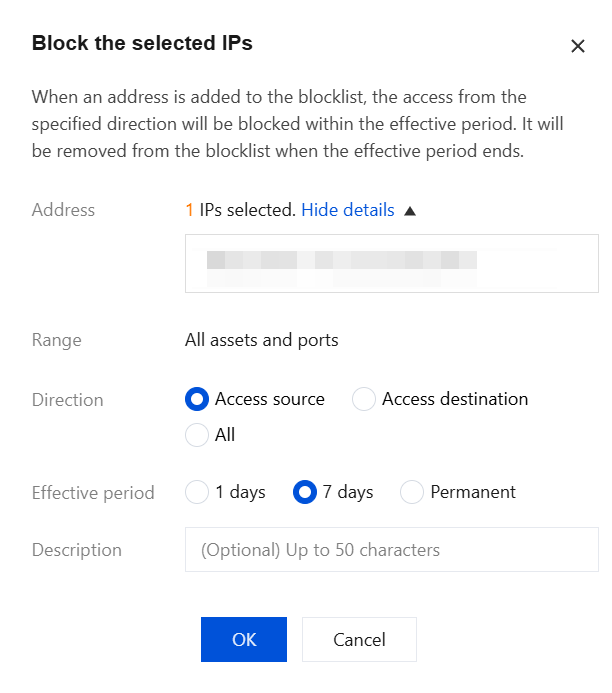
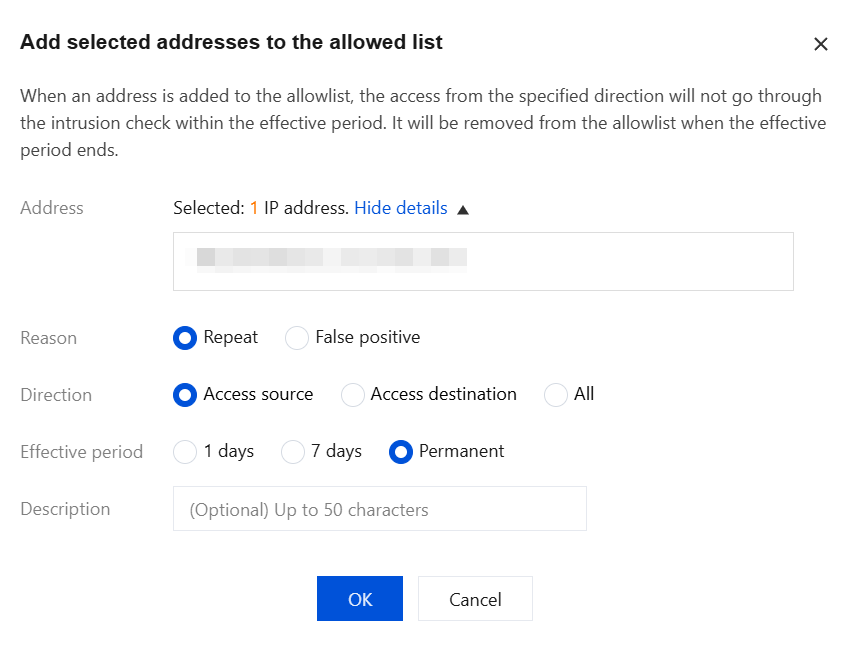
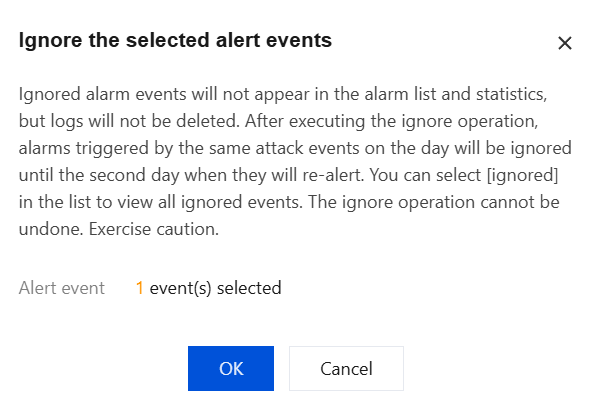
Block: For assets with higher risk levels, you can click Block to add the IP address to the blocked list in the Managing Defense Operations module, select the block duration, add remarks. CFW will automatically block access from this IP address to all user assets within the specified time frame. Allow: For IP addresses that should not be blocked for user tasks, you can click Allow. Add the IP address to the Allowlist strategy in the Intrusion Defense module, select the allow duration and reason for allowing, fill in remarks. CFW will bypass the detection of the Intrusion Defense module for this IP address within the specified time frame and no longer block it. If the user is unsure whether the reason for allowing is a false positive, they can prioritize selecting emergency allow. If it is confirmed as a false positive, they can provide feedback on the false positive content and modify it after clicking OK. Ignore: For duplicate interception events, you can click Ignore. The ignored interception events will not appear in the interception list or statistics, but the logs will not be deleted. You can select "Ignored" in the list to view all ignored events. The ignore operation cannot be undone, so proceed with caution.
Quarantine: Click Quarantine, quarantine of asset instances will automatically deploy Enterprise Security Group blocking rules, blocking network access in specified directions for the selected assets, facilitating subsequent location and troubleshooting to mitigate losses in a timely manner.
Note:
After the asset instance is isolated, you can use the Ops allowlist to access the asset. You can choose to manually enter IP addresses or use Zero Trust protection.
Only supports manual entry of 10 IP addresses.
Zero Trust protection supports asset access authorization based on WeChat or WeCom user identities. For details on how to integrate WeChat or WeCom users, see Enterprise Security Group. Batch Handling of Alarm Information
On the Blocked Attacks page, you can process multiple interception entries. Select multiple interception entries and click One-click Block, Allow, Quarantine, or Ignore. Note:
Due to the varying statuses of assets, the available action buttons may differ. The quarantine operation is only applicable to lateral movement and outbound interception events, isolating compromised hosts to prevent further impact escalation.
Users can reverse operations by navigating to Intrusion Defense > Block List, Allow List, or Isolation List. Ignore operations cannot be undone; proceed with caution.
Alarms exceeding 7 days will expire and cannot be processed.
False Positive Handling
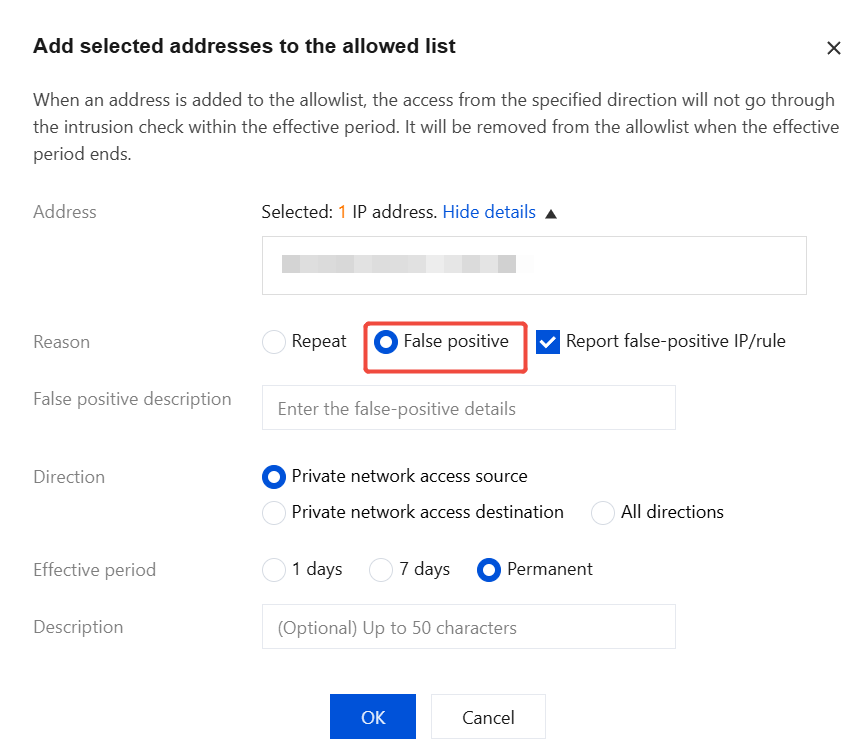
You can add the IP address to the allowlist. On the Blocked Attacks page, select the desired asset/IP address, click Allow, choose False Positive as the allow reason, and click OK.
Query All Attack Events from a Specific IP Address Against Me
In the asset view, hover the mouse over Access Destination/Access Source or Asset Name, then click the below View in Intrusion Defense Logs to query all attack events.
Note:
In the figure, hovering the mouse over Access Destination/Access Source is taken as an example.
View Latest Intercepted Events
The Blocked Attacks page has an auto-refresh feature. At the top of the page, click the icon, and in the sorting of interception records, select "Recent Interceptions", then click OK to monitor the latest interception events in real time.