Note:
The new version of Alarm Center is now available. This document only describes operations for the previous version of Alarm Center. If you are currently using the previous version, click Switch to New Version in the upper-right corner of Alarm Center. For content related to the new Alarm Center, see Viewing and Handling Attacks of Alarm Events.
Visualization of the Summary of Attack alerts
Through the visual summary of alarm information, it is convenient to perform statistical analysis and operational handling on attack events detected by the firewall. The statistical data is updated every 20 minutes.
1. Log in to CFW console, in the left navigation, click Alarm Center > Attack alerts. 2. On the Attack Alarm Summary page, conduct visual analysis on existing security alarm events based on ①Personal Assets and ②Time.
On the left side of the page is a trend curve showing changes in recent security events after filtering, displaying alarm counts at different times. It also presents statistics on compromised hosts, pending events, network scanning and probing, and attacks exploiting vulnerabilities.
The right side of the page displays the top 10 ranking of alarm-triggering IP addresses, providing reference for proactively avoiding attacks from risky IP addresses.
Quickly Locate Alarm Events
Provides multiple filtering features to quickly filter and locate existing attack alarm events.
In the event list on the Attack alerts Page, you can locate existing attack alarm events based on ①Alarm Event Type, ②Condition Filter, and ③Custom Header. Alarm event types: Click the button at ① in the figure to view details of alarm information under different categories.
Condition Filter: Click the button at ② in the figure to filter attack alarm events by condition.
Supports viewing alarm information in pending, blocked, allowed, and ignored statuses.
Supports filtering by alarm severity level.
Supports filtering by security event type, protocol, and detection source.
Supports directly clicking the icon to filter by source IP or destination IP.
Supports sorting and viewing by occurrence time and alarm count.
Supports filtering through keyword search, including source IP, source port, destination IP, destination port, severity level, protocol, and detection source.
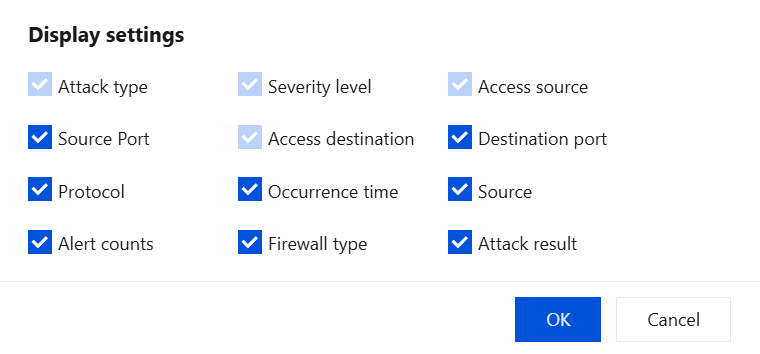
Customize table headers: Click the icon at ③ in the figure to define header fields and select up to 10. View Located Event Details
After locating a specific attack alarm event, click to the left of the event to view its detailed information. Note:
To access the CWPP deep detection feature, you need to purchase CWPP. Threat profile: Click Click to view to see the threat profile of this access source, including geolocation of the IP address, whether it is an IP address in threat intelligence, network information, reverse DNS lookup records, and so on.
Asset Details: Click Click to view to navigate to the Asset Center and view the details of the attacked assets.
Quick Handling of Alarm Information
Handle Single Alarm
On the Attack alerts Page, you can handle individual alarm information. In the event operation bar, perform block, allow, ignore, and Quarantine operations on the access source. Note:
The isolation operation only applies to alarm events for outbound traffic, isolating compromised hosts to prevent further expansion of the impact.
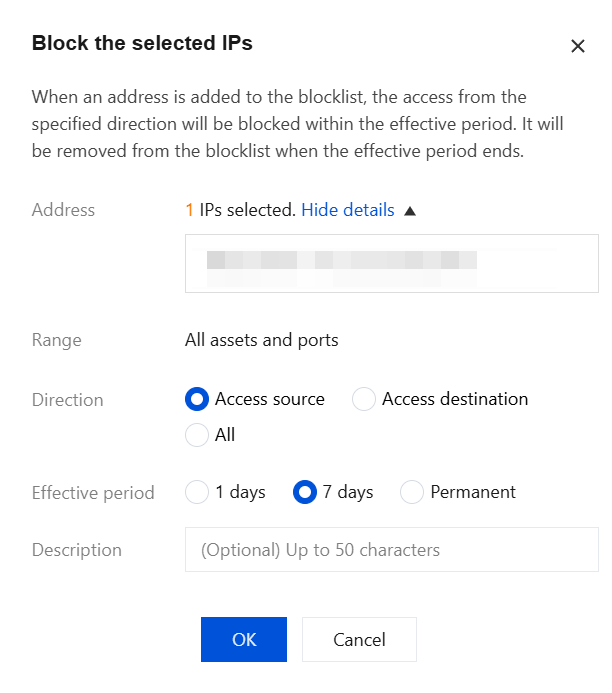
Block: For security events with high severity levels or frequent alarms, click Block to add the IP address to the blocked list in the Intrusion Defense module. Specify the blocking duration and add remarks. CFW will automatically block all access attempts from this IP address to your assets within the specified time frame. Note:
When an alarm IP address may be from the intelligence allowlist, a prompt will appear. Do not manually block/ban it. Enable the Intrusion Defense blocking mode, and CFW will automatically block attack traffic from this address while allowing normal traffic.
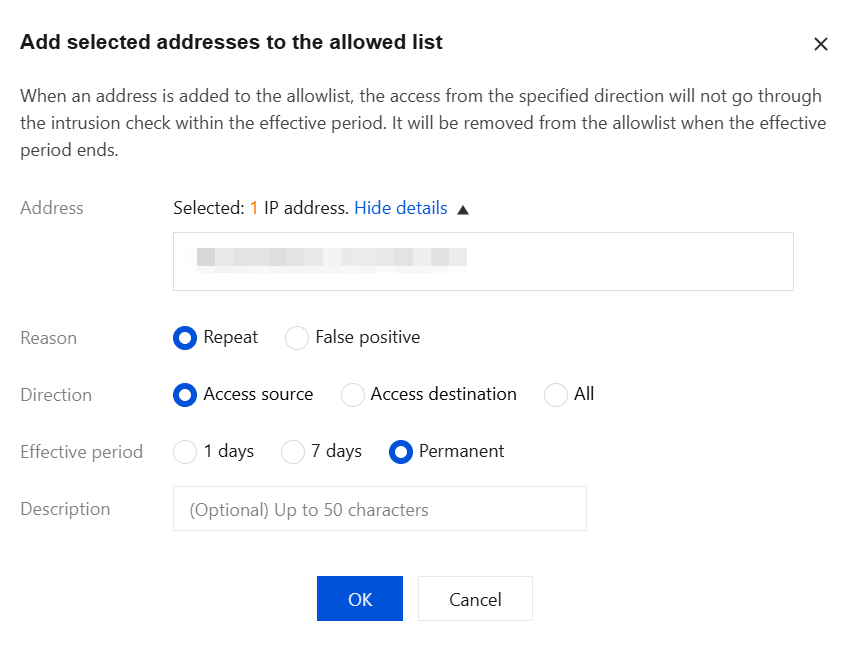
Allow: For alarms with duplicates or potential false positives, click Allow to add the IP address to the allowlist (allowlist) in the Management Defense Operations module. Specify the allowance duration and reason, and enter remarks. If the alarm is confirmed as a false positive, you can provide feedback. CFW will bypass Intrusion Defense detection for this IP address within the specified time frame, allowing its traffic. Ignore: If you do not want to handle the alarm information, you can click Ignore. The log will not disappear but can be viewed in the Ignored list under the handling status.
Quarantine: Select the traffic direction to block and the effective duration, click Quarantine. Blocking rules for the asset instance will be automatically deployed to the Enterprise Security Group, blocking network access in the specified direction for the selected assets within the specified time frame.
Note:
After the asset instance is isolated, you can use the Ops allowlist to access the asset. You can choose to manually enter IP addresses or use Zero Trust protection.
Only supports manual entry of 10 IP addresses.
Zero Trust protection supports selecting WeChat or WeCom users to allow asset access. For how to onboard WeChat or WeCom users, see Enterprise Security Group for details. Batch Handling of Alarm Information
On the Attack alerts Page, you can handle multiple alarms in bulk. Select multiple alarms and click One-click Block, Allow, Isolate, or Ignore. Note:
The isolation operation only applies to alarm events for outbound traffic, isolating compromised hosts to prevent further escalation of the impact. It is primarily available for alarm events of the host compromise type.
If users need to modify operations, they can navigate to Intrusion Defense > Block List, Allow List, or Isolation List to delete the IP address and reverse the operation.
Alarms exceeding 7 days will expire and cannot be processed.