To make it easier to switch the Virtual Private Cloud (VPC) network or subnet of a Cloud Virtual Desktop (CVD) instance, CVD allows you to switch between different subnets within the same VPC network or between different subnets in different VPC networks.
Operation Limits
Only CVD instances in the Running status support switching the VPC network.
A single batch operation supports switching the VPC network for a maximum of 20 CVD instances.
The VPC network switching process takes approximately 2 minutes. The CVD instance will be unavailable during this process.
Operation Steps
1. Log in to the CVD console and go to the Desktop List page.
2. Select the CVD instance for which you want to switch the VPC network.
Note:
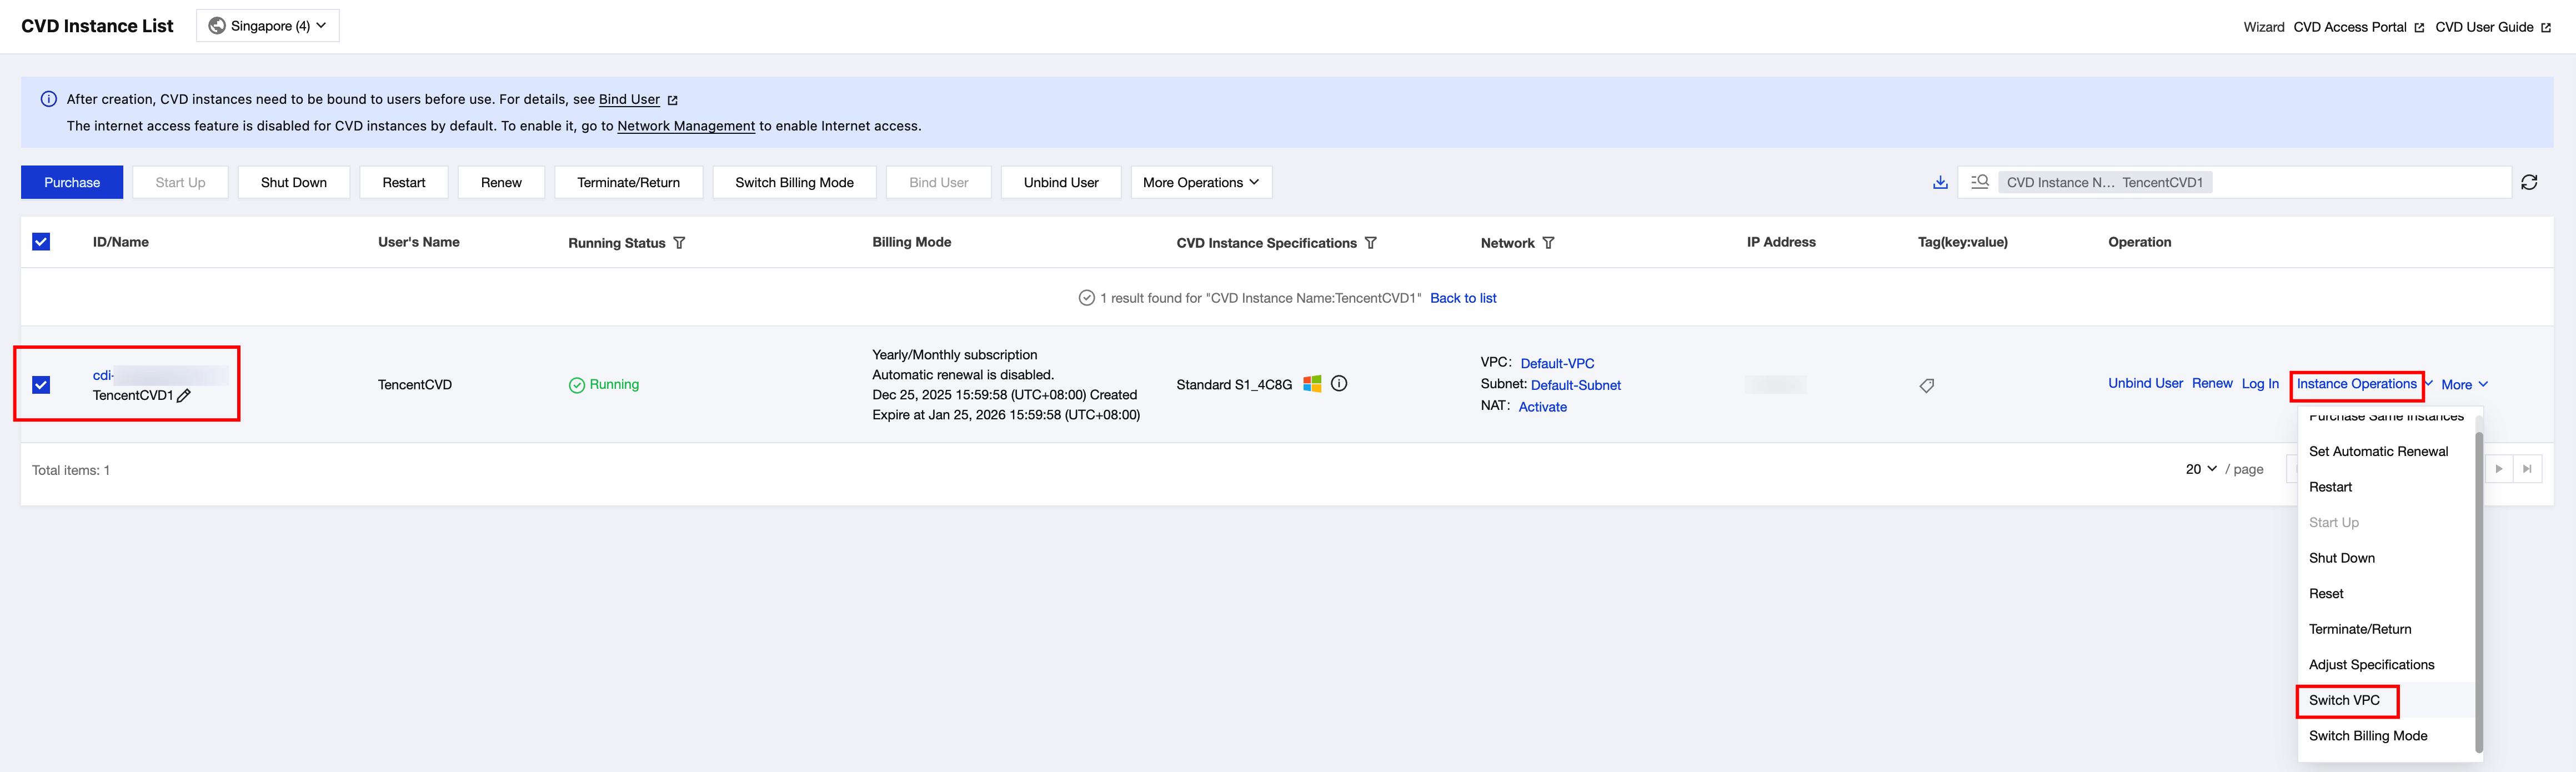
To switch the VPC network for multiple CVD instances in a batch, select the checkboxes for the desired instances in the desktop list, and then click More Operations > Switch VPC in the operation bar at the top.
CVD Instance List
Instance Details Page
On the Desktop List page of the CVD console, select the CVD instance for which you need to switch the VPC network. Then, click More Operations > Switch VPC in the operation bar at the top, or choose Instance Operations > Switch VPC in the operation column.
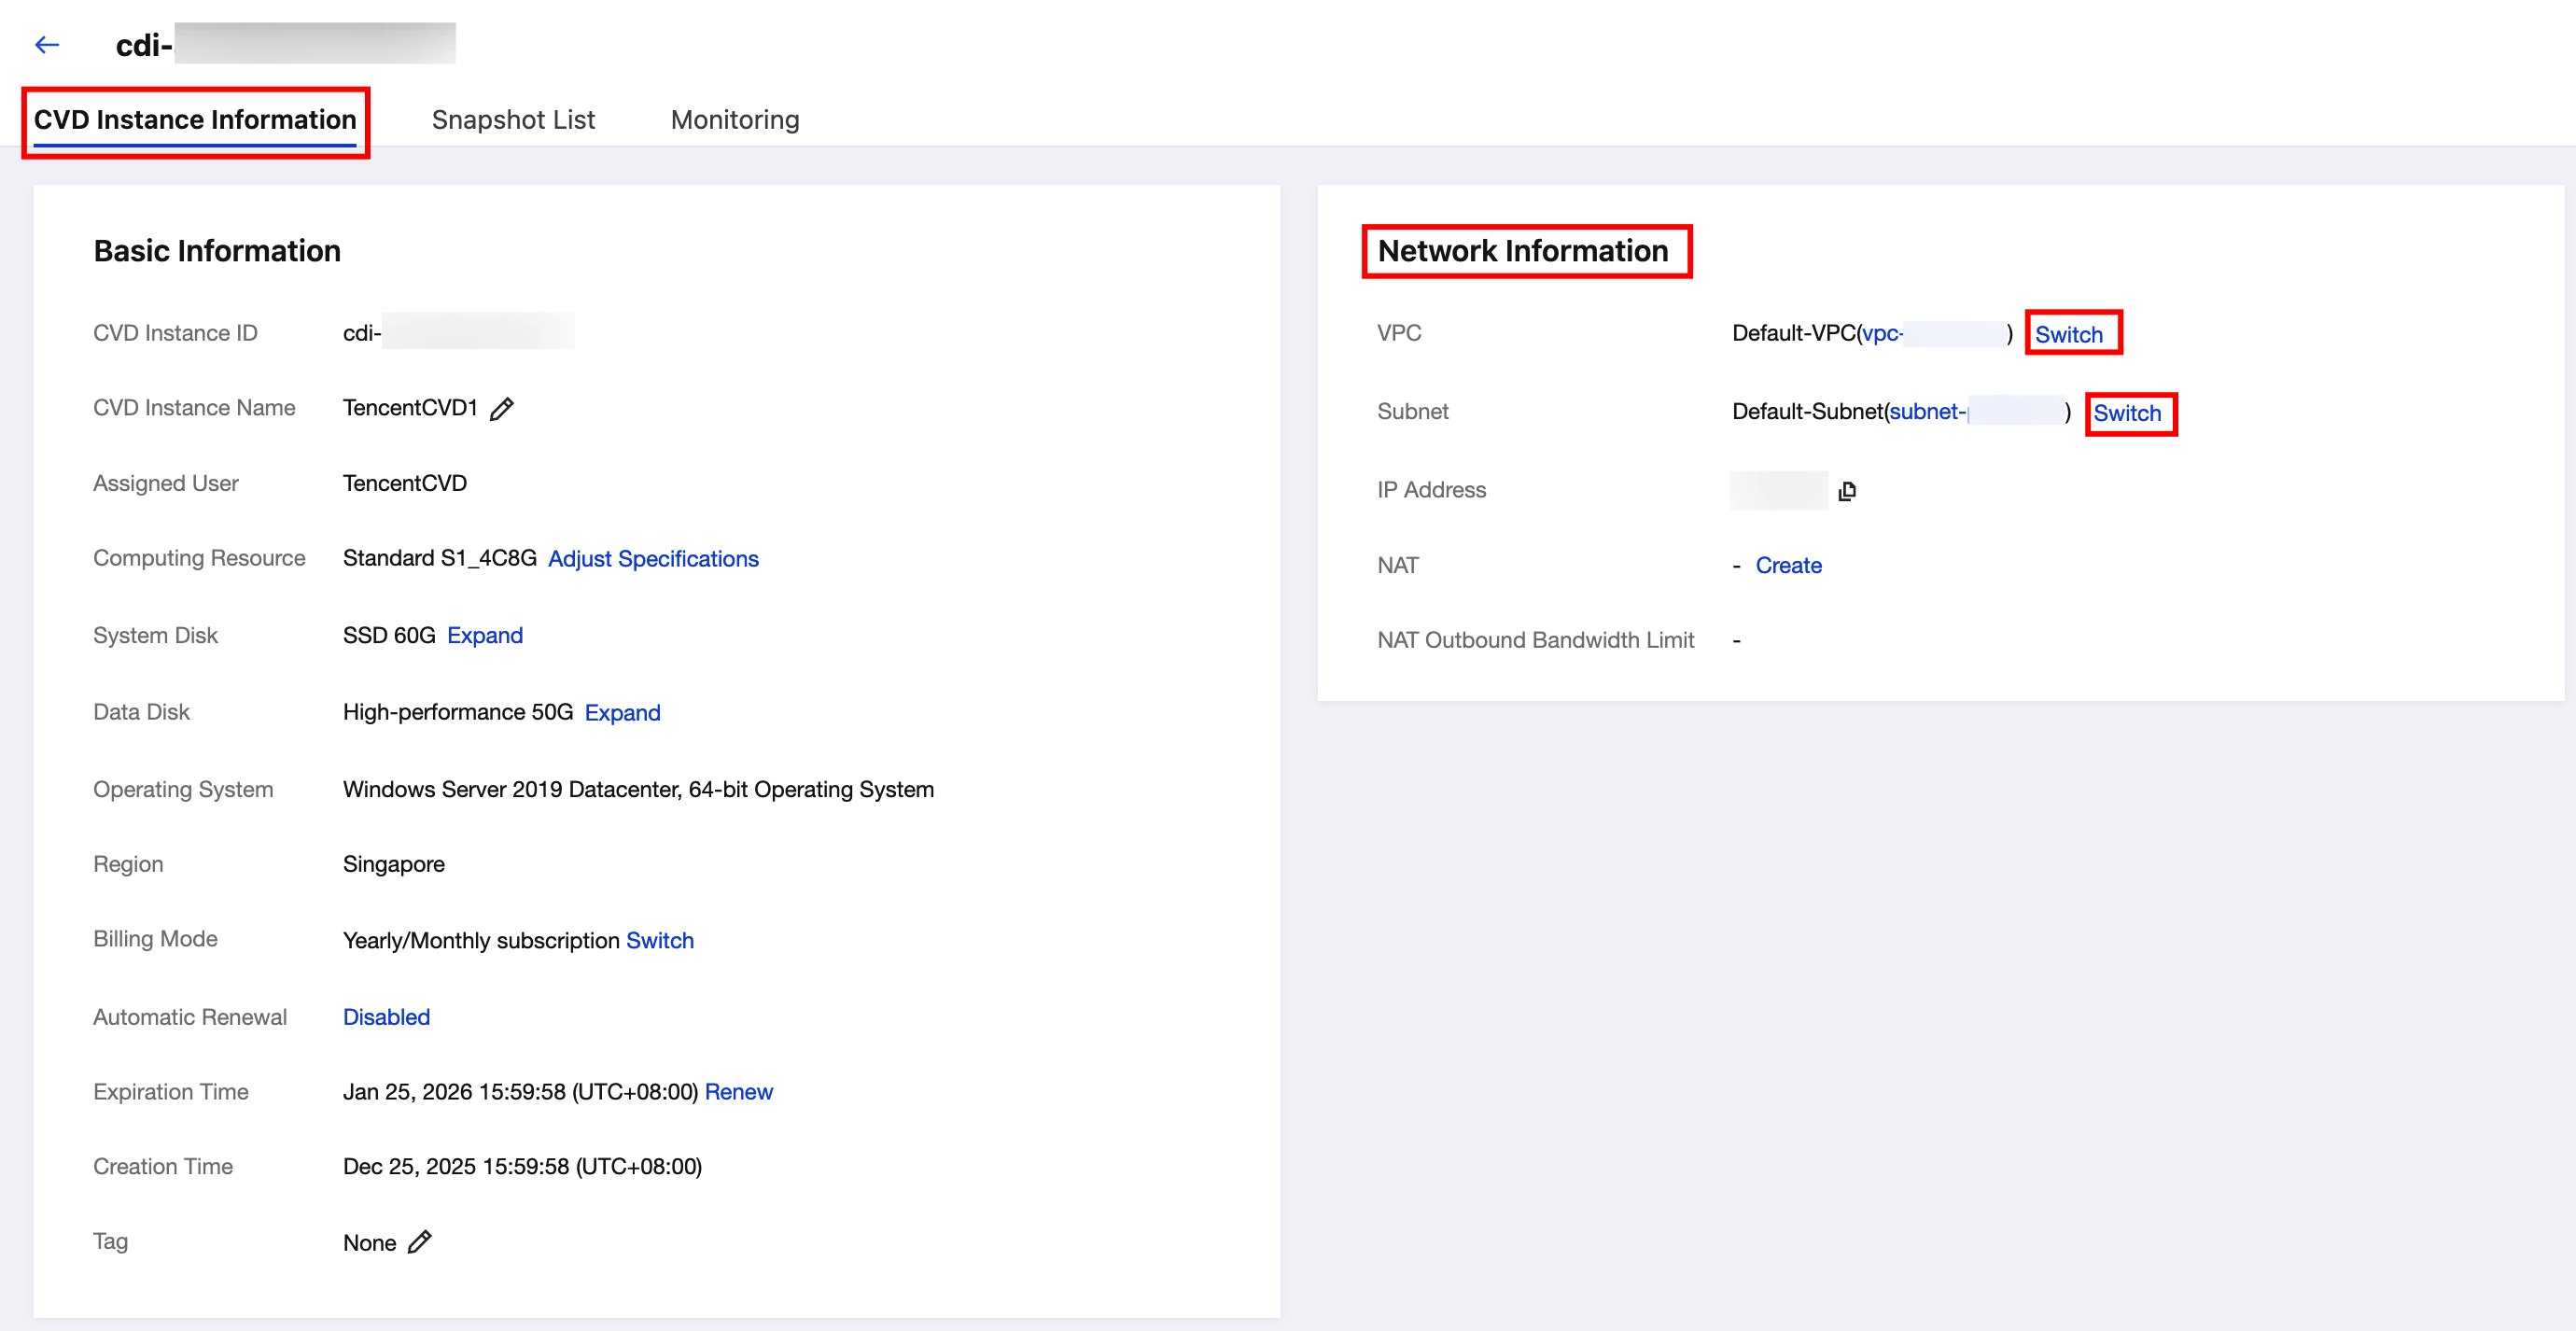
On the instance details page of the CVD console, locate the Network Information section of the CVD Instance Information tab, and click Switch next to the current VPC network or subnet.
3. In the Switch VPC pop-up window, confirm the current network information of the CVD instance, select the target VPC network and target subnet, and click Confirm to proceed.
Note:
During VPC network switch, the operation status in the desktop list shows Switching VPC. No other operations can be performed on the CVD instance in this status.
During VPC network switch, when end users log in to the CVD portal, the desktop will be temporarily unavailable. The desktop card status prompts Administrator is adjusting configurations. After the VPC network is switched, end users can use the CVD instance normally.