2. Select Cloud Native Gateway in the left sidebar and click the target instance to go to the instance details.
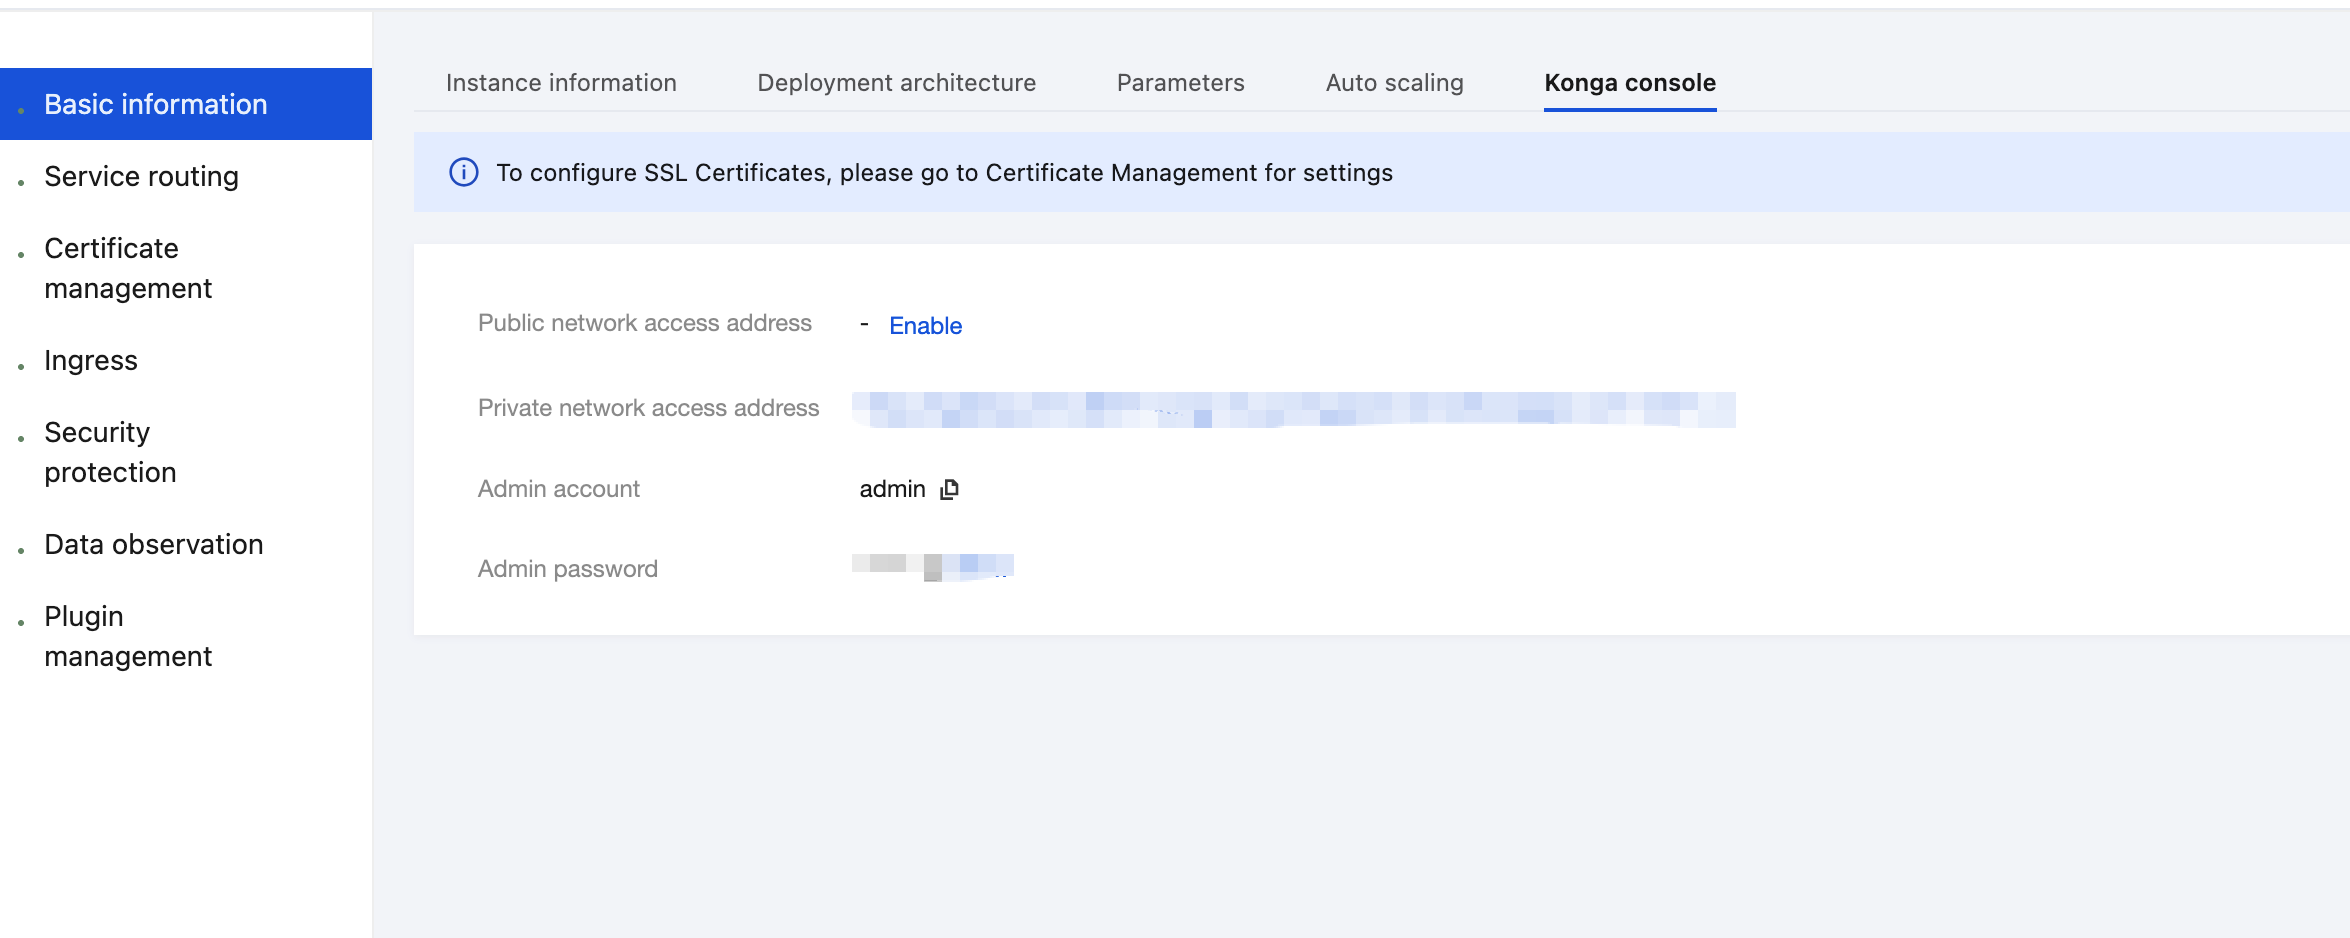
3. On the Basic Information page, click the Konga console Tag to view the management console login method.
4. Click the public network access address to go to the Management Console page. In the left sidebar, click SERVICES to enter the service list.
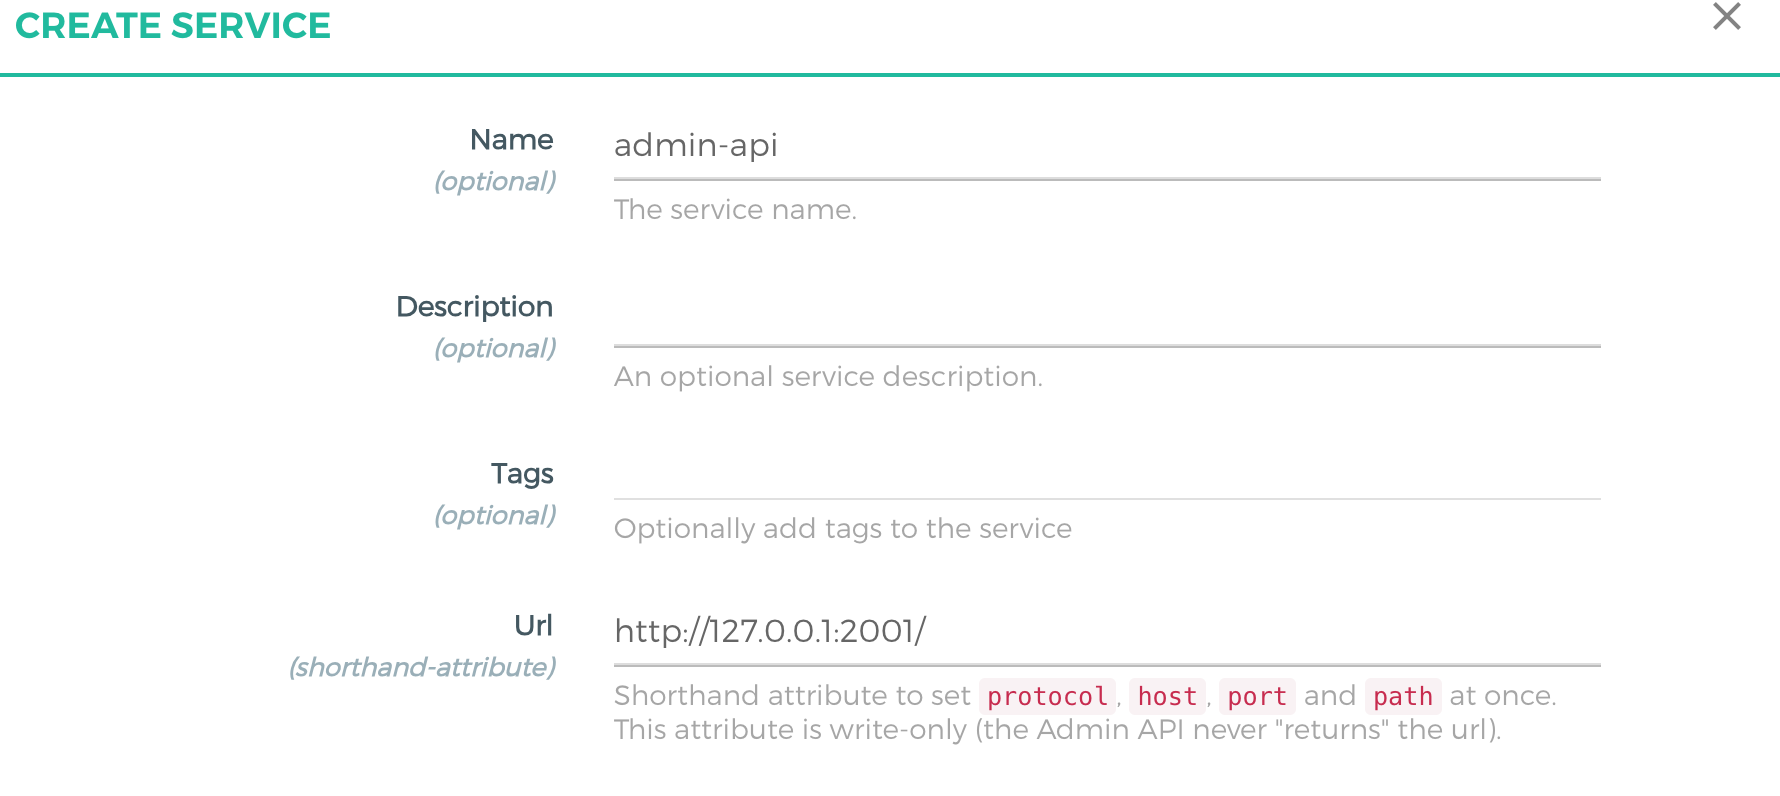
5. Click ADD NEW SERVICE, specify the content in the displayed dialog box, and set the URL content to http://127.0.0.1:2001/ to create a service.
6. After the service is created, click the created service in the service list to go to the service details page, and click Routes in the left sidebar to enter the route list.
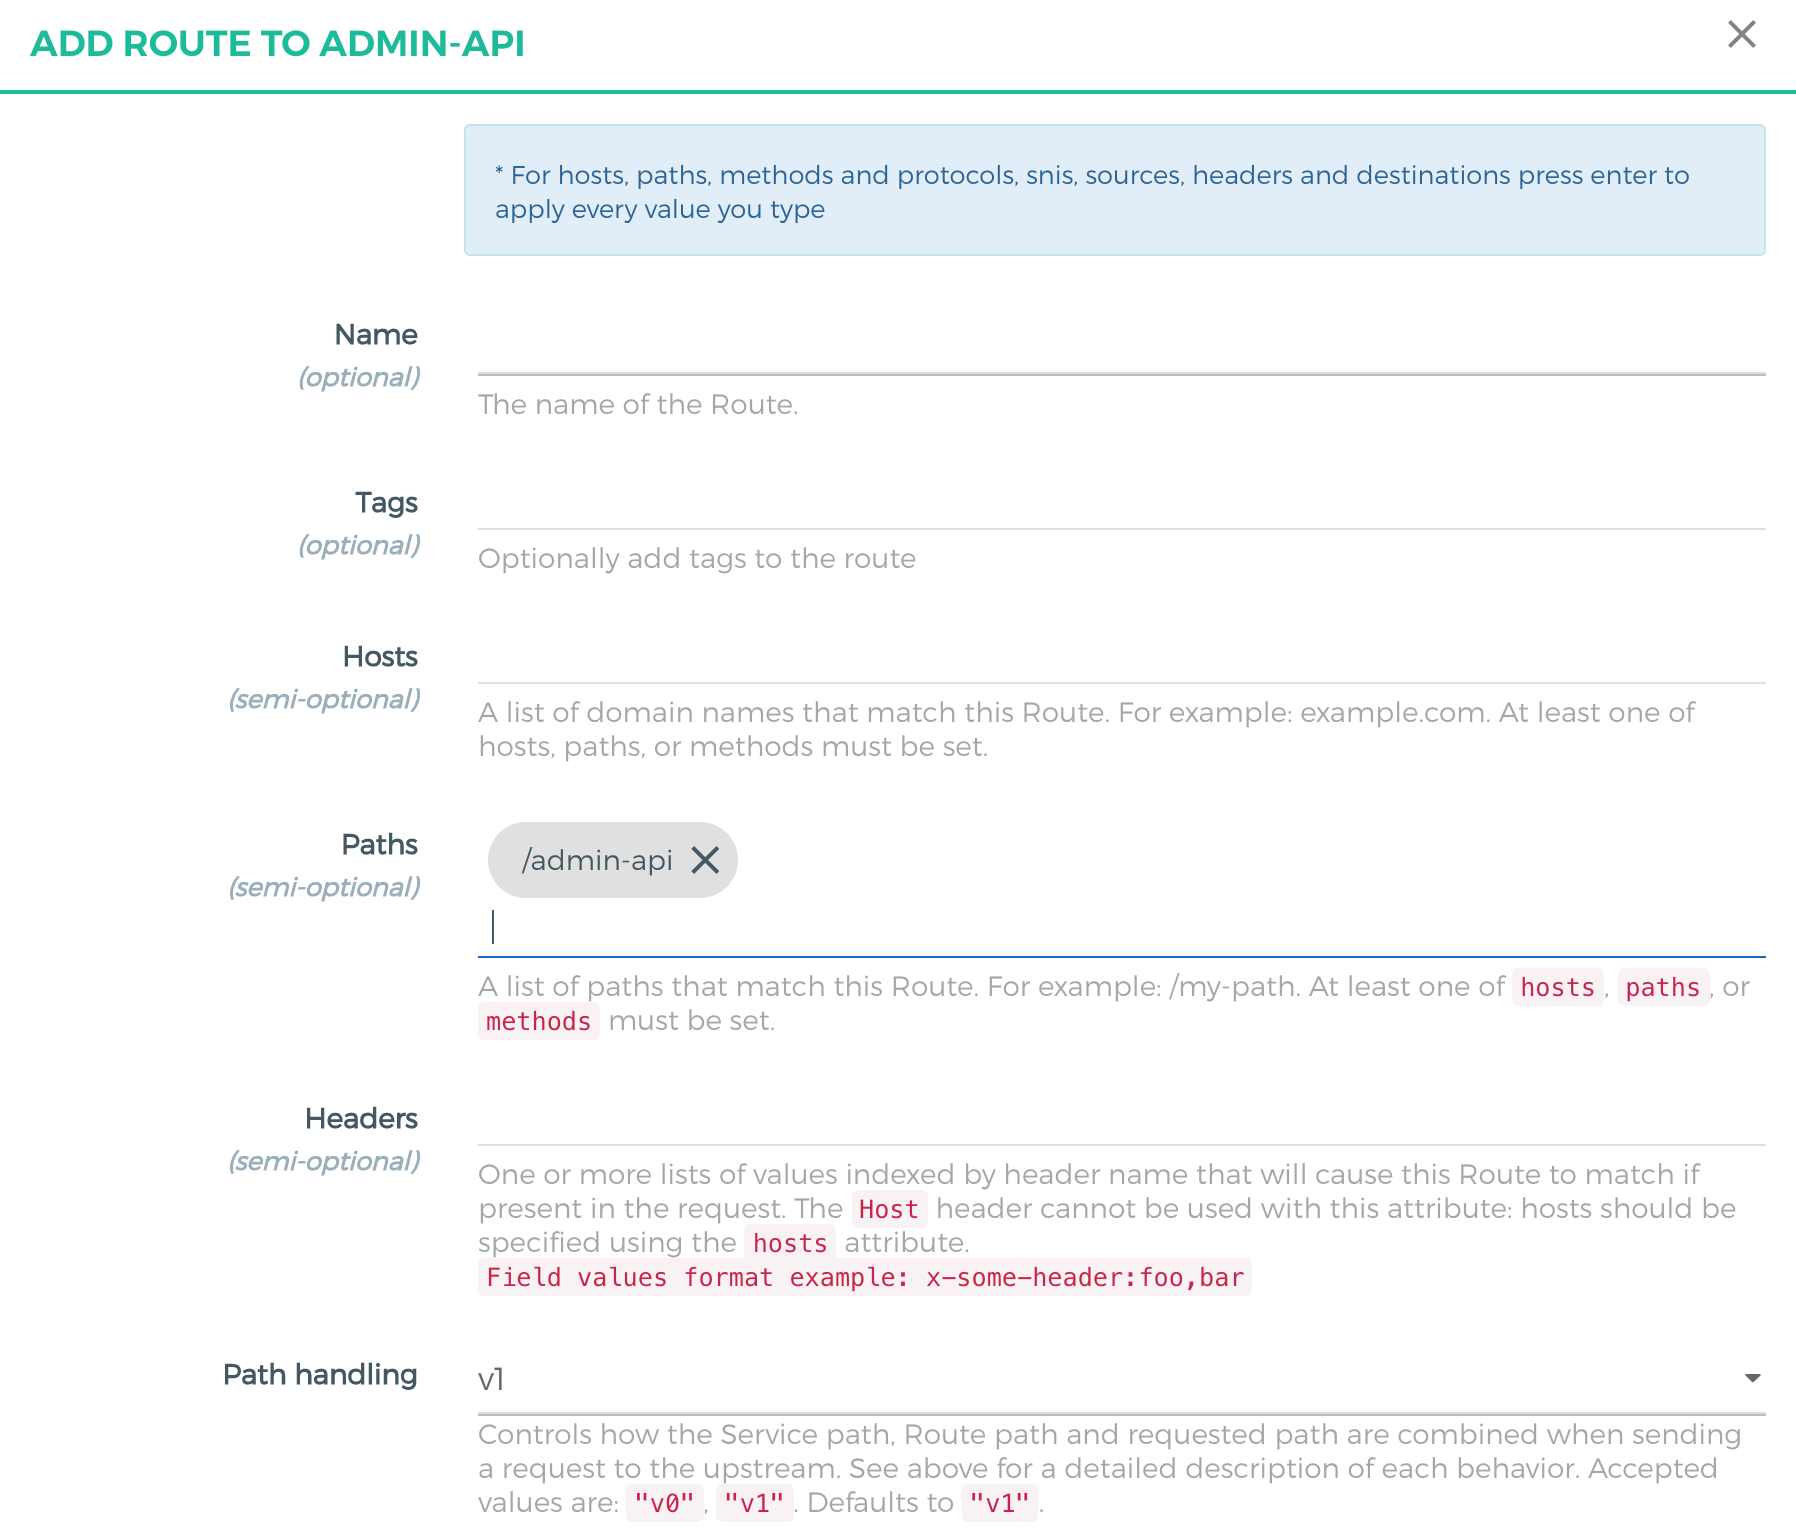
7. Click ADD ROUTE, specify the content in the displayed dialog box, and set the Path content to /admin-api to create a route.
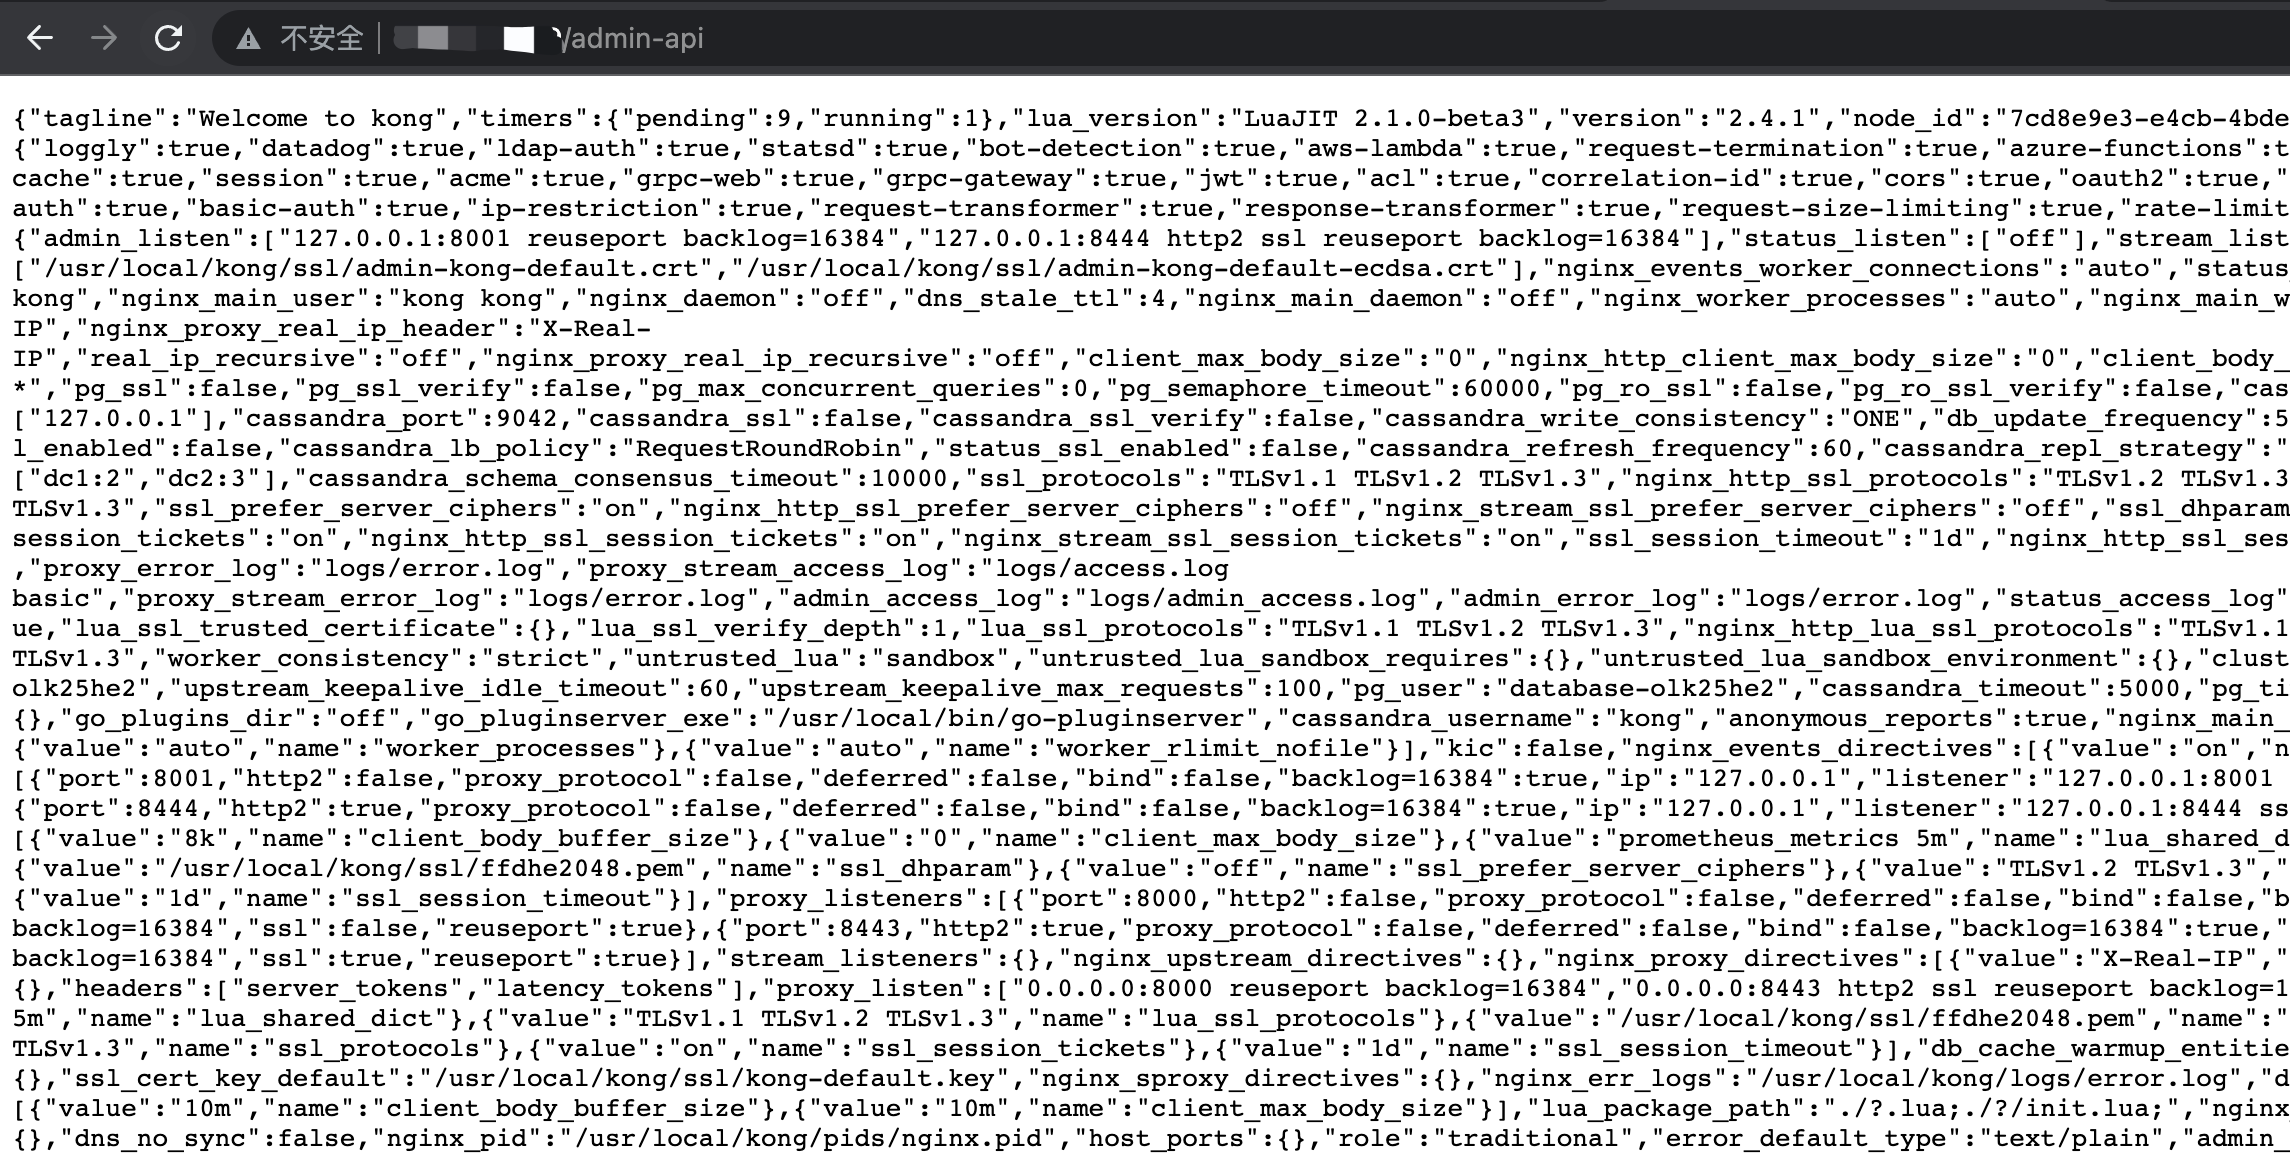
8. Open a browser and access admin api via the public network address, and set the uri content to /admin-api.
Step 2: Configuring the basic auth Plugin for admin api
1. Log in to the Konga console and click CONSUMERS in the left sidebar to go to the consumer list.
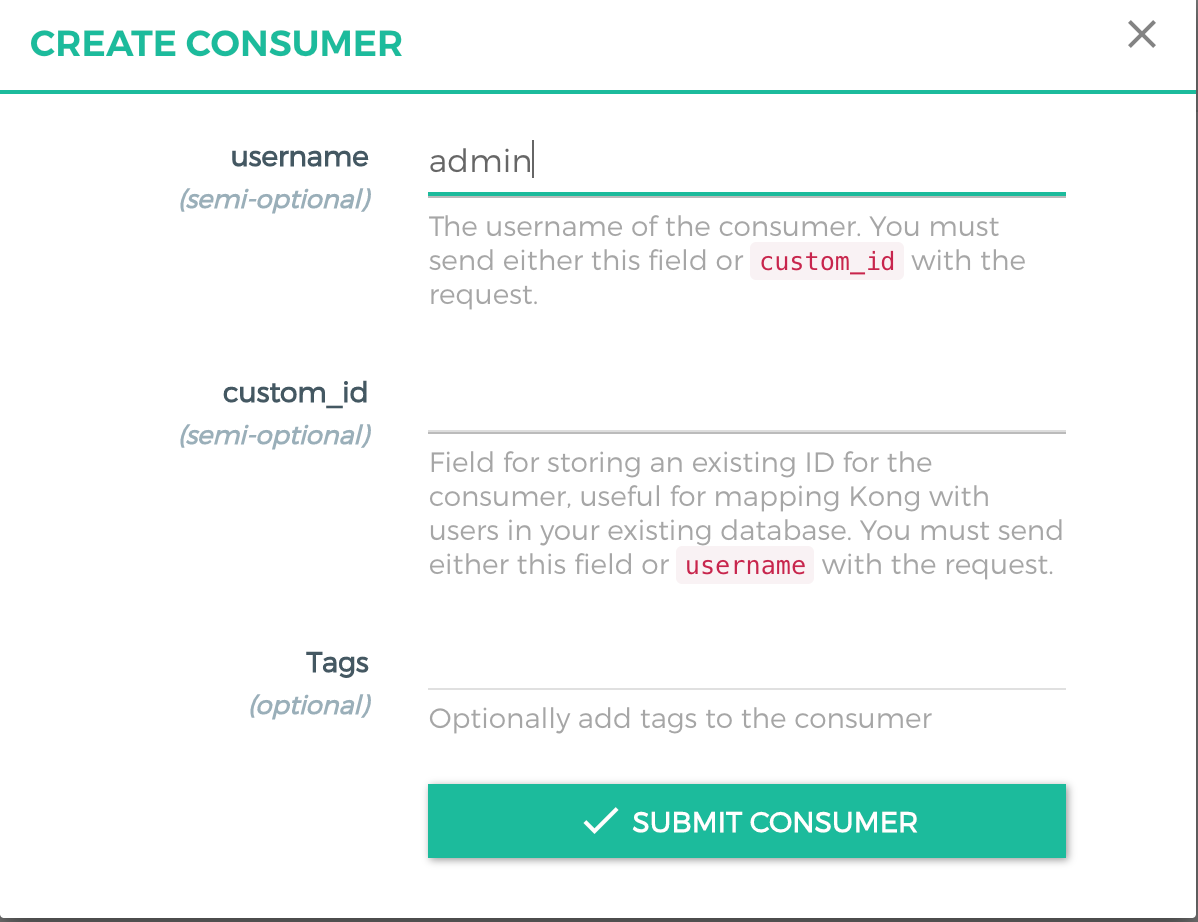
2. Click CREATE CONSUMER and specify the content in the displayed dialog box.
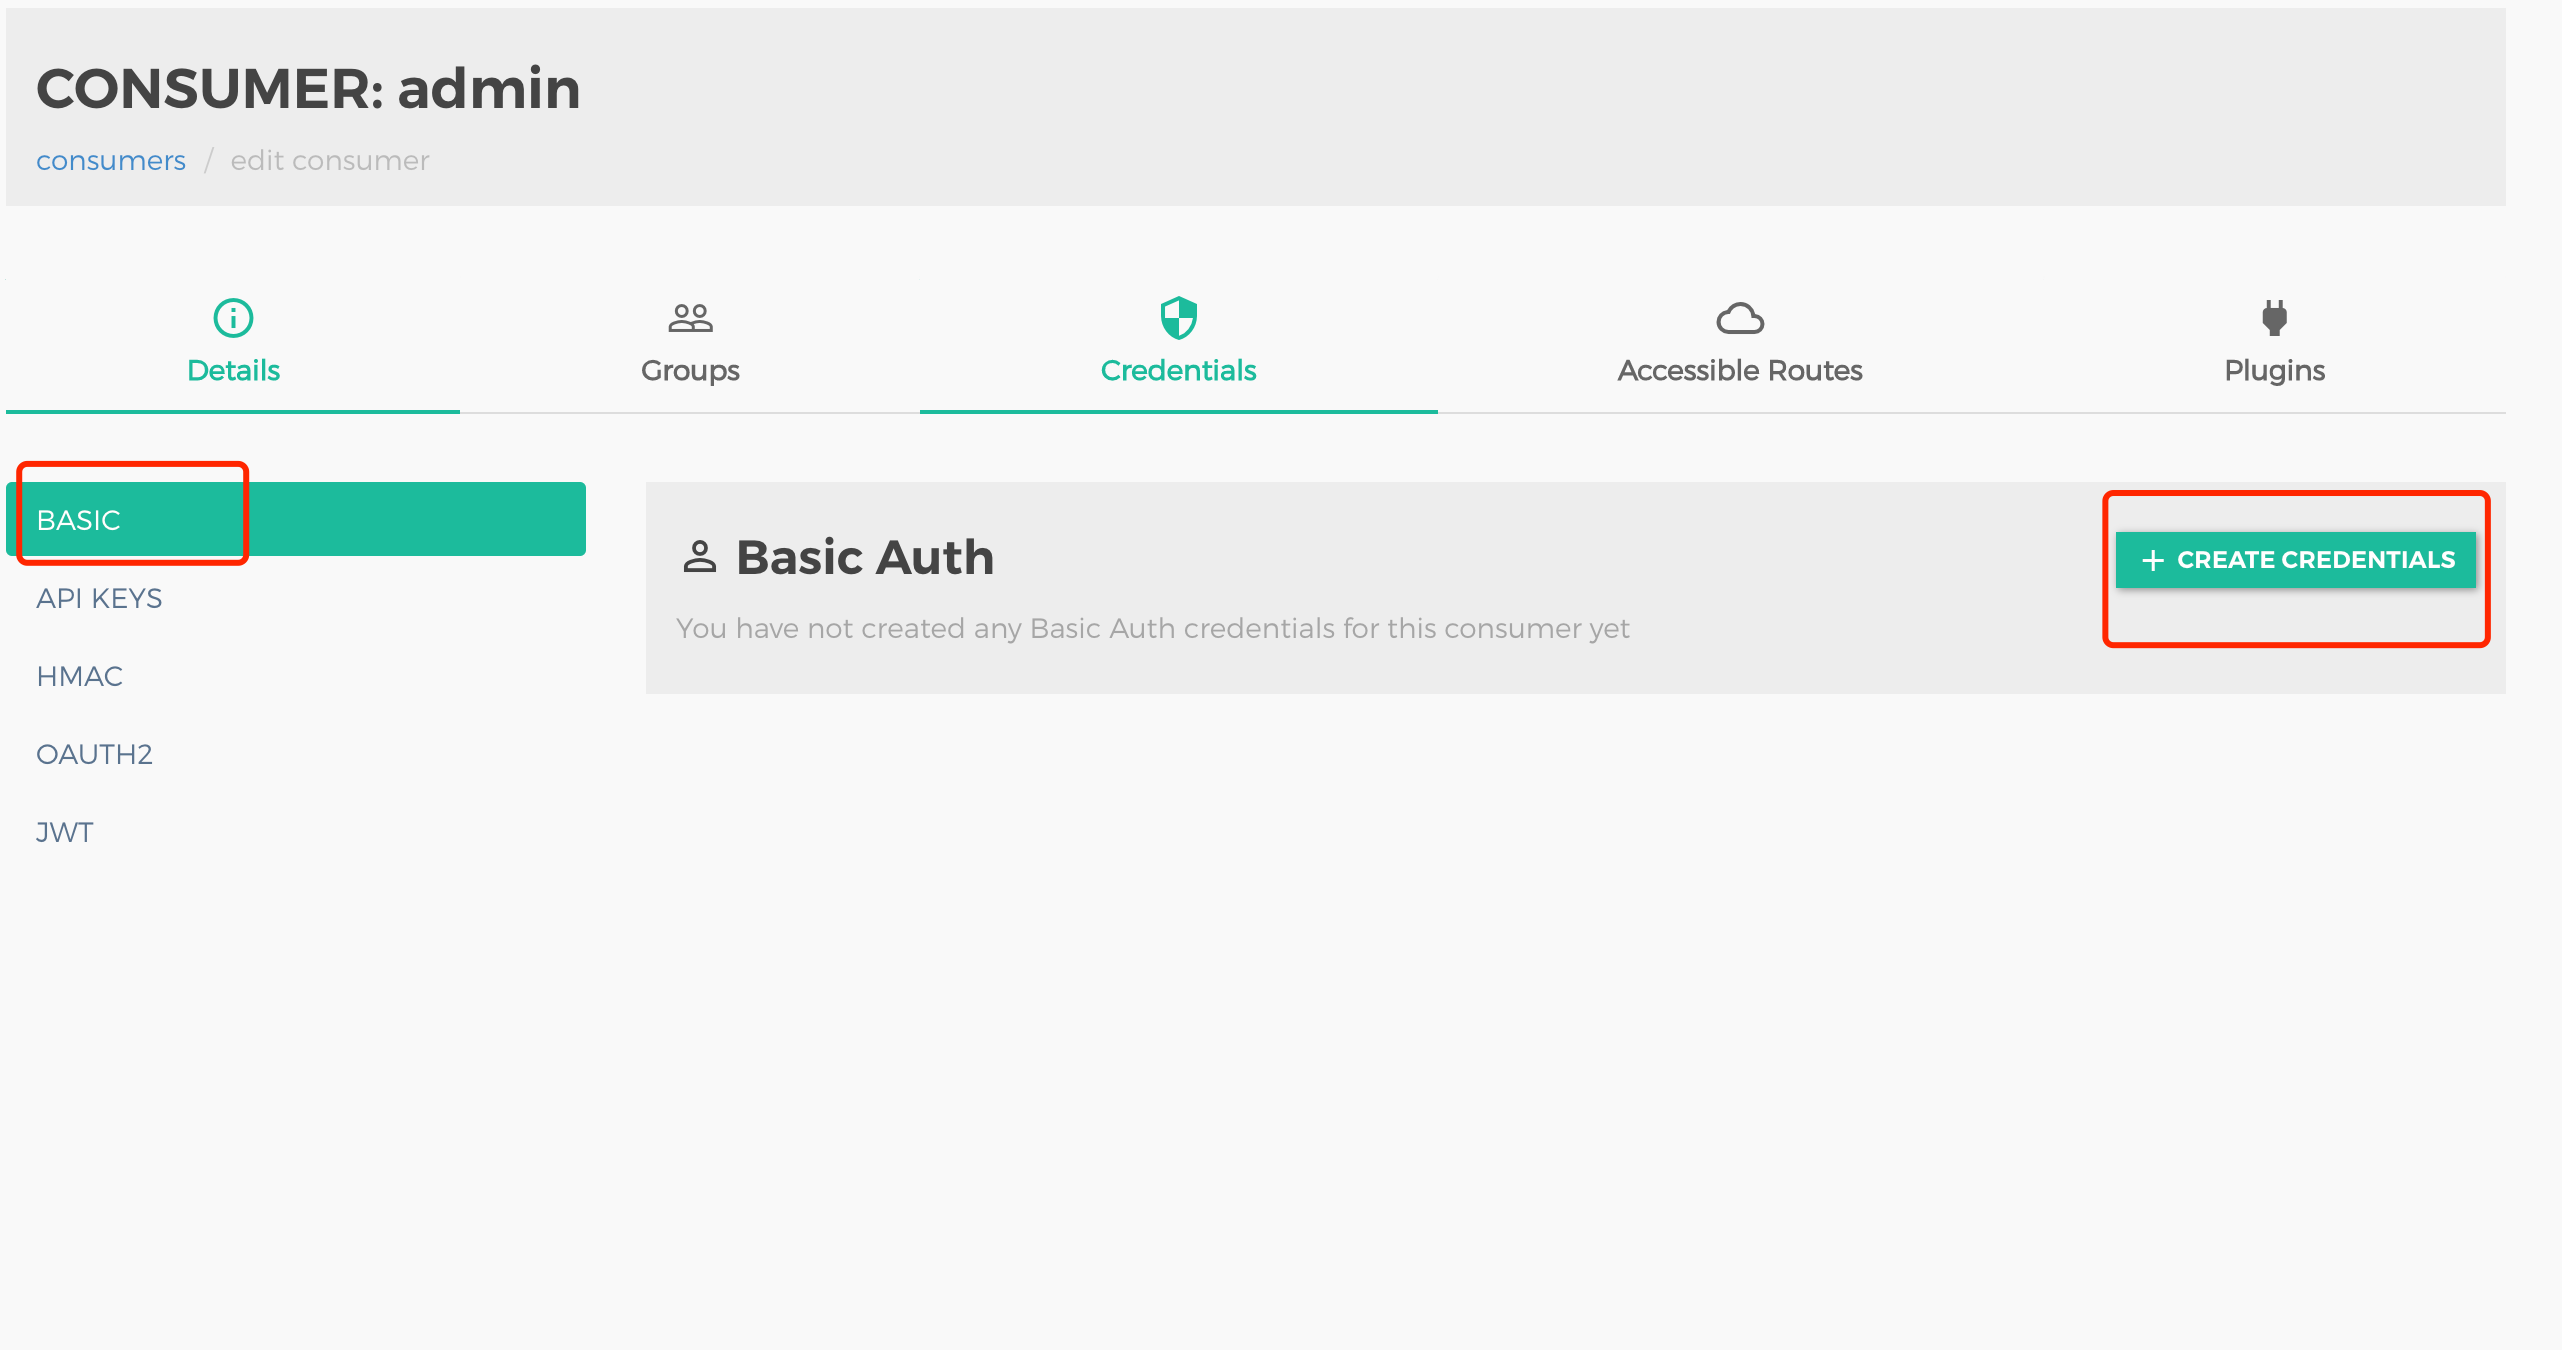
3. Select the option to the left of Credentials and choose BASIC, then click CREATE CREDENTIALS.
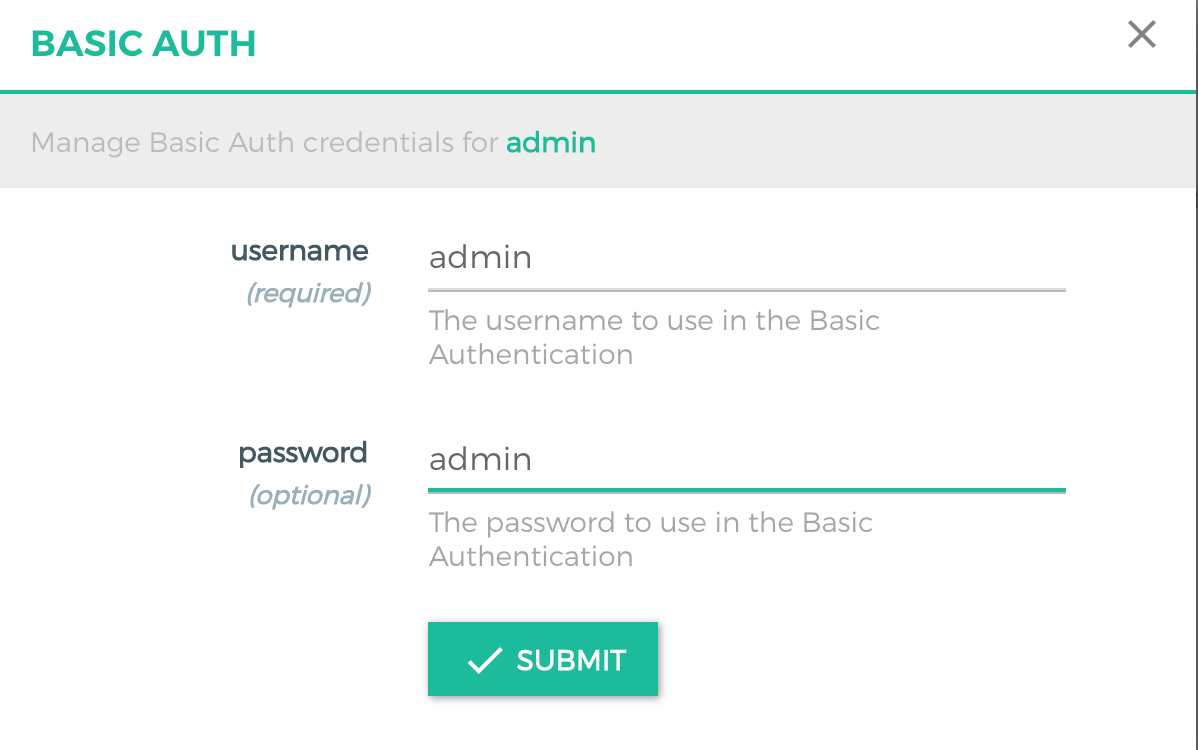
Specify the content in the displayed dialog box to create a consumer.
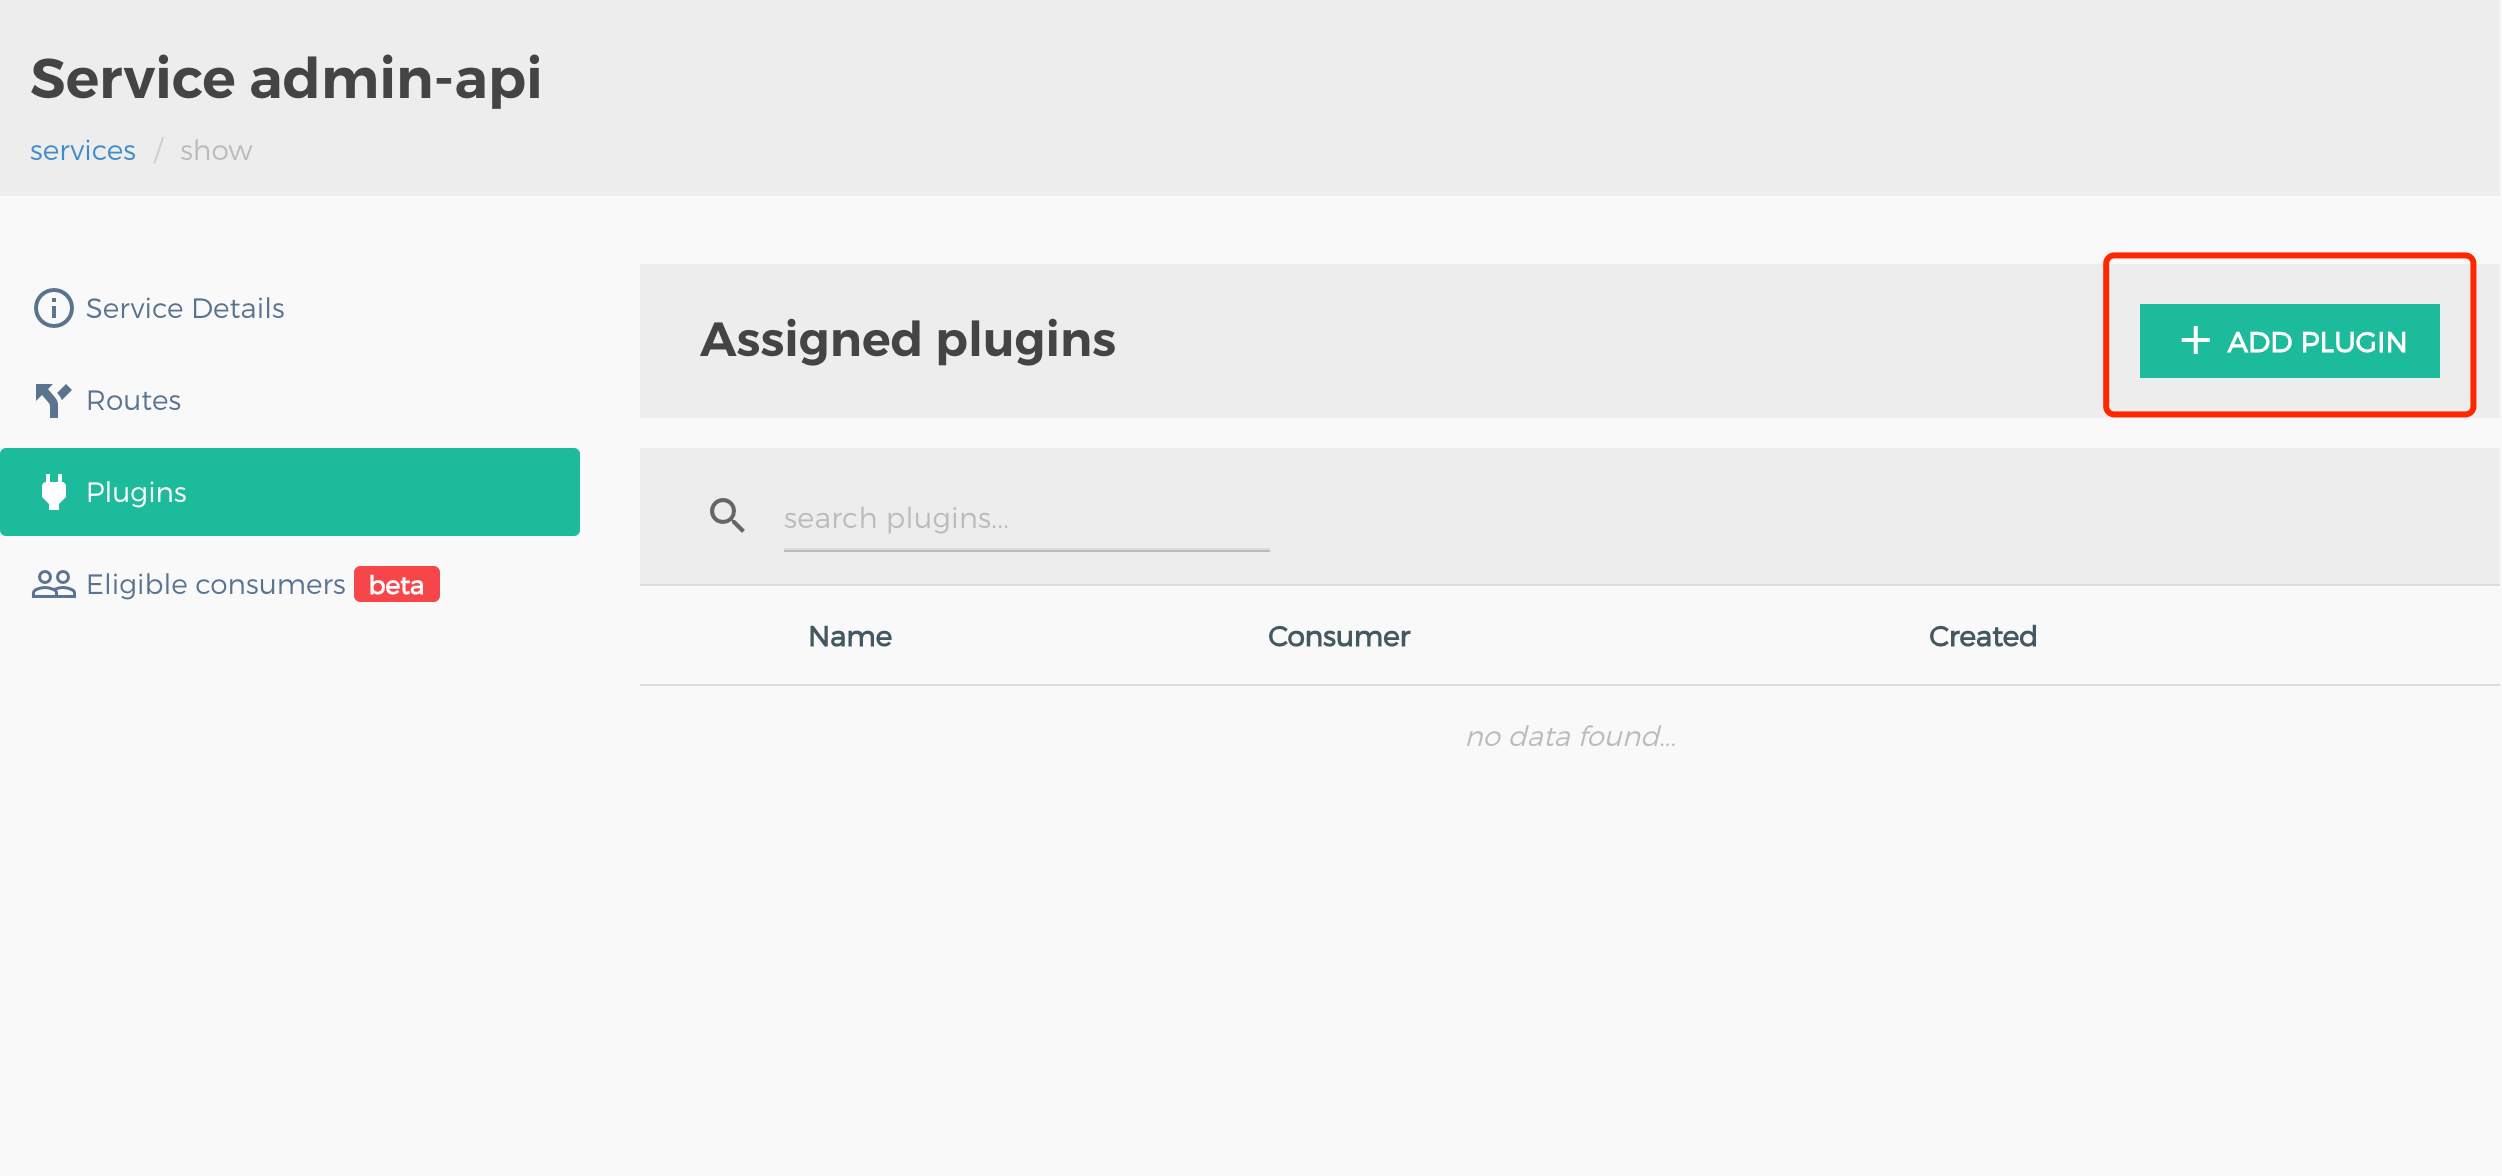
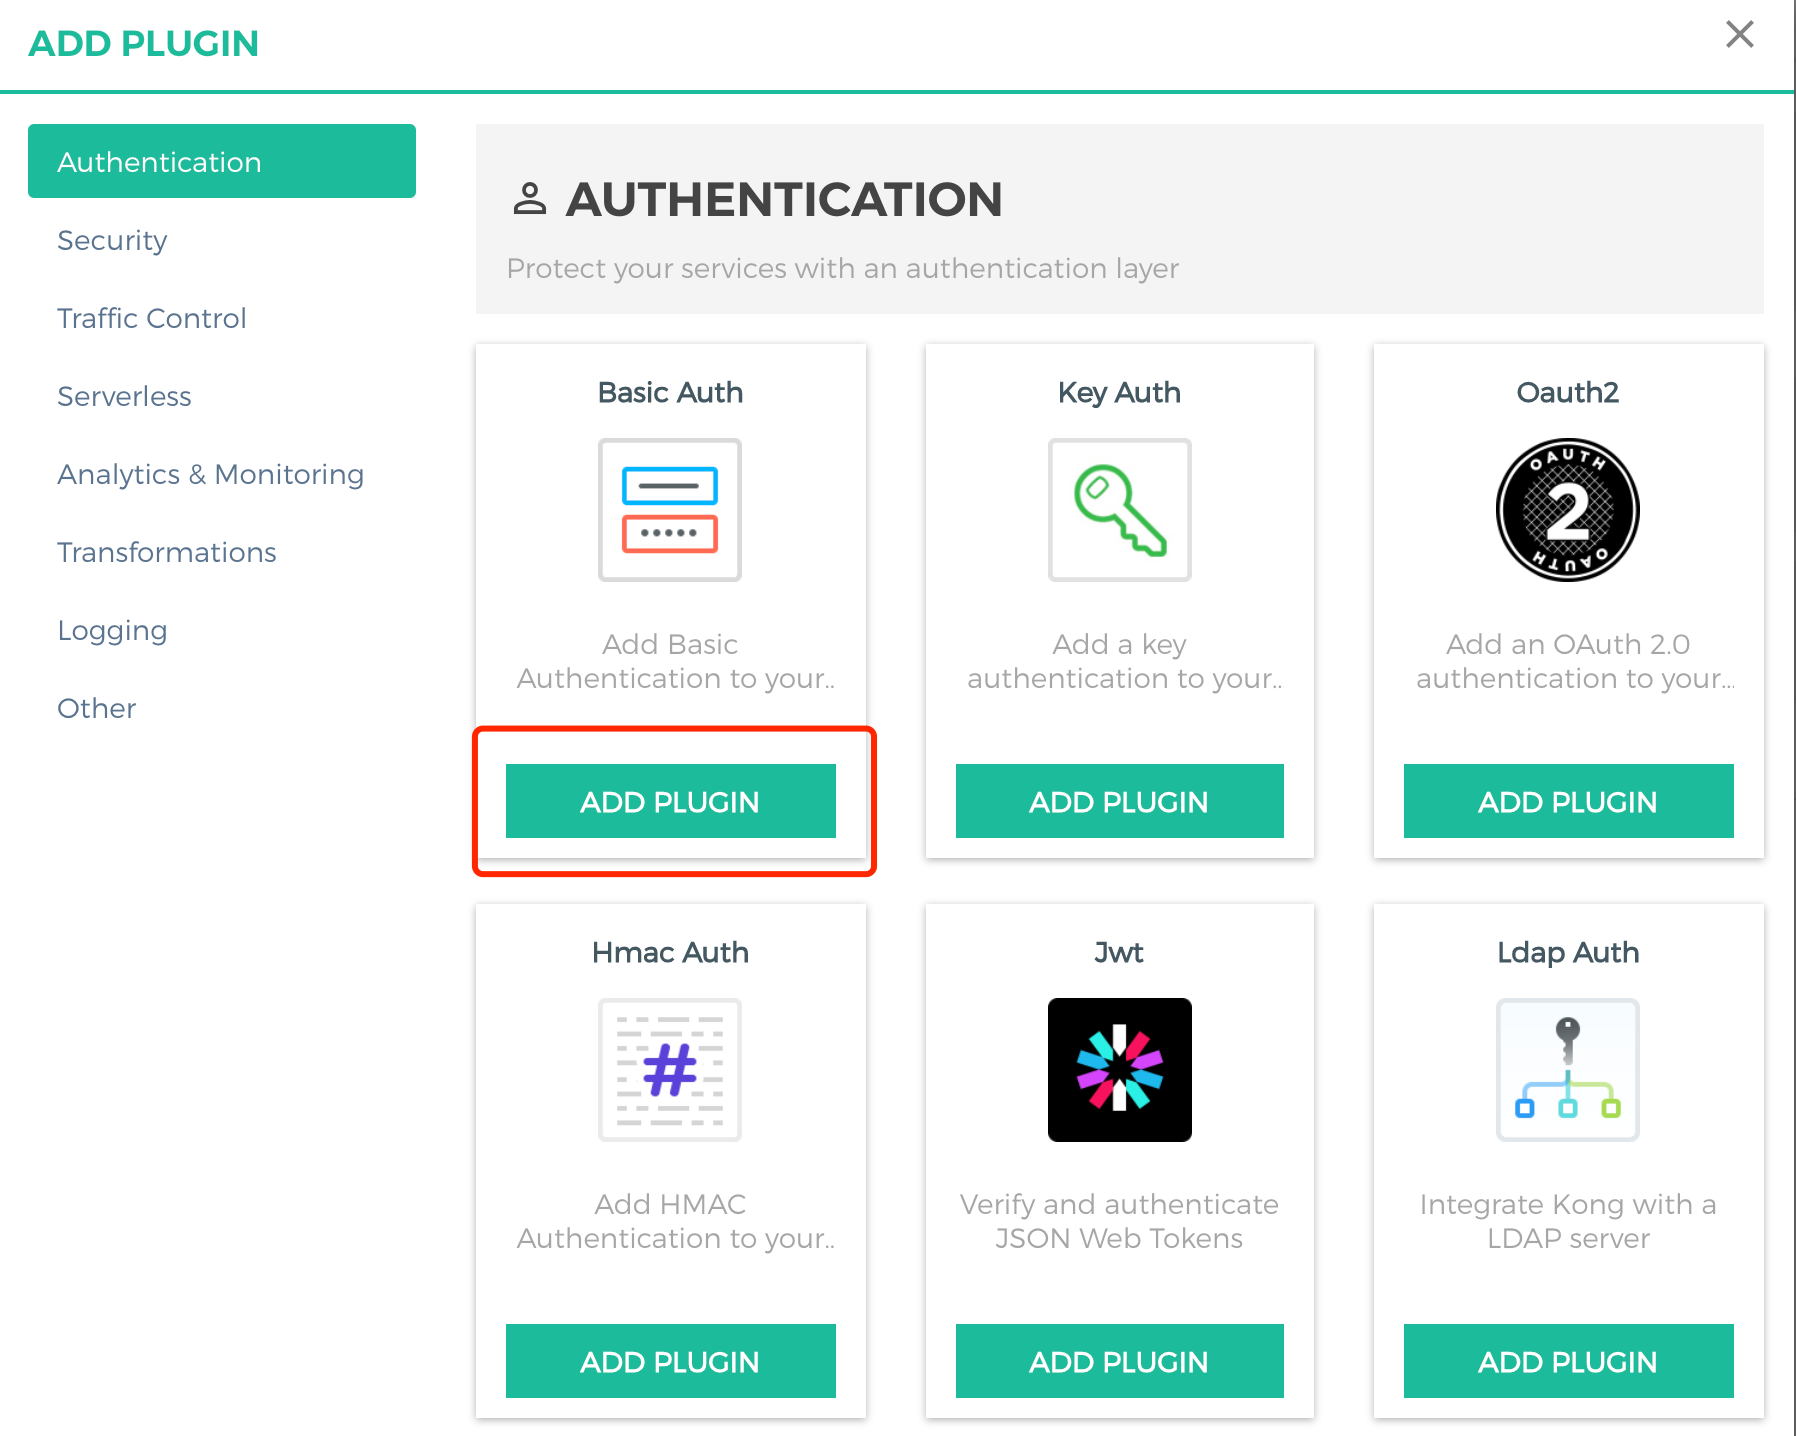
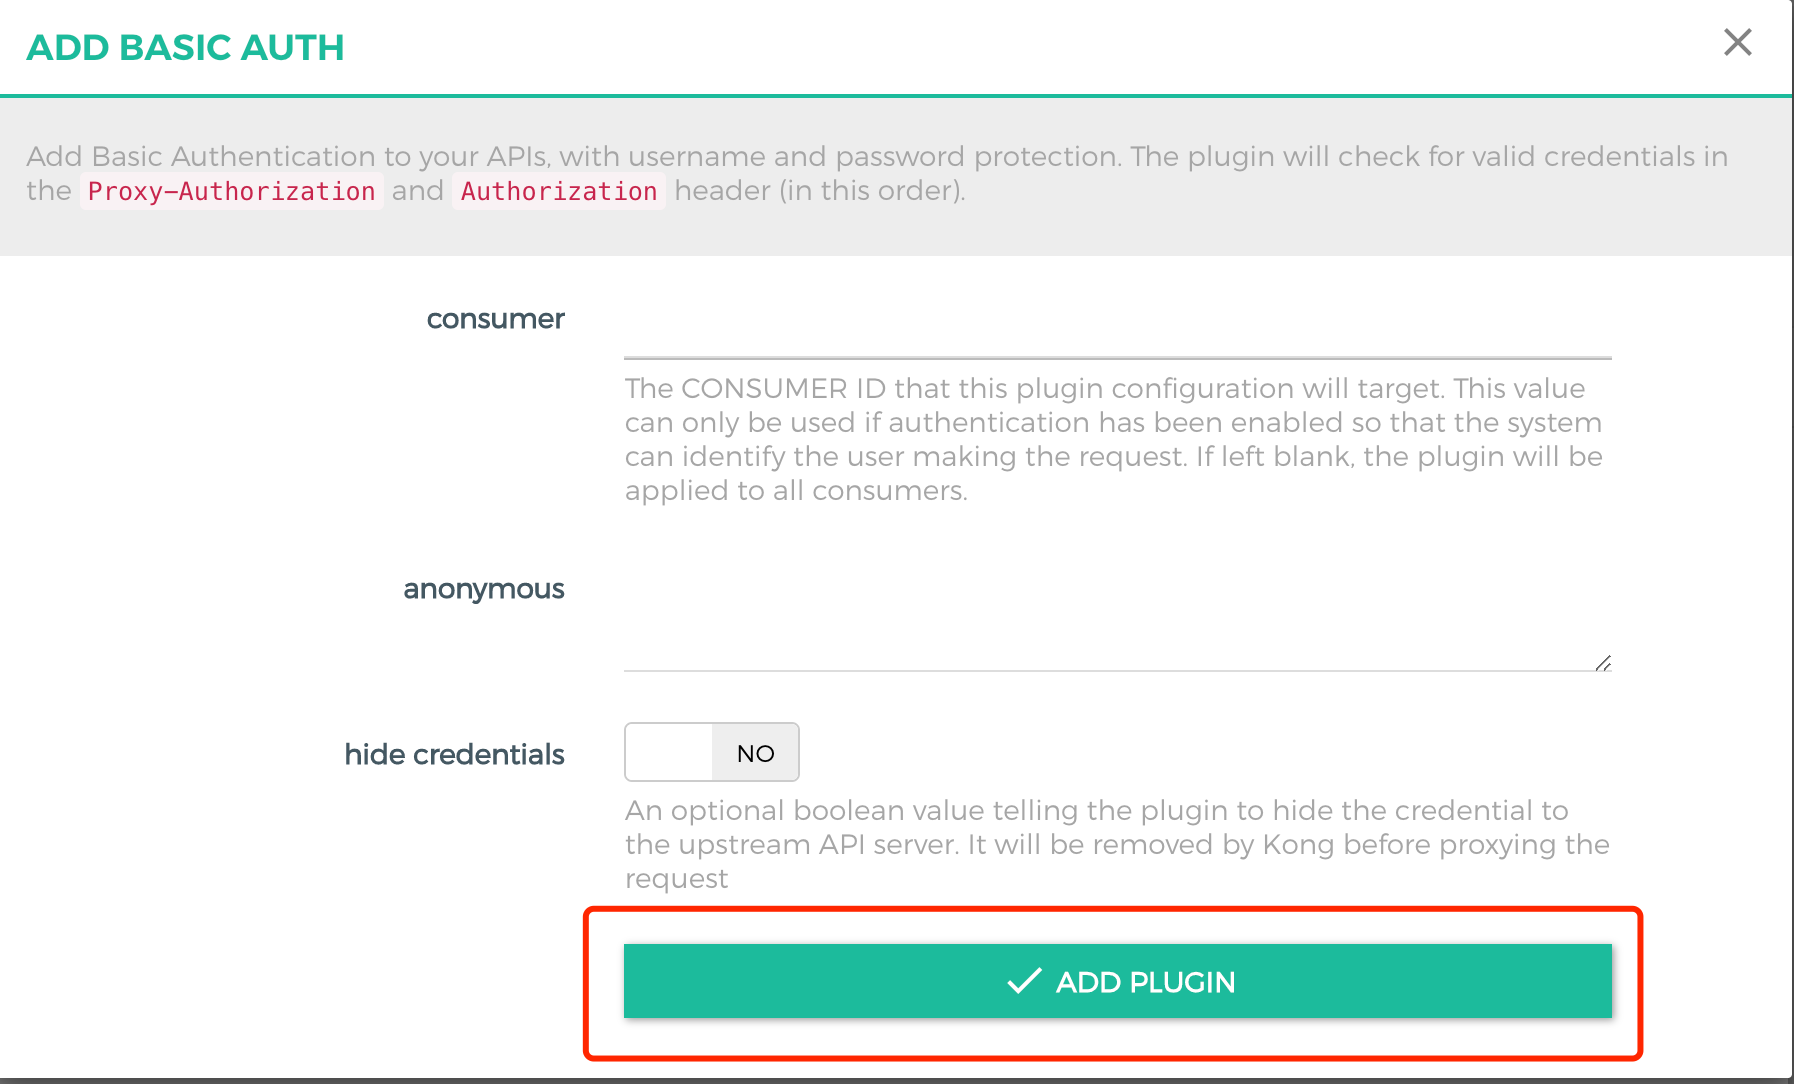
4. In the left sidebar, click SERVICES > admin-api > Plugins > ADD Plugin in sequence, select the Basic Auth plugin, and complete the addition.
5. Open a browser and access admin api via the public network address, set the uri content to /admin-api, and enter the previously configured username and password to access it.