This document describes how to implement IP address access control on a cloud native gateway using the Kong IP Restriction plugin, covering the following two scenarios:
Configuring an IP address allowlist/blocklist for access control
Configuring a CIDR allowlist/blocklist for access control
Prerequisites
The gateway instance has been purchased. For details, see Create Gateway.
The service (Service) and route (Route) have been configured.
Operation Steps
Scenario 1: Configuring an IP Address Allowlist/Blocklist for Access Control
An IP address blocklist is used as an example to describe how to deny access from an IP address or some IP addresses. The allowlist configuration is similar.
2. Select Cloud Native Gateway in the left sidebar and click the target instance to go to the instance details.
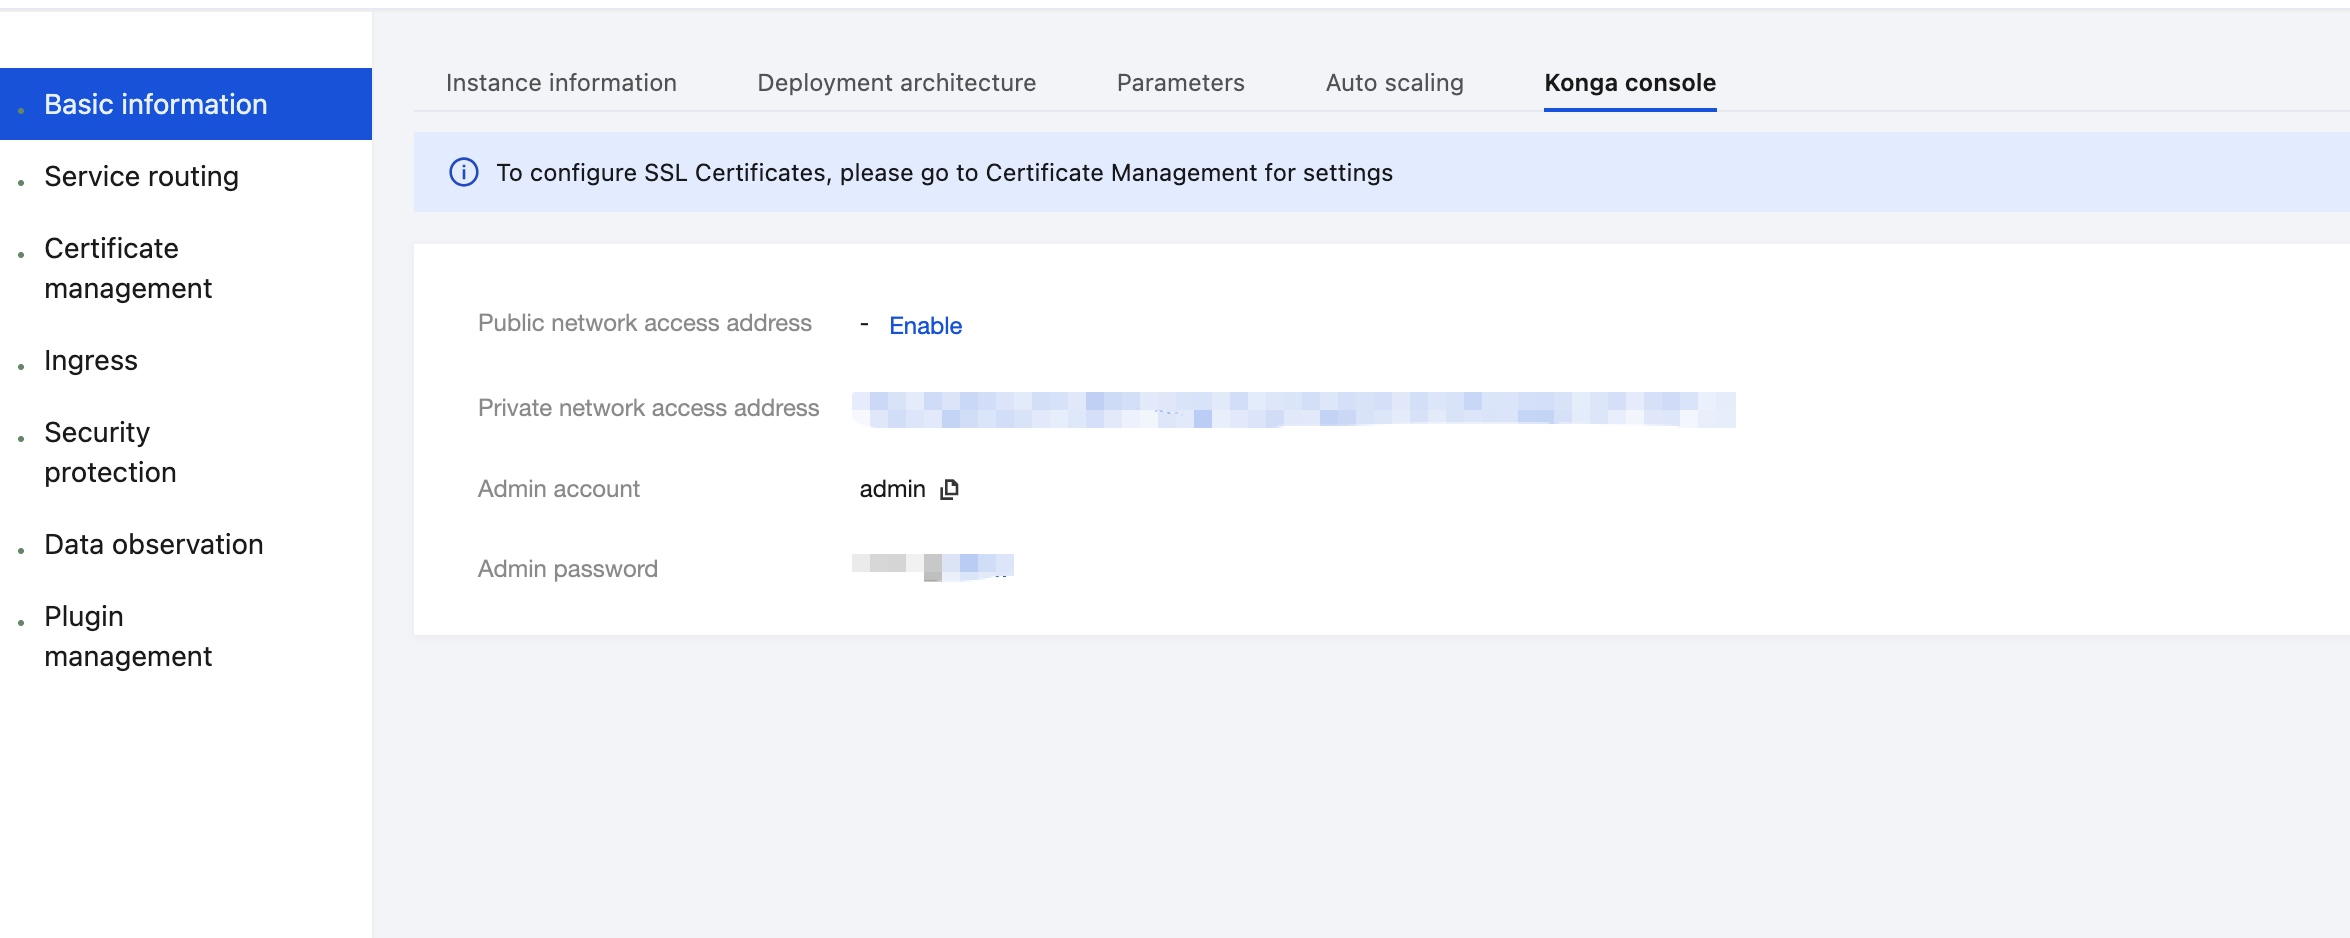
3. On the Basic Information page, click the Konga console Tag to view the management console login method.
4. Click the public network access address to go to the Konga console.
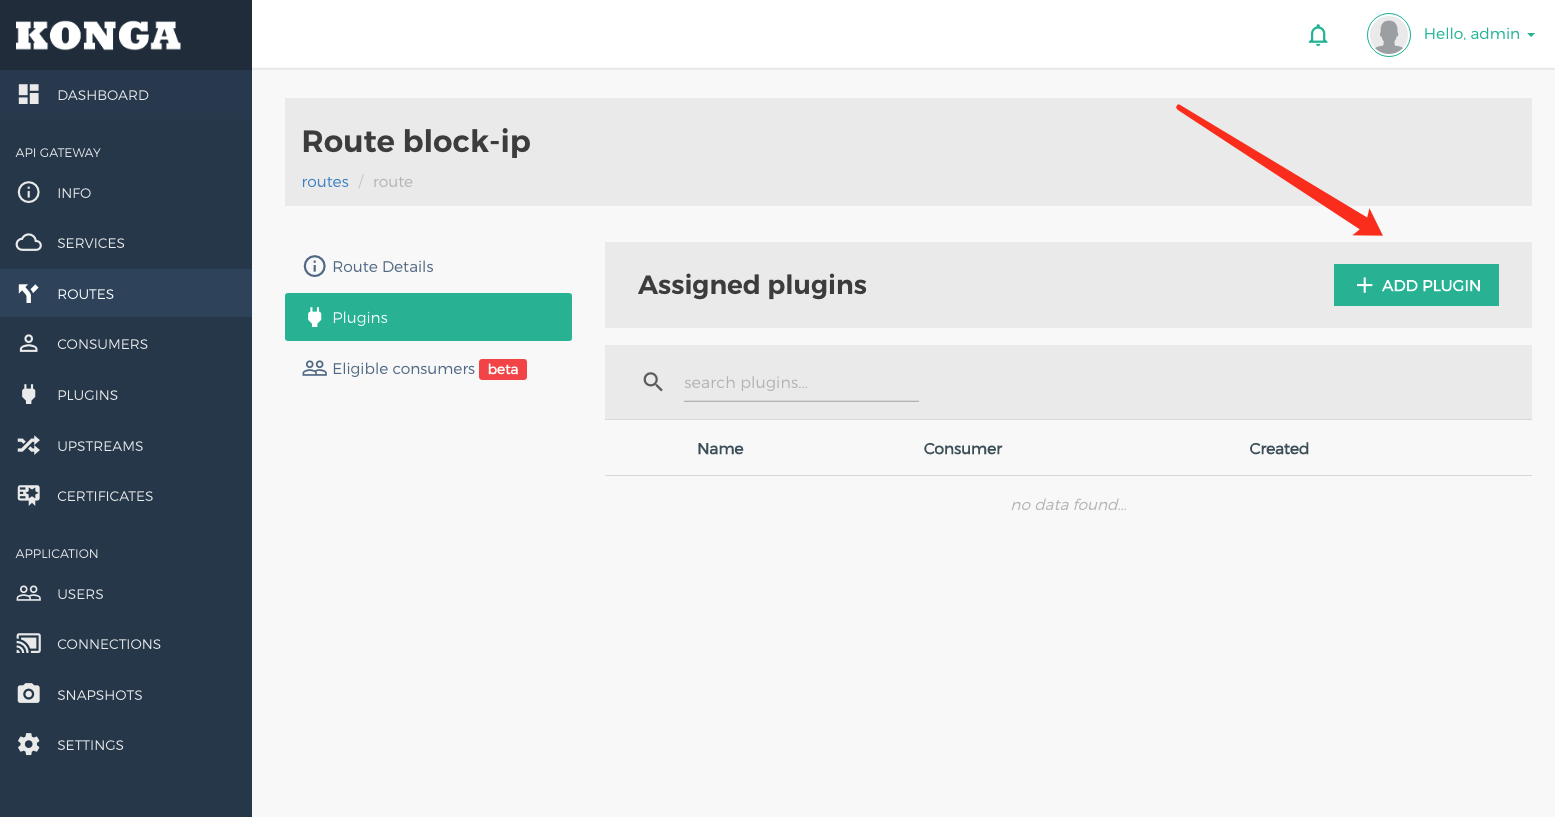
5. Log in to the Konga management console, go to the Route details page that requires IP address restriction, and click the Add Plugin button to create a plugin.
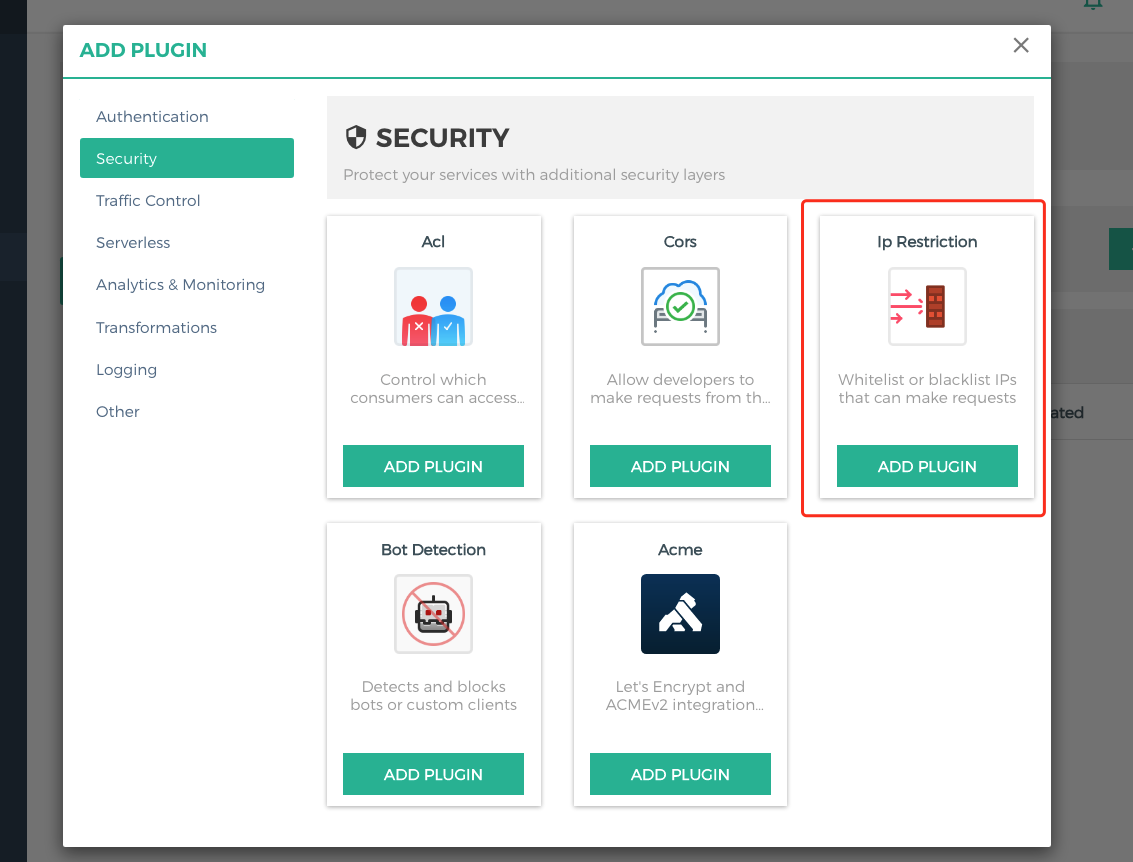
6. Select the IP Restriction plugin under the Security group in the plugin marketplace and click Add Plugin.
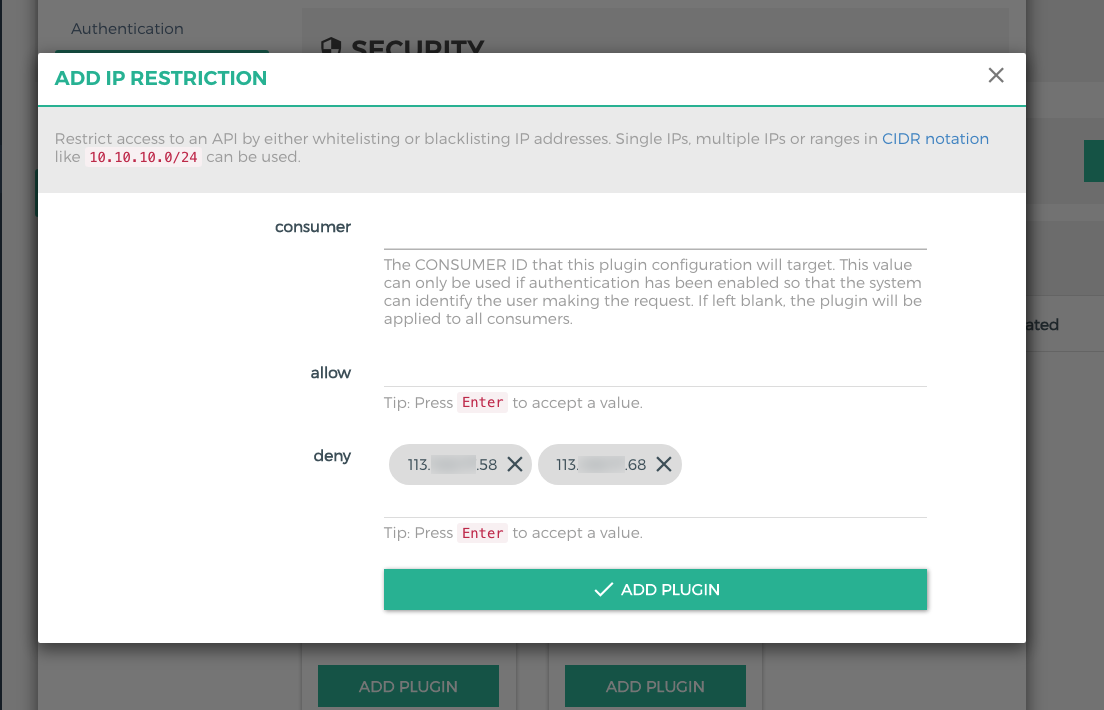
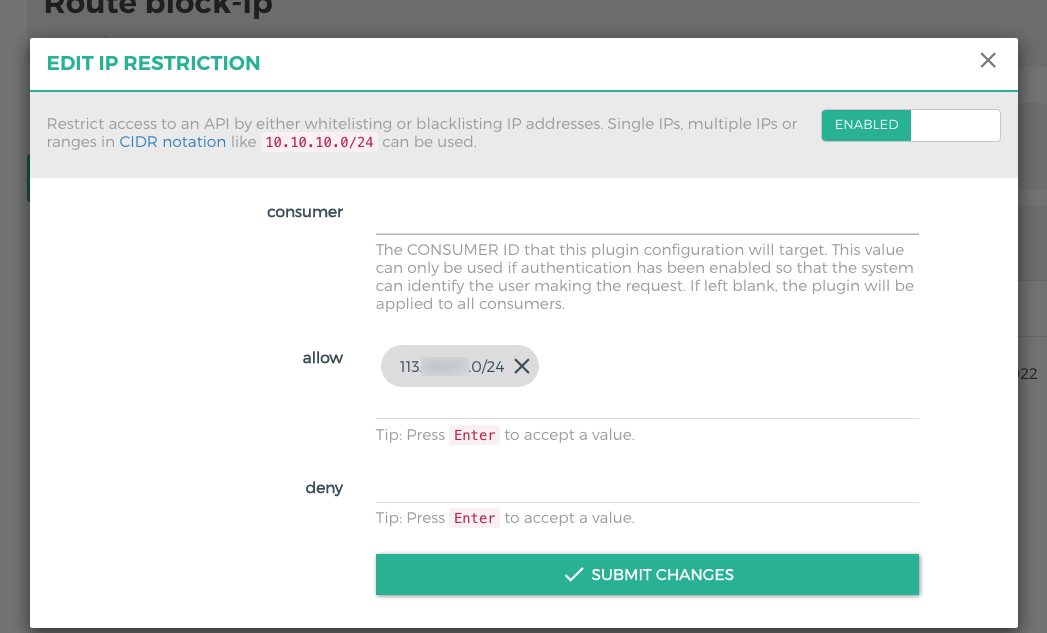
7. In the plugin configuration, enter the IP address to be restricted, press Enter, and save.
allow: Enter the IP addresses that are allowed to access. If there are multiple IP addresses, enter them separately.
deny: Enter the IP addresses that are denied to access. If there are multiple IP addresses, enter them separately.
consumer: Enter the ID of the consumer that requires application access control. If it is left blank, the IP address access control applies to all consumers.
Note:
At least one of allow and deny needs to be configured.
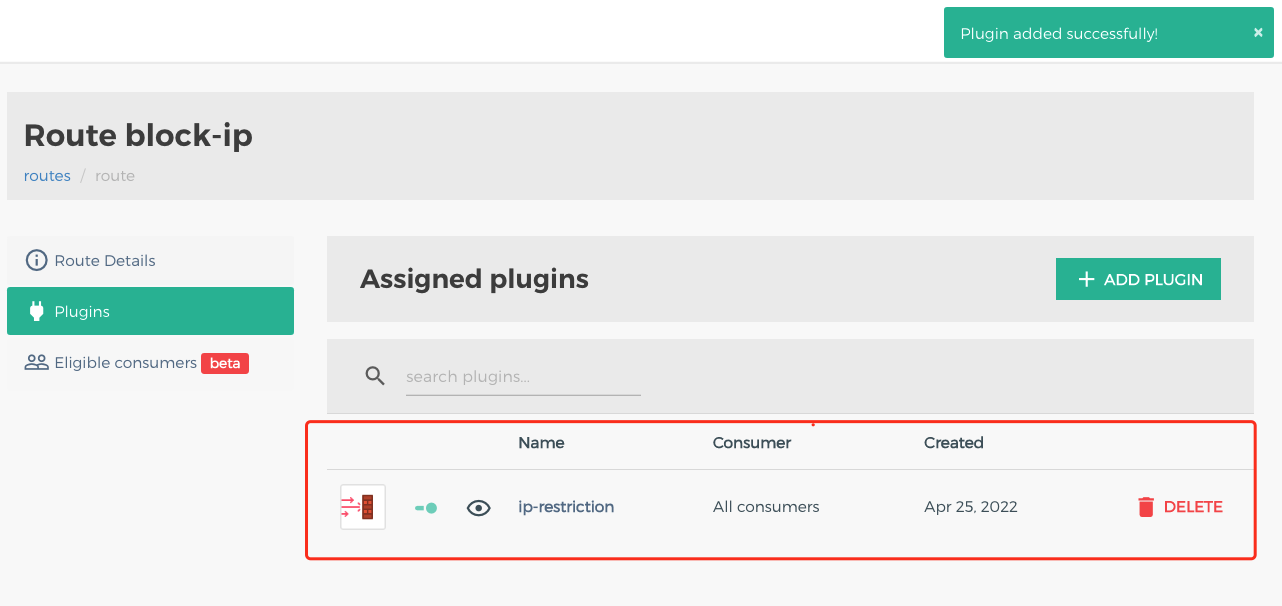
8. Return to the route page and confirm the plugins that are bound to and created for the route.
9. Initiate an API request. The access request from the IP address is restricted.
HTTP/1.1 403 Forbidden
Connection: keep-alive
Content-Length: 48
Content-Type: application/json;charset=utf-8
Date: Mon, 25 Apr 2022 02:57:32 GMT
X-Kong-Response-Latency: 1
{
"message":"Your IP address is not allowed"
}
Scenario 2: Configuring a CIDR Allowlist/Blocklist for Access Control
A CIDR allowlist is used as an example to describe how to allow access requests from an IP range. The blocklist configuration is similar.
1. Go to the details page of the route for which IP address restriction needs to be configured, and click ADD PLUGIN.
2. In the plugin configuration, enter the following configuration, press Enter, and save.
allow: Enter the CIDR that is allowed to access.
deny: Enter the CIDR that is denied to access.
consumer: Enter the ID of the consumer that requires application access control. If it is left blank, the IP address access control applies to all consumers.
Note:
At least one of allow and deny needs to be configured.
3. Initiate an API request. If you use an IP address that is not within the CIDR, the request is denied.
HTTP/1.1 403 Forbidden
Date: Mon, 25 Apr 2022 03:06:58 GMT
Content-Type: application/json;charset=utf-8
Connection: keep-alive
Content-Length: 48
X-Kong-Response-Latency: 14
{
"message":"Your IP address is not allowed"
}
Must-Knows
When both allow and deny are applied to an IP address at the same time, the IP address is denied to access.