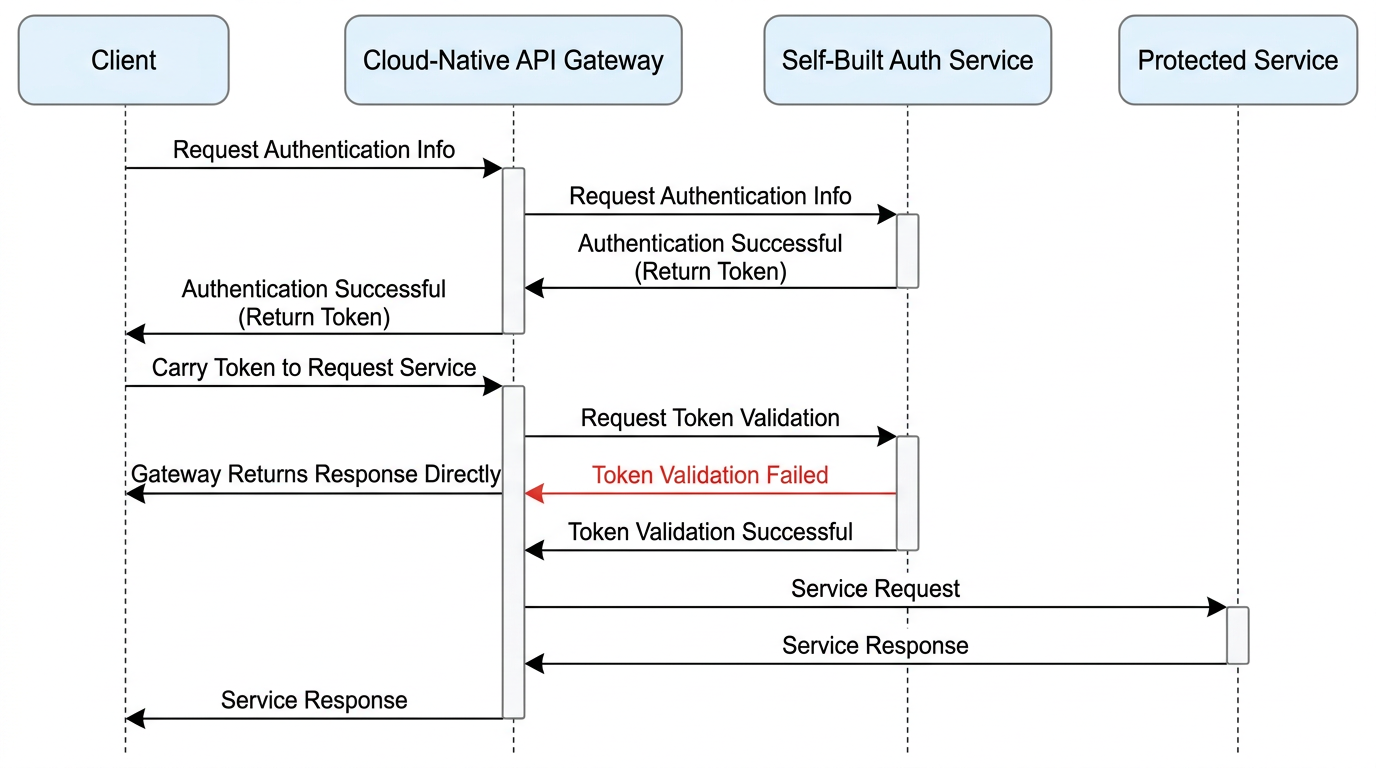
Cloud Native API Gateway provides custom authentication, facilitating unified authentication at the gateway entry. When a client request carries credential information (token) in a custom format, the gateway can forward the request to a centralized authentication service based on the configuration to complete authentication and forward or deny the request based on the authentication result to ensure API communication security.
The custom authentication process of Cloud Native API Gateway is as follows:
Cloud Native API Gateway provides the following custom authentication capabilities:
Custom authentication can be configured on a gateway service or route to perform custom authentication for a specific route or all routes under a specific service.
When the authentication service is unavailable, policies, including allow and deny can be configured.
A route allowlist can be configured to simplify usage. That is, routes in the allowlist under a service do not need to be authenticated, and other routes need to be authenticated.
The authentication result return policy can be configured, including identification via HTTP status codes and via response headers.
An authentication request can carry headers and the body.
An authentication response can retain headers and the body (transmitted through the response header).
When a request does not carry a token, it can be redirected to a specified address to obtain the token.
Plugin Configuration Description
Field Name
Description
Description
description
Plugin Description
-
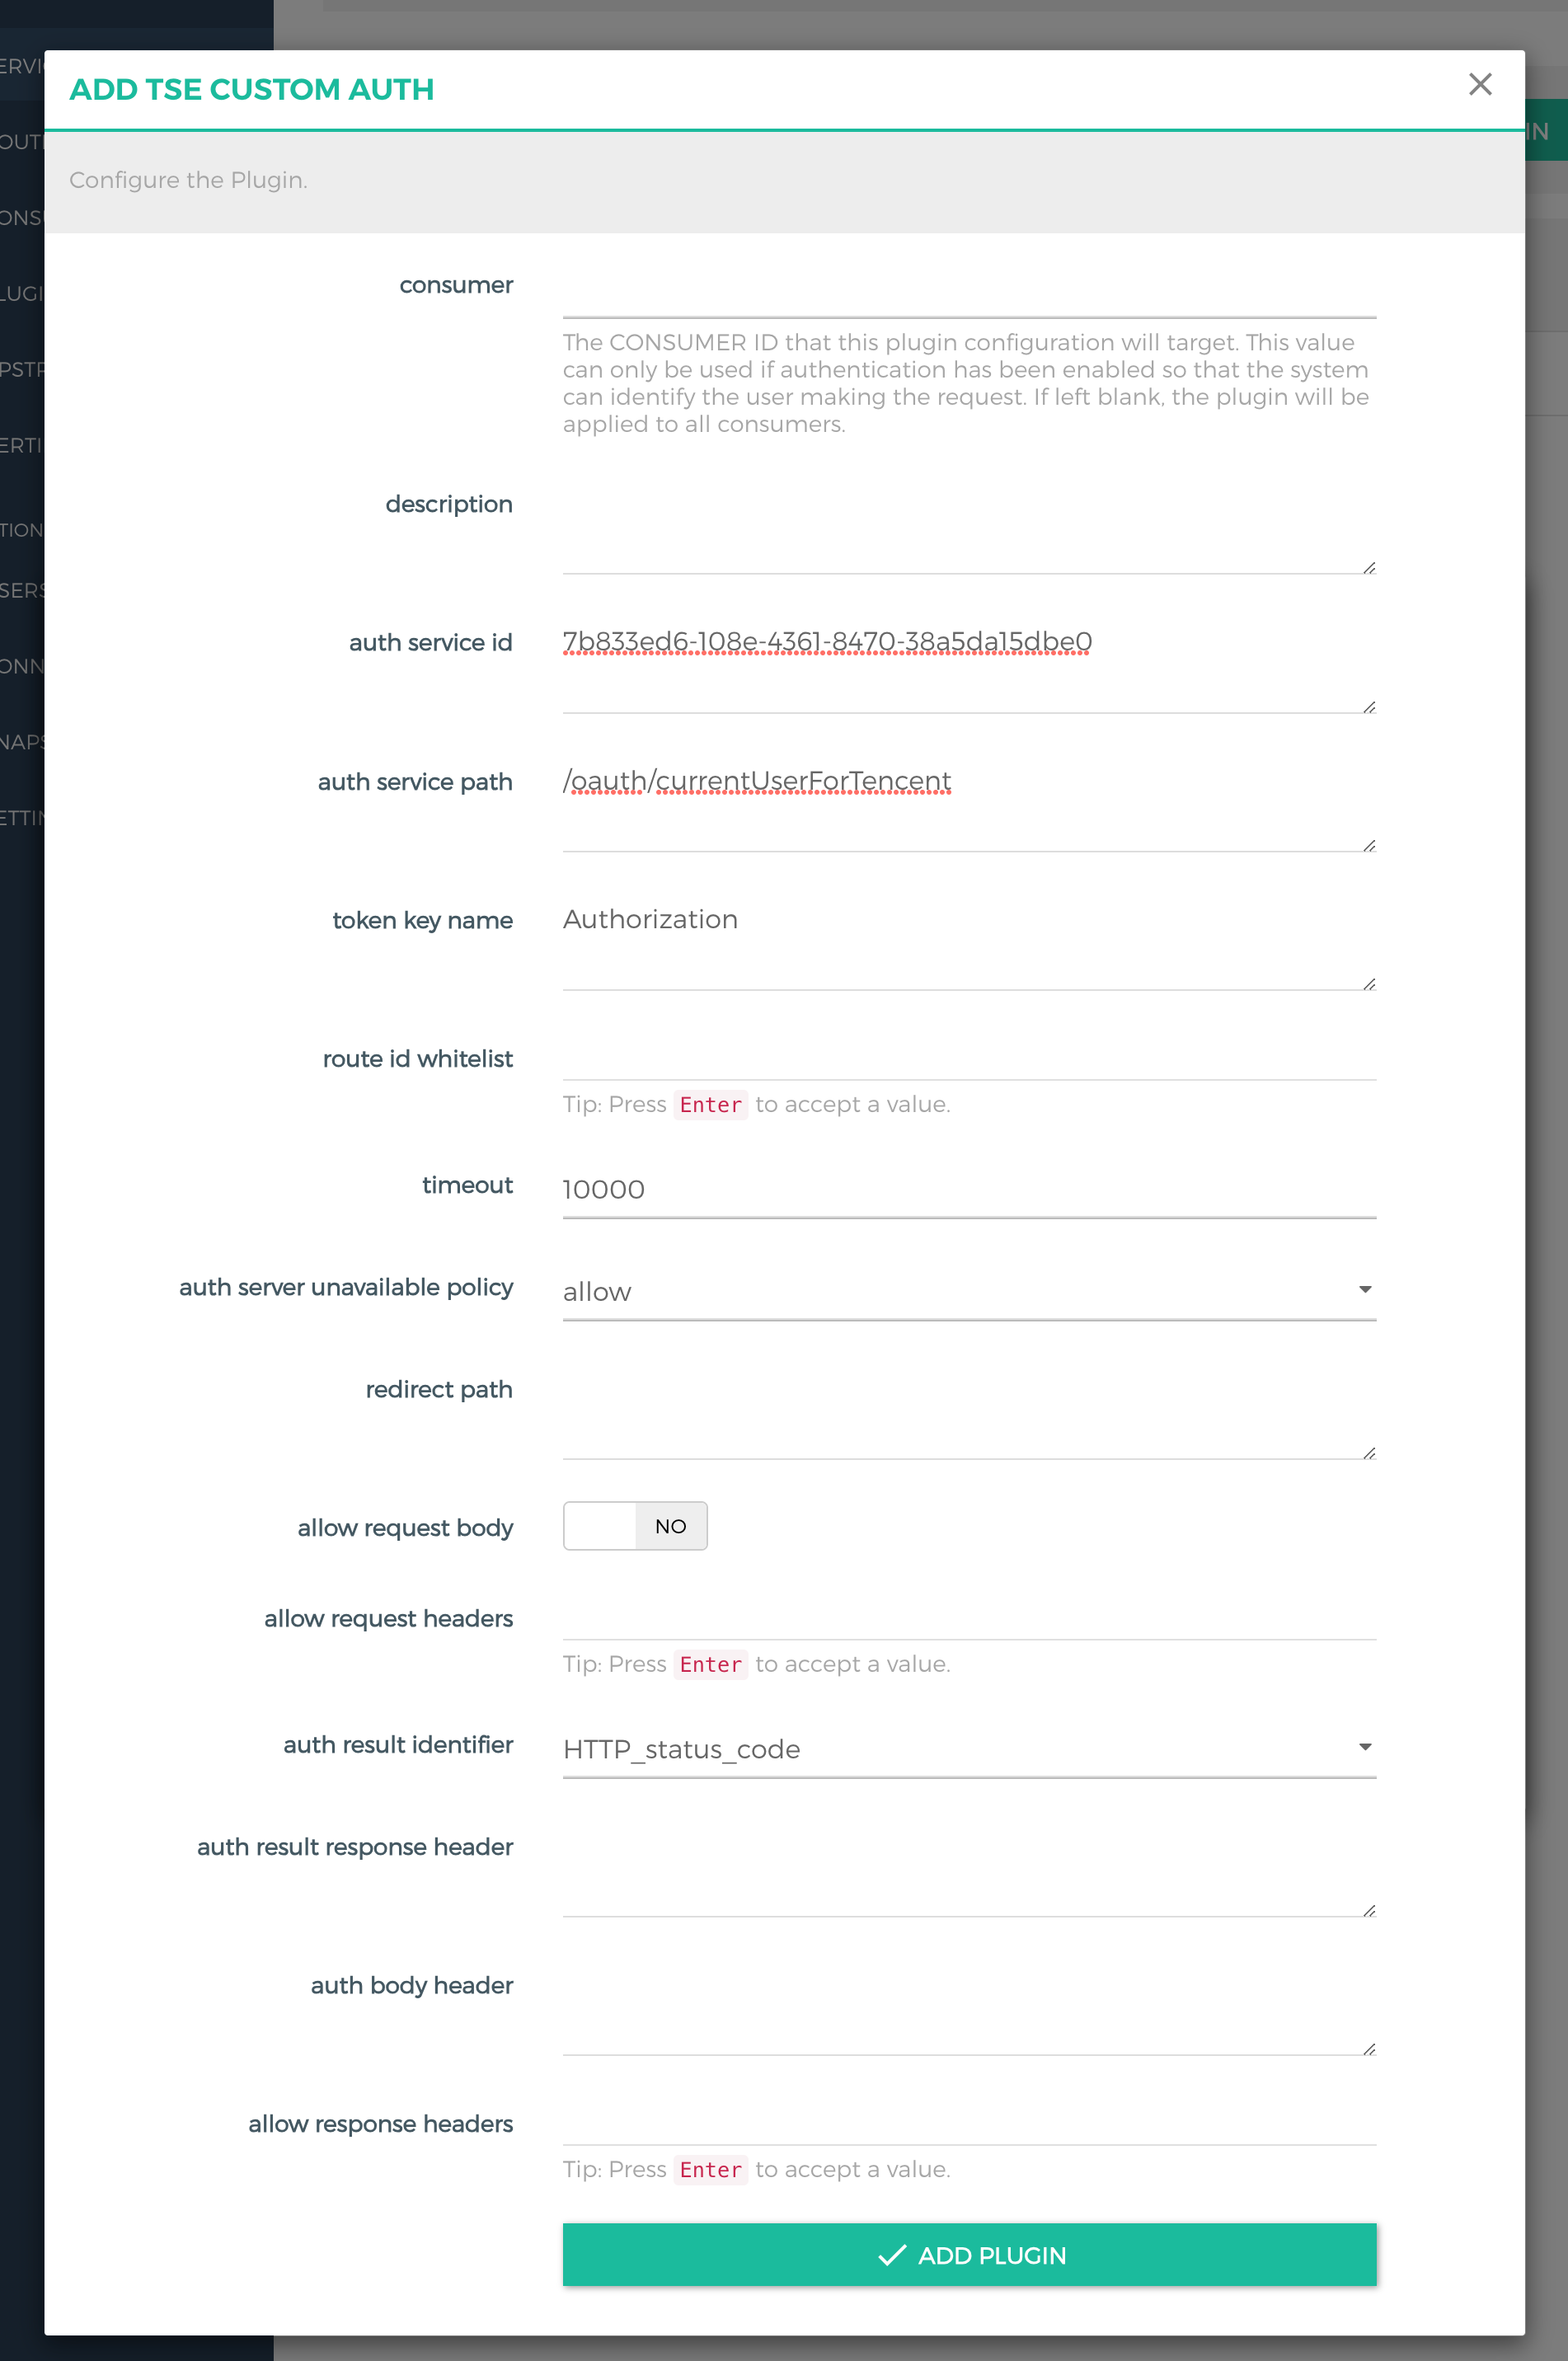
auth service id
Authentication service ID.
Go to the Cloud Native Gateway console, click the target instance ID to enter the instance details page, click Service Routing on the left, click Service, and then directly copy the service ID from the service list.
auth service path
Authentication API path.
-
token key name
Name of the request header for storing the token.
-
route id whitelist
Route allowlist, which is a list of route IDs, and routes in the list are not authenticated.
-
timeout
Timeout time of the authentication service, which is 10 seconds by default.
-
auth server unavailable policy
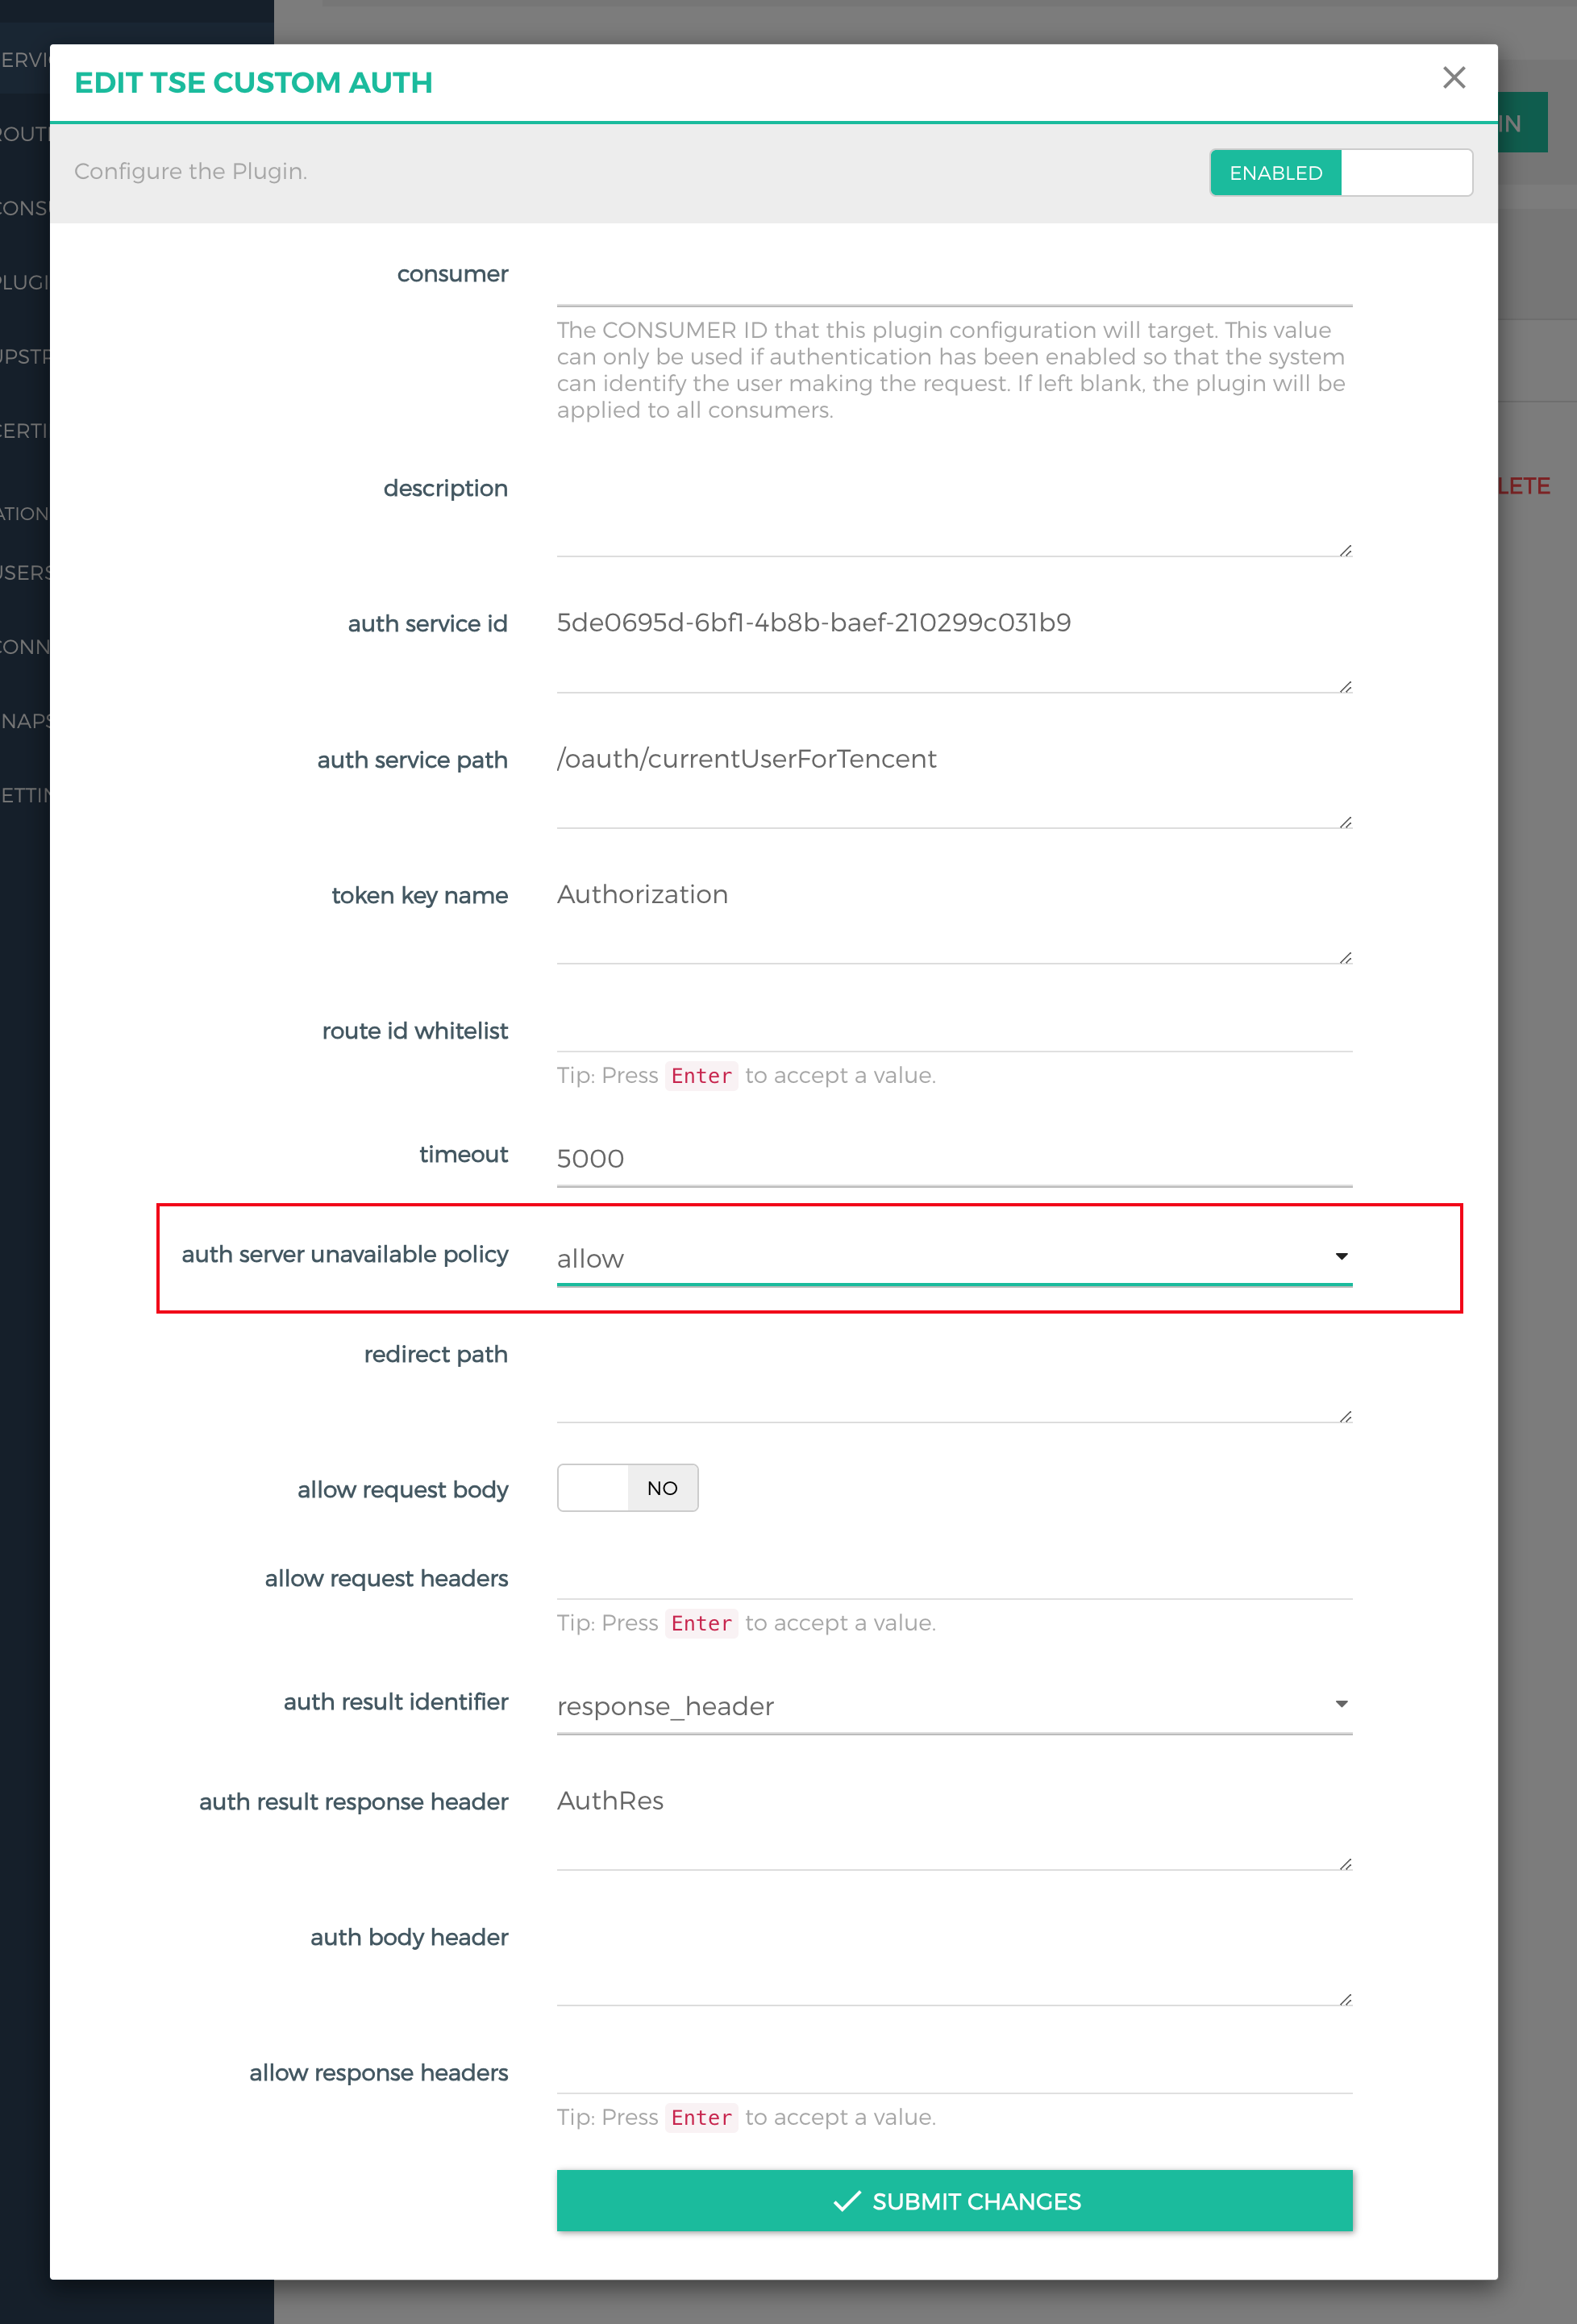
Policy used by the gateway to process requests from the client when the authentication service is unavailable. Two policies are supported: allow and deny.
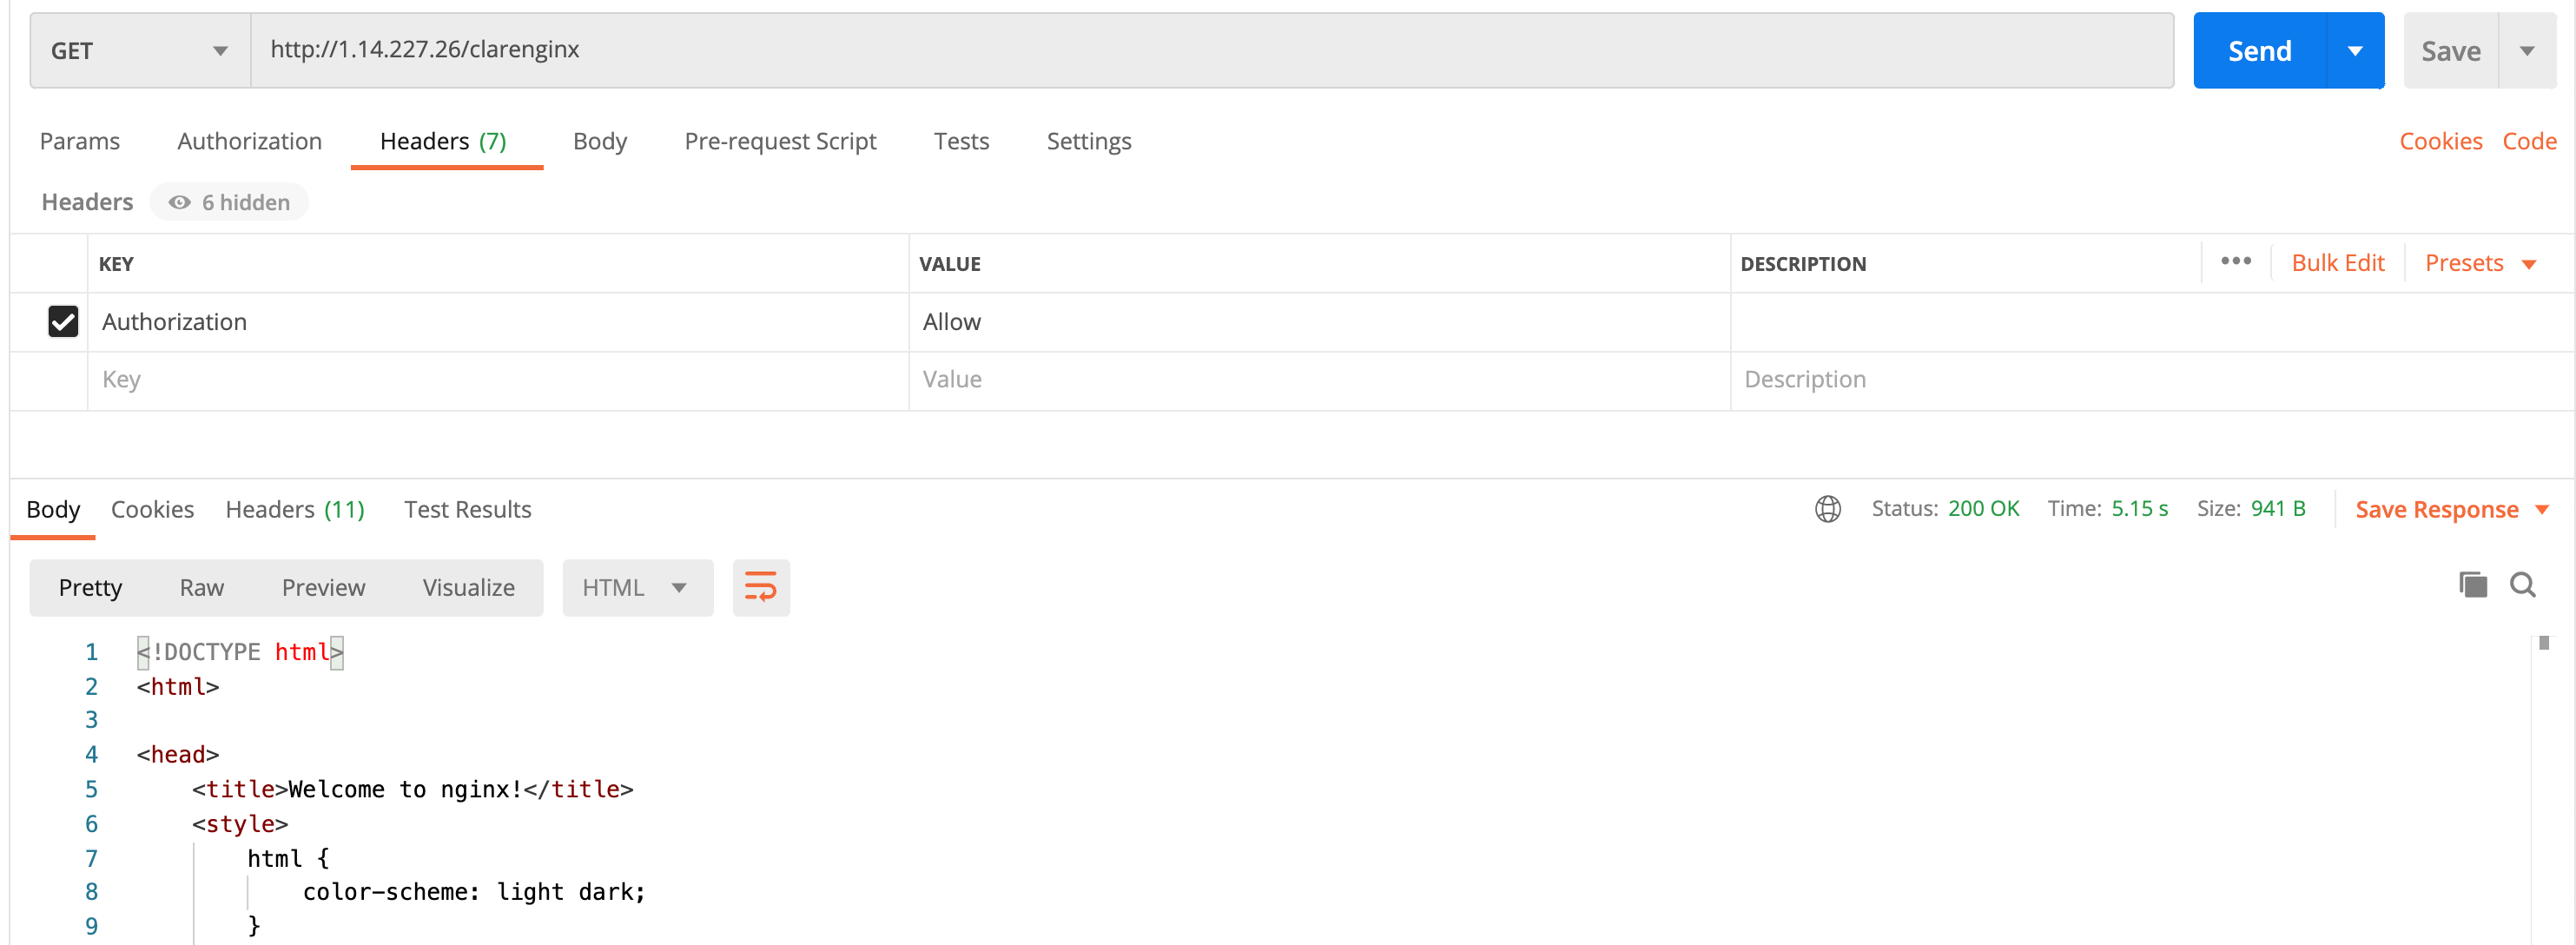
allow: When the authentication service is unavailable, the gateway forwards requests from the client to the backend service.
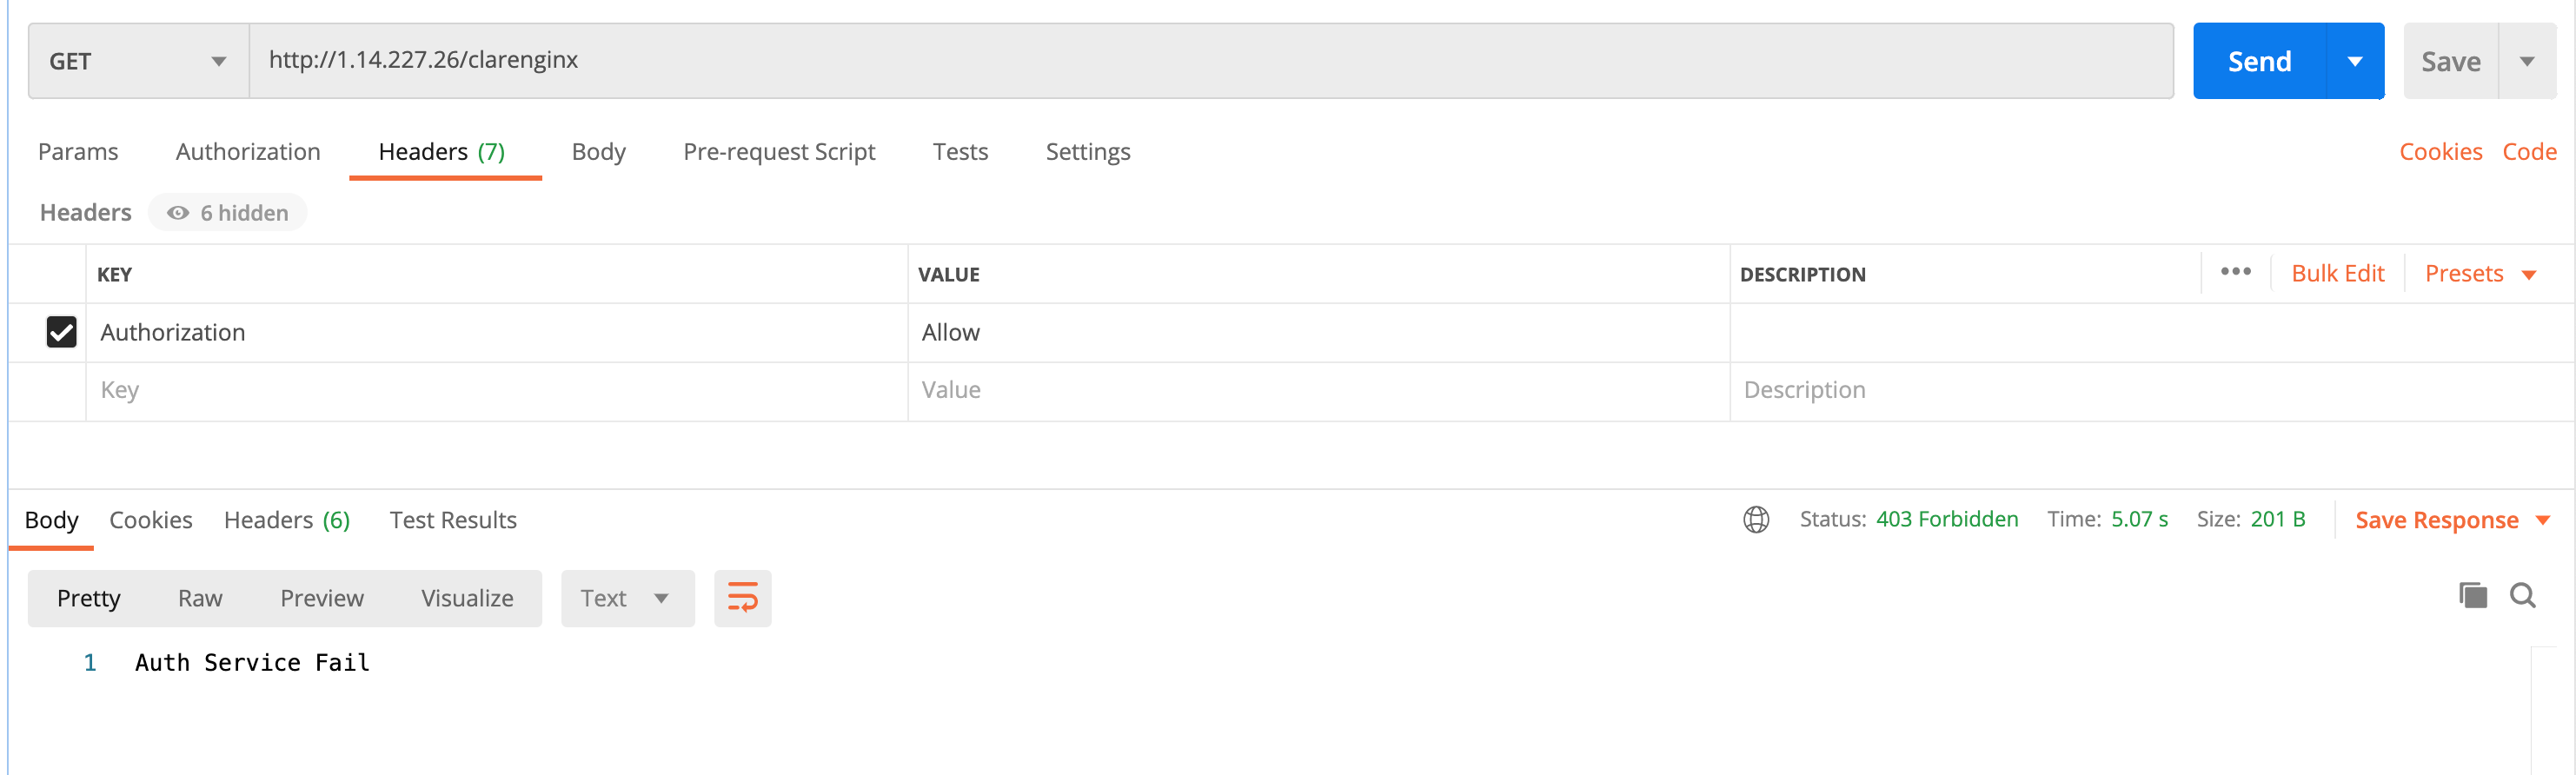
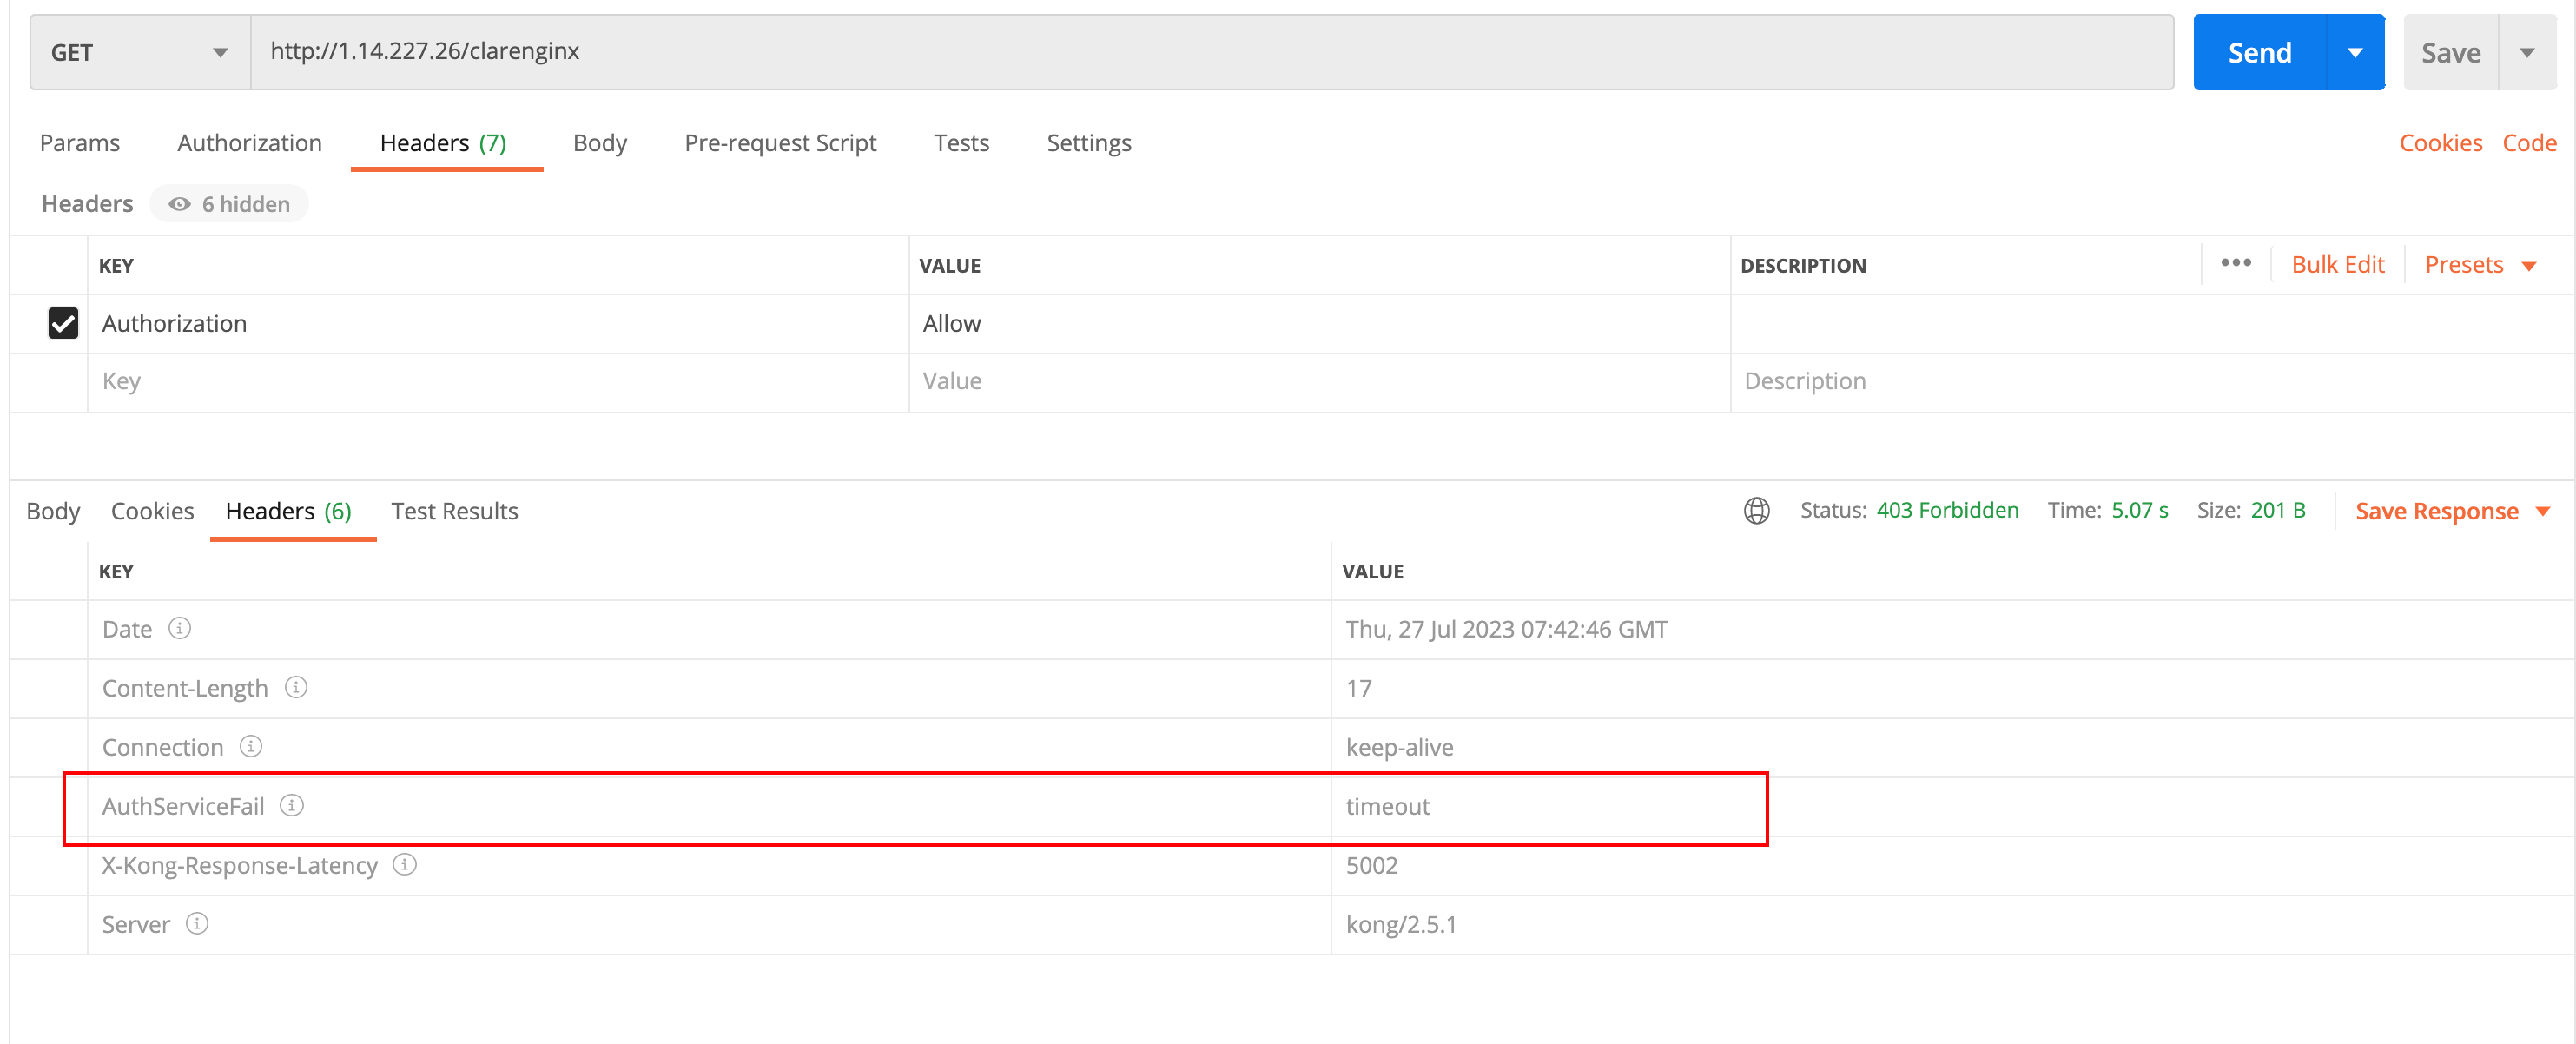
deny: When the authentication service is unavailable, the gateway denies requests from the client and returns a 403 status code and a header indicating that the authentication service is unavailable.
redirect path
Redirection path when a request does not carry a token.
The gateway returns 302 for redirection. The redirection URL concatenation rule is as follows: {request scheme}://{request host}/{redirect_path}
allow request body
Whether the request Body is allowed in the authentication request.
-
allow request headers
List of headers that can be carried in an authentication request.
-
auth result identifier
Policy for returning authentication results, which supports two methods: identification via HTTP status code (HTTP_status_code) or return via response header (response_header).
HTTP status code identifier (HTTP_status_code): Authentication is successful when the authentication service returns 200. Otherwise, authentication fails.
Response header identifier (response_header): The authentication server returns HTTP 200 to the gateway and uses a custom response header to identify the authentication result. When the value of the custom response header is true, authentication is successful. When the value of the custom response header is false or empty, authentication fails.
auth result response header
Custom response header that identifies the authentication result.
-
auth body header
Response header to which the authentication response body belongs.
The body returned by the authentication service can be stored in a custom response header and returned to the client.
allow response headers
List of headers that can be carried in an authentication response.
-
Use Cases
Preparation Steps
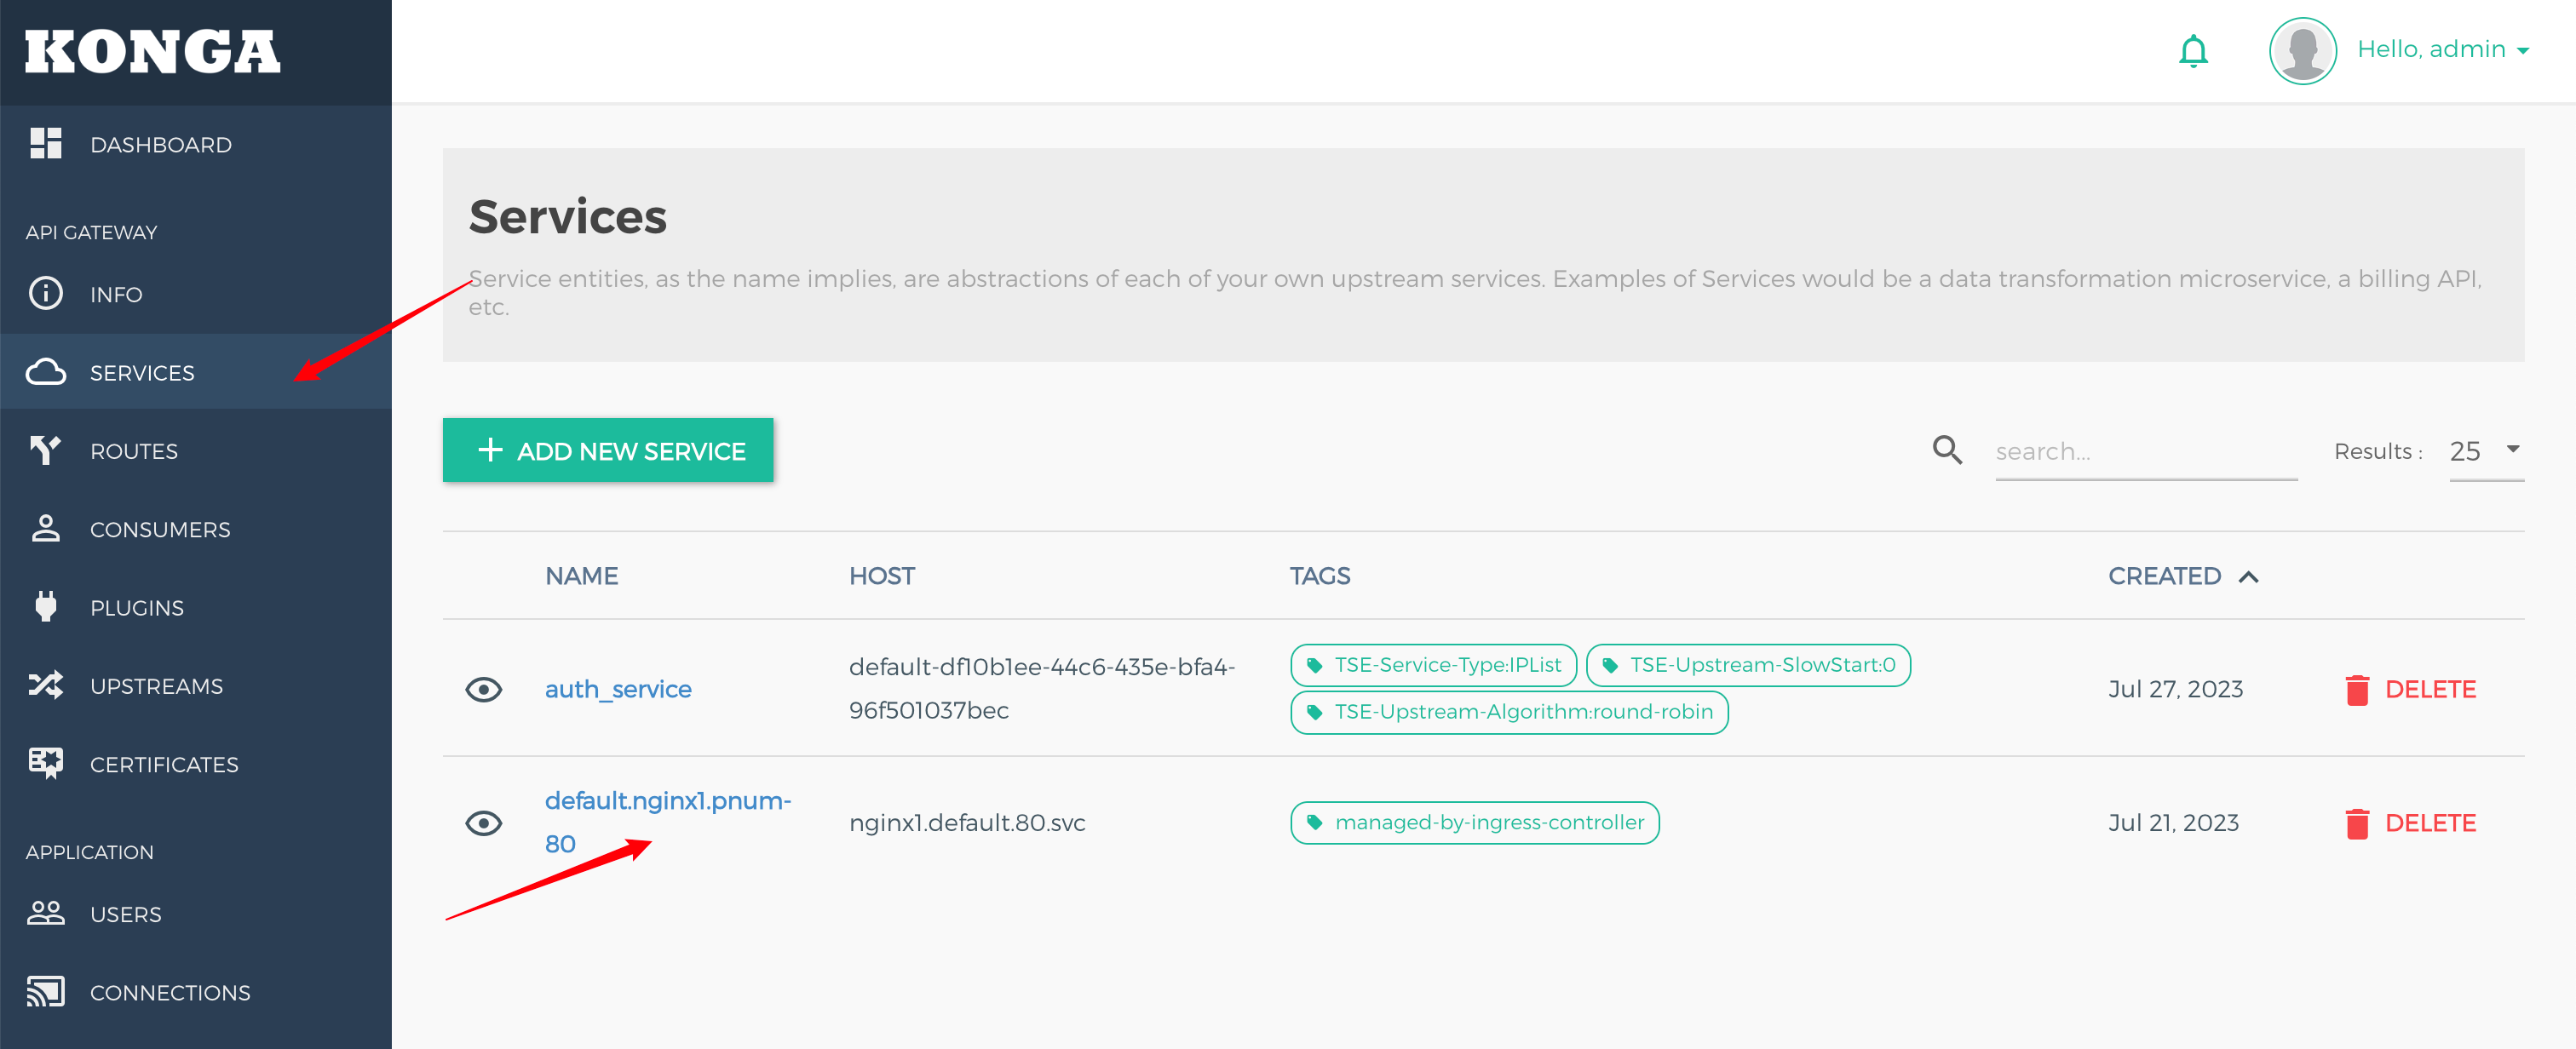
1. Create the backend service Nginx and the route that need to be accessed.
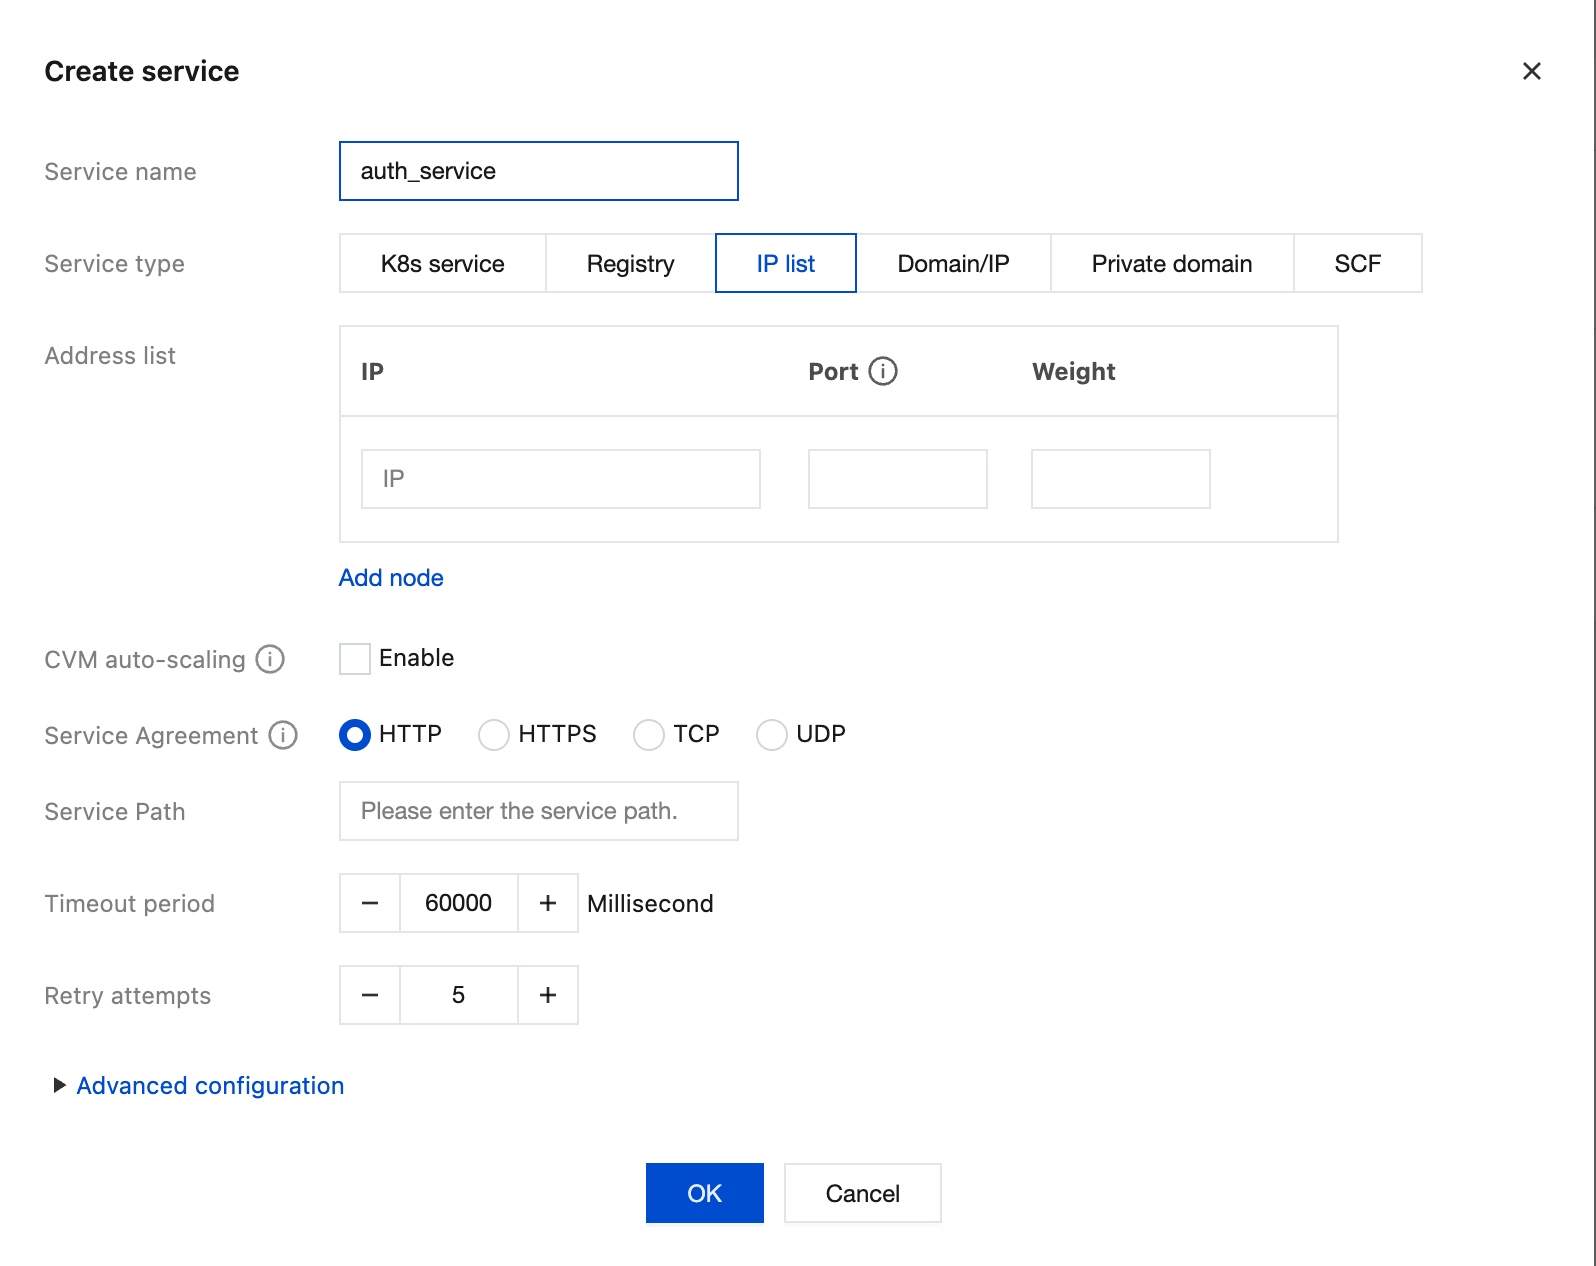
2. Create an authentication service auth_service, and enter the service type, address list, and request protocol based on the authentication service information.
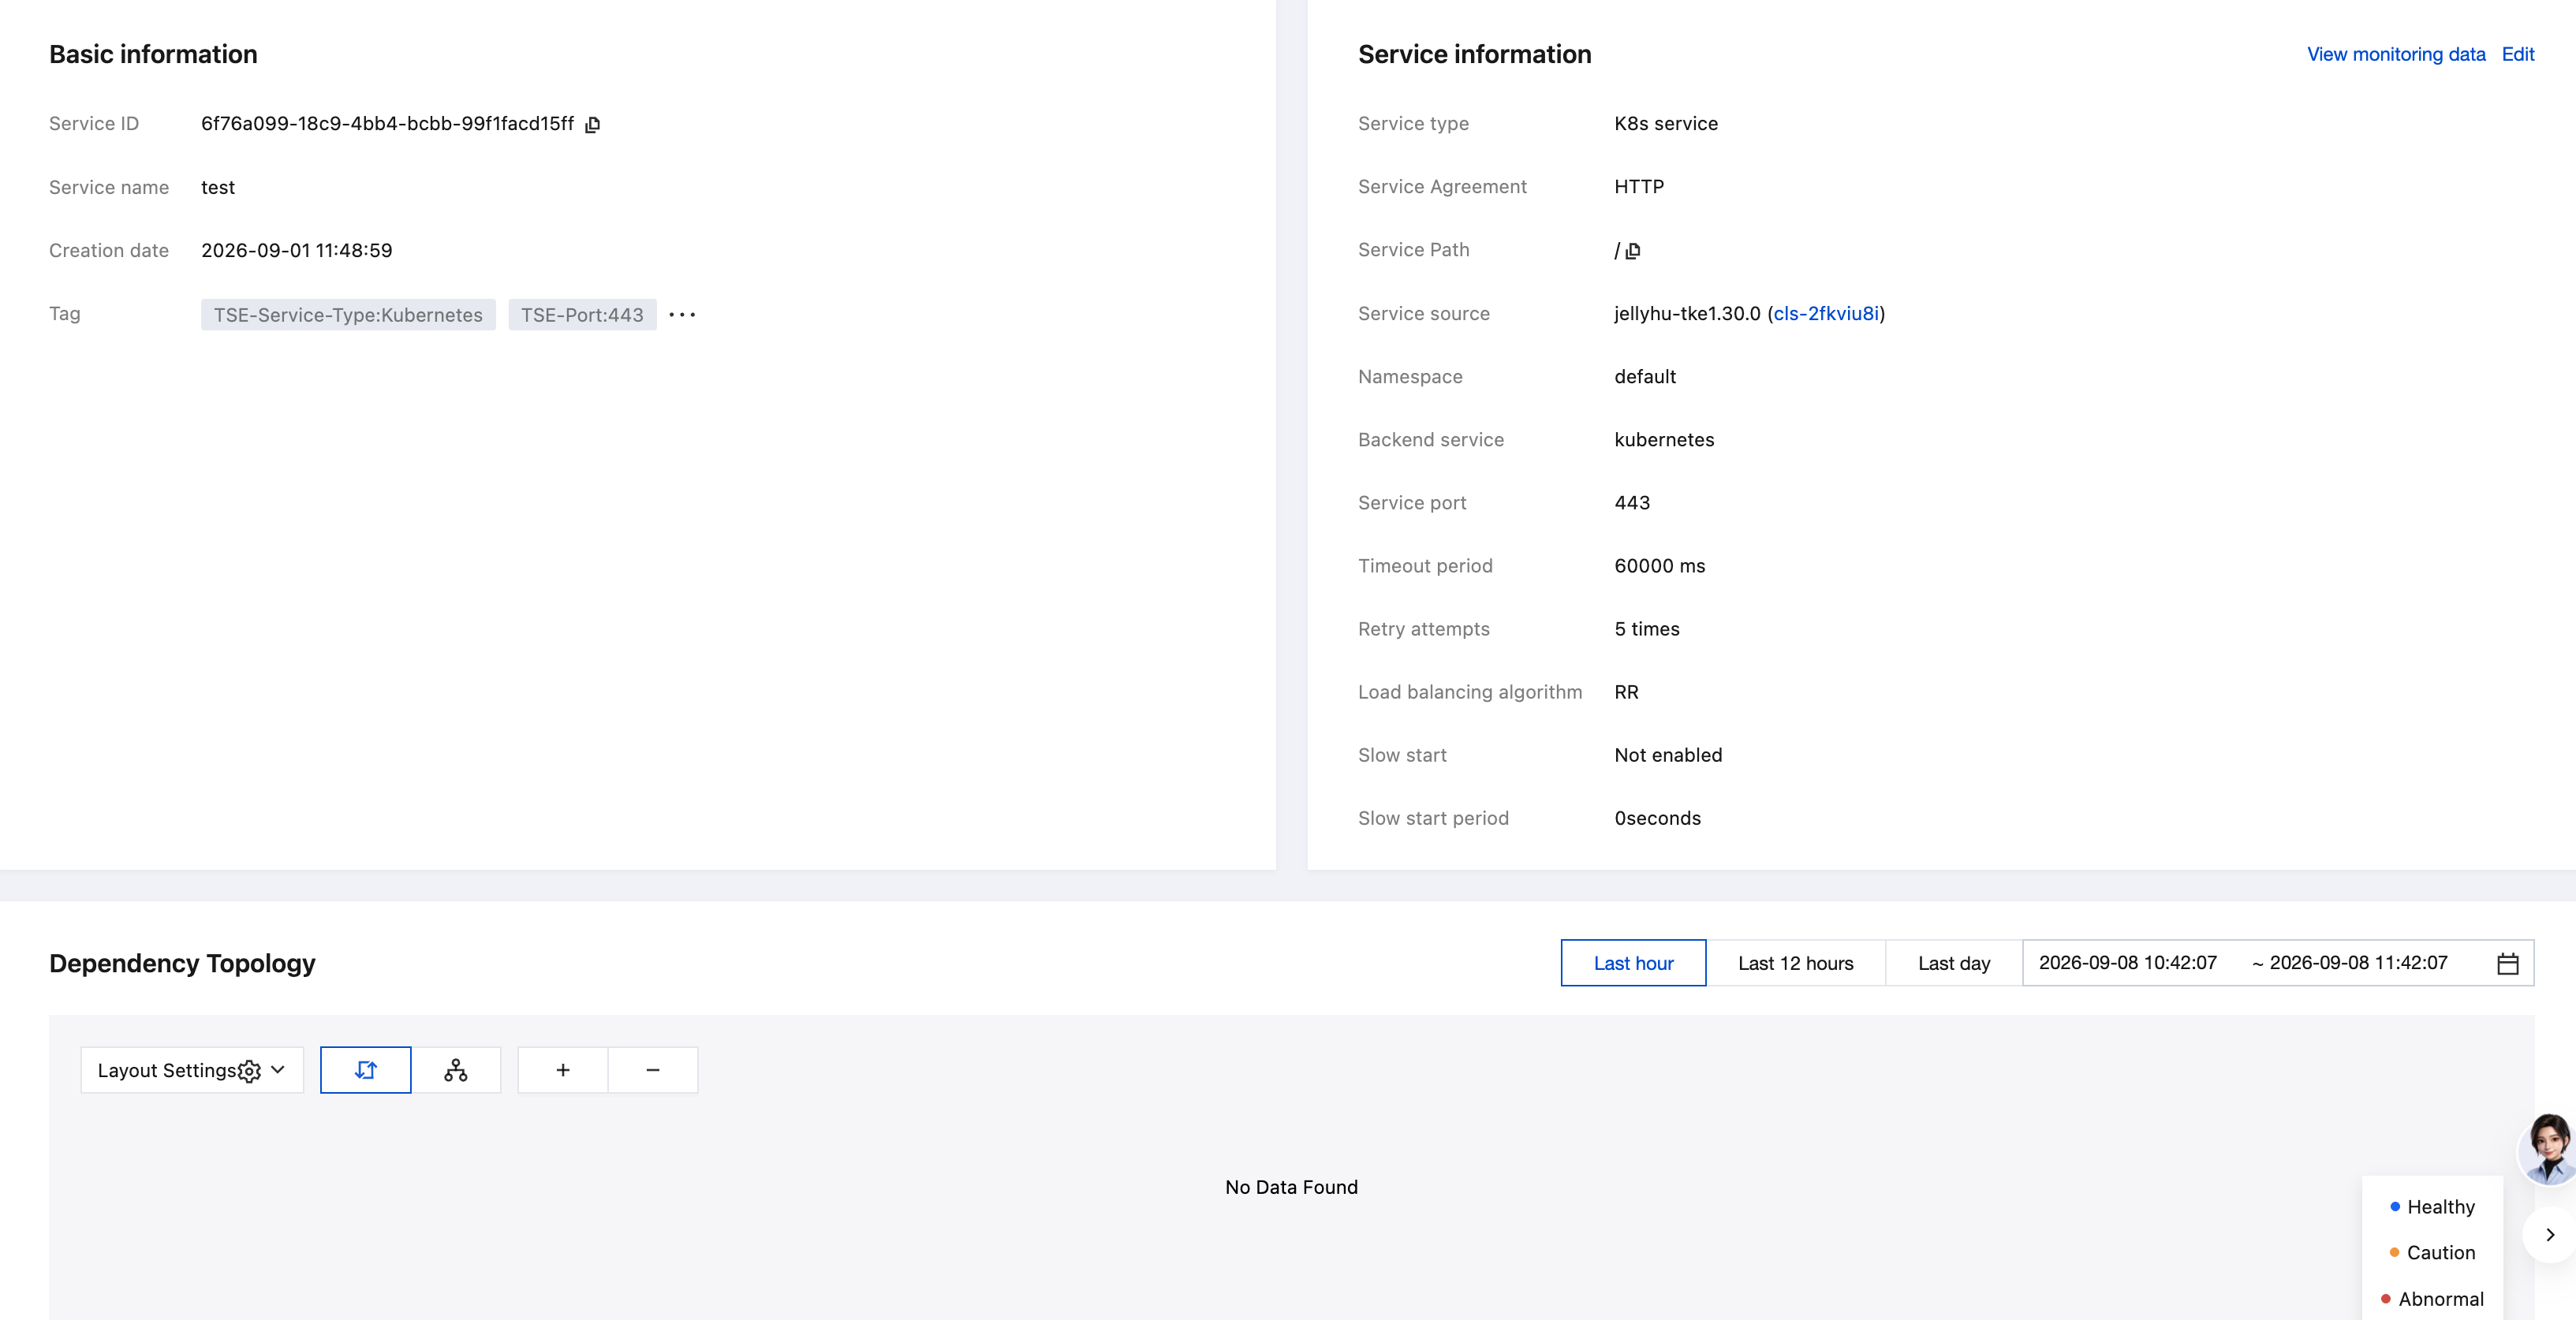
3. Click the service ID, and then click the Service Information tab to view the service information.
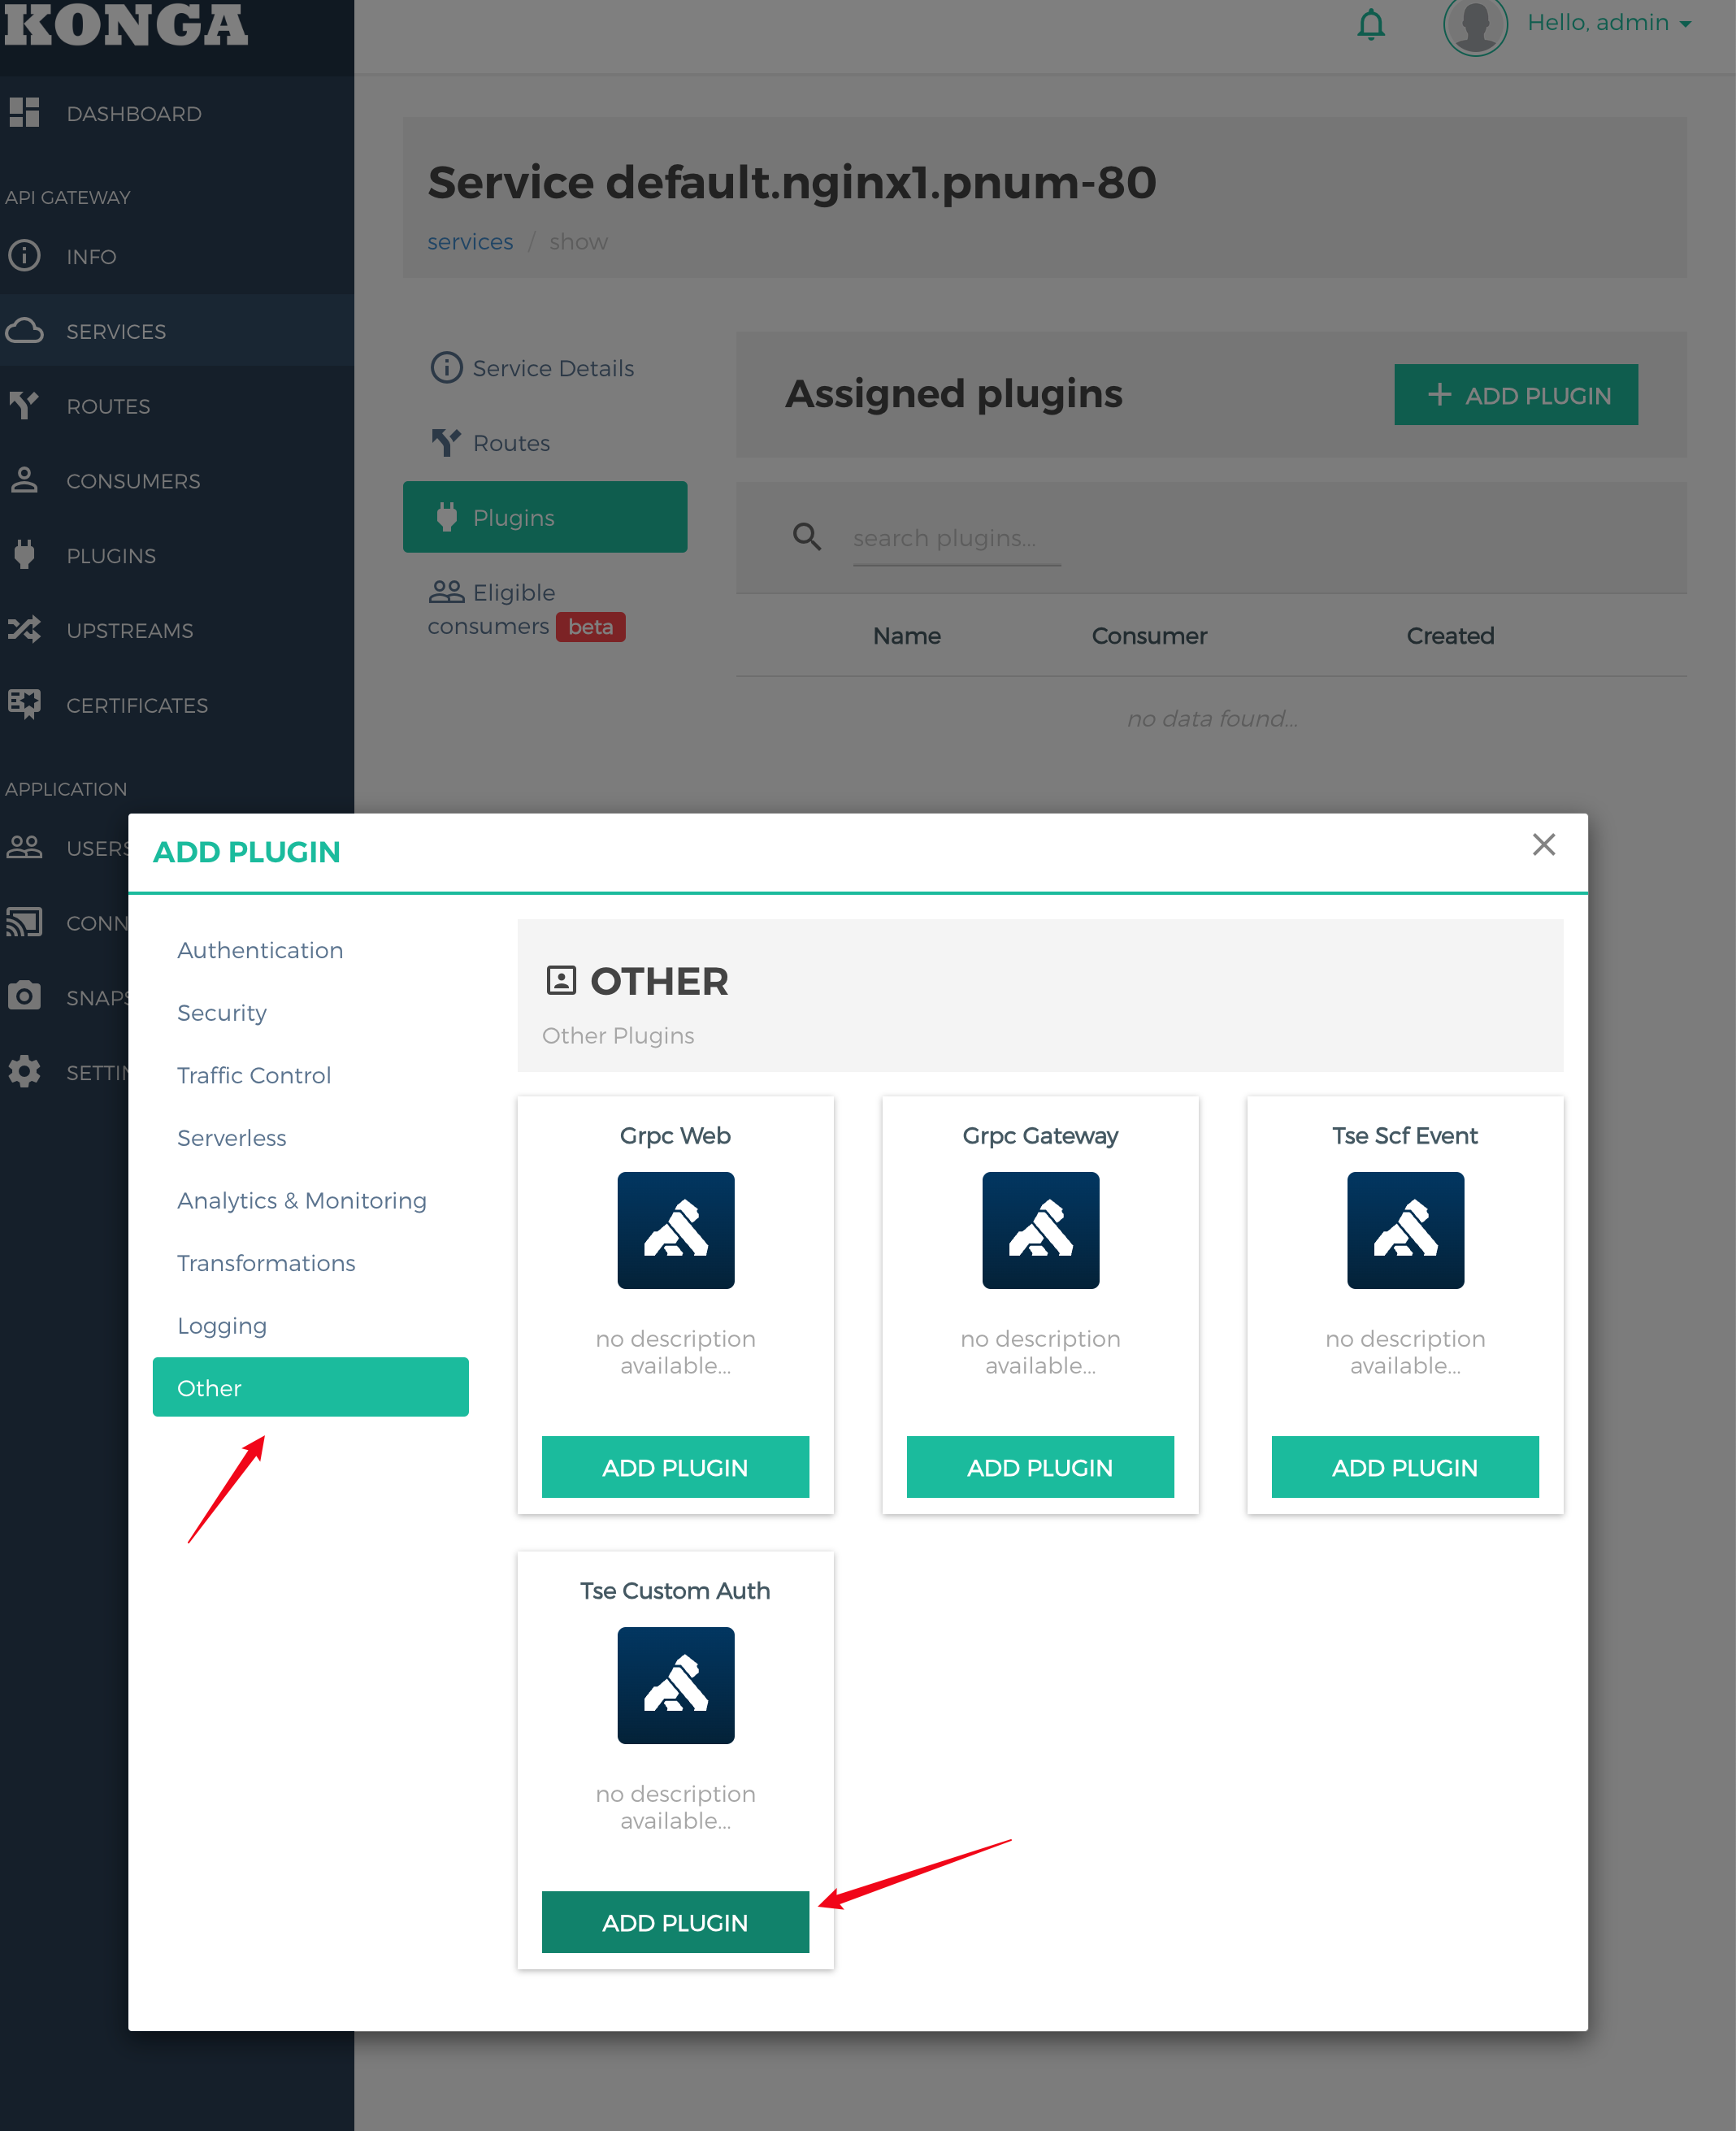
4. Install the custom authentication plugin.
Go to Plugin Management, choose System Plugins > tse-custom-auth, and click Install Latest Version to install it.
Scenario 1: Identifying the Authentication Result Using the HTTP Status Code
Scenario description: When your authentication server uses HTTP status codes to identify the authentication result, set auth result identifier to HTTP status code. The gateway determines the authentication result based on the status code returned by the authentication server. If the status code is 200, the gateway considers that authentication is successful and forwards the request to the backend service. In other cases, the gateway regards that authentication fails and denies the request.
2. Select Cloud Native Gateway in the left sidebar and click the target instance to go to the instance details.
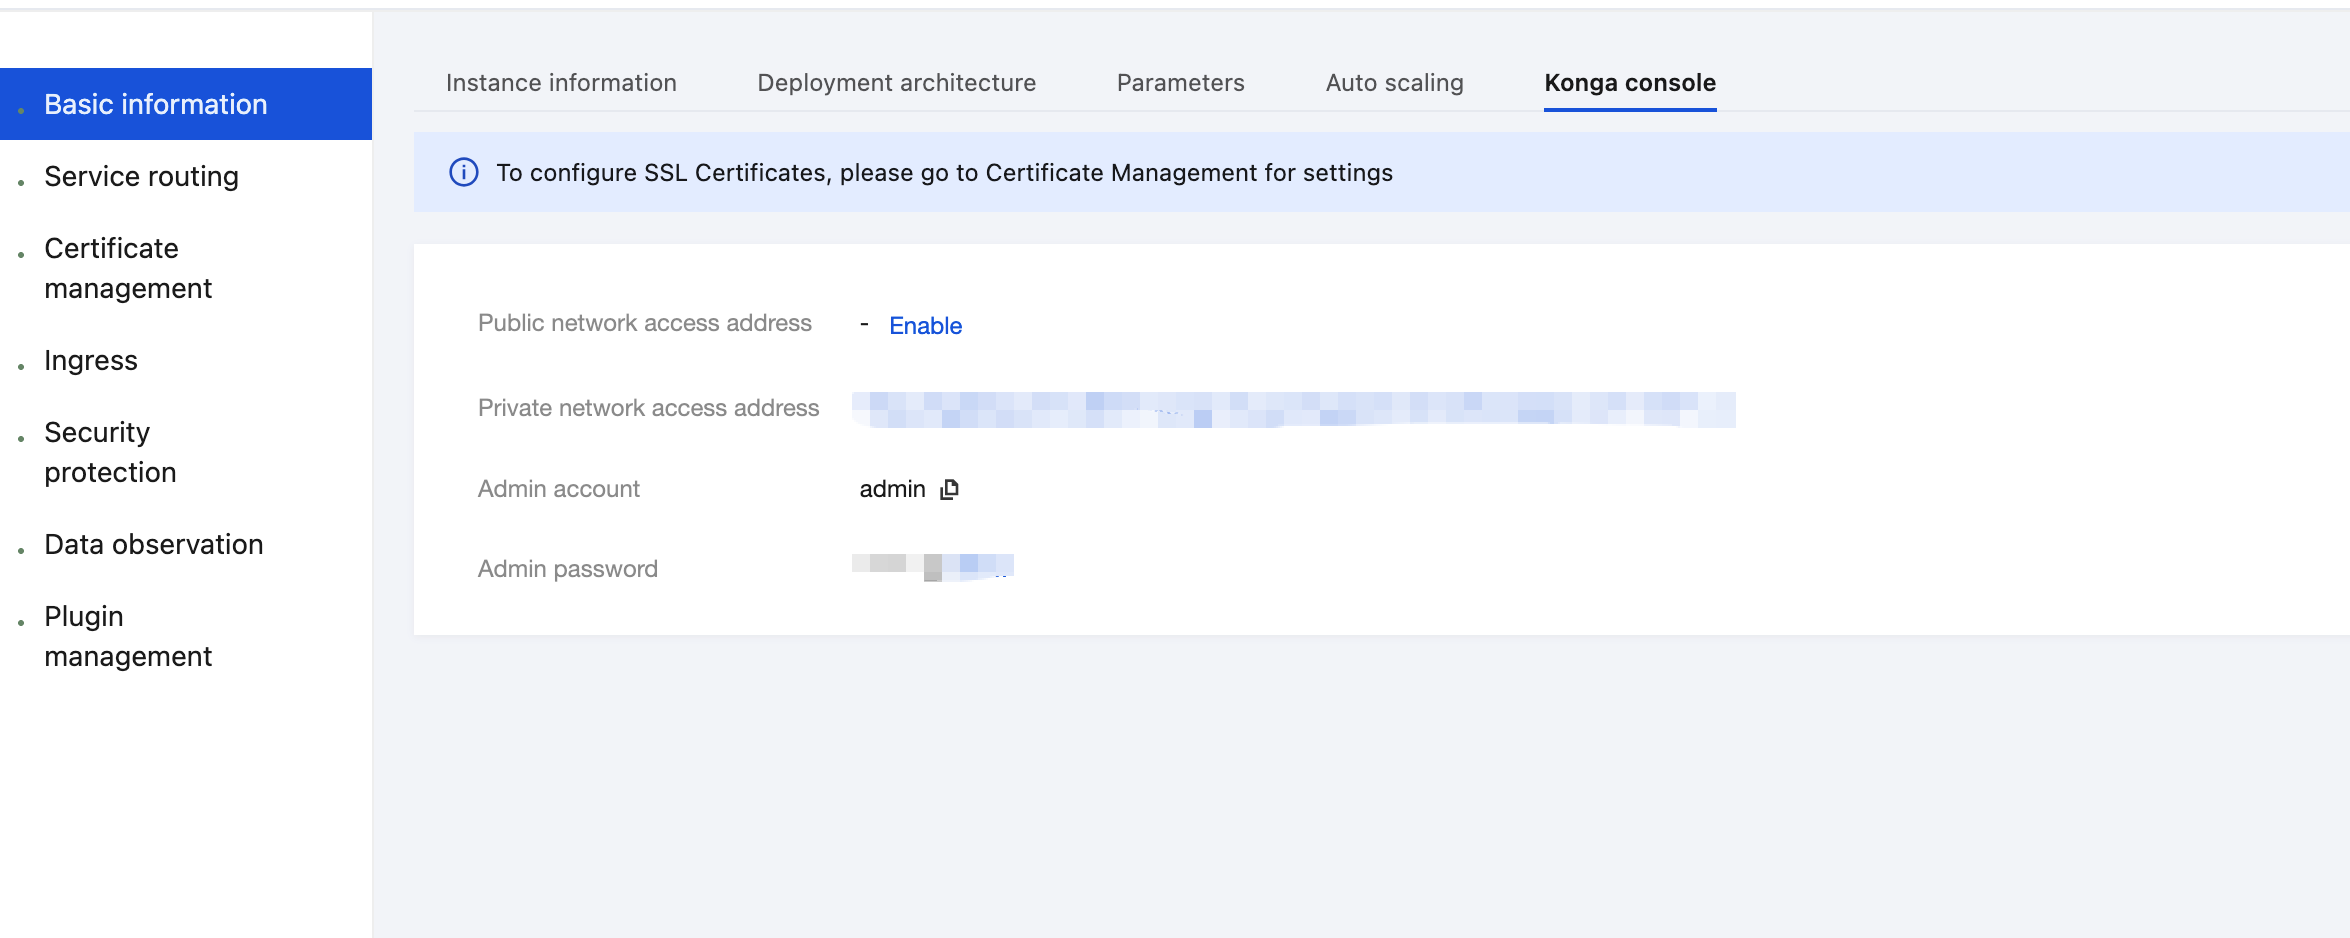
3. On the Basic Information page, click the Konga console Tag to view the management console login method.
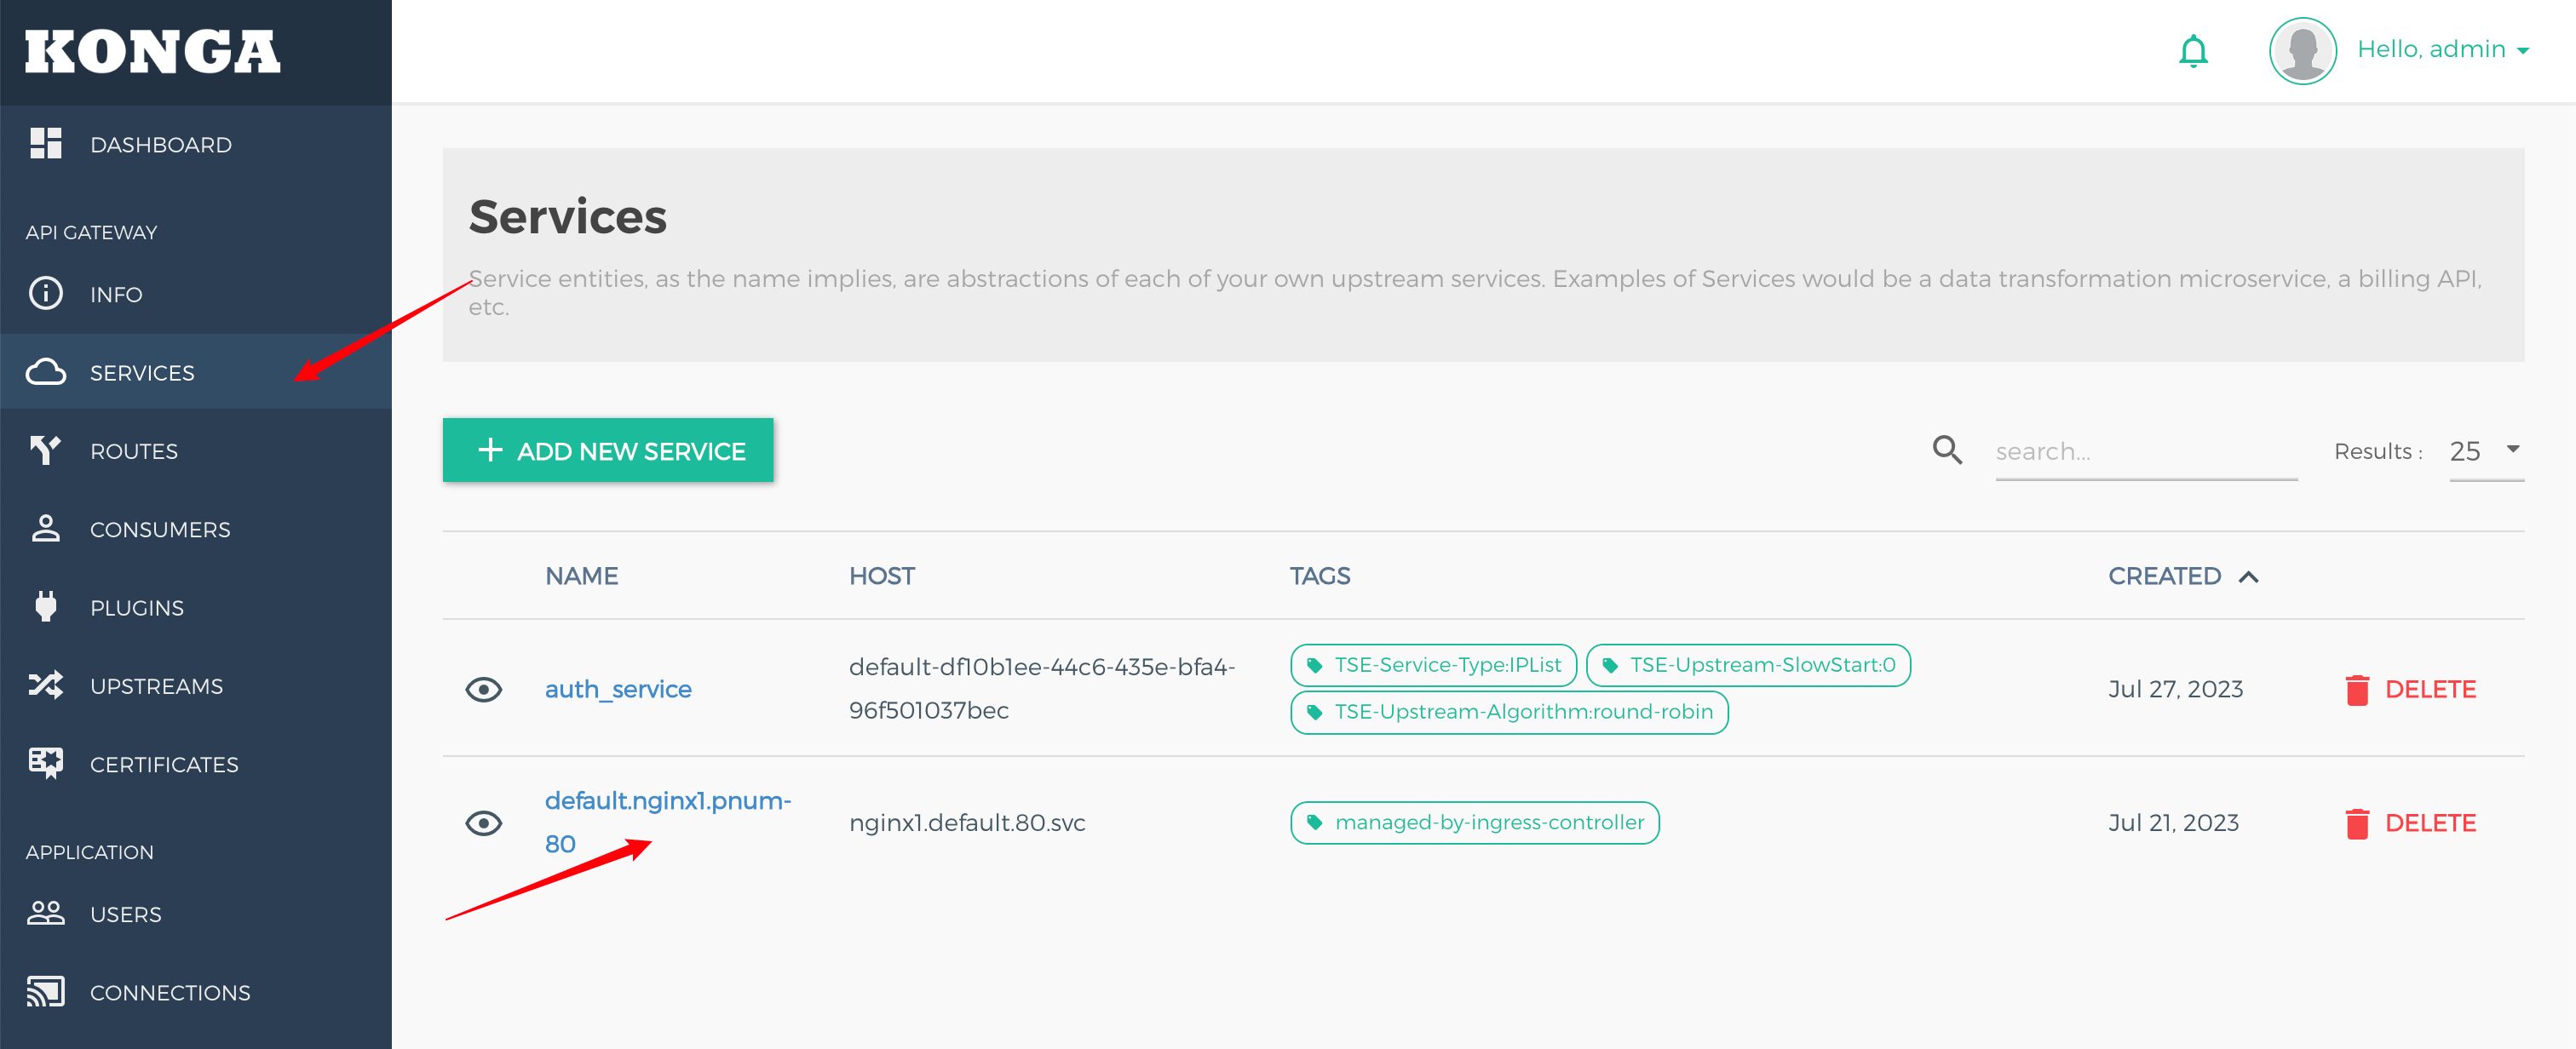
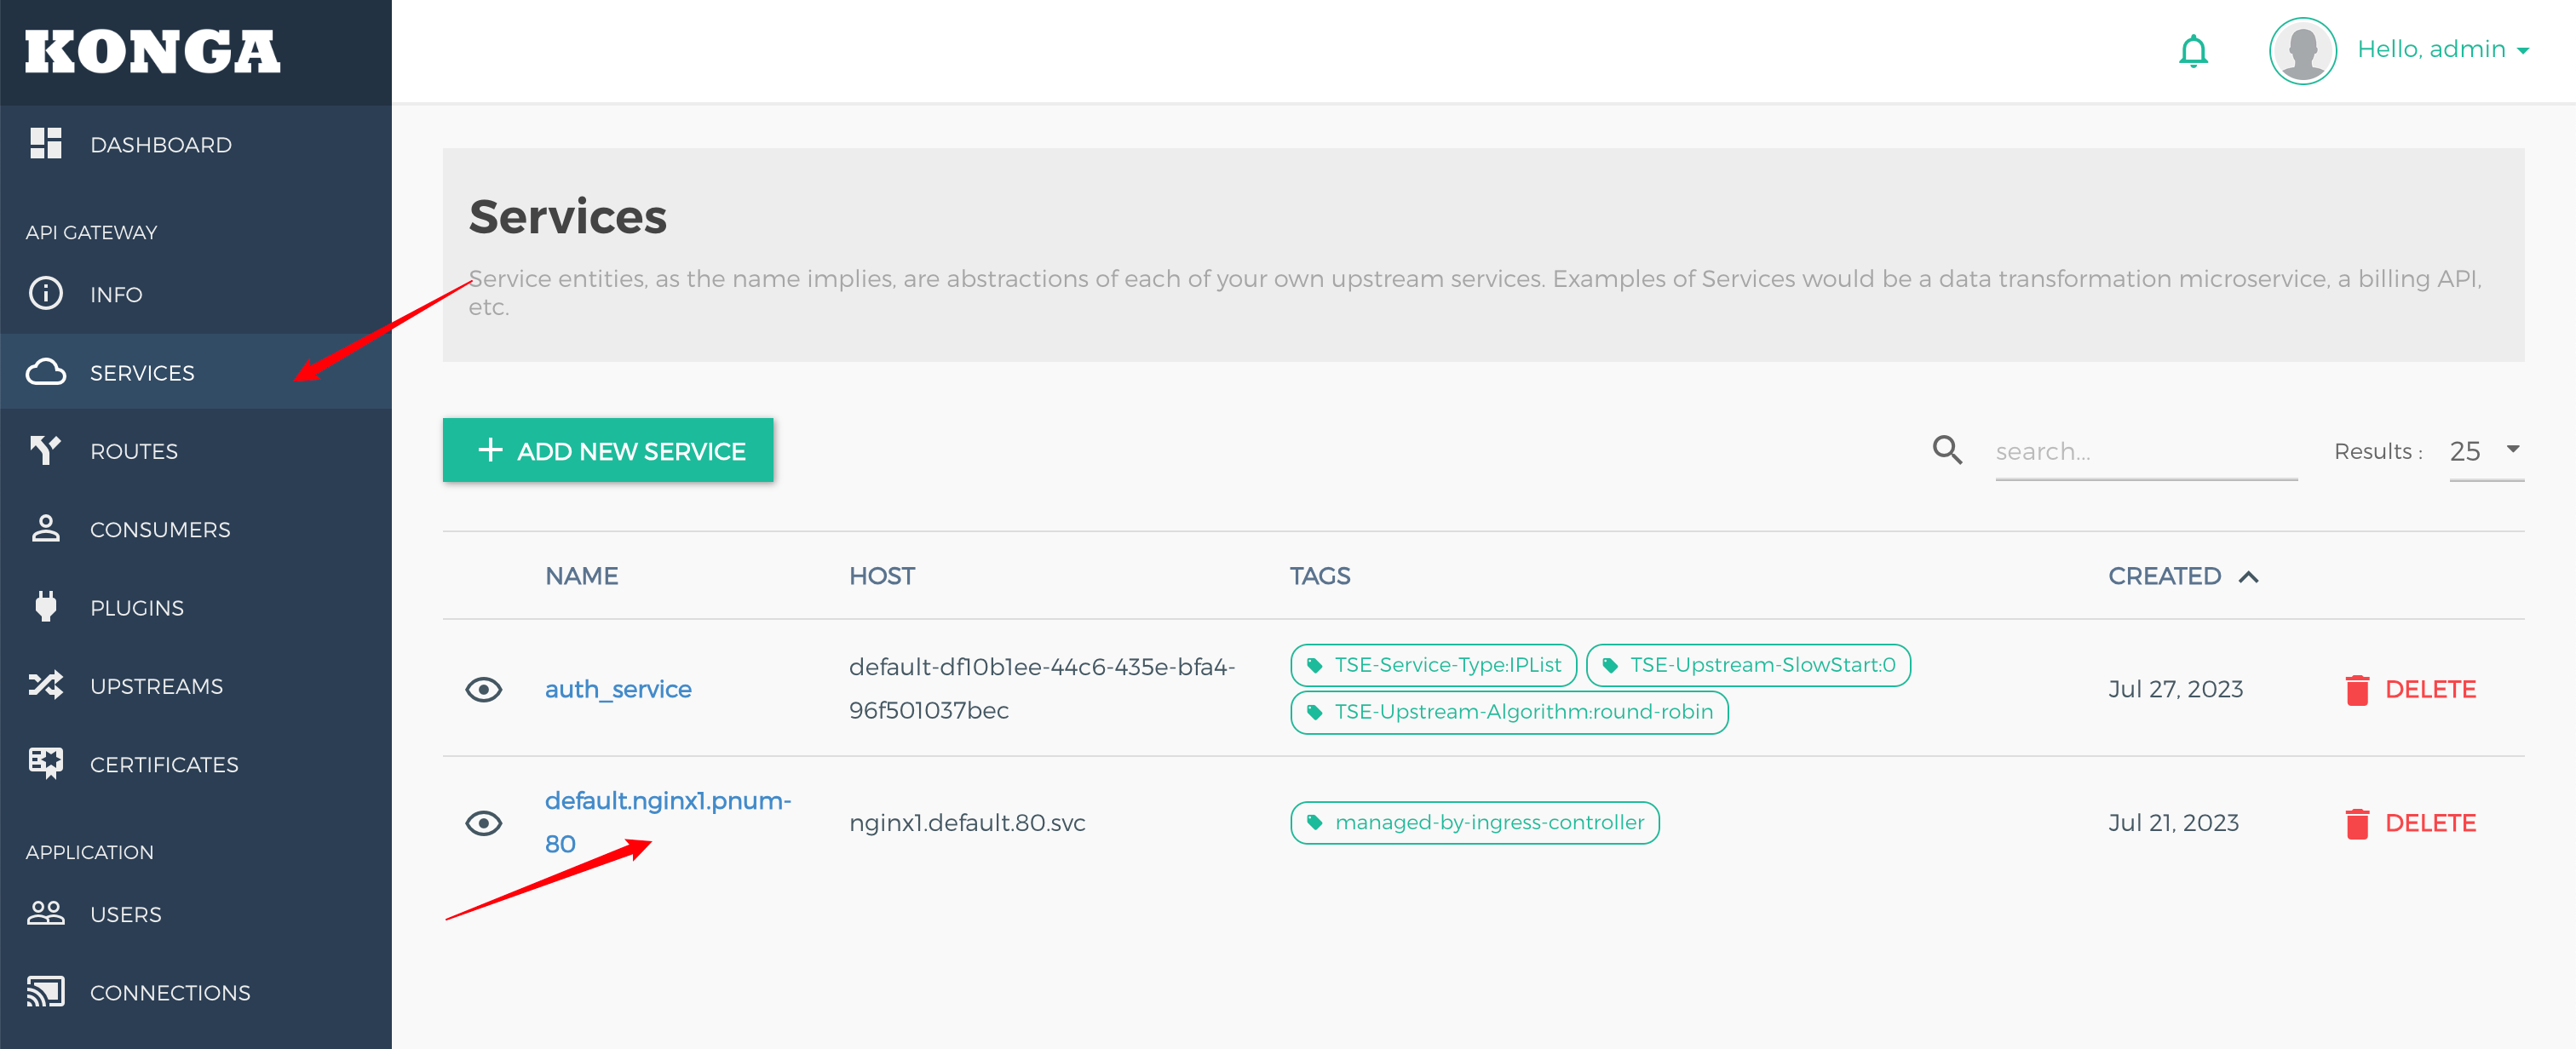
4. Click the Service page on the left, and then click the nginx service to go to its details.
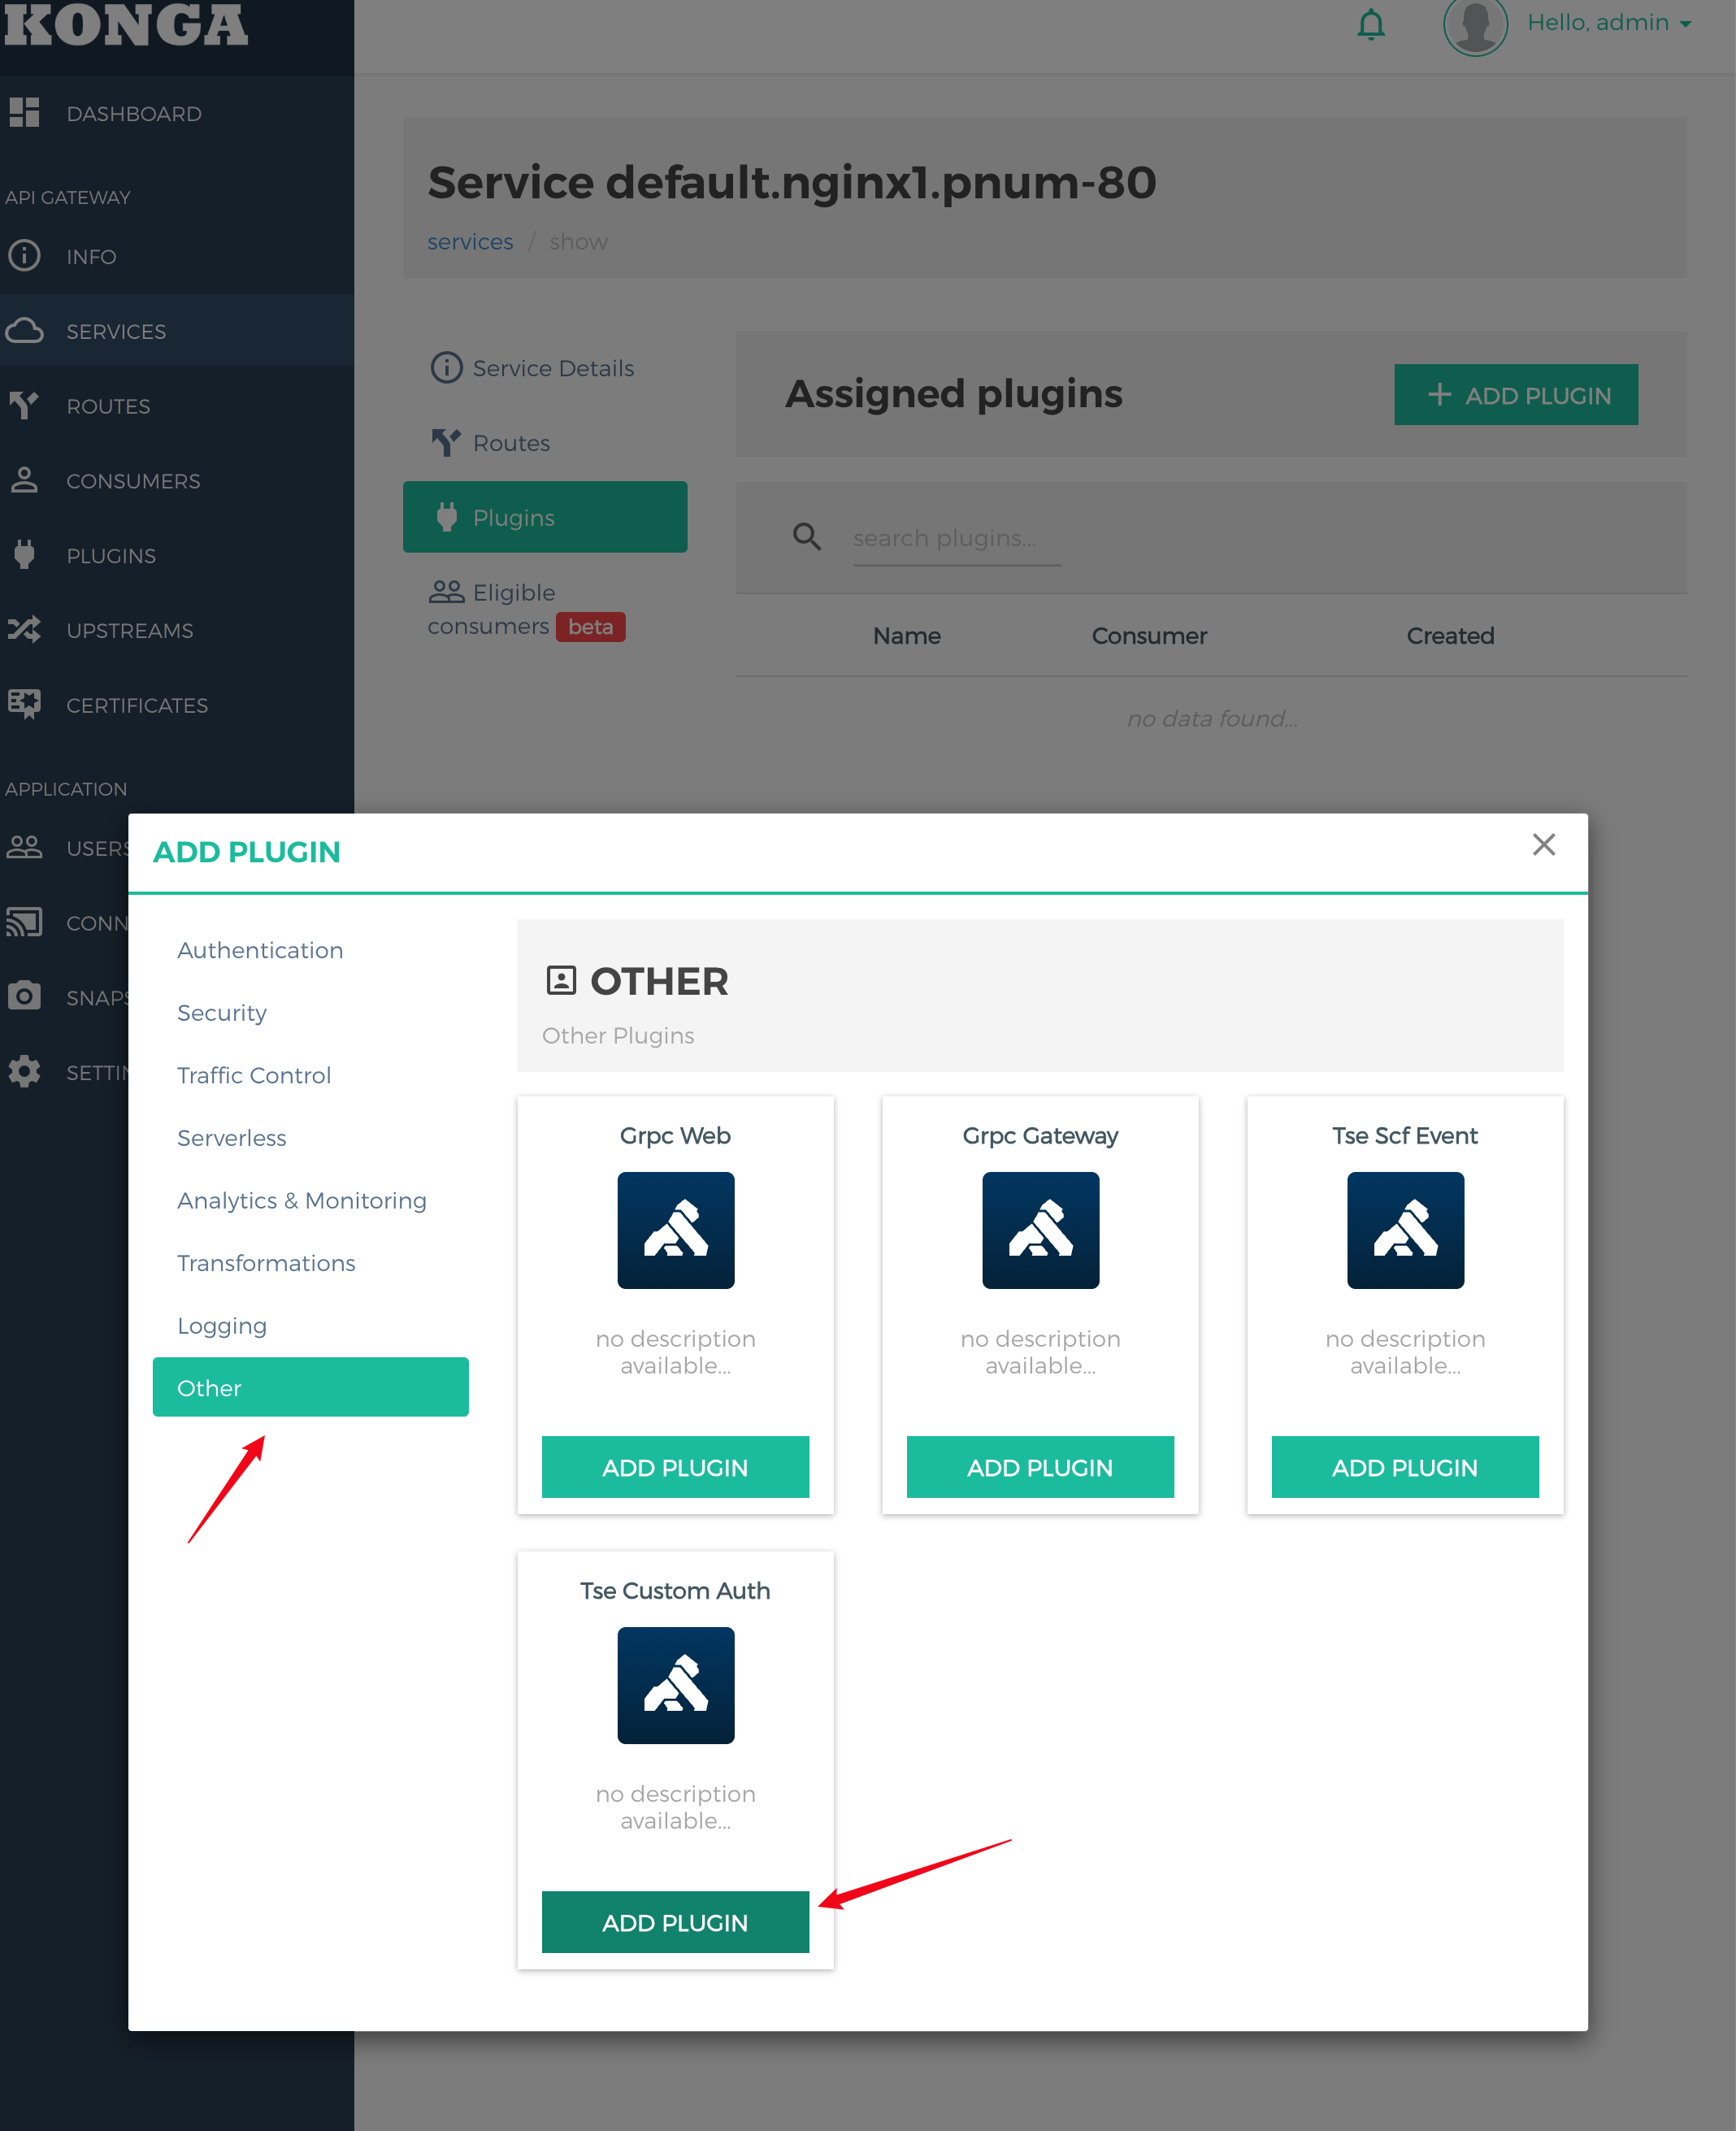
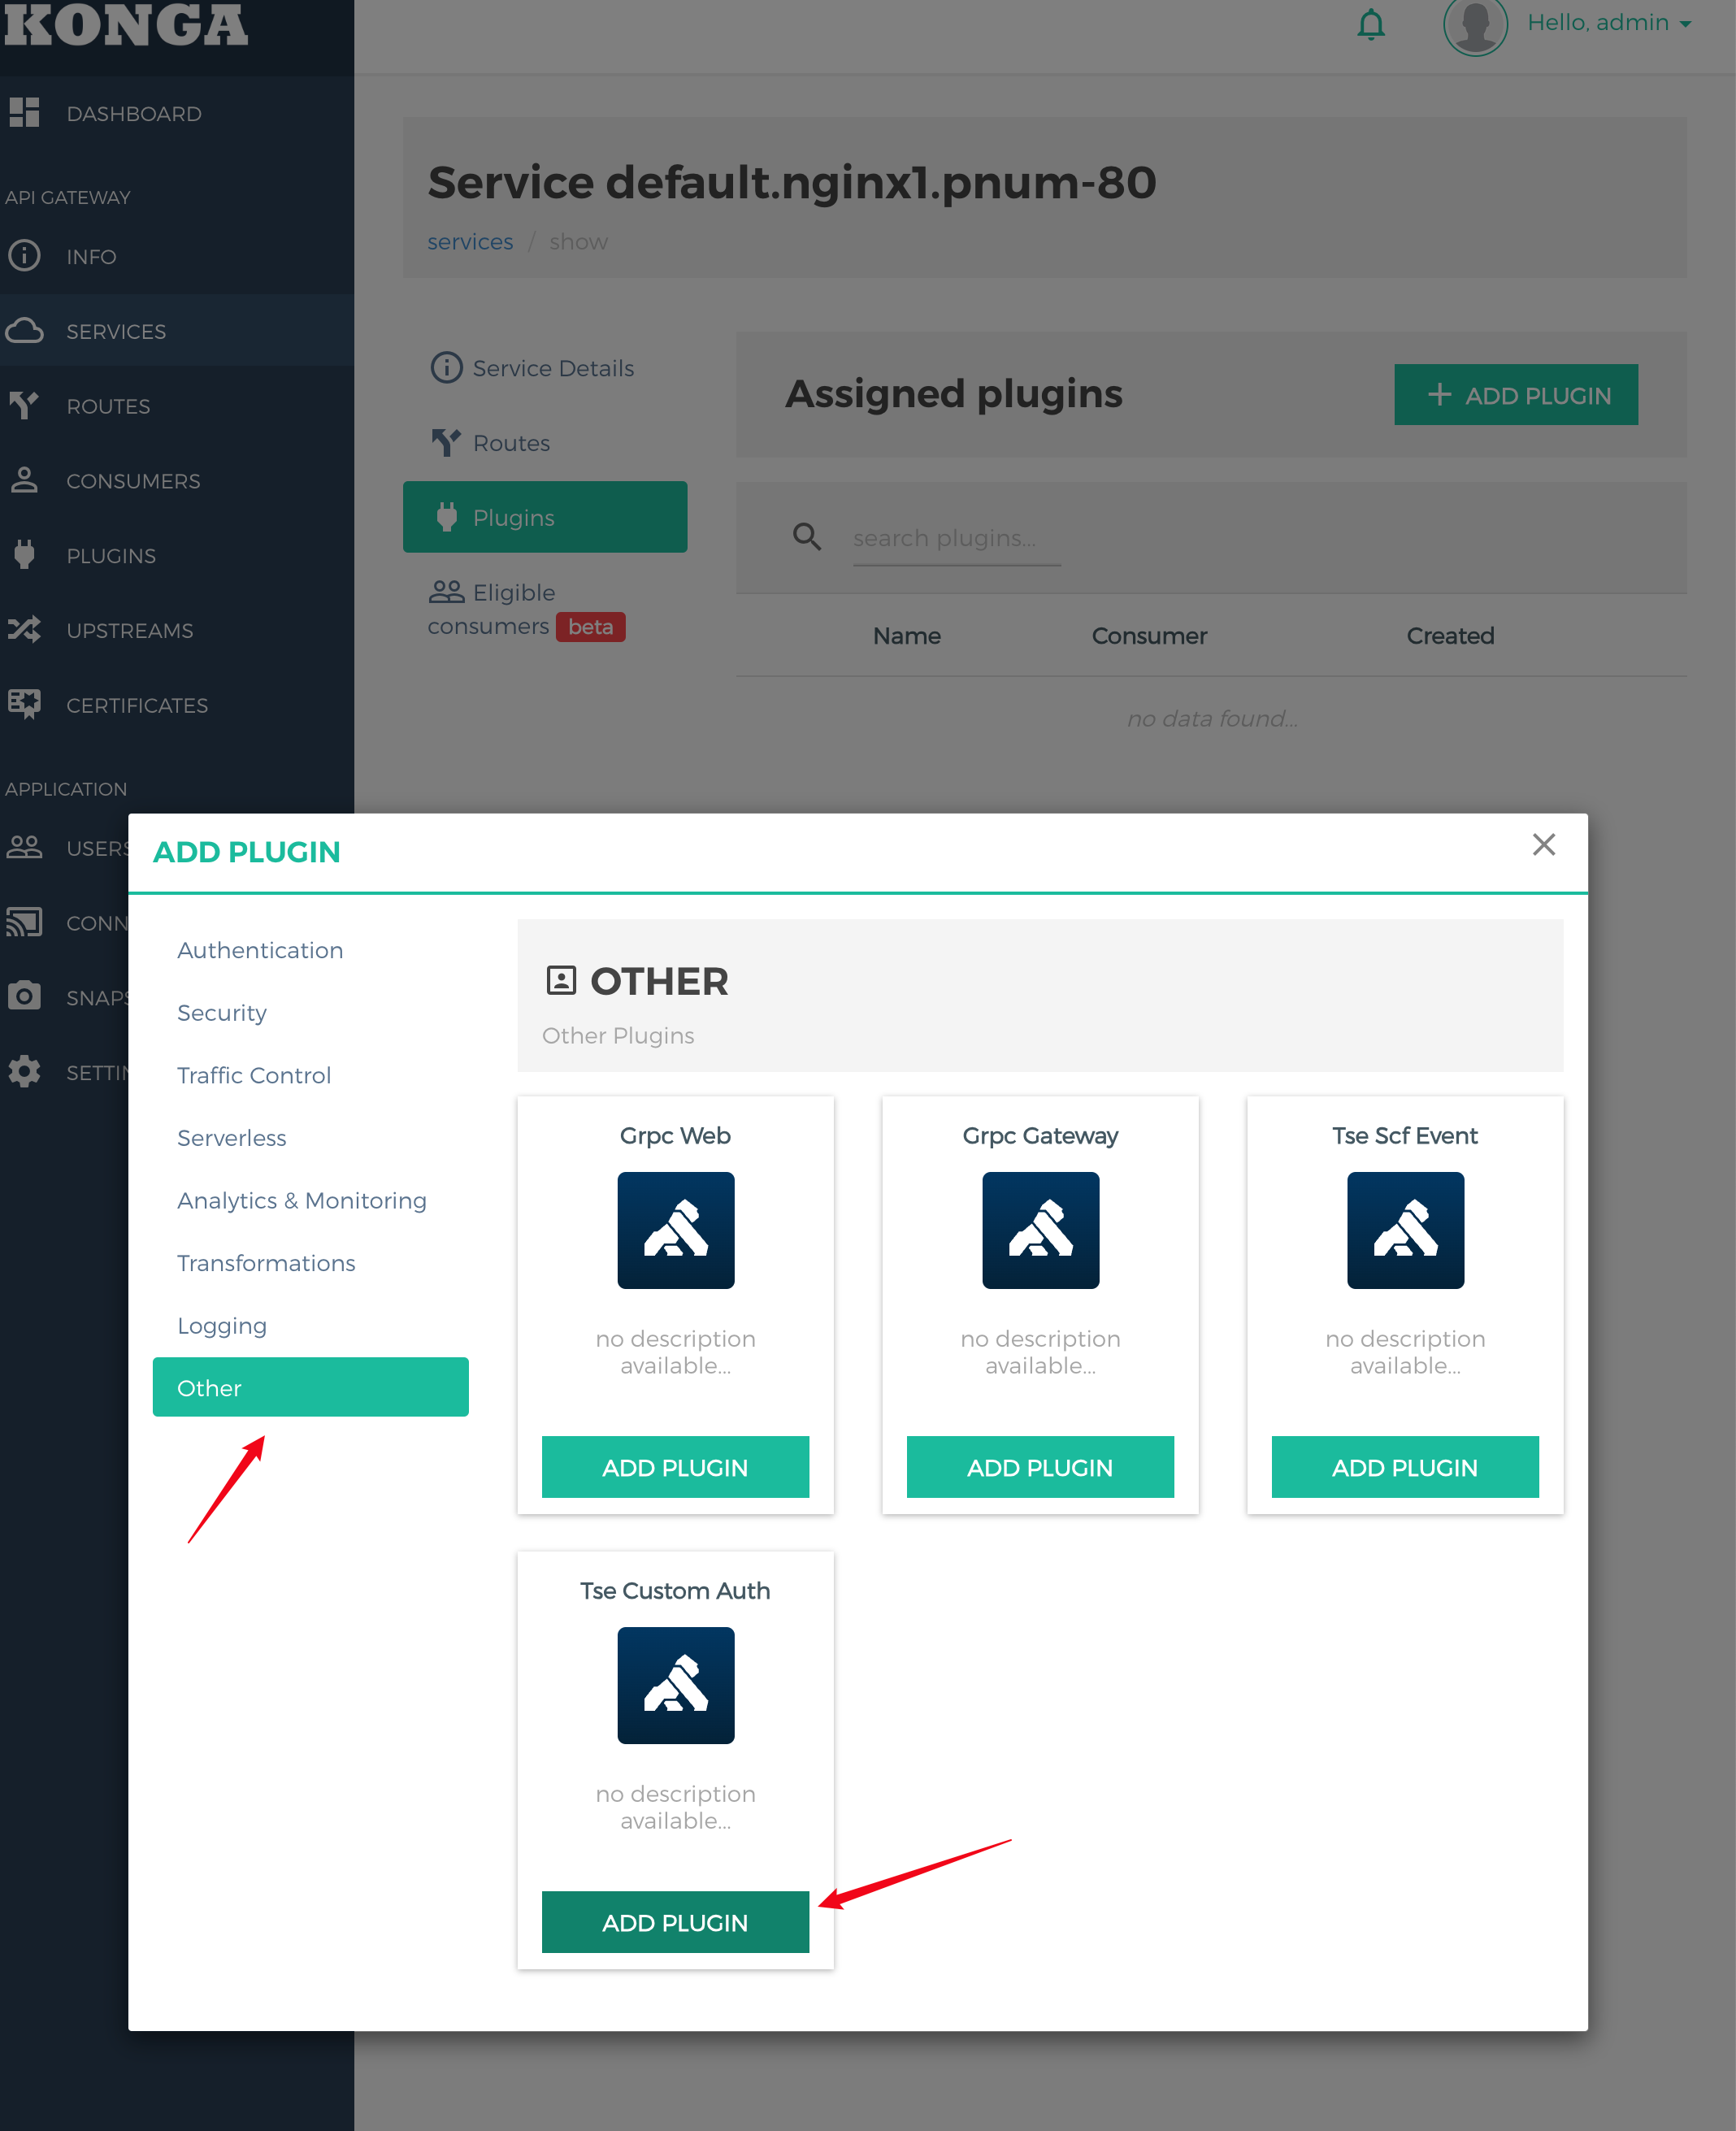
5. Click Plugins > +ADD Plugin to add the custom authentication plugin.
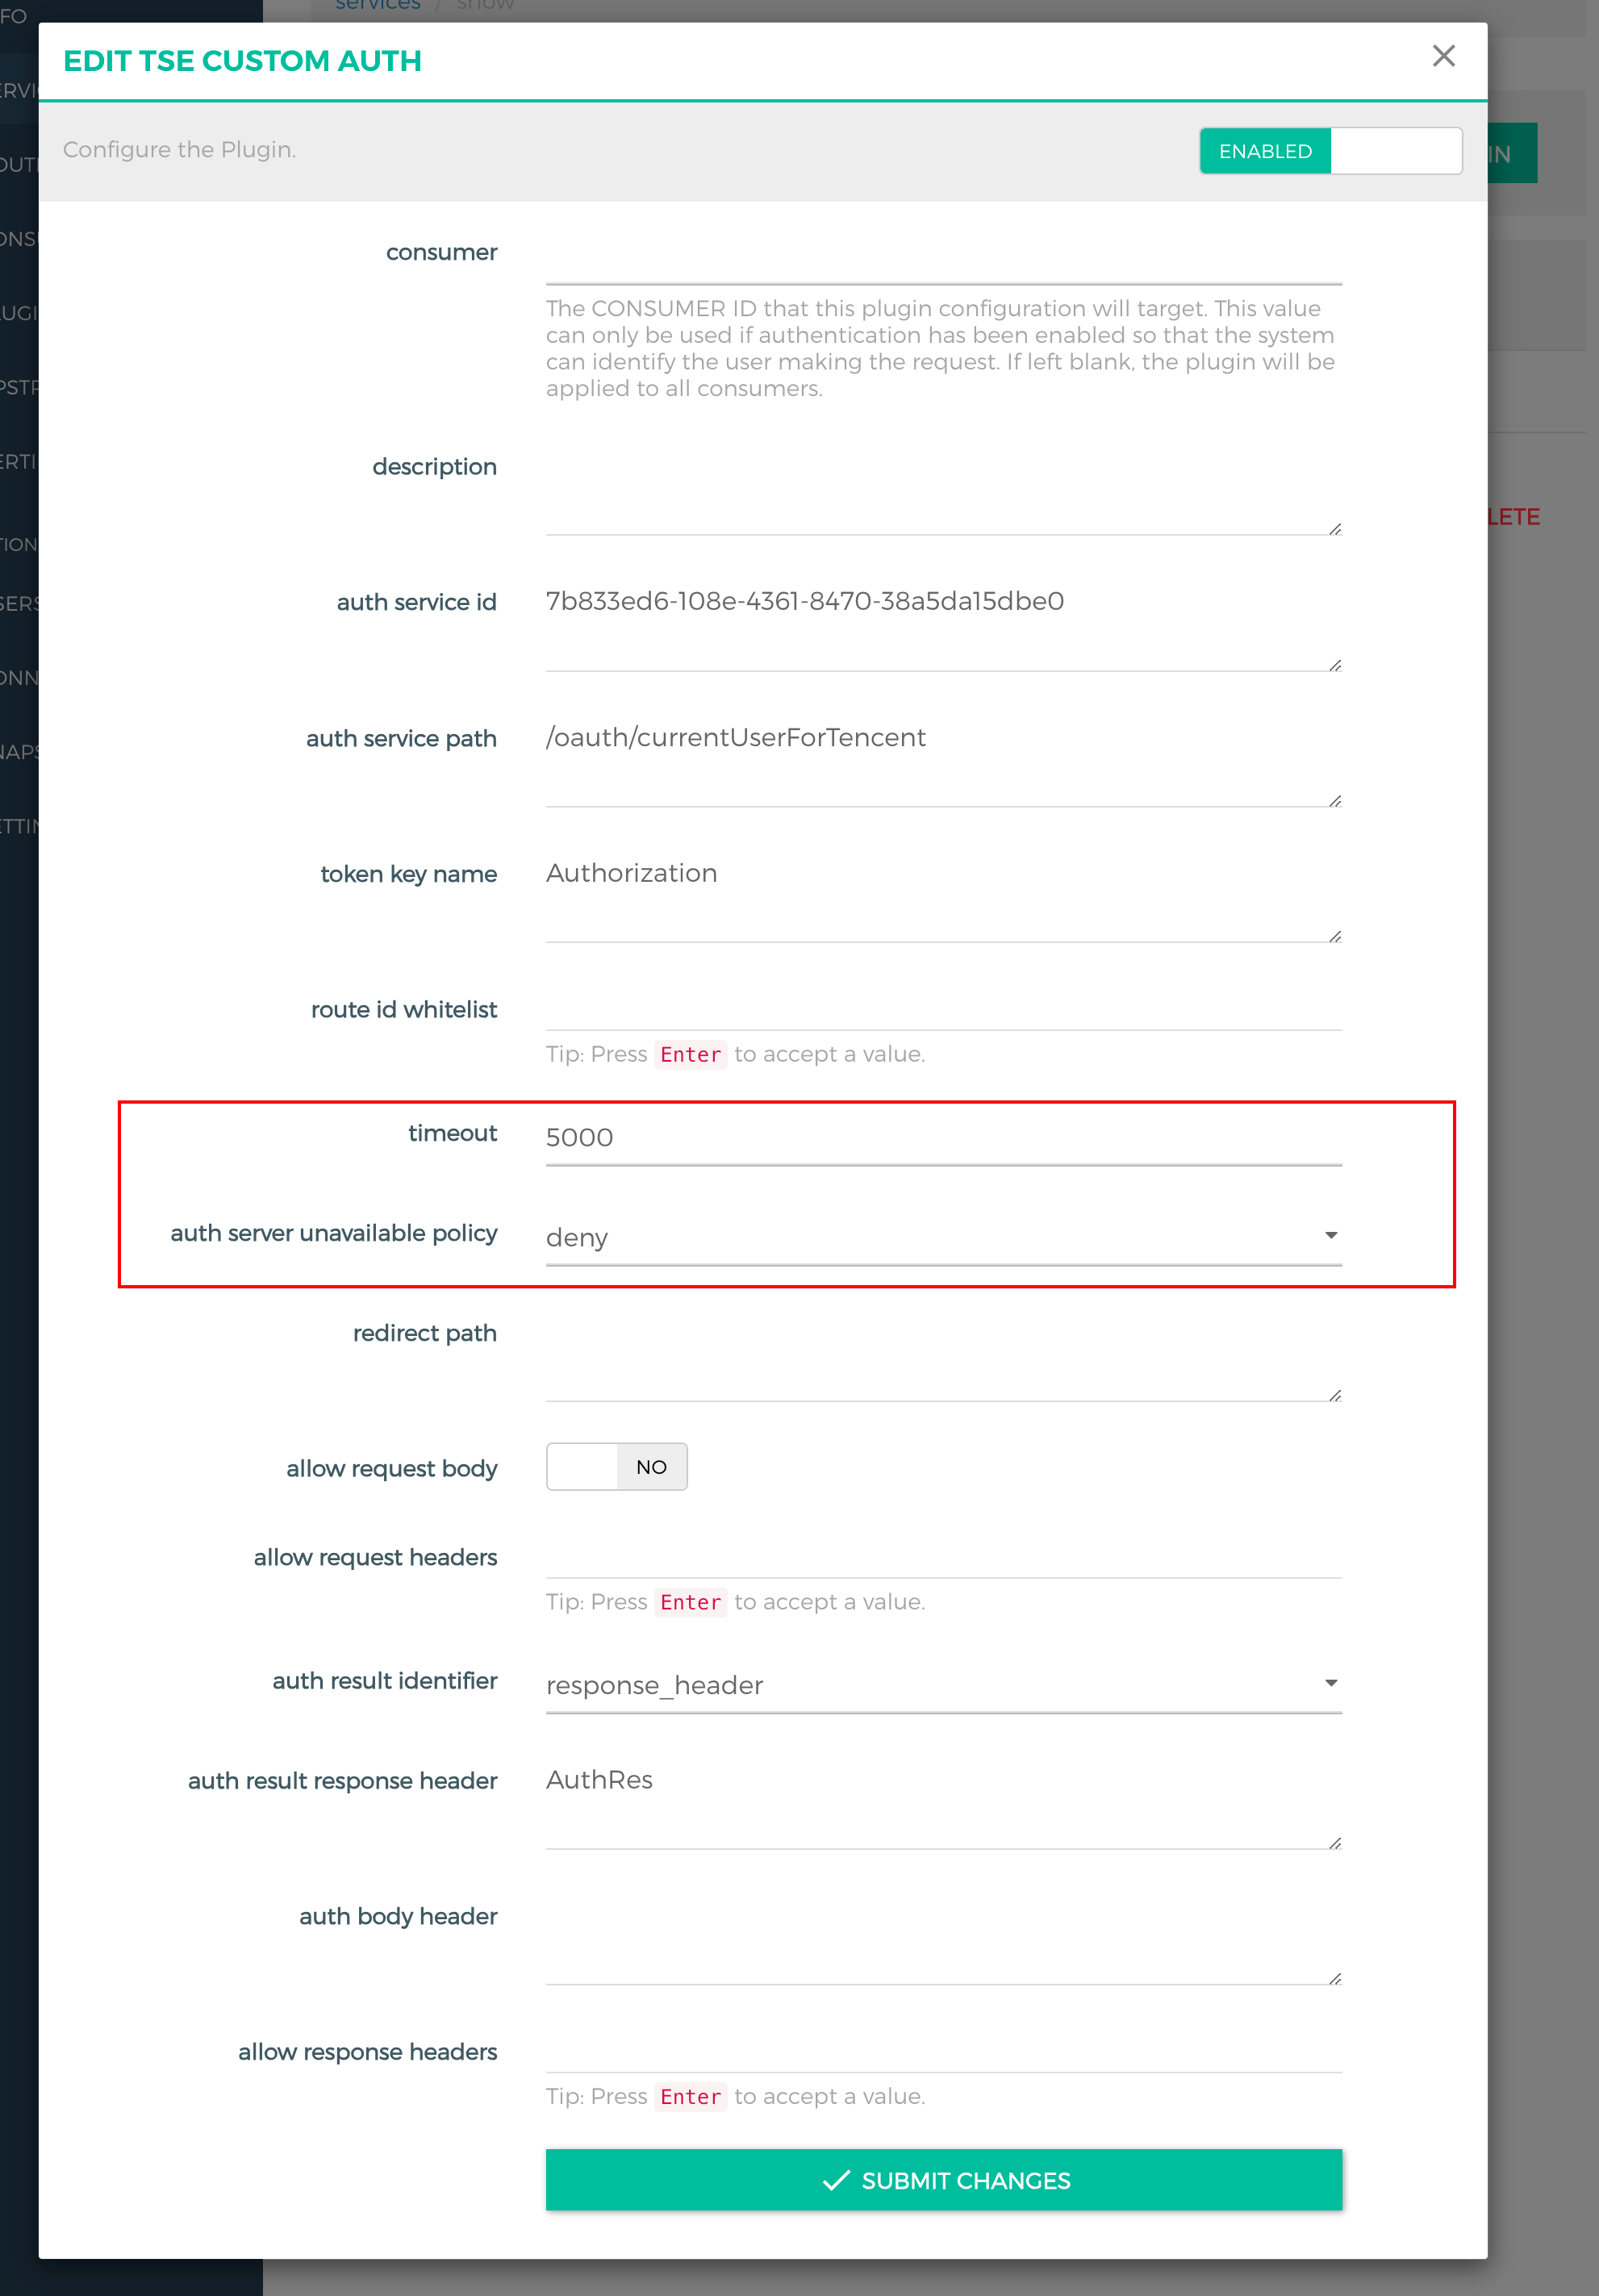
6. Specify the plugin configurations, click ADD PLUGIN, and set auth result identifier to HTTP status code.
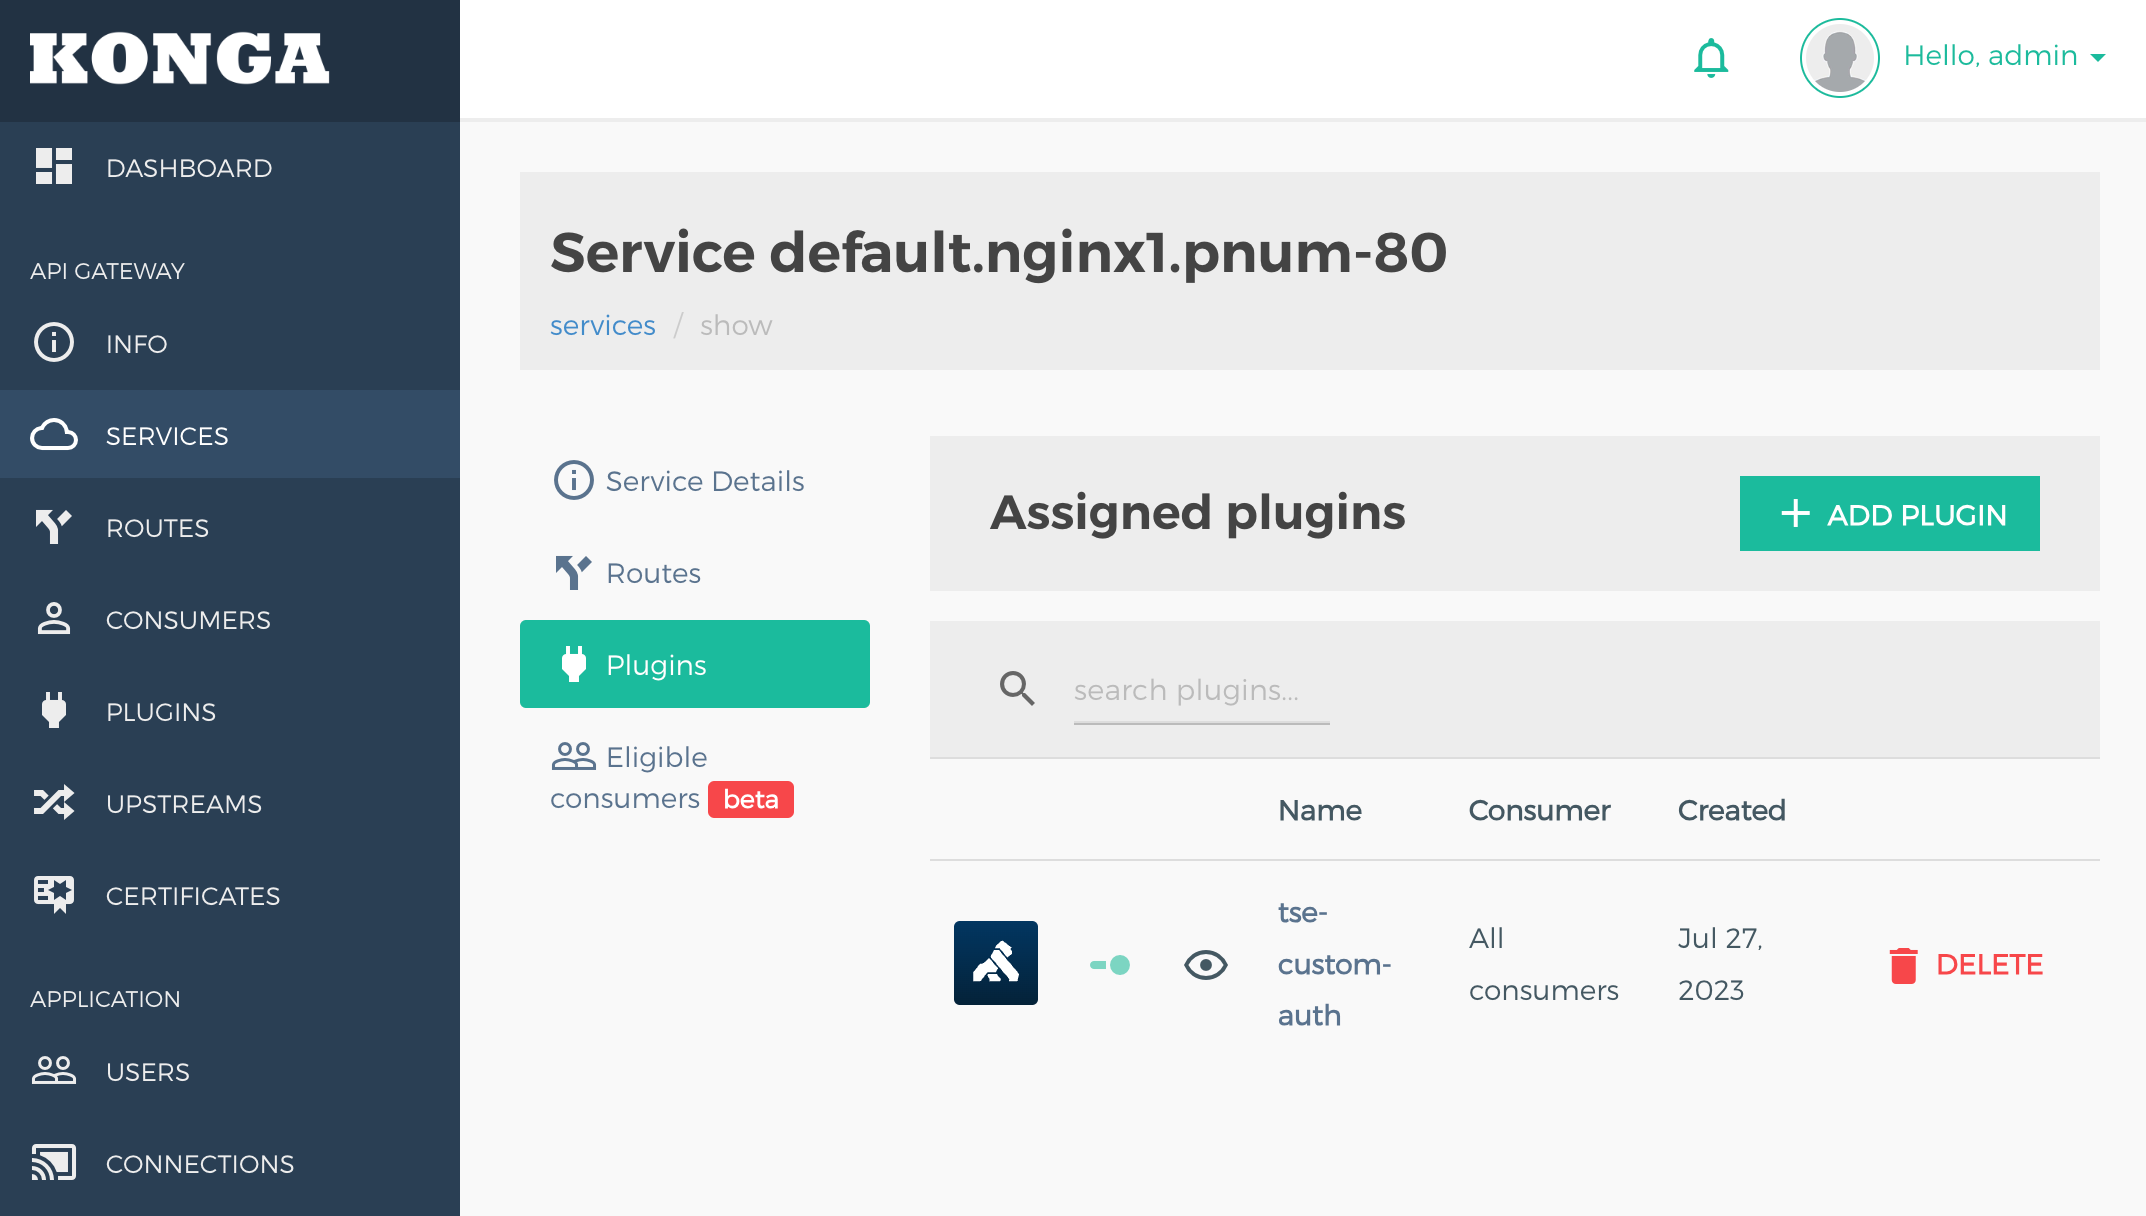
7. Confirm that the plugin is bound to the backend service.
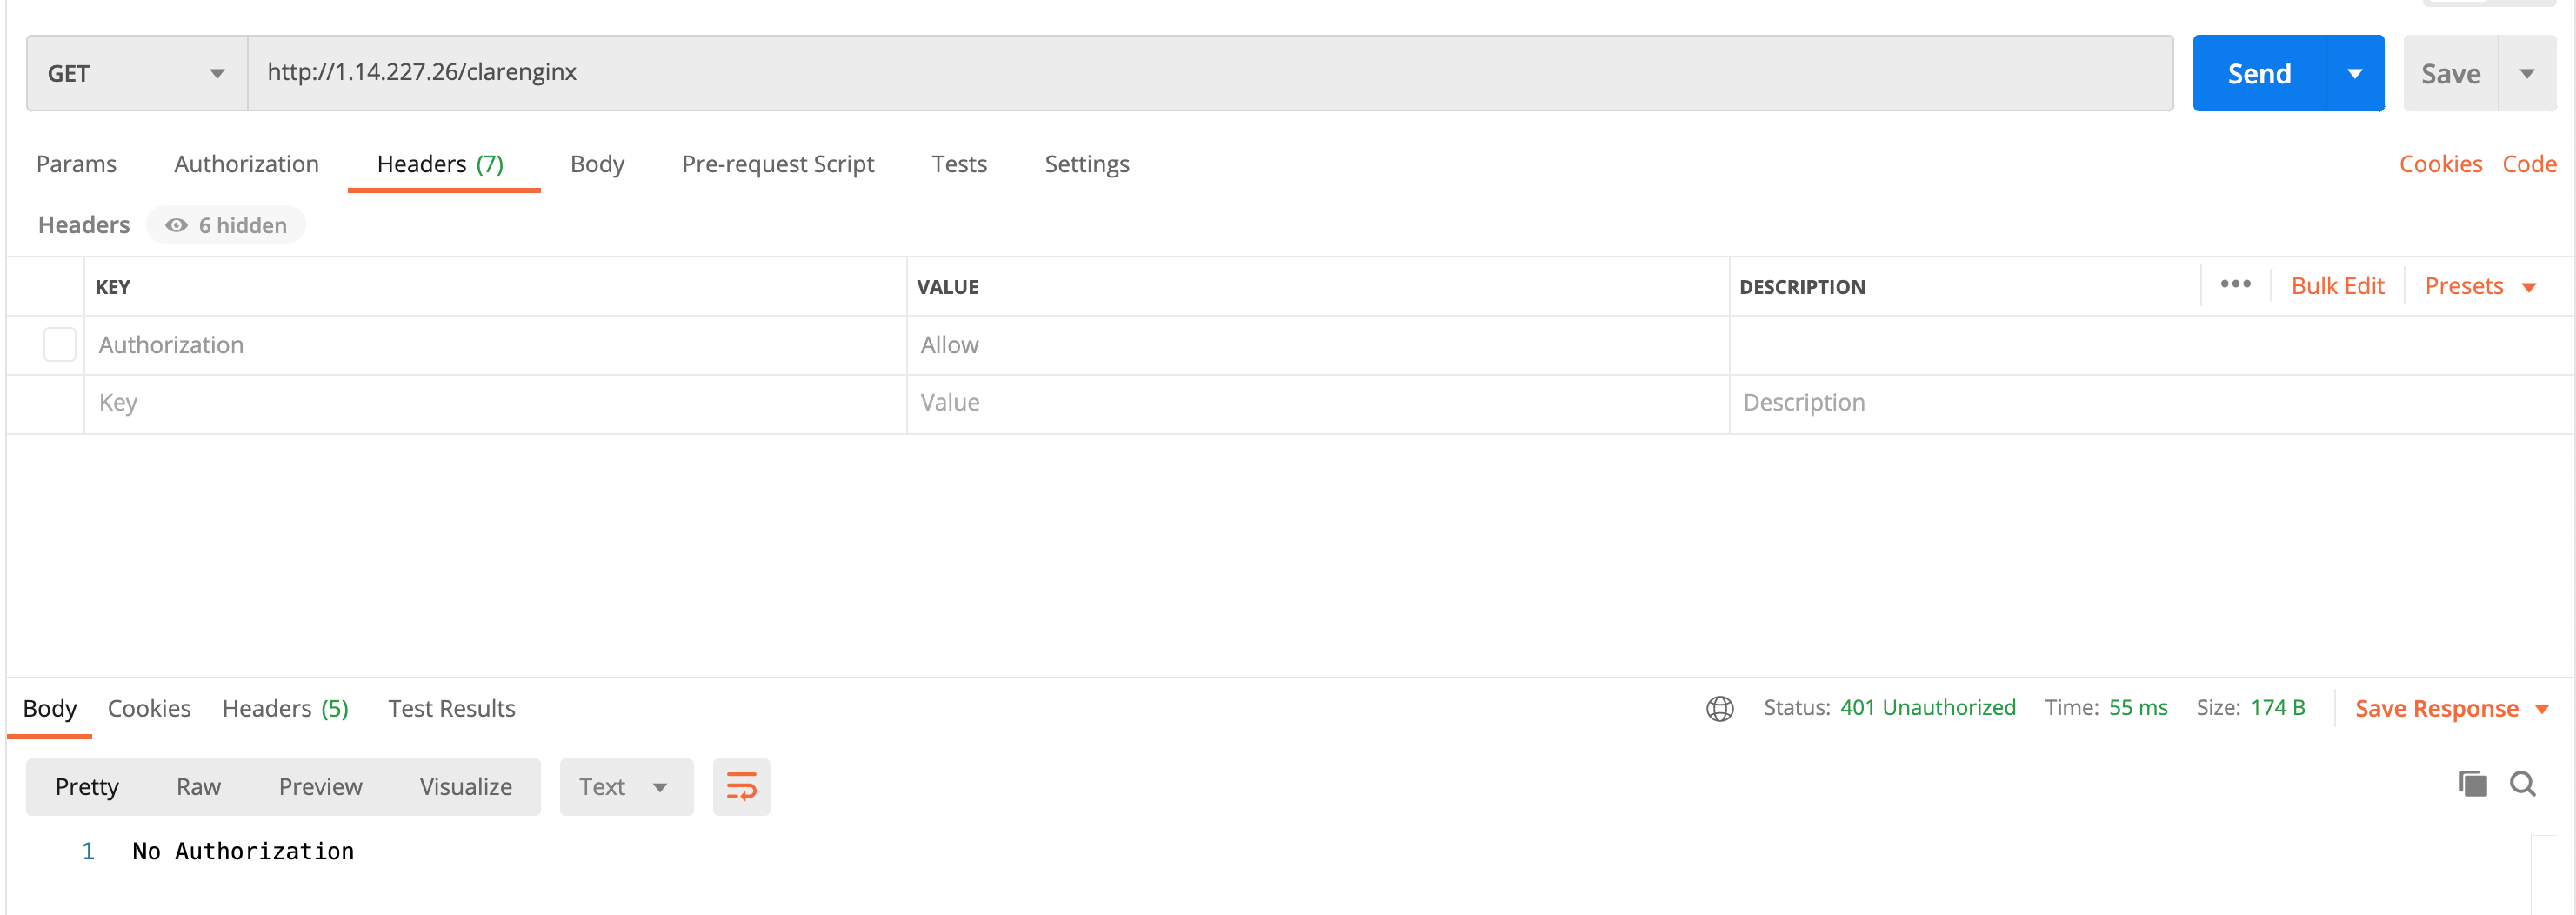
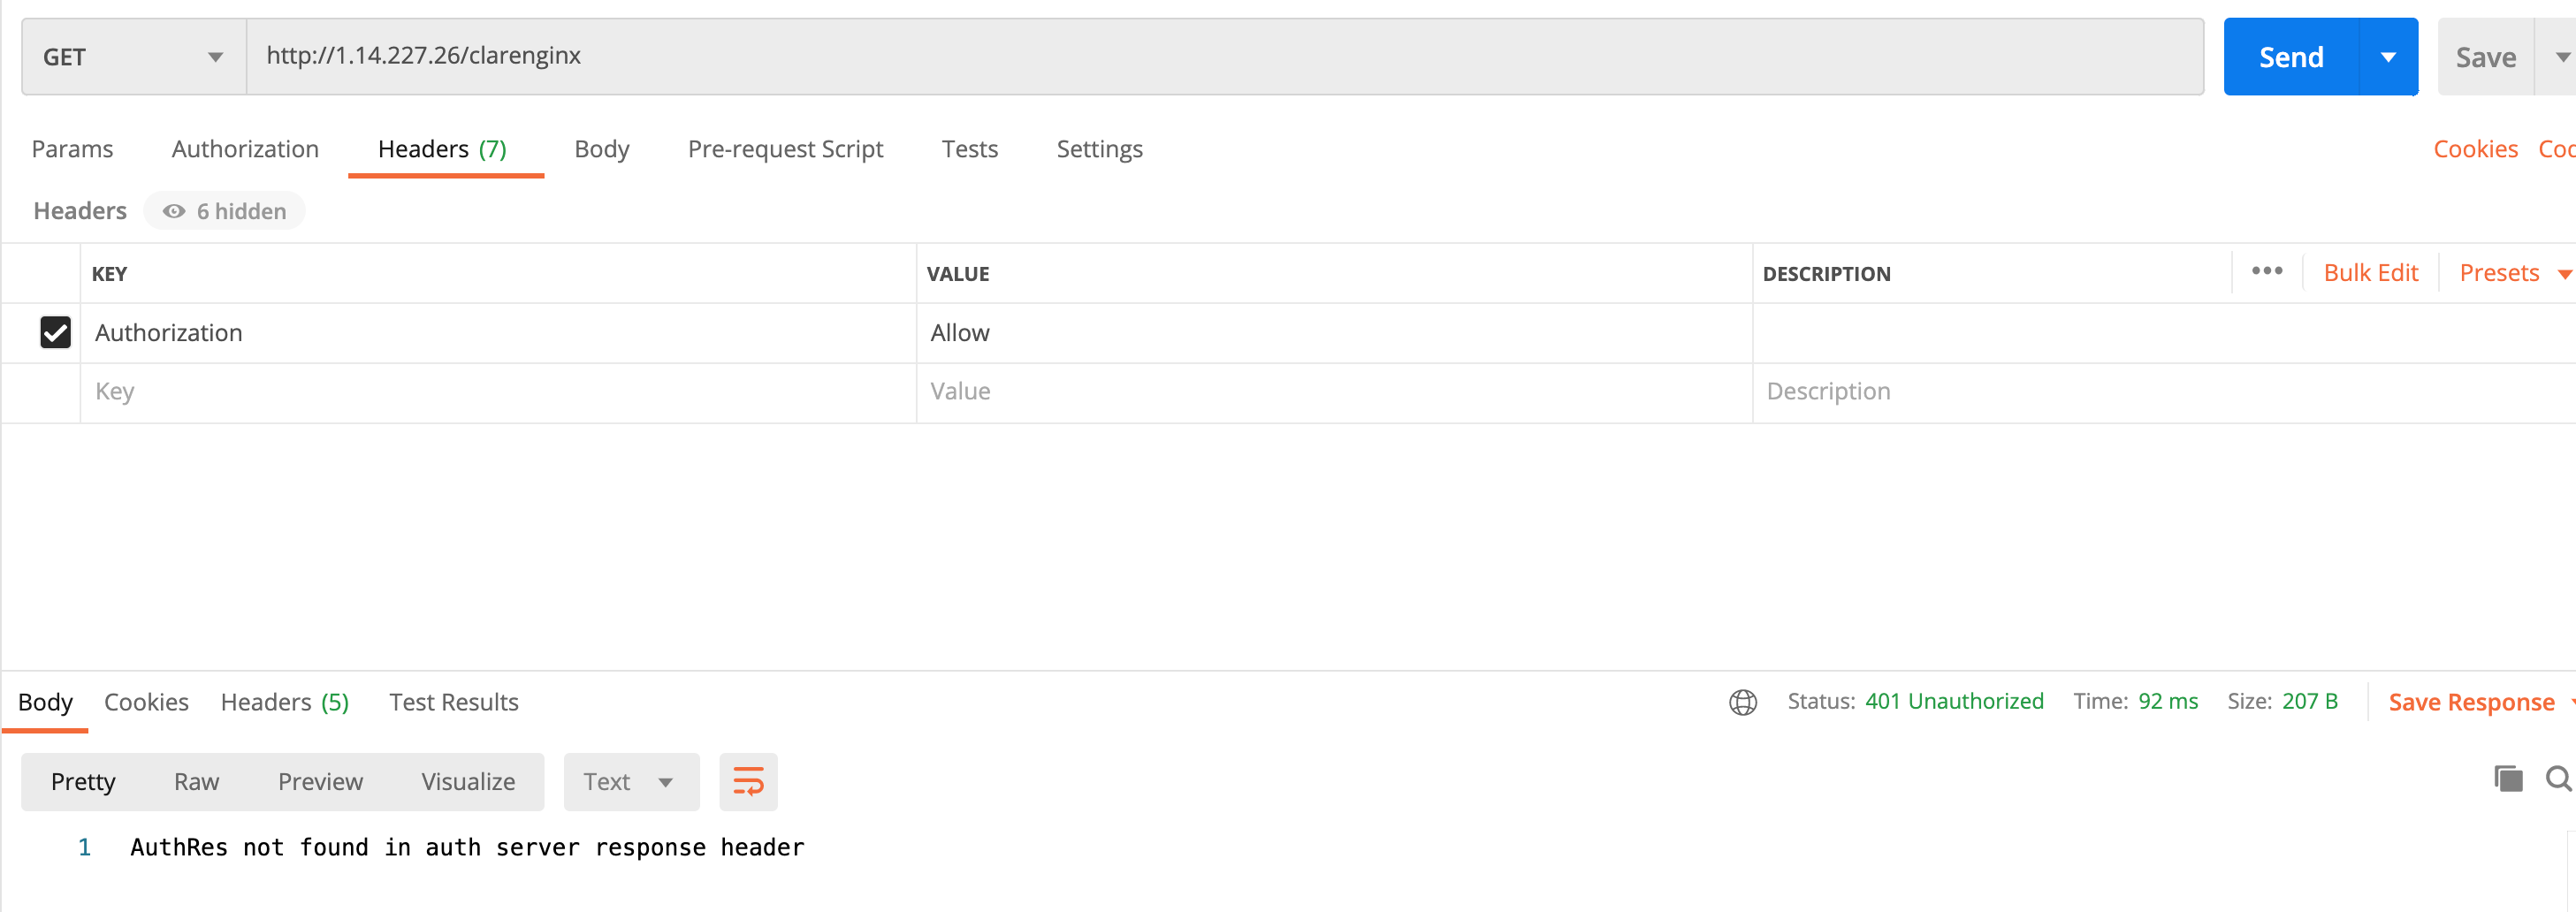
8. Access the backend service without a Token. The access is denied, and 401 is returned.
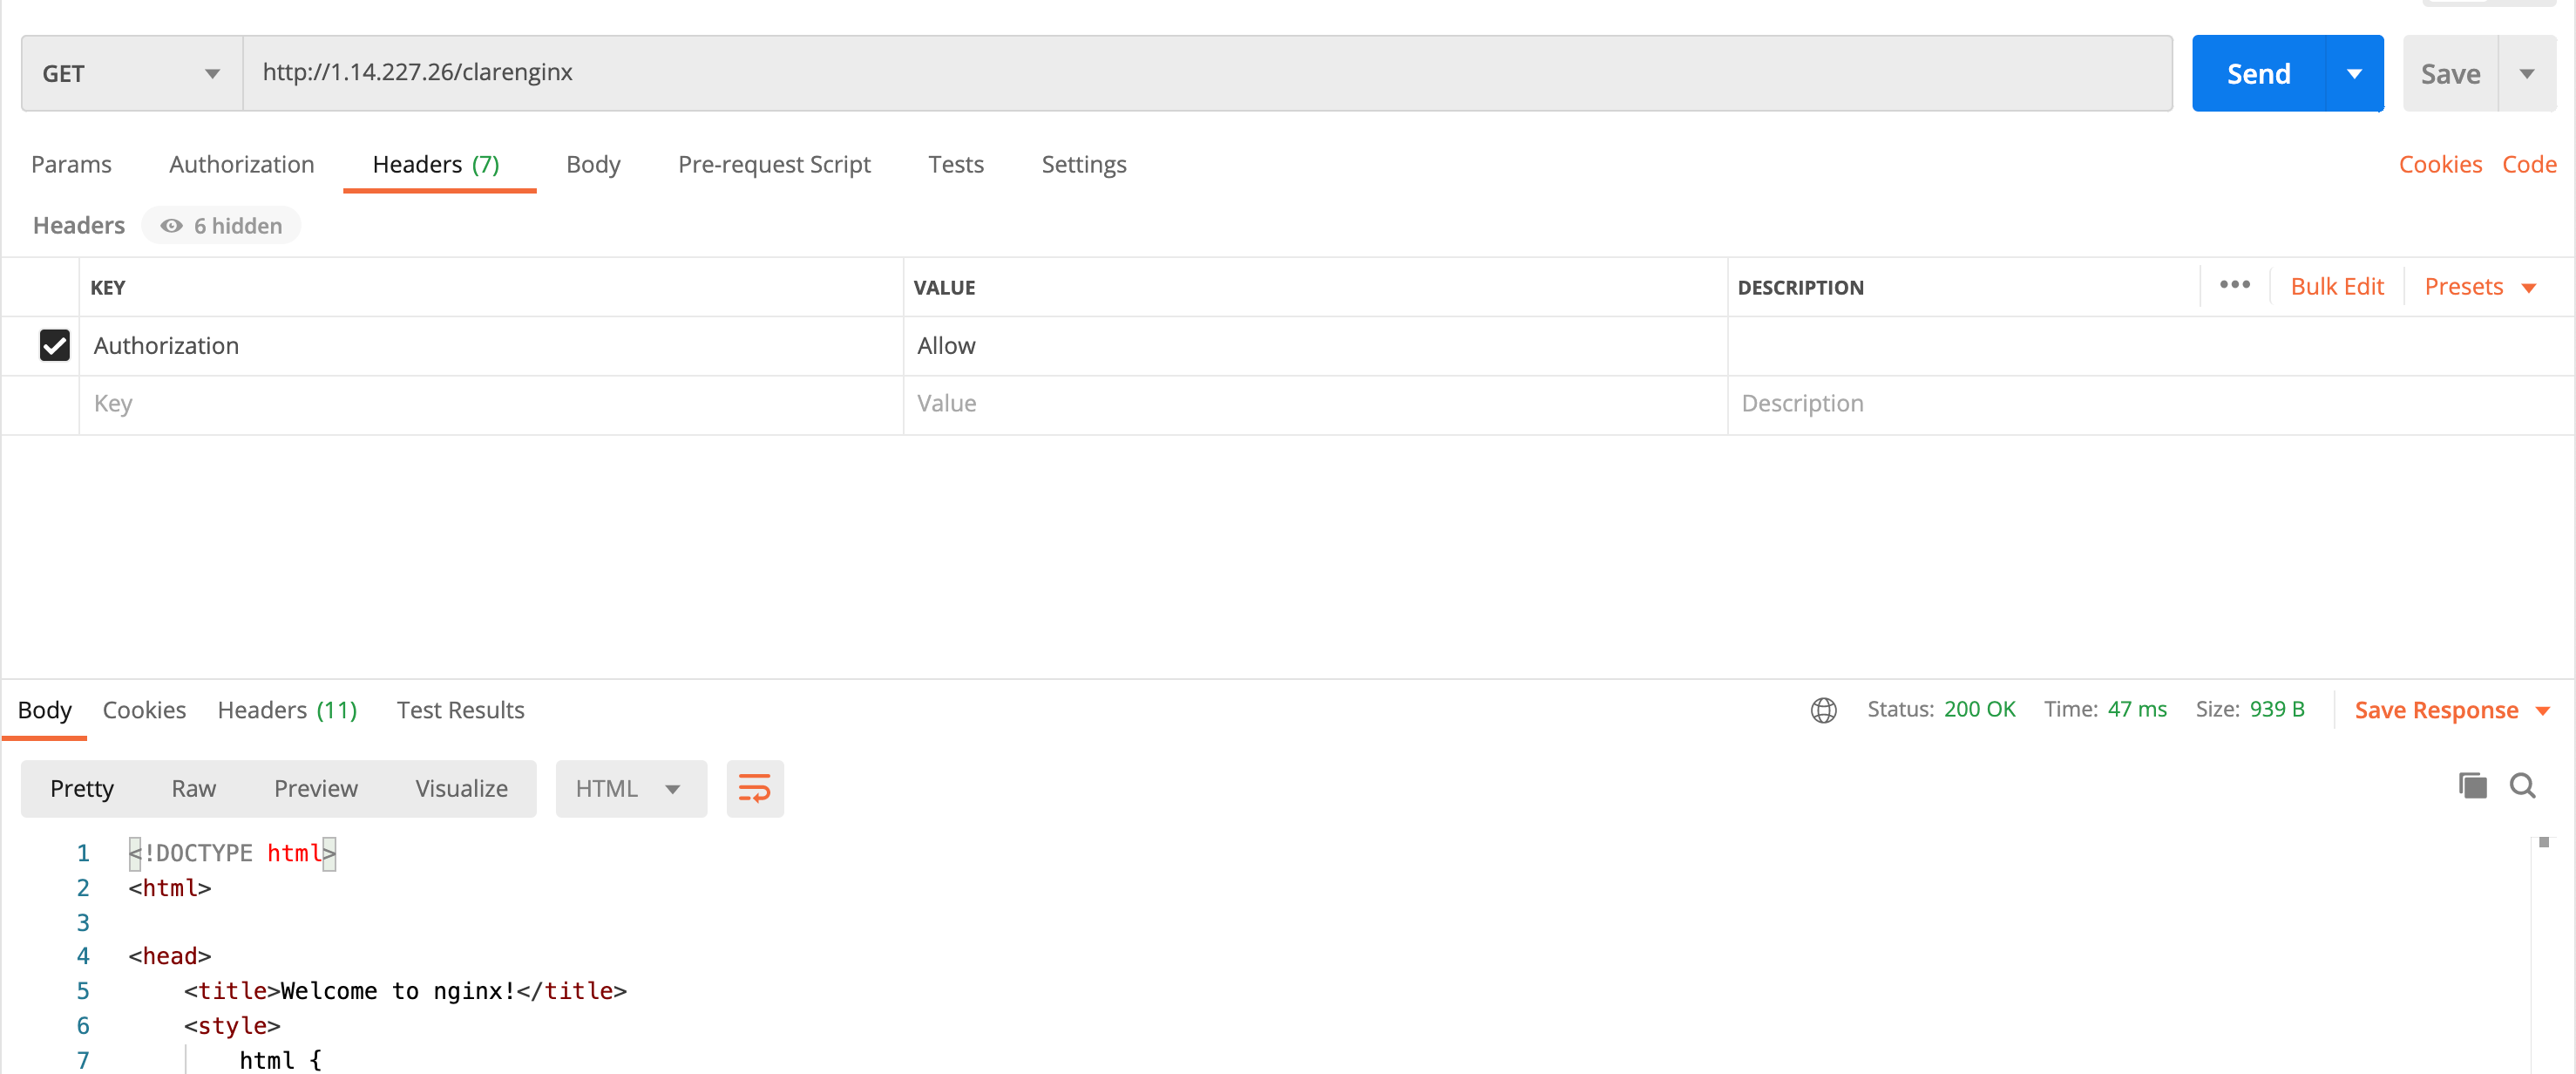
9. Access the backend service with the correct Token. The access to the backend service is successful.
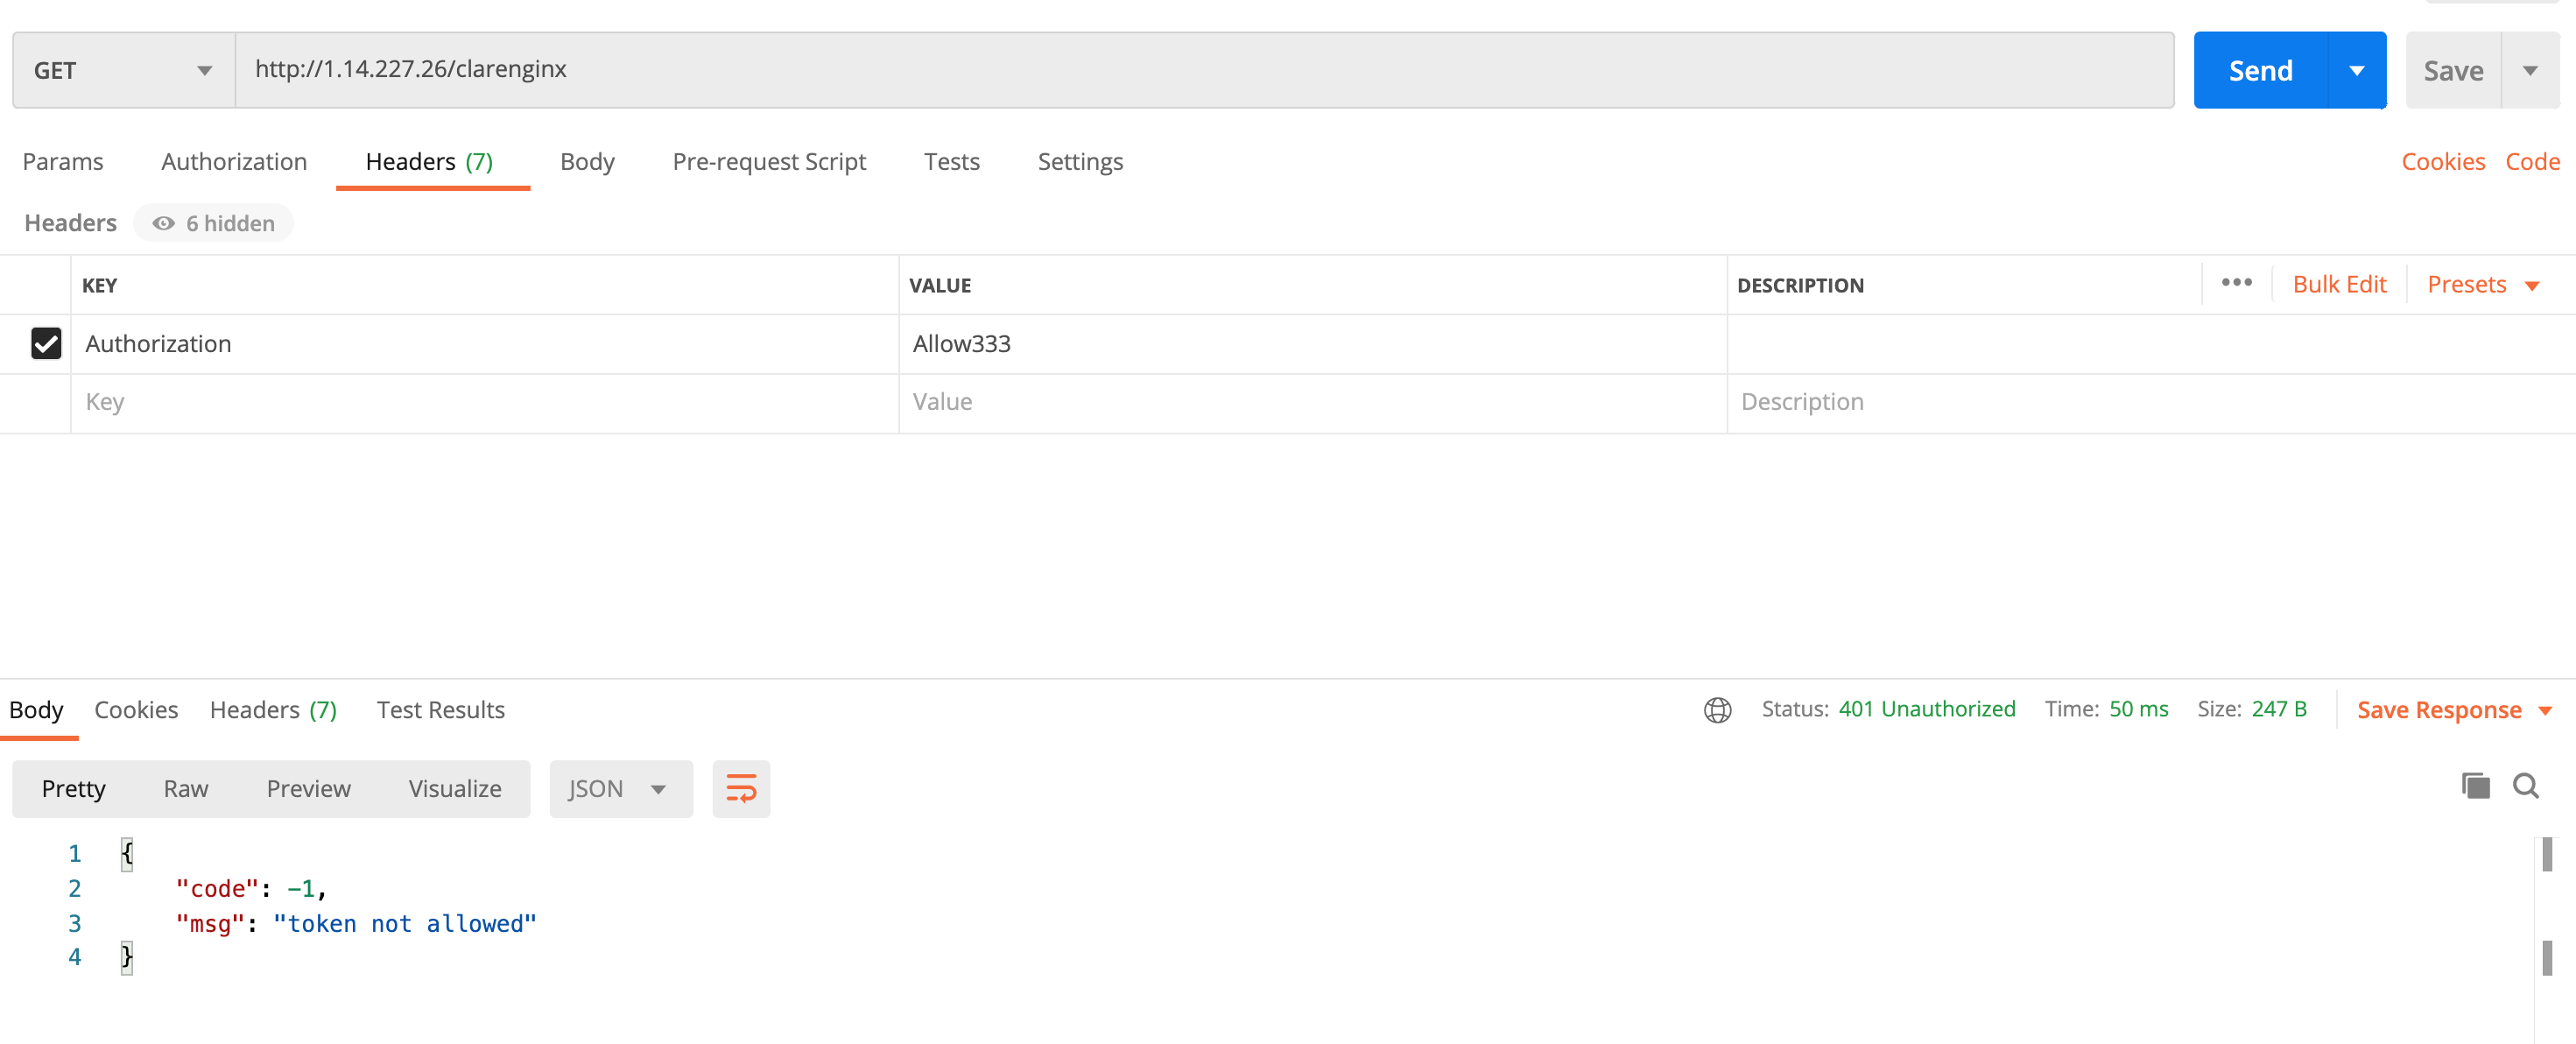
10. Access the backend service with an incorrect Token. The access is denied, and 401 is returned.
Scenario 2: Returning the Authentication Result Through a Response Header
Scenario description: When the client only accepts the 200 status code and the authentication result needs to be identified through a response header, set auth result identifier to response_header, and define a header for storing the authentication result. The gateway attempts to obtain the value of this response header to determine the authentication result. If the header value is true, the gateway considers that authentication is successful and forwards the request to the backend service. In other cases, the gateway regards that authentication fails and denies the request.
2. Select Cloud Native Gateway in the left sidebar and click the target instance to go to the instance details.
3. On the Basic Information page, click the Konga console Tag to view the management console login method.
4. Click the link to go to the Konga console login page. Enter your username and password to access the Konga console.
5. Click the nginx service to go to its details. Click Plugins > +ADD Plugin to add the custom authentication plugin.
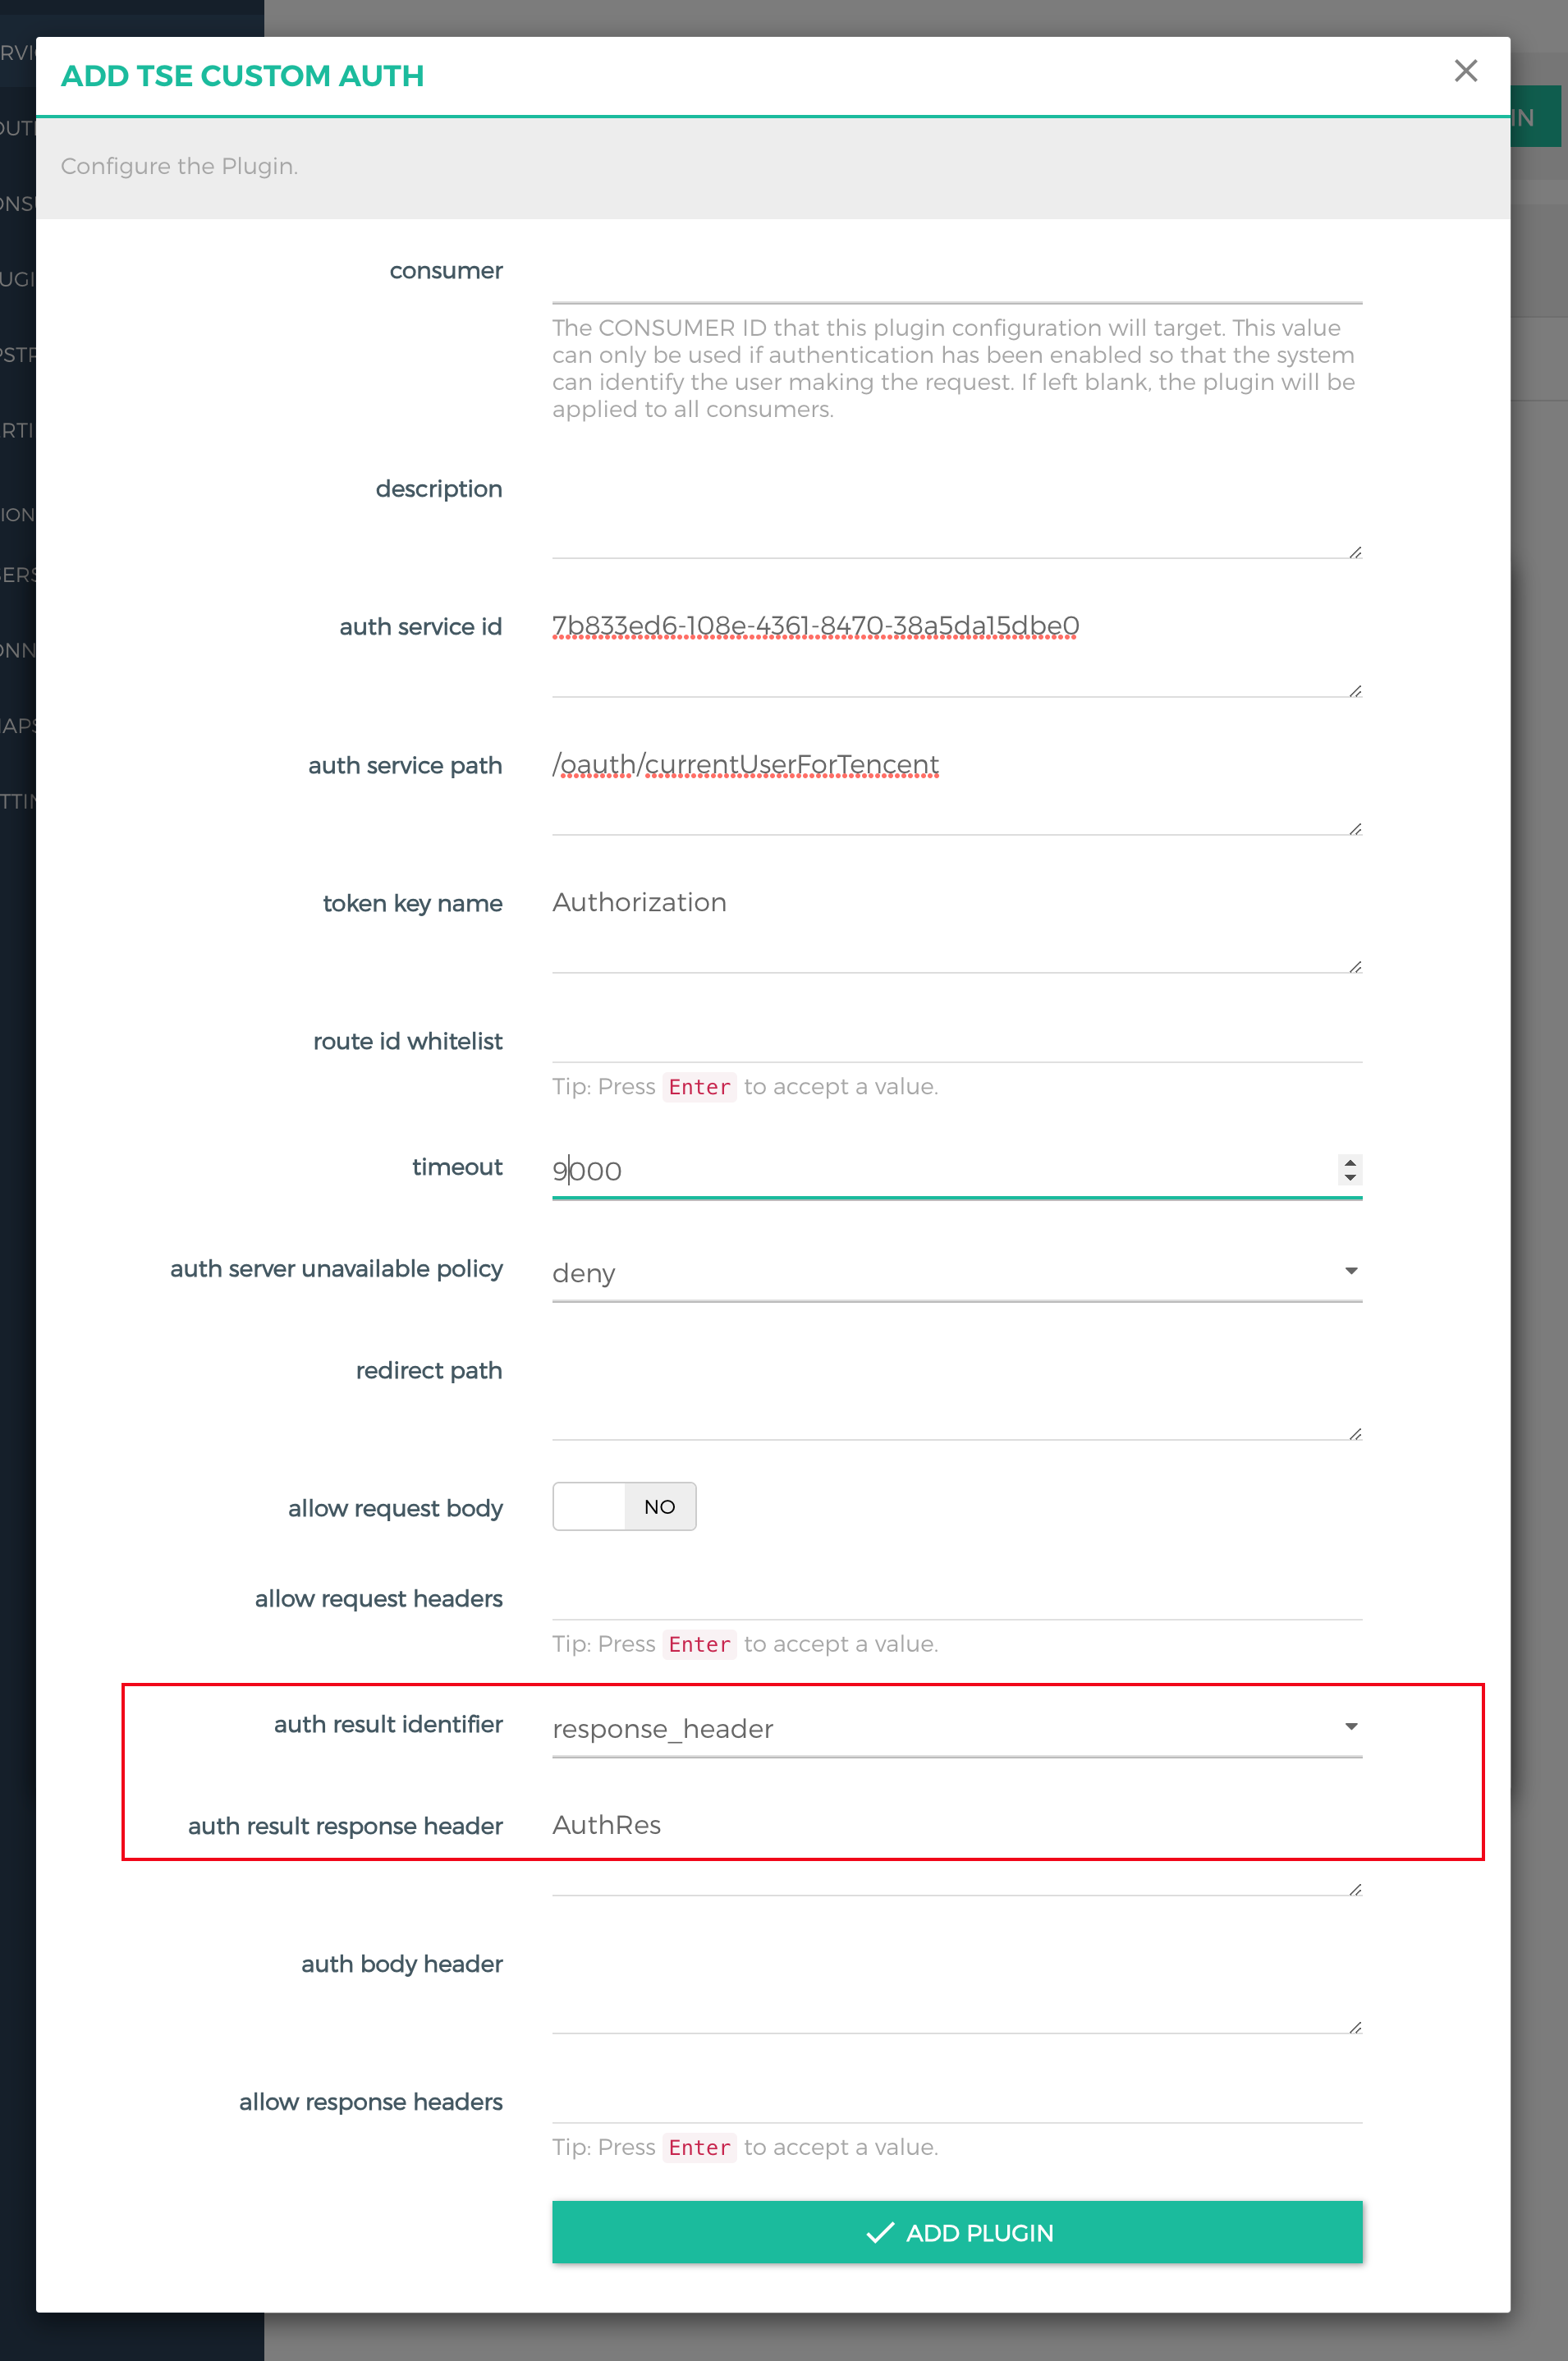
6. Specify the plugin configurations, click ADD PLUGIN, set auth result identifier to response_header, and define the response header where the authentication result resides as AuthRes.
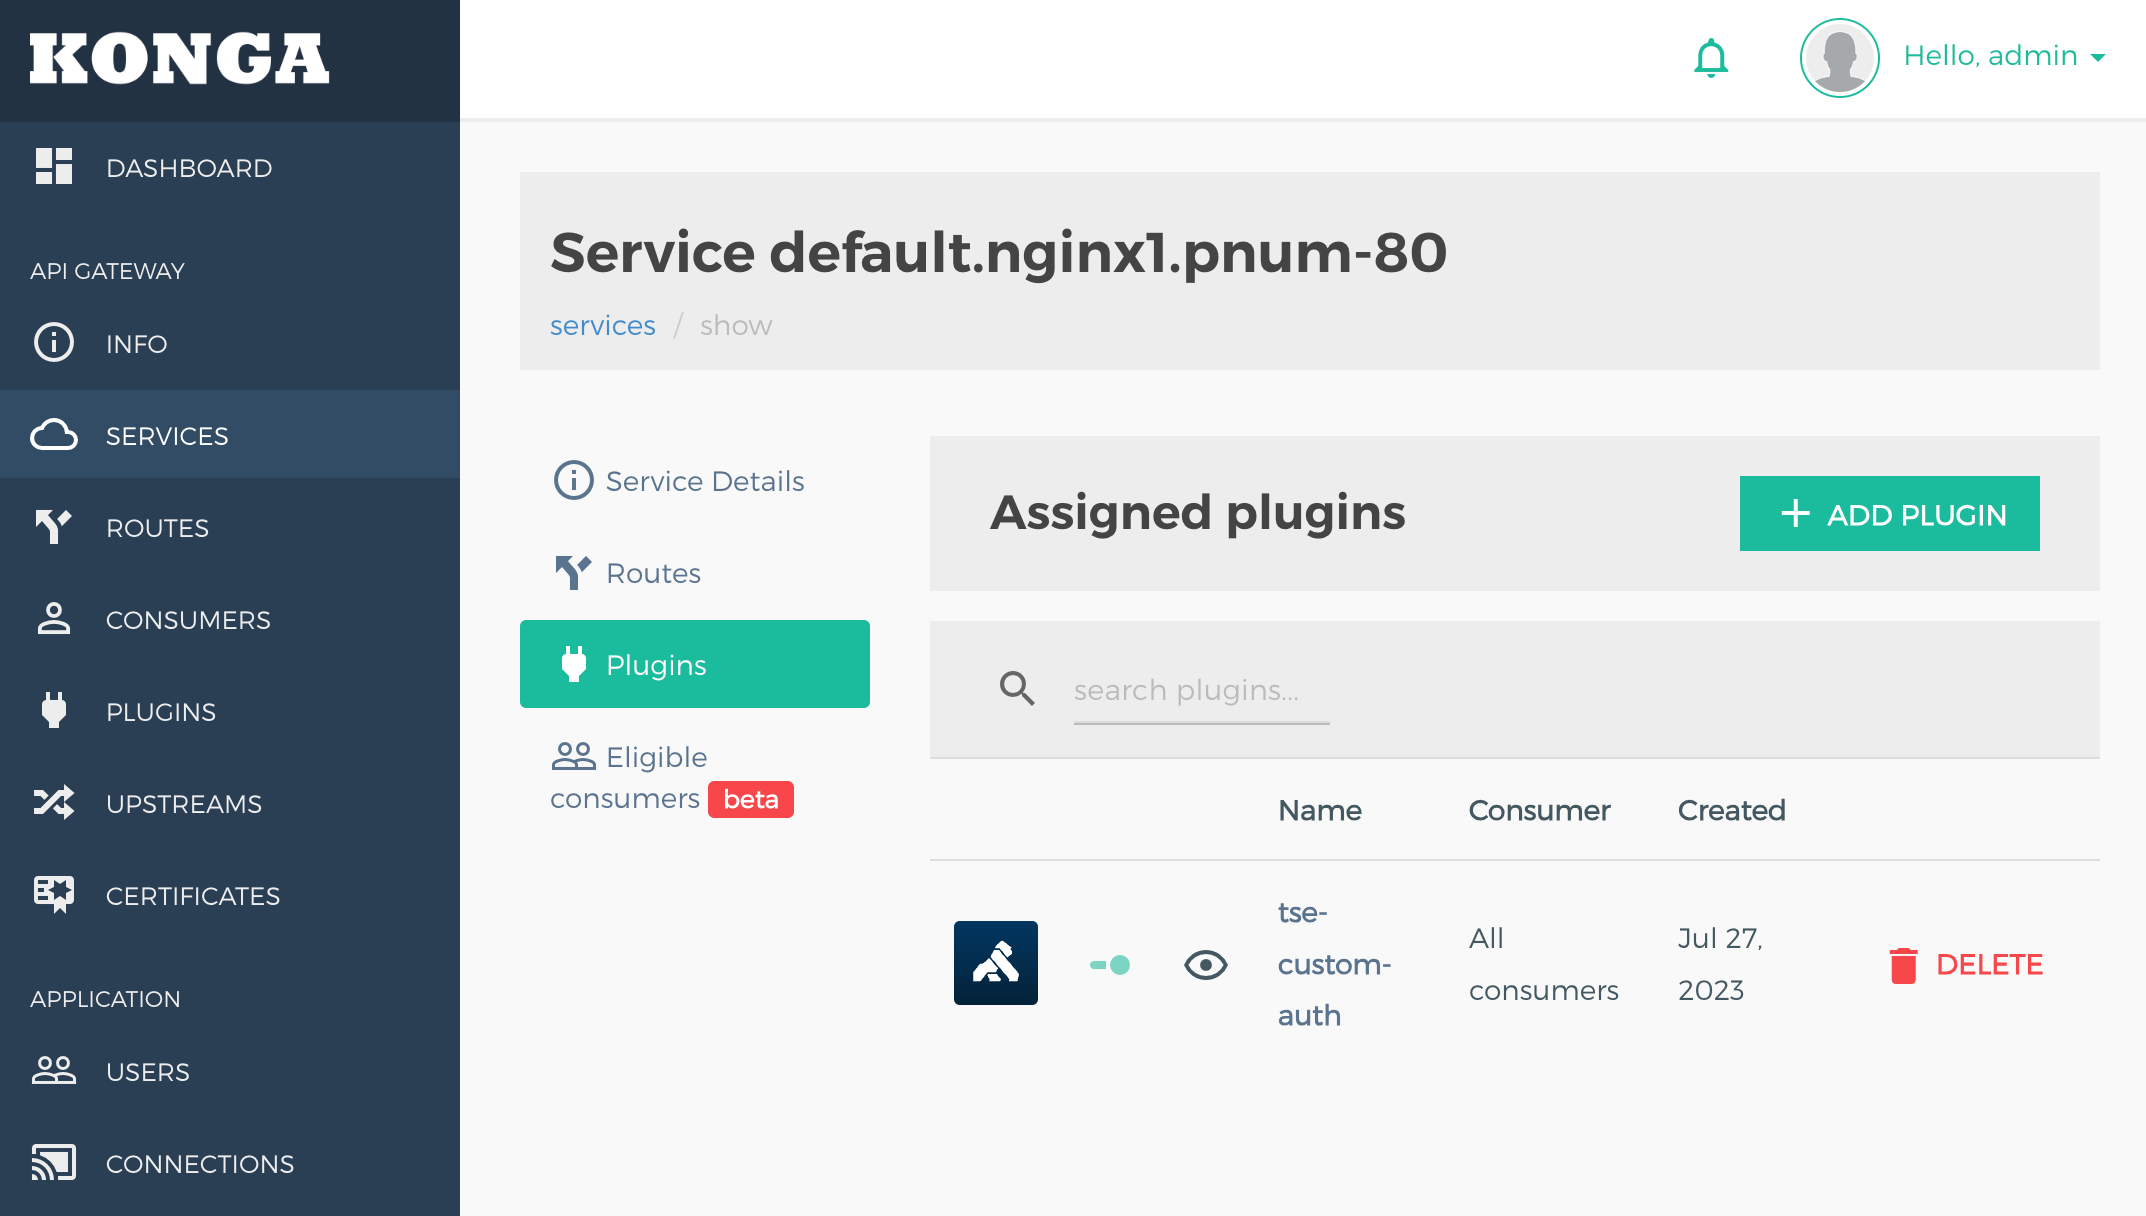
7. Confirm that the plugin is bound to the backend service.
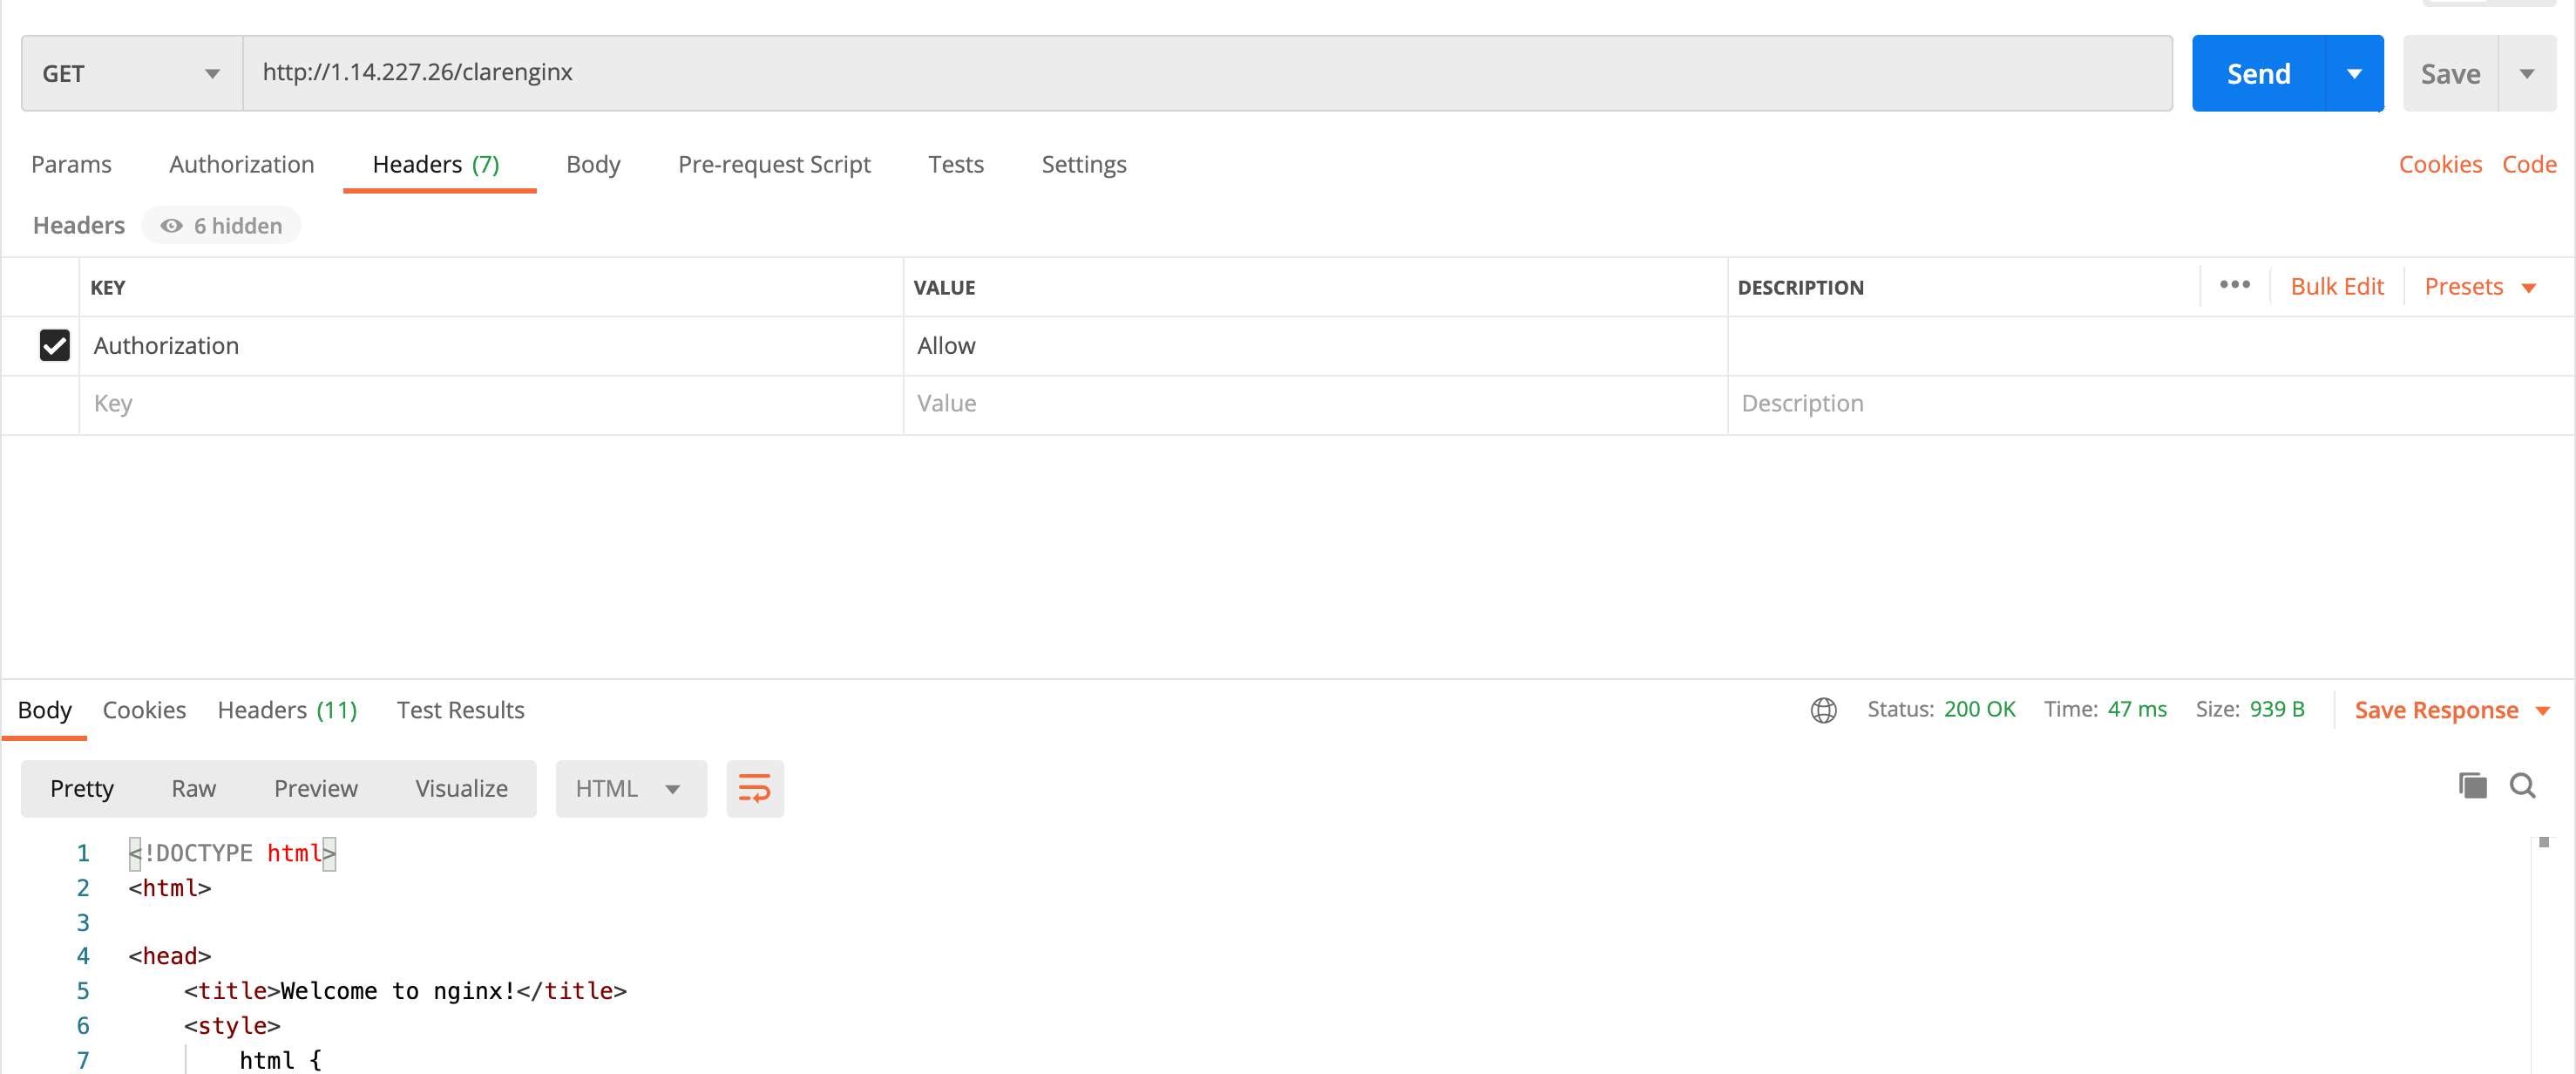
8. When the response header AuthRes included in the response returned by the authentication service is set to true, authentication is successful.
9. When the authentication service does not return the response header AuthRes, authentication fails.
Scenario 3: Unavailable Authentication Service
Scenario description: When the authentication service is unavailable (no response), the gateway allows or denies all requests based on the configuration.
2. Select Cloud Native Gateway in the left sidebar and click the target instance to go to the instance details.
3. On the Basic Information page, click the Konga console Tag to view the management console login method.
4. Click the link to go to the Konga console login page. Enter your username and password to access the Konga console.
5. Click the nginx service to go to its details. Click Plugins > +ADD Plugin to add the custom authentication plugin.
6. Fill in the plugin configuration, click ADD PLUGIN, set the auth server unavailable policy to deny, and configure the timeout to 5000 (that is, 5 seconds).
7. Simulate a scenario in which the authentication service is faulty and a request with a token is sent to the service. The request is denied after the timeout time expires, and the response header identifies the failure cause.
8. Modify the plugin configuration and set auth server unavailable policy to allow.
9. Simulate a scenario in which the authentication service is faulty and a request with a token is sent to the service. After the timeout time expires, it is regarded that the authentication service does not make a response, and the request is allowed.
Ingress Configuration Methods
1. Define KongPlugin resources. Refer to the following example: