EIP Direct Connection is ideal for scenarioswhere you want to check the public IP in CVM, like when you need to forward private and public traffic to different IP addresses. This document provides instructions on how to configure EIP Direct Connection in both Linux and Windows CVM.
Note:
EIP Direct Connection may cause network interruption. Please consider whether a short interruption to your business operations is acceptable.
Use Cases
When you want to access internet via an EIP, you can choose NAT mode or direct connection mode. The default mode is NAT mode.
In NAT mode, EIP is invisible on the local machine. You need to manually add an EIP address for each configuration.
In direct connection mode, the EIP is visible on the local machine. You do not need to manually add an EIP address for each configuration, which can minimize development cost.
Use Limits
At present, EIP direct connection is under beta test and is only available to allowed users. It only supports devices in a VPC. You can submit a ticket.
If you switch your devices to a VPC, you need to reconfigure EIP Direct Connection.
On CVM, EIP direct connection cannot take effect at the same time as an NAT gateway. If the routing table associated with the subnet where your CVM resides is configured with a routing policy of accessing the public network through the NAT gateway, direct connection cannot be implemented through the EIP on the CVM. You can allow the CVM to access the public network through its EIP by adjusting the priorities of NAT gateways and EIPs. In this case, EIP direct connection can be implemented.
Directions
Note:
To use EIP direct connection, you need to enable it in the console first, then download the script for EIP Direct Connection and run it in your CVM. Otherwise, EIP direct connection might not funtion properly.
We provide a script for configuring the IP so that private network traffic goes through the private IP and public network traffic goes through the public. For other applications, configure the routing accordingly.
Configuring EIP direct connection on Linux CVM
Configuring EIP direct connection on Windows CVM
The script for Linux is applicable to the following scenarios: both the private IP and public IP are bound to the primary ENI (eth0), where the public network address is accessed through the public IP, and the private network address is accessed through the private IP.
Note:
The script for Linux supports CentOS 6 and later, and Ubuntu.
Step one: download the script for EIP direct connection
EIP direct connection may cause network interruption. Therefore, you need to download the script for EIP direct connection and upload it to CVM in advance. You can obtain the script by using one of the following methods:
Method 1: upload the script for EIP direct connection
2. Run the script for EIP direct connection as follows:
2.1 Run the following command to add the execution permission:
chmod +x eip_direct.sh
2.2 Execute the ip addr command to check the name of the ENI that requires EIP direct connection.
2.3 Execute the following command to run the script.
Here, ethx indicates the name of the ENI (required). XX.XX.XX.XX indicates the EIP address (optional). You may leave it blank and run ./eip_direct.sh install ethx directly.
./eip_direct.sh install ethx XX.XX.XX.XX
The script for Windows is applicable to the following scenarios: Public network traffic goes through the primary ENI, and private network traffic goes through the secondary ENI.
Note:
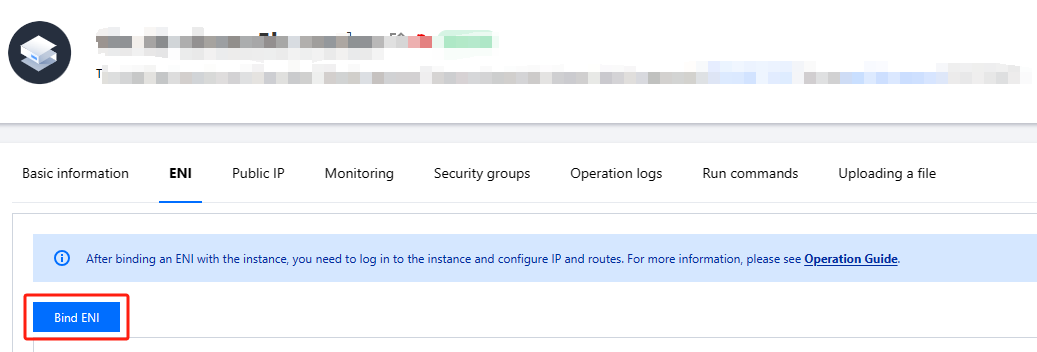
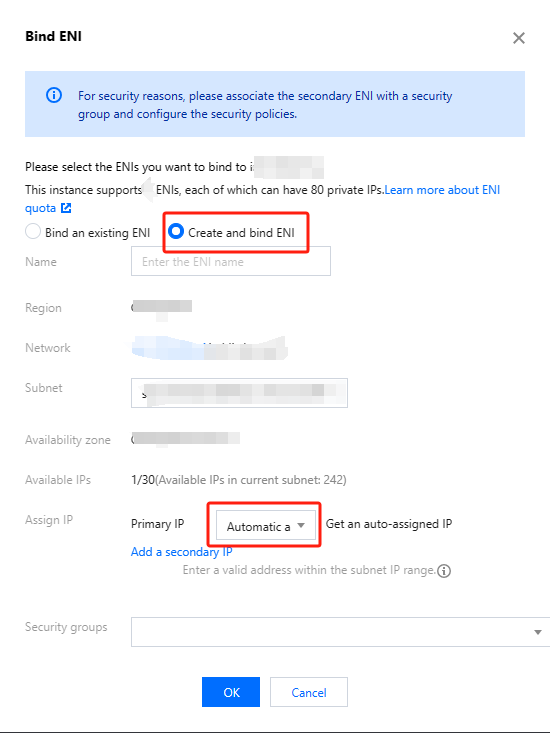
To use EIP direct connection in Windows, you need one ENI for private IP and one ENI for public IP, and bind the public IP to the primary ENI and bind the private IP to the secondary ENI.
During configuration of EIP direct connection in Windows, your internet connection may be interrupted. Therefore, we recommend that you log in to a Windows instance via VNC.
Step one: download the script for EIP direct connection
During configuration of EIP direct connection, the internet connection will be interrupted. Therefore, you need to download the script for EIP direct connection and upload it to CVM in advance.
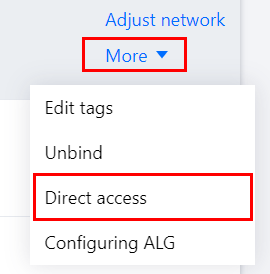
Given that the Windows script is designed for scenarios where auxiliary network cards handle internal network traffic, it is therefore necessary to configure auxiliary network cards for the CVM.
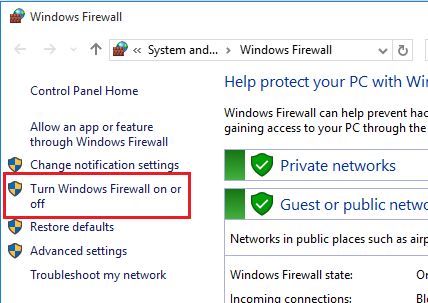
to open the Windows PowerShell window. Enter firewall.cpland press Enter to open the Windows Firewall page.
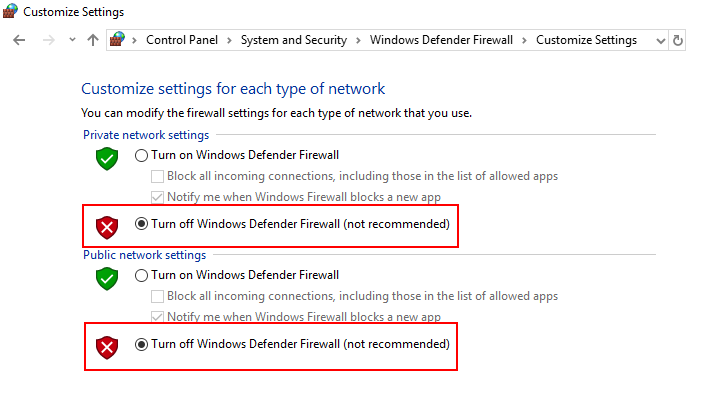
3. Click Turn Windows Firewall on or off to go to the Customize Settings page.
4. Select Turn off Windows Firewall both in the Private network settings pane and the Public network settings pane.
5. Double-click to run the script downloaded in Step 1. Enter the public IP address and press Enter twice.
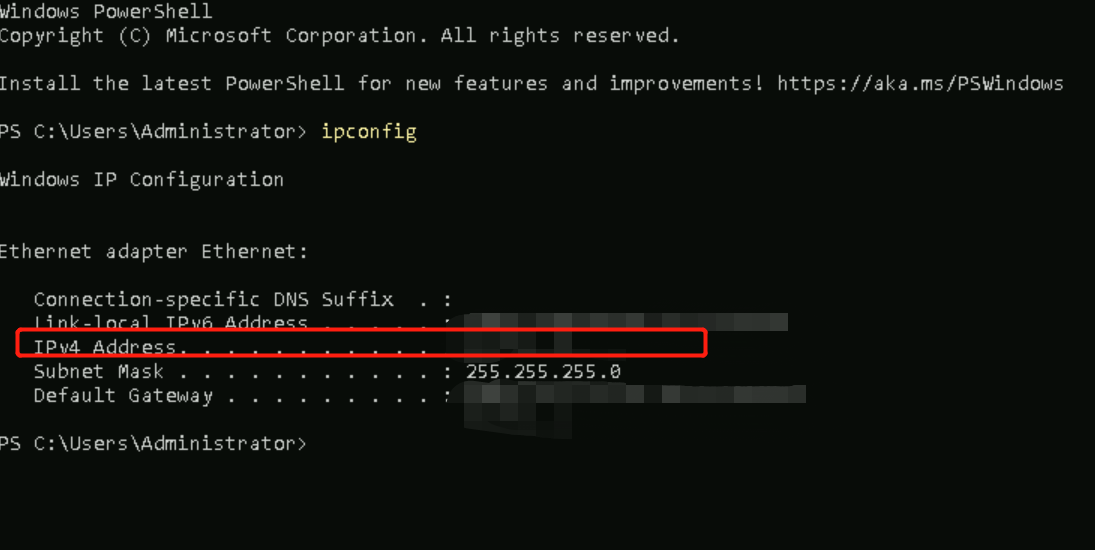
6. Enter ipconfig in the Windows PowerShell window and press Enter. You can see that the IPv4 address on the primary ENI changes to the public network address.
Note:
When the direct connection is enabled, you cannot assign a private IP to the primary ENI. Otherwise, the CVM cannot access the public network.