Session Clusters
Download
フォーカスモード
フォントサイズ
Jobs can be submitted for debugging through a Session cluster.
Creating a Session Cluster
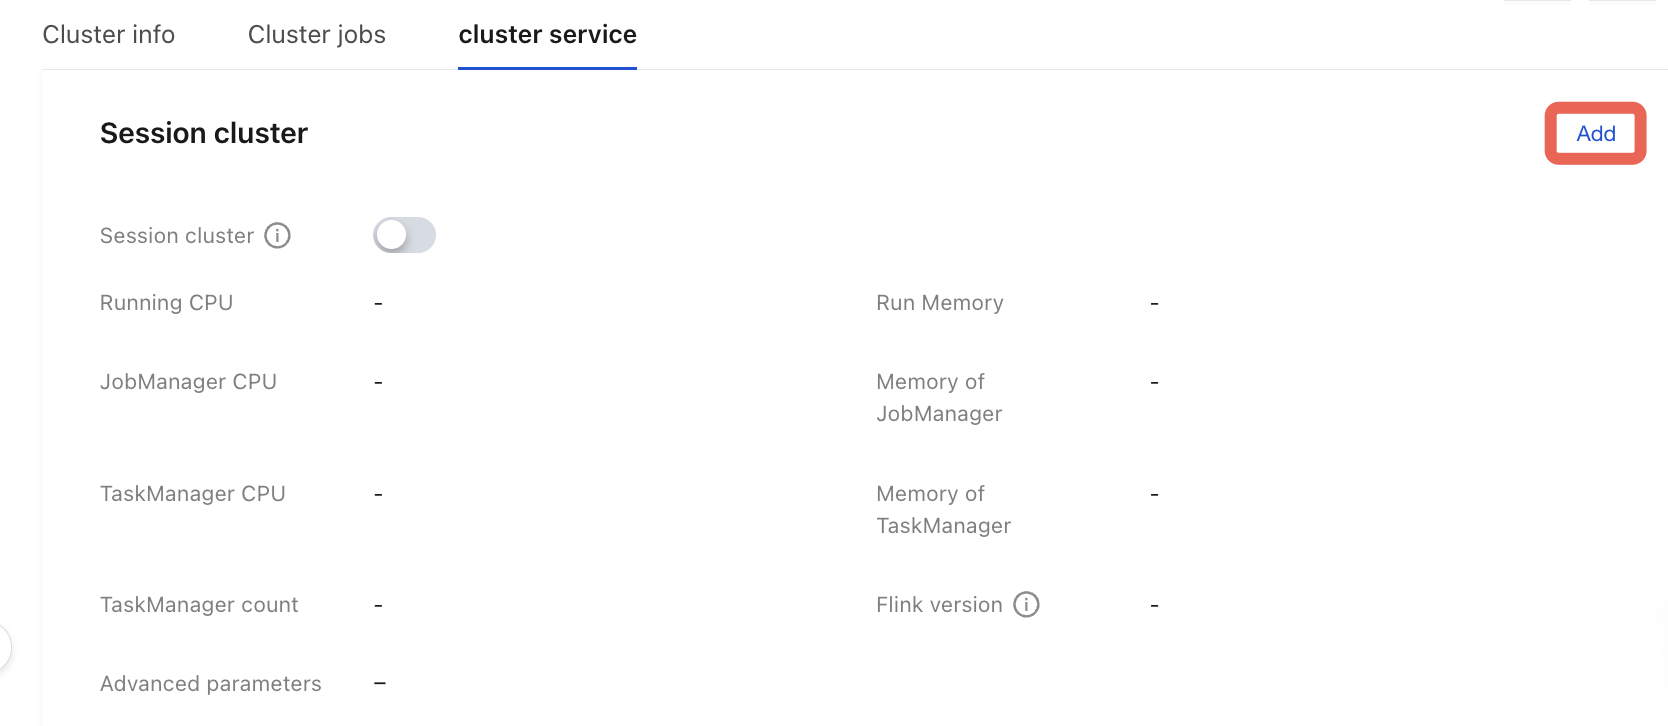
1. You can add a Session cluster in the cluster services section of the cluster page.
2. Configure the Session cluster. For its advanced parameters, see Job Advanced Parameters.
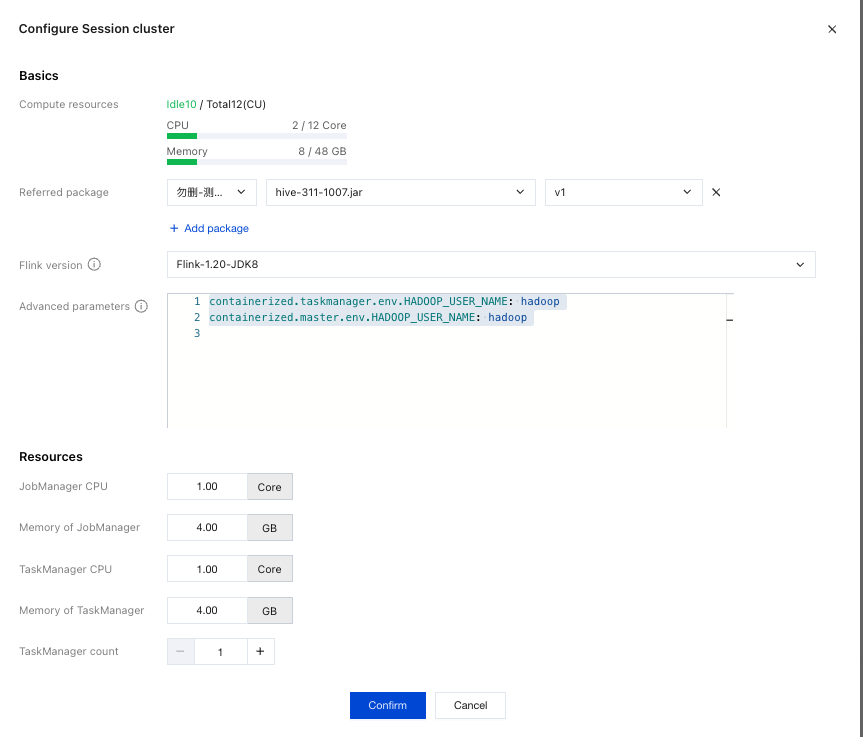
Note
When a Session cluster uses a Meta Accelerated COS bucket, the corresponding dependencies must also be uploaded.
When a Session cluster uses Kerberos authentication, the corresponding dependencies must also be uploaded.
3. The process starts after you click Confirm.
Accelerating COS Buckets
1. Download the Meta Accelerated bucket dependencies. (Some Connectors have them built-in, but for Iceberg/Setats Connectors, you need to manually download and upload the flink-chdfs-hadoop-1.10.0-0.1.4.jar dependency.)
2. Configure advanced parameters:
flink.hadoop.fs.cosn.trsf.fs.AbstractFileSystem.ofs.impl: com.qcloud.chdfs.fs.CHDFSDelegateFSAdapterflink.hadoop.fs.cosn.trsf.fs.ofs.impl: com.qcloud.chdfs.fs.CHDFSHadoopFileSystemAdapterflink.hadoop.fs.cosn.trsf.fs.ofs.tmp.cache.dir: /tmp/chdfs/flink.hadoop.fs.cosn.trsf.fs.ofs.user.appid: <YourAppId>flink.hadoop.fs.cosn.trsf.fs.ofs.bucket.region: <YourRegion>flink.hadoop.fs.cosn.trsf.fs.ofs.upload.flush.flag: trueflink.hadoop.fs.AbstractFileSystem.cosn.impl: org.apache.hadoop.fs.CosNflink.hadoop.fs.cosn.impl: org.apache.hadoop.fs.CosFileSystemflink.hadoop.fs.cosn.bucket.region: <YourRegion>flink.hadoop.fs.cosn.userinfo.appid: <YourAppId>flink.hadoop.fs.ofs.impl: com.qcloud.chdfs.fs.CHDFSHadoopFileSystemAdapterflink.hadoop.fs.ofs.tmp.cache.dir: /tmp/chdfs/flink.hadoop.fs.ofs.upload.flush.flag: trueflink.hadoop.fs.ofs.user.appid: <YourAppId>flink.hadoop.fs.ofs.bucket.region: <YourRegion>containerized.taskmanager.env.HADOOP_USER_NAME: hadoopcontainerized.master.env.HADOOP_USER_NAME: hadoop
Kerberos Authentication
Obtaining Dependencies
1. Log in to the cluster master node to get the files krb5.conf, emr.keytab, core-site.xml, and hdfs-site.xml in the following paths.
/etc/krb5.conf/var/krb5kdc/emr.keytab/usr/local/service/hadoop/etc/hadoop/core-site.xml/usr/local/service/hadoop/etc/hadoop/hdfs-site.xml/usr/local/service/hive/conf/hive-site.xml
2. Modify the hive-site.xml file. Add the following configuration to hive-site.xml. The IP address value is taken from the value of
hive.server2.thrift.bind.host in the configuration file.<property><name>hive.metastore.uris</name><value>thrift://ip:7004</value></property>
3. Obtain hivemetastore-site.xml and hiveserver2-site.xml, and click the file names to download them.
4. Package the obtained configuration files in a JAR package.
jar cvf hive-xxx.jar krb5.conf emr.keytab core-site.xml hdfs-site.xml hive-site.xml hivemetastore-site.xml hiveserver2-site.xml
5. Check the JAR structure (run the vim command vim hdfs-xxx.jar). The JAR file includes the following information. Make sure no file is missing and the structure is correct.
META-INF/META-INF/MANIFEST.MFemr.keytabkrb5.confhdfs-site.xmlcore-site.xmlhive-site.xmlhivemetastore-site.xmlhiveserver2-site.xml
6. Upload the jar package on the Program Package Management page, and then reference this package in the job parameter configuration.
7. Obtain the kerberos principal for configuring Job Advanced Parameters.
klist -kt /var/krb5kdc/emr.keytab# The output is as follows. Select the first one: hadoop/172.28.28.51@EMR-OQPO48B9KVNO Timestamp Principal---- ------------------- ------------------------------------------------------2 08/09/2021 15:34:40 hadoop/172.28.28.51@EMR-OQPO48B92 08/09/2021 15:34:40 HTTP/172.28.28.51@EMR-OQPO48B92 08/09/2021 15:34:40 hadoop/VM-28-51-centos@EMR-OQPO48B92 08/09/2021 15:34:40 HTTP/VM-28-51-centos@EMR-OQPO48B9
Advanced Parameters
containerized.taskmanager.env.HADOOP_USER_NAME: hadoopcontainerized.master.env.HADOOP_USER_NAME: hadoopsecurity.kerberos.login.principal: hadoop/172.28.28.51@EMR-OQPO48B9security.kerberos.login.keytab: emr.keytabsecurity.kerberos.login.conf: krb5.confflink.hadoop.hadoop.security.authentication: kerberosflink.hadoop.hadoop.security.auth_to_local: RULE:[1:$1] RULE:[2:$1] DEFAULT
Note:
The values of security.kerberos.login.keytab and security.kerberos.login.conf are the respective file names.
Debugging with Session
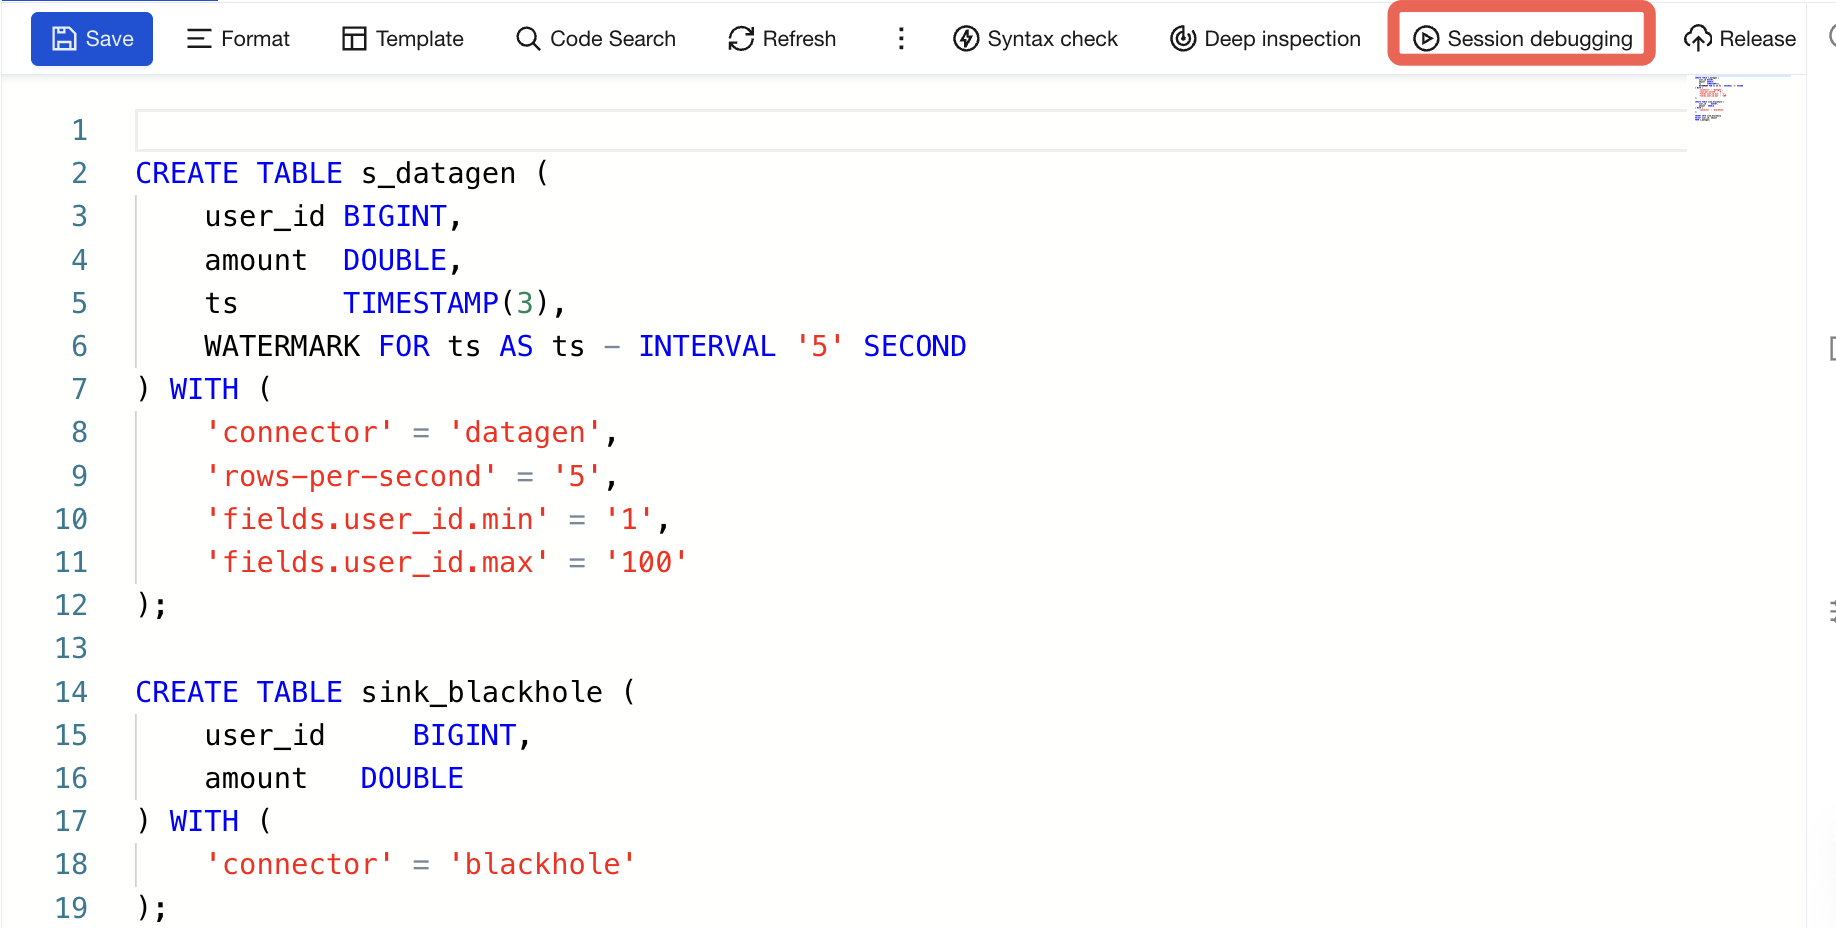
1. Go to the development and debugging section of job management, switch to the draft, and then click Session Debug.
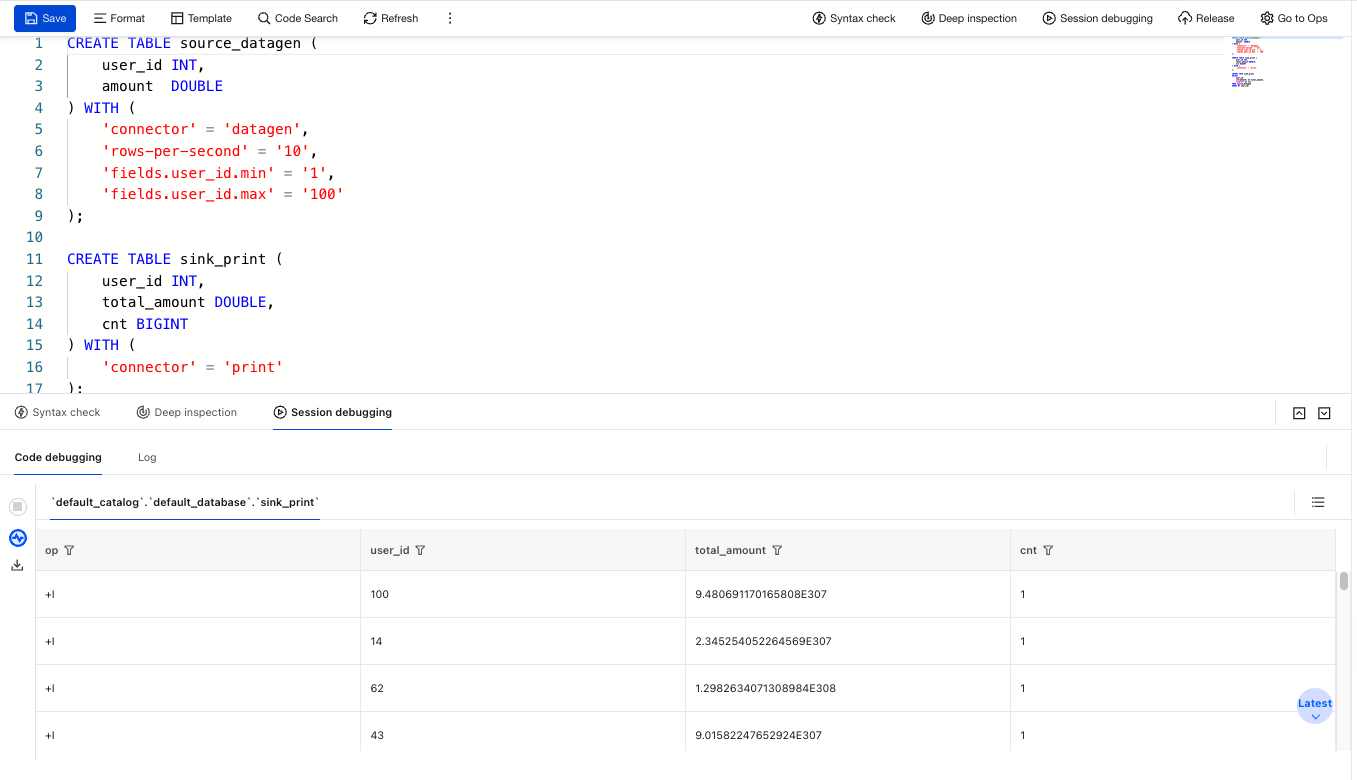
2. You can view the job output on the page (it will not be actually written to the Sink).
Note:
Session debugging automatically ends after a certain amount of data is output or after a certain period of time.
フィードバック