iOS (SwiftUI)
ダウンロード
フォーカスモード
フォントサイズ
This guide provides step-by-step instructions for adding contacts using TUIKit SwiftUI.
Development Environment Requirements
Xcode 15 or later
iOS 15.0 or later
Prerequisites
Before building the interface, ensure the following steps are complete:
1. Create an application in the console.
2. Create at least two user accounts in the console.
3. Integrate
TUIKit SwiftUI.4. Call the
login method of LoginStore to authenticate the user.Notice:
1. You only need to log in once each time the app is launched.
2. Ensure that the login is successful. We recommend performing subsequent operations within the login success callback.
If you have not completed these steps, refer to the instructions in Quick Start before proceeding. Otherwise, you may encounter issues with the following features.
If all prerequisites are met, continue with the instructions below.
Step-by-Step Instructions
The AddFriendView in the ContactList component of TUIKit SwiftUI provides a dedicated interface for adding contacts. Follow these steps to implement the contact addition workflow:
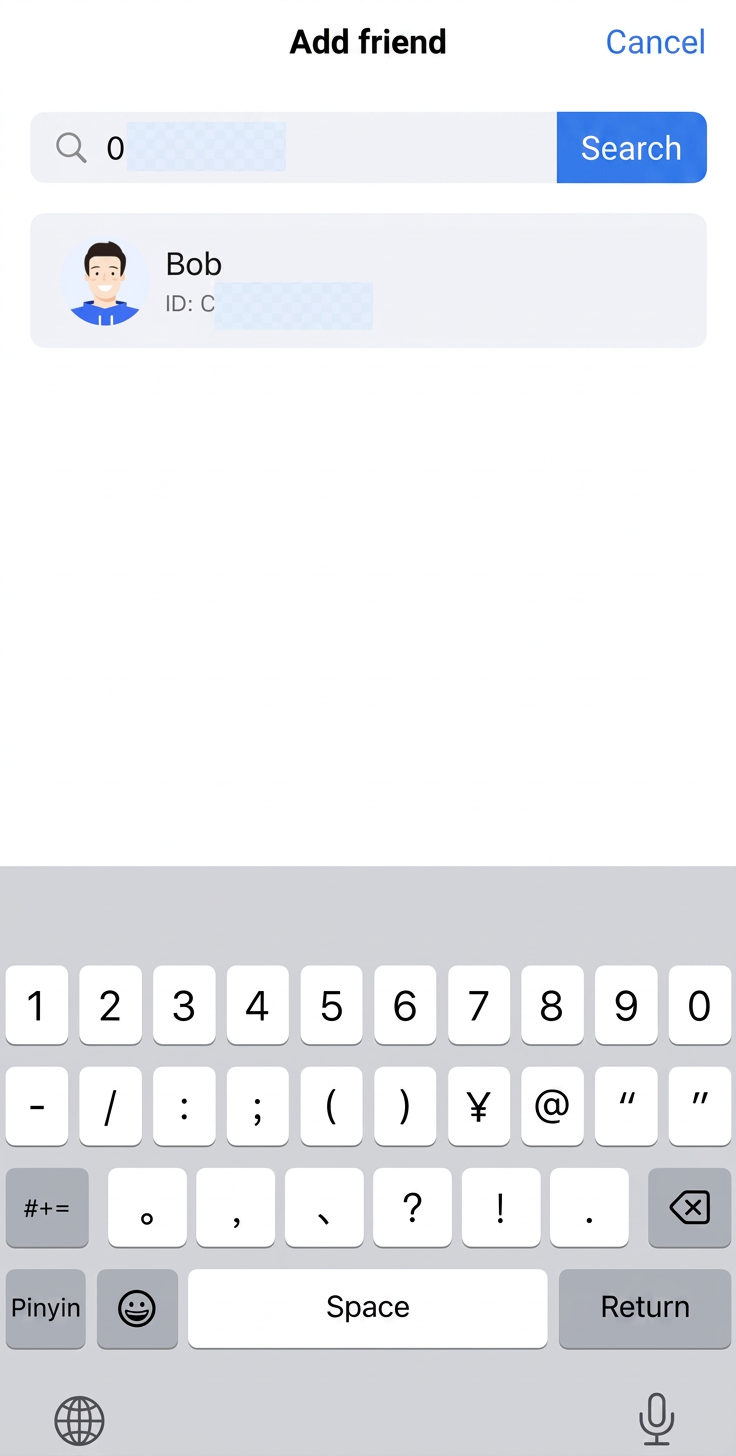
1. Search for the target contact by userID.
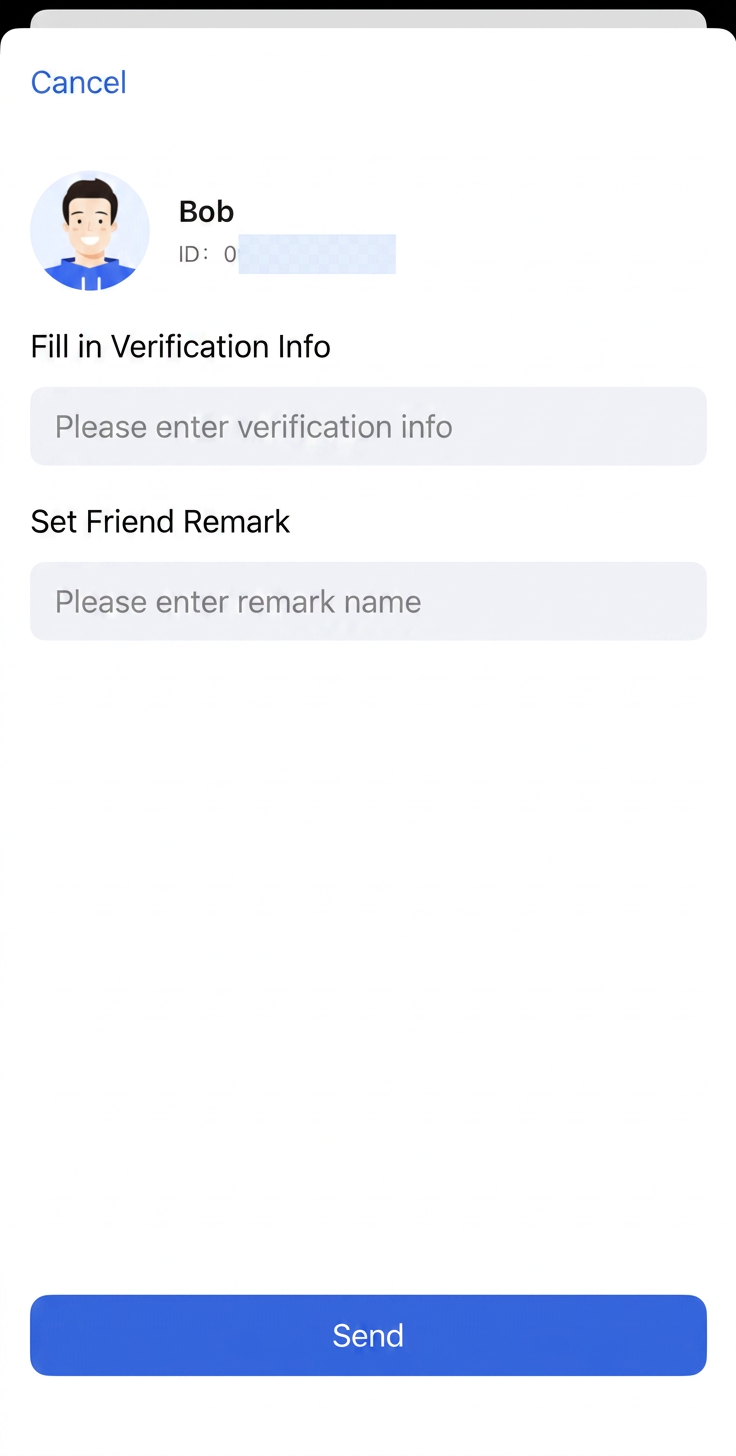
2. Add the target contact as a friend.
3. After sending a friend request, the recipient will automatically accept by default. If the recipient has configured the Default Friend Verification Setting, approval may be required. In that case, the recipient can accept the request in the New Contacts section of the ContactList. For details on building the ContactList, see the Contact List documentation.
Note:
You can configure the Default Friend Verification Setting in the console at: Chat > Feature Configuration > Friends & Relationship Chain > Default Friend Verification Setting.
When using the sample code, pre-fill the following parameters:
sdkAppID: The sdkAppID you obtained earlier.userID: The operator's userID (e.g., user1 created during Quick Start).userSig: The operator's userSig (generated for user1 in Quick Start).The add friend interface loads automatically when the app starts. Example code:
// ContentView.swiftimport SwiftUIstruct ContentView: View {var body: some View {AddContactPage()}}// AddContactPage.swiftimport AtomicXimport AtomicXCoreimport SwiftUIpublic struct AddContactPage: View {@StateObject private var themeState = ThemeState.shared@State private var isLoggedIn = false@State private var isLoggingIn = true@State private var loginError: String? = nilprivate let sdkAppID: Int32 = 1234567890 // TODO: Fill in your sdkAppID hereprivate let userID = "" // TODO: Fill in your userID hereprivate let userSig = "" // TODO: Fill in your generated userSig herepublic var body: some View {Group {if isLoggedIn {addContactContentView} else if isLoggingIn {ProgressView("Logging in...")} else {VStack(spacing: 12) {Image(systemName: "exclamationmark.triangle").font(.system(size: 40)).foregroundColor(.orange)Text(loginError ?? "Login failed").foregroundColor(.secondary)}}}.environmentObject(themeState).onAppear {login()}}// MARK: - Add Contact Contentprivate var addContactContentView: some View {AddFriendView()}// MARK: - Loginprivate func login() {guard !userSig.isEmpty else {isLoggingIn = falseloginError = "userSig is empty. Please fill in a valid userSig."return}LoginStore.shared.login(sdkAppID: sdkAppID, userID: userID, userSig: userSig) { result inswitch result {case .success:print(">>>>> Login success, userID: \\(userID)")isLoggedIn = trueisLoggingIn = falsecase .failure(let error):print(">>>>> Login failed: \\(error.code), \\(error.message)")loginError = "Login failed: \\(error.code), \\(error.message)"isLoggingIn = false}}}}
The resulting UI is shown below:
Search Contact | Send Request |
 |  |
Further Practice
Contact Us
フィードバック