Push Template
ダウンロード
フォーカスモード
フォントサイズ
Template Push allows developers to create reusable message templates on the push platform, each with a defined structure and variable placeholders. When sending a push notification, simply provide the variable values— the platform automatically generates and delivers the final message by populating the template, ensuring consistency, efficiency, and personalized content. One template can be used for multiple batch pushes, dramatically reducing development and operational overhead. Common scenarios include:
System Notification: Order status, logistics updates, account changes, verification code alerts.
Operations & Marketing: Promotional campaigns, member benefits, new product launches, coupon distribution.
User Re-engagement: Inactive user reminders, unread message alerts, feature upgrade notifications.
Industry-Specific: Financial transaction alerts, e-commerce logistics updates, OTA itinerary changes, IoT device alarms, and more.
Creating a Push Template
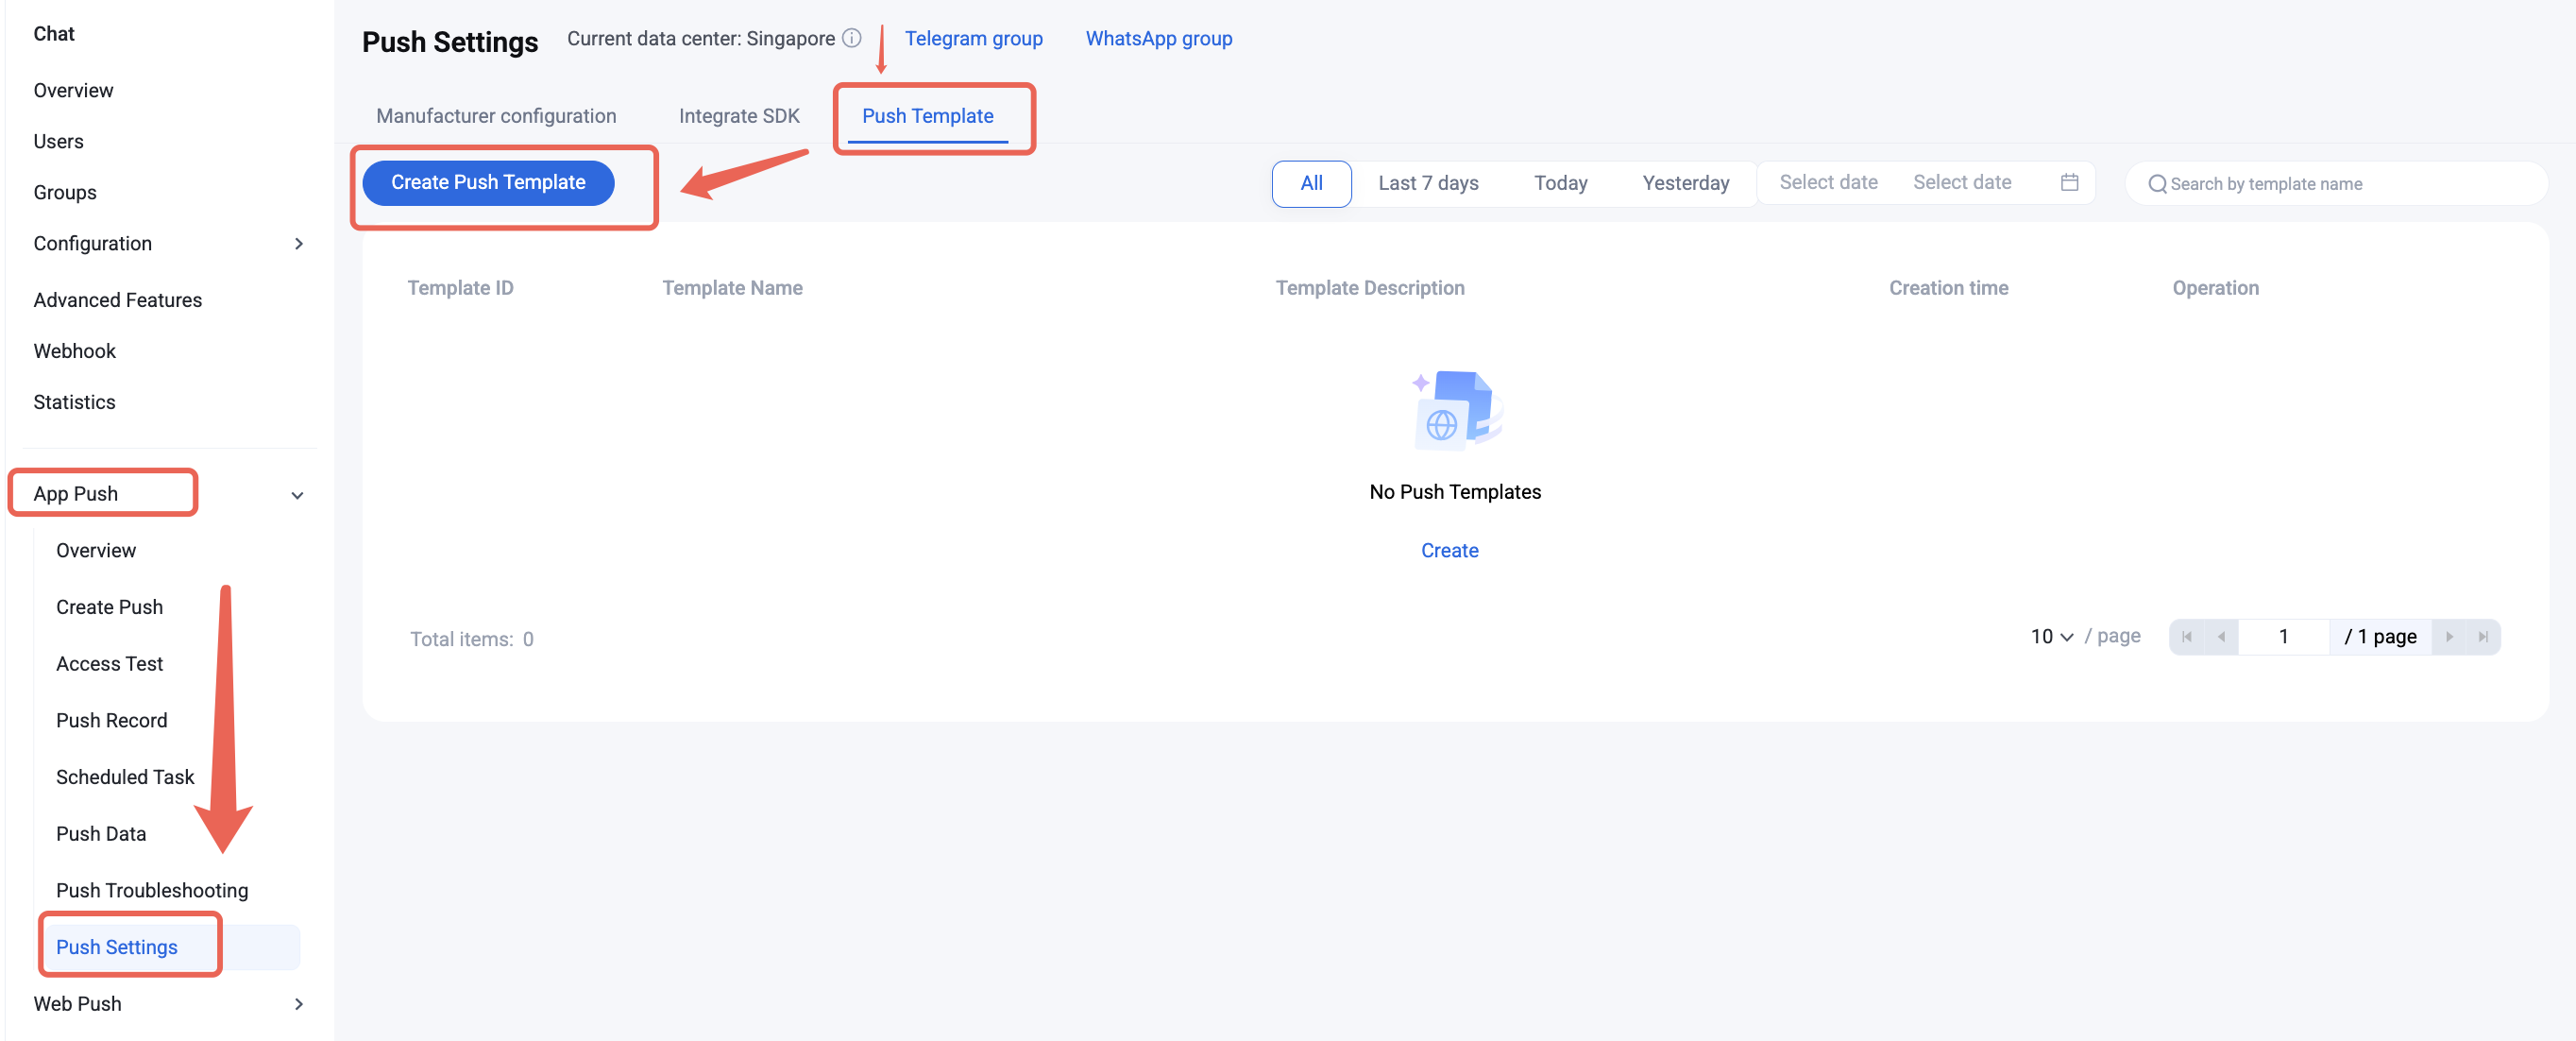
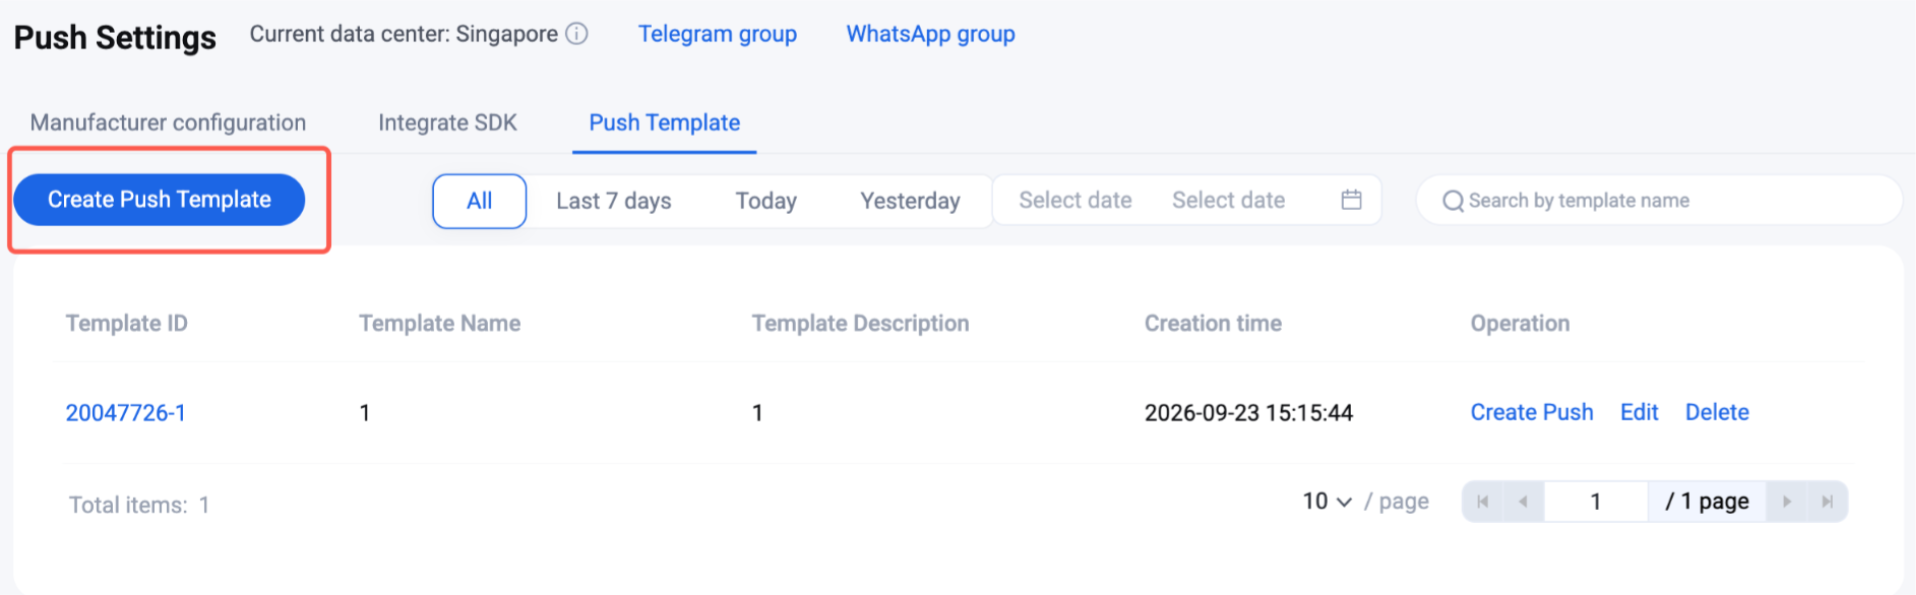
1. Navigate to Console > Chat > App Push > Push Settings, then click Push Template > Create Push Template.
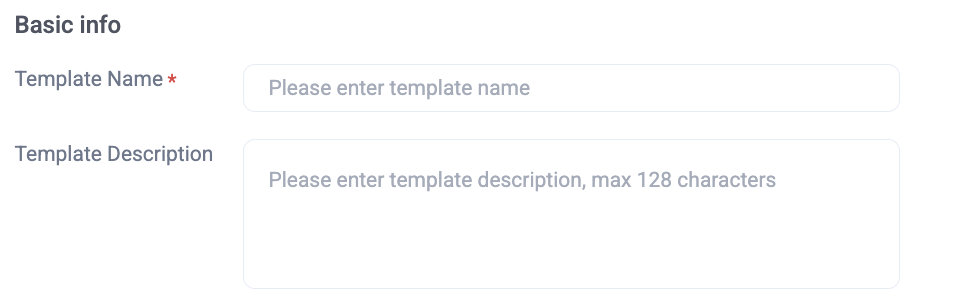
2. Enter the template name and description in the Basic Information section.
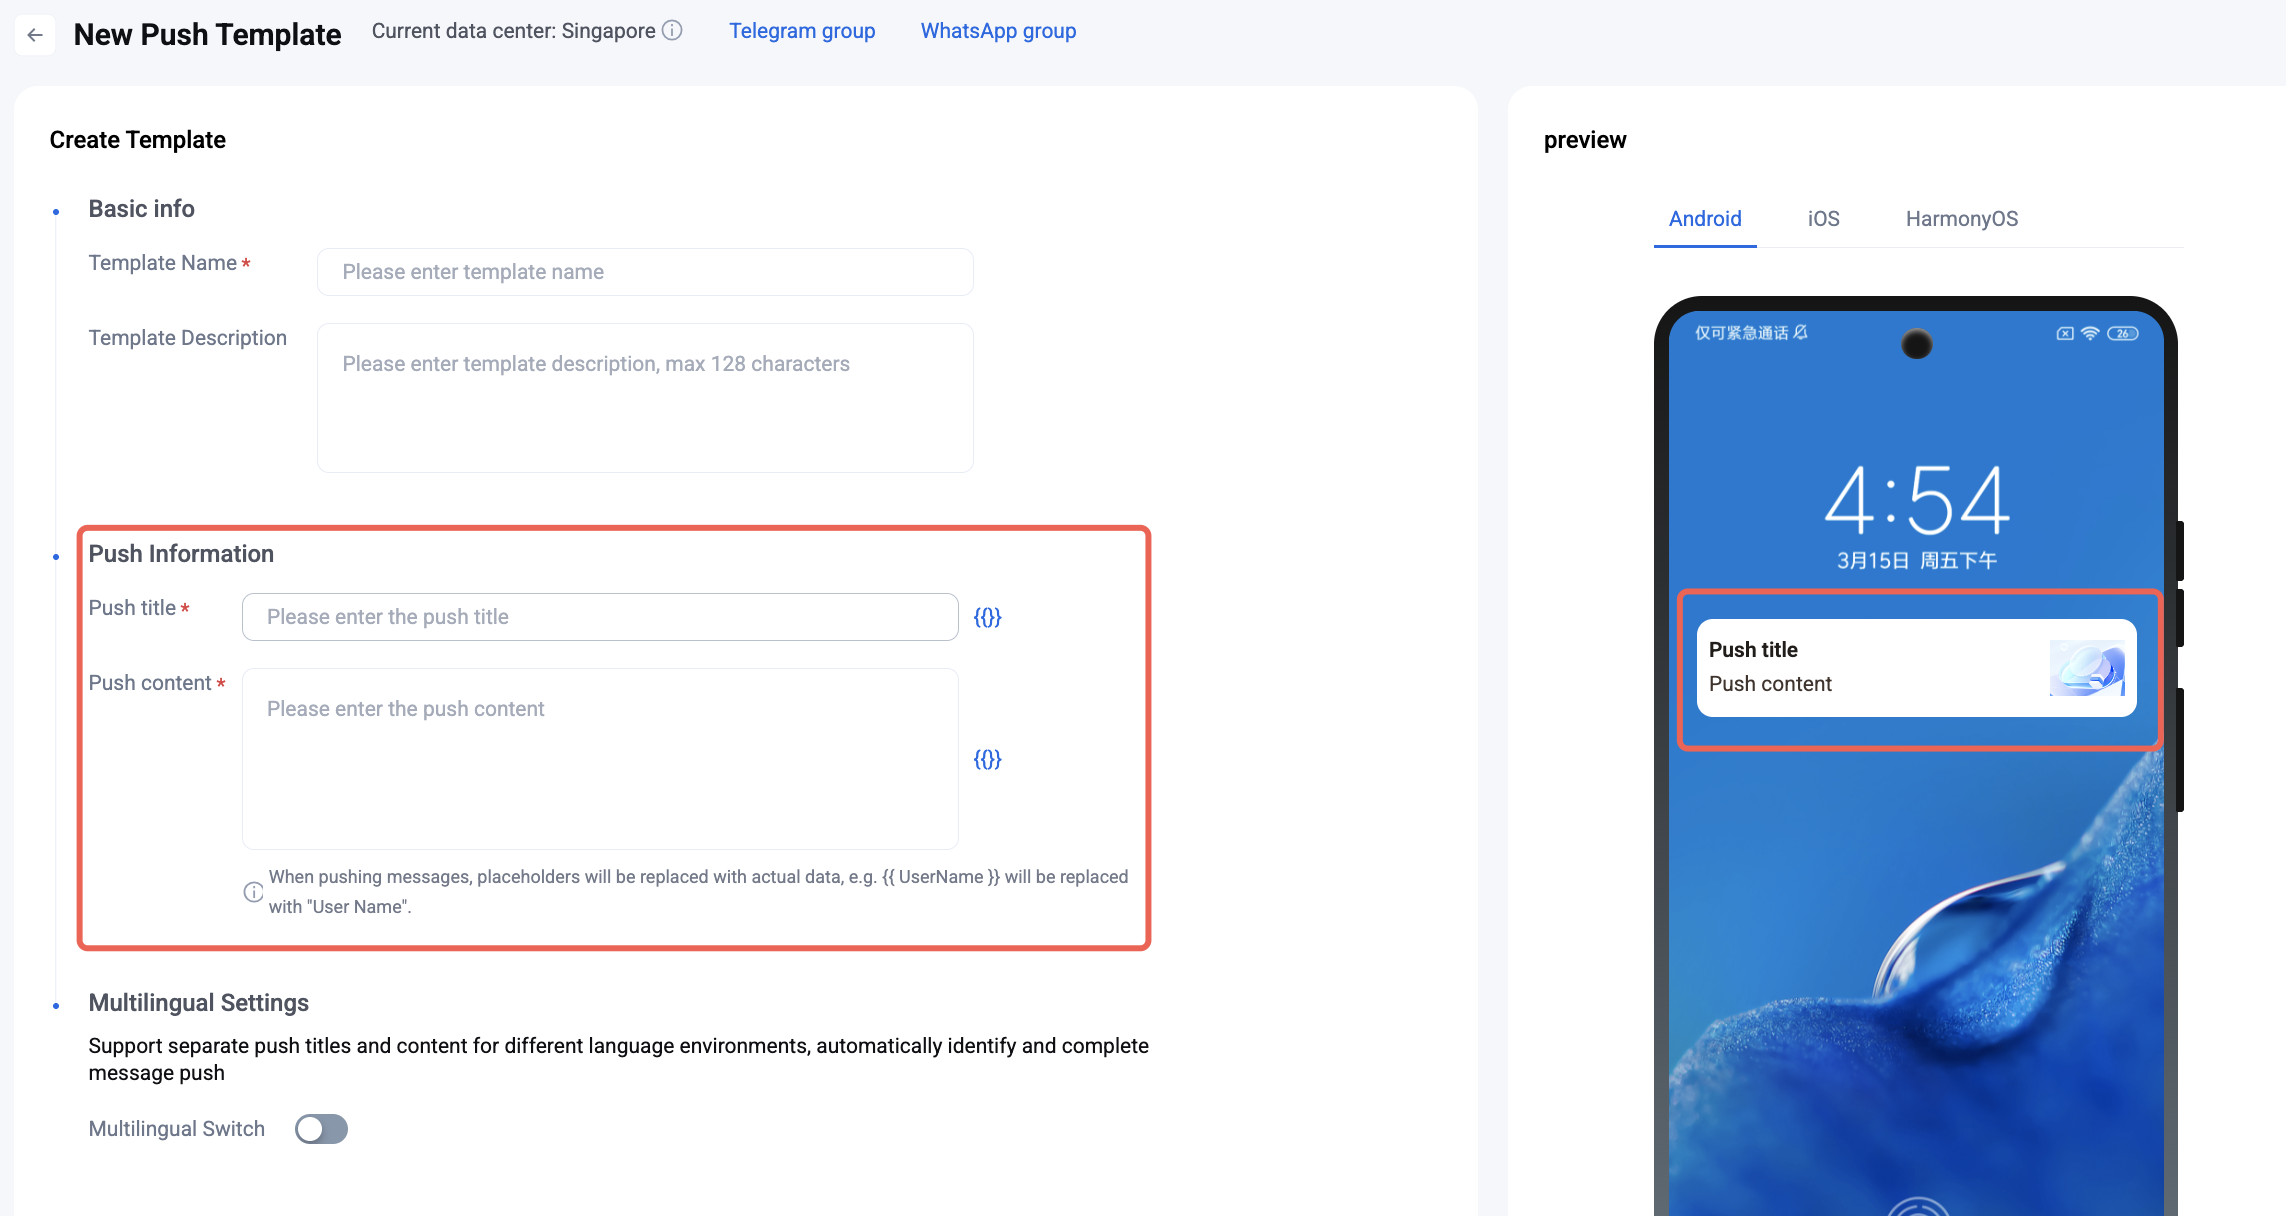
3. Enter the push title and message content. For Chat message templates, you can add preset variables; for standard push notifications, add custom variables. The left side shows a live preview of your push message.
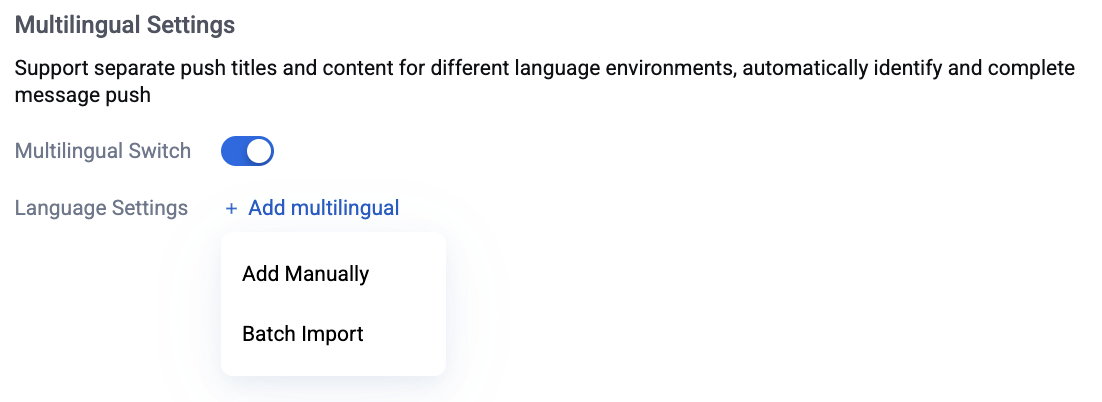
4. (Optional) To add translations for multiple languages, enable the Multilingual Switch. You can manually enter translations or import them in bulk.
5. Click Save to store your push template. The template will now appear on the Push Settings page, where you can manage and use it for future push tasks.
Using Push Templates
Push templates can be used in two ways:
1. Using Templates in the Console
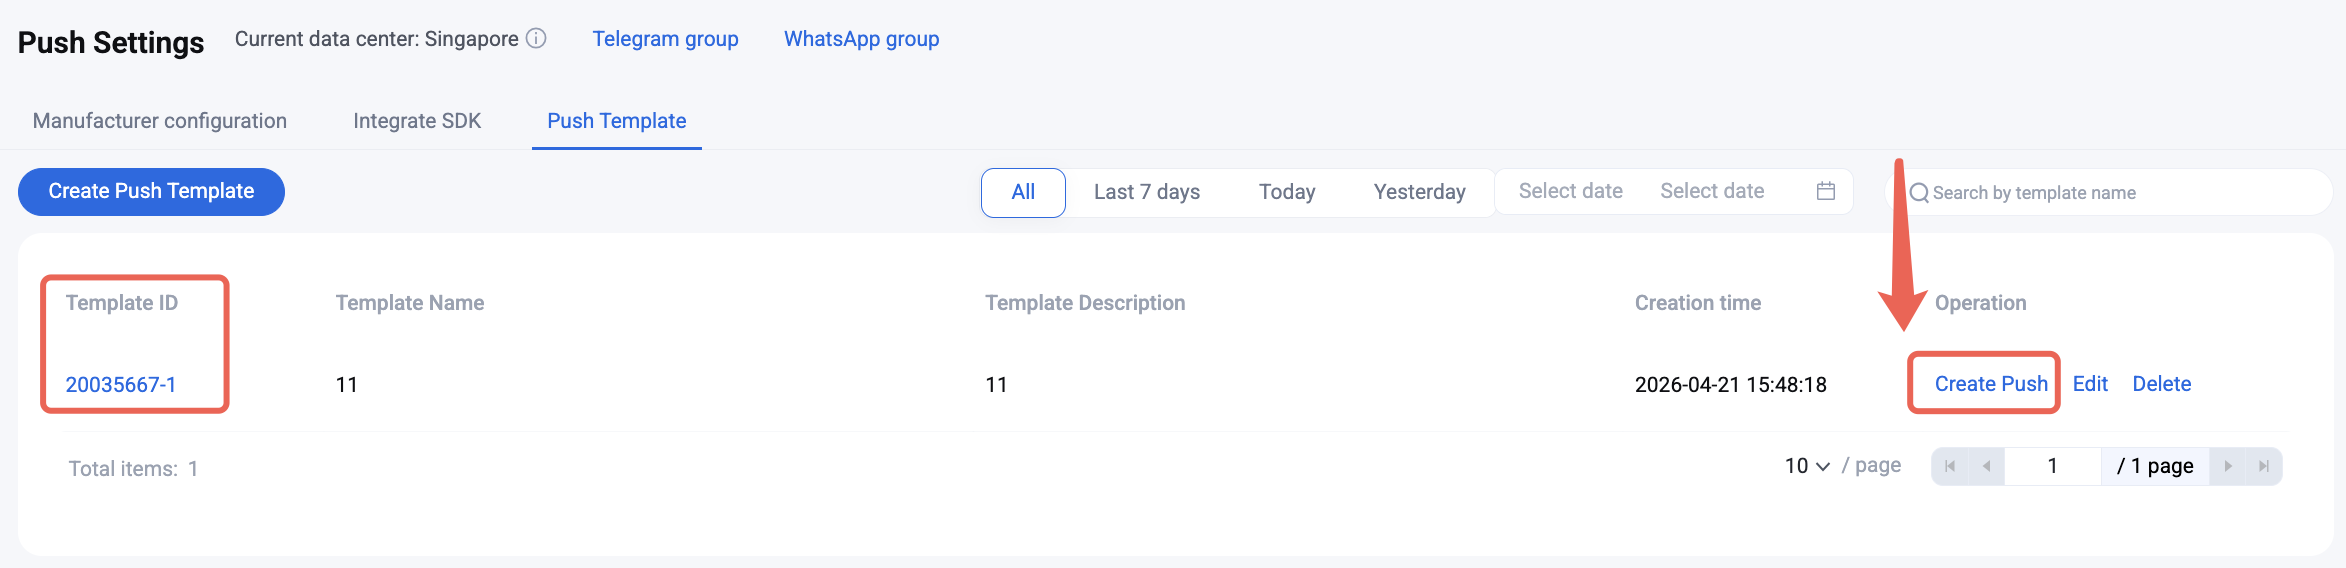
1.1 On the Push Settings page, select your template and click Create Push.
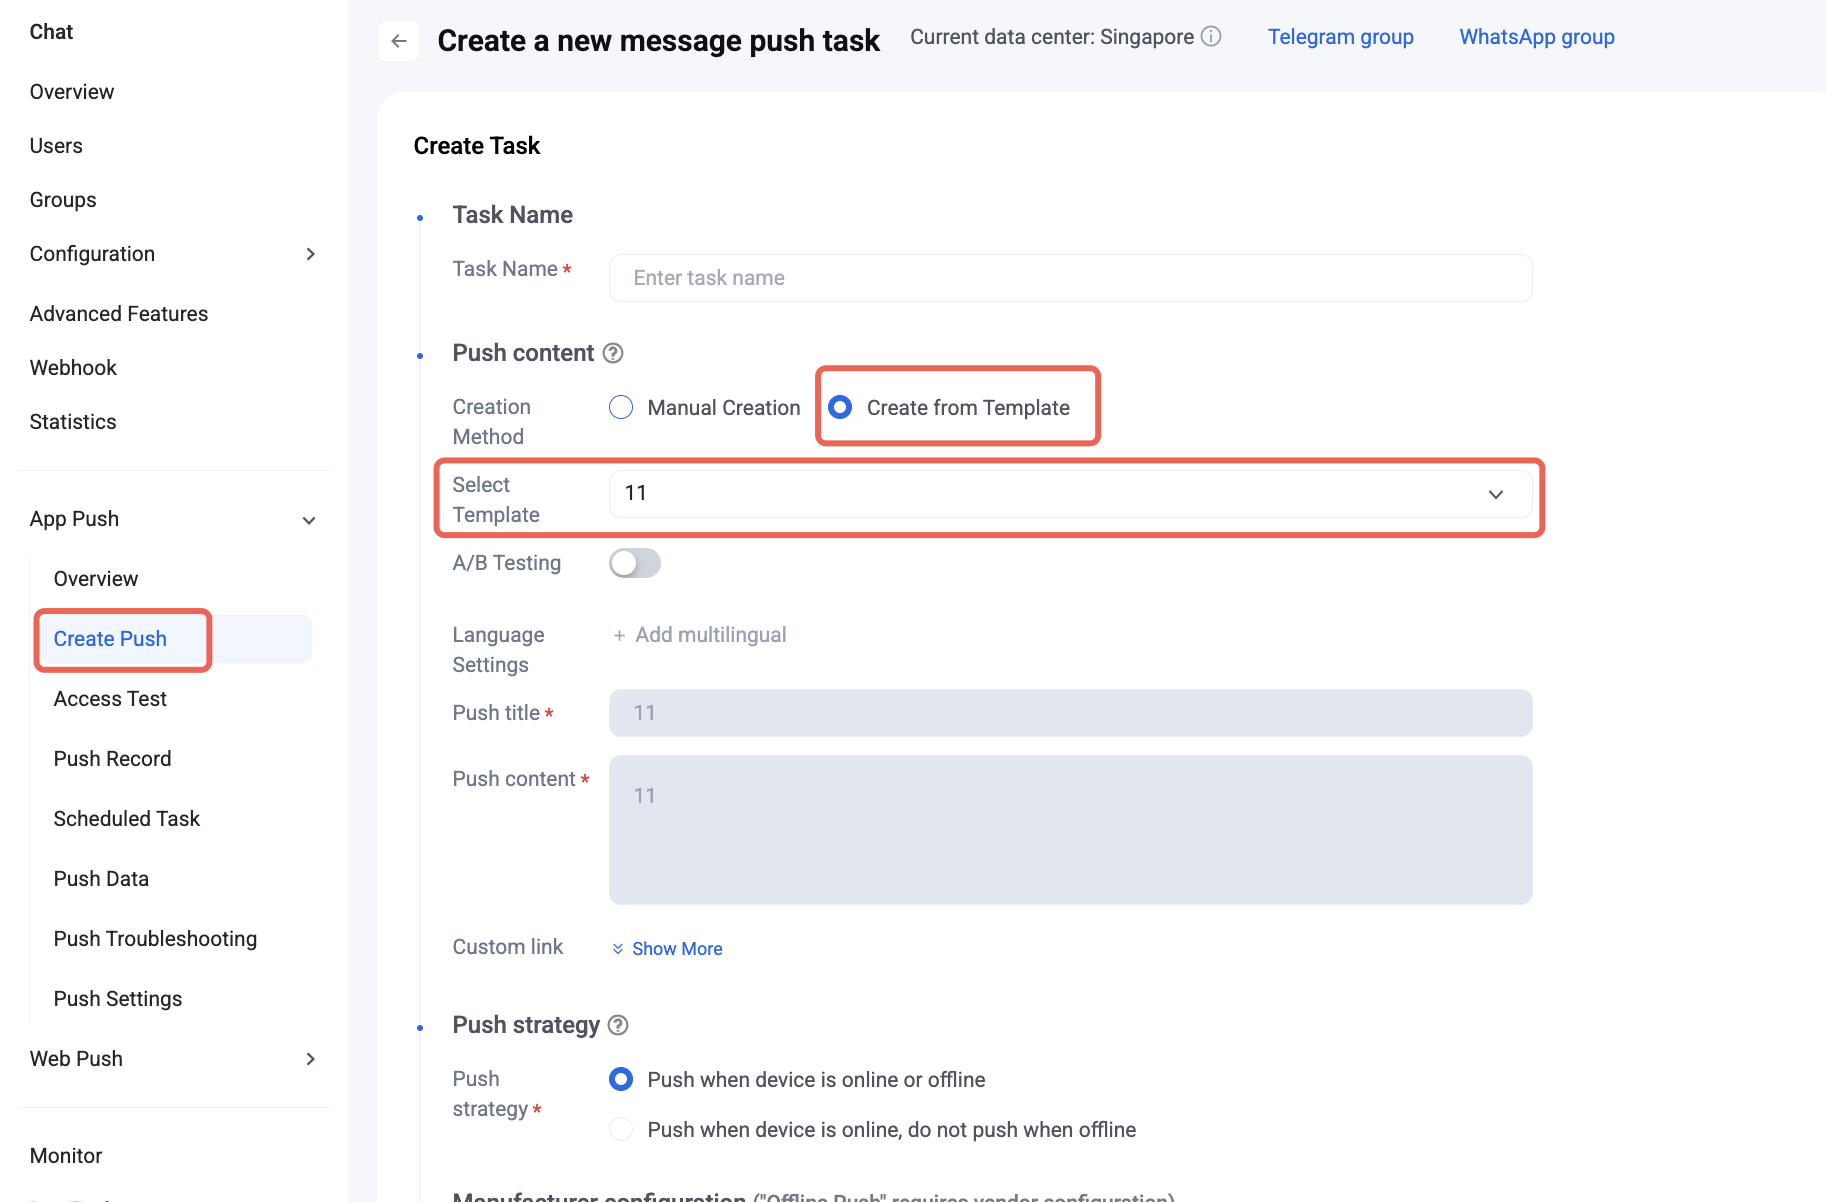
Or, go to the Create Push page, select Create from Template, then choose your desired push template.
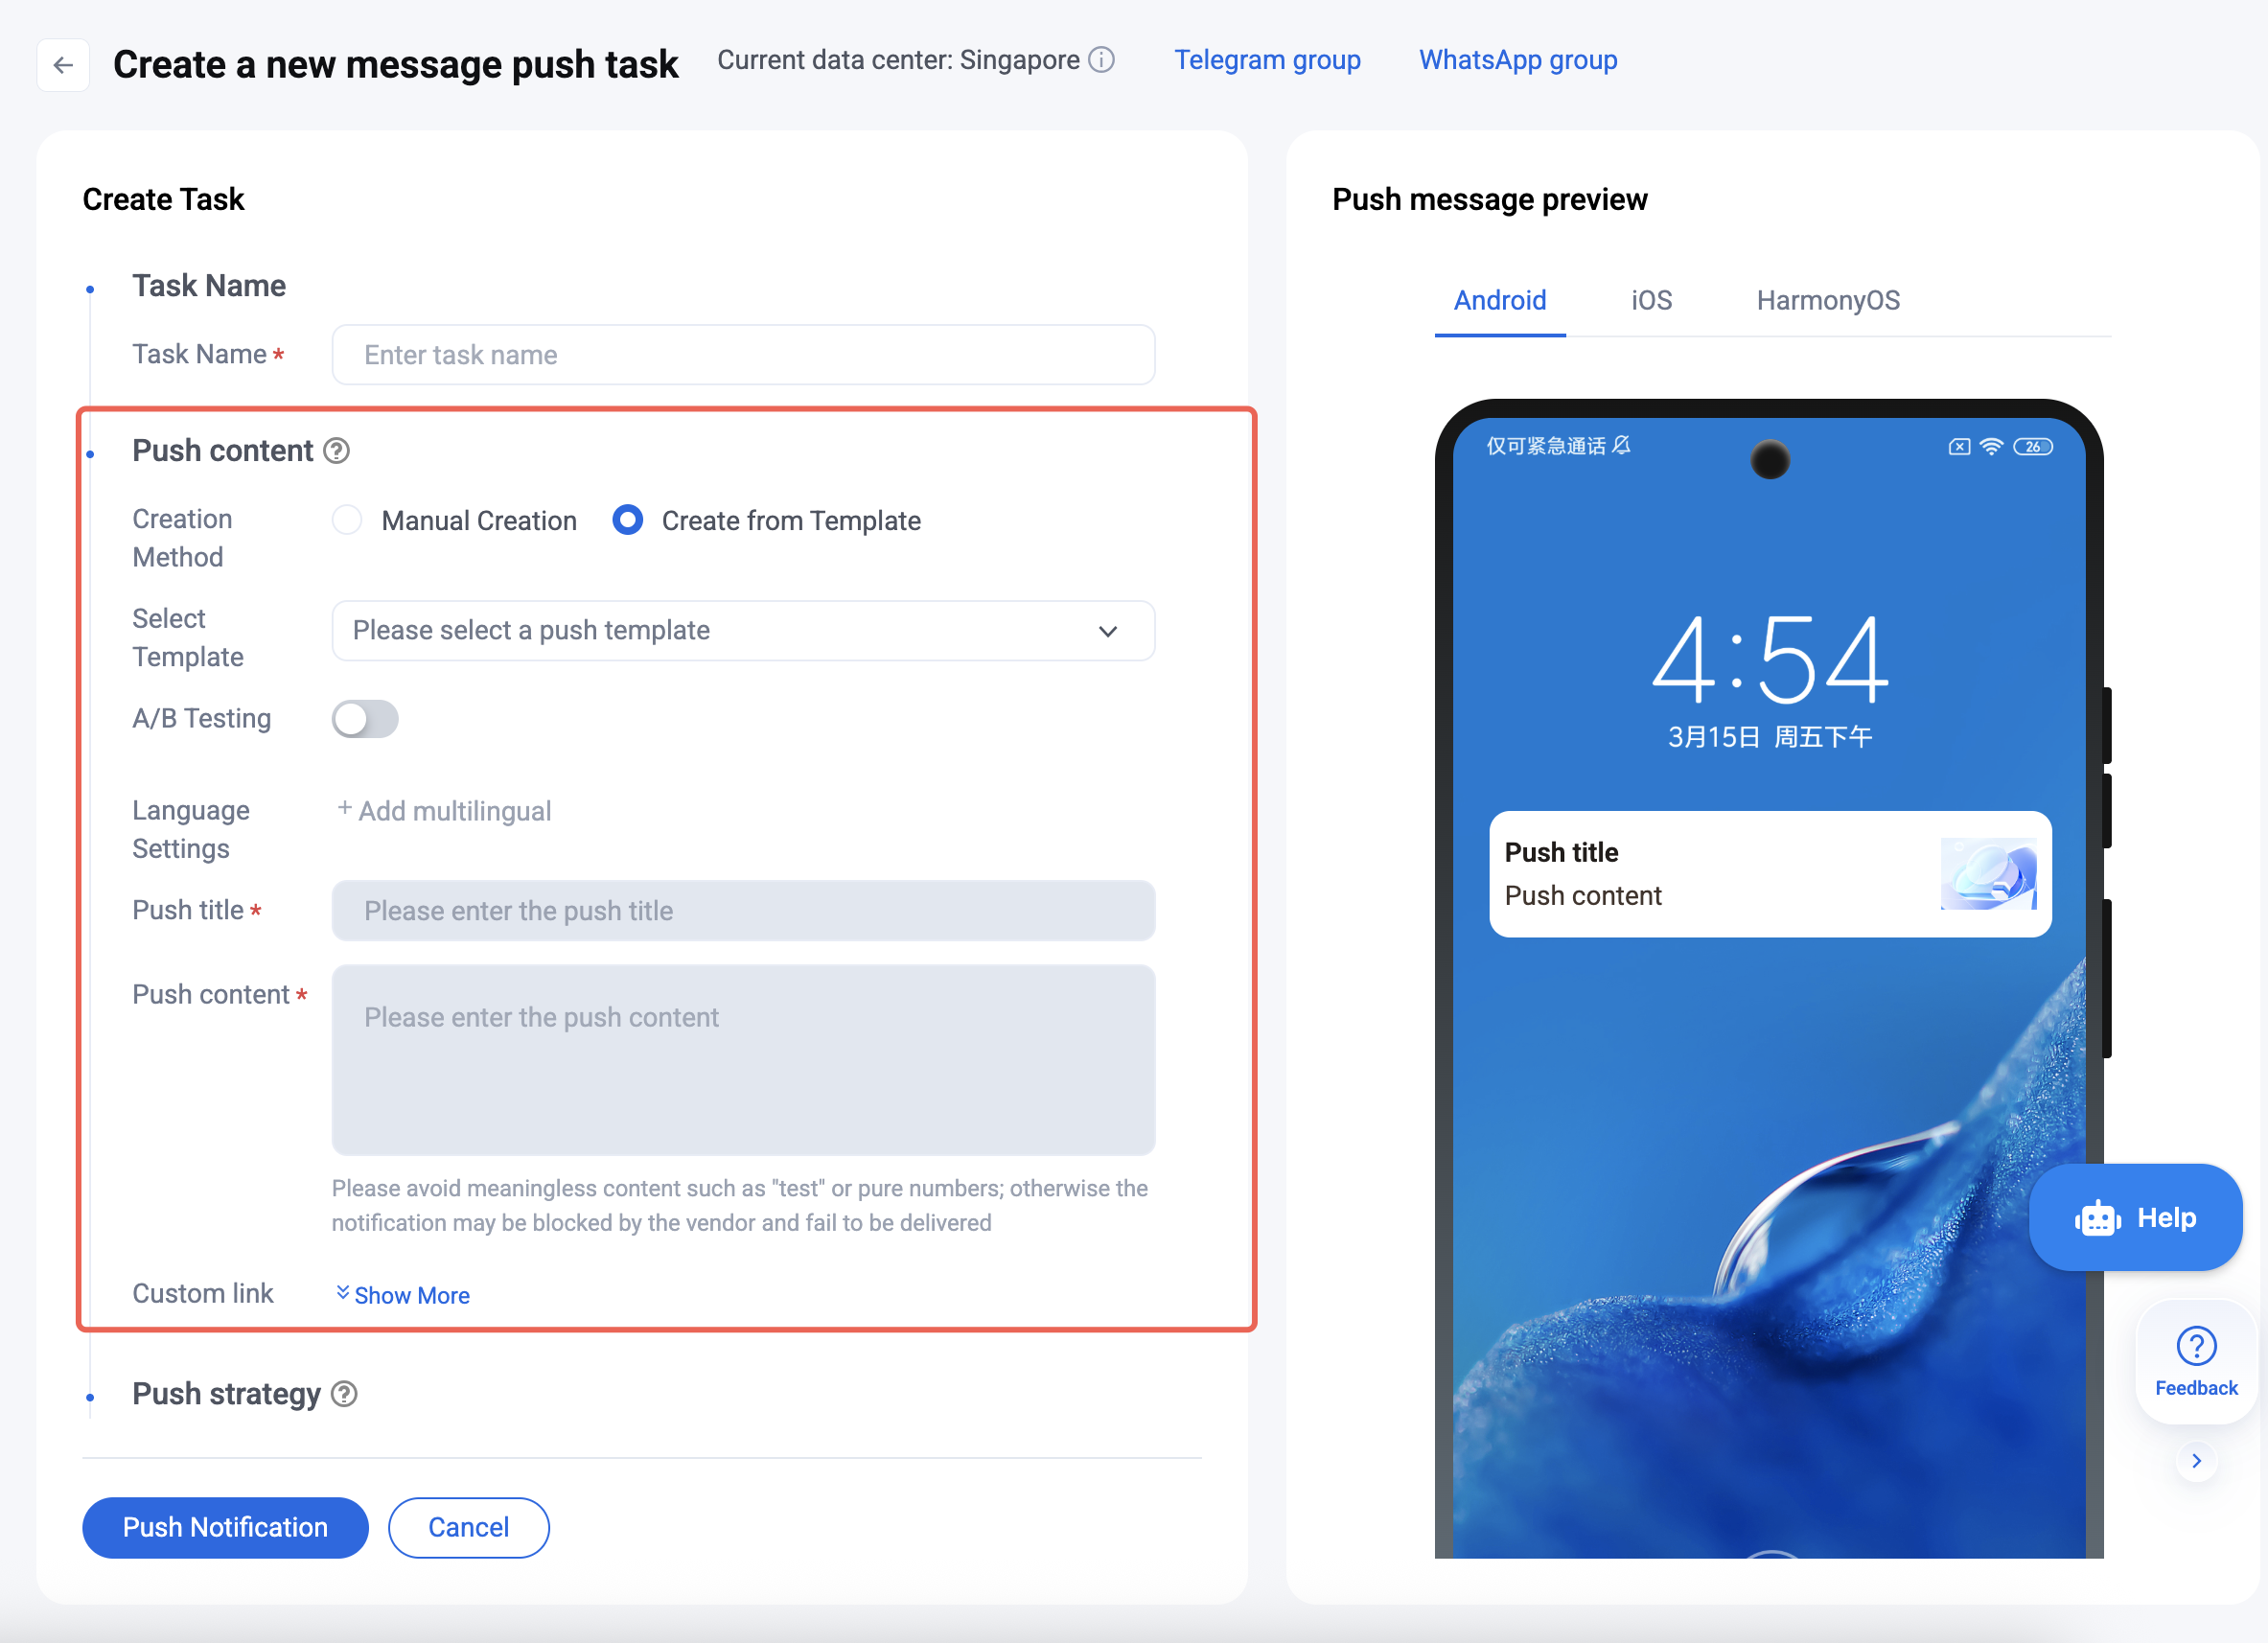
1.2 After you select a Push Template and review the Push Preview, configure the push strategy, target audience, and sending timing. Click Push Notification to proceed.
1.3 Review the Push Message Preview. Once everything is correct, click Confirm Push.
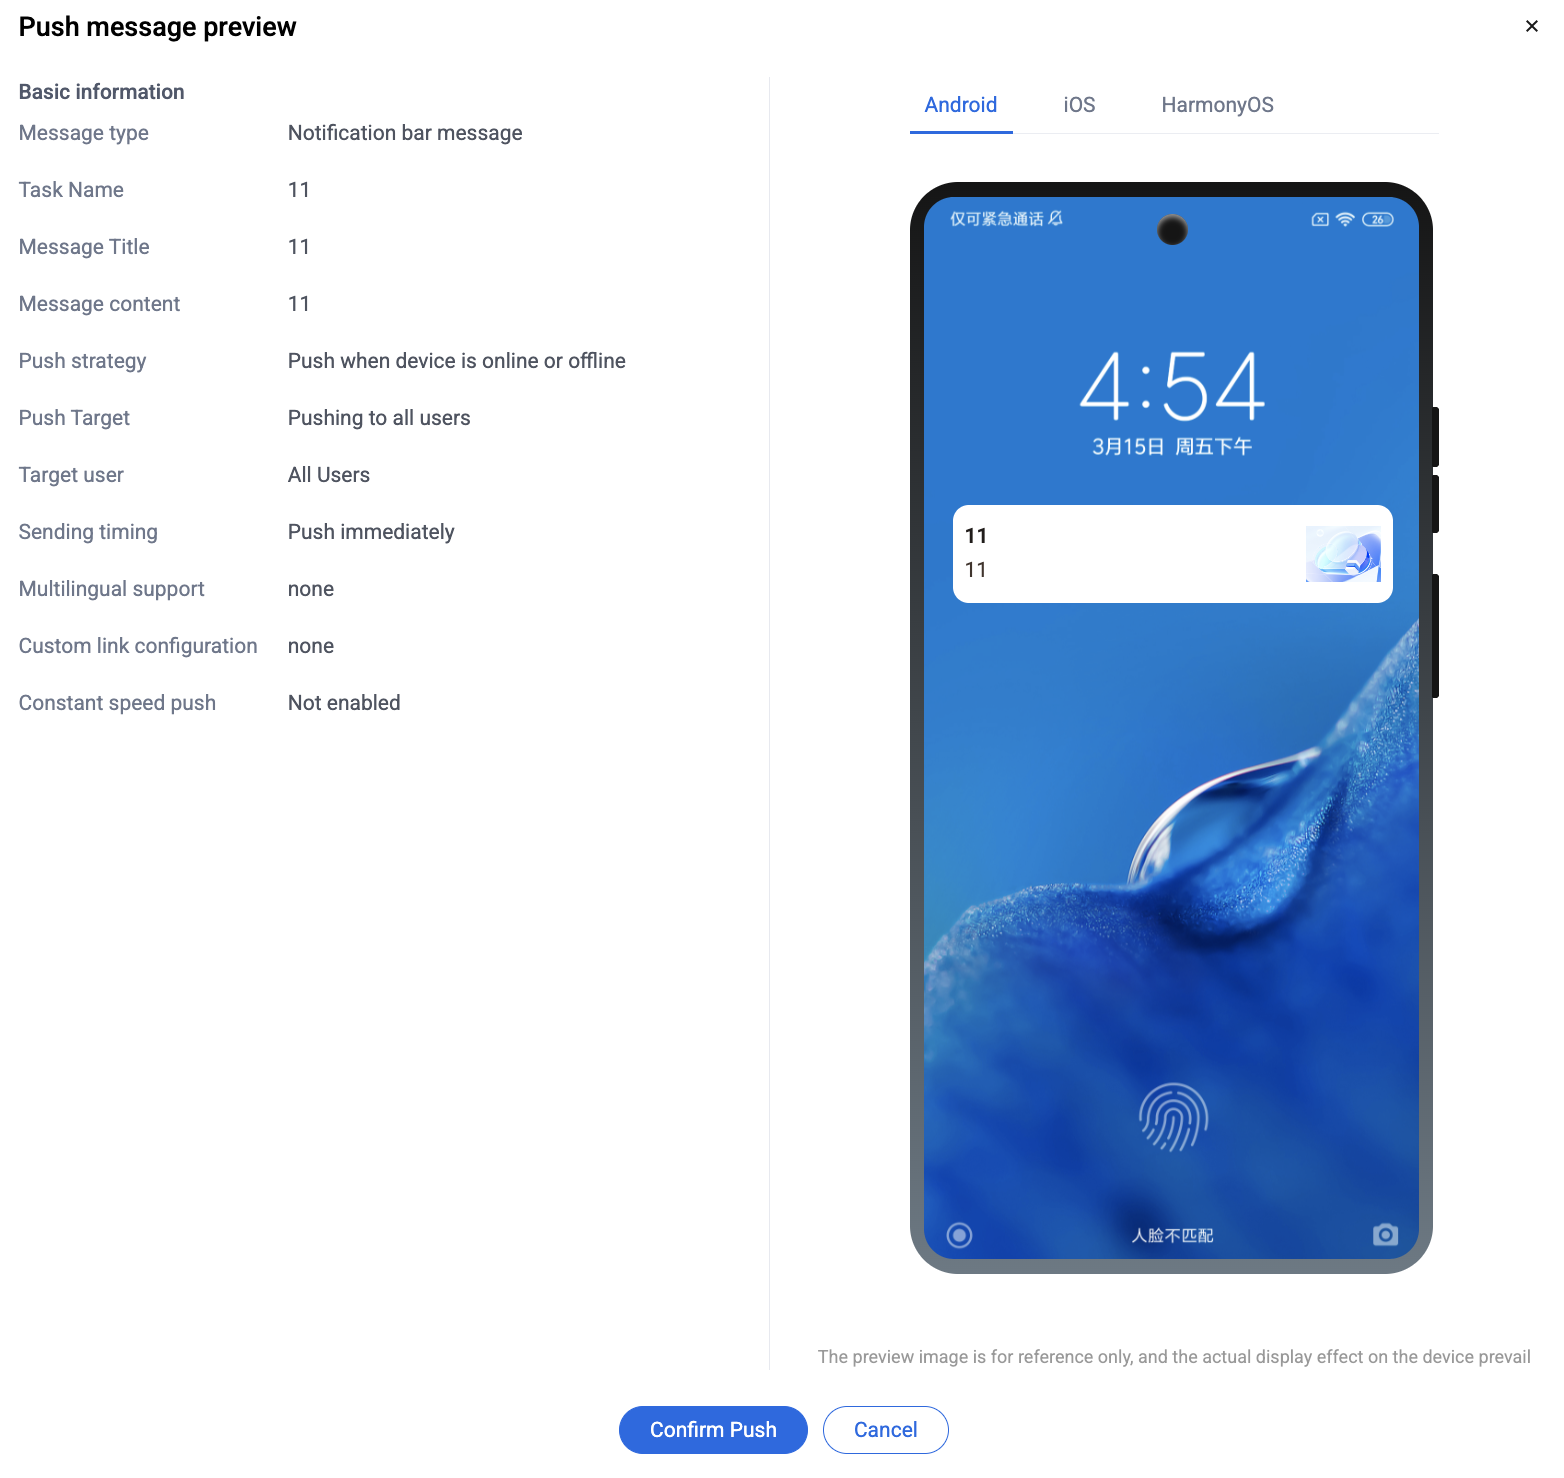
2. Using Templates on the Client Side
Refer to the push template API below for how to configure and use templates on the client. For full details, see the API List.
Feature Category | Field | Type | Usage Description |
Push Template | pushTemplateId | String | Push Template ID. The template is created in the console; specify this ID when sending from the client. |
Push Template | pushTemplateParam | JSON String | Parameters to fill the push template. Example: The template: {appName} sent you a messageYour meeting at {address} will start in {time}!Parameter content:{"appName": "TIMPush","address": "1908 Meeting Room","time": "3 minutes"} |
Usage Examples
V2TIMOfflinePushInfo v2TIMOfflinePushInfo = new V2TIMOfflinePushInfo();Map<String, Object> map = new HashMap<>();map.put("pushTemplateId", "templateid");Map<String, Object> pushTemplateParamMap = new HashMap<>();pushTemplateParamMap.put("key1", "value1");map.put("pushTemplateParam", new Gson().toJson(pushTemplateParamMap));String param = new Gson().toJson(map);v2TIMOfflinePushInfo.setVendorParams(param);
val map = mutableMapOf<String, Any>("pushTemplateId" to "templateid")val pushTemplateMap = mapOf("key1" to "value1")map["pushTemplateParam"] = Gson().toJson(pushTemplateMap)val param = Gson().toJson(map)val v2TIMOfflinePushInfo = V2TIMOfflinePushInfo()v2TIMOfflinePushInfo.vendorParams = param
NSMutableDictionary *map = [@{@"pushTemplateId": @"templateid"} mutableCopy];NSDictionary *pushTemplateParamMap = @{@"key1": @"value1"};NSData *pushTemplateData = [NSJSONSerialization dataWithJSONObject:pushTemplateParamMap options:0 error:nil];NSString *pushTemplateJson = [[NSString alloc] initWithData:pushTemplateData encoding:NSUTF8StringEncoding];[map setObject:pushTemplateJson forKey:@"pushTemplateParam"];NSData *paramsData = [NSJSONSerialization dataWithJSONObject:map options:0 error:nil];NSString *params = [[NSString alloc] initWithData:paramsData encoding:NSUTF8StringEncoding];V2TIMOfflinePushInfo *v2TIMOfflinePushInfo = [[V2TIMOfflinePushInfo alloc] init];v2TIMOfflinePushInfo.vendorParams = params;
var map: [String: Any] = ["pushTemplateId": "templateid",]let pushTemplateParamMap: [String: String] = ["key1": "value1"]if let pushTemplateData = try? JSONSerialization.data(withJSONObject: pushTemplateParamMap),let pushTemplateJson = String(data: pushTemplateData, encoding: .utf8) {map["pushTemplateParam"] = pushTemplateJson}let paramsData = try! JSONSerialization.data(withJSONObject: map)let params = String(data: paramsData, encoding: .utf8)!let v2TIMOfflinePushInfo = V2TIMOfflinePushInfo()v2TIMOfflinePushInfo.vendorParams = params;
#include <sstream>#include <string>V2TIMOfflinePushInfo offline_push_info;std::ostringstream param;// Build main structparam << "{";param << "\\"pushTemplateId\\":\\"templateid\\",";// Build pushTemplateParam JSON stringstd::string push_template_json = "{\\"key1\\":\\"value1\\"}";param << "\\"pushTemplateParam\\":\\"";for (const char c : push_template_json) {if (c == '"') param << '\\\\';param << c;}param << "\\"}";offline_push_info.vendorParams = param.str();
フィードバック