A subnet is a network space in a VPC, which carries all the cloud resource deployments. A VPC has at least one subnet. A subnet will be created together with the VPC. You can also create more subnets in a VPC according to your business needs.
A subnet is specific to an availability zone. A VPC allows subnets in different availability zones, and these subnets can communicate with each other via a private network by default. This document guides you through how to create a subnet in a VPC.
2. Click Subnet on the left sidebar to access the management page.
3.
Select
the region and VPC in which the subnet will be created and click +New.
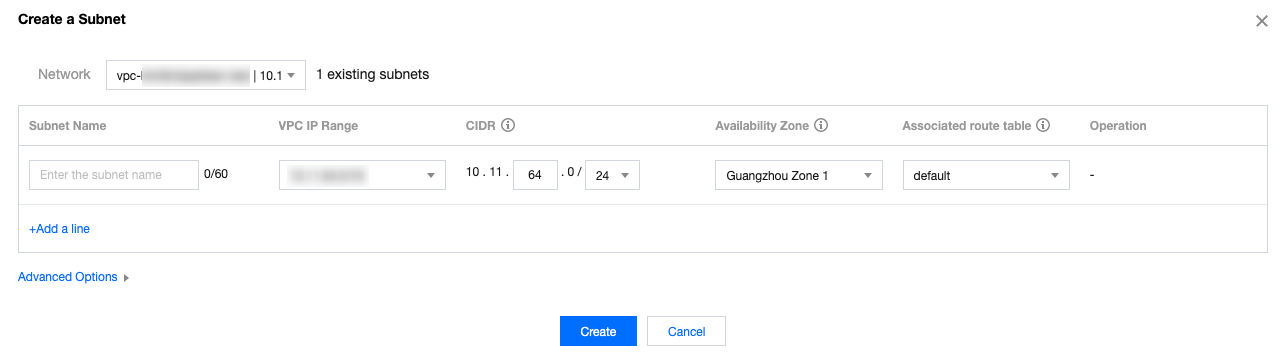
4. Configure the subnet parameters in the pop-up dialog box.
Network: the VPC where the subnet resides. The VPC selected in step 3 will be automatically displayed. Alternatively, you can select a VPC from the drop-down list.
Subnet Name: enter a custom subnet name within 60 characters.
VPC IP Range: the CIDR block of the selected VPC will be automatically displayed.
CIDR: set the CIDR block of the subnet, which must be part of the VPC CIDR block and cannot overlap with the CIDR block of other existing subnets under the VPC.
Note:
Plan subnet IP ranges that suit your business scale. A private IP address within the specified subnet will be automatically assigned to the CVM instance you are creating. The primary private IP of a CVM can be modified.For more information, see Modifying Primary Private IP.
Availability Zone: select an availability zone where the subnet resides.
Associated route table: select a route table to be associated. The subnet must be associated with a route table to control outbound traffic. The default route table of the VPC will be associated by default to ensure private network interconnection in the VPC. You can also select another route table within the VPC.
Add a line: click Add a line to create multiple subnets at a time. Click
to delete the selected subnet settings.
Advanced Options: you can optionally set tags for the subnet to better manage subnet resources. Click Add to set multiple tags at a time. You can click the icon in the Operation column to delete the selected tag settings.
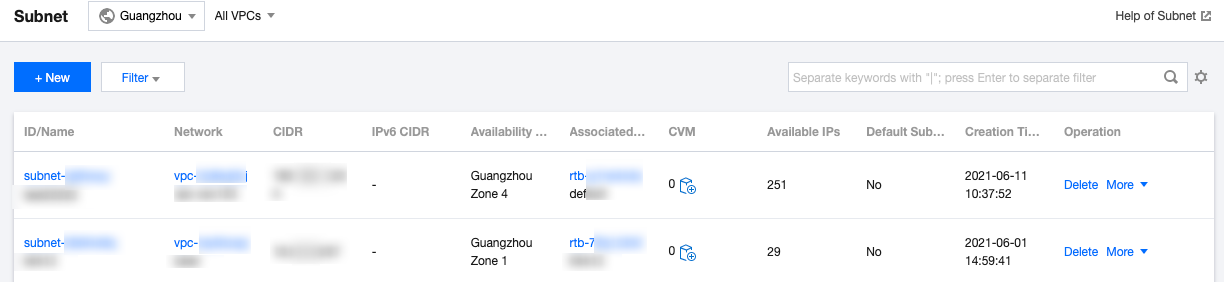
5. After completing the configurations, click Create. Then subnets that have been successfully created will be displayed in the list, as shown below.
Subsequent Operation
After creating a subnet, you can deploy resources including CVM and CLB in it.
Click the icon as shown below to directly purchase a CVM on the CVM purchase page. For more information, see Building Up an IPv4 VPC.