ポリシージェネレーターによるカスタムポリシーの作成
操作シナリオ
本ドキュメントは、異なる作成方法を通じてカスタムポリシーを作成する方法を紹介します。カスタムポリシーは細粒度の権限分割を可能にし、ユーザーの差異化された権限管理ニーズを柔軟に満たすことができます。
操作手順
ポリシージェネレーターによる作成
ポリシージェネレーターによって作成されたポリシーは、ポリシーウィザードからサービスと操作を選択し、リソースを定義することによって、ポリシー構文を自動生成します。これはシンプルで柔軟であり、優先的に推奨されます。
1. Cloud Access Management (CAM)コンソールのポリシーページで、左上の新しいカスタムポリシーをクリックします。
2. ポップアップした作成方法選択ウィンドウで、ポリシージェネレーターによる作成をクリックし、ポリシー編集ページに移動します。
3. 「ビジュアルポリシージェネレーター」のサービス選択ページで、以下の情報を補充し、権限付与声明を編集してください。(JSONを選択することもでき、ポリシー構文方式を使用してポリシーを編集します。権限付与効果はビジュアルポリシージェネレーターと同じです。)
効果(必須):許可または拒否を選択します。
サービス(必須):権限付与対象のプロダクトを選択します。
操作(必須):権限付与する操作を選択します。
リソース(必須):すべてのリソースまたは権限付与する特定のリソースを選択します。権限付与粒度が操作レベルまたはサービスレベルのクラウド製品は、具体的なリソースの6セグメント形式の記入をサポートしておらず、すべてのリソースを選択すればよいです。権限付与粒度がリソースレベルのクラウド製品は、特定のリソースを選択できます。リソースの記述方法については、CAMをサポートする製品の該当製品の「CAMガイド」ドキュメントを参照してください。クラウド製品でサポートされている権限付与の粒度については、CAMをサポートする製品の「権限付与粒度」を参照してください。
条件(任意):上記の権限付与の有効条件を設定します。詳細は有効条件を参照してください。
説明:
複数のサービスをサポートするには、権限を追加をクリックして、続けて複数の権限付与声明を追加し、別のサービスに対する権限ポリシーを設定できます。
1つのポリシーに複数のステートメントを追加可能です。
4. ポリシー権限付与声明の編集が完了したら、次へをクリックして、基本情報およびユーザー/ユーザーグループの関連ページに移動します。
5. 関連ユーザー/ユーザーグループページで、ポリシー名と説明情報を補充し、同時にユーザーまたはユーザーグループを関連付けて迅速に権限を付与できます。
説明:
関連ユーザー/ユーザーグループページで、ポリシー名と説明情報を補充し、同時にユーザーまたはユーザーグループを関連付けて迅速に権限を付与できます。
6. 完了をクリックして、ポリシージェネレーターを使用してカスタムポリシーの作成操作を完了します。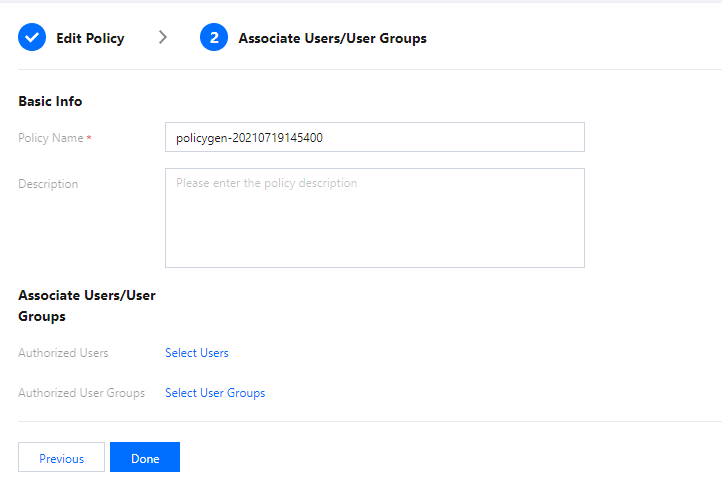
フィードバック