Flutter
Download
포커스 모드
폰트 크기
Prerequisites
1. Environment Requirements
Flutter >= 3.3.0
2. Acquiring the SDK
Download the TAVMagicFlutter compressed package. After extracting the TAVMagicFlutter folder, you may proceed with the integration process.
3. Applying for a License
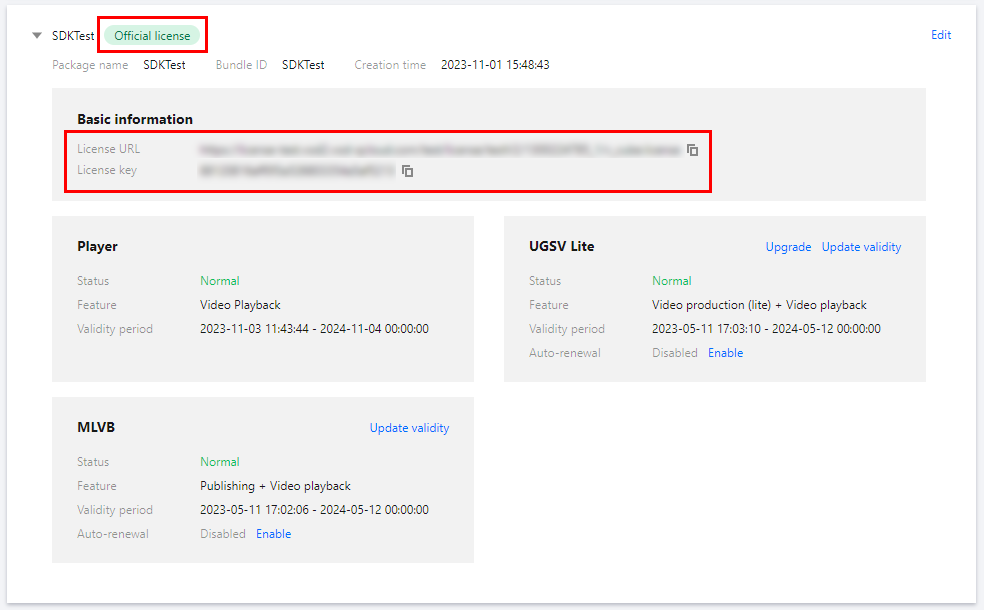
Please refer to the License Application Guide to obtain your License. After successful application, you may copy the License Key and License URL from the License Management page in either the CSS console or the VOD console, as illustrated below:
Integrating the SDK
Here are the steps to integrate TAVMagicCutFlutter. You may also directly reference the code in the example project.
1. Adding Dependencies
1. Copy
TAVMagicCutFlutter to the project root directory, or place it in any other accessible directory based on your project structure requirements.2. Add the dependency in the project's
pubspec.yaml file and specify the SDK directory, using the root directory as an example.tavmagic_cut_flutter:path: ./TAVMagicCutFlutter/Flutter
2. Copy Special Effects Resource Materials to the Project
To utilize the same asset resources (stickers, filters, effects, music, templates) as demonstrated, you may copy and drag the
Resource asset package from the example into your application project directory.Android
Copy the
resource directory from Resource/Android to the src/main/assets folder of your Flutter project's main Android module (typically named app). If the assets directory does not exist, please create it manually.iOS
Copy the
Resource directory located under Resource/IOS to the root directory of your Flutter project's iOS main module. Then, launch Xcode and open your Flutter iOS project.Right-click on the main module folder (typically named
Runner), select Add Files to XXX, and choose the Resource folder before clicking Add.Upon adding, a dialog will appear. If no additional configurations are required for your project, generally select
Reference files in place for the Action option and Create groups for the Groups option.3. Configuring License Authentication
You may configure the URL and KEY within the initialization code of relevant business modules according to your operational requirements. Once the License is configured, the download process will be triggered immediately. Setting this during application initialization helps prevent potential performance impacts caused by on-demand downloads during actual usage.
FTAVMagicKitBase.instance.setLicense(TAV_MAGIC_LICENSE, TAV_MAGIC_KEY, listener: (errorCode, msg){if (errorCode == 0) {// success} else {// failed}});
Using the SDK
1. Album Selection
Navigation and Selection Editing
_editProcessor = await tavMagicKit().openSelectEdit(selectOptions: FTAVKitSelectorOption());
Album Selection Only
tavMagicKit().openMediaSelected((resultList) {// get media}, options: FTAVKitSelectorOption());
Album Selection Configuration
FTAVKitSelectorOption()..displayColumnCount = 3 // display Column Count..mediaCategory = FTAVMediaCategory.ALL; // media category
2. Screen Recording Editing
Capture and edit screen recordings.
_editProcessor = await tavMagicKit().openRecordEdit();
3. Draft Editing
Navigate to the draft page and proceed with editing.
_editProcessor = await tavMagicKit().openDraftListForEdit();
4. Editing
Open directly for editing
_editProcessor = await tavMagicKit().openEdit(editOption: FTAVKitEditOptions());
Parameters
editOption: Edit configurations.
mediaResultList: The selected media files can be obtained by navigating through the album selection interface.
FTAVKitEditOptions
minEditDurationUs: Minimum edit duration.
maxEditDurationUs: Maximum editing duration.
Exit Editing Mode
_editProcessor?.exitEdit();
Listen for Editing
Monitor the editing process and invoke video generation upon completion:
_editProcessor?.setEditEventListener((code, params) async {if (code == FTAVEditResultEventCode.PUBLISH) {String? editorKey = params[FTAVEditResultParamKey.EDITOR_KEY]?.toString();if (null != editorKey) {curGerTaskId = await tavMagicKit().generateVideoByEditKey(editorKey, listener: FTAVGenerateListener(onGenerateStarted: () {if (_progressController != null) {_progressController!.close();_progressController = null;}_progressController = DemoProgressController();_progressController!.show(context: context, onCancel: () {tavMagicKit().cancelGenerateByTaskId(curGerTaskId!);_progressController?.close();});},onGenerateProgress: (progress) {_progressController?.updateProgress(progress);},onGenerateCompleted: (int code, String msg, String outputPath) {_progressController?.close();if (code == FTAVGenerateResultCode.GENERATE_RESULT_SUCCEED) {////// release editor///tavMagicKit().releaseEditorByEditKey(editorKey);// jump to video pageNavigator.of(context).push(MaterialPageRoute(builder : (context) => VideoPage(outputPath),));} else {ScaffoldMessenger.of(context).showSnackBar(SnackBar(content: Text('video generate error:$code, msg:$msg')));}}));}}});
Release the Editing Object
tavMagicKit().releaseEditorByEditKey(editorKey);
5. Video Generation
Generate Video
curGerTaskId = await tavMagicKit().generateVideoByEditKey(editorKey, listener: FTAVGenerateListener(onGenerateStarted: (){},onGenerateProgress: (progress){},onGenerateCompleted: (int code, String msg, String outputPath) {}));
Cancel generation
tavMagicKit().cancelGenerateByTaskId(curGerTaskId);
피드백