レスキューモードの使用
Download
フォーカスモード
フォントサイズ
概要
CVMOSの使用中に、マシンgrubガイドファイルの消失、システムキーファイルの欠落、lib動的ライブラリファイルの破損/欠落などの問題が発生した場合は、OSが修復を完了するためにシングルユーザーモードを開始できない可能性があります。この場合はCVMレスキューモードを使用してシステムを修復する必要があります。ここではCVMコンソールを介してレスキューモードを使用する方法について説明します。
操作手順
レスキューモードの開始
ご注意:
レスキューモード開始前に、誤操作などによる影響を防止するため、インスタンスをバックアップすることを強くお勧めします。CBSでは スナップショットの作成 を介してバックアップでき、ローカルシステムディスクでは カスタムイメージの作成 を介してイメージをバックアップできます。
1. CVMコンソール にログインします。
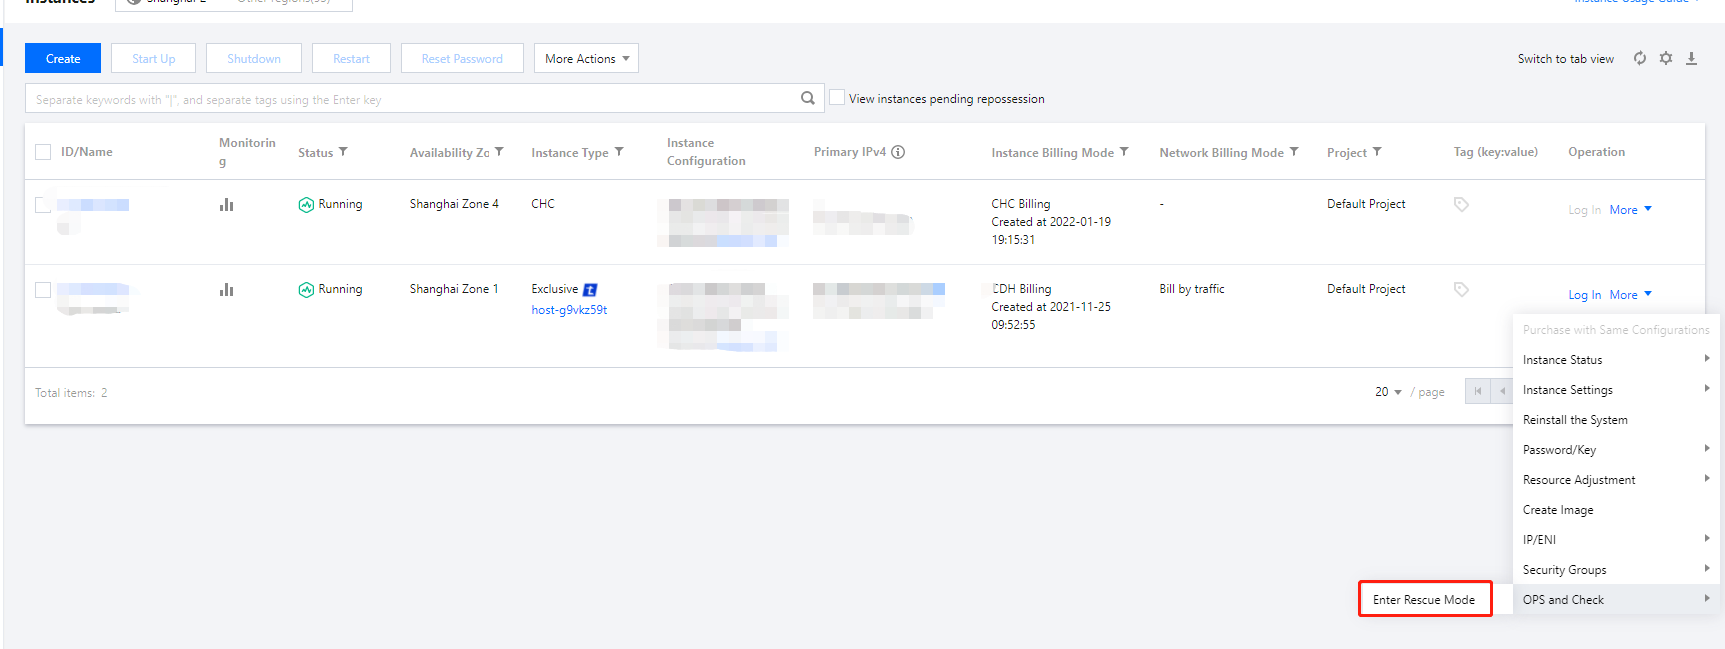
2. インスタンス管理ページで、実際に使用されているビューモードに従って操作します。
下図に示すように、インスタンスが配置される行右側のその他 > 運用保守と検査 > レスキューモードの開始を選択します。
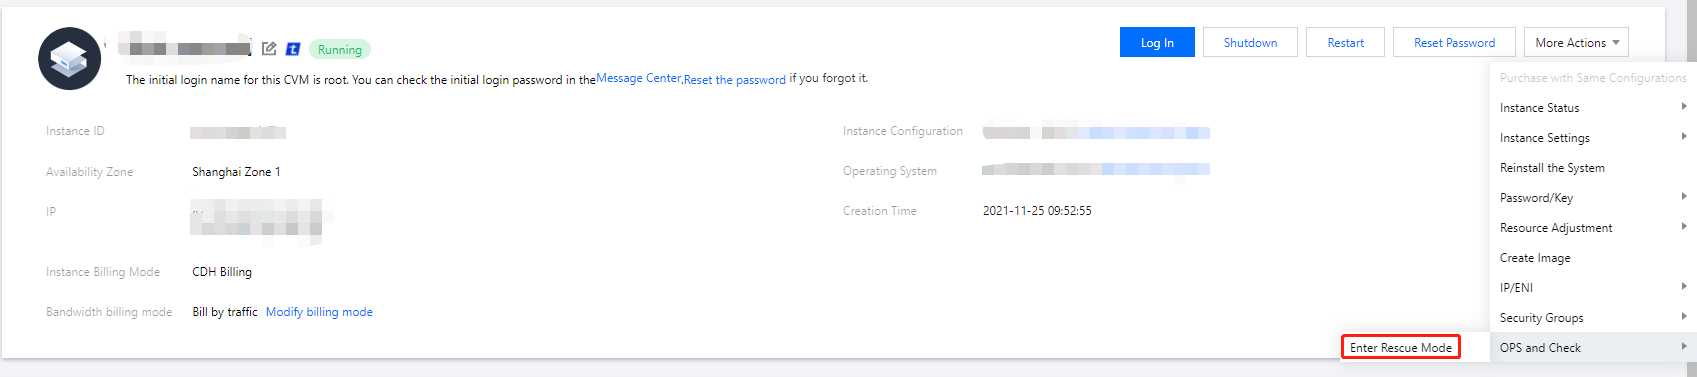
下図に示すように、インスタンスが配置されるタブを選択し、右上方のその他操作 > 運用保守と検査 > レスキューモードの開始を選択します。
3.
下図に示すように
、ポップアップした「レスキューモードの開始」ウィンドウで、レスキューモード中にインスタンスにログインするためのパスワードを設定します。ご注意:
現在、レスキューモードはLinuxインスタンスのみをサポートしており、Windows インスタンスをサポートしていません。Windowsインスタンスを操作してレスキューモードを開始する場合は、デフォルトでLinuxレスキューモード(CentOS 7.5 64ビット)になります。
レスキューモードでのインスタンスユーザー名はデフォルトで
rootです。インスタンスはシャットダウン状態でのみレスキューモードを開始できます。強制シャットダウンはデータの消失やファイルシステムの破損を引き起こす可能性がありますので、ここではインスタンスをシャットダウンした後に操作することをお勧めします。インスタンスのシャットダウン操作については、インスタンスのシャットダウン をご参照ください。
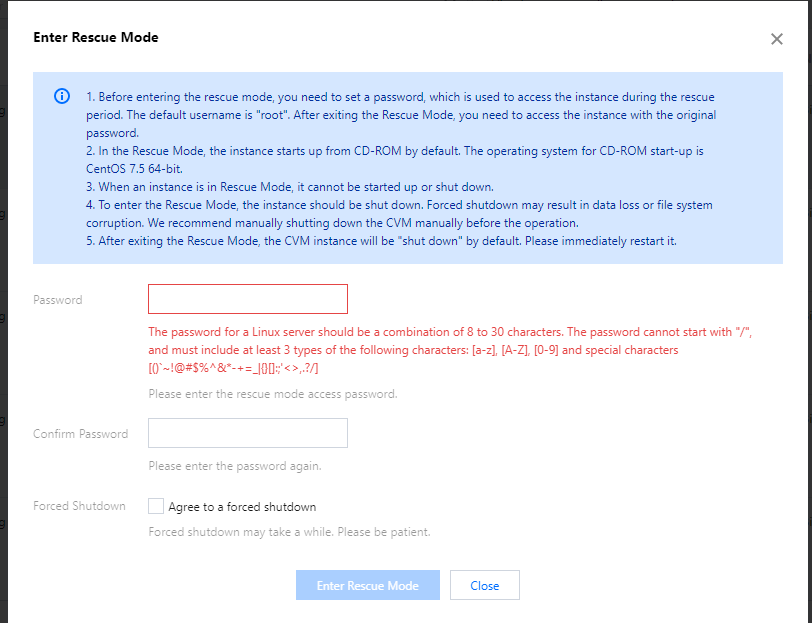
4. レスキューモードの開始をクリックします。
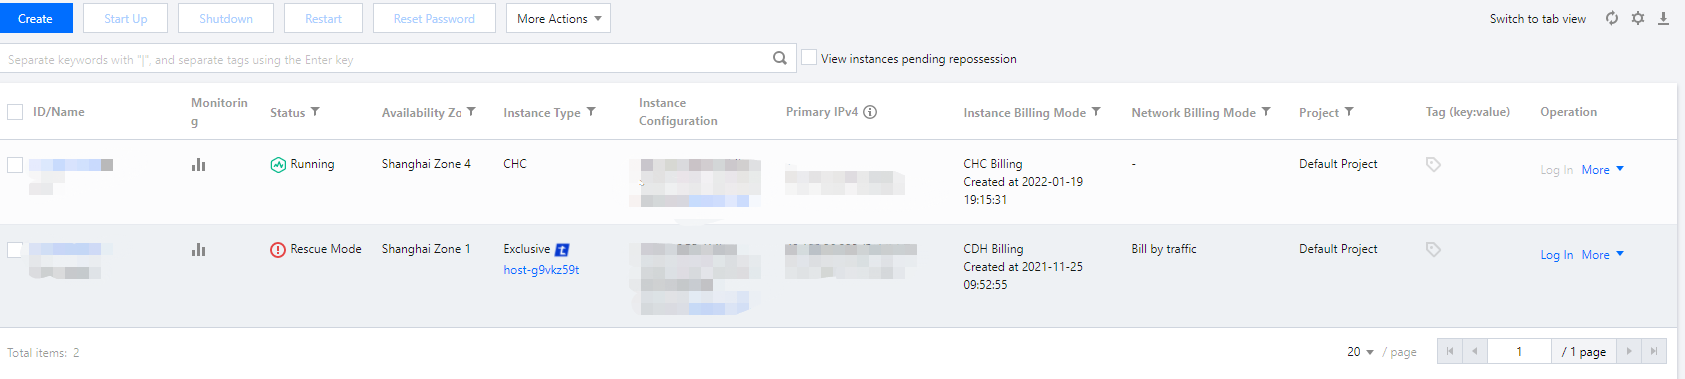
このとき、インスタンスがレスキューモードに入っていることを確認できます。下図に示すように、インスタンスの状態が表示されたら、正常にレスキューモードに入ったことを意味します。次の手順を参考に、できる限り早急にインスタンスを修復してください。
レスキューモードを使用してシステムを修復します
1.
rootアカウントおよび 手順3 で設定したパスワードを使用し、次の方式でインスタンスにログインします。インスタンスにパブリックIPが有る場合は、SSHを使用してLinuxインスタンスにログイン をご参照ください。
インスタンスにパブリックIPがない場合は、VNCを使用してLinuxインスタンスにログイン をご参照ください。
2. ログインに成功したら、次のコマンドを順に実行してシステムディスクのルートパーテーションをマウントします。
レスキューモードでのインスタンスのシステムディスクデバイス名は
vda、ルートパーテーションはvda1で、デフォルトではマウントされていません。mkdir -p /mnt/vm1
mount /dev/vda1 /mnt/vm1
マウントに成功したら、ルートパーテーション内のデータを操作できるようになります。
mount -o bindコマンドを使用して元のファイルシステムのサブディレクトリの一部をマウントし、かつchrootコマンドを使用して指定のルートディレクトリでコマンドを実行することもできます。具体的な操作コマンドは次のとおりです。mount -o bind /dev /mnt/vm1/devmount -o bind /dev/pts /mnt/vm1/dev/ptsmount -o bind /proc /mnt/vm1/procmount -o bind /run /mnt/vm1/runmount -o bind /sys /mnt/vm1/syschroot /mnt/vm1 /bin/bash
レスキューモードの終了
1. インスタンスの修復が完了したら、実際に使用するビューモードに応じて、次の手順に従いレスキューモードを終了します。
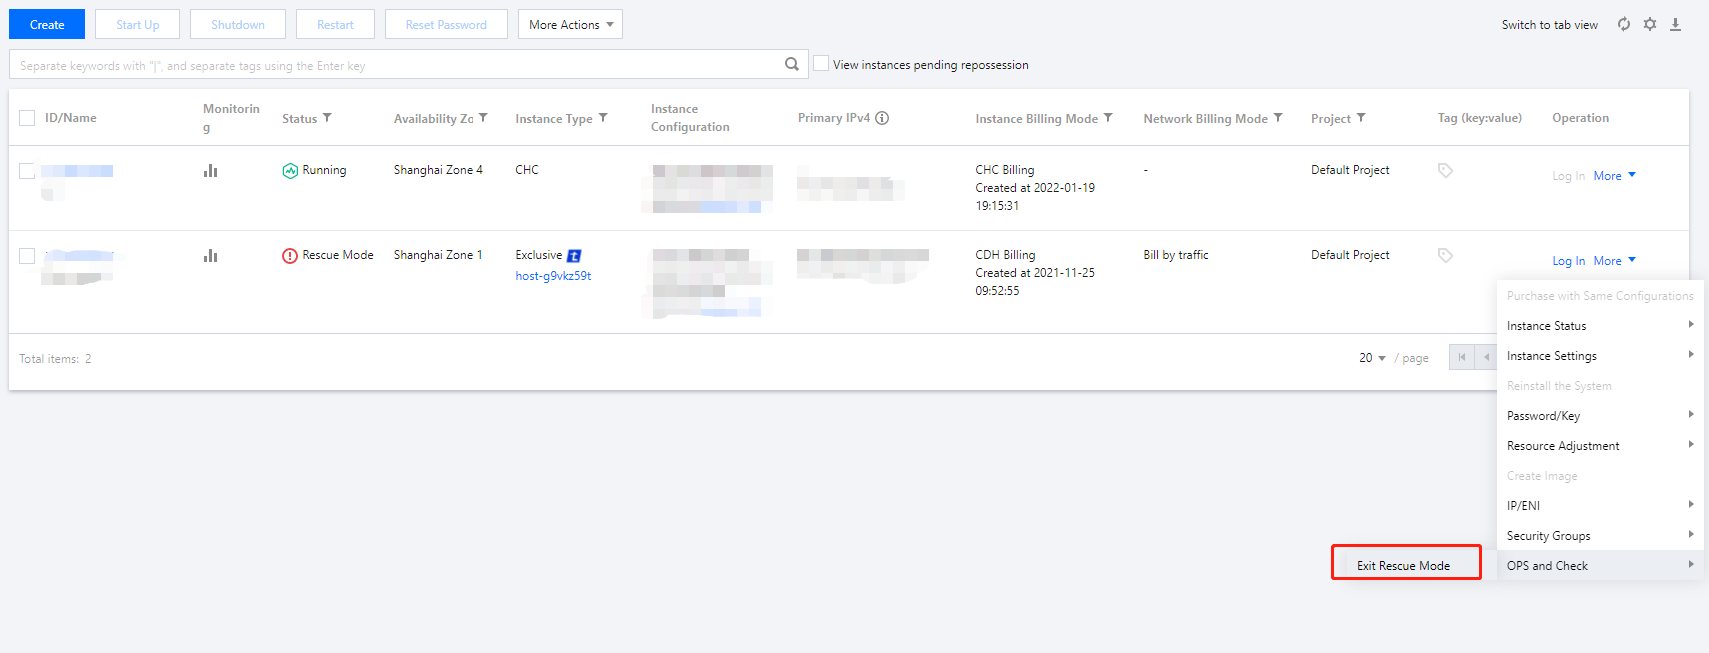
下図に示すように、インスタンスが配置される行右側のその他 > 運用保守と検査 > レスキューモードの終了を選択します。
下図に示すように、インスタンスが配置されるタブを選択し、右上方のその他操作 > 運用保守と検査 > レスキューモードの終了を選択します。

2. インスタンスがレスキューモードを終了すると、シャットダウン状態になります。インスタンスの起動 を参考に起動すれば、使用を再開できます。
フィードバック