Using Anti-DDoS
Unduh
Mode fokus
Ukuran font
Overview
Anti-DDoS provides comprehensive, efficient, and professional protection against DDoS attacks. It offers multiple solutions, including Anti-DDoS Pro and Anti-DDoS Advanced for enterprises to handle DDoS attacks. With sufficient and high-quality anti-DDoS resources and continuously evolved "self-developed + AI-based intelligent identification" cleaning algorithms, Anti-DDoS ensures stable and secure operations of users' businesses.
The public network CLB of Cloud Native Gateway provides basic Anti-DDoS protection by default. For a higher level of protection, you can purchase an Anti-DDoS Advanced product and bind it to the Cloud Native Gateway to enjoy more secure services.
Operation Steps
Step 1: Purchasing an Anti-DDoS Instance
The gateway provides basic Anti-DDoS protection of up to 2 Gbps for all added public network CLB instances by default. For higher-level protection, you can purchase Anti-DDoS Pro or Anti-DDoS Advanced. Anti-DDoS offers multiple protection solutions for different scenarios. See Anti-DDoS Solution Comparison to choose the one that fits your needs.
Step 2: Binding the Protection Instance to Gateway Resources
Scenario 1: Using Anti-DDoS Advanced
Scenario 2: Using Anti-DDoS Pro
1. Go to the Anti-DDoS console, click Cloud Asset List, select Cloud Native Gateway, and confirm the region.
2. In Asset IP, select the public network CLB IP address that requires Anti-DDoS protection, and click Add Protection on the right.
3. In the Add Protection dialog box, select the Anti-DDoS Pro instance to bind, and click OK.
4. Confirm that in the asset list, the protection type has been updated to Anti-DDoS Pro, and the maximum protection capability is Full Protection.
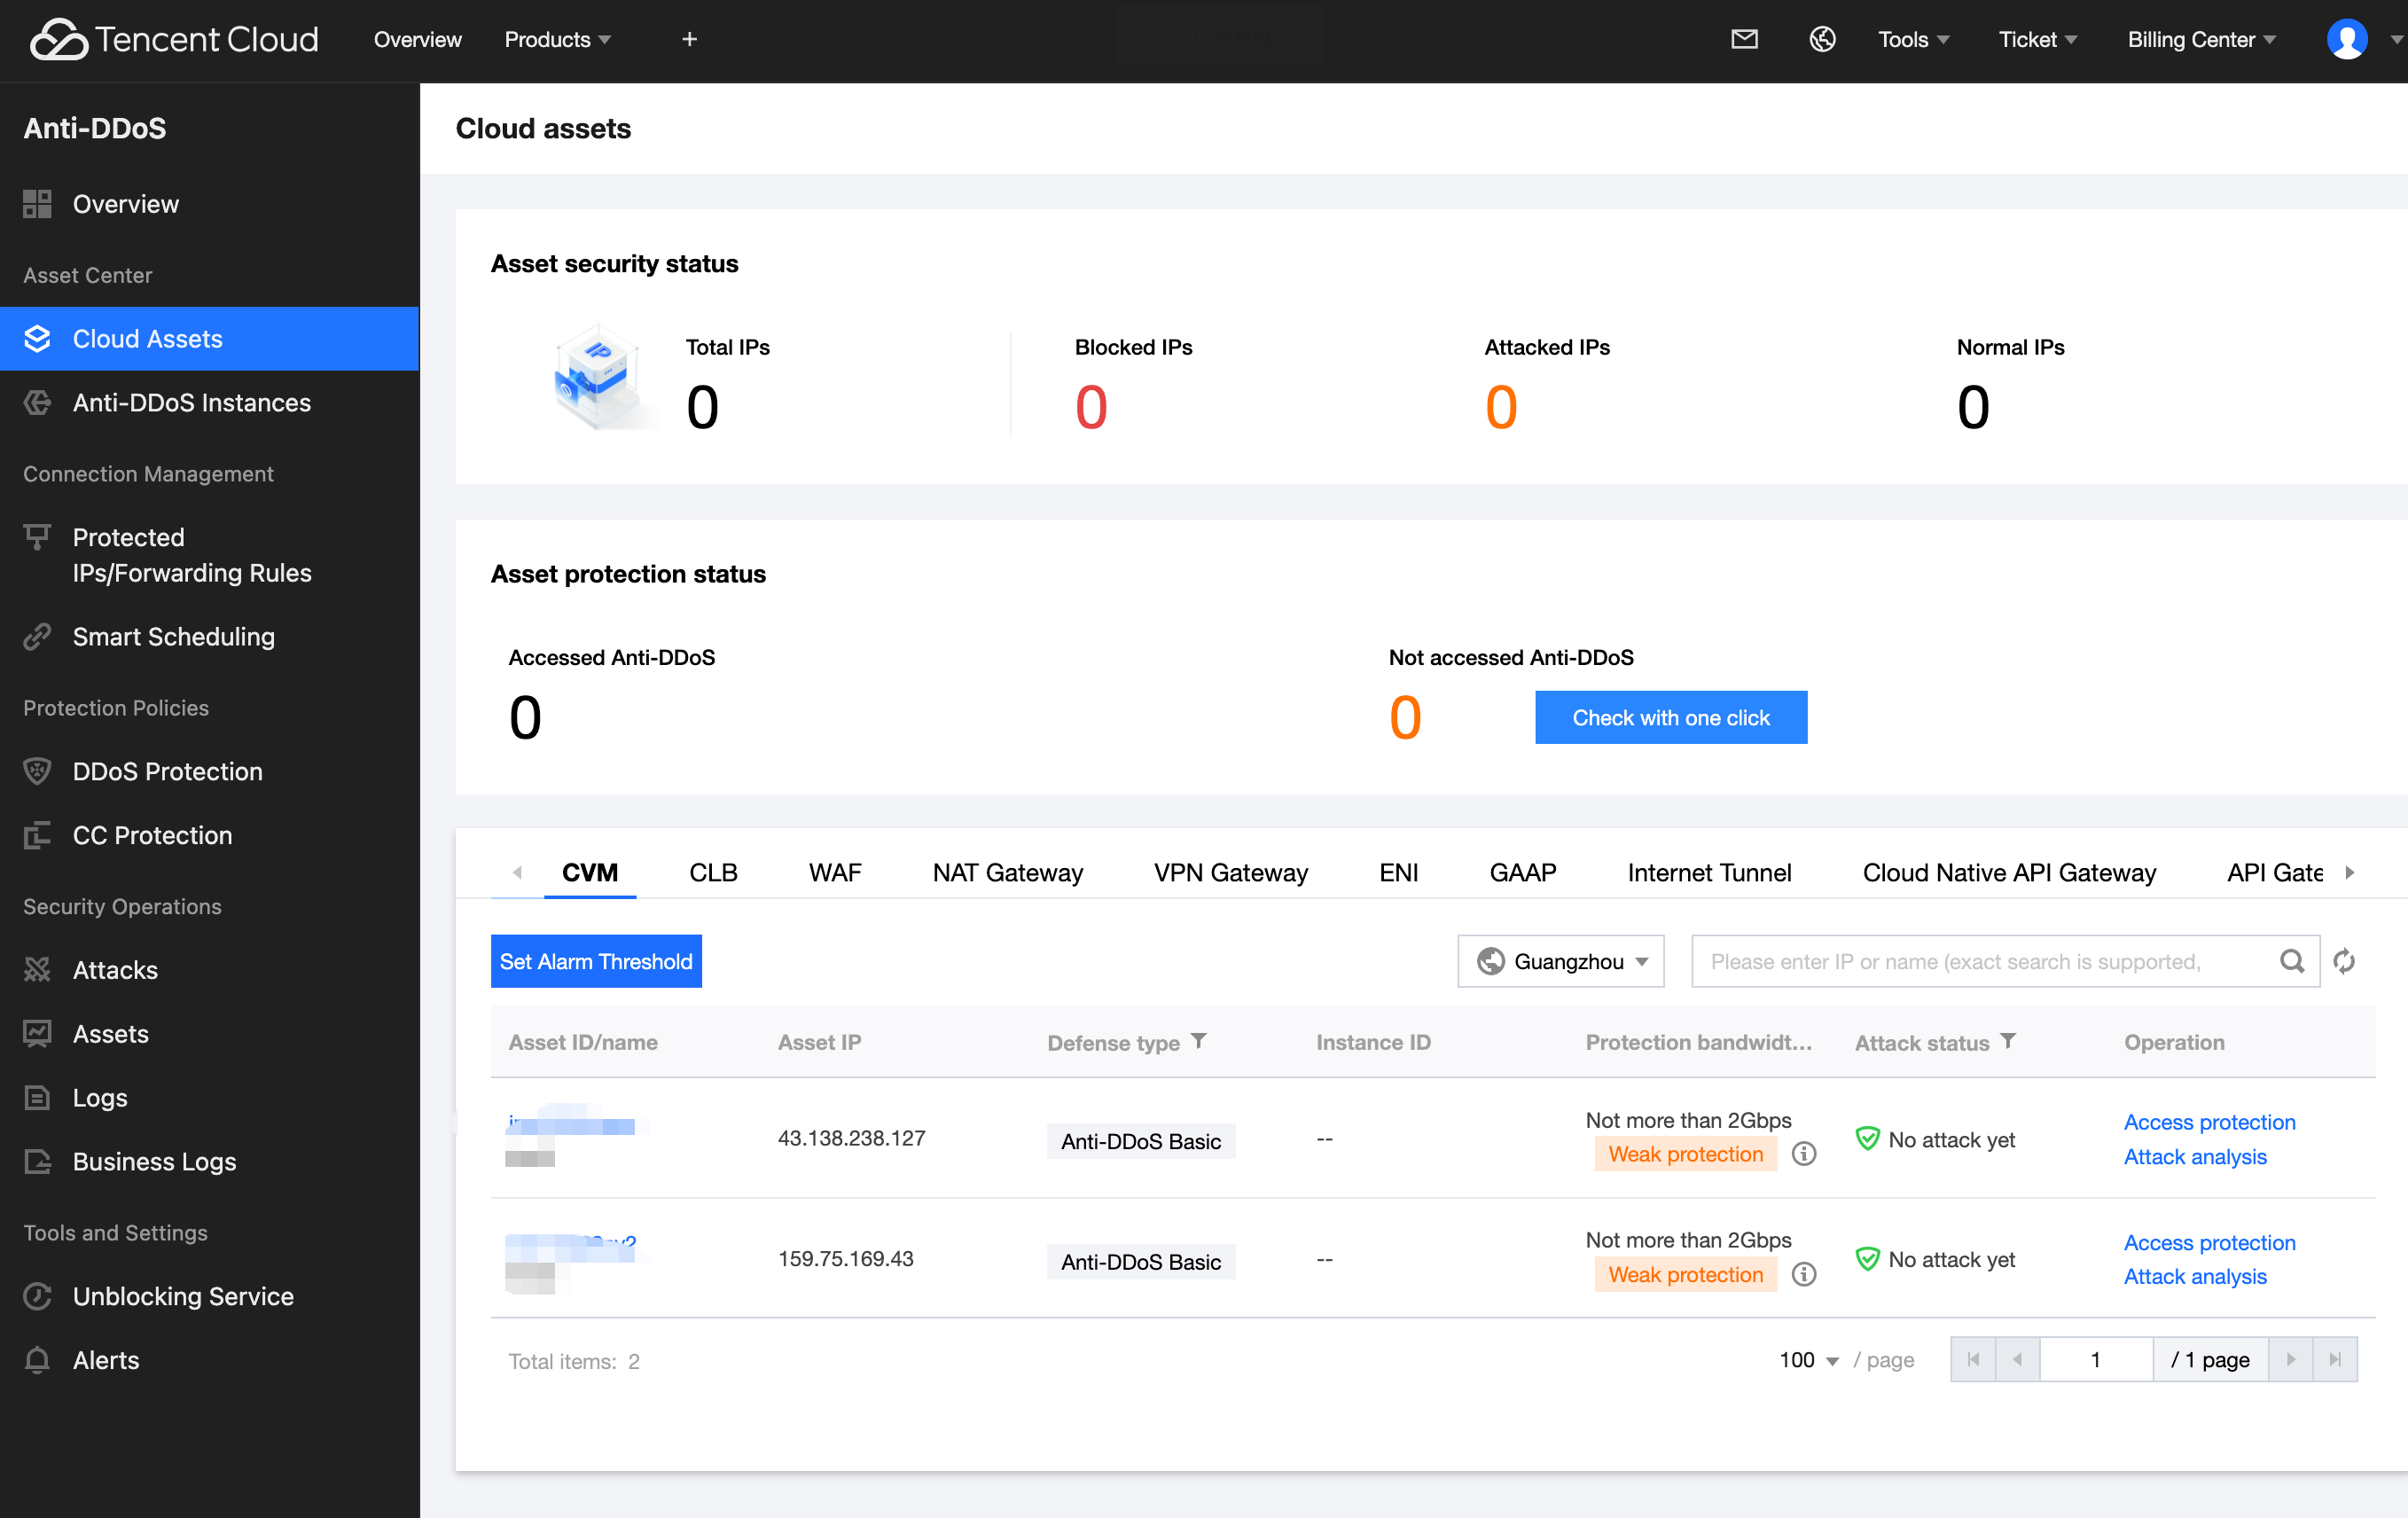
5. In the Cloud Native Gateway console, click the instance ID to go to the instance details page. Select Security Protection, go to the Anti-DDoS tab, and confirm the resources associated with the current Anti-DDoS Pro instance.
Step 3: Viewing/Configuring the Protection Policy
Bantuan dan Dukungan
Apakah halaman ini membantu?
Anda juga dapat Menghubungi Penjualan atau Mengirimkan Tiket untuk meminta bantuan.
masukan