tencent cloud

TencentDB for PostgreSQL

Release Notes and Announcements
Release Notes
Product Announcements
Product Introduction
Overview
Features
Strengths
Scenarios
Information Security
Regions and AZs
Product Feature List
Large version lifecycle description
MSSQL Compatible Version
Billing
Billing Overview
Instance Type and Specification
Purchase Methods
Refund
Overdue Payments
Backup Space Billing
Database Audit Billing Overview
Getting Started
Creating TencentDB for PostgreSQL Instance
Connecting to TencentDB for PostgreSQL Instance
Managing TencentDB for PostgreSQL Instance
Importing Data
Migrating Data with DTS
Kernel Version Introduction
Kernel Version Overview
Kernel Version Release Notes
Viewing Kernel Version
Proprietary Kernel Features
Database Audit
Audit Service Description
Activating Audit Service
View Audit Logs
Modify audit services
Audit Performance Description
User Guide
Instance Management
Upgrading Instance
CPU Elastic Scaling
Read-Only Instance
Account Management
Database Management
Parameter Management
Log Management and Analysis
Backup and Restoration
Data Migration
Extension Management
Network Management
Access Management
Data Security
Tenant and Resource Isolation
Security Groups
Monitoring and Alarms
Tag
AI Practice
Using the Tencentdb_ai Plug-In to Call Large Models
Building Ai Applications with the Tencentdb Ai Plug-In
Combining Supabase to Quickly Build Backend Service Based on TencentDB for PostgreSQL
Use Cases
postgres_fdw Extension for Cross-database Access
Automatically Creating Partition in PostgreSQL
Searching in High Numbers of Tags Based on pg_roaringbitmap
Querying People Nearby with One SQL Statement
Configuring TencentDB for PostgreSQL as GitLab's External Data Source
Supporting Tiered Storage Based on cos_fdw Extension
Implement Read/Write Separation via pgpool
Implementing Slow SQL Analysis Using the Auto_explain Plugin
Using pglogical for Logical Replication
Using Debezium to Collect PostgreSQL Data
Set Up a Remote Disaster Recovery Environment for PostgreSQL Locally on CVM
Read-Only Instance and Read-Only Group Practical Tutorial
How to Use SCF for Scheduled Database Operations
Fix Table Bloat
Performance White Paper
Test Methods
Test Results
API Documentation
History
Introduction
API Category
Making API Requests
Instance APIs
Read-Only Instance APIs
Backup and Recovery APIs
Parameter Management APIs
Security Group APIs
Performance Optimization APIs
Account APIs
Specification APIs
Network APIs
Data Types
Error Codes
FAQs
Service Agreement
Service Level Agreement
Terms of Service
Glossary
Contact Us

Restarting Instances

PDF
Mode fokus
Ukuran font
Terakhir diperbarui: 2025-08-05 11:22:59
Restart is indispensable to the maintenance of databases. Restarting a PostgreSQL instance is equivalent to restarting a database (service and process) on a local server.

Notes

Please exercise great caution when restarting a database, which plays a vital role in the business. Before the restart, it is recommended to disconnect the database from server and stop writing data.
Restarting an instance does not change its physical attributes, so the public IP, private IP, and any data stored on the instance will remain unchanged.
After the restart, reconnection to the database is needed. Please make sure your business has a reconnection mechanism.
Be sure to restart the instance during off-hours so as to ensure success and reduce impact on your business.

Directions

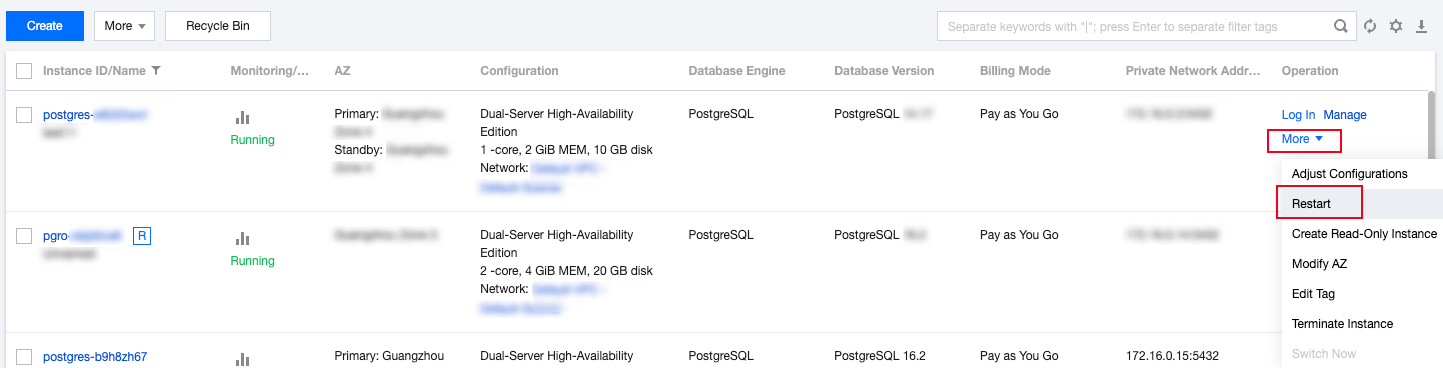
1. Log in to the TencentDB for PostgreSQL console, locate the desired instance in the instance list, and click More > Restart in the Operation column.
Note:
Generally, it takes a few seconds to minutes to restart an instance, during which the instance cannot be accessed and existing connections to it will be closed.
Restart will fail if there are a large number of writes and dirty pages during the restart. In this case, the instance will roll back to the status before the restart and can still be accessed.
There is a chance of failure in restarting a database. If it takes more than 10 minutes to restart, you can submit a ticket for help.

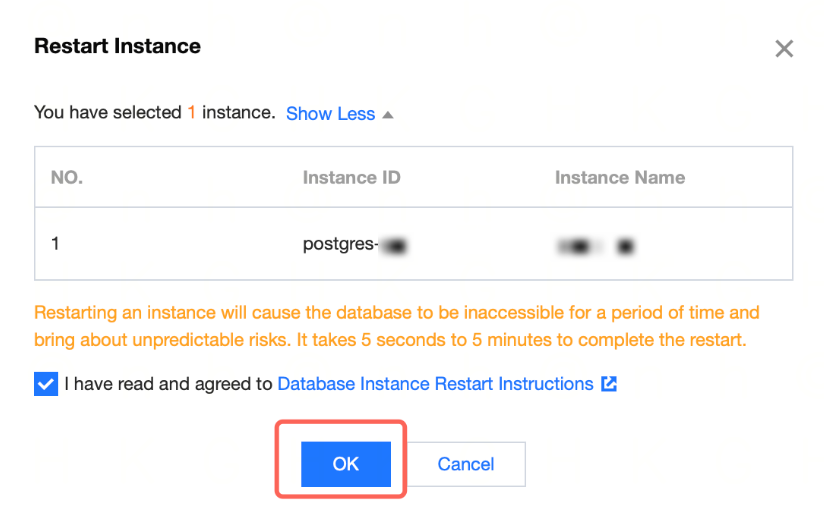
2. In the pop-up dialog box, indicate your consent and click OK.


Bantuan dan Dukungan

Apakah halaman ini membantu?

masukan