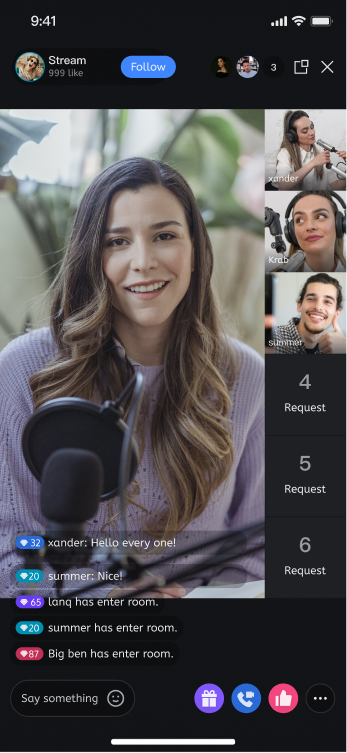
UILiveKit's host streaming page offers a comprehensive, ready-to-use interface for live streaming scenarios. It enables rapid integration of essential features for hosts to start streaming, allowing you to efficiently build your live streaming workflow without the complexity of custom UI or business logic.
Note:
This guide covers the host start process using UI components (including a complete interactive UI). If you prefer to build your own host interface with the Core SDK, see Host Start (Core SDK).
Feature Overview
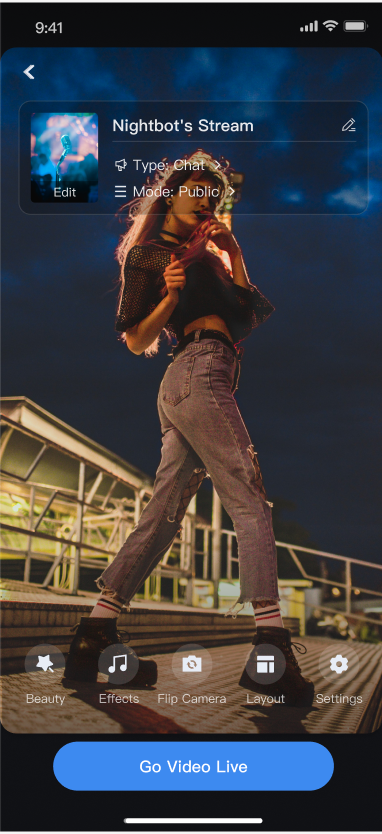
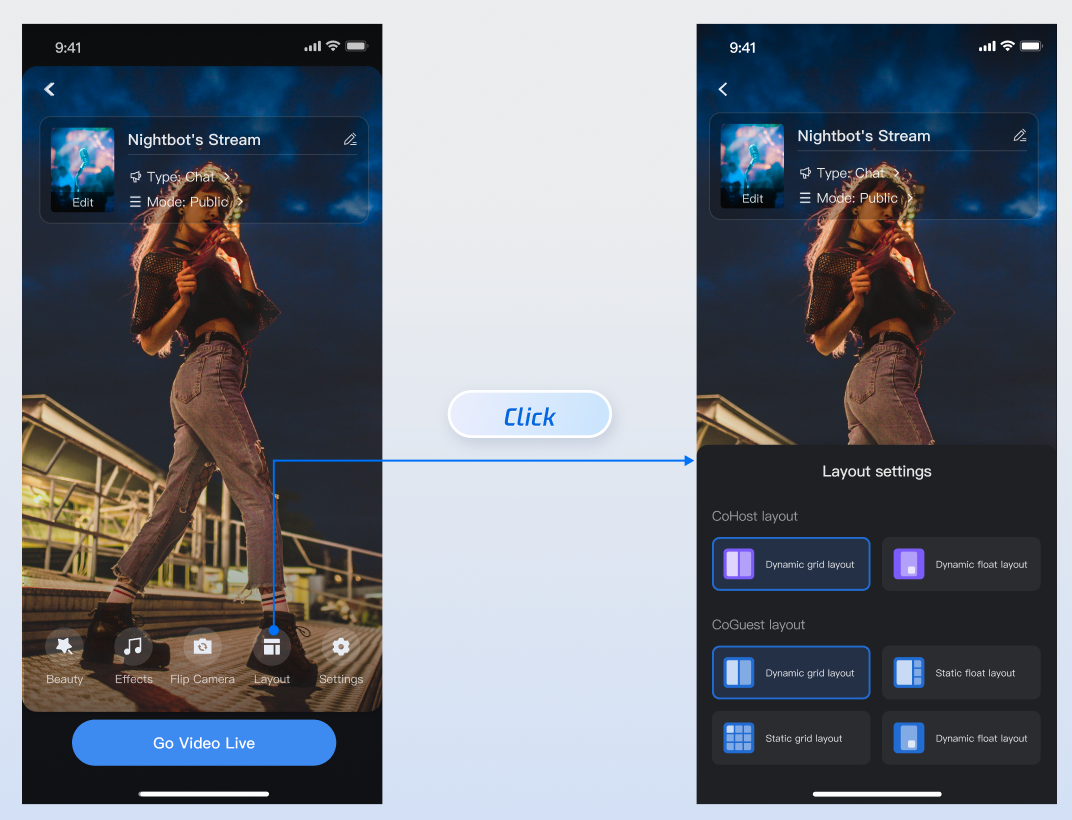
Pre-Stream Preview: Configure room name, background, video preview, beauty effects, audio effects, layout templates, and more before going live.
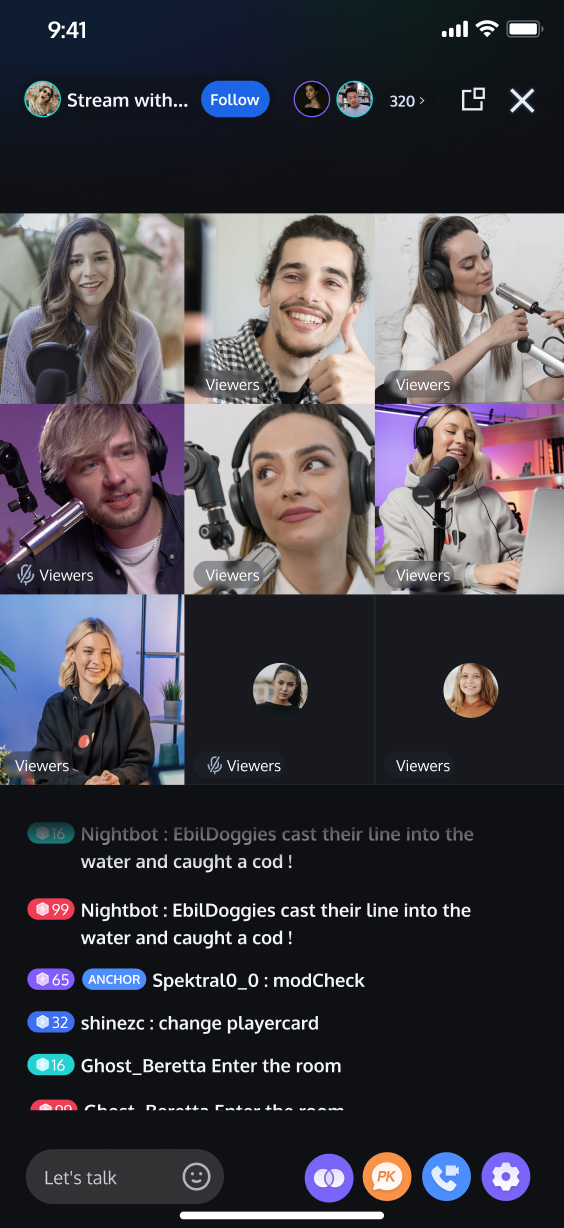
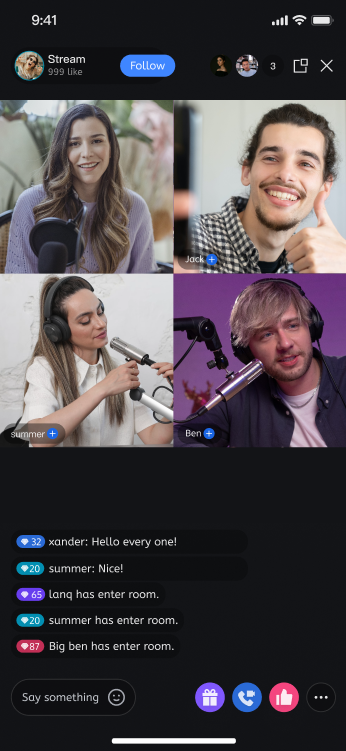
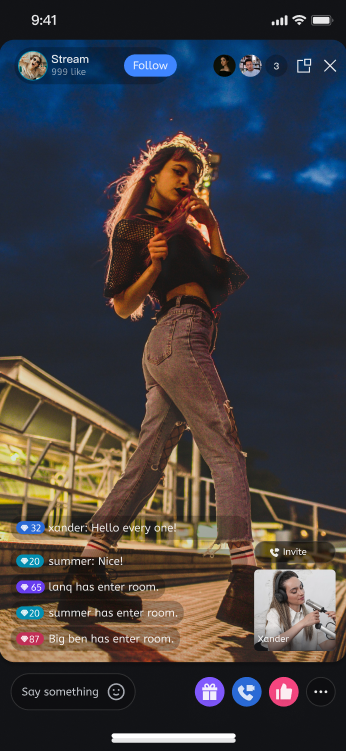
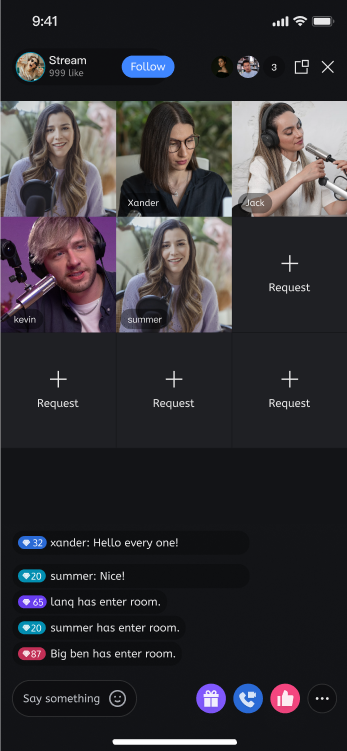
Co-hosting Interaction: Engage in real-time with audience members or other hosts across different live rooms during the stream.
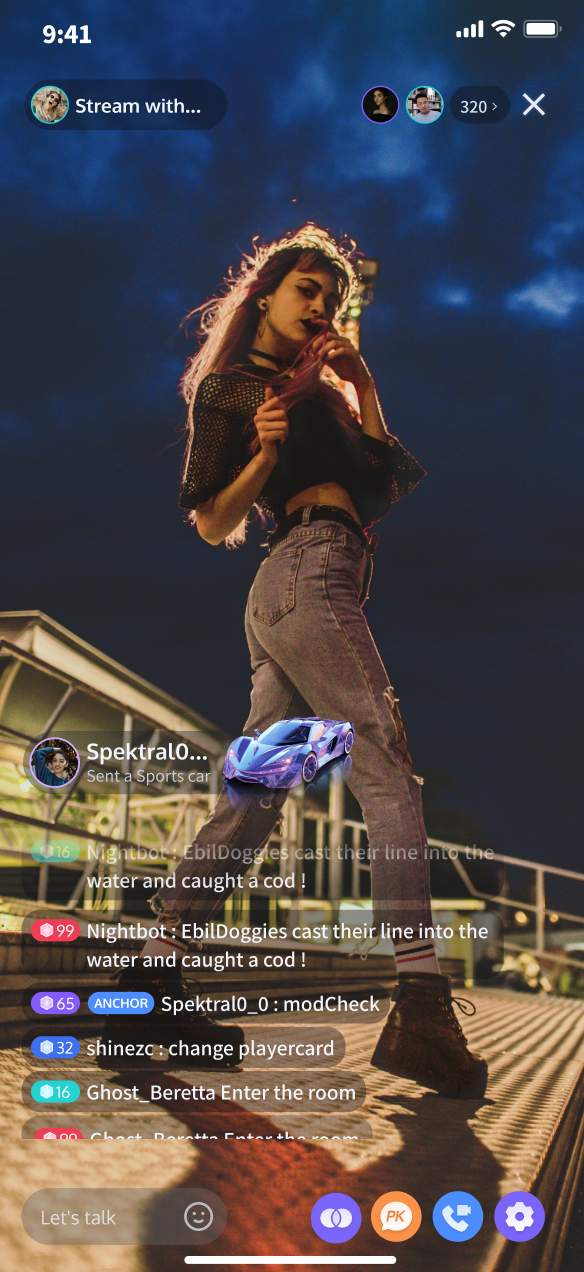
Audience Interaction: Includes rich engagement features such as live comments and gift support.
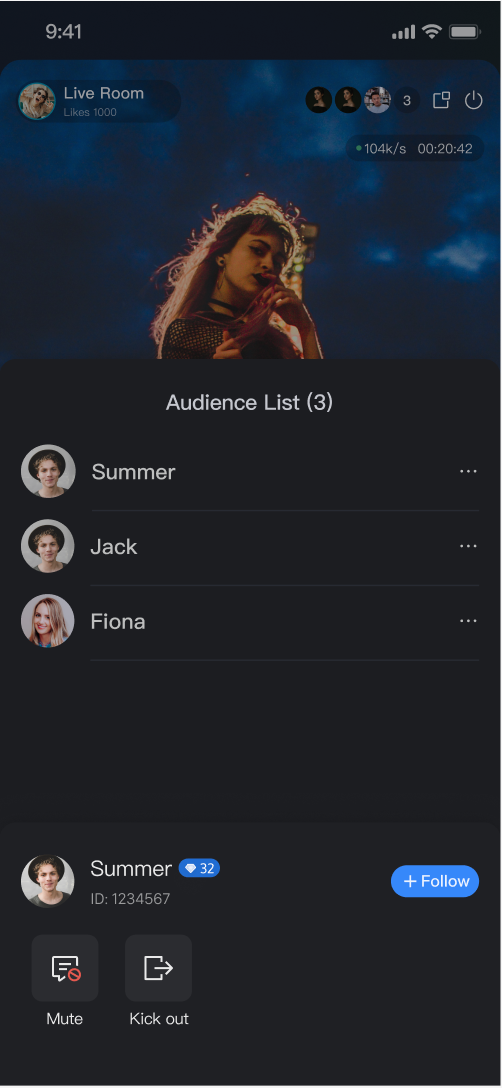
Live Room Management: View the online user list and manage participants with actions like muting or removing users from the live room.
Pre-stream Setup
Co-Host Interaction
Audience Interaction
Live Room Management
Quick Integration
Step 1. Activate the Service
Refer to the Activate Service document to enable the trial version or activate the Pro Edition package.
Step 2. Integrate the SDK
Refer to Preparations guide to integrate the TUILiveKit SDK.
Step 3. Add the Pre-stream Preparation Page
The AnchorPrepareView component includes camera preview, audio effect settings, layout configuration, and other built-in features. Create and load the host streaming preparation view as shown below:
Swift
importUIKit
importSnapkit
importTUILiveKit
importAtomicXCore
// YourAnchorPrepareViewController represents the view controller for loading the host start page
// Pass roomId when initializing AnchorPrepareView
let view =AnchorPrepareView(roomId: roomId)
return view
}()
publicoverridefuncviewDidLoad(){
super.viewDidLoad()
// Add prepareView to the view
view.addSubview(prepareView)
prepareView.snp.makeConstraints { make in
make.edges.equalToSuperview()
}
}
}
Step 4. Add the Host Streaming Page
The AnchorView component brings together audio/video streaming, audience co-hosting, interactive features, and live room management. Simply create and load AnchorView as shown below:
Swift
importUIKit
importSnapkit
importTUILiveKit
importAtomicXCore
// YourAnchorPrepareViewController represents the view controller for loading the host start page
fatalError("init(coder:) has not been implemented")
}
publicoverridefuncviewDidLoad(){
super.viewDidLoad()
// Add anchorView to the view
view.addSubview(anchorView)
anchorView.snp.makeConstraints { make in
make.edges.equalToSuperview()
}
}
}
Step 5. Event Callback Customization
AnchorView supports a delegate (AnchorViewDelegate) for listening to core lifecycle events such as successful live start, stream end with statistics, floating window clicks, and more. Set the delegate after creating AnchorView in Step 4:
Method
Description
func onStartLiving()
Called when the host has successfully started streaming (room created/joined, streaming started).
func onEndLiving(state: AnchorState)
Called when the host ends the stream. state includes live statistics: totalDuration (duration), totalViewers(audience count), totalMessageSent (live comments), totalGiftCoins (gift revenue), totalGiftUniqueSenders (gifters), totalLikesReceived (likes), liveEndedReason (end reason)—useful for displaying the live summary page.
func onClickFloatWindow()
Called when the user clicks the floating window.
importUIKit
importSnapkit
importTUILiveKit
importAtomicXCore
// YourAnchorViewController handles loading the host start streaming page
Step 6. Navigate from Preparation Page to Streaming Page
Implement the delegate methods for the AnchorPrepareView component, as described in Step 3, to handle navigation from the preparation page to the host streaming page. Example code:
Swift
importUIKit
importTUILiveKit
importAtomicXCore
// Set delegate when initializing AnchorPrepareView
// - state: PrepareState encapsulates camera, audio effects, and other settings for the host start page. You only need to configure as shown in the sample code below.
publicfunconClickStartButton(state:PrepareState){
// Navigate to the host start page
// Initialize live stream information
var liveInfo =LiveInfo(seatTemplate:.videoDynamicGrid9Seats)
// If you used Server APIs to pre-create the room, fill in the RoomId returned by the server here.
TUILiveKit provides flexible options for customizing features and styles on both the preparation and streaming pages. You can adjust layouts or hide/show feature modules based on your business requirements.
Select Live Stream Layout Templates
TUILiveKit includes 4 live stream layout templates. Select your preferred style from the "Layout" option in the host preparation page UI:
Layout Template Overview
Layout
Dynamic Grid Layout
Floating Window Layout
Fixed Grid Layout
Fixed Floating Window Layout
Template Value
.videoDynamicGrid9Seats
.videoDynamicFloat7Seats
.videoFixedGrid9Seats
.videoFixedFloat7Seats
Description
Default layout. The grid size adjusts dynamically based on the number of co-hosts.
Co-hosts are shown in floating windows.
The number of co-hosts is fixed. Each guest occupies a dedicated grid cell.
The number of co-hosts is fixed. Guests appear in fixed floating windows.
Preview
Customize Preparation Page
Use the API on the prepareView created in Step 3 to hide the entire operation area or specific features on the preparation page.
Swift
importUIKit
importSnapkit
importTUILiveKit
importAtomicXCore
// YourAnchorPrepareViewController represents the view controller for loading the host start page
// Customize feature area - Example: Hide beauty feature
prepareView.disableMenuBeauty(true)
}
}
API
Description
disableFeatureMenu(true)
Hide the entire feature area
disableMenuBeauty(true)
Hide the beauty button
disableMenuAudioEffect(true)
Hide the audio effect button
disableMenuSwitchCamera(true)
Hide the camera switch button
Customize Host Streaming Page UI
For host UI customization, refer to Host Core Page. Modify styles and add custom business components in AnchorView.
To adjust video stream widgets, see Adjust Video Stream Widgets. Update display elements such as names and avatars on video slots within AnchorView.
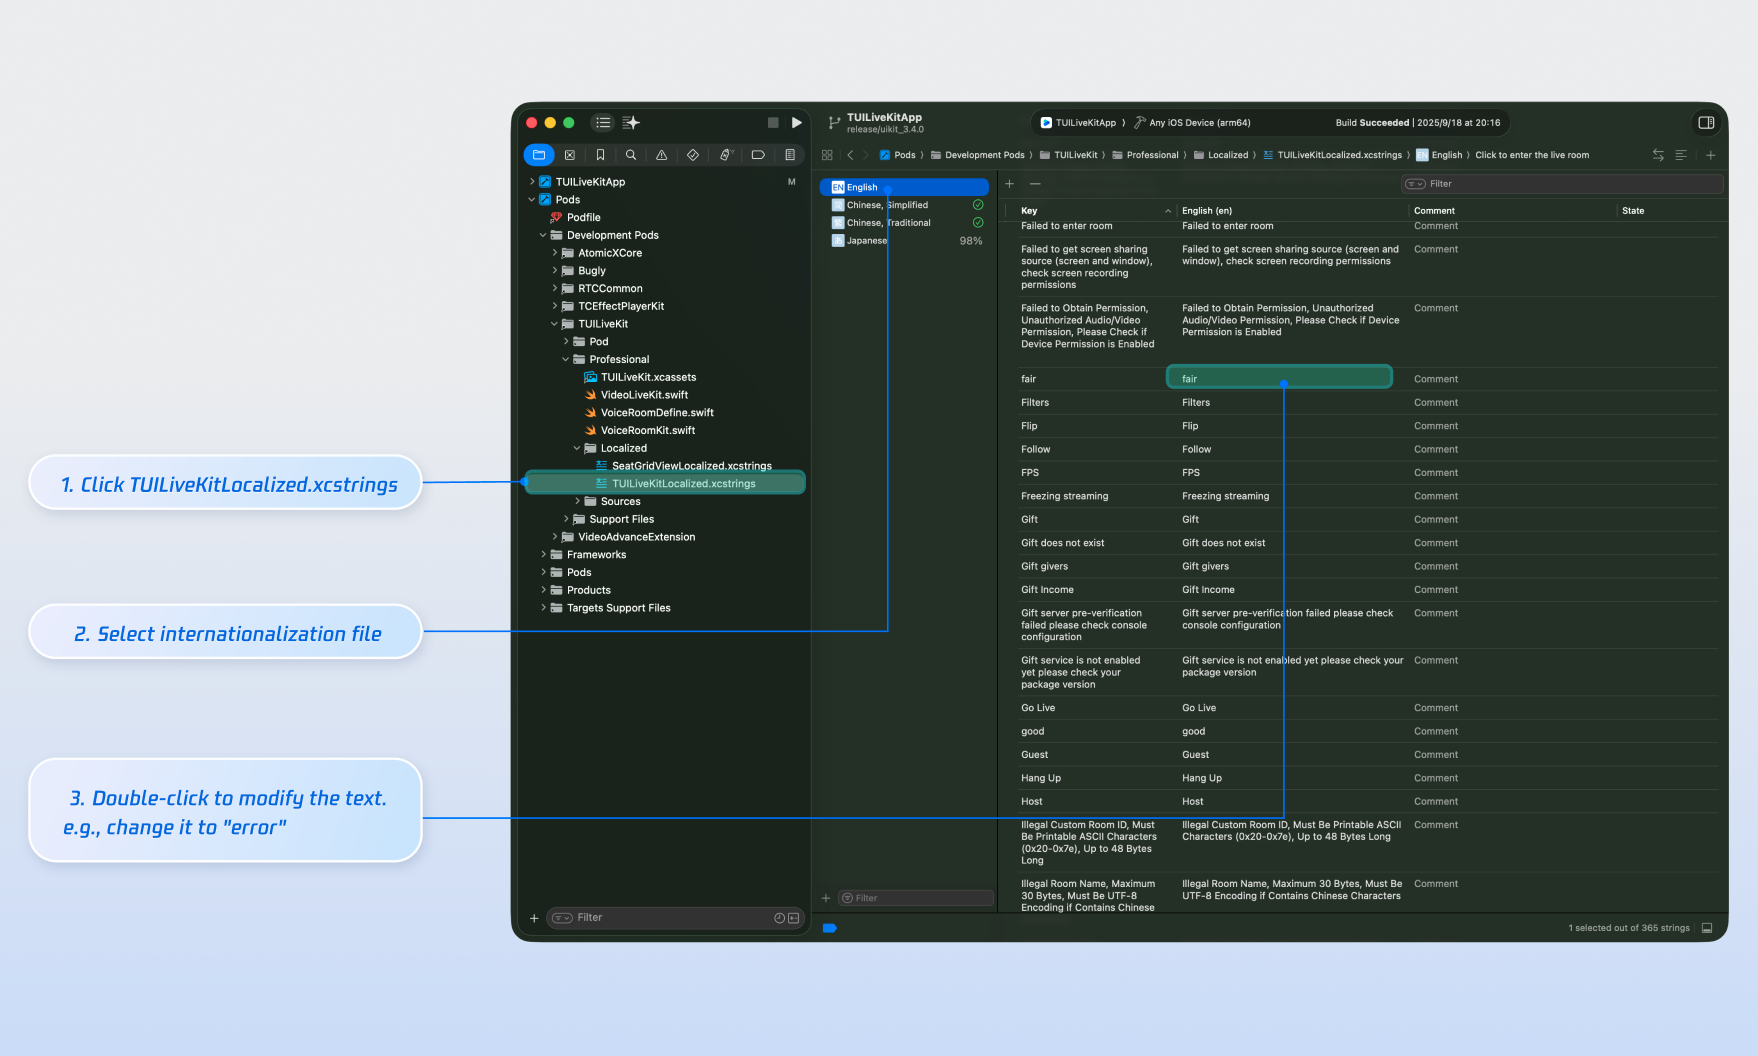
Customize Texts
TUILiveKit manages UI text through the Apple Strings Catalog, allowing you to visually edit copywriting with Xcode's graphical tools.
Note:
Apple Strings Catalog (.xcstrings) is a localization format introduced in Xcode 15. It supports structured formats for plurals, device-specific variants, and more. This is now the recommended approach for managing localization in iOS and macOS apps.
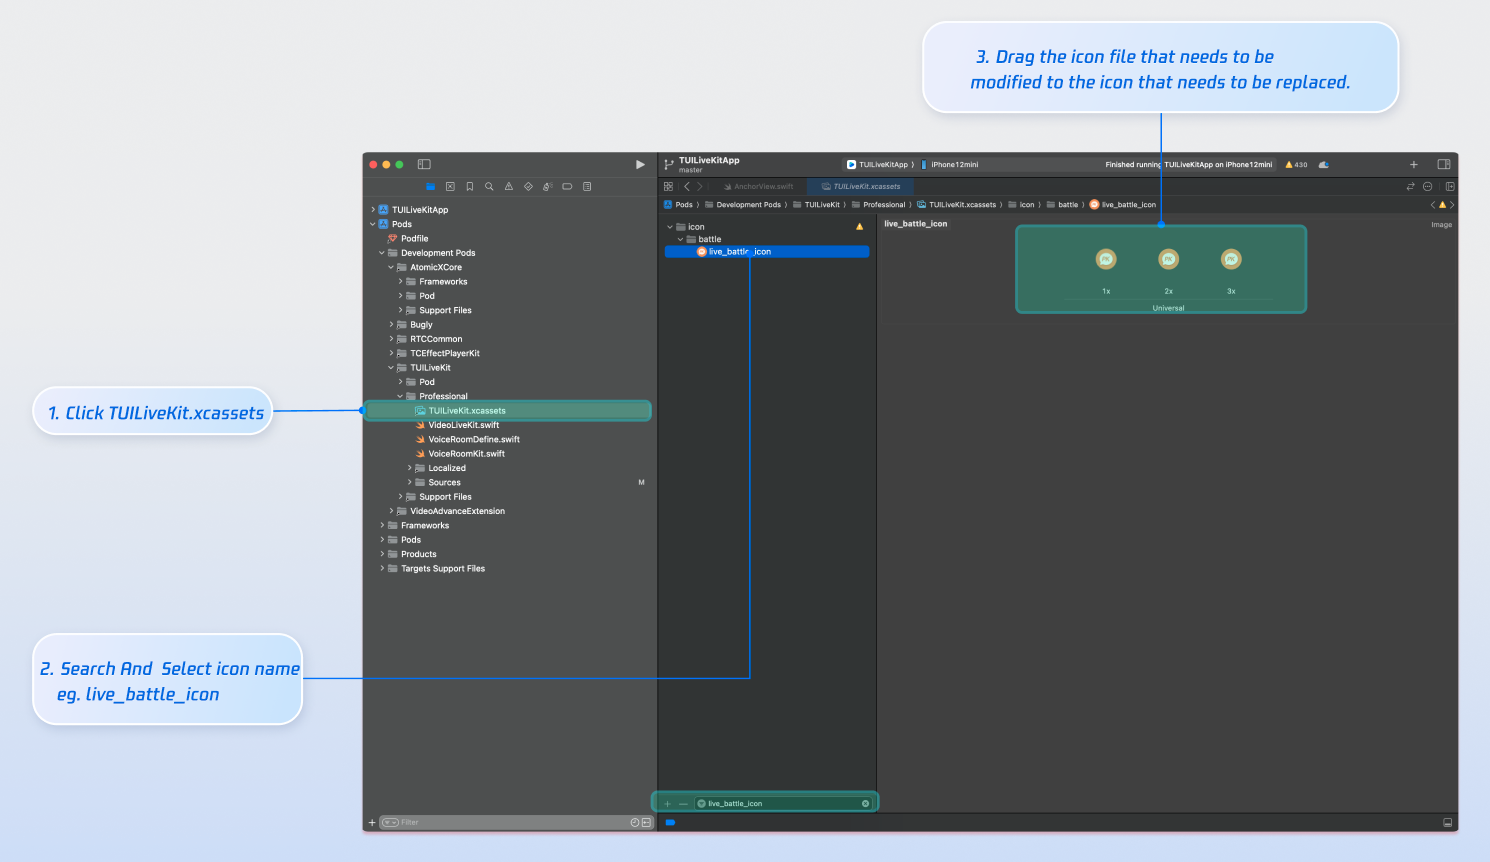
Customize Icons
TUILiveKit uses TUILiveKit.xcassets to manage UI image resources. Customize icons for your interface quickly using Xcode's graphical asset tools.
Next Steps
Congratulations! You have successfully integrated the host streaming feature. Next, you can add capabilities such as audience viewing, live stream list, and gift system. See the table below for more information:
Feature
Description
Integration Guide
Audience Viewing
Allow audience to join the host's live room and watch the stream, including audience co-hosting, live room info, online audience list, and live comments display.