tencent cloud

Elasticsearch Service

User Guide
Release Notes and Announcements
Release Notes
Product Announcements
Security Announcement
Product Introduction
Overview
Elasticsearch Version Support Notes
Features
Elastic Stack (X-Pack)
Strengths
Scenarios
Capabilities and Restrictions
Related Concepts
Purchase Guide
Billing Overview
Pricing
Elasticsearch Service Serverless Pricing
Notes on Arrears
ES Kernel Enhancement
Kernel Release Notes
Targeted Routing Optimization
Compression Algorithm Optimization
FST Off-Heap Memory Optimization
Getting Started
Evaluation of Cluster Specification and Capacity Configuration
Creating Clusters
Accessing Clusters
ES Serverless Guide
Service Overview
Basic Concepts
5-Minute Quick Experience
Quick Start
Access Control
Writing Data
Data Query
Index Management
Alarm Management
ES API References
Related Issues
Data Application Guide
Data Application Overview
Data Management
Elasticsearch Guide
Managing Clusters
Access Control
Multi-AZ Cluster Deployment
Cluster Scaling
Cluster Configuration
Plugin Configuration
Monitoring and Alarming
Log Query
Data Backup
Upgrade
Practical Tutorial
Data Migration and Sync
Use Case Construction
Index Configuration
SQL Support
Receiving Watcher Alerts via WeCom Bot
API Documentation
History
Introduction
API Category
Instance APIs
Making API Requests
Data Types
Error Codes
FAQs
Product
ES Cluster
Service Level Agreement
Glossary
New Version Introduction
Elasticsearch Service July 2020 Release
Elasticsearch Service February 2020 Release
Elasticsearch Service December 2019 Release

Accessing Clusters from Kibana

PDF
Mode fokus
Ukuran font
Terakhir diperbarui: 2025-01-24 11:32:43
ES comes with a Kibana module. You can access the Kibana page of your cluster to visually query, analyze, and manage your data. This tutorial is designed to help you get started with Kibana.

Accessing Kibana Page

Entries

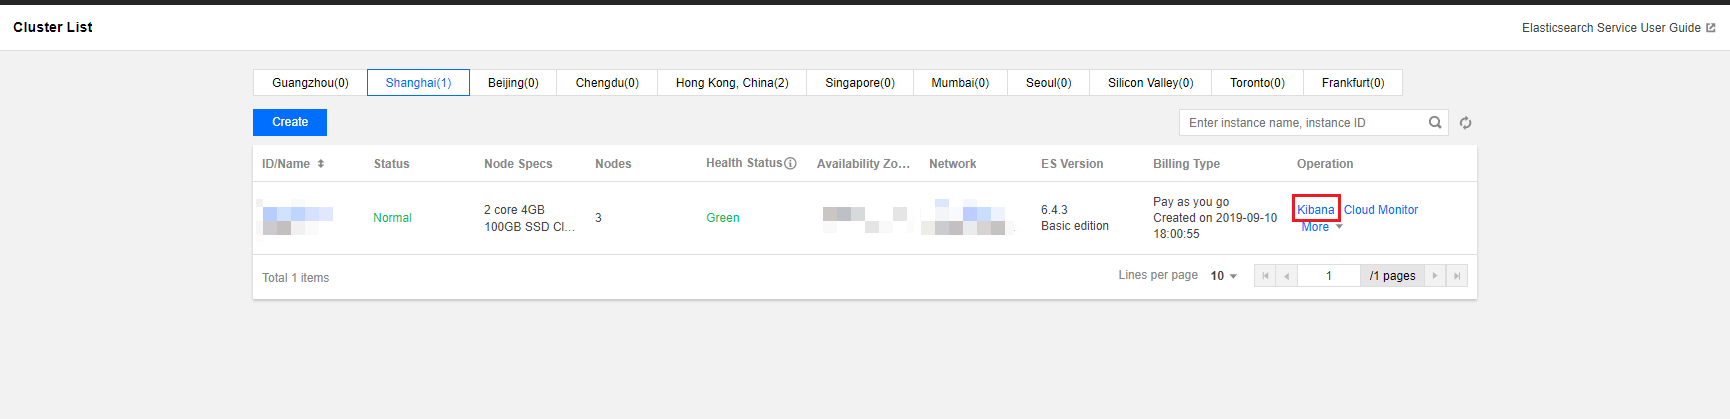
There are two entries to the Kibana page, which are located on the cluster list page and the cluster details page, as shown below. Click either of them to jump to the Kibana login page.
Note:
By default, Kibana is accessed at the public address. If you are concerned that accessing Kibana over the public network will cause security problems, you can disable the Kibana public address and enable the Kibana private address for access on the cluster details page.


Login

To access the Kibana page, you need to log in with the username "elastic" and the Kibana password you set when you created your cluster. If you forgot your password, you can reset it on the cluster details page. For security reasons, you can configure an access blocklist/allowlist for the public address of the Kibana page. For more information, please see Kibana Access Settings.
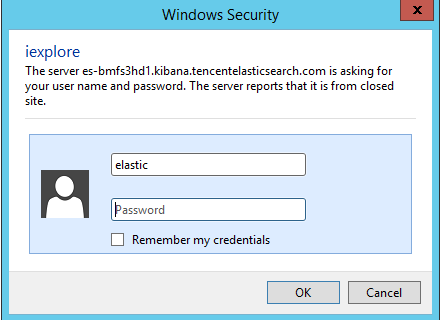
If "ES cluster user authentication" is not enabled, the Kibana login page is as shown below:


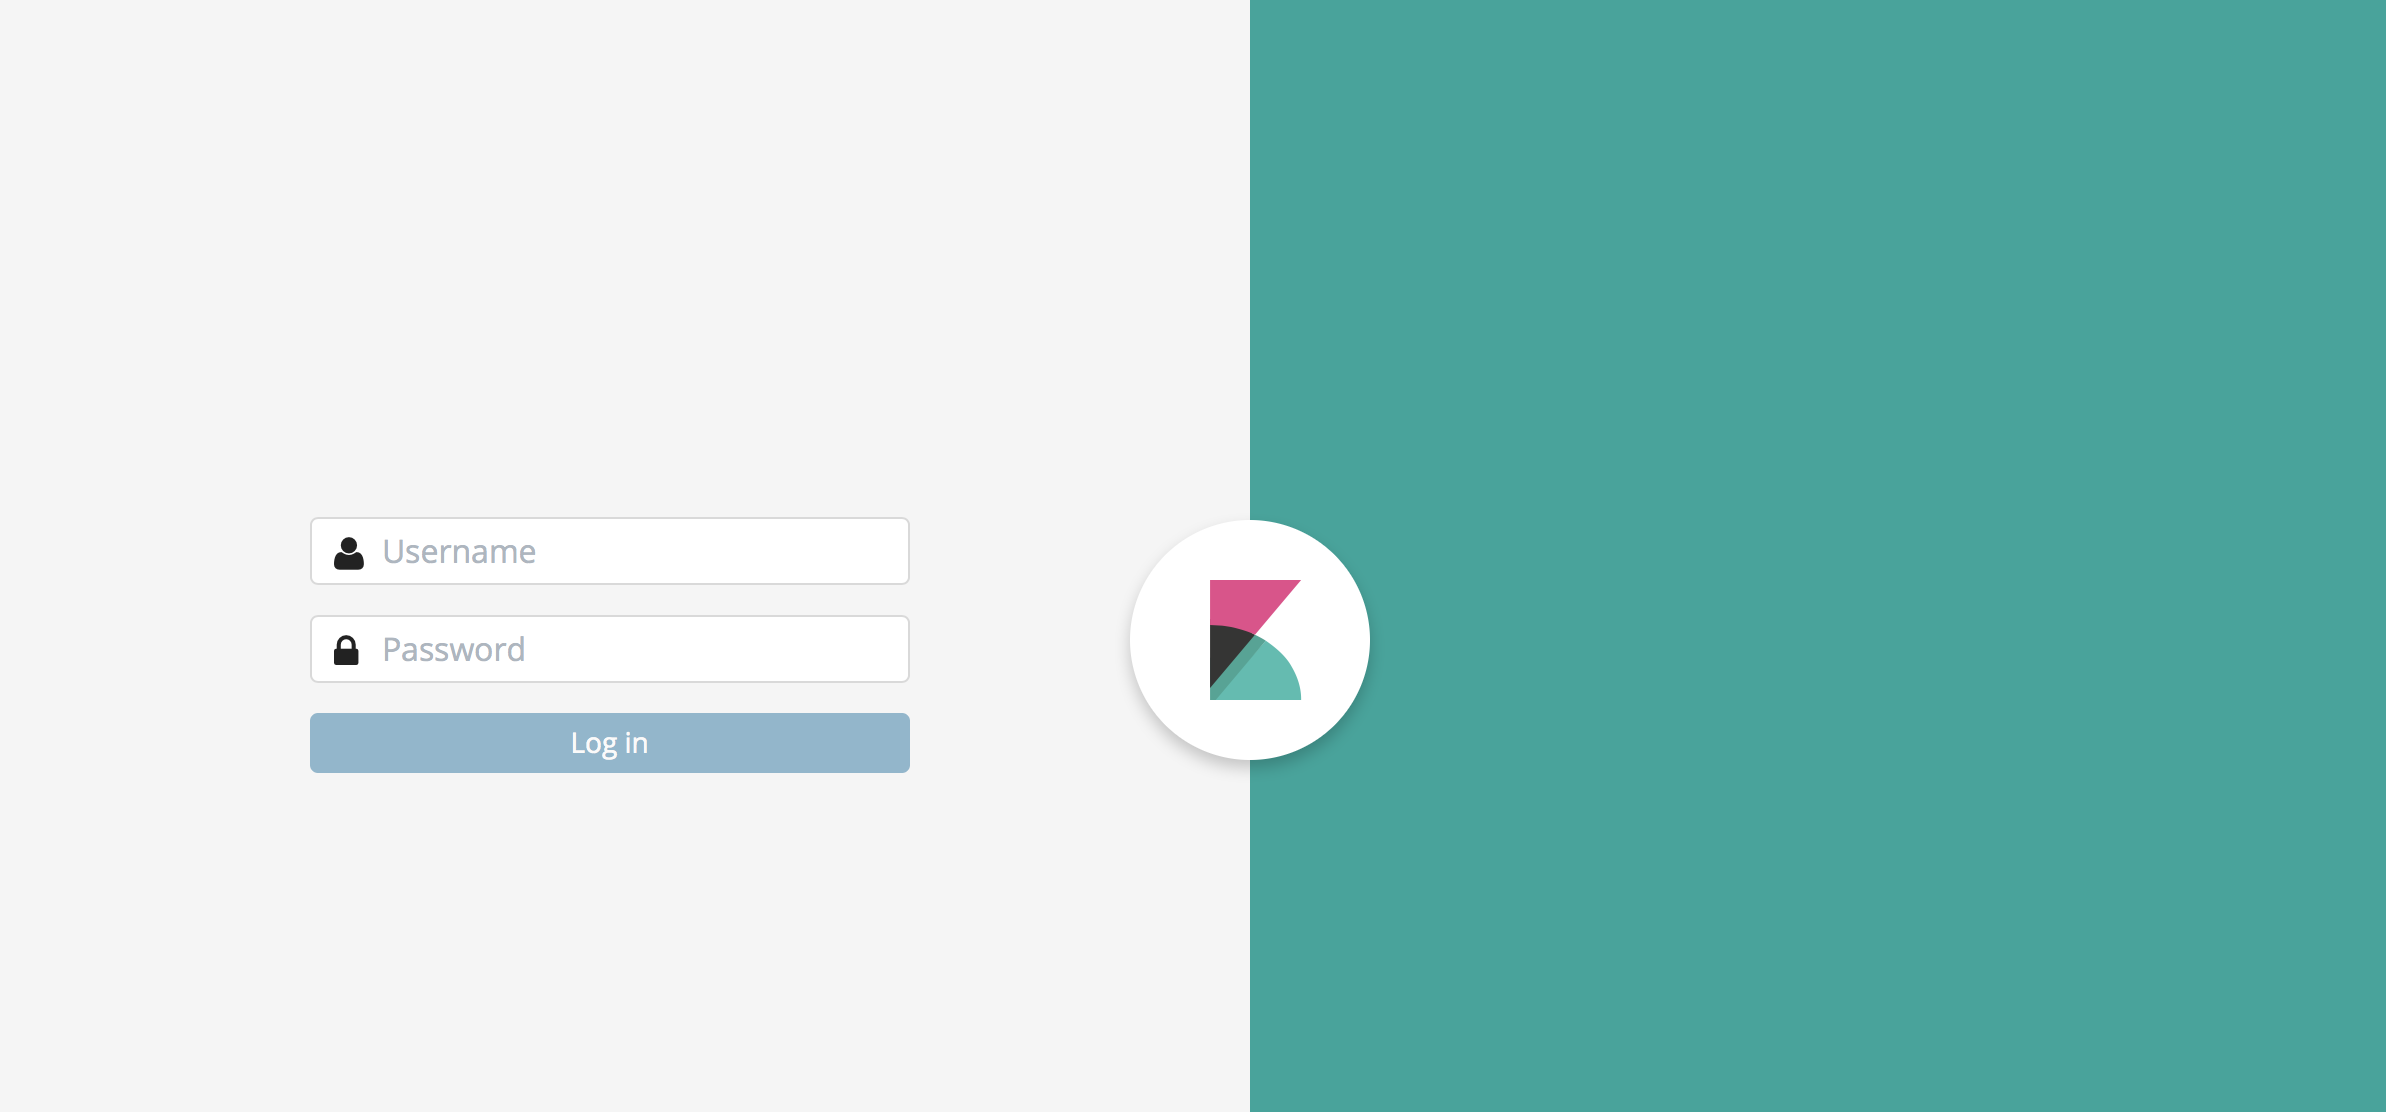
If "ES cluster user authentication" is enabled, the Kibana login page is as shown below:


Access

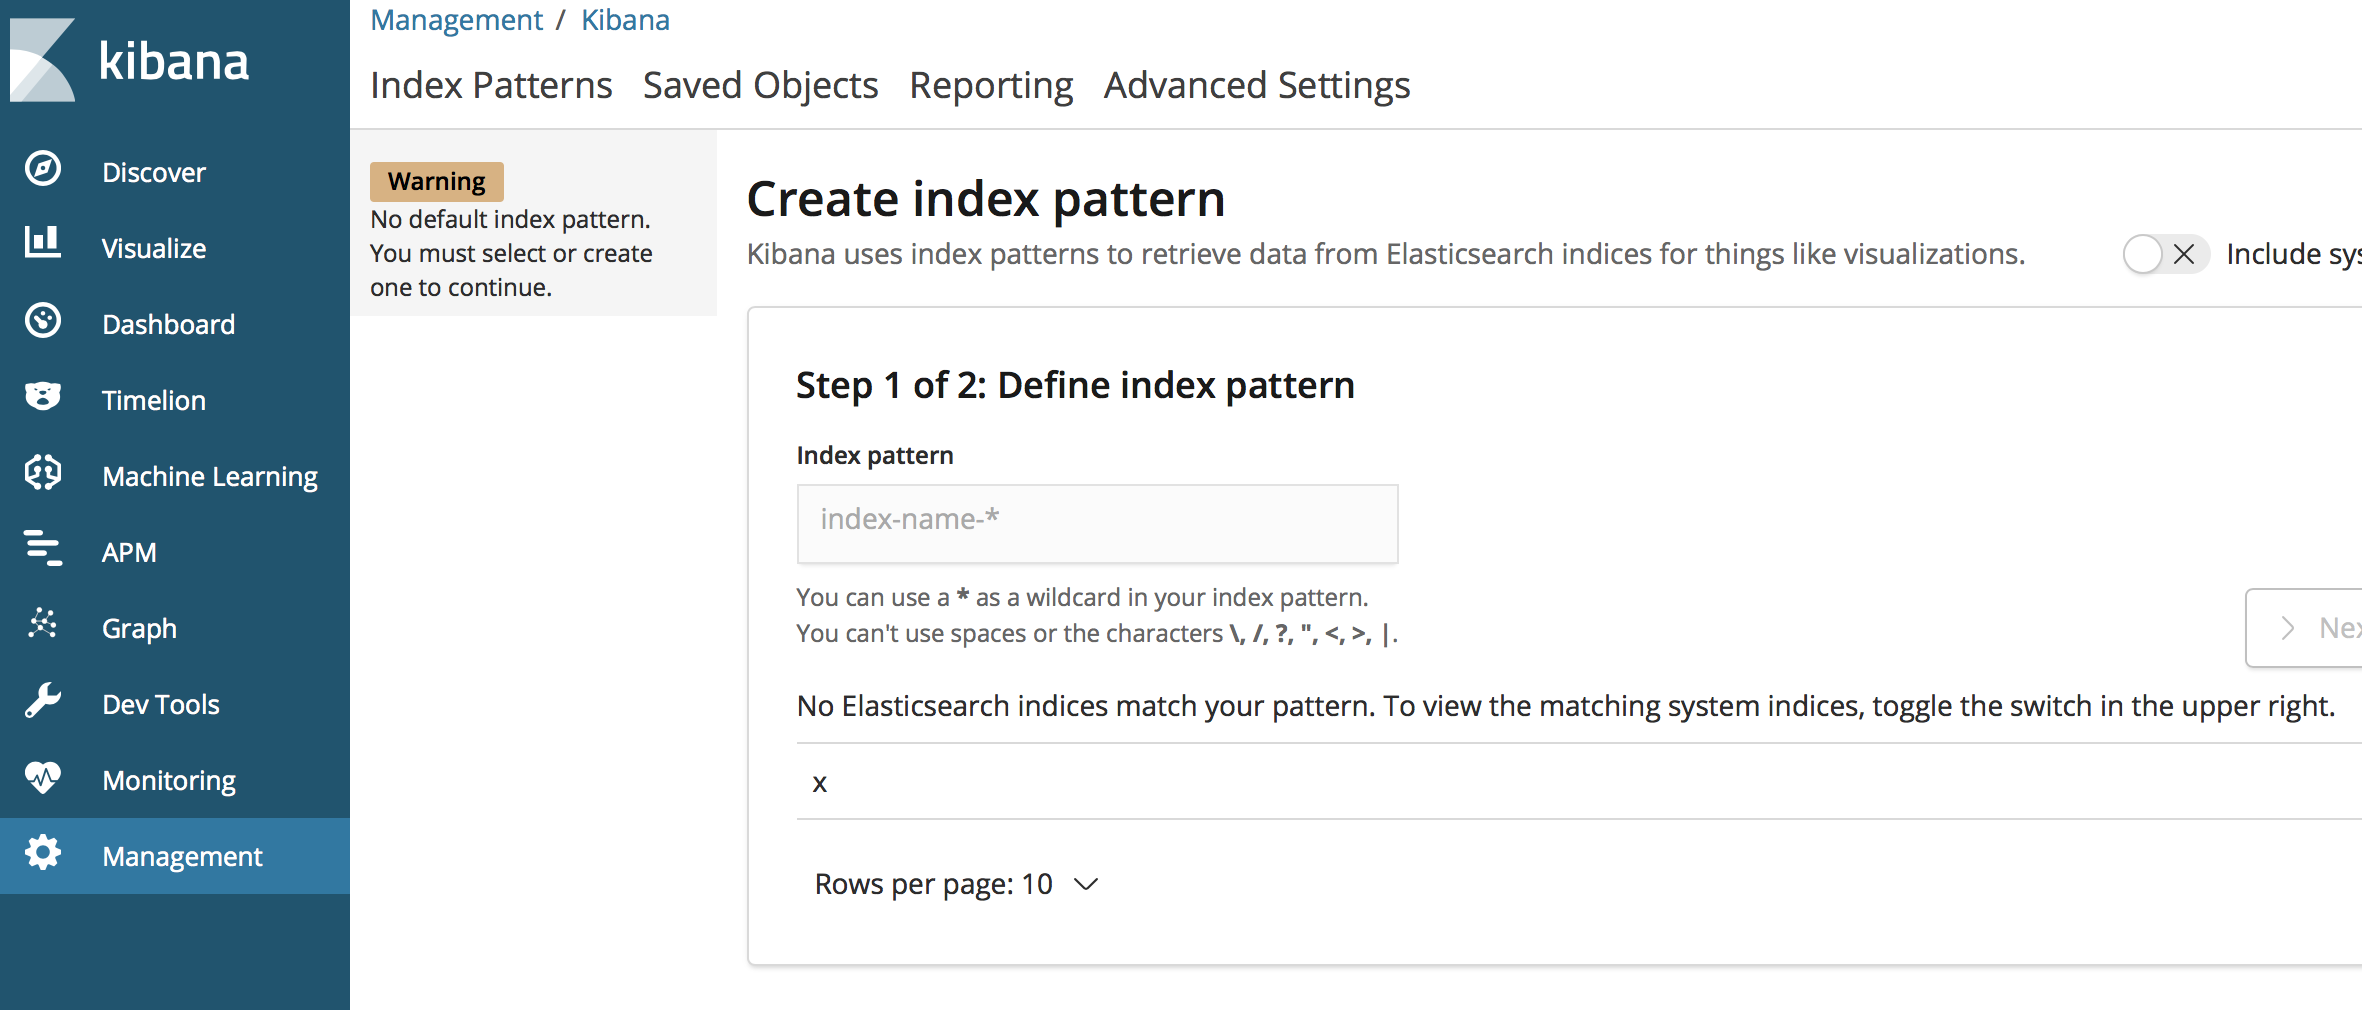
After logging in to the Kibana page, if you are a new user, your cluster has not stored any custom indexed data, and you will be prompted to configure an index. For more information, please see Adding and Accessing Index.


Adding and Accessing Index (Storing Data)

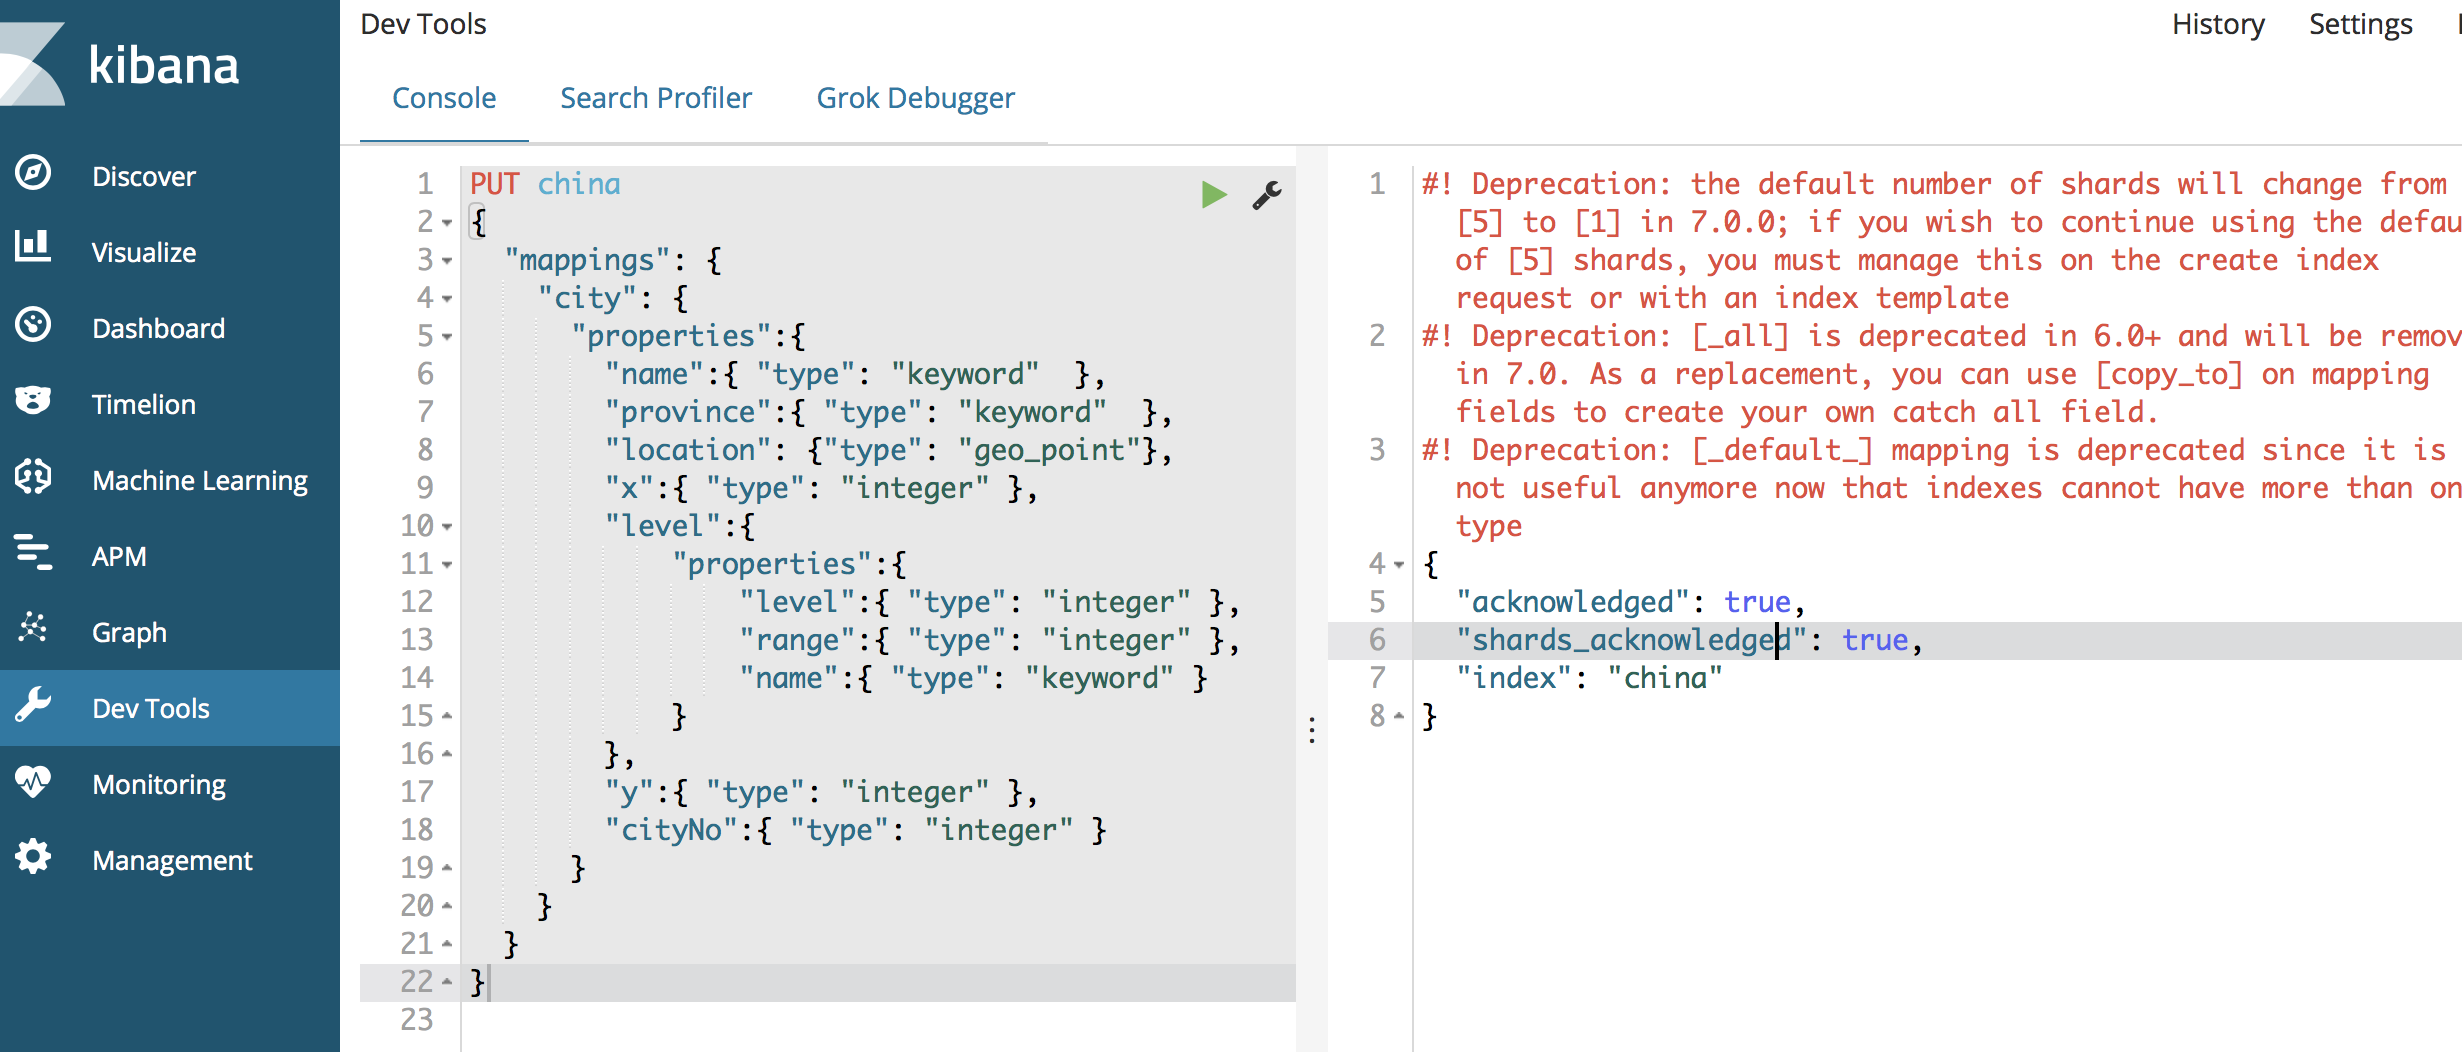
On the left sidebar on the Kibana page, click Dev Tools to enter the development tools page, where you can send various operation requests to your cluster through the console. The following shows how to manipulate your cluster and store data with sample city information.

Adding index

Defining the mapping of index

Specify the index name as china, type name as city, and detailed field and type information. The type of the location field is geo_point which can represent location information, and level is the object type and contains subfield information. For more information on field types, please see Field Datatypes.


PUT china
{
  "mappings": {
    "city": {
      "properties":{
        "name":{ "type": "keyword"  },
        "province":{ "type": "keyword"  },
        "location": {"type": "geo_point"},
        "x":{ "type": "integer" },
        "level":{
            "properties":{               
                "level":{ "type": "integer" },
                "range":{ "type": "integer" },
                "name":{ "type": "keyword" }
            }
        },
        "y":{ "type": "integer" },
        "cityNo":{ "type": "integer" }
      }
    }
  }
}

Adding one single document


PUT china/city/wuhan
{"name":"Wuhan","province":"No.188, Yanjiang Avenue, Jiang'an District, Hubei Province","location":{"lat":30.5952548577,"lon":114.2999398195},"x":6384,"level":{"level":2,"range":19,"name":"New first-tier city"},"y":4231,"cityNo":7}

Querying one single document

GET /china/city/wuhan

Adding multiple documents

POST _bulk
{ "index" : { "_index": "china", "_type" : "city", "_id" : "beijing" } }
{"name":"Beijing","province":"Beijing","location":{"lat":39.9031324643,"lon":116.4010433787},"x":6763,"level":{"range":4,"level":1,"name":"First-tier city"},"y":6381,"cityNo":1}
{ "index" : { "_index": "china", "_type" : "city", "_id" : "shanghai" } }
{"name":"Shanghai","province":"Shanghai","location":{"lat":31.2319526784,"lon":121.469443249},"x":7779,"level":{"range":4,"level":1,"name":"First-tier city"},"y":4409,"cityNo":2}
{ "index" : { "_index": "china", "_type" : "city", "_id" : "guangzhou" } }
{"name":"Guangzhou","province":"No.79, Jixiang Road, Yuexiu District, Guangdong Province","location":{"lat":23.1317146641,"lon":113.2595185241},"x":6173,"level":{"range":4,"level":1,"name":"First-tier city"},"y":2560,"cityNo":3}
{ "index" : { "_index": "china", "_type" : "city", "_id" : "shenzhen" } }
{"name":"Shenzhen","province":"No.37, Xinyuan Road, Futian District, Guangdong Province","location":{"lat":22.5455465546,"lon":114.0527779134},"x":6336,"level":{"range":4,"level":1,"name":"First-tier city"},"y":2429,"cityNo":4}
{ "index" : { "_index": "china", "_type" : "city", "_id" : "chengdu" } }
{"name":"Chengdu","province":"No. 88-1, Hongxing Road 4th Section, Jinjiang District, Sichuan Province","location":{"lat":30.6522796787,"lon":104.0725574128},"x":4387,"level":{"level":2,"range":19,"name":"New first-tier city"},"y":4304,"cityNo":5}
{ "index" : { "_index": "china", "_type" : "city", "_id" : "hangzhou" } }
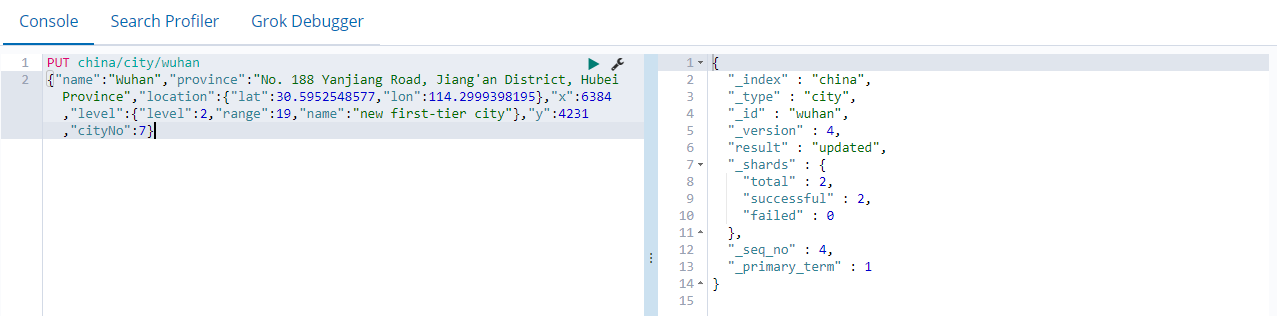
{"name":"Hangzhou","province":"No.316, Huancheng North Road, Gongshu District, Zhejiang Province","location":{"lat":30.2753694112,"lon":120.1509063337},"x":7530,"level":{"level":2,"range":19,"name":"New first-tier city"},"y":4182,"cityNo":6}

Querying multiple documents

GET /china/city/_search

Accessing index

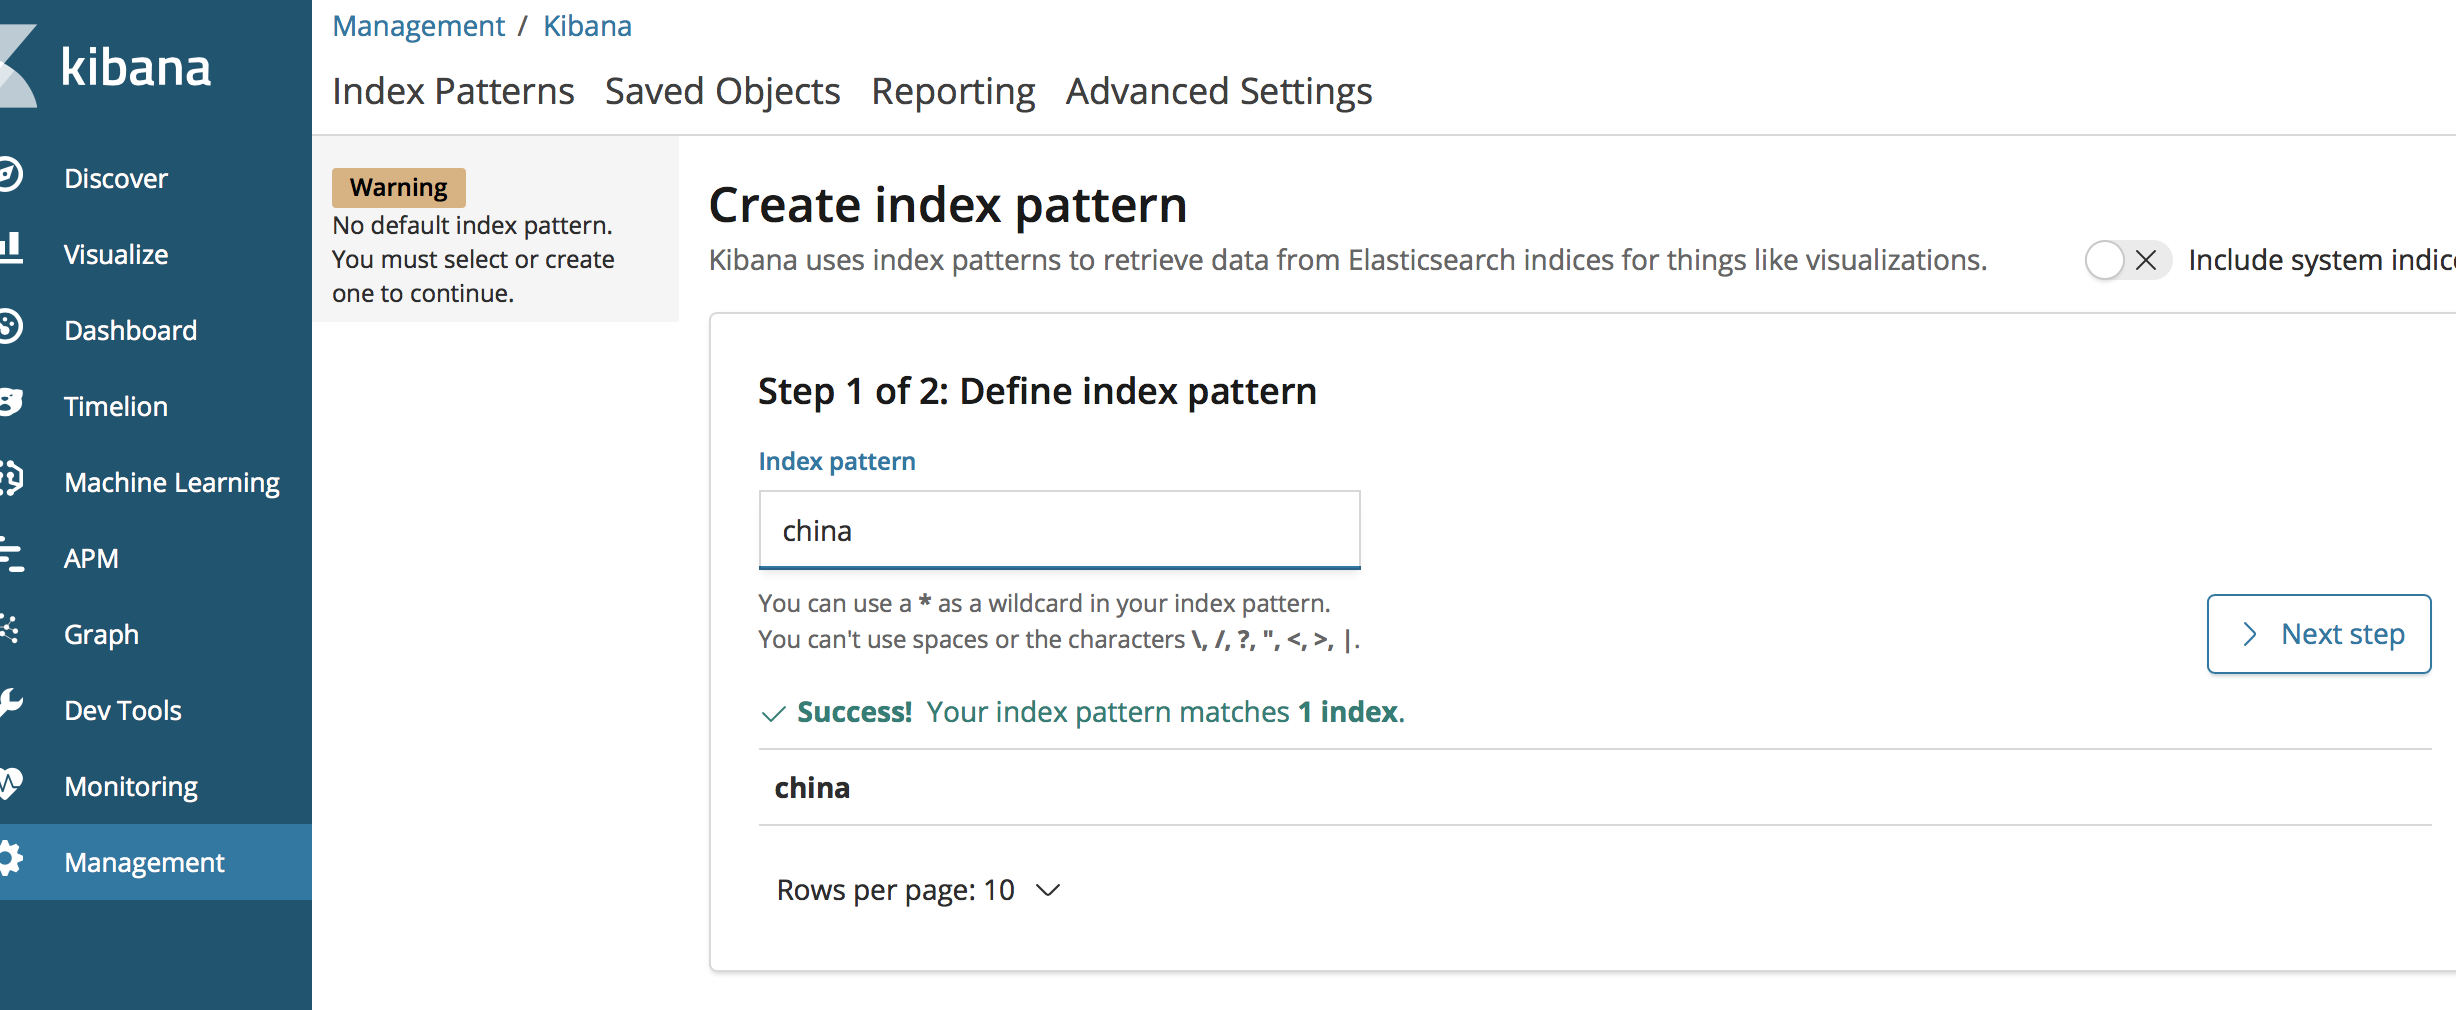
Configuring Kibana to access index

To use Kibana, you need to configure at least one index that can be matched. Enter the index china created above and click Next step to proceed to the next step.

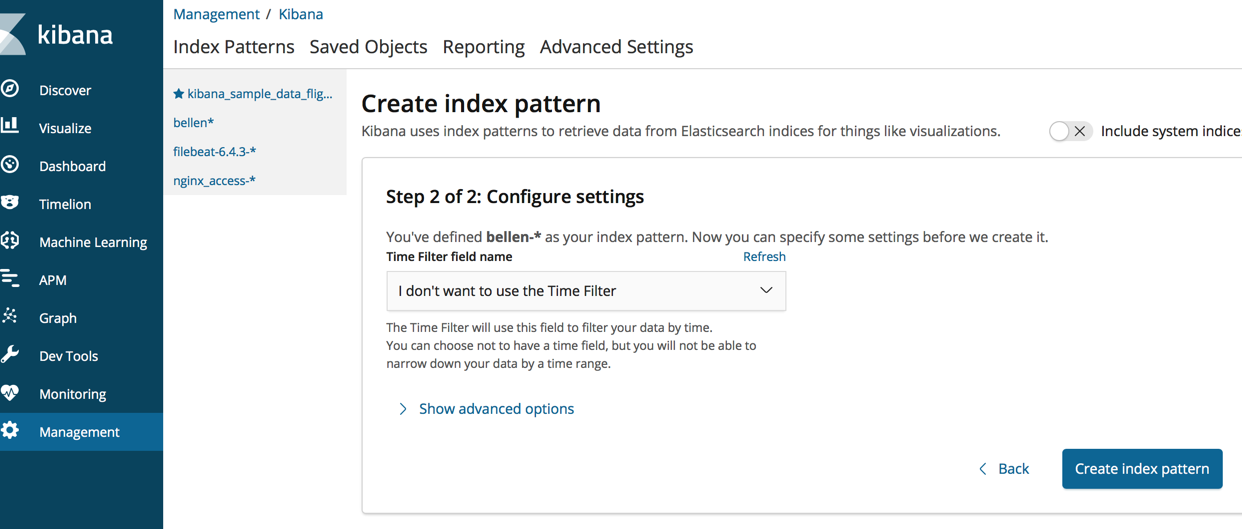
You need to configure a time filter field to filter the data in an index by time. If there is no field in the index that indicates time, you can choose not to use the time filter feature. Click Create index pattern to create an index pattern.

View the fields for the index.

Click Discover on the left sidebar to view the documents that have been added under the index.


Visual Query and Analysis

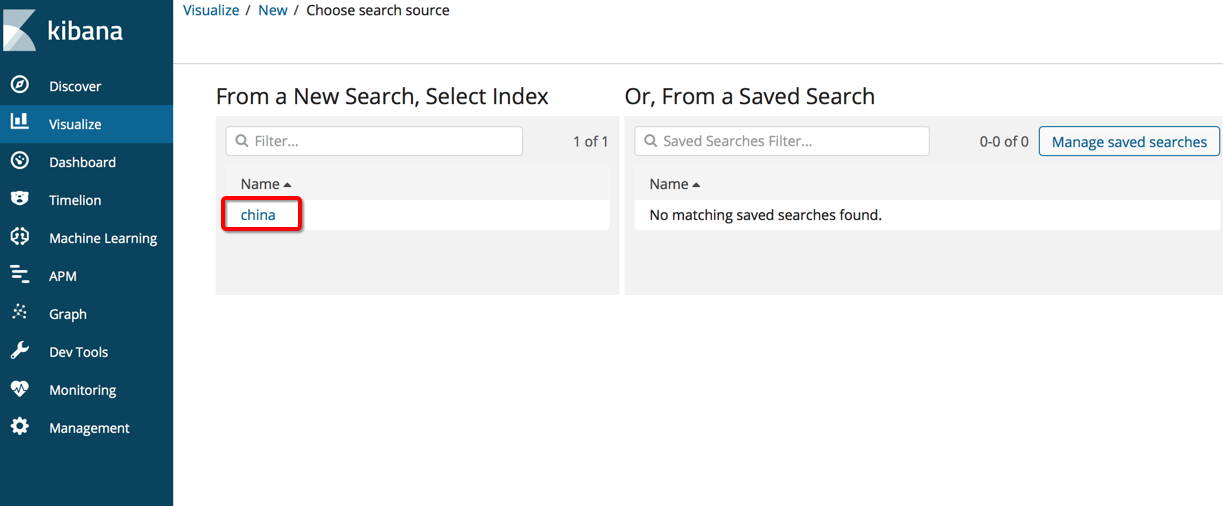
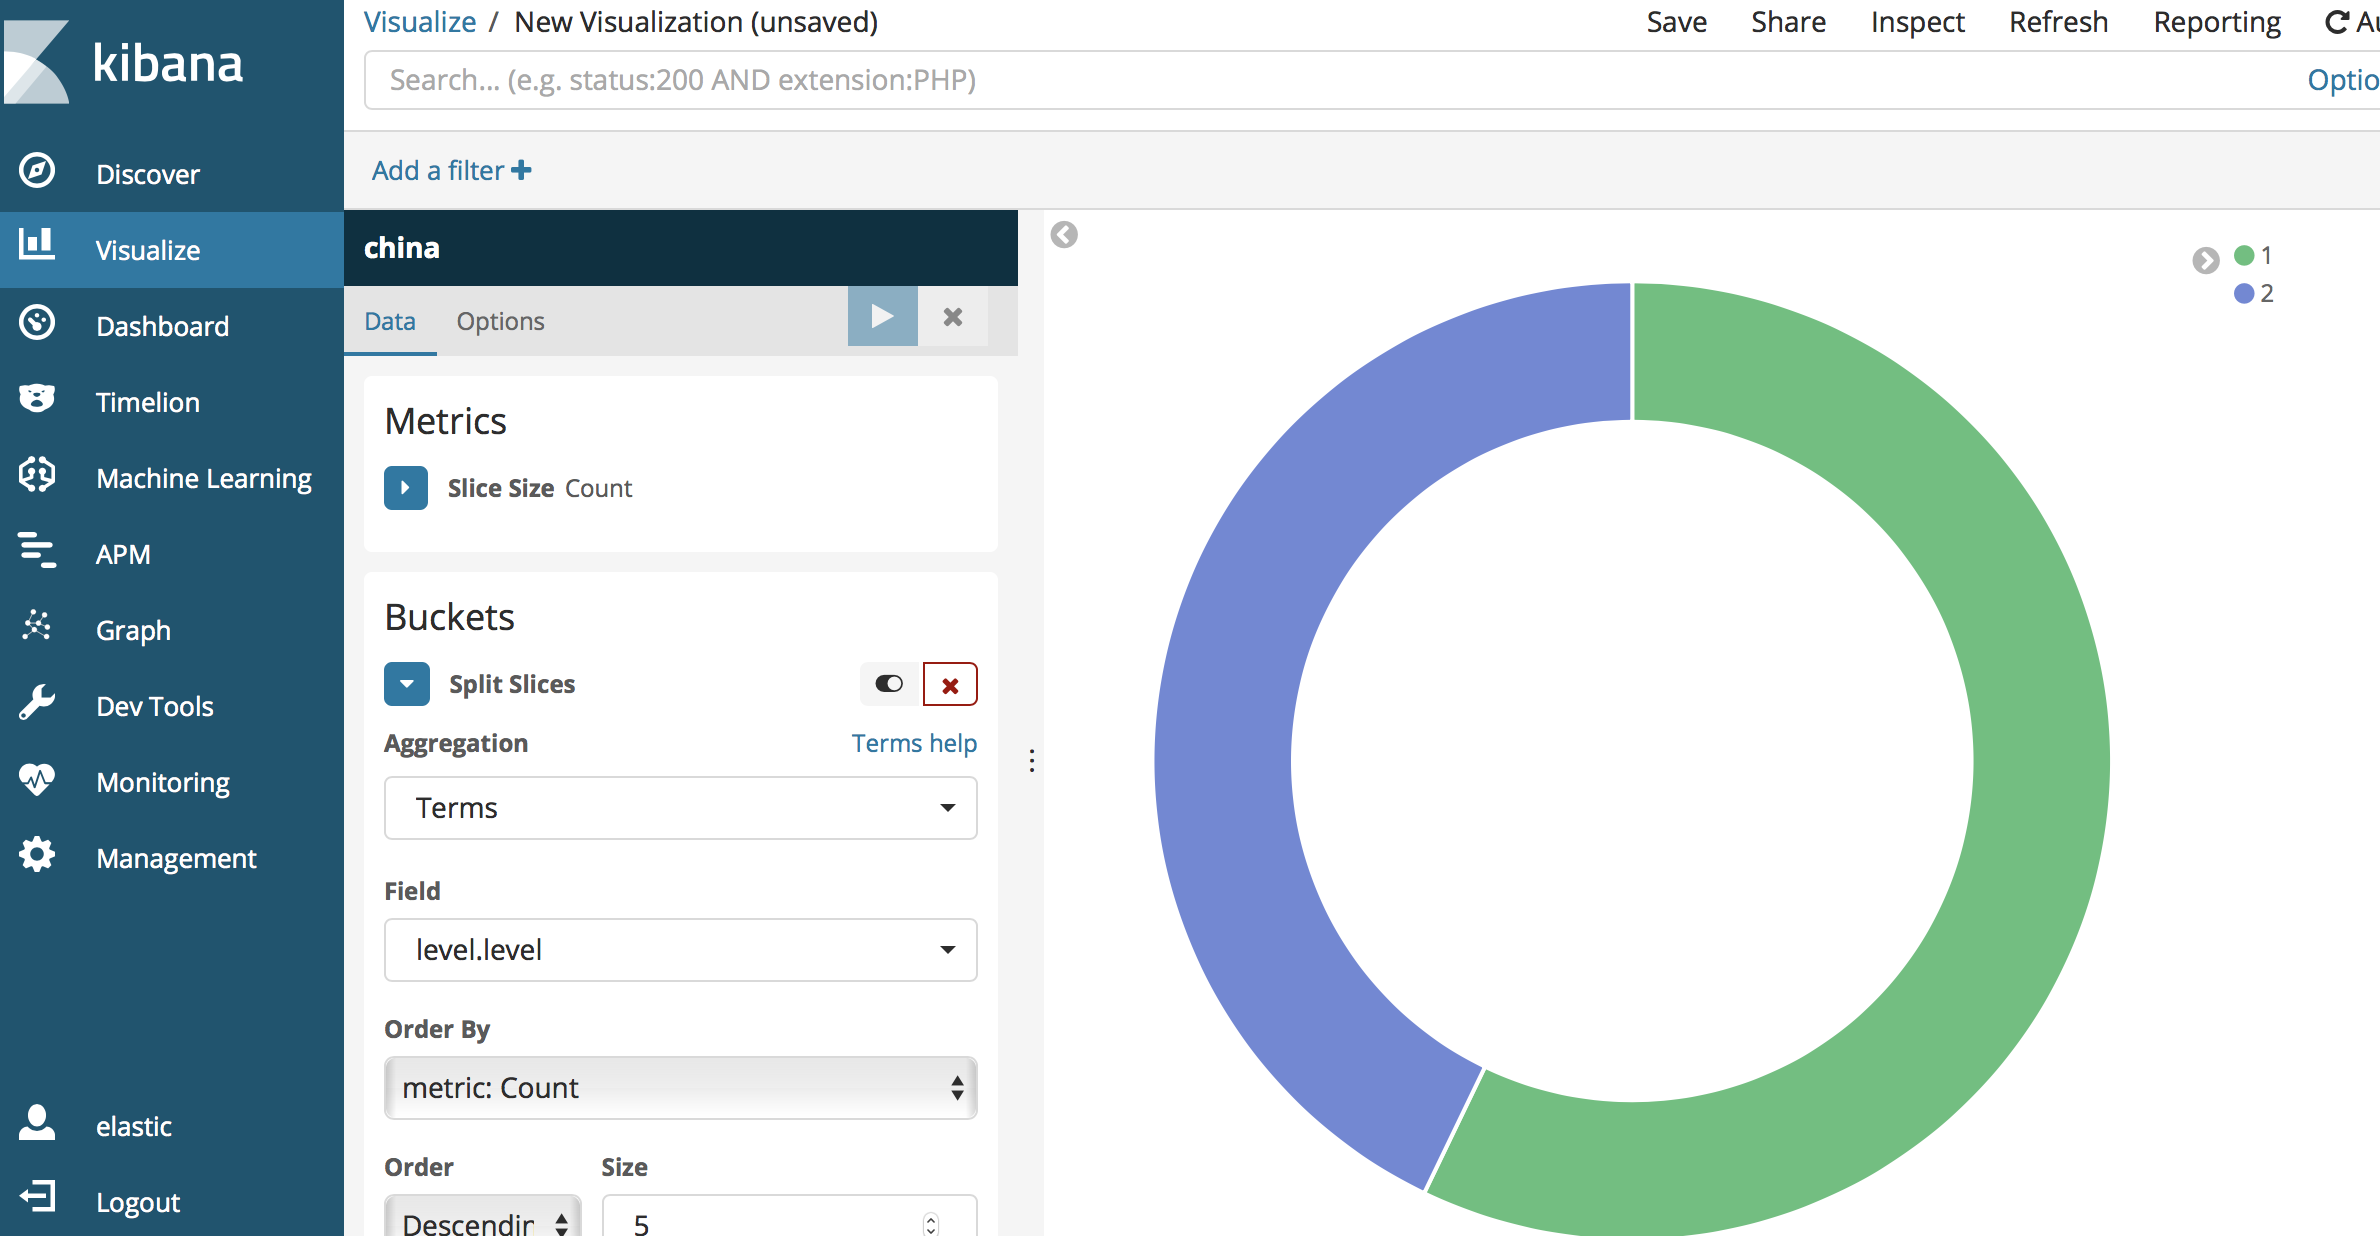
Kibana can perform visual statistical analysis of data. Click Visualize on the left sidebar to configure various visual charts for data analysis. For example, to count the different levels under the china index mentioned above, follow the steps below:

Select the count metric, aggregate the statistics by the level.level field, and click Save.


For more information on how to use Kibana, please see Kibana's official documentation.

Bantuan dan Dukungan

Apakah halaman ini membantu?

masukan