to open the server manager. The Server Manager window will appear.
2. Click Add roles and features.
3. In the Add Roles and Features Wizard pop-up window, click Next to access the Installation Type page.
4. Select Role-based or feature-based installation and click Next.
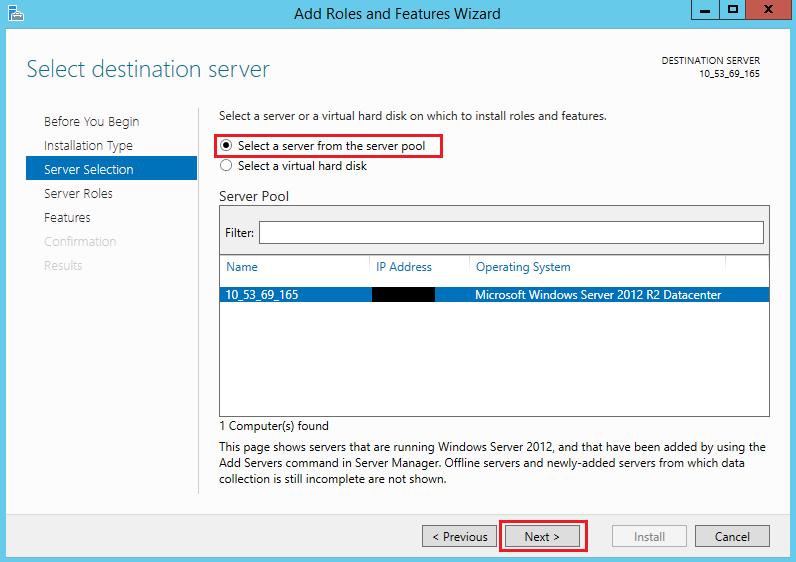
5. On the Select destination server page, keep the default configurations and click Next.
6. On the Select server roles page, check Web Server (IIS) and click Add Feature in the window that pops up.
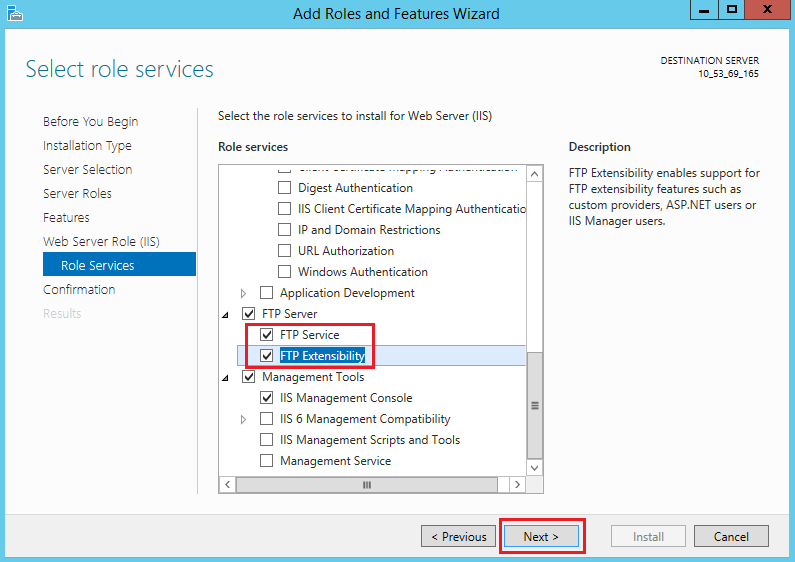
7. Click Next 3 times to access the Select role services page.
8. Check FTP Service and FTP Extensibility, and click Next.
9. Click Install to start installing the FTP service.
10. After the installation is completed, click Close.
Step 3. Create an FTP username and password
Note:
The following steps create an FTP account with password authentication. If you plan to use anonymous access only, skip this section.
1. In the “Server Manager” window, select Tools > Computer Management in the top-right navigation bar to open the “Computer Management” window.
2. Select System Tools > Local Users and Groups > Users on the left sidebar.
3. On the right panel of the Users interface, right-click the blank space and select New User, as shown below:
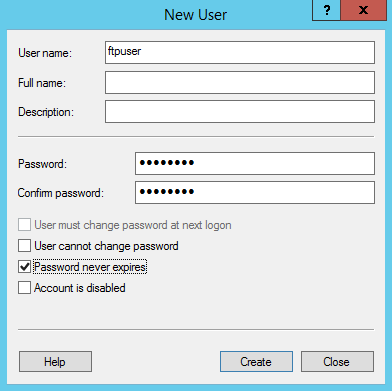
4. On the New User page, configure the username and password according to the following instructions. Click Create.
Set the main parameters as follows:
User name: custom. This document uses ftpuser as an example.
Password and Confirm password: custom. The password must contain uppercase and lowercase letters and digits. This document uses tf7295TFY as an example.
Clear User must change password at next logon, and check Password never expires.
Select options based on your actual needs. This document uses Password never expires as an example.
5. Click Close. You can see the newly created user ftpuser in the list.
Step 4. Set the shared folder permission
Note:
This document uses the C:\\test folder as the shared folder of the FTP site. It contains the test.txt file you want to share with others. Create the C:\\test folder and the test.txt file under it as instructed. You can also use any other folder as needed.
1. On the desktop, click
to open the This PC window.
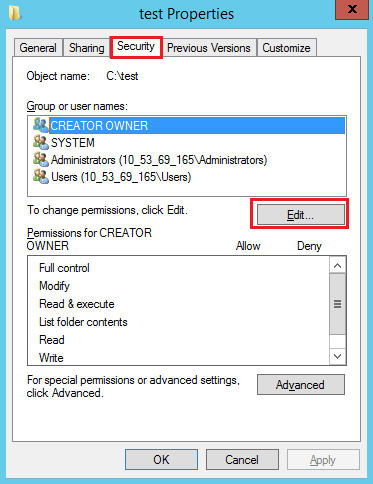
2. Select and right-click the test folder under the C drive. Select Properties.
3. In the test Properties window, select the Security tab.
4. Select Everyone and click Edit.
If “Group or user names” does not contain Everyone, refer to Adding Everyone to add the user.
5.
On the “Permissions for test” page
, set the permission for Everyone and click OK.
This document uses granting Everyone all permissions as an example.
6. Click OK to complete the configuration.
Step 5. Add an FTP site
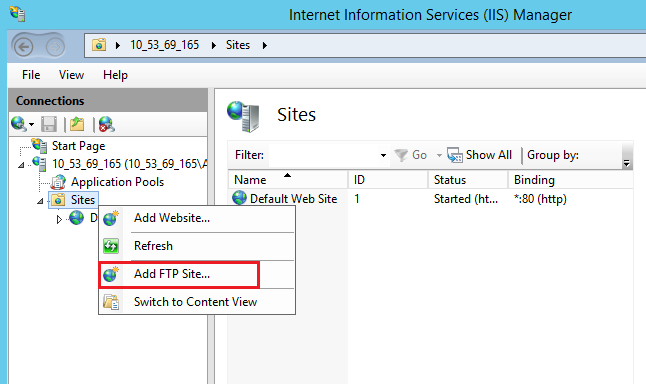
1. In the Server Manager window, select Tools > Internet Information Services (IIS) Manager in the top-right navigation bar.
2. In the Internet Information Services (IIS) Manager pop-up window, expand your server in the left sidebar, right-click Sites, and select Add FTP Site, as shown below:
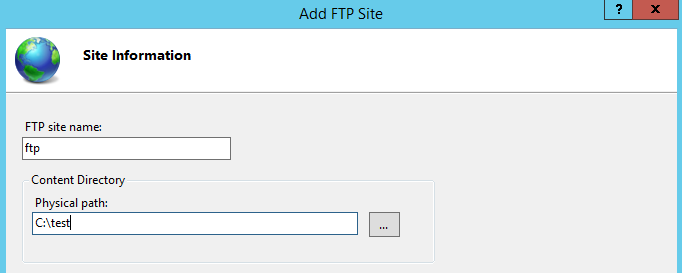
3. On the Site Information page, enter the following information and click Next.
FTP site name: name of your FTP site. This document uses ftp as an example.
Physical path: path of the shared folder with the permission configured. This document uses C:\\test as an example.
4. On the Binding and SSL Settings page, enter the following information and click Next.
Configure the main parameters as follows:
Binding: the IP Address defaults to All Unassigned. The default FTP port number is 21. You can set a custom port number.
SSL: select an option. In this document, No SSL is selected.
No SSL: no SSL is used.
Allow SSL: allow the FTP server to connect with clients with or without SSL.
Require SSL: SSL encryption is required for communication between the FTP server and clients.
If you choose Allow SSL or Require SSL, you can select an existing SSL certificate in “SSL Certificates”, or create an SSL certificate.
5. On the Authentication and Authorization Information page, enter the following information and click Next.
Authentication: select an identity verification method. This document uses Basic as an example.
Anonymous: allow users that provide the anonymous or FTP username to access the content.
Basic: require users to provide valid user names and passwords to access the content. Under this mode, passwords are transmitted without encryption. Therefore, select this authentication mode only when you know that the connection between the clients and the FTP server is secure (for example, by using SSL).
Authorization: select one of the following options from the Allow access to drop-down list. This document uses the specified ftpuser user as an example.
- All users: all users, anonymous or identified, can access the content.
- Anonymous users: anonymous users can access the content.
- Specified role or user group: only the specified roles or members of the specified groups can access the content. If you choose this option, you need to specify the roles or user groups.
- Specified users: only the specified user can access the content. If you choose this option, you need to specify the username.
Permissions: configure the permissions for the authorized users. This document takes setting the Read and Write permissions as an example.
Read: allow the authorized user to read the shared content.
Write: allow the authorized user to write into the directory.
6. Click Finish to successfully create the FTP site.
Step 6. Configure the security group and firewall
1. After the FTP site is created, add an inbound rule that allows traffic to the FTP port based on the FTP access mode:
Active mode: open the ports 20 and 21.
Passive mode: open the ports 21 and 1024-65535 (for example, open the ports 5000-6000).
For more information, see Adding Security Group Rules.
2. (Optional) Refer to Microsoft documentation on how to configure the firewall so that the FTP server is able to accept passive connections from the firewall.
Step 7. Test the FTP site
You can use tools such as the FTP client software, browser, or file manager to verify the FTP server. This document uses the file manager of the client as an example.
1. Configure Internet Explorer as needed:
Firewall configured (active mode):
Open an Internet Explorer window on the Client side and select Tools > Internet Options > Advanced. Uncheck Use Passive FTP for the firewall and the DSL modem compatibility and click OK.
Firewall has not been configured (passive mode):
1.1.1 Open an Internet Explorer window on the FTP server side and select Tools > Internet Options > Advanced. Uncheck Use Passive FTP for the firewall and the DSL modem compatibility and click OK.
1.1.2 Open an Internet Explorer window on the Client side and select Tools > Internet Options > Advanced. Check Use Passive FTP for the firewall and the DSL modem compatibility and click OK.
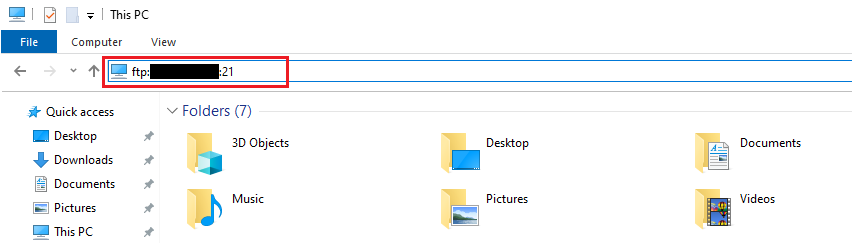
2. Open the PC where the client is installed, type the following address in the address box of the browser, and press Enter.
ftp://CVM public IP address:21
3. In the pop-up window, enter the username and password configured in creating the FTP username and password.
In this document, the username is ftpuser, and the password is tf7295TFY.
4. You can upload and download files after a successful login.
Appendix
Adding Everyone
1. In the test Properties window, select the Security tab and click Edit.
2. On the Permissions for test page, click Add.
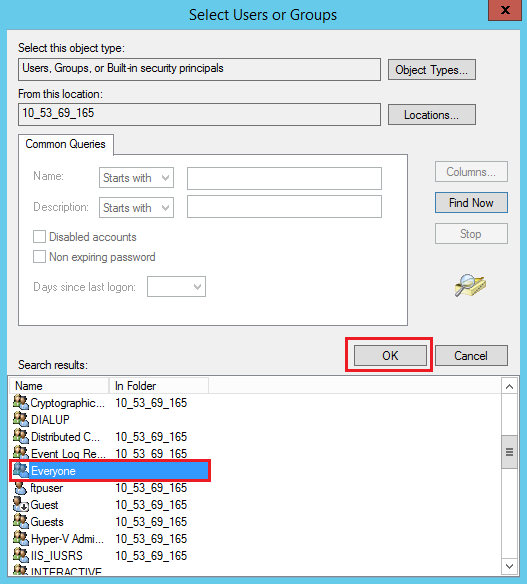
3. On the Select Users or Groups dialog box, click Advanced.
4. In the pop-up window, click Find Now.
5. Select Everyone under Search results and click OK.
6. On the Select Users or Groups dialog box, click OK.
Go to Step 5 to configure the permission for Everyone.
Creating a server certificate
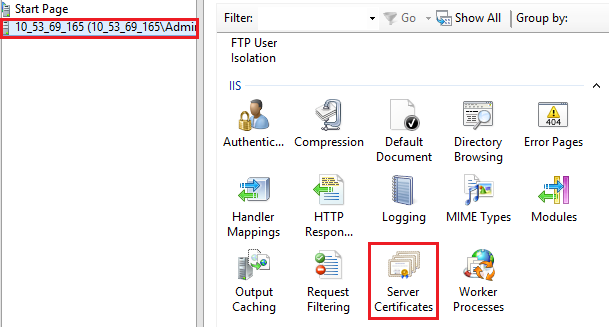
1. In the Server Manager window, select Tools > Internet Information Services (IIS) Manager in the top-right navigation bar.
2. In the Internet Information Services (IIS) Manager pop-up window, select the server in the left sidebar and double-click Server Certificates on the right panel.
3. Select Create Self-Signed Certificate in the right operation column.
4. In the Create Self-Signed Certificate pop-up window, enter a certificate name and the storage type.
This document uses creating an SSL certificate for personal storage as an example.


 Yes
Yes
 No
No
Was this page helpful?