This document describes how to view the statistics of machine recognition calls in the VM console.
Recognition Statistics
In the recognition statistics module, you can view the data of machine recognition calls, such as statistics, data trend, distribution of non-compliant content, and data reports.
1. Log in to the VM console and click Recognition Statistics on the VM page.
2. On the Recognition Statistics tab, you can view the data of machine recognition calls, such as recognition result statistics (total calls, passes, violations, and suspected violations), data trend, distribution of non-compliant content, and recognition statistics reports (which can be exported).
Time picker: it controls the overall data display on the recognition statistics page.
You can choose to view data from yesterday, last 7 days (default), last 15 days, last 30 days, or a custom time period.
Data statistics: it is controlled by the time picker and displays the statistics of data recognition for the selected time period, including total calls (duration), passes (duration and proportion), violations (duration and proportion), and suspected violations (duration and proportion).
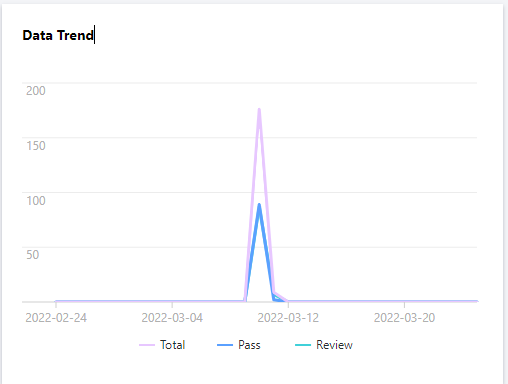
Data trend: it is controlled by the time picker and displays the data recognition trend for the selected time period. You can click each keyword (total calls, passes, violations, or suspected violations) in the trend graph to view their respective trends.
Non-compliant data distribution: it is controlled by the time picker and displays the distribution of non-compliant data for the selected time period. You can click keywords (porn, ad, etc.) on the right of the statistics graph to display statistics in different dimensions.
Recognition statistics: it is controlled by the time picker and displays the daily statistics. In the top-right corner of the recognition statistics table, you can click Export Statistics to export the statistics report.
Detailed Query
In the detailed query module, you can view the data details of machine recognition calls and manually recognize and tag video data.
1. Log in to the VM console and click Detailed Query on the VM page.
2. On the Detailed Query tab, you can view the data details of machine recognition calls and manually recognize and tag video data.
Time picker: it controls the overall data display on the detailed query page.
You can choose to view data from today, yesterday (default), last 7 days, last 15 days, last 30 days, or a custom time period.
Search
In the top-right corner of the detailed query page, click the search box, enter the video ID or URL, and click Search. After the search is completed, the target video data will be displayed in the data area.
View video details
2.1.1 On the detailed query page, click the thumbnail of the video you want to view to enter the details page.
2.1.2 On the video details page, you can view the video's non-compliant frames and audio segments. You can adjust the speed, volume, and full screen mode in the video player, download the video, mark content on the playback track as non-compliant, or click the non-compliant tag on the right of a non-compliant image to modify the recognition result.
2.1.3 After completing the operation, return to the detailed query page.
Template Configuration
In the template configuration module, you can customize the video recognition policy template to recognize videos according to your business needs.
1. Log in to the VM console and click Template Configuration on the VM page.
2. On the Template Configuration tab, you can customize the video recognition policy template.
Image Recognition Configuration: select the time interval for frame capturing, which can be 1s, 5s, 10s, 30s, or 1 min.
Audio Recognition Configuration: select whether to enable the audio recognition service. If it is enabled, you can select the audio stream or large file segment duration, which can be 15s, 30s, or 60s, and you can also enter a callback address for verification.
Note:
The callback address must be a URL conforming to the regular HTTP protocol.
3. After completing the configuration, click Save Configuration to save the current configuration. You can also click Clear Configuration to restore to the default configuration.


 Yes
Yes
 No
No
Was this page helpful?