The NAT Firewall Toggle (Primary/Secondary) supports traffic management and security protection for private network assets, and also supports network traffic forwarding based on SNAT and DNAT.
1. Log in to the CFW console, and in the left sidebar, choose Firewall Toggle > NAT Boundary (Primary/Secondary).
Note:
When a NAT Firewall Toggle is enabled, the internet traffic from the corresponding subnet will transit through the firewall. At that time, Access Control rules and the Intrusion Defense feature will take effect, and traffic logs will be generated.
2. On the NAT Boundary (Primary/Secondary) page, you can create instances, synchronize assets, and view and monitor the bandwidth usage of the NAT Firewall.
2. In the new NAT Firewall pop-up window, you can create a new NAT Firewall instance for the current account, fill in the relevant fields, and click Next.
Note:
Creating a "NAT Firewall" instance entails extensive backend configuration and may take several minutes to complete.
Field description:
Region: Select a region. Supported regions include the Chinese mainland, Hong Kong (China), Taiwan (China), and some overseas regions. The region cannot be changed after the instance is created.
Note:
Users can select regions with VPC in Chinese mainland, Hong Kong (China), Taiwan (China), and some overseas regions. Within the same region, multiple firewall instances can be created, but the total bandwidth must not exceed the specified quota.
Availability zone (Primary): Select an appropriate AZ based on your requirements.
Availability zone (Secondary): Select the appropriate standby AZ based on your requirements.
Instance name: Enter the instance name.
Quota: Select the instance specifications based on your requirements, with a minimum bandwidth of 20Mbps. For higher bandwidth, upgrade and scale out. Specifications must match the number of rules. For details, see Instance Specifications.
Note:
The Internet bandwidth should remain consistent. If multiple NAT firewalls are deployed, the total bandwidth of these NAT firewalls must be less than or equal to the bandwidth of the Internet boundary.
Mode: Includes new mode and access mode.
Addition Mode: If there are no NAT Gateways in the current region, the addition mode leverages the built-in NAT feature of the NAT Boundary Firewall to enable specified instances to access the Internet through the firewall.
Existing: If there is an existing NAT Gateway in the current region, or if you want to keep the egress IP for public network access unchanged, the existing can smoothly integrate the NAT Firewall between the NAT Gateway and CVM instances.
EIP: In the new mode, CFW supports binding to idle and unused EIPs and also supports quickly creating EIPs. If you choose to create a new EIP, the system automatically applies for an EIP for you through CAM.
Note:
Please note that the EIP bandwidth must be greater than or equal to the firewall's protected bandwidth; otherwise, it will result in excess protected bandwidth. The EIP cost is billed by the EIP product, and the firewall does not charge any EIP bandwidth fees.
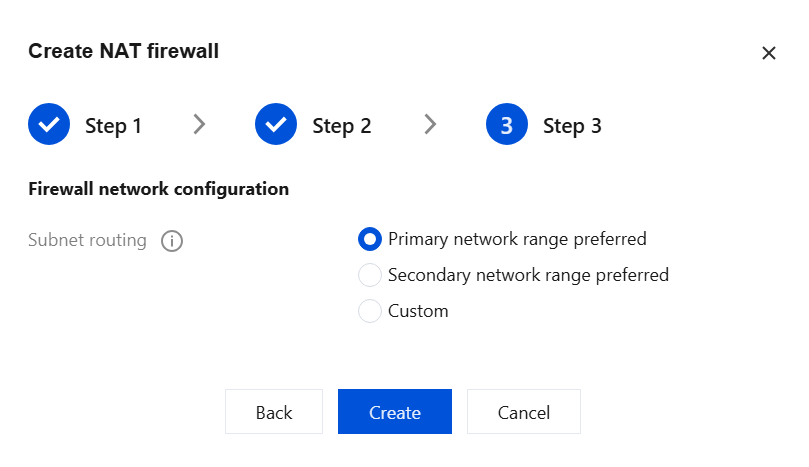
3. After selecting the VPC or NAT to be connected, configure the firewall network settings and choose Subnet routing. The methods for establishing a traffic redirection subnet include the following three:
Note:
Traffic redirection subnet: CFW will create a /24 subnet within the VPC you connect to, which is used to steer traffic to the firewall. You can choose different methods to create the subnet.
For NAT Firewall instances with bandwidth less than 600Mbps: the new mode supports a maximum of 8 VPCs, and the access mode supports a maximum of 4 NAT Gateways.
For NAT Firewall instances with bandwidth greater than 600Mbps: the new mode supports a maximum of 10 VPCs, and the access mode supports a maximum of 5 NAT Gateways.
Primary network range preferred: CFW will automatically select an available subnet range within the chosen VPC; when there are no subnet quotas available within the VPC, it will use the expansion IP range of the selected VPC.
Secondary network range preferred: CFW will prioritize using the idle expansion IP range reserved for the VPC. This mode does not consume the subnet quota of the selected VPC.
Note:
expansion IP range refers to the auxiliary network segment in VPC, which can be referred to Editing IPv4 CIDR Blocks.
Custom: Users can define the subnet range for firewall usage. Please note that it must be a /24 subnet; the custom subnet range must belong to the current VPC's CIDR. Input example: 192.168.0.0/24.
4. After configuration is complete, click Create to successfully create a NAT Firewall.
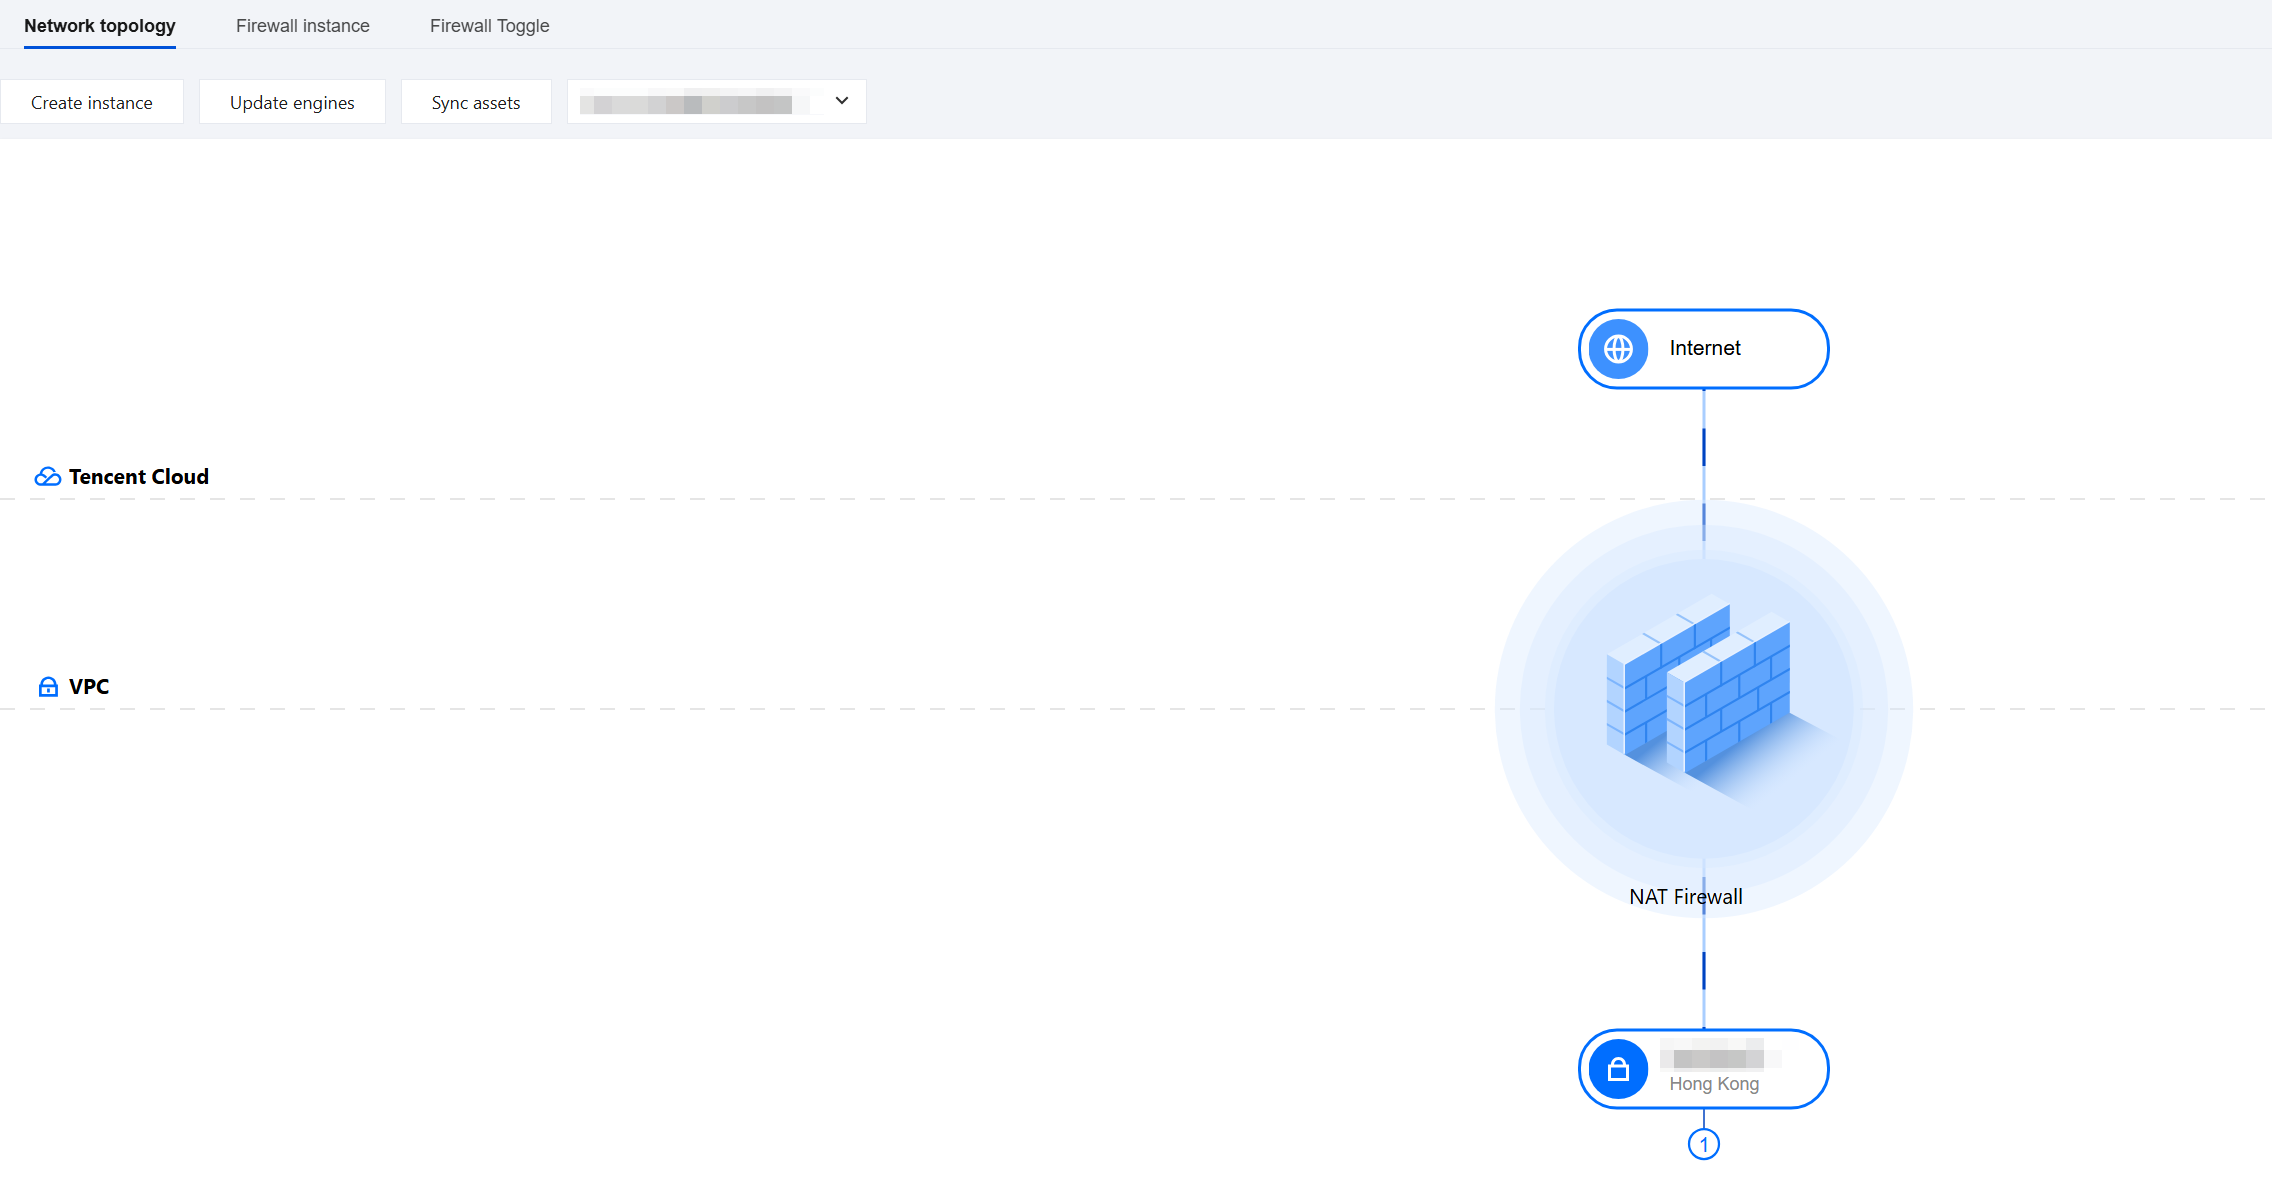
Network Topology
CFW provides a visual view to help you quickly visualize access relationships at the NAT boundary. In the NAT boundary visual view, VPCs display VPC instances.
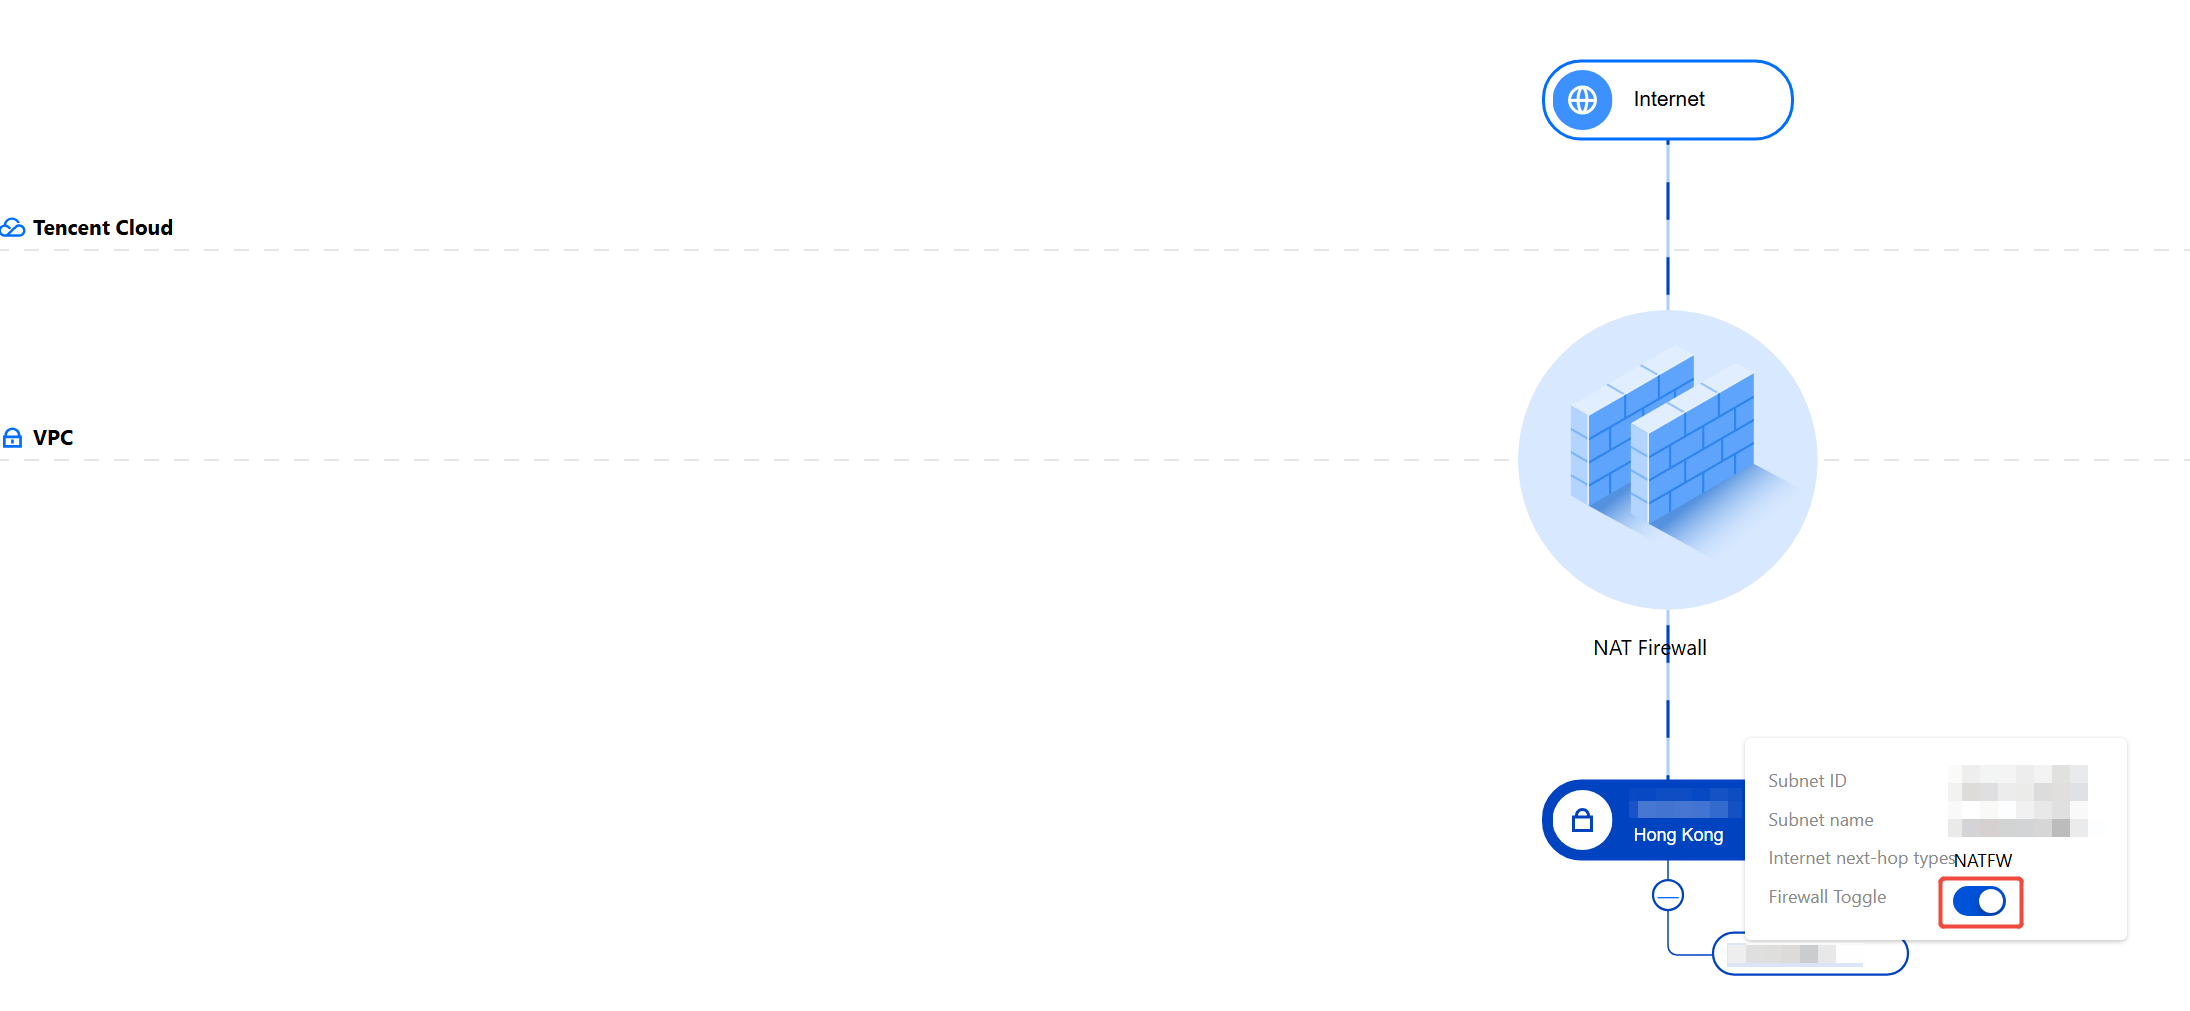
2. Click a VPC node to view the corresponding subnet list, and you can enable or disable the firewall toggle targeting the current subnet.
Firewall Toggle
On the NAT Boundary (Primary/Secondary) > Firewall Toggle page, you can enable or disable NAT Firewall protection. CFW automatically synchronizes cloud assets at regular intervals, so you do not need to worry about firewall configurations after asset changes (for example, if a subnet is modified, the firewall will automatically synchronize the change within a short time).
Enable protection
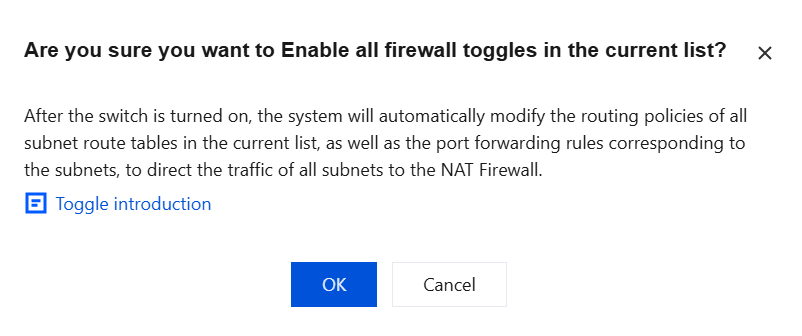
Above the instance list, click Enable all. All disabled NAT boundary firewall toggles will be turned on. All routing tables will automatically add routing policies with the next hop type set to NAT Boundary Firewall. All internet traffic from all subnets will transit through the NAT Boundary Firewall.
Note:
After the toggle is enabled, do not manually modify the routes associated with the toggle in the VPC console, as this may cause the firewall to lose routing and result in network interruption.
When users choose to enable all subnets associated with the same routing table, the system will automatically add a routing policy with the next hop pointing to the NAT Firewall in that routing table and disable the original route to the public network. Consequently, all internet traffic from subnets associated with this routing table will transit through the NAT Firewall.
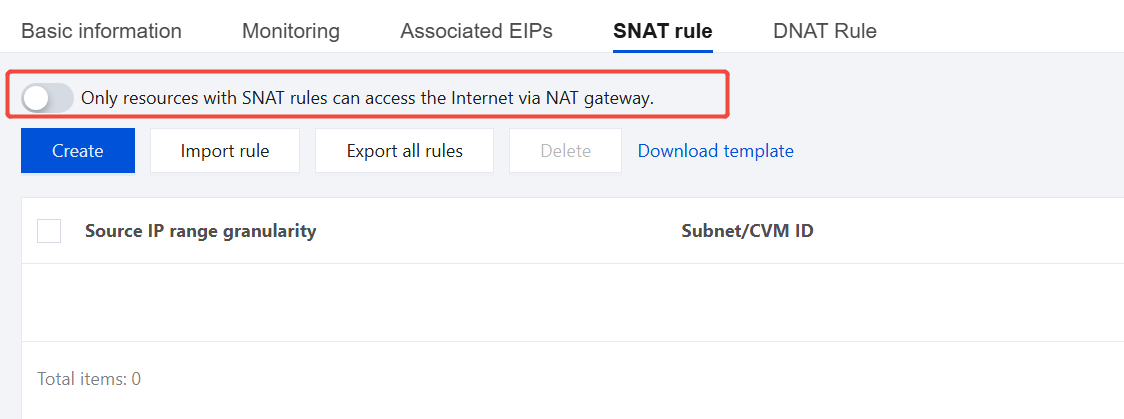
If the firewall instance is in access mode, ensure the toggle in the SNAT rules diagram of the corresponding NAT Gateway is disabled; otherwise, the firewall traffic steering policy will not take effect.
A firewall toggle corresponds to a subnet and controls whether traffic transits through the NAT Firewall. Subnets associated with the same routing table will be enabled or disabled simultaneously. After the NAT Firewall is created, traffic steering does not take effect immediately. You need to go to the Firewall Toggle page to manually enable it.
Note:
After the toggle is enabled, the system will automatically modify the routing policy of the subnet-associated routing table and the port forwarding rules corresponding to the subnet, redirecting the traffic of this subnet to the NAT Firewall.
Disable protection
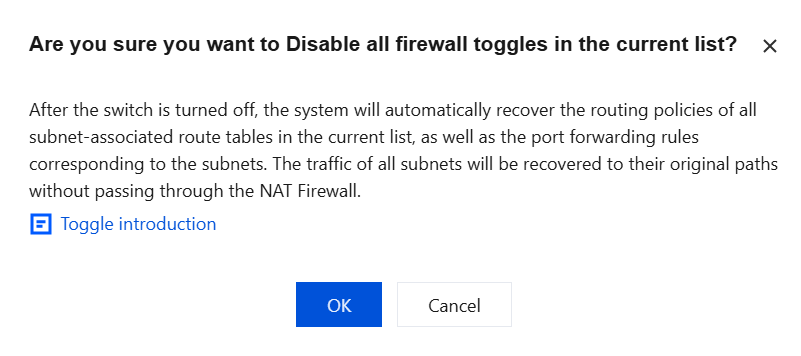
Method 1: Above the instance list, click Disable protection. All enabled NAT Firewall toggles will be disabled. The NAT Firewall will automatically disable routing policies with the next hop type set to NAT Firewall in all routing tables. All subnets will disconnect from the internet. Users need to manually enable new routing policies in the VPC console.
Note:
If users choose to disable all subnets associated with the same routing table, the system will automatically disable the routing policy with the next hop pointing to the NAT Firewall in that routing table. Then all subnets associated with this routing table will disconnect from the internet.
Method 2: Disable the firewall toggle individually.
To disable a Firewall Toggle individually, click the "Firewall Toggle" button for a specific subnet in the Firewall Toggle operation bar. The Firewall Toggles for other subnets associated with the same routing table will also be disabled simultaneously.
Note:
After the toggle is disabled, the system will automatically restore the routing policy of the subnet-associated routing table and the port forwarding rules corresponding to the subnet. The traffic of this subnet will resume its previous path and will not transit through the NAT Firewall.
Network Configuration
1. On the NAT Boundary (Primary/Secondary) > Firewall instance page, select the desired instance, and choose More > Network Configuration.
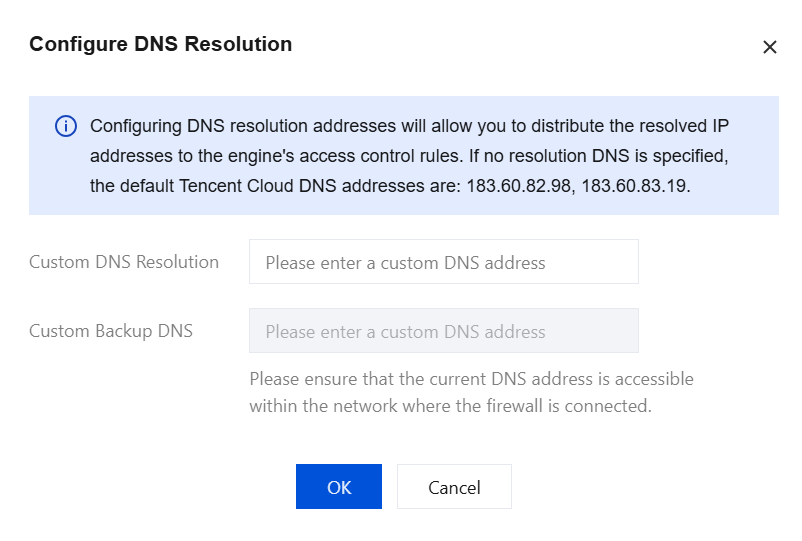
2. Click Configure DNS Resolution to configure the custom DNS resolution address for access control rules of domain name resolution type.
3. In the Configure DNS Resolution window, fill in the relevant parameters, click OK to save.
Note:
By default, Tencent Cloud's default DNS server addresses will be used, which are 183.60.82.98 and 183.60.83.19. If you need to specify DNS servers for resolution, please fill them in below.
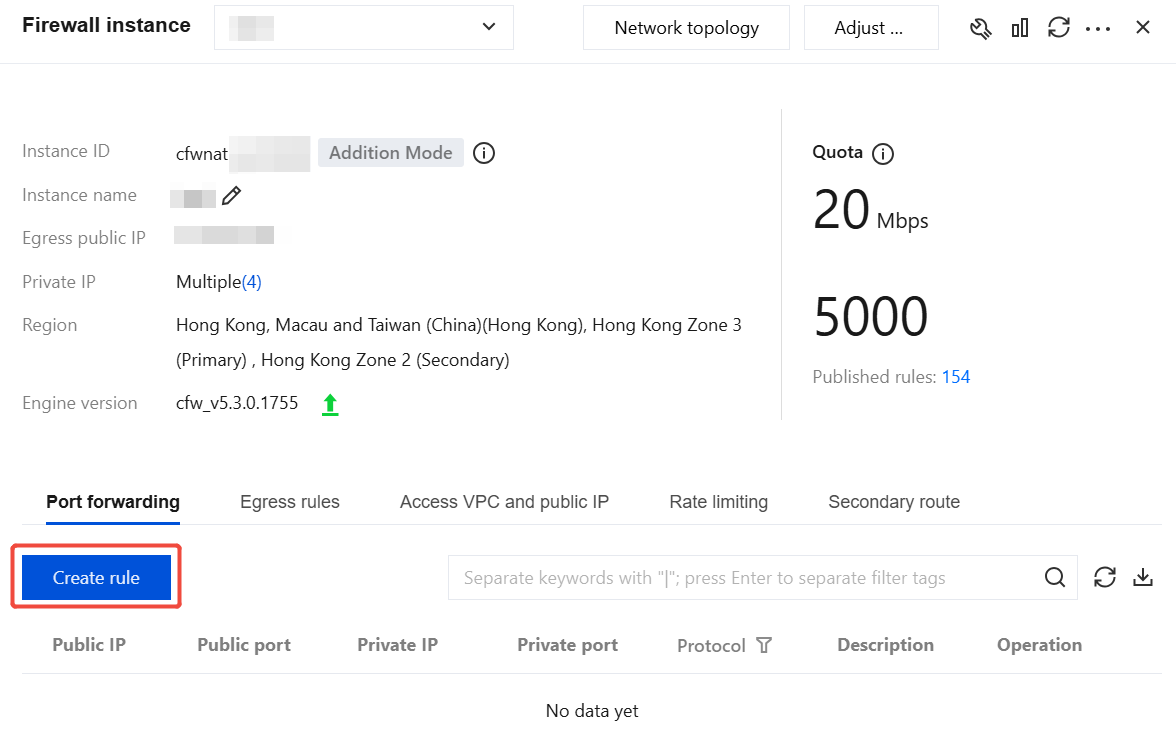
In the right sidebar, you can view the DNAT port forwarding rules added by users based on the NAT Boundary Firewall Instance, as well as the Elastic IPs associated with the instance.
Note:
In Access Mode, after the toggle is enabled for the first time, the NAT Firewall automatically synchronizes the port forwarding rules of the existing NAT Gateway to ensure traffic flow. Subsequent operations on these rules should be performed in the CFW Console.
In subnets with the Firewall Toggle enabled, SNAT and DNAT traffic will transit through the firewall; in subnets with the toggle disabled, SNAT and DNAT traffic will follow the original path.
Do not go to the VPC console to operate port forwarding rules, as this may cause network interruption.
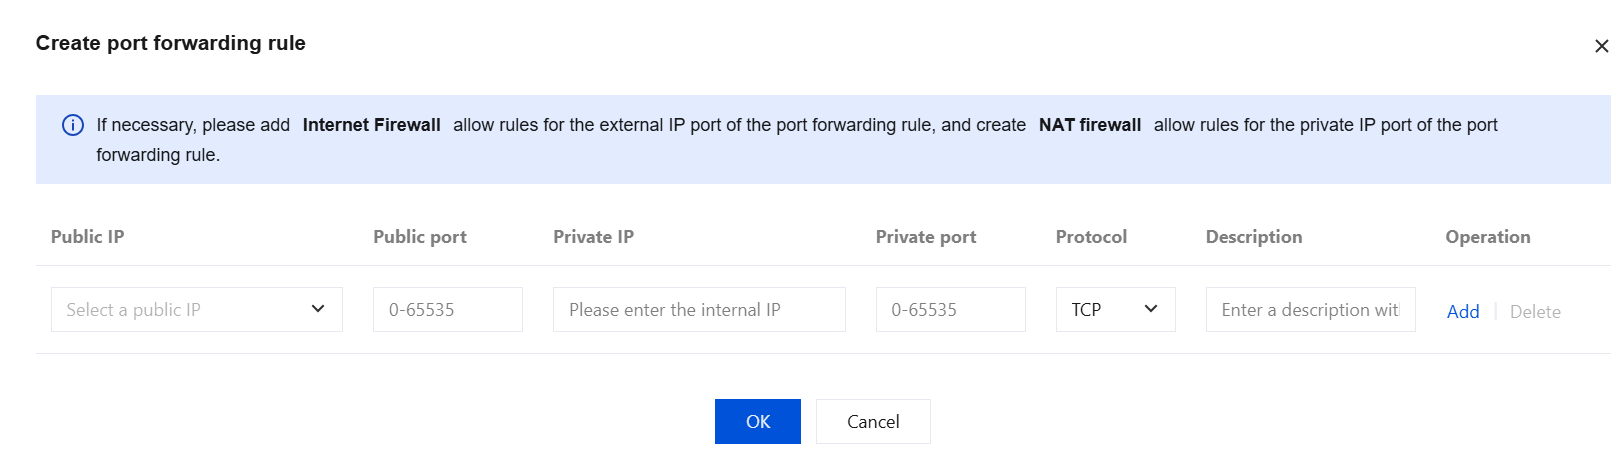
1.1 On the Configuration page, under the Port forwarding tab, click Create rule.
1.2 In the "Create port forwarding rule" pop-up box, users can add a DNAT rule for the current NAT Boundary Firewall Instance with an external IP address bound to the user's Elastic IP.
Note:
In the external IP port drop-down list, the options provided are the Elastic IPs bound to the current NAT Firewall instance.
When entering an internal IP address, users need to enter an available IP address within the local VPC subnet.
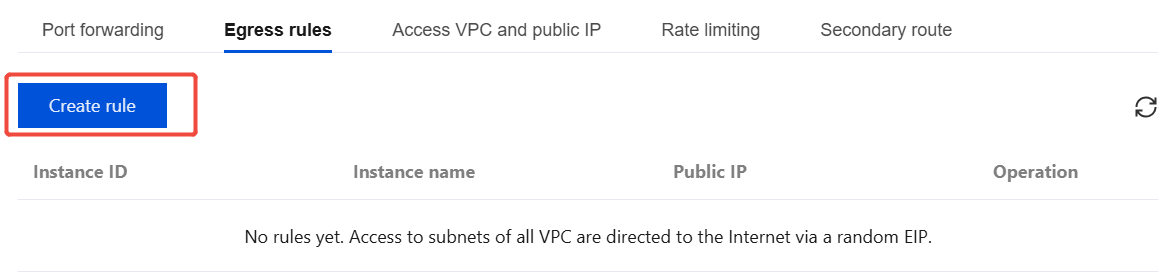
Egress Rule
In add mode, when the rule list is empty, all VPC subnets will randomly select a NAT Gateway to access the internet.
Note:
The access mode currently does not support egress rule.
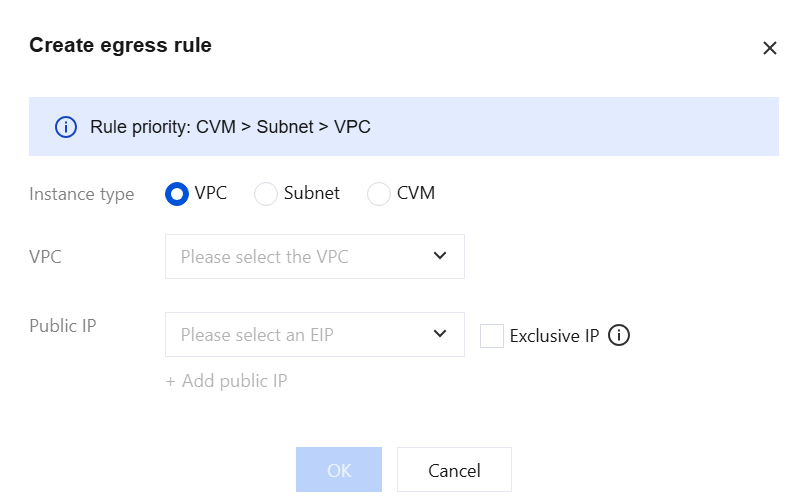
1.1 On the Configuration page, under the Egress rules tab, click Create rule.
1.2 In the Create egress rule pop-up box, the firewall instance ID information is provided. You can add an SNAT rule for the current NAT Firewall and click OK.
Note:
The instance type can be VPC, Subnet, or CVM. Only instances that have been connected to the NAT Firewall and have no egress NAT rules bound are supported.
The Exclusive IP option allows the selected external IP address to be used as the egress IP for the subnet/VPC of the dedicated rule and cannot be used by other subnets/VPCs outside the dedicated rule.
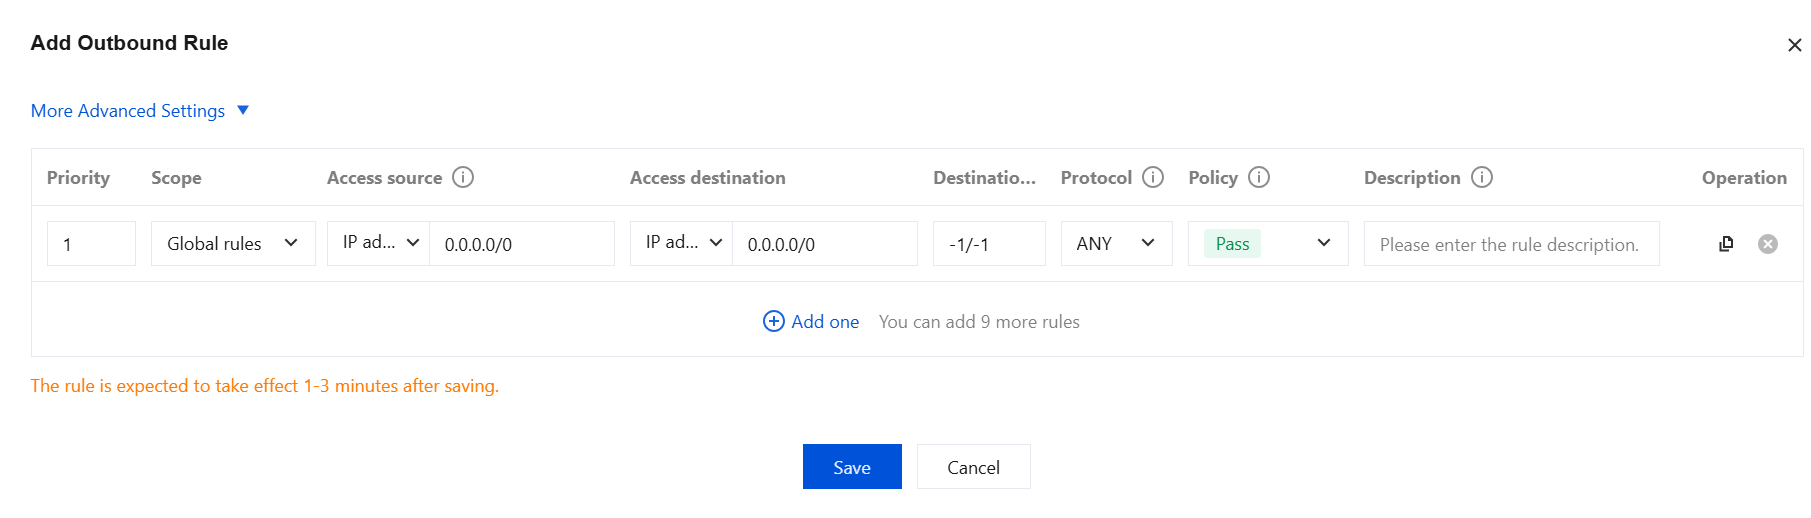
Access DNS traffic
Due to the underlying architecture of Tencent Cloud, traffic from PrivateDNS (183.60.83.19, 183.60.82.98) does not pass through the firewall and therefore cannot be protected by the NAT Firewall. Other DNS traffic, excluding PrivateDNS, can pass through the firewall.
c. On the Add rule page, fill in the relevant fields, select the DNS protocol, and click Save. For detailed operations, refer to NAT Border Rule.
Note:
Only when the access destination type is Domain Name > FQDN Matching or Address Template > Domain Address Template, can the DNS protocol be selected.
Associate Elastic IPs
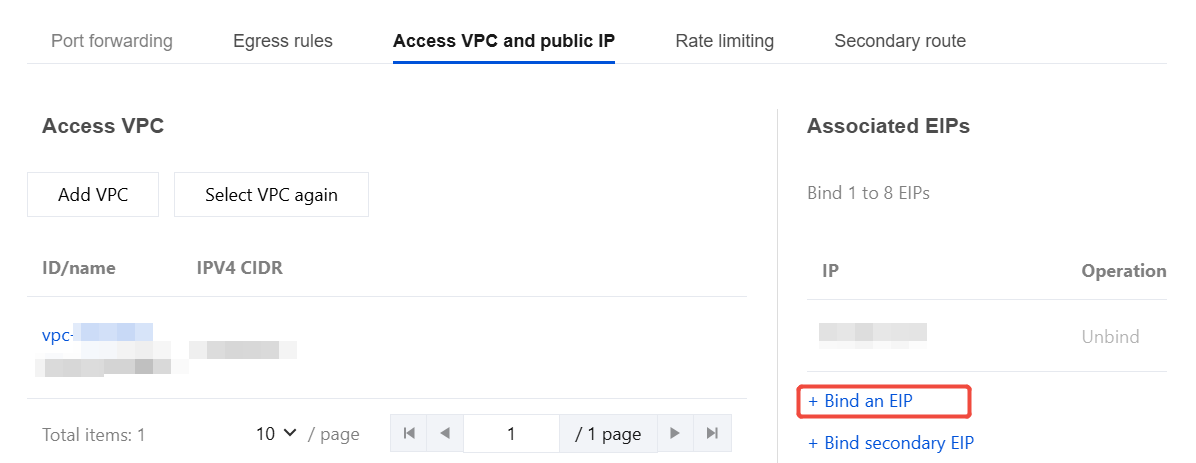
1.1 Under the Access VPC and public IP tab on the Configuration page, click + Bind an EIP.
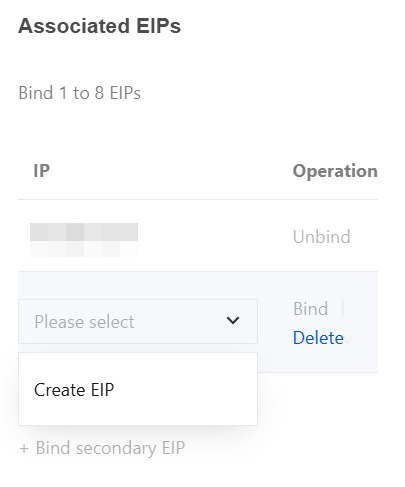
1.2 In the single-select dropdown box, users can bind a system-created Elastic IP or select one from all idle Elastic IPs in the current region to bind to the current NAT Boundary Firewall Instance.
Note:
The Associate Elastic IPs feature currently only supports the newly added mode.
When an Elastic IP is unbound, the corresponding DNAT rules on the page will also disappear.
The same applies to binding a secondary Elastic IP.
Rate Limit
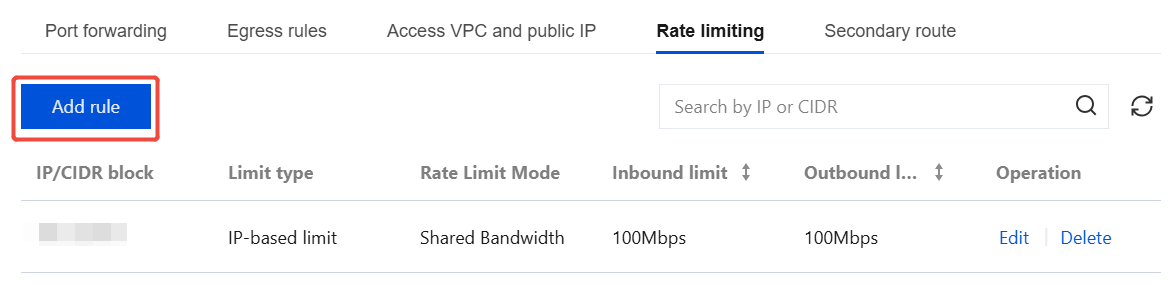
Under the Rate limiting tab on the Configuration page, bandwidth rate limiting can be configured for IP address/CIDR addresses under the current firewall instance.
Note:
The rate limiting mechanism of the NAT Gateway is triggered after traffic statistics are collected. Due to the time window between statistics collection and rate limiting enforcement, discrepancies may occur in the traffic monitoring data on the NAT Gateway.
Add Rate Limit
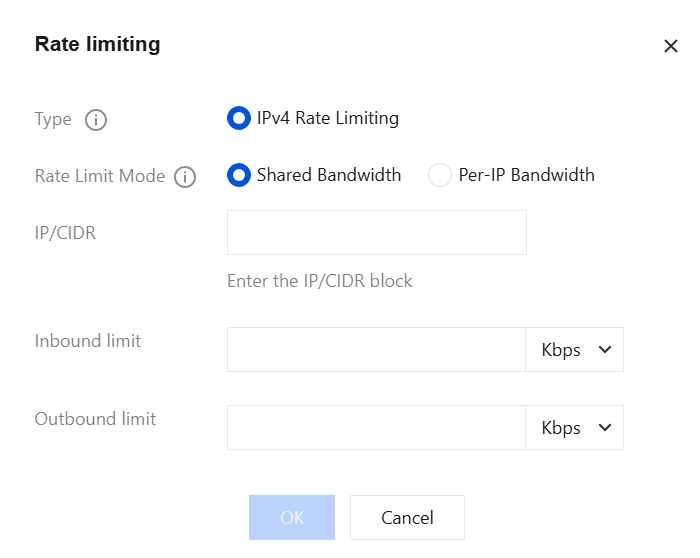
a. Click Add rule, and a pop-up window for adding a rate limit rule will appear.
b. Enter the IP/CIDR to be rate-limited, select the Rate Limiting Mode, and specify the bandwidth rate limits. At least one of the Inbound limit or Outbound limit rates must be provided. Unfilled fields default to no restriction. Click OK to complete the bandwidth rate limiting configuration.
Note:
Only private IP addresses are supported.
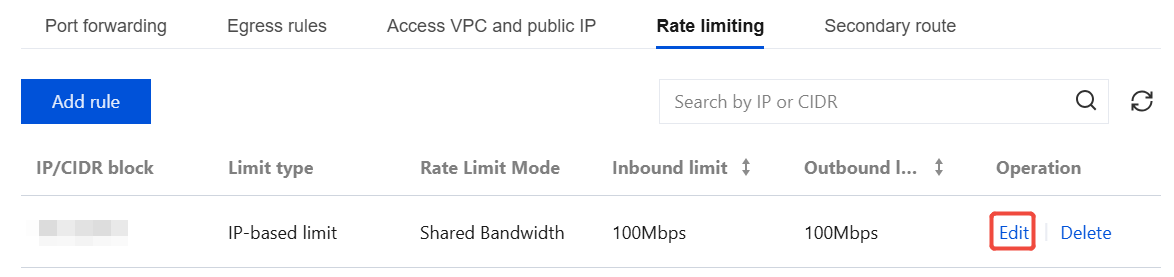
Edit Rate Limit
a. For successfully configured rate limit rules, click Edit in the Action column to modify the rule.
b. Re-enter the IP/CIDR requiring rate limiting and the bandwidth rate limits. At least one of the inbound or outbound rates must be specified. Unfilled fields default to no restriction. Click OK to complete the bandwidth rate limiting configuration.
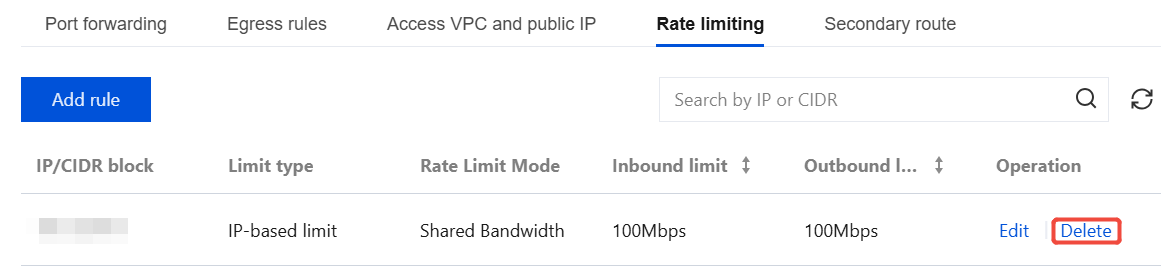
Delete Rate Limit: For successfully configured rate limit rules, clicking Delete in the Action column will remove the bandwidth rate limit restriction.
Spec Adjustment
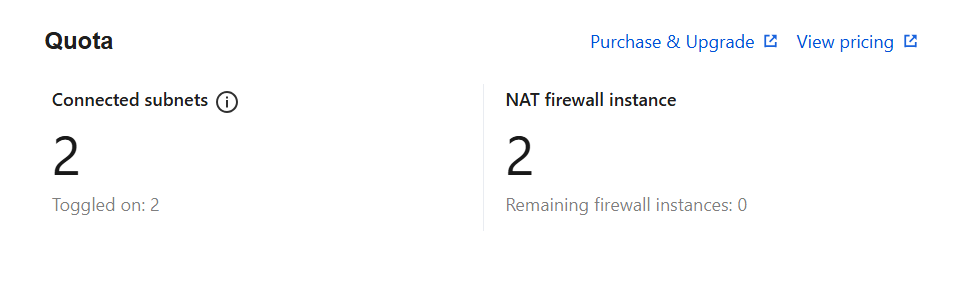
1. On the NAT Boundary (Primary/Secondary) page, click Purchars & Upgrade in the upper-right corner. This redirects you to the configuration change page, where you can upgrade parameters such as bandwidth, edition, and log storage capacity.
Note:
Here, if only the bandwidth is scaled during upgrade and scale, this bandwidth refers to the internet boundary bandwidth, which can also be understood as the total bandwidth of CFW.
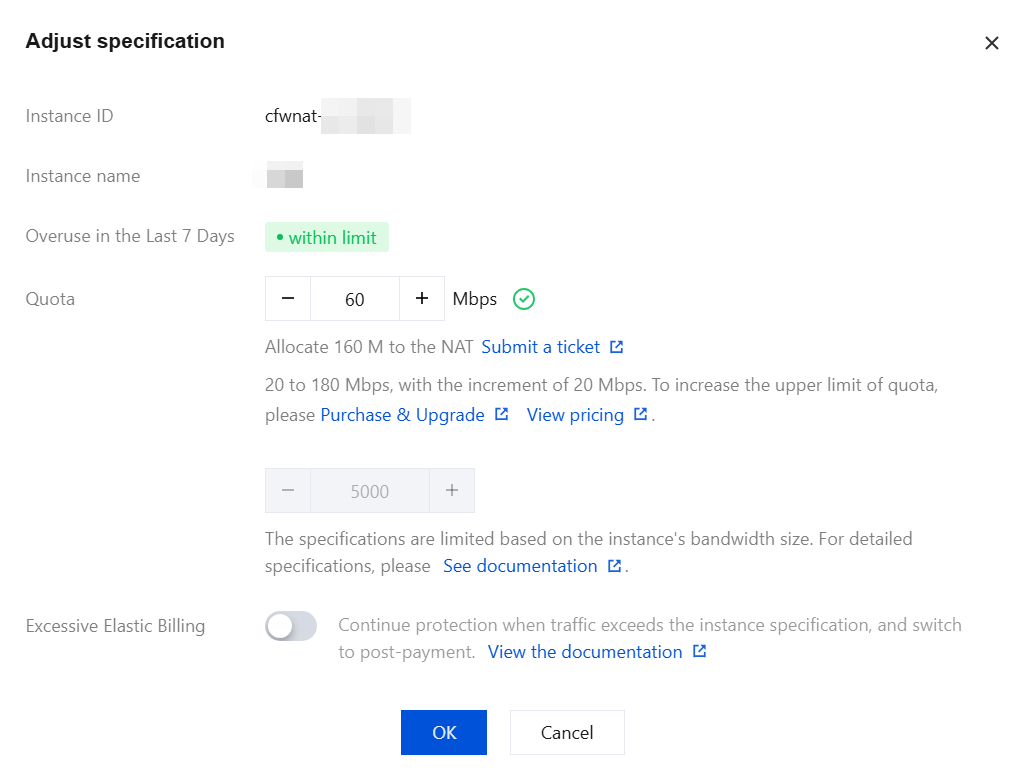
2. To scale the bandwidth for a single NAT Firewall instance, follow the steps below:
Note:
The adjustment scope should be consistent with the internet bandwidth. If multiple NAT firewalls are deployed, the sum of their bandwidth must be less than or equal to the bandwidth of the internet boundary.
If the target bandwidth exceeds the currently purchased bandwidth specification, you can click Purchars & Upgrade to adjust the internet boundary bandwidth.
For minor bandwidth adjustments, no network switchover is required. For major bandwidth adjustments (which involve upgrading the instance specification tier; for details, see Instance Specifications), the backend needs to reconfigure the network, which may cause a 3-5 second network interruption.
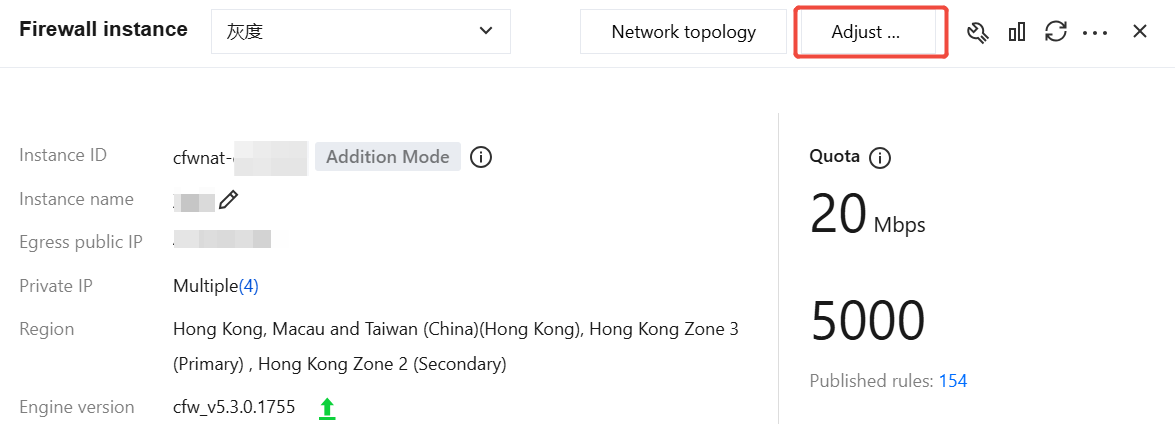
2.1 On the NAT Boundary (Primary/Secondary) > Firewall instance page, locate the instance whose bandwidth needs adjustment, and click its Instance ID or the Configuration on the right.
2.2 On the Firewall instance page, click Adjust specification in the upper-right corner.
2.3 After the bandwidth is allocated, click OK and wait for the backend adjustment to complete.
Instance Specifications
NAT Firewall Instance Specifications Tier Table.
Note:
NAT instance specifications and NAT rule list quotas are independent of each other, unrelated to billing logic, and cannot be scaled out separately. They can only be upgraded by enhancing the instance specifications. For each ACL configured in the console, we automatically convert it into specific rules according to the deployment formula, identify the source and destination, and deploy them to the specified NAT firewall instance.
Deployment formula: Number of deployed rules = Number of source addresses × Number of destination addresses × Number of ports × Number of protocol types.
NAT instance specifications determine the maximum number of ACL rules each NAT firewall can handle. Excessive deployment of ACL rules may cause engine instability.
To avoid impacting your business operations, we recommend optimizing rules based on each instance's specifications and the number of deployed rules, reducing the proportion of redundant rules to enhance engine stability.
Specification Tiers
Minimum Bandwidth/Mbps
Maximum Bandwidth/Mbps
Concurrent Connections/Unit
Number of Rules Quota / Item
1
20
299
130,000
5,000
2
300
1,300
130,000
20,000
3
1,301
4,095
150,000
40,000
4
4,096
6,143
300,000
60,000
5
6,144
10,239
500,000
120,000
6
10,240
102,400
1,000,000
200,000
Monitoring Status
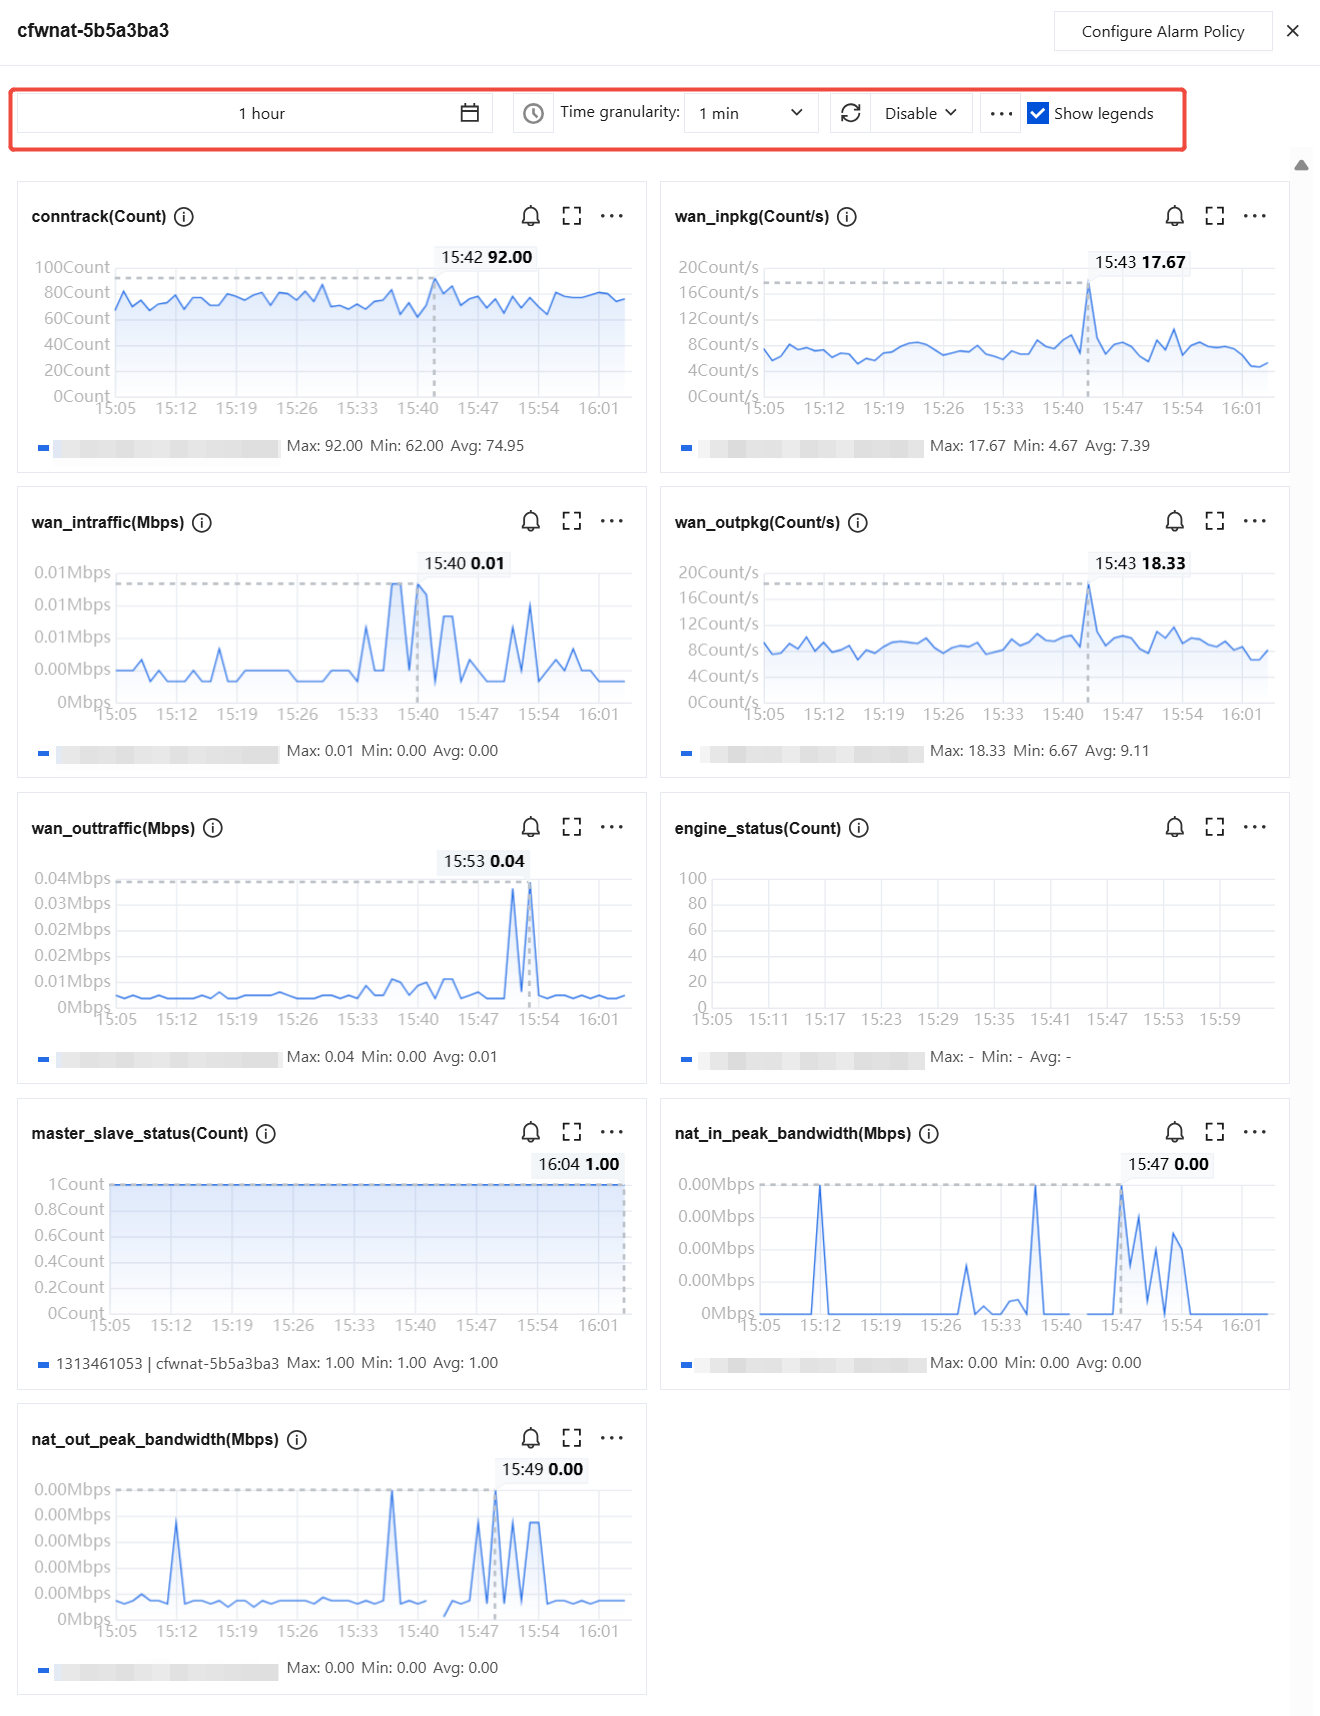
On the NAT Boundary (Primary/Secondary) page, you can view and monitor NAT Firewall-based bandwidth, synchronize assets, and manage network topology.
1. In the upper-right corner of the status monitoring panel, click
to go to the Firewall Status Monitoring page.
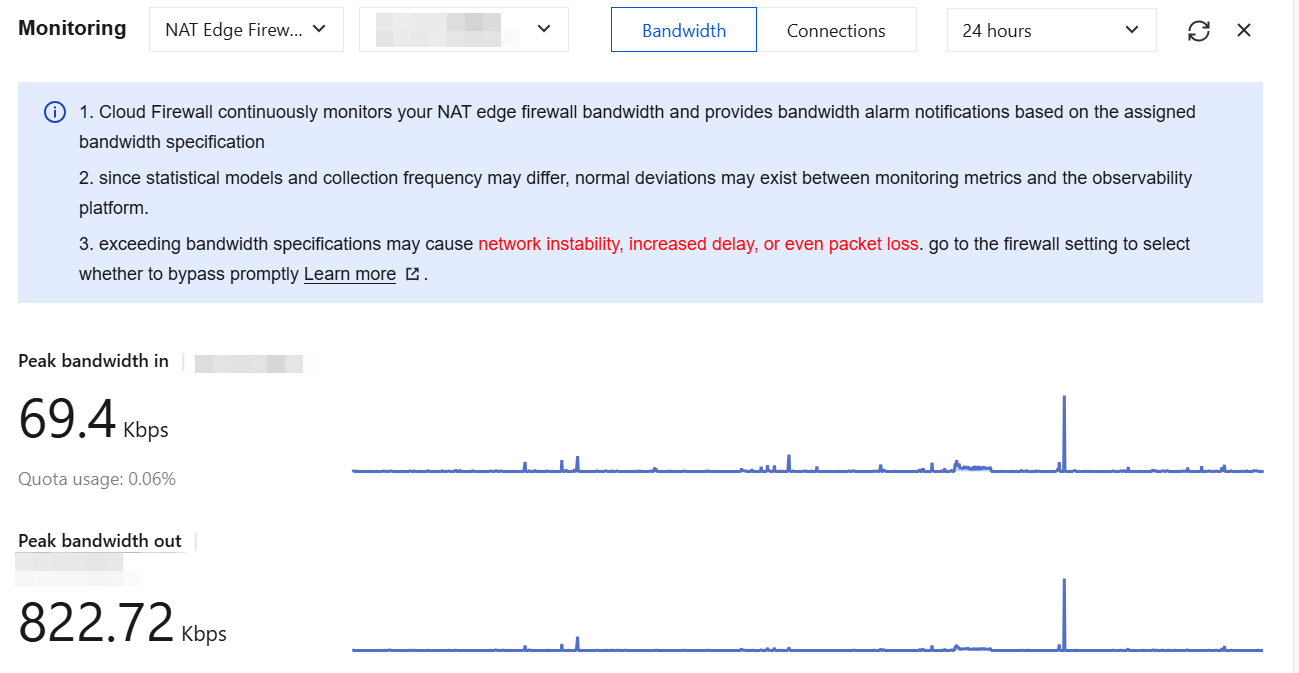
2. On the Firewall Status Monitoring page, you can view and monitor NAT boundary-based bandwidth in real time. This helps avoid network packet loss and fluctuations caused by NAT Firewall bandwidth exceeding the capacity limit, enabling timely actions such as scaling out or disabling certain toggles.
Note:
The bandwidth data displayed in monitoring uses a packet-direction statistical method, which separately counts inbound and outbound packet traffic. Packet direction uses the transmission direction of individual packets as the statistical dimension, differing from session direction: session direction uses a complete network session (request + response) as the statistical dimension, attributing the entire session's traffic to the initiator direction. Consequently, the request traffic and response traffic of the same session are counted into inbound and outbound bandwidth respectively.
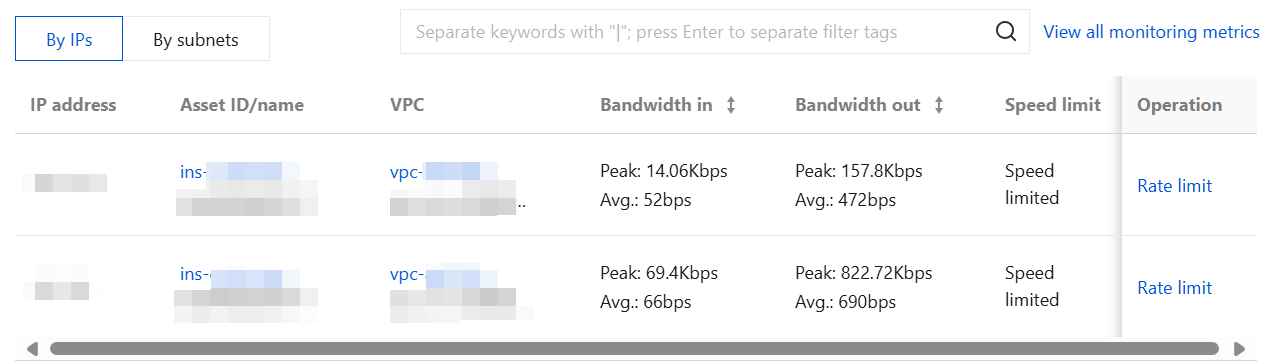
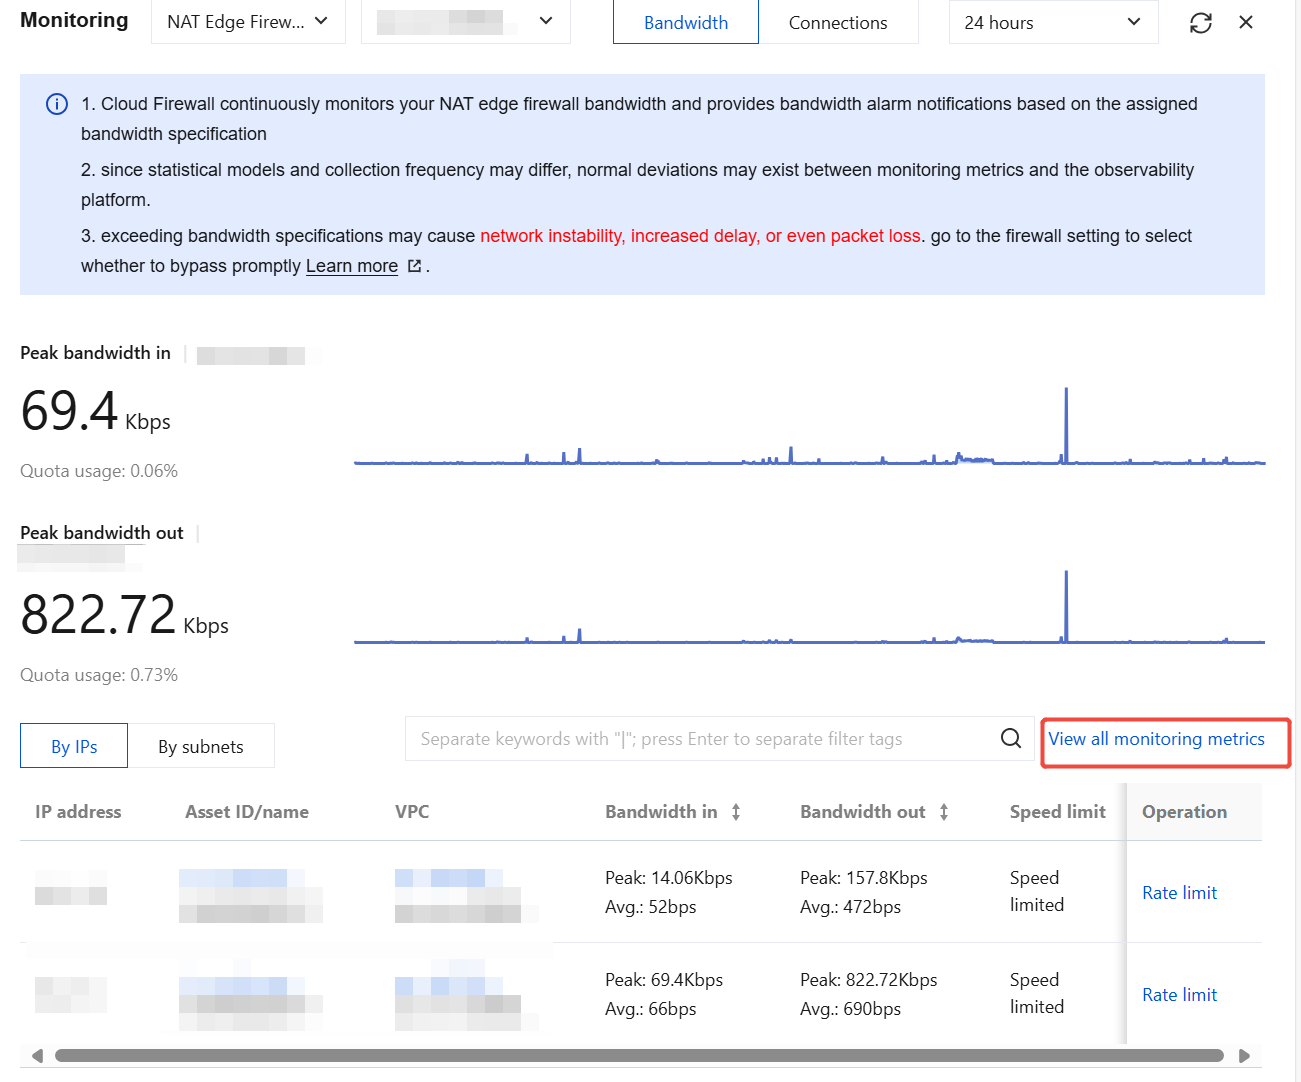
3. On the Firewall Status Monitoring page, it supports viewing bandwidth status monitoring from IP address and subnet perspectives.
IP address Perspective: Asset information of the IP address, associated VPC, peak and average inbound/outbound bandwidth, rate limiting status, and rate limiting operations.
4. Click View all monitoring metrics to see more monitoring metrics for this instance, including inbound/outbound packet data. You can also go to TCOP to view more data.
5. You can configure settings such as the monitoring data time interval, YoY/MoM comparisons, and refresh time.
Engine Upgrade
NAT Boundary Firewall adopts a private deployment model, with its firewall engine dedicated to the tenant. Therefore, you need to manually perform engine updates. For specific upgrade steps, see Firewall Engine Upgrade.
Synchronizing Assets
On the NAT Boundary (Primary/Secondary) > Firewall instance page, click Sync assets to actively call the background API to re-read and synchronize the asset information of user subnets. This prevents situations where user assets change during the background polling interval but have not yet been synchronized.
Synchronization Routes
On the NAT Boundary (Primary/Secondary) > Firewall Instance page, click Sync routes. The firewall will synchronize routes from the main routing table to itself. After synchronization, traffic passing through the firewall will be protected by it. The synchronization process is expected to take approximately 10 minutes. Upon completion, the status will be automatically refreshed for you.
Perform Other Operations on VPC and NAT
Add Access to VPC/NAT
Add Mode
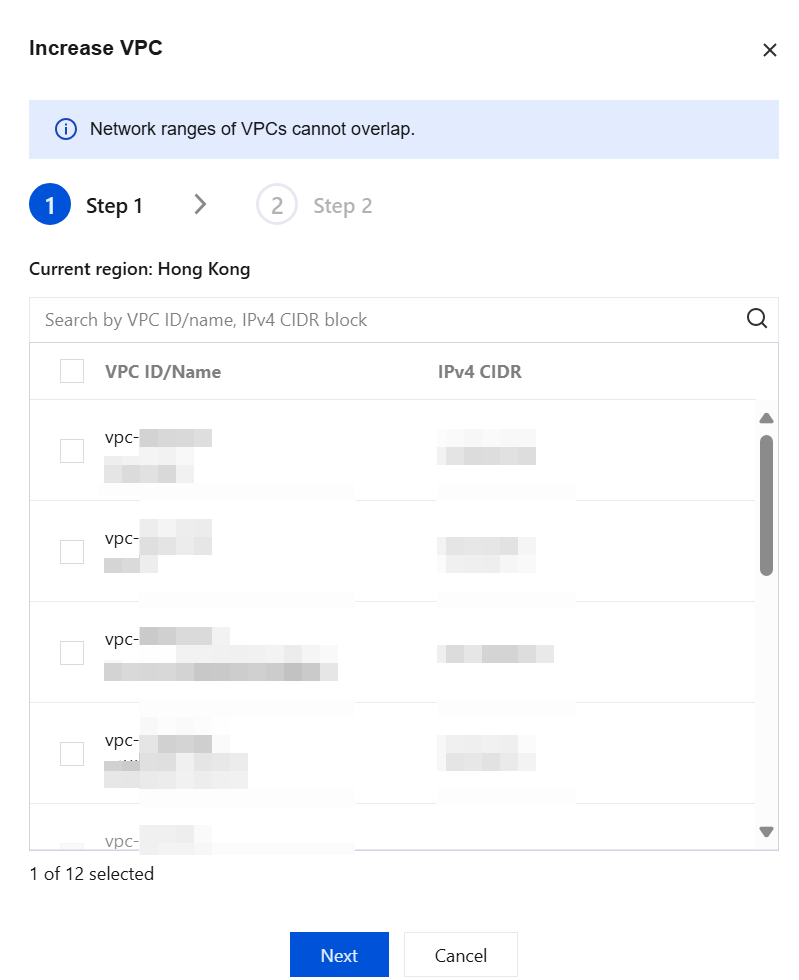
1.1 On the NAT Boundary (Primary/Secondary) > Firewall Instance page, click More > Access configuration. In the dropdown box, click Add VPC.
1.2 In the Increase VPC dialog box, select the desired VPC and click OK to complete the configuration.
Note:
Supports keyword search for VPC ID/name and IPv4 CIDR.
The checkbox: The user's current VPC is selected by default and cannot be deselected.
Clicking Add VPC to Access triggers a lock on the NAT Firewall Toggle for the current region. The lock remains in place until you finish reselecting VPCs and click OK to unlock it. During the lock period, if another user in the same region requests to enable the toggle, a message will indicate that another user is reconfiguring VPC access and the toggle is locked. Please try again later.
Access Mode
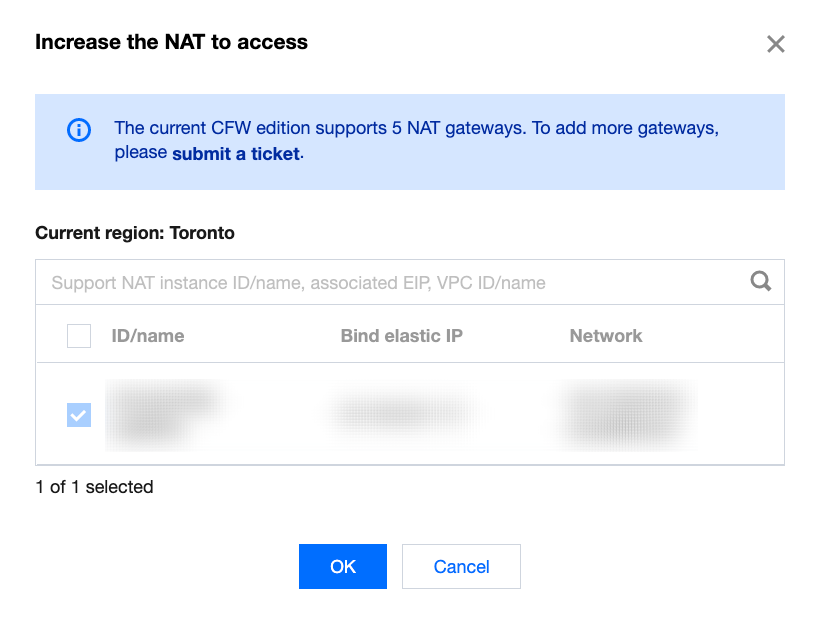
1.1 On the NAT Boundary (Primary/Secondary) > Firewall instance page, click More > Access configuration. In the dropdown box, click Add NAT.
1.2 In the pop-up window for adding a NAT connection, select the required NAT and click OK to complete the configuration.
The checkbox: The NAT Gateway that the user's current NAT firewall instance has already connected to is selected by default and cannot be deselected.
Change Associated VPC/NAT
Add Mode
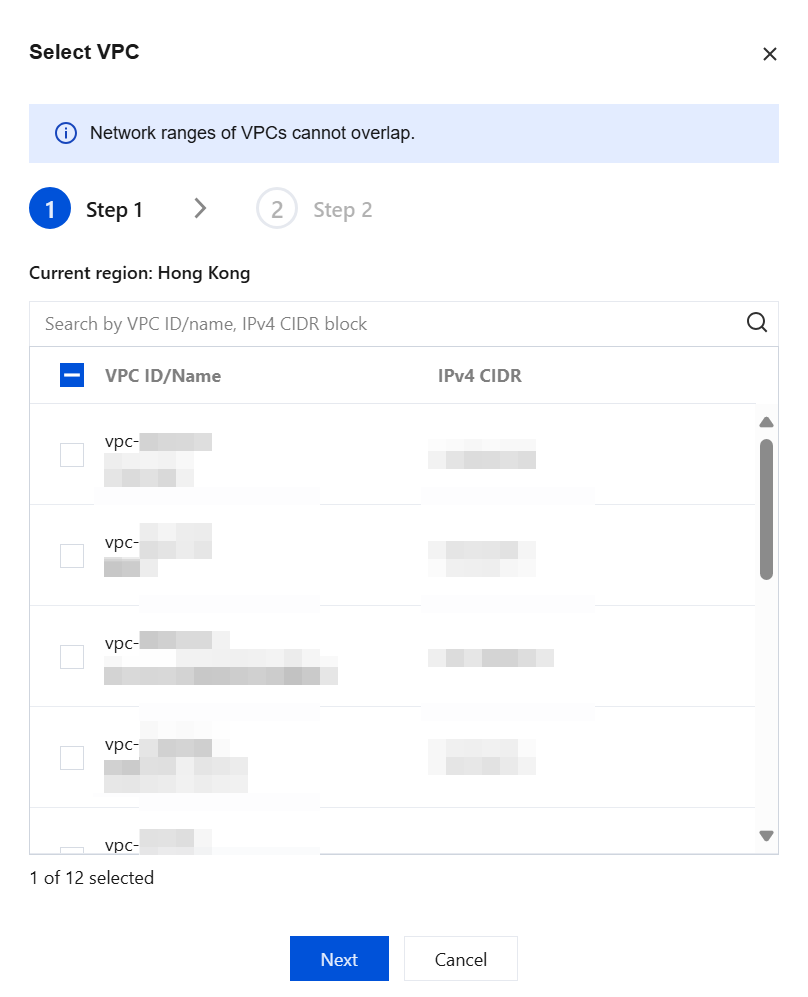
1.1 On the NAT Boundary (Primary/Secondary) > Firewall instance page, choose More > Access configuration. In the dropdown box, click Change associated VPC.
Note:
All subnet toggles and DNS traffic toggles under the current firewall instance must be disabled.
1.2 In the "Select VPC to Connect" section, you can view the VPCs in the current region of the user, select the required VPC, and click OK to complete the configuration.
The checkbox: The user's current VPC is selected by default and cannot be deselected.
Access Mode
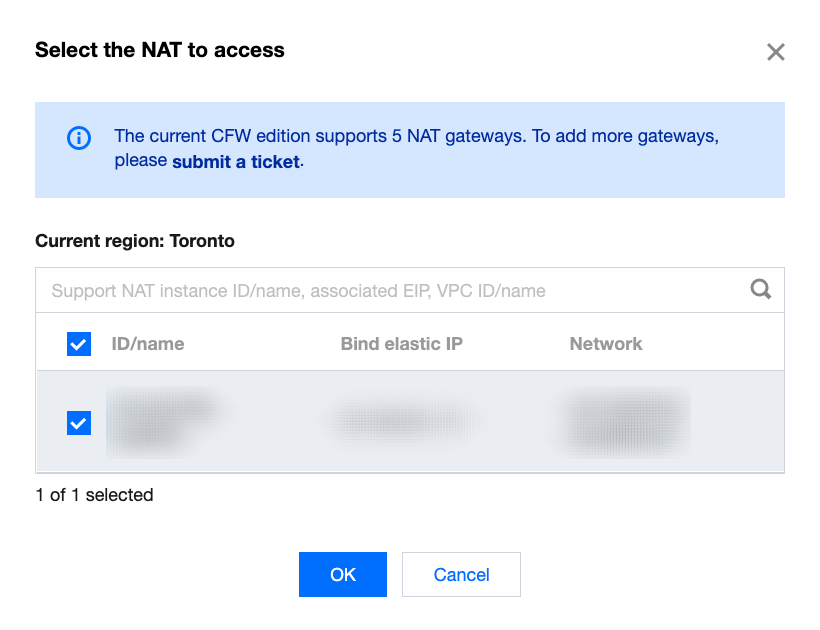
1.1 On the NAT Boundary (Primary/Secondary) > Firewall instance page, choose More > Access configuration. In the dropdown box, click Change associated NAT.
Note:
Please first check whether all toggles are disabled. To reselect access NAT, all toggles must be disabled (excluding switches currently being disabled).
1.2 In the "Select NAT to Connect" section, the NAT instances in the user's current region are displayed. Select the required NAT.
Note:
Clicking Select the required NAT triggers a lock on the NAT Firewall Toggle for the current region. The lock remains in place until you finish reselecting and click OK to unlock it. During the lock period, if another user in the same region requests to enable the toggle, a message will indicate that another user is reconfiguring NAT access and the toggle is locked. Please try again later.
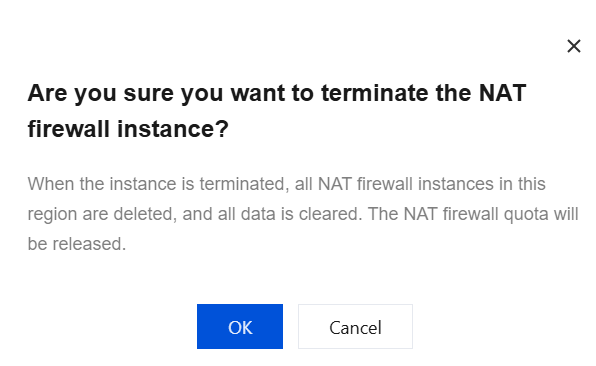
Before the instance is terminated, all Firewall Toggles must be disabled.
Users can independently terminate instances on the page due to business changes.
After the instance is terminated, all its configurations will be deleted while logs are retained. Upon completion, the quota will be released, routing and port forwarding will automatically revert to their previous state, and the region display will update to show only remaining regions. If no regions remain, the page will return to the initial instance creation page.
2. In the pop-up confirmation box, click OK to delete all configurations for this instance.
Enable ByPass: In ByPass mode, all traffic under the current instance will bypass the firewall, and all firewall configurations will become invalid. It is recommended to use during debugging. After enabling, it is expected to take effect within 1 minute. After debugging is completed, please manually disable ByPass mode. If you need further assistance, please submit a ticket.
Note:
Enabling ByPass mode may result in the following effects:
1. The route switching process may experience a brief disconnection lasting several seconds.
2. Existing persistent connections will be affected and will need to automatically retry to establish new connections.
Restarting instance: We will first restart the firewall secondary node. After the restart is complete, a primary/secondary switchover will be performed, followed by restarting the firewall primary node. After the primary node restart is complete, another primary/secondary switchover will be performed. The entire process is expected to take approximately 10 minutes. During this period, the network may experience minor jitter, and you will be unable to perform operations or modify firewall configurations. It is recommended to perform this operation during off-peak business hours.
Primary/Secondary switchover: The firewall uses a mutual primary/secondary scheme, where the active instance is the primary instance. You can choose whether to switch to the secondary firewall instance. The switchover process is expected to take approximately 2-10 seconds, during which the network may experience minor jitter.
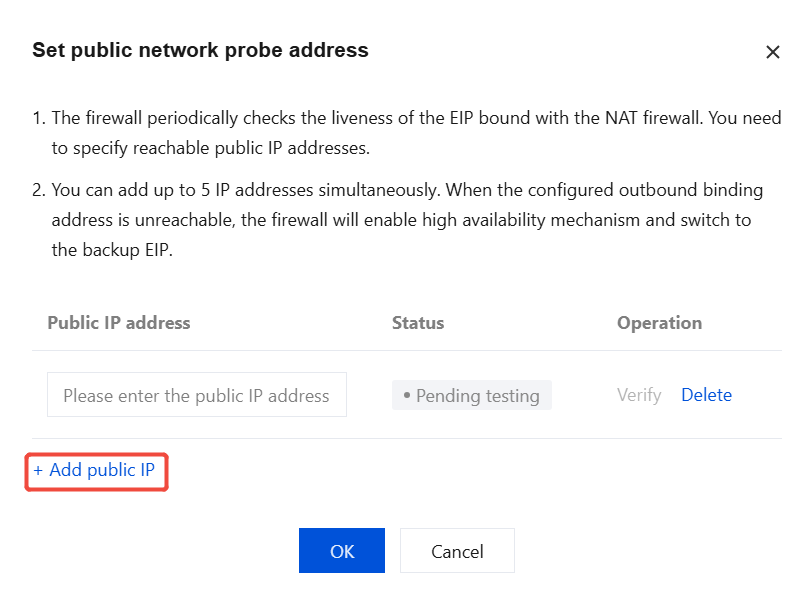
Test settings: Set the public network probing address.
a. The firewall uses scheduled probing to detect the availability status of EIPs bound to the NAT Firewall. Therefore, you need to specify a reachable public IP address for probing.
b. You can add up to 5 IP addresses simultaneously. If a configured egress-bound IP address becomes unreachable, the firewall will enable the high-availability mechanism to switch to a secondary EIP.
Enable transparent mode: In transparent mode, the current firewall instance only forwards network traffic, and related Access Control or Intrusion Defense features will not take effect. This mode is recommended for debugging purposes and takes effect within approximately 1 minute after enabling. Please manually disable transparent mode after debugging. If further assistance is needed, submit a ticket.
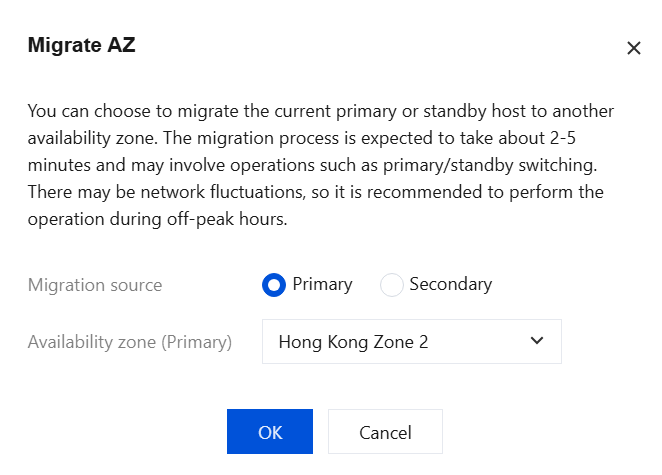
Migrate AZ: You can choose to migrate the current primary or secondary node to a different AZ. The migration process is expected to take approximately 2-5 minutes. Operations such as primary/secondary switchover may occur during this period, potentially causing network jitter. It is recommended to perform this operation during off-peak business hours.
Related Information
To configure the corresponding Firewall Toggle for your public IP addresses and associated cloud assets, see Internet Firewall Toggle for operations.
To automatically detect VPC information and interconnection relationships, and create a CFW Toggle between each pair of interconnected VPCs, see VPC Firewall Toggle.