Agent Accelerator
Download
Focus Mode
Font Size
Scenarios
To address pain points such as connection interruptions and invalid Token consumption caused by long public network paths and network jitter when users in the Chinese mainland access overseas models like Gemini and Claude, Tencent Cloud introduces the "Enable Agent Accelerator with One Click" feature. By building a dedicated acceleration network, we are committed to eliminating latency concerns, ensuring smooth AI Token generation, and delivering a better inference experience for you.
Billing Description
Prerequisites
Creating an Agent Accelerator
Note:
Agent Accelerator supports only scenarios where the request source is on Tencent Cloud, and the object associated with Agent Accelerator is a Tencent Cloud VPC instance. Each UIN can create up to 5 Agent Accelerator instances.
1. Log in to the GA2.0 console.
2. In the left sidebar, select Agent Accelerator under GA 2.0, and then click Use Now.
3. Enter the instance name and select acceleration applications. Multiple acceleration applications can be selected.
The instance name must start with a letter or Chinese character and contain 2 to 128 characters. It supports digits, periods (.), hyphens (-), and underscores (_).
Accelerated applications include Clawhub, Gemini, Claude, GitHub, HuggingFace, and more. More applications will be added continuously. If you need other applications, you can apply by submitting a ticket. The domains corresponding to each application are as follows:
Clawhub :clawhub.ai ,docs.openclaw.ai ,openclaw.ai ,convex.cloud ,wry-manatee-359.convex.site .
Gemini :generativelanguage.googleapis.com ,aistudio.google.com ,aiplatform.googleapis.com ,oauth2.googleapis.com ,googleapis.com ,cloudaicompanion.googleapis.com .
Claude :api.anthropic.com ,platform.claude.com ,claude.ai.
GitHub :github.com ,objects.githubusercontent.com ,pkg-containers.githubusercontent.com ,ghcr.io ,github.io .
HuggingFace:huggingface.co ,hf.co ,cdn-lfs.hf.co ,cdn-lfs-us-1.hf.co ,cdn-lfs-eu-1.hf.co.
4. Click OK to create an Agent Accelerator instance.
Associating with a VPC
Note:
The purpose of associating a VPC is to redirect traffic from VPCs on Tencent Cloud that access accelerated applications to an Agent Accelerator instance. You need to authorize the Agent Accelerator production account to use PrivateDNS to redirect requests within your VPC instance to the Agent Accelerator instance. For detailed operations, see Cross-Account VPC Association.
1. On the Agent Accelerator instance page, click Associate. On the VPC binding page that appears, select Region and then select the VPC instance that needs acceleration in that region.
2. Select the statement below to agree that Tencent Cloud uses PrivateDNS to resolve accelerated application domains to the Agent Accelerator instance. After selecting it, click OK to associate the VPC instance.
Disassociating from a VPC
On the Agent Accelerator instance page, click Disassociate. You can disassociate VPC instances individually or in batches.
Note:
After disassociation, traffic from this VPC that accesses accelerated applications will no longer be routed through the Agent Accelerator.
Accelerating Applications
1. On the Agent Accelerator instance page, click the pencil icon to the right of Acceleration Applications. You can then delete acceleration applications as needed in the input box.
2. To add an acceleration application, click the acceleration application input box and select the desired application.
Associating a VPC Across Accounts
In cloud acceleration scenarios, traffic from your access to accelerated applications must be redirected to an Agent Accelerator instance. This is implemented through PrivateDNS. Because the VPC instance under your account and the PrivateDNS instance under the Agent Accelerator production account are in different accounts, you need to grant authorization to the Agent Accelerator production account. The detailed steps are as follows:
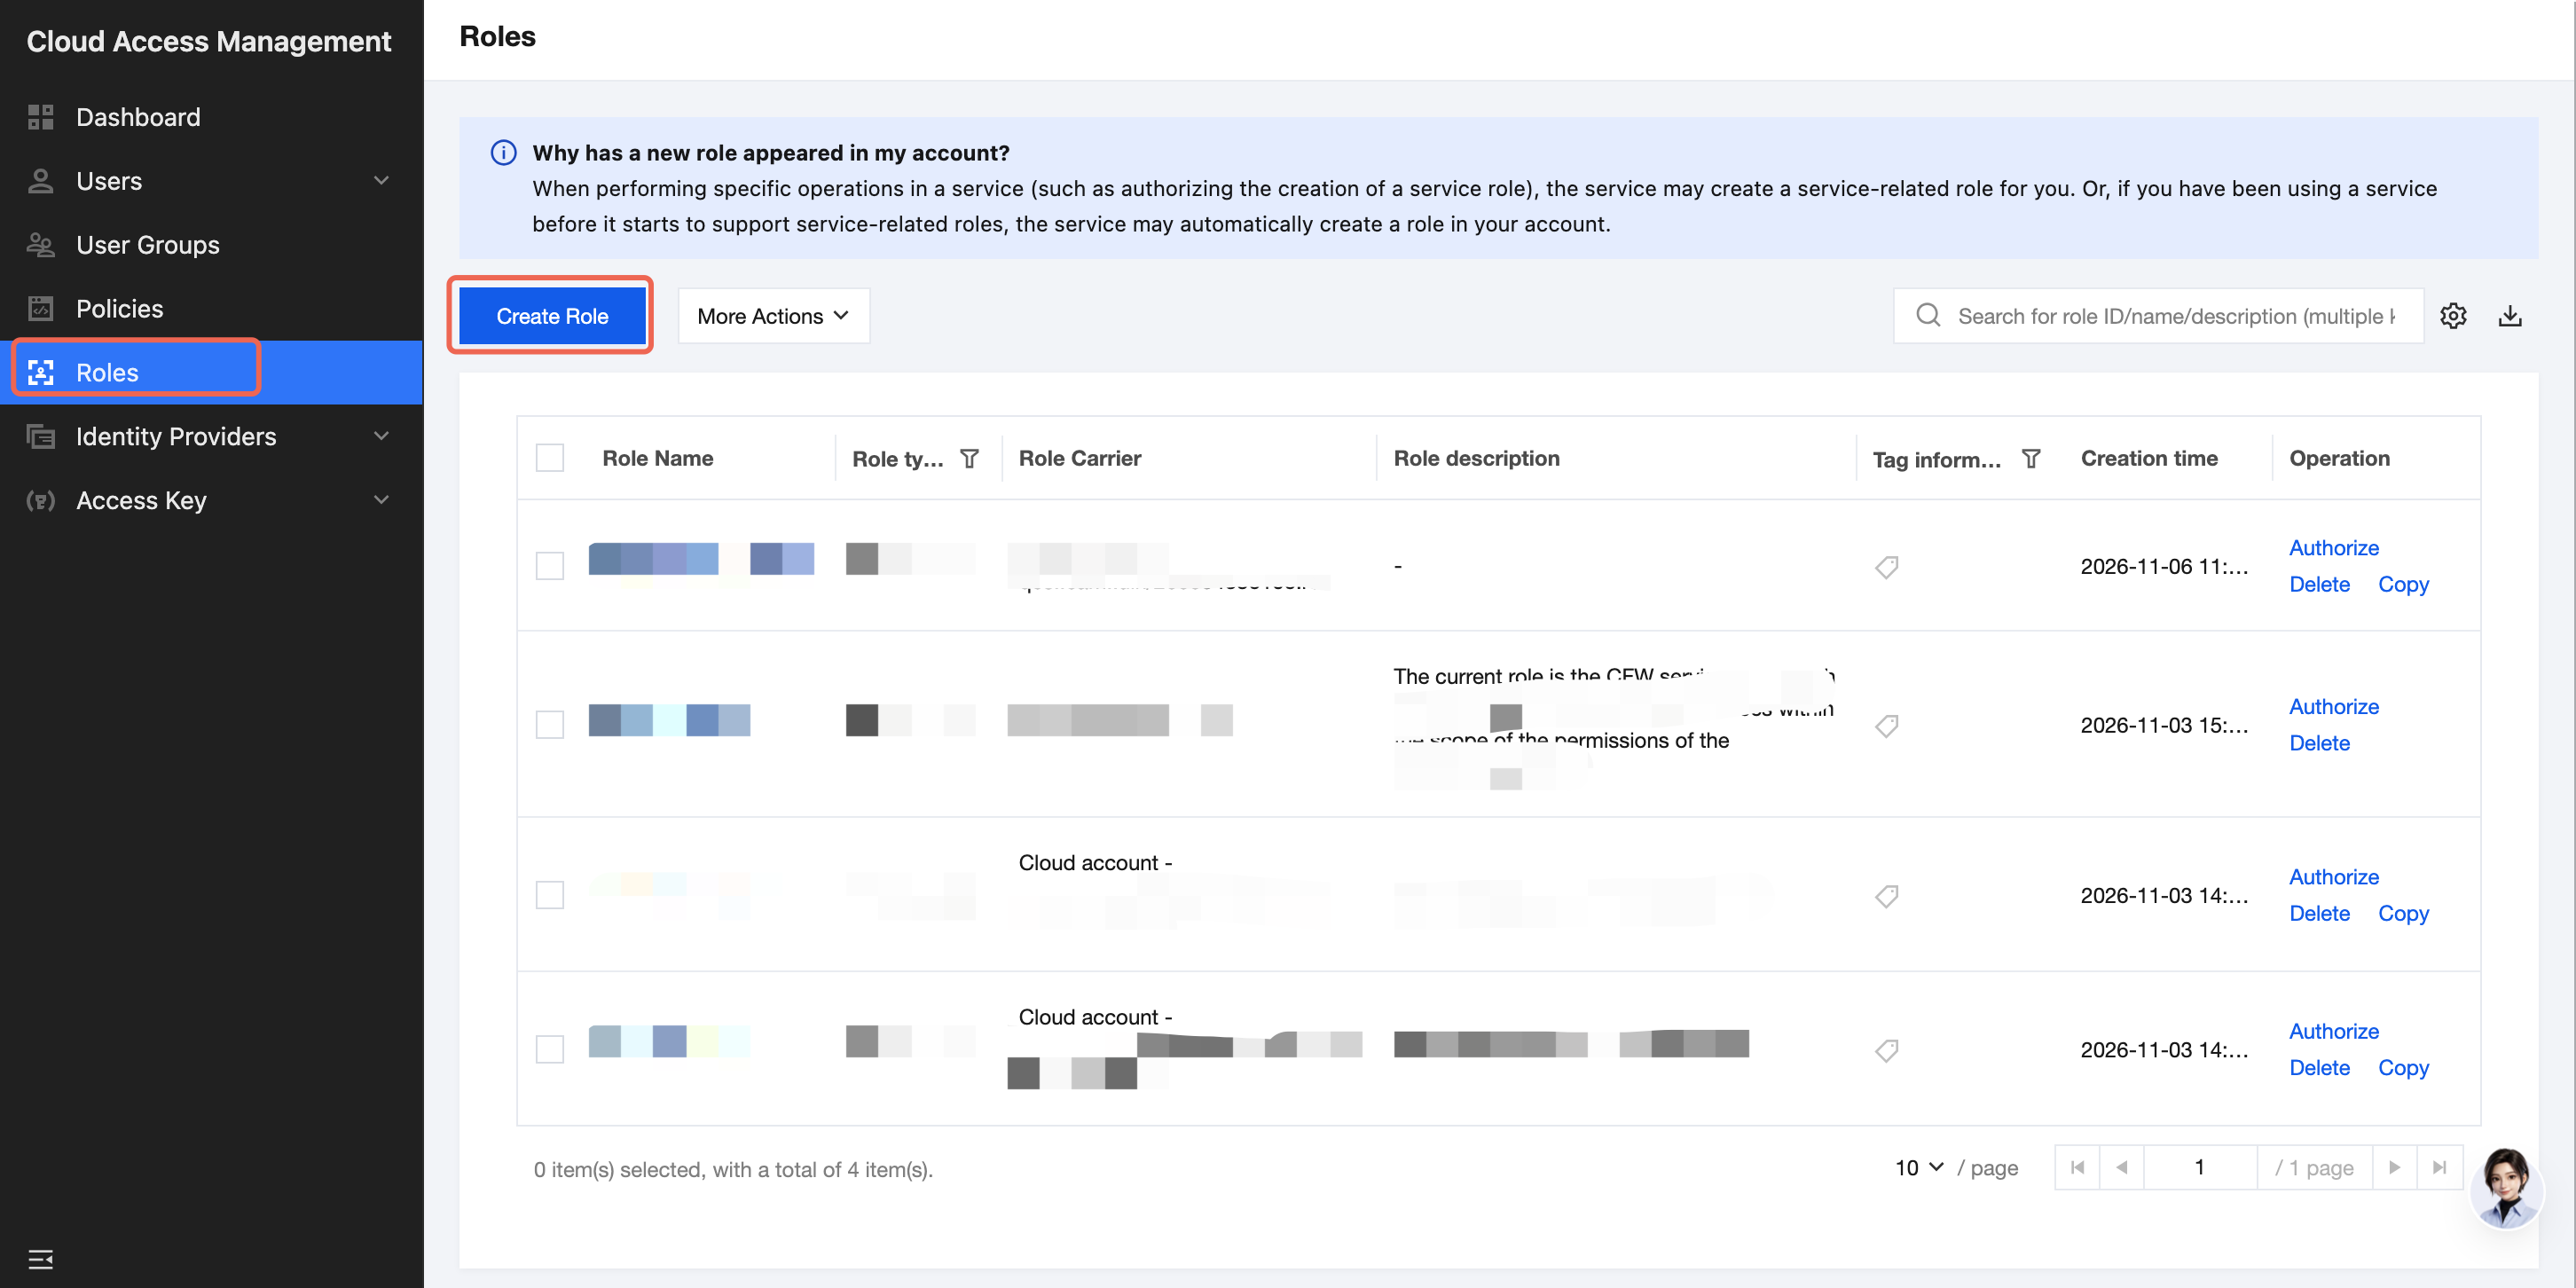
1. Log in to the Tencent Cloud CAM console with your account, go to the Roles page, and click Create Role, as shown in the following figure:
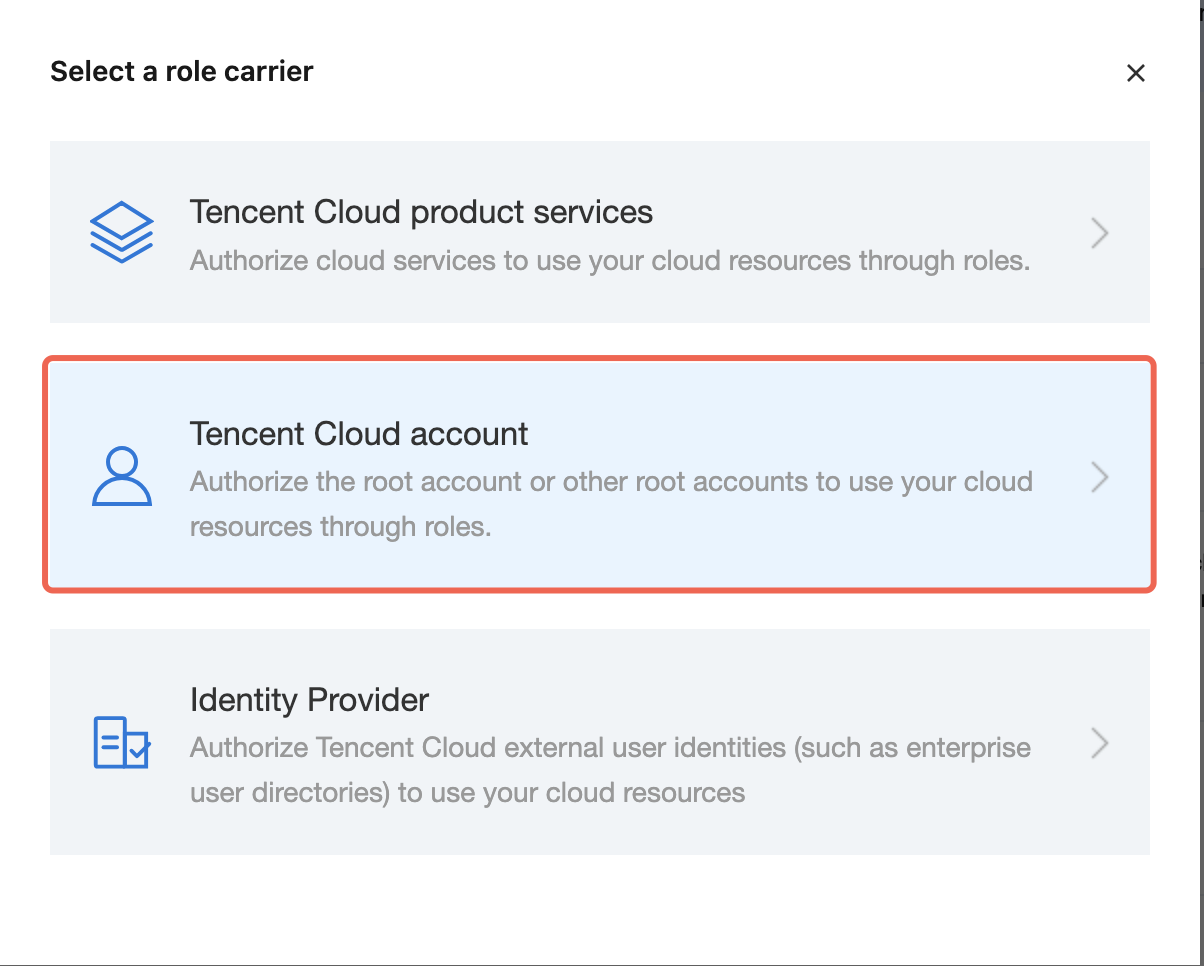
2. In the Select Role Carrier window that appears, click Tencent Cloud Account, as shown in the following figure:
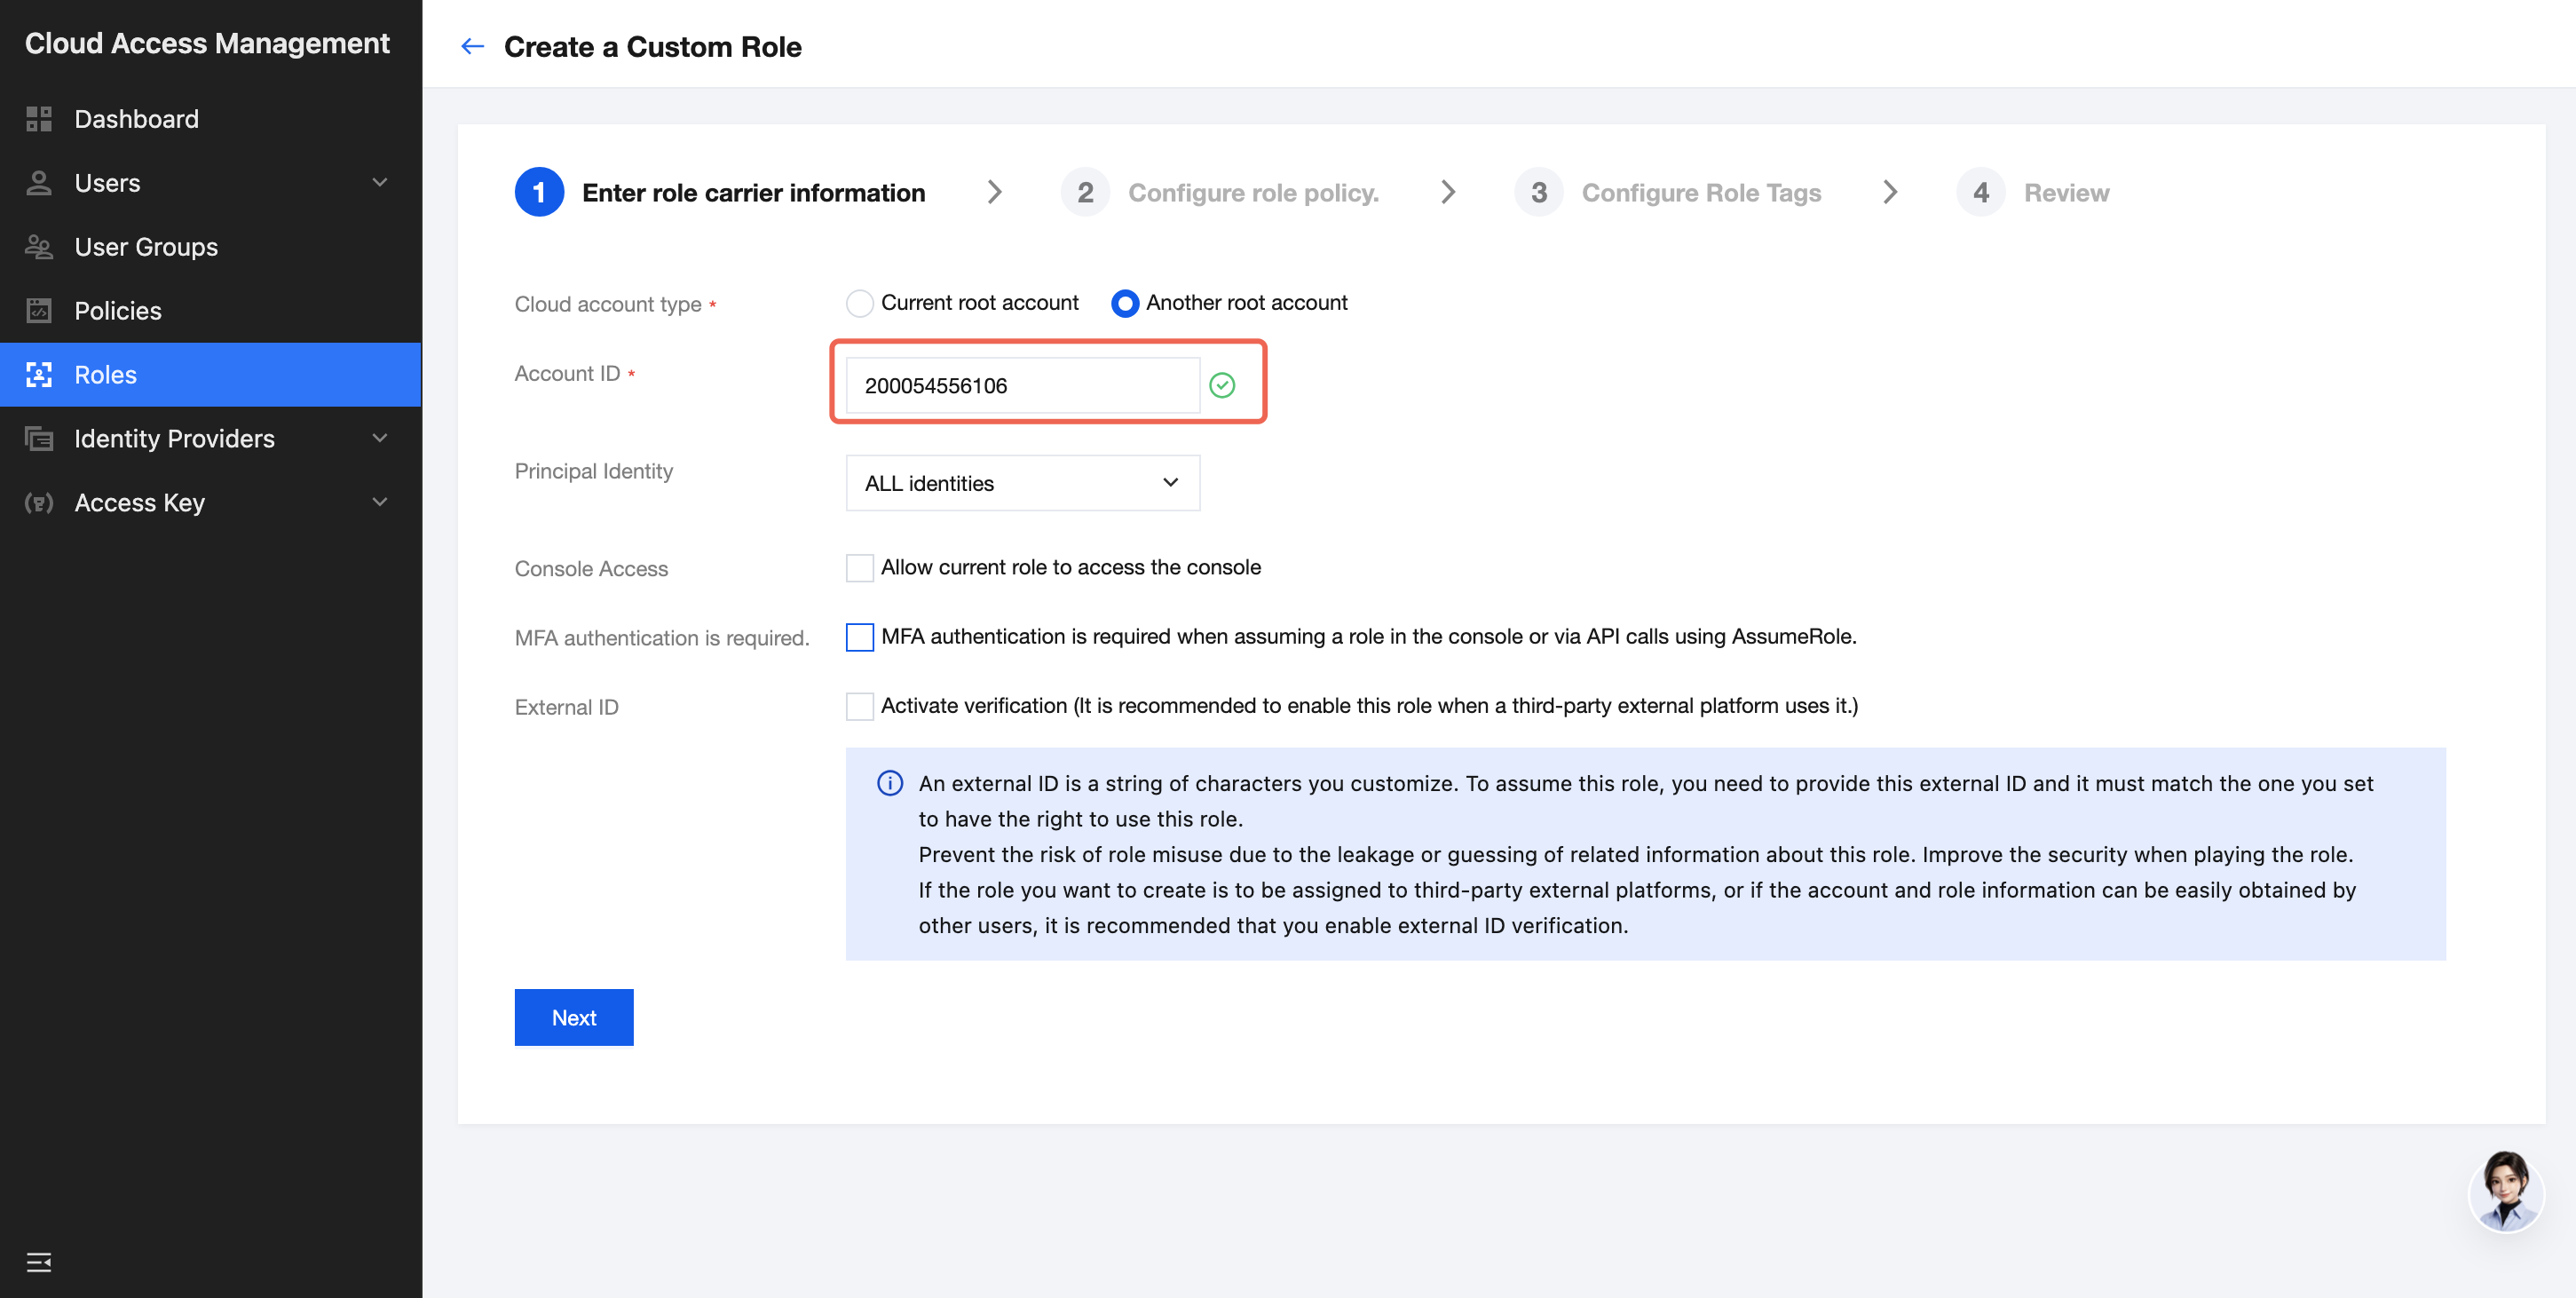
3. On the Create Custom Role page, select Other Root Account for the cloud account type and enter 200054556106 as the account ID. Other options do not need to be selected by default.
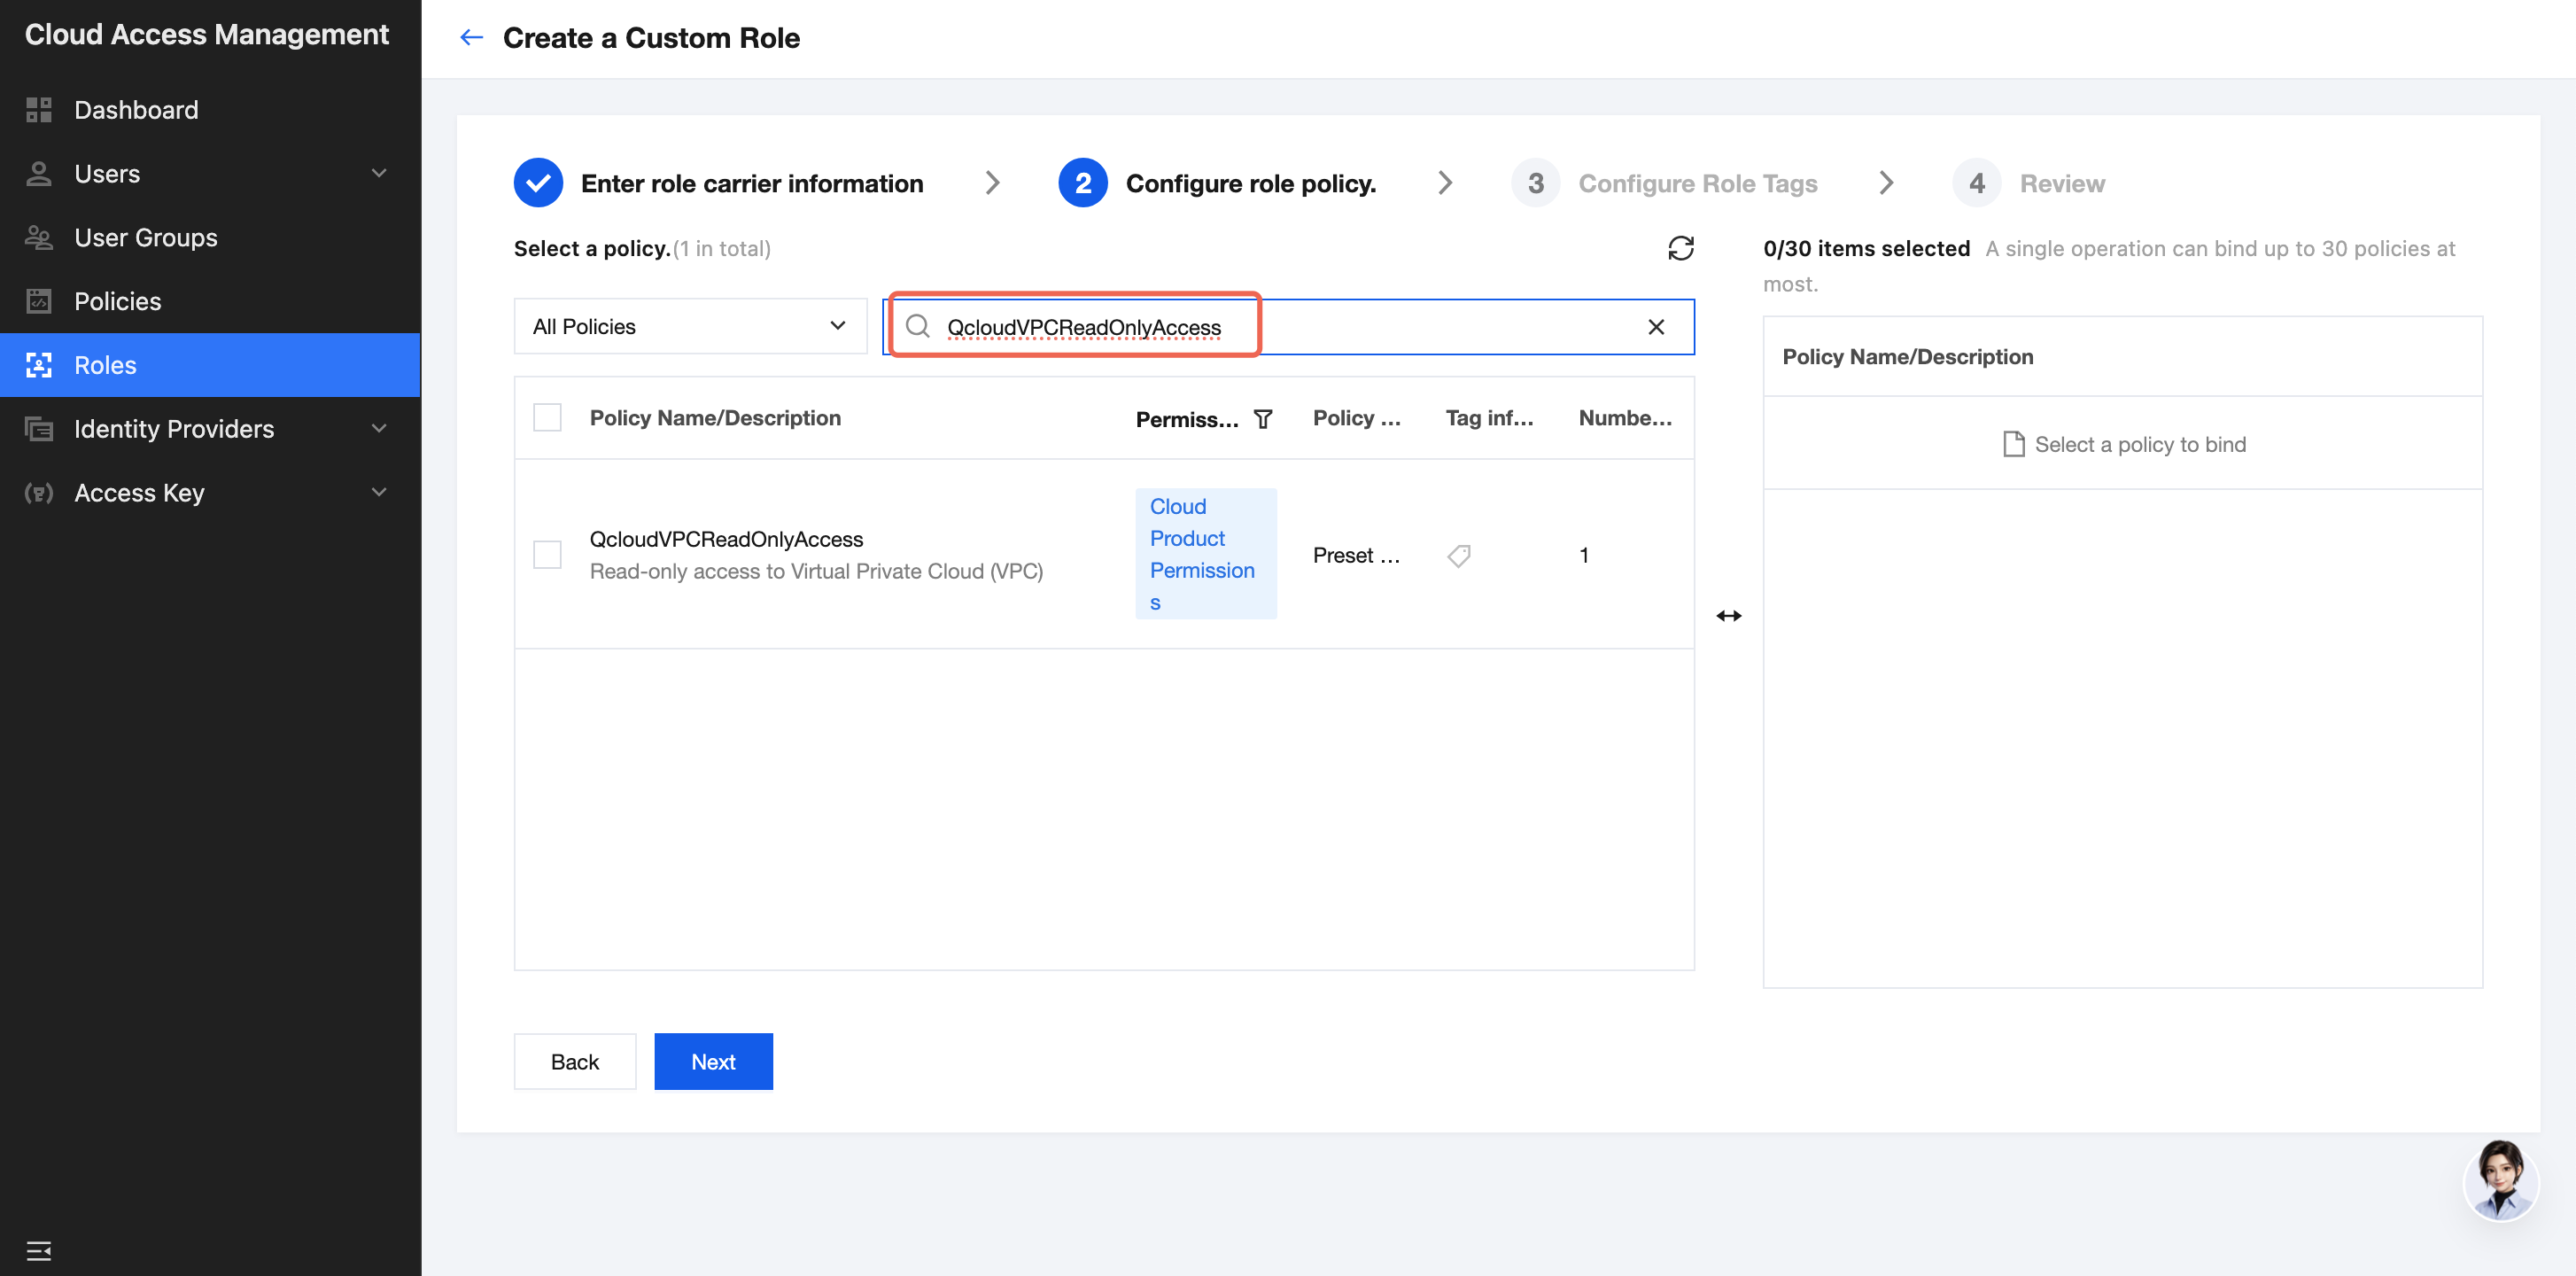
4. Go to the Configure Role Policy step, search for and select the QcloudVPCReadOnlyAccess policy, and click Next, as shown in the following figure:
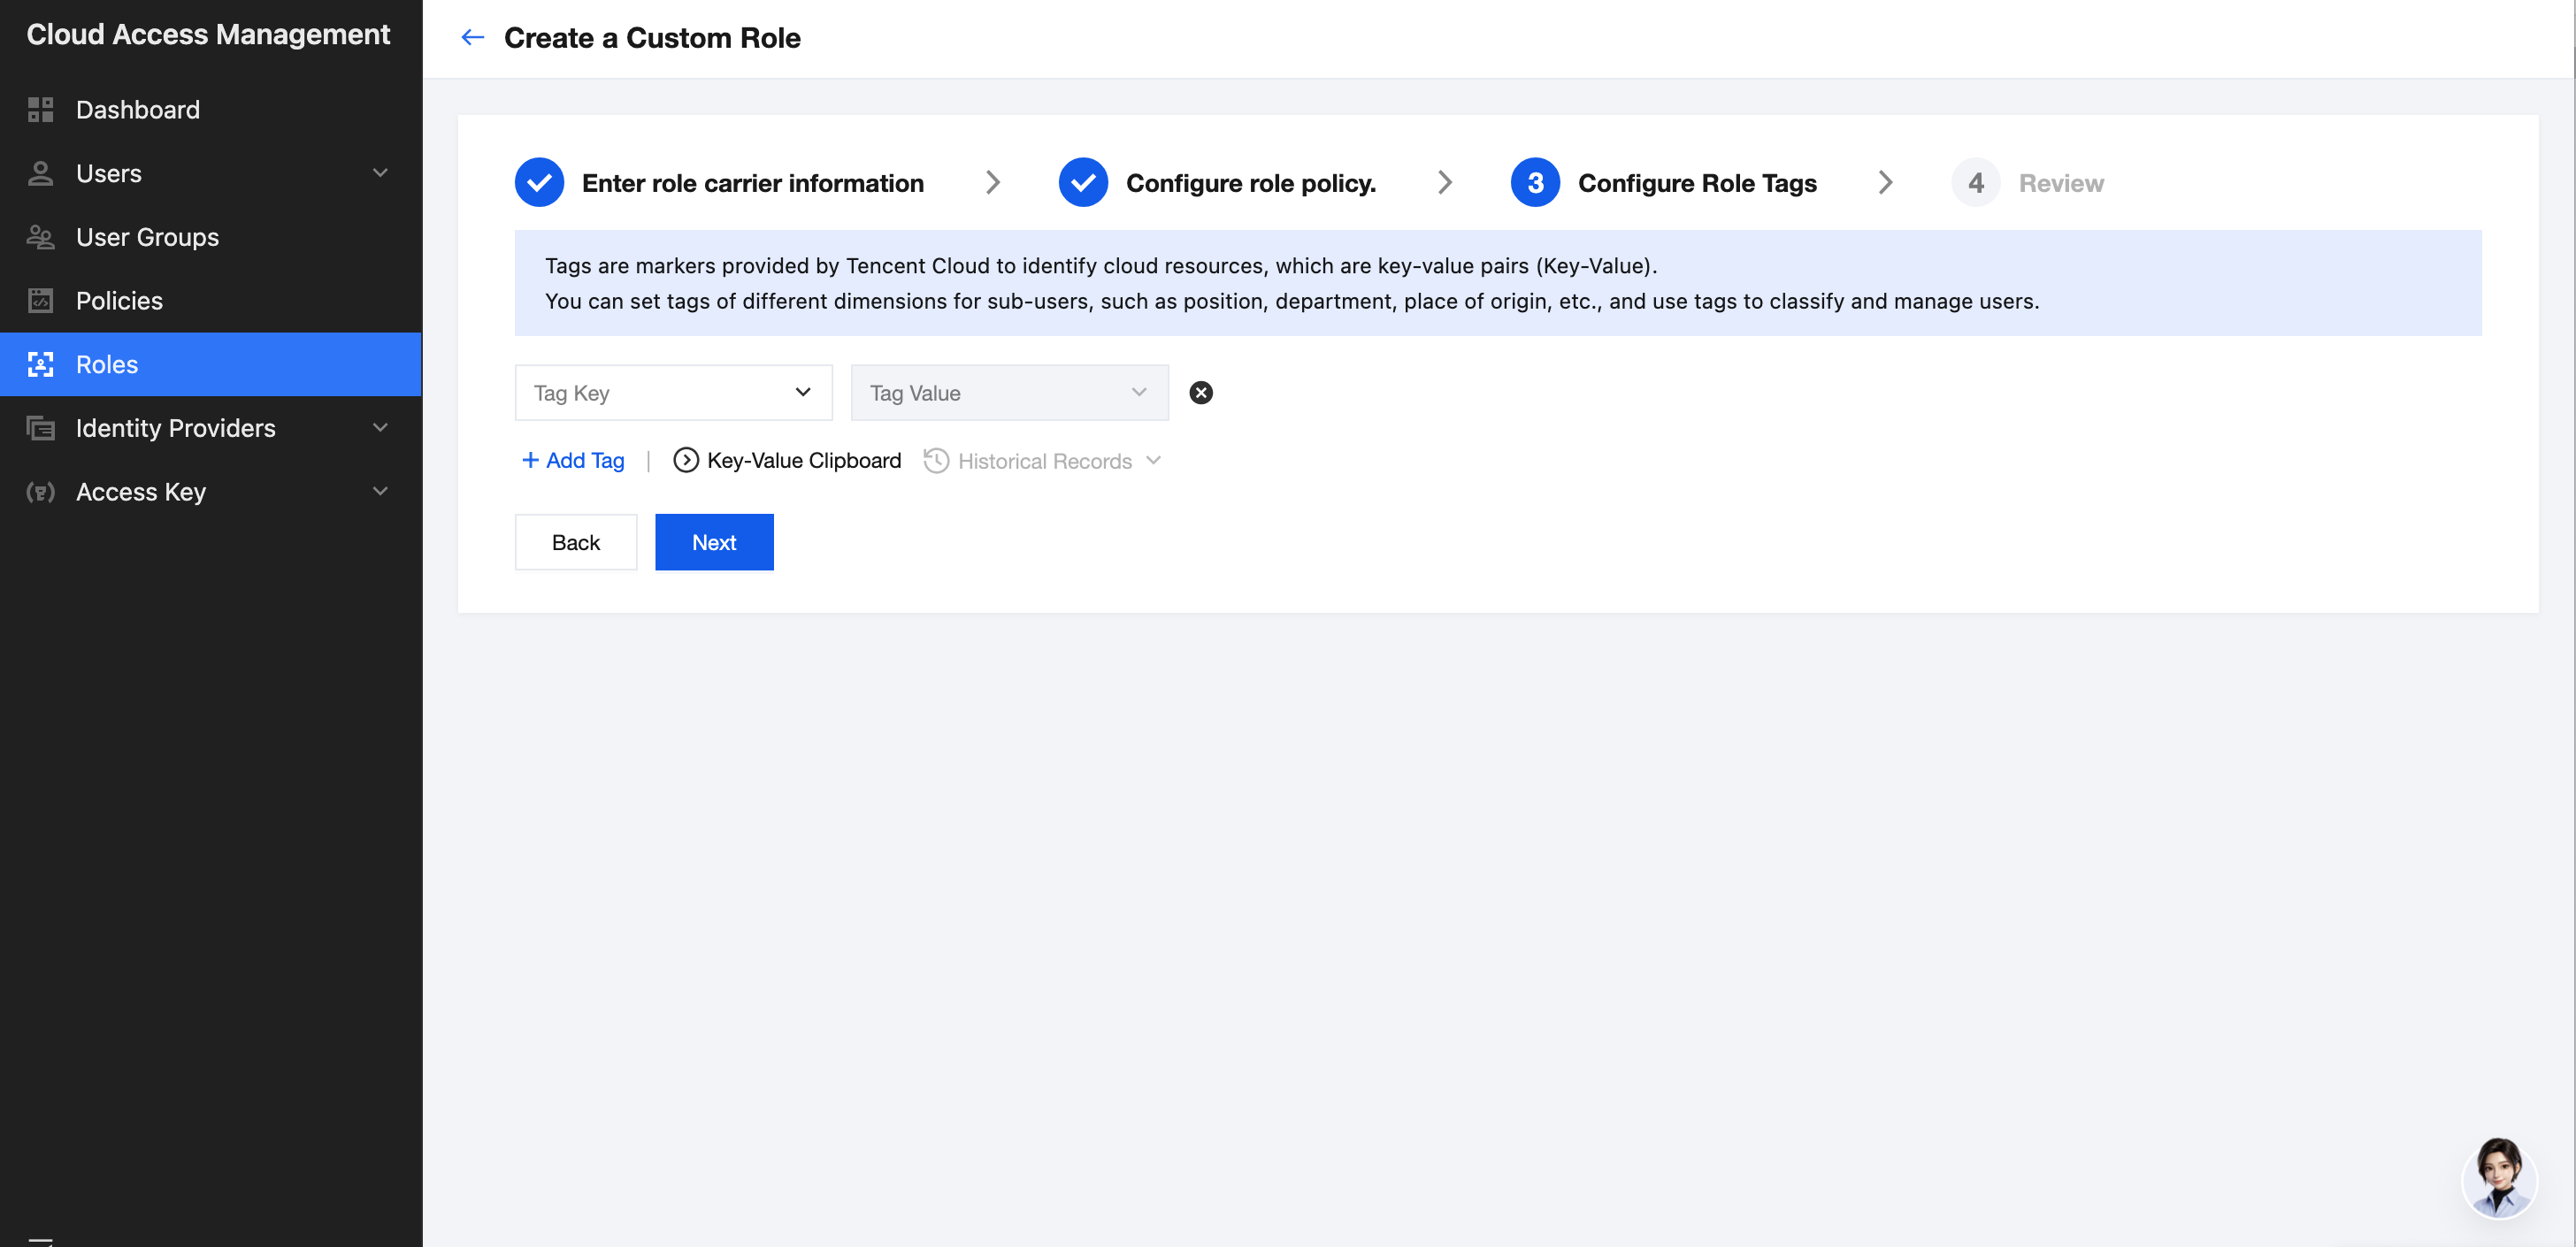
5. Go to the Configure Role Tags step. You can set tags of different dimensions for the sub-user as needed. If there are no tags, leave them blank. After completing the settings, click Next:
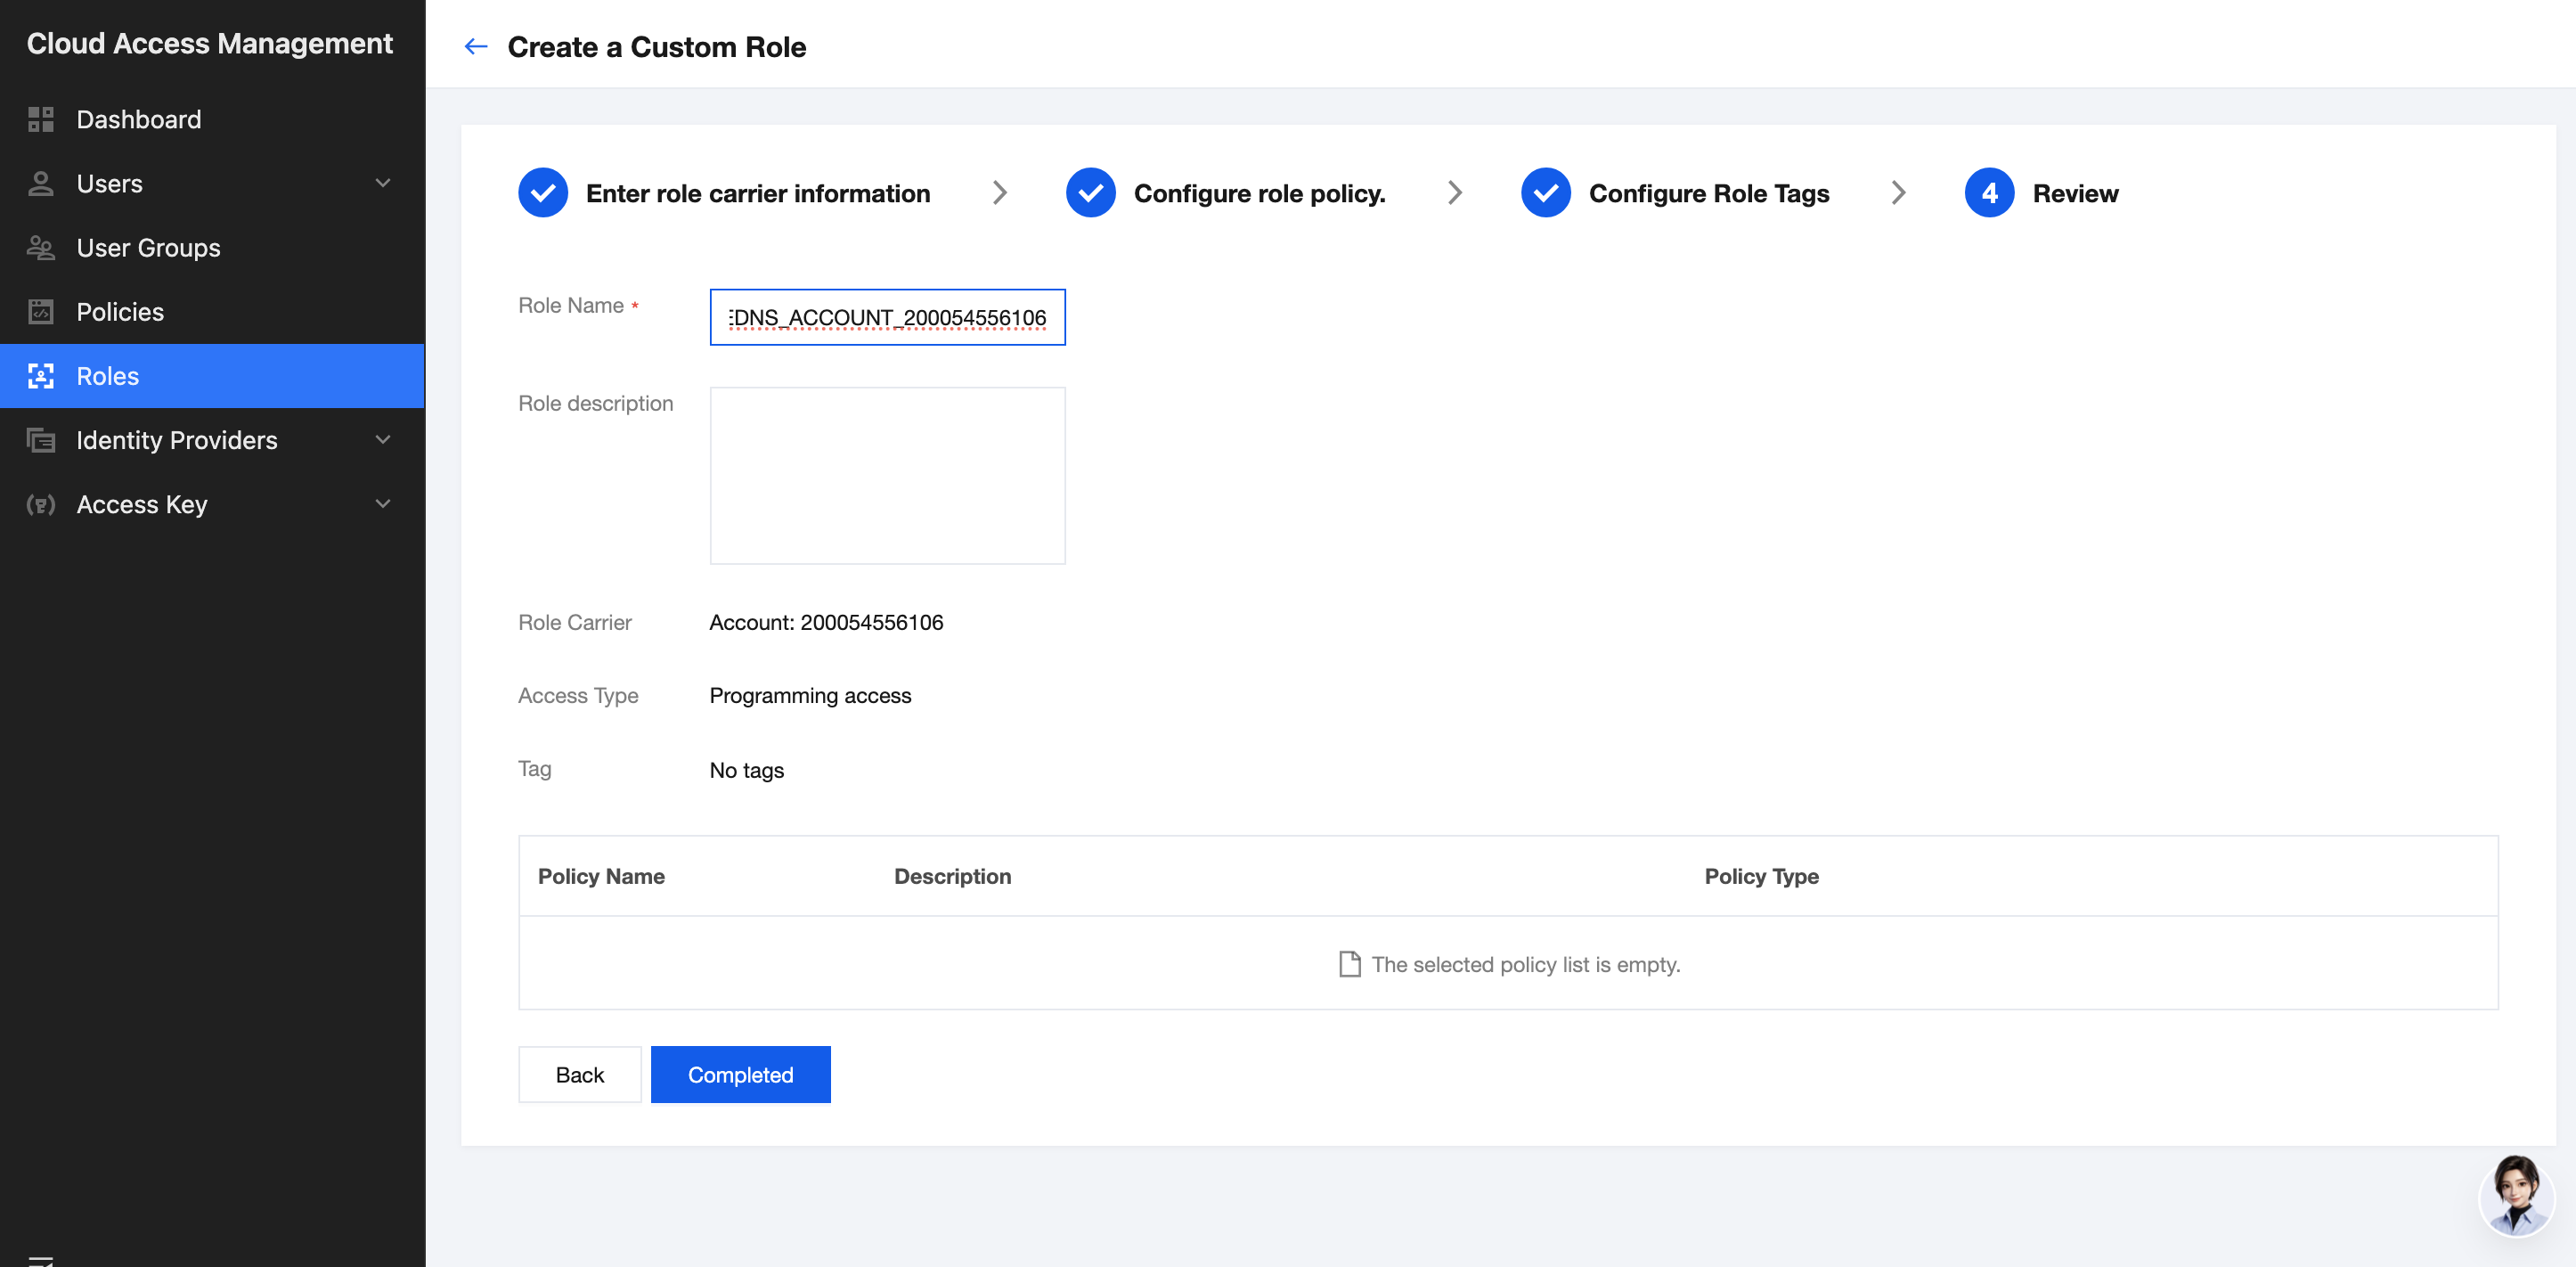
6. Go to the review step. The role name must be set to PRIVATEDNS_ACCOUNT_200054556106, otherwise authorization will fail. Finally, click Complete.
7. After completing the above steps, return to the Agent Accelerator console to bind a VPC instance to the Agent Accelerator.
Help and Support
Was this page helpful?
You can also Contact sales or Submit a Ticket for help.
Help us improve! Rate your documentation experience in 5 mins.
Feedback