DRM暗号化設定
Download
フォーカスモード
フォントサイズ
Cloud Streaming Services (CSS)は、Widevine、Fairplay、NormalAESをベースにしたDRM暗号化プロトコルを使用し、ライブストリーミング暗号化、画面録画禁止、ホットリンク保護などのサービスを提供し、ユーザーのビデオコンテンツを全面的に保護します。本書では、コンソールでDRM暗号化機能を使用する手順を説明します。
注意事項
Tencent Cloudは、ビデオストリームに対する暗号化処理のみを提供します。DRM暗号化ベースの証明書管理は、サードパーティのSDMC社とDRMtoday社により提供された有料サービスです。詳しくは、SDMC社またはDRMtoday社までお問い合わせください。
前提条件
Tencent CSSサービスが有効になっており、再生ドメイン名が追加されていること。
SDMC DRMサービスまたはDRMtodayにサービスアカウントを作成し、アクセスキーを設定していること。
コンソールの設定
DRMへのアクセスキーの設定
1. CSSコンソールにログインし、機能設定 > **DRM管理に進みます。
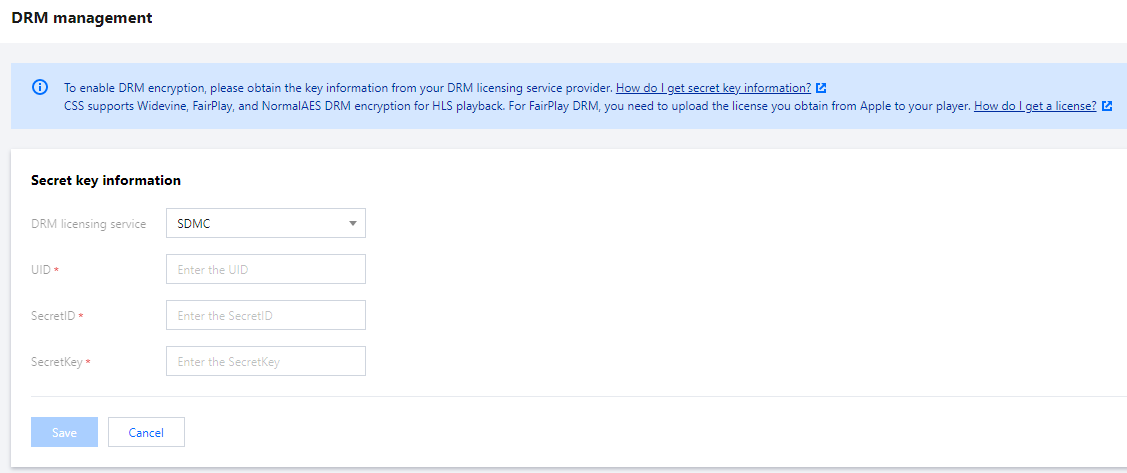
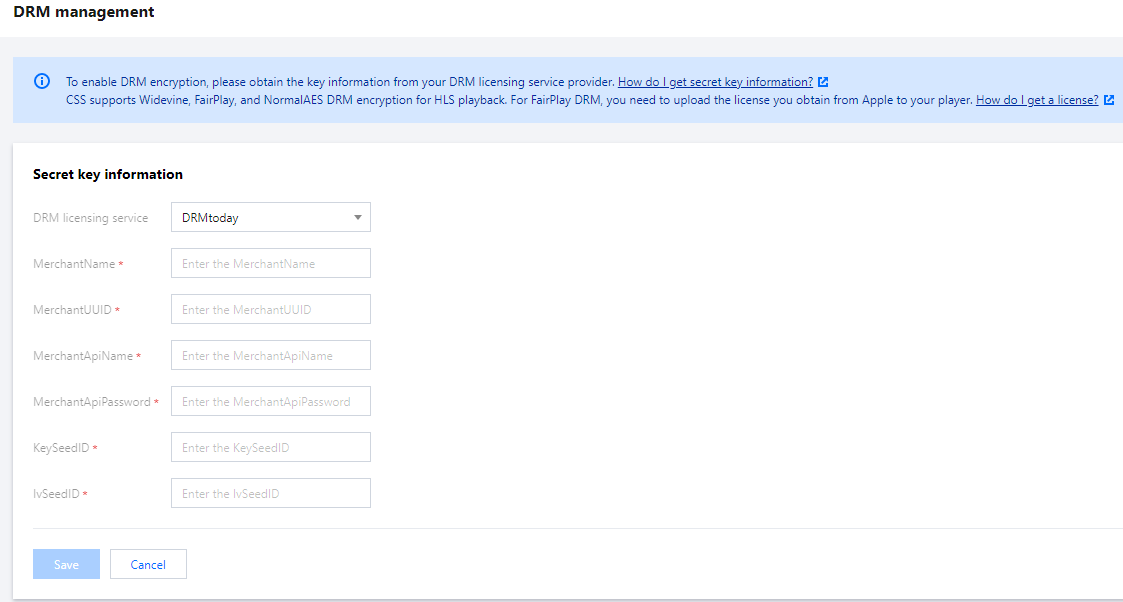
2. 編集をクリックし、キーの情報を入力し、証明書管理サービスのプロバイダー(SDMCまたはDRMtoday)を選択します。詳細な設定は以下の通りです:
証明書管理サービスのプロバイダーがSDMCの場合
ユーザーがSDMCのDRMにアクセスする時に使用するキーの情報(UID、SecretID、SecretKey)を設定します。これらのキーの情報は、サードパーティから入手してください。
証明書管理サービスのプロバイダーがDRMtodayの場合
ユーザーがDRMtodayのDRMにアクセスする時に使用するキーの情報(MerchantName、MerchantUUID、MerchantApiName、MerchantApiPassword、KeySeedID、IvSeedID)を設定します。これらのキーの情報は、サードパーティから入手してください。
トランスコーディングテンプレートの設定とドメイン名のバインド
1. 機能設定 > CSSトランスコーディングに進みます。
2. トランスコーディングテンプレートを作成をクリックし、DRM暗号化情報を設定します。

DRM暗号化設定項目 | 設定要否 | についての説明 |
DRM暗号化 | 不要 | DRM暗号化の有効/無効。デフォルトでは無効です。有効にするには、DRM管理でDRMキーを設定しておく必要があります |
暗号化タイプ | 必要 | Widevine、Fairplay、NomalAESをサポートします。Fairplayを使用するには、プレイヤー側からAppleに申請した証明書をアップロードする必要があります。詳しくは、Fairplay証明書の申請 |
DRMタグ | 必要 | SD、HD、UHD1、UHD2を選択できます。 |
をご参照ください
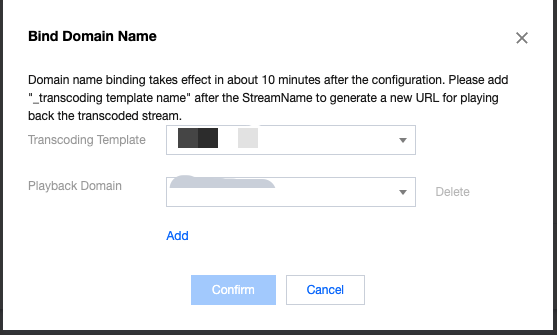
3. ドメイン名をバインドをクリックし、トランスコーディングテンプレートと再生ドメイン名をバインドします。
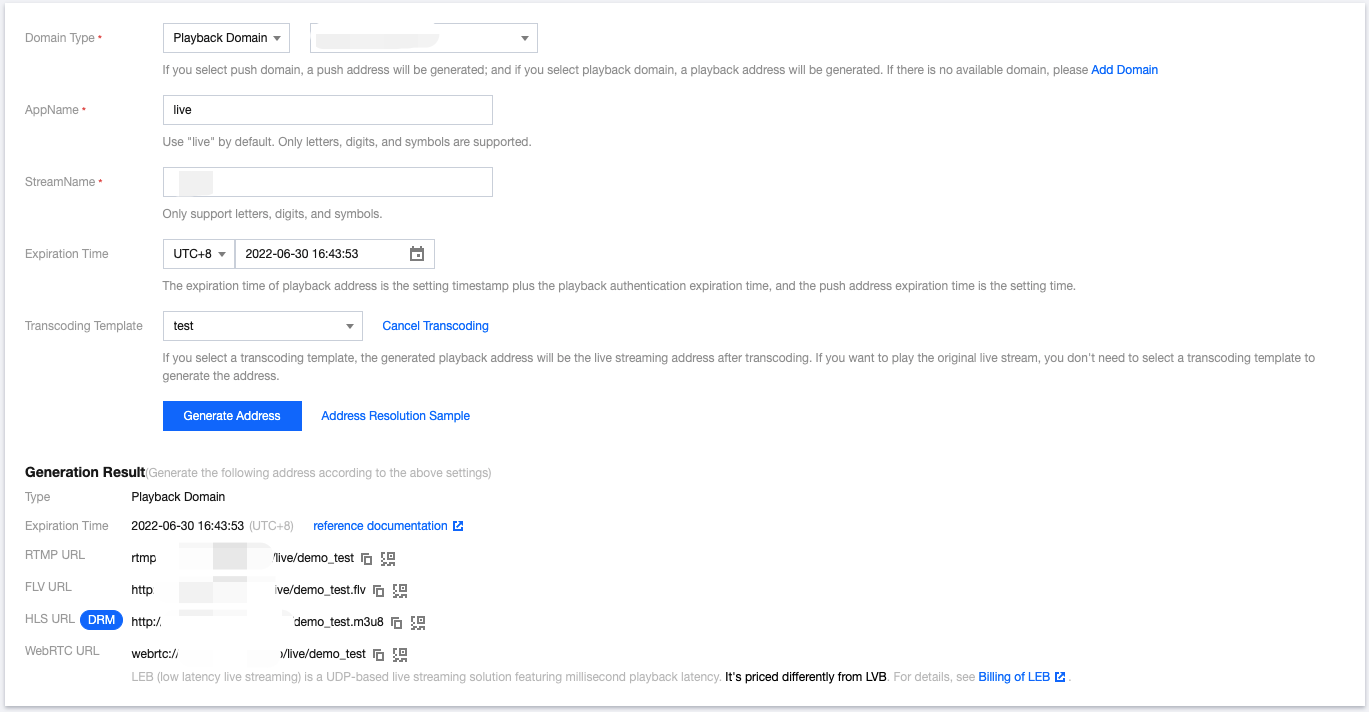
DRM再生アドレスの取得
DRM暗号化を使用するには、再生アドレスはHLS再生プロトコルを使用する必要があります。アドレスジェネレータで対応するトランスコーディングテンプレートを選択し、再生アドレスを生成して、HLS再生プロトコルを使用するアドレスをDRM再生アドレスとして使用してください。
プレーヤーの設定
ライブストリーミングDRM暗号化機能を使用する場合、プレイヤーは以下の要件を満たさなければなりません。
プレイヤーは SDMC と連携し、ビデオ情報を通しライセンスを取得して復号化する必要があります。
iOSプラットフォームはFairplayをサポートし、AndroidプラットフォームはWideVineとNomalAESをサポートしています。
iOSプラットフォームの場合、証明書を申請しSDMCプラットフォームにアップロードする必要があります。
フィードバック