CODING Code Repository (CODING-CR) is based on the Git open-source version control system. With Git, your local computer and CODING each have a complete code repository, so both can engage in distributed version management. To manage code on your local computer, you must first download, install, and set up Git. If you don't need to manage code on your local computer, CODING allows you to perform most code repository operations in your browser. This document explains how to get started with CODING-CR.
Prerequisites
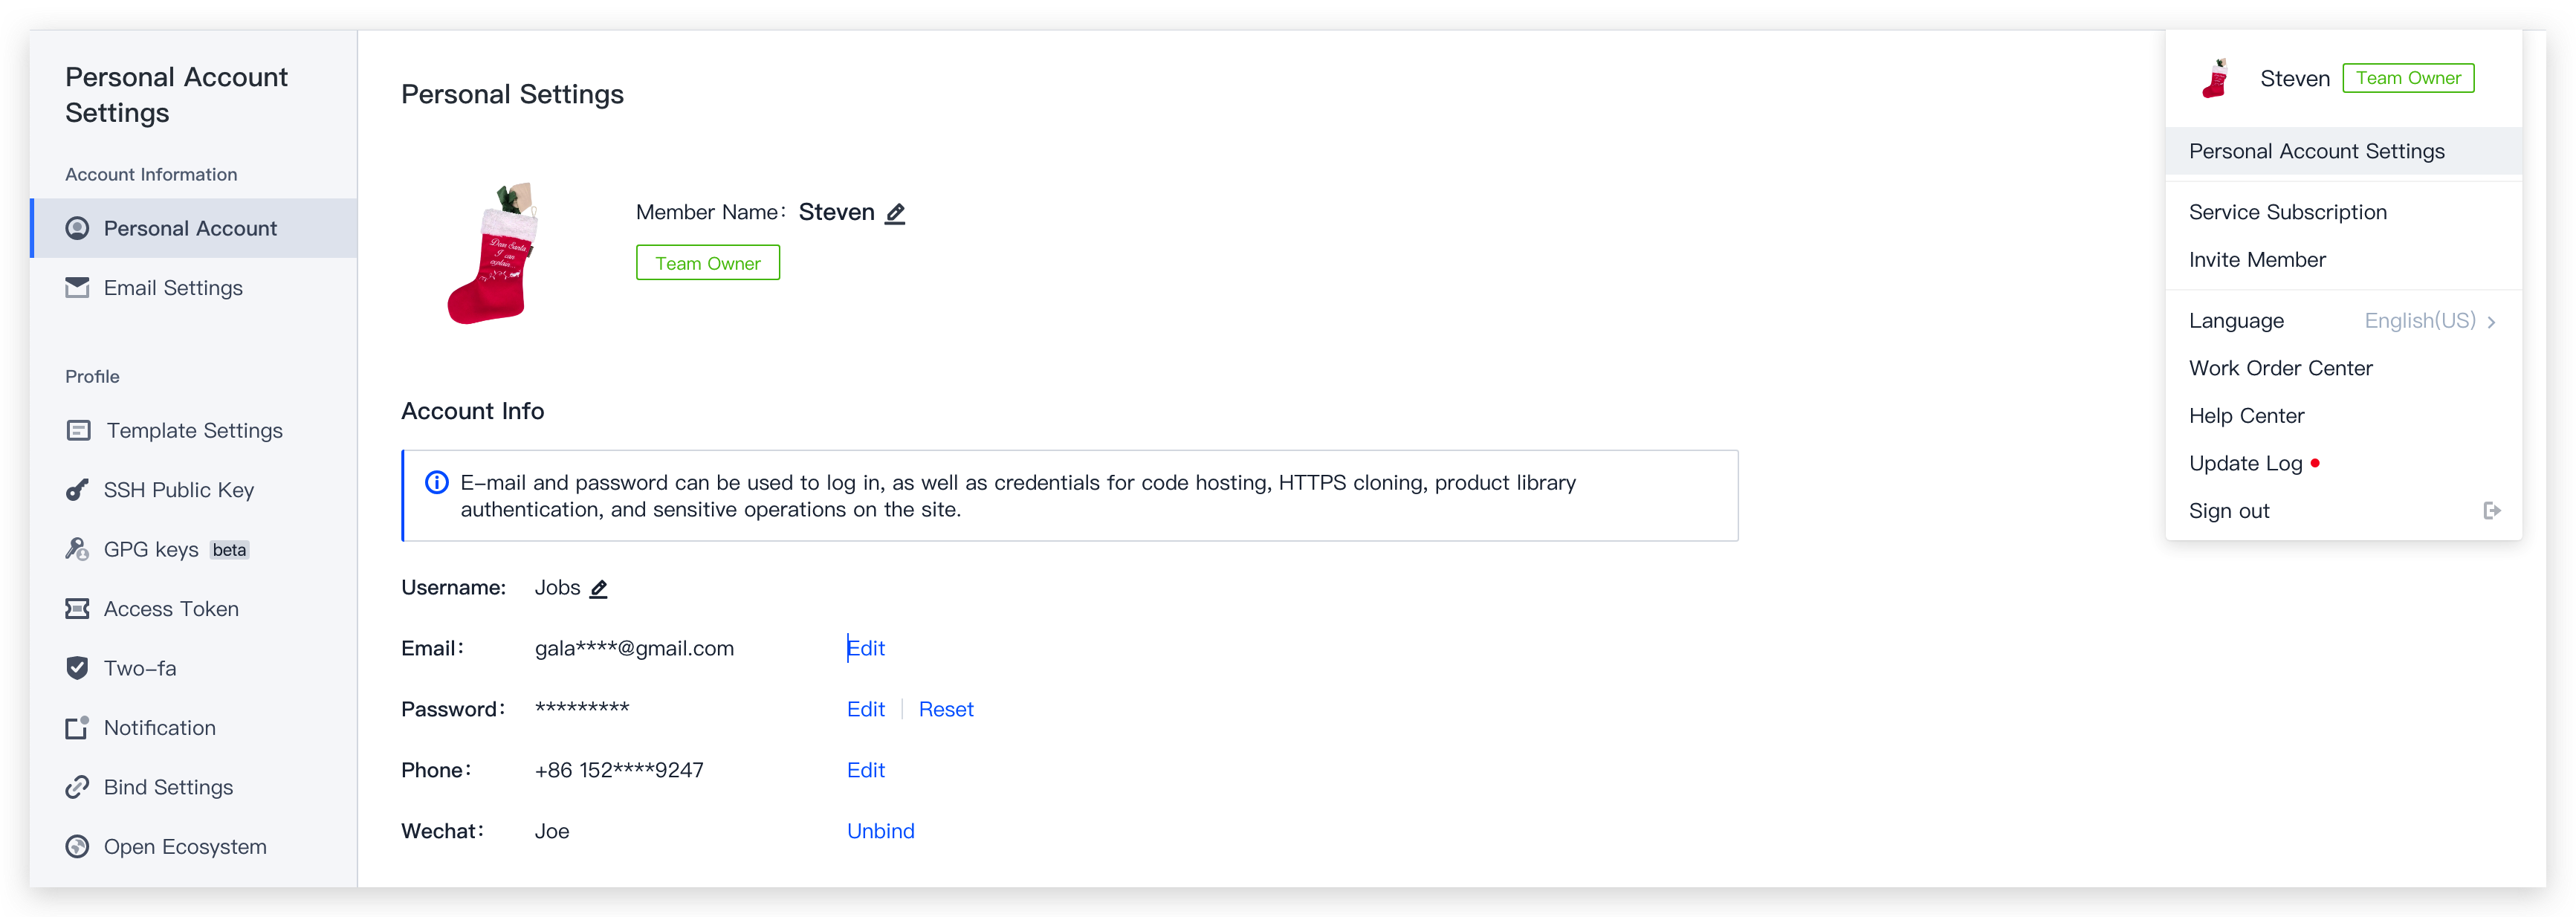
Before using CODING_CR, you must activate the CODING DevOps service for your Tencent Cloud account. Follow the pop-up prompts to go to Personal Settings and enter your email, password, and mobile number. You will use this information when performing subsequent operations, such as code cloning or push.
Local Environment Initialization
Install Git
Windows
1. Download Git from the Git website and follow the prompts to install it. We recommend using the default options.
2. After installation, right-click to open Git Bash and get started with Git.
Linux
On a Linux system, you can use the system's package management tool to directly install the pre-compiled Git binary installation package.
On a Fedora/Centos system, use yum to install Git: yum install git-core.
On a Ubuntu/Debian system, use apt-get to install Git: apt-get install git.
macOS
1. Run the following command to install the package management tool Homebrew.
2. After Homebrew is installed, enter brew install git to install Git.
3. After Git is installed, run git --version to check your current Git version.
Local environment initialization
After Git is installed, create a folder, open the folder, and enter git init to initialize the local environment.
Set user information
After Git is installed, you should immediately set a committer name and email address, which will be used to create a record for each commit. Use the following command to set user information.
$ git config --global user.name "Your name"
$ git config --global user.email "Your email"
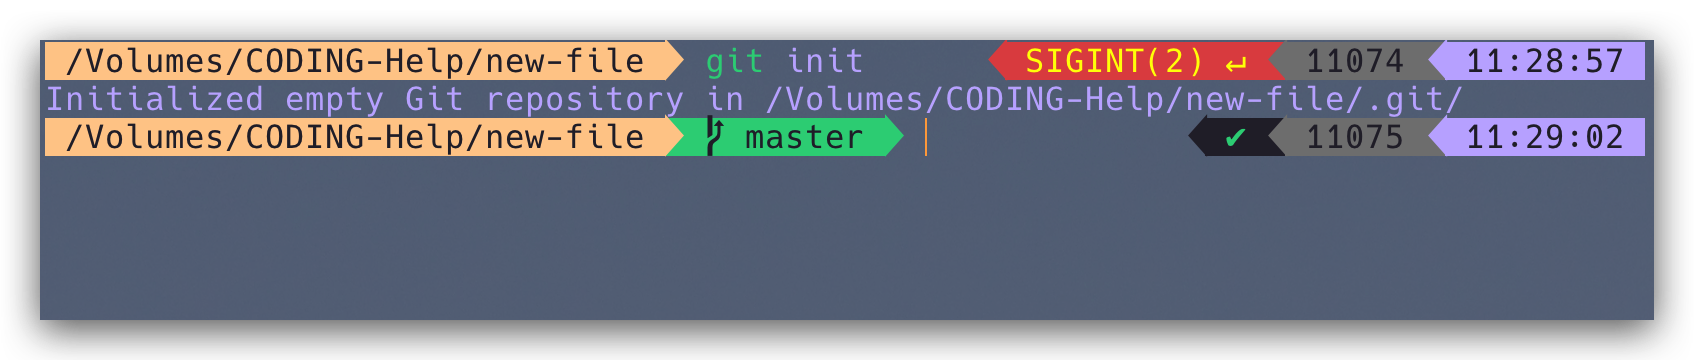
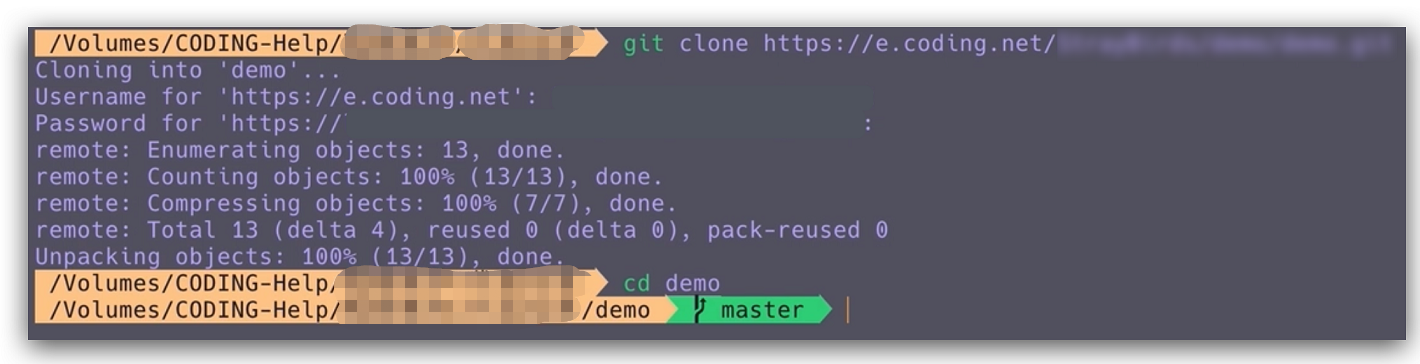
For example, if your CODING account is named Dahei and your Git user information is: name – Dabai and Email – dabai@coding.net, when your code is pushed to your CODING repository, the status is displayed as follows:
Note:
You can configure custom user information in Git. We recommend you directly use the username and email address of your CODING account for efficient collaboration.
Create a CODING Code Repository
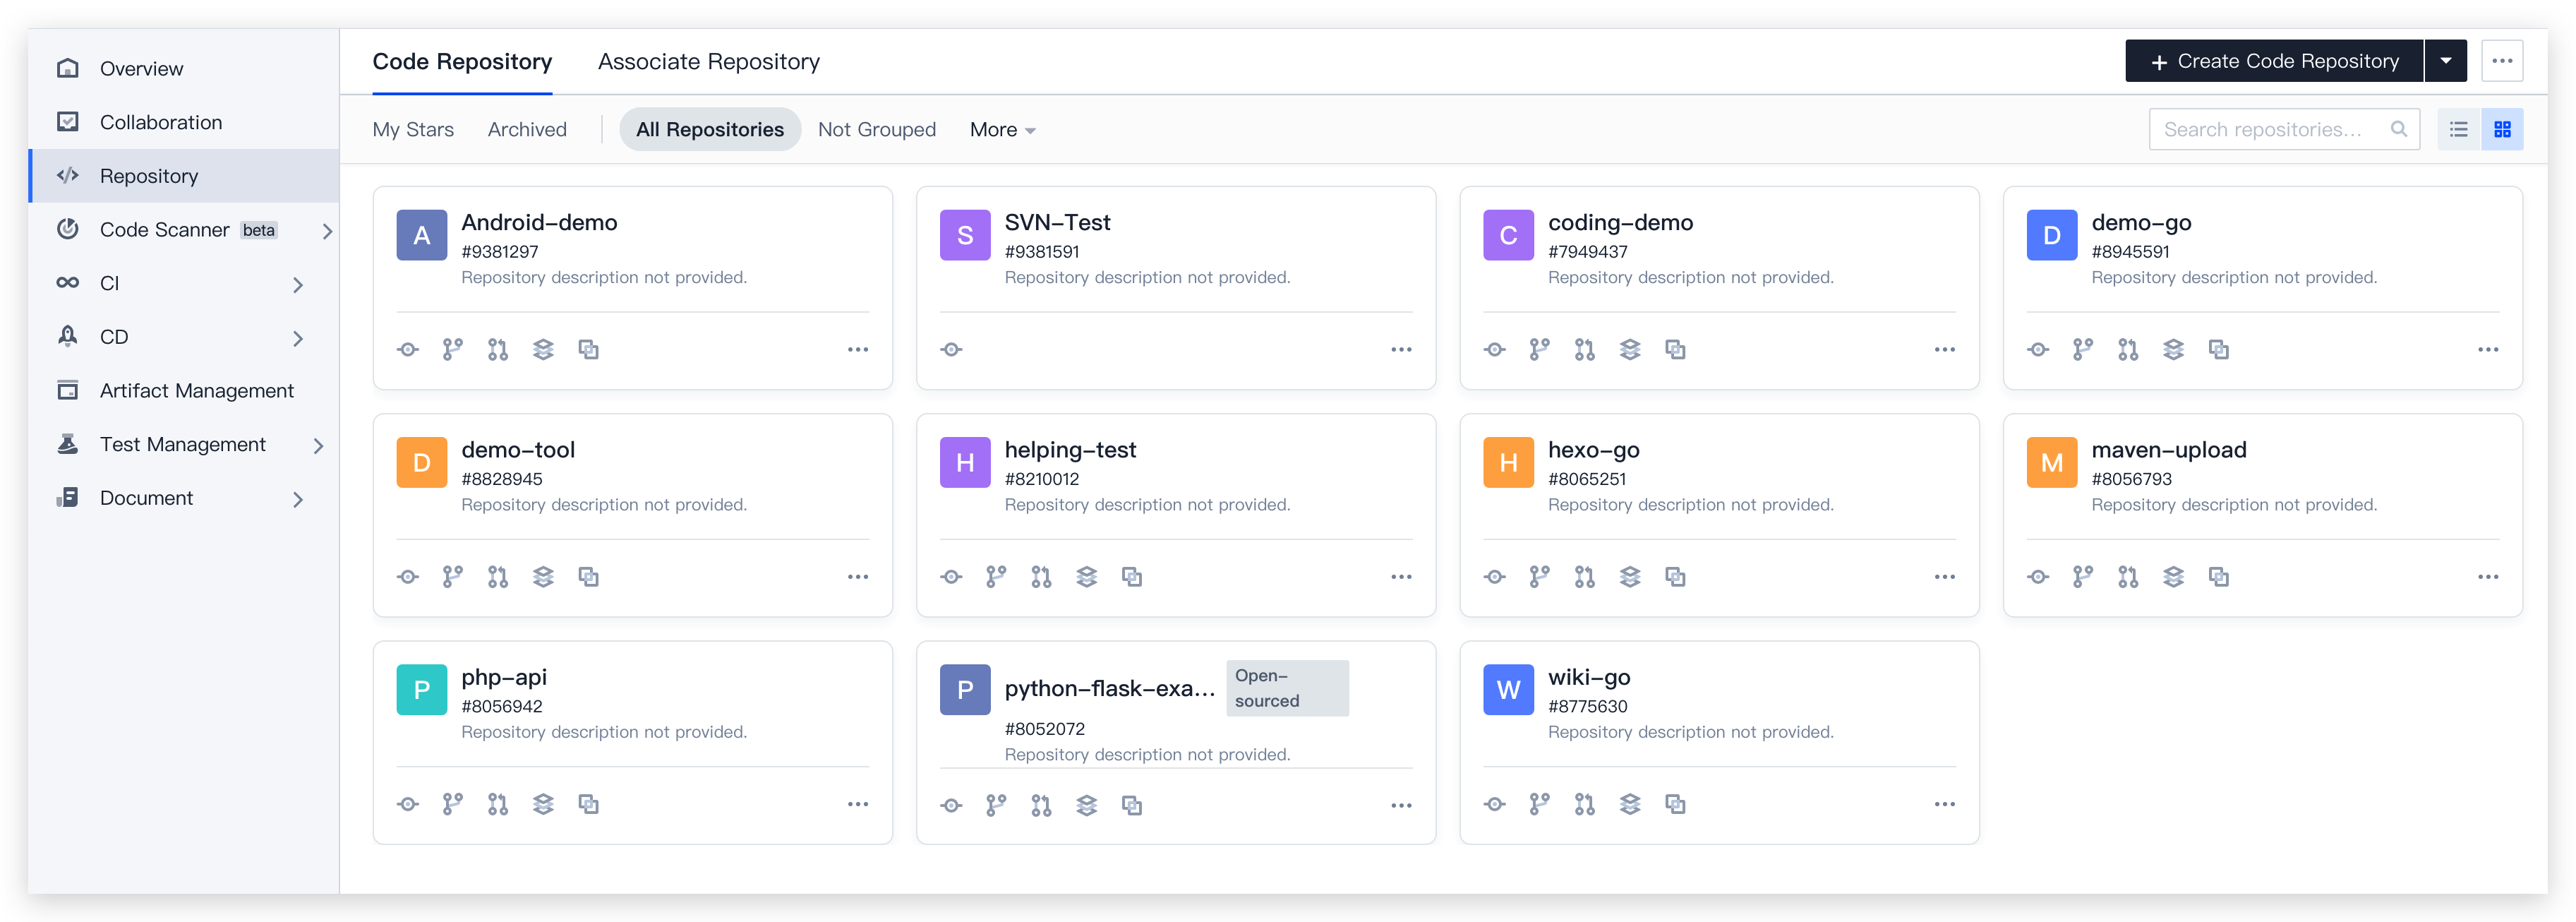
1. Open any project and click Code Repositories on the left navigation bar to open the Code Repository Management page, where you can create or open a code repository.
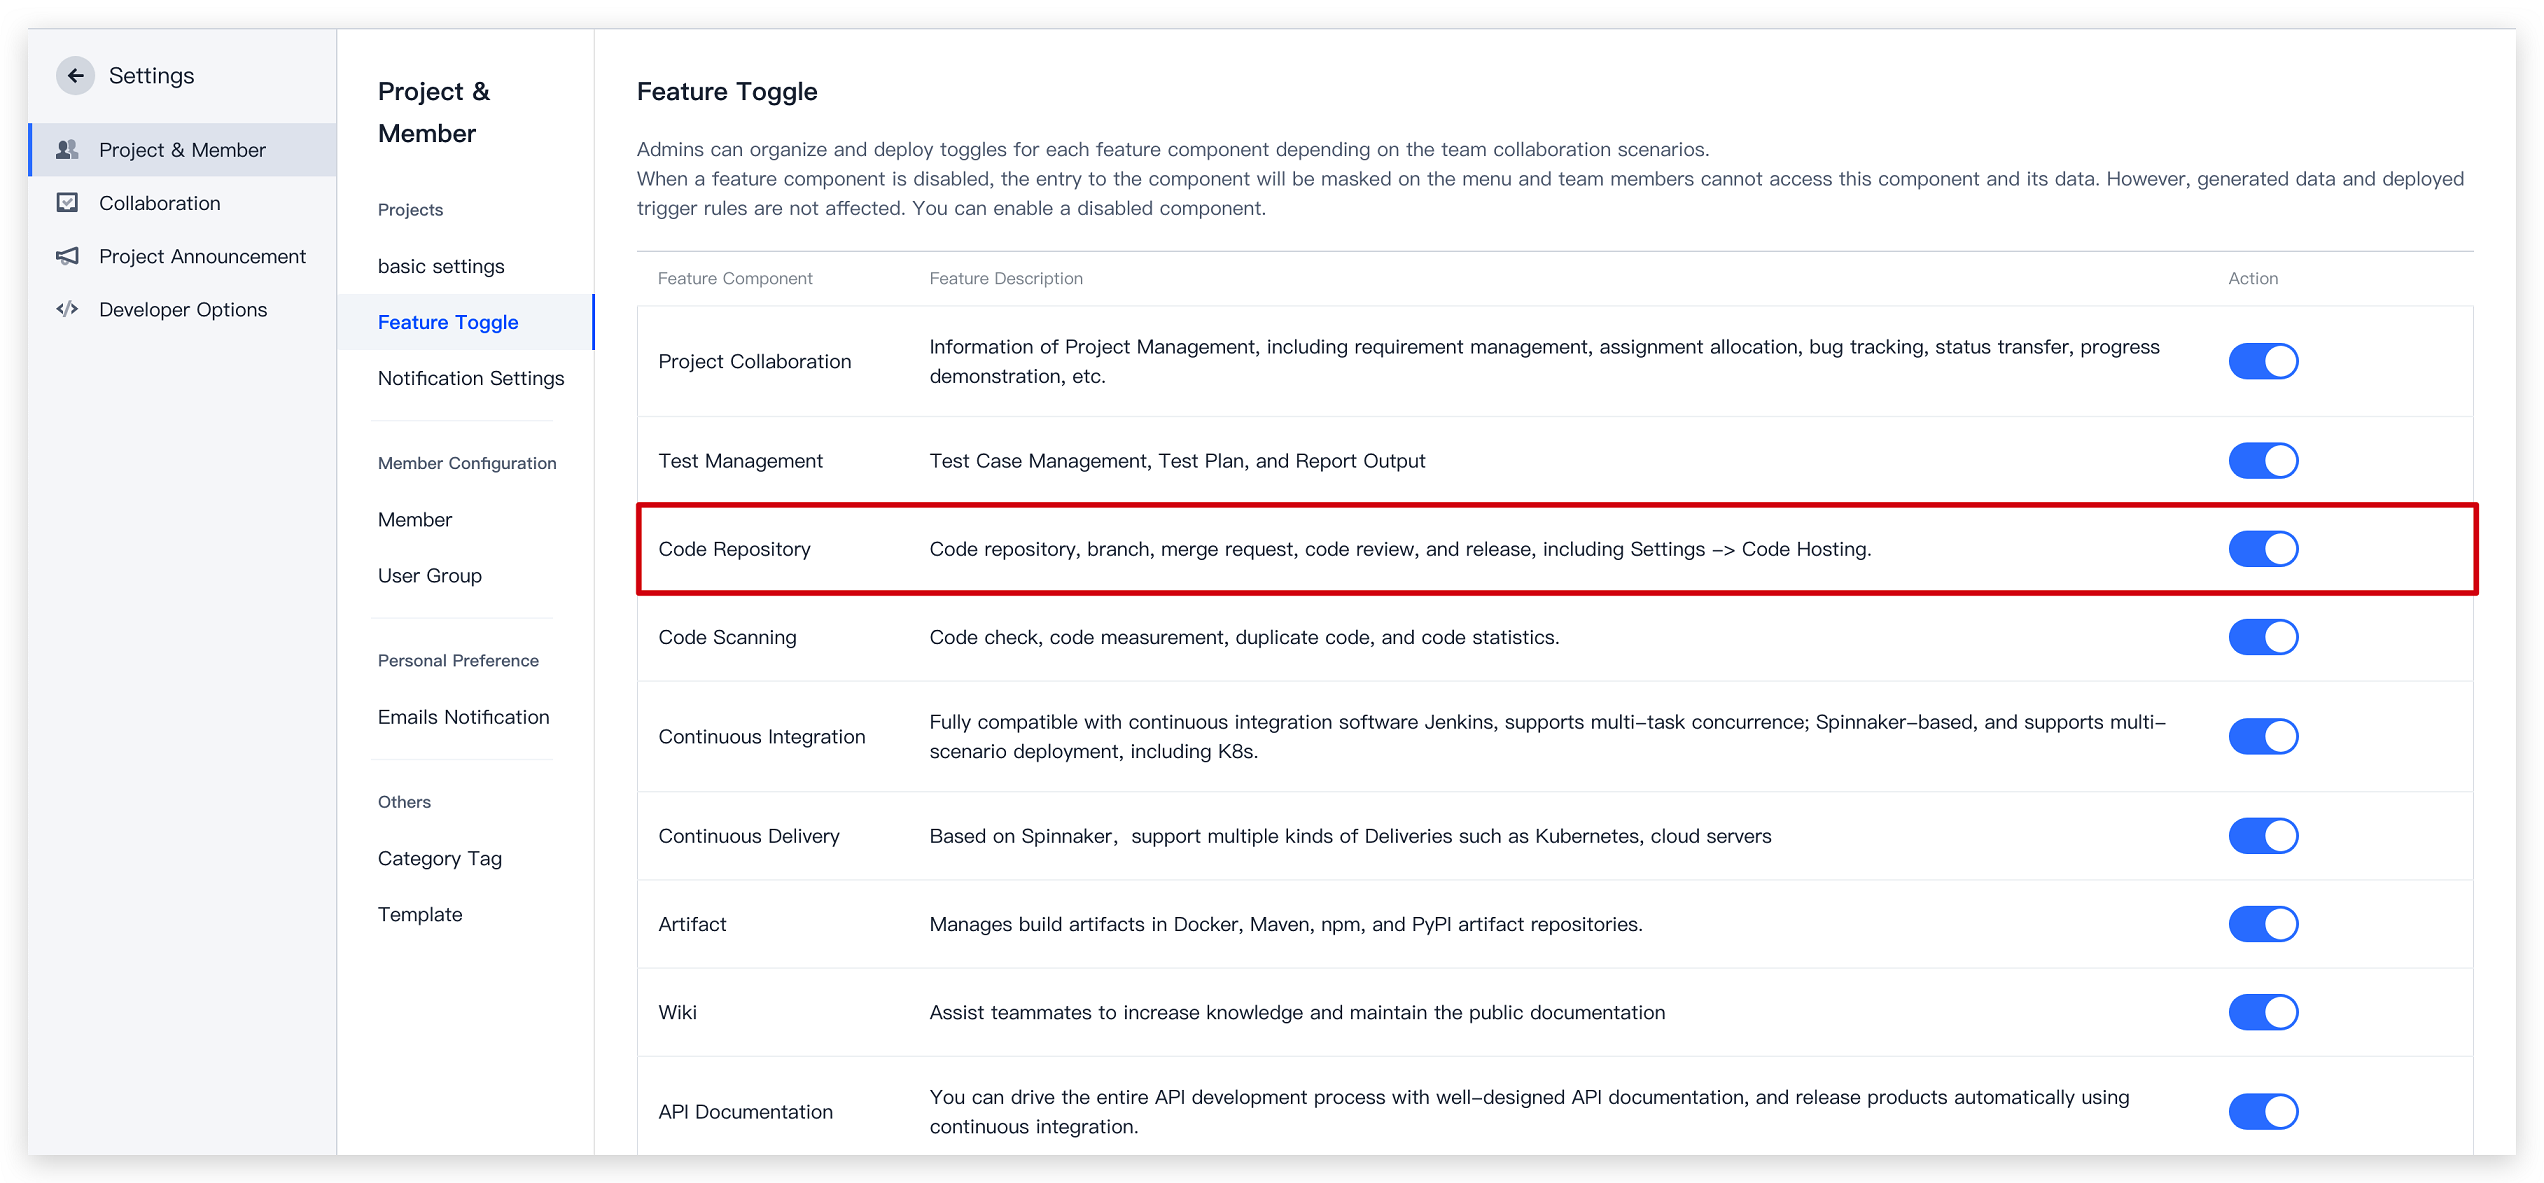
2. If the code repository entry is not displayed, a project admin must open the project, click Project Settings in the lower-left corner, and go to Project and Members > Functions to enable the code repository function.
Push and Pull Code
This section will demonstrate how to pull code from and push code to remote repositories to facilitate cloud-based coding.
Pull code from remote repository
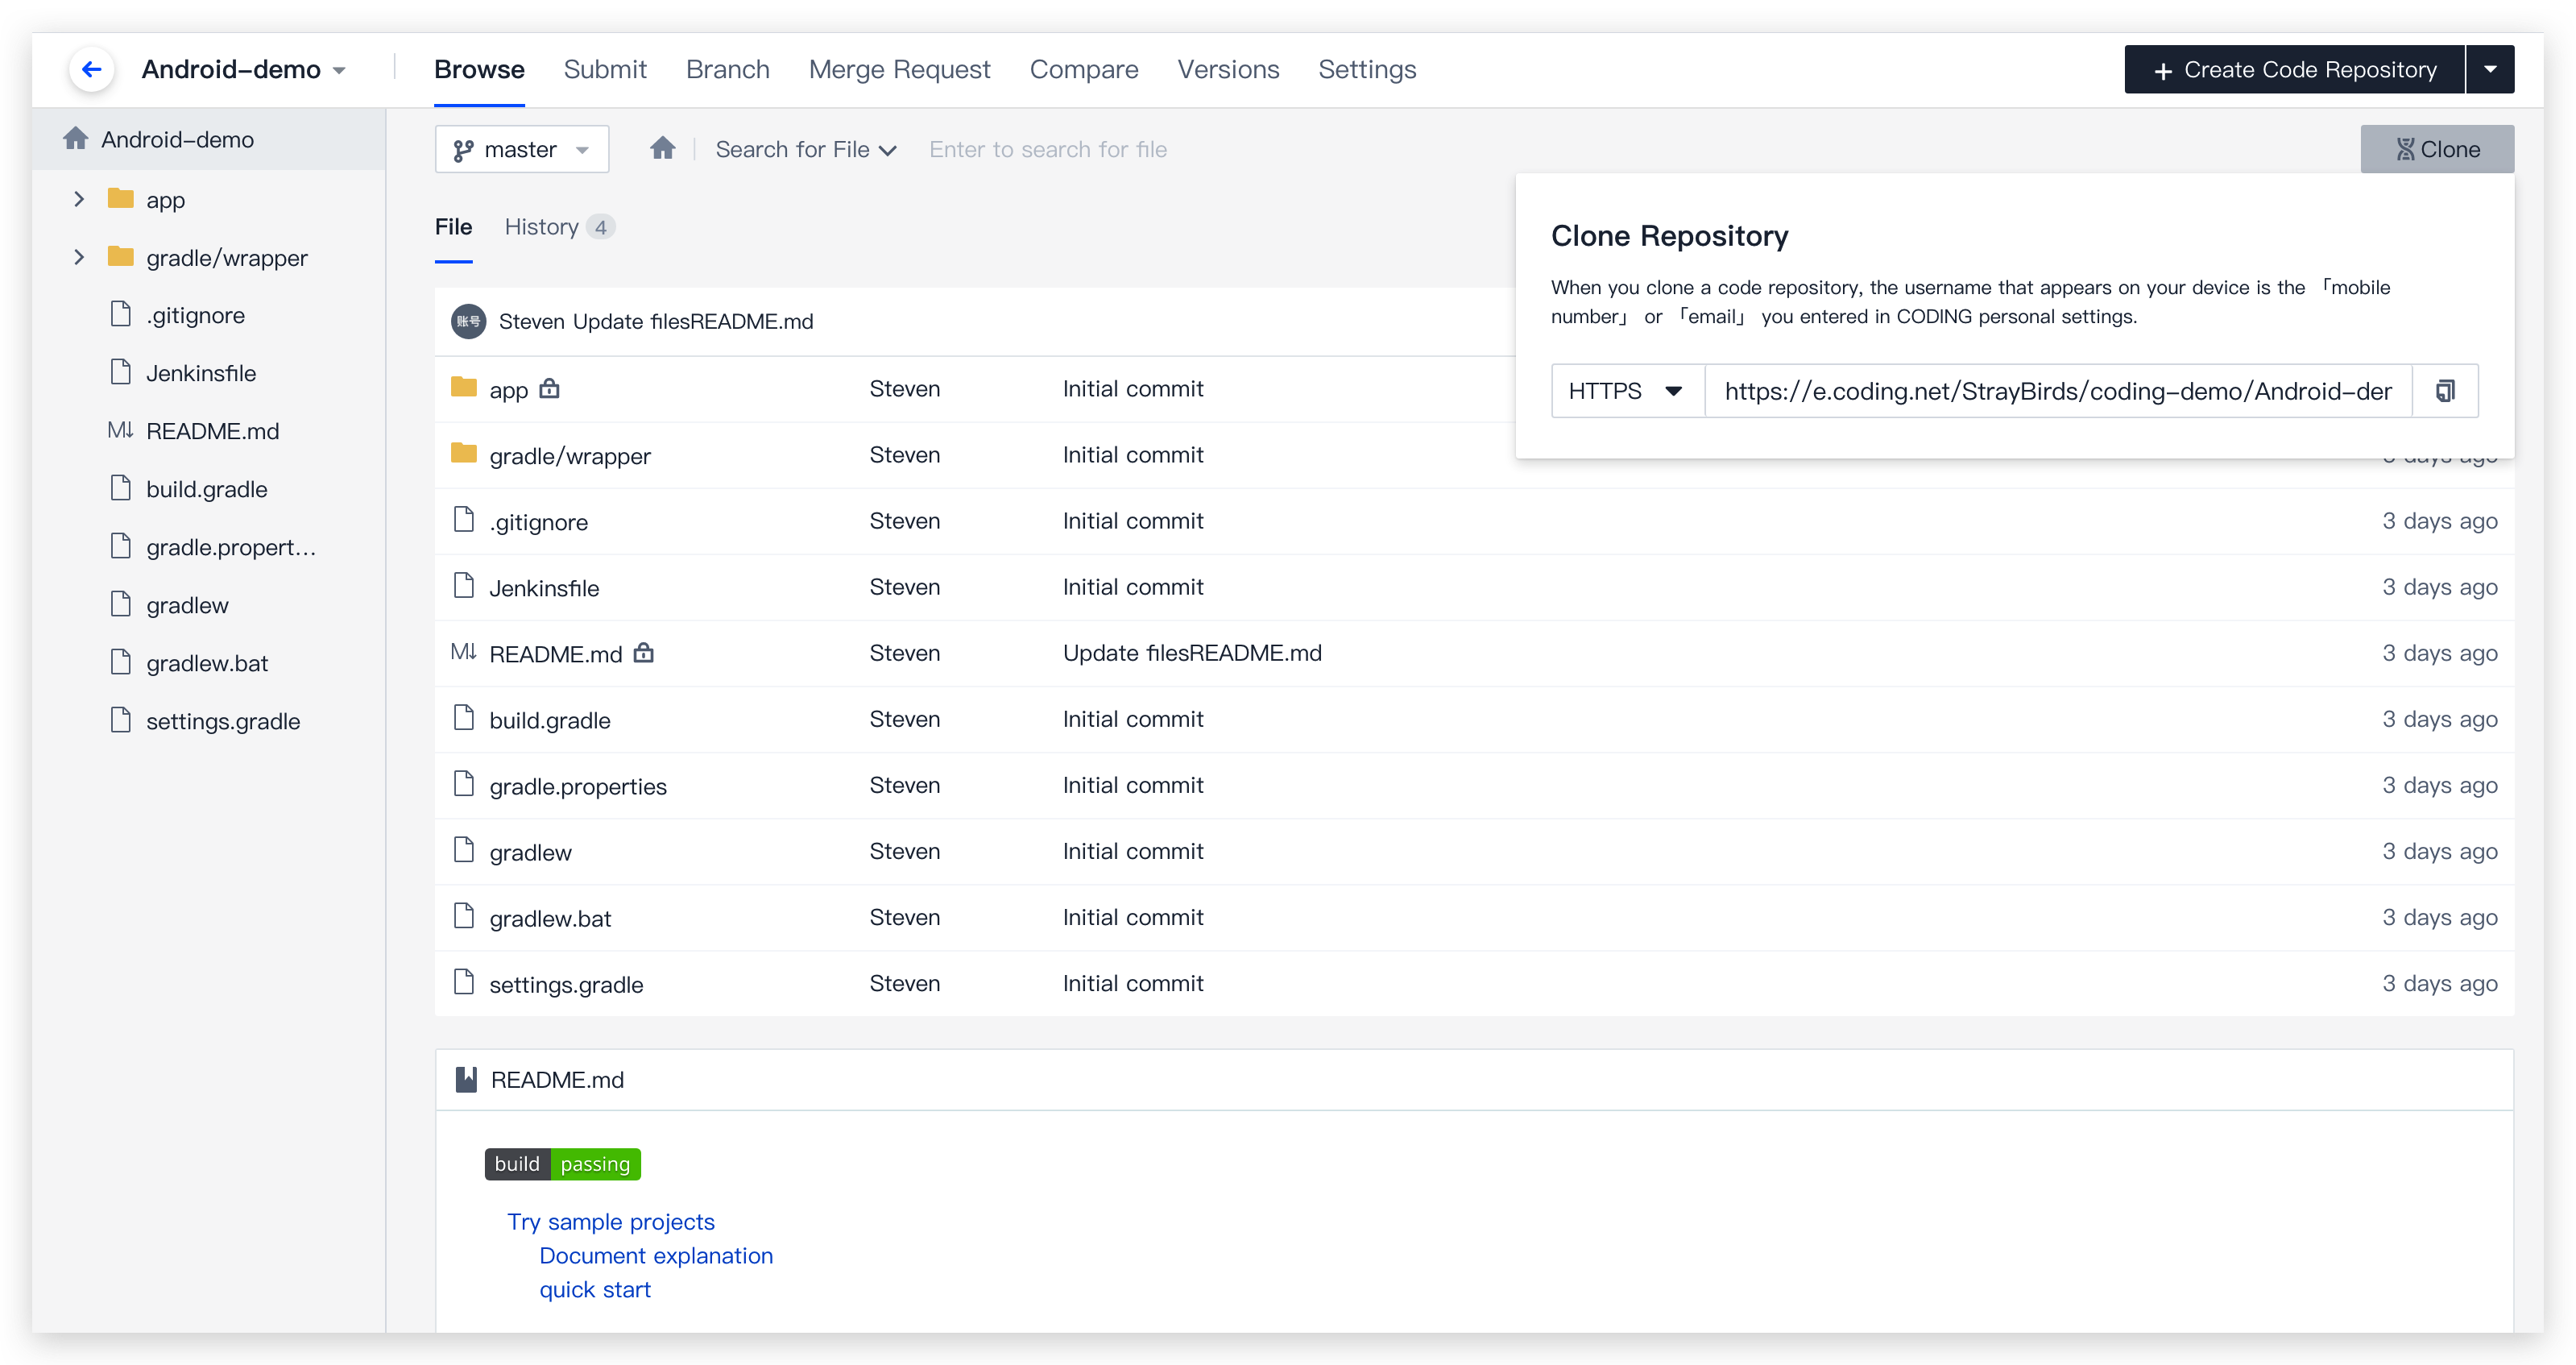
After initializing a local code repository, you can open the terminal in a folder and run the git clone + repository address command to pull code.
When pulling for the first time, you must enter your credentials. Enter the email and password you used to register a CODING account. You can also open the dropdown menu in the upper-right corner and go to Personal Account Settings to modify your credential information.
When the operation is successful, you can modify the code in your local code repository.
Edit files
In a folder, create the readme.txt and learn-git.txt files. In one of the files, write I'm learning git. (or customize as needed) and save it.
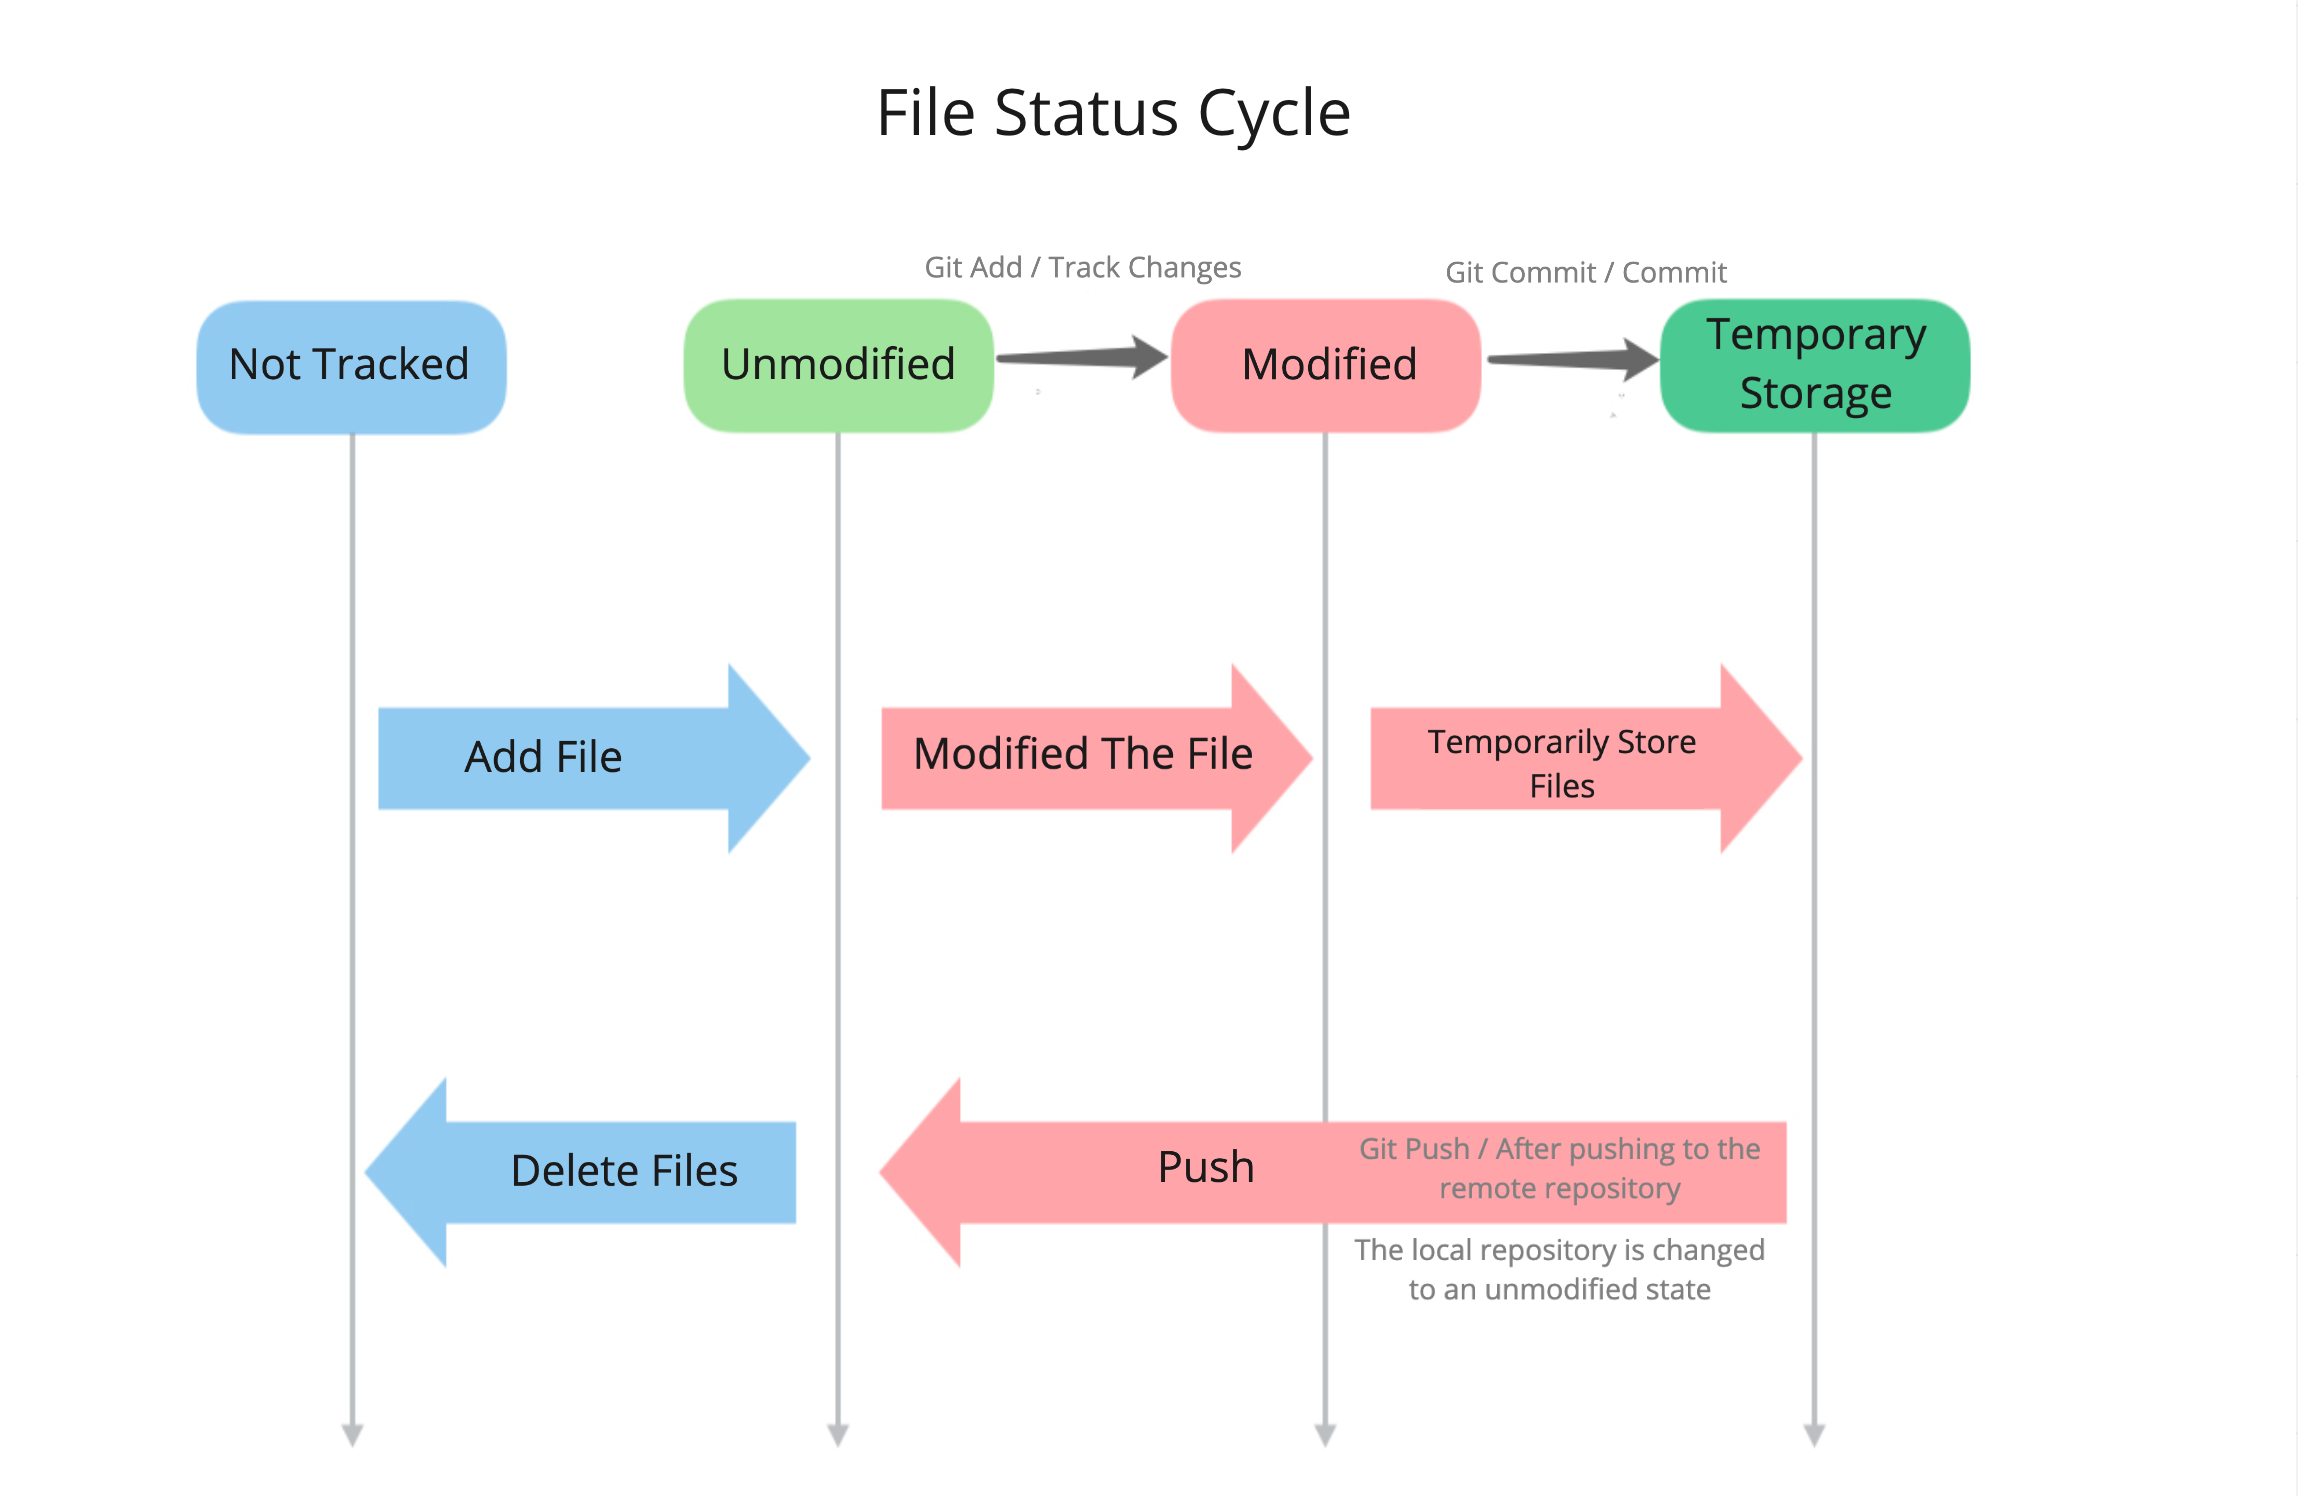
Flowchart
Before committing code, you can refer to this flowchart to understand the status lifecycle Git uses when tracking files.
Track files (git add)
After creating or editing a file, run the git add command to add the file to the staging area (Index Stage) of the local Git repository.
Command to track a specific file:
gitadd readme.txt
Command to add multiple files:
gitadd readme.txt learn_git.txt
To track all files at once, you can directly enter git add in the terminal.
Commit files (git commit)
After files to commit are added to the staging area, run git commit to commit the files to the local repository. This command commits all files in the staging area:
git commit -m "wrote a readme and a learn_git file"
The content enclosed in quotes following -m is your commit description. The following lines are the result returned. Make sure that you add a change description to each commit to provide a clear description of what changes were committed.
In addition to the git commit command, you can also use the standard plugin to standardize commit messages in the repository for easy backtracking.
// Step 1: Install yarn
brew installyarn
// Step 2: Install plugin
yarnadd -D standard-version
// Step 3: Commit code with the plugin
git cz
Associate issues automatically
When you commit code, # Issue ID is included in the commit message. You can also directly associate issues in the project.
If the Development Convention function is enabled for this repository and a commit convention (such as check associated issues) is specified in the Branch Convention, make sure issues of the corresponding type are associated in the commit message. Otherwise, this branch will violate the convention.
For example, for an issue (requirement) with the ID 630, add #630 in the commit message to automatically associate the requirement. Add project-1#630 to associate issue 630 in project-1.
View file status (git status)
If you are not sure that Git is precisely tracking file changes and want to confirm the file status, use the git status command to see the file status.
If no files are tracked in the current repository, the result returned is as follows:
$ git status
On branch master
Your branch is up-to-date with 'origin/master'
nothing to commit, working directory clean
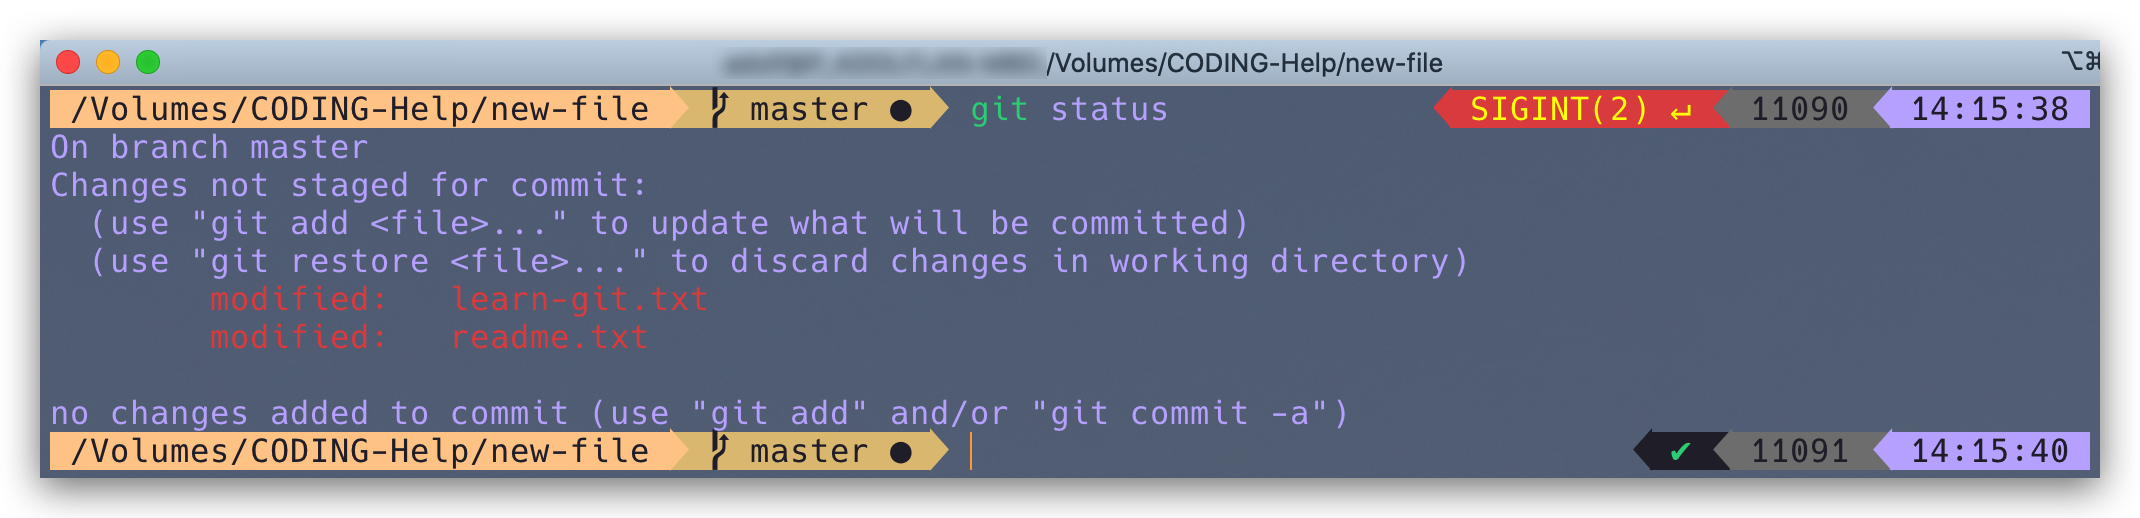
If a file has changed but the changes were not tracked, the result returned is as follows:
Run git add to track the file. After successful tracking, the font color will change from red to green.
When a file has been tracked and already committed to the repository, the result returned is as follows:
Push files to remote repository (git push)
On the terminal, run the command:
git push
To automatically create a merge request and associate issues upon commit, use the following command:
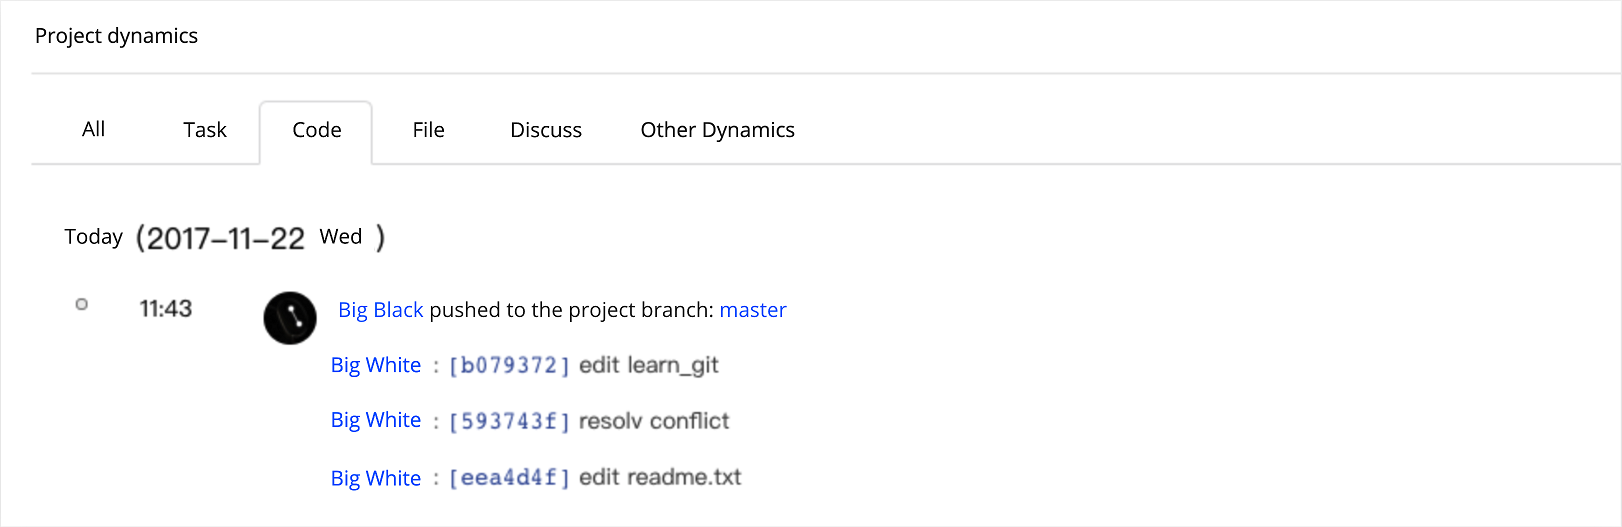
The git push is the push command. It pushes the local branch to the remote repository, which is equivalent to creating a remote backup. Go to the CODING code repository to view pushed files. If multiple people collaborate in maintaining the remote repository, you need to run the git pull command to synchronize your local repository with the remote repository to get any code committed by other users.
View and Edit Remote Repositories
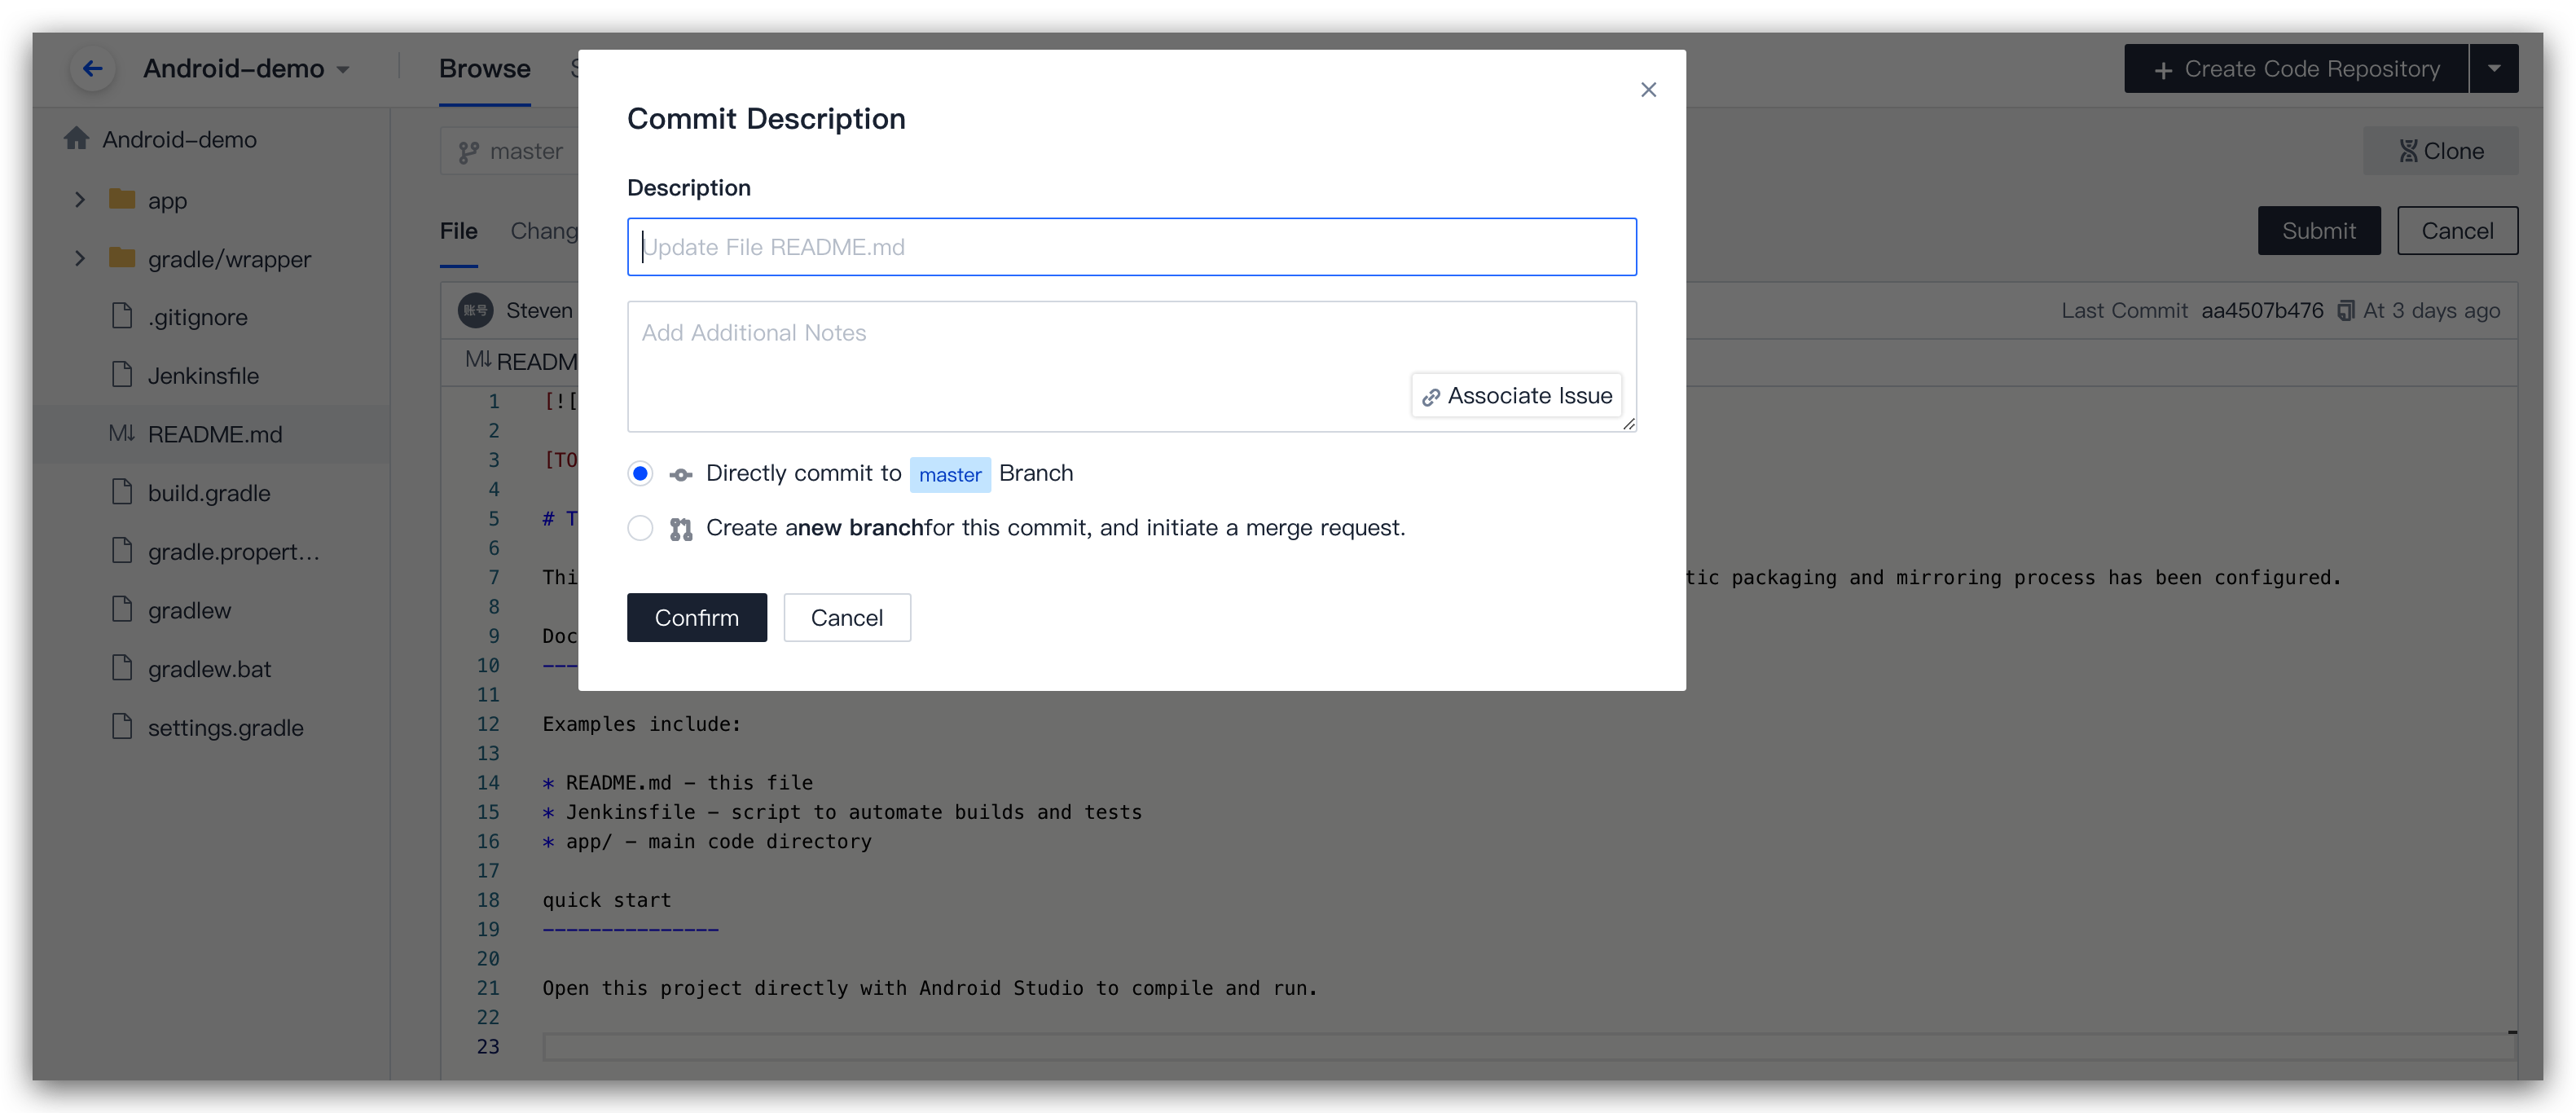
After a file is pushed to the CODING code repository, you can edit, save, and commit code on the webpage. Let's take the README.md file as an example. After editing and committing the changes, you can add a simple description of the modified content. If you do not add a description, the default commit description is "File xxx updated".


 Yes
Yes
 No
No
Was this page helpful?