Account Management
Unduh
Mode fokus
Ukuran font
This section primarily explains account management operations, including basic information maintenance, permissions, and security.
Entry
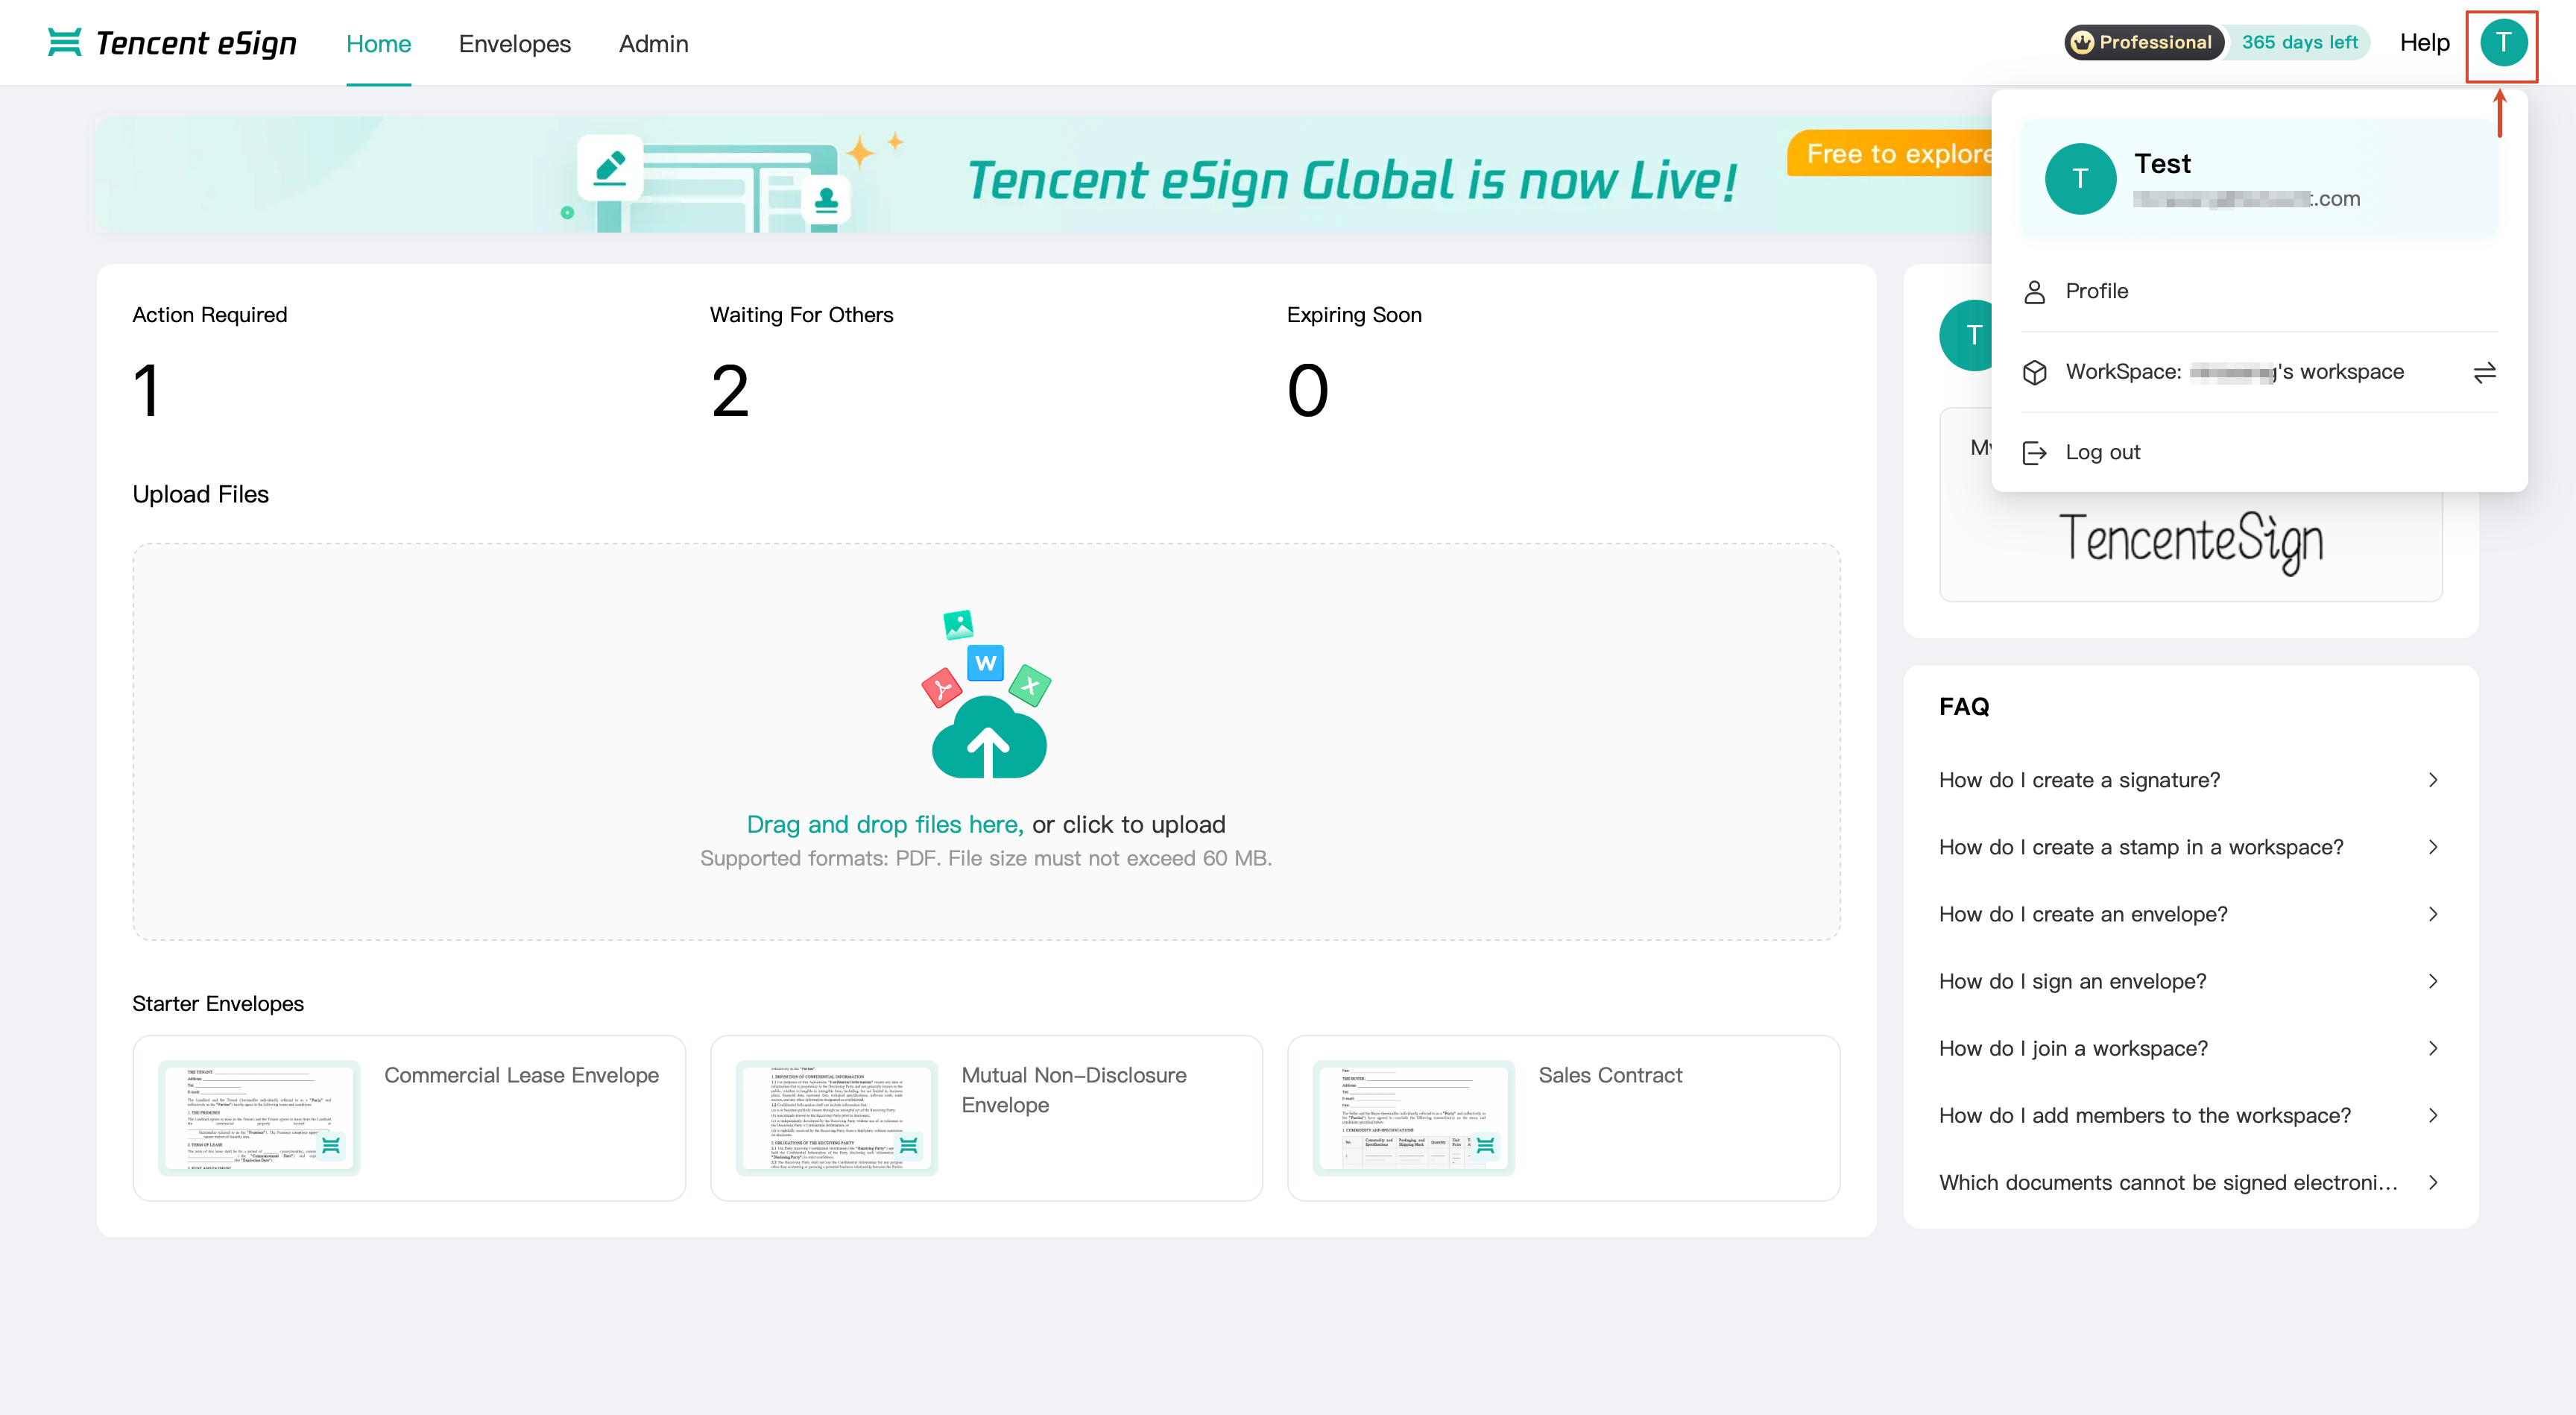
When you hover the mouse over the user avatar in the upper-right corner of the page, the system automatically displays the account drop-down menu. When you move the mouse away from the avatar area, the drop-down menu is automatically hidden.
The currently logged-in account name and bound email are displayed at the top of the menu. The menu contains three feature options: Profile, Workspace, and Log Out.
Detailed Features
Profile
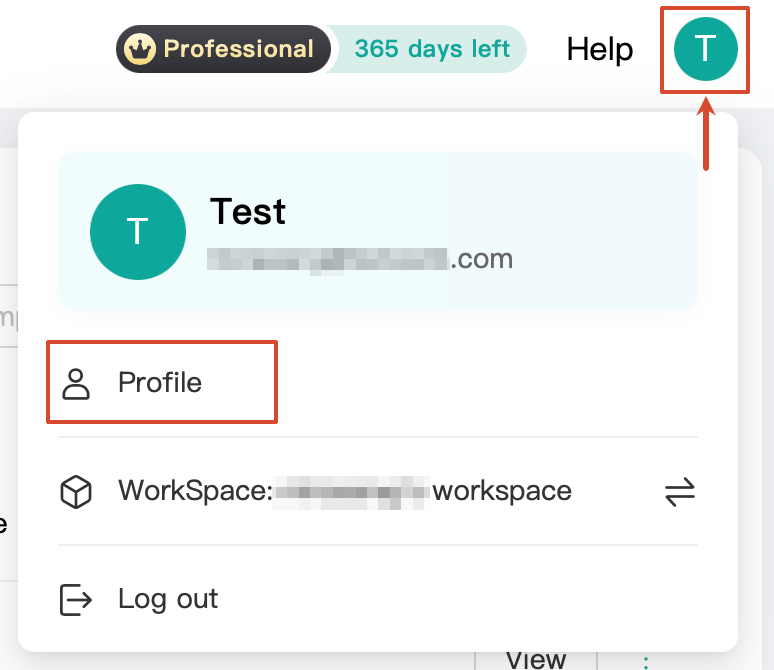
In the account drop-down menu, click Profile to go to the Profile Management page.
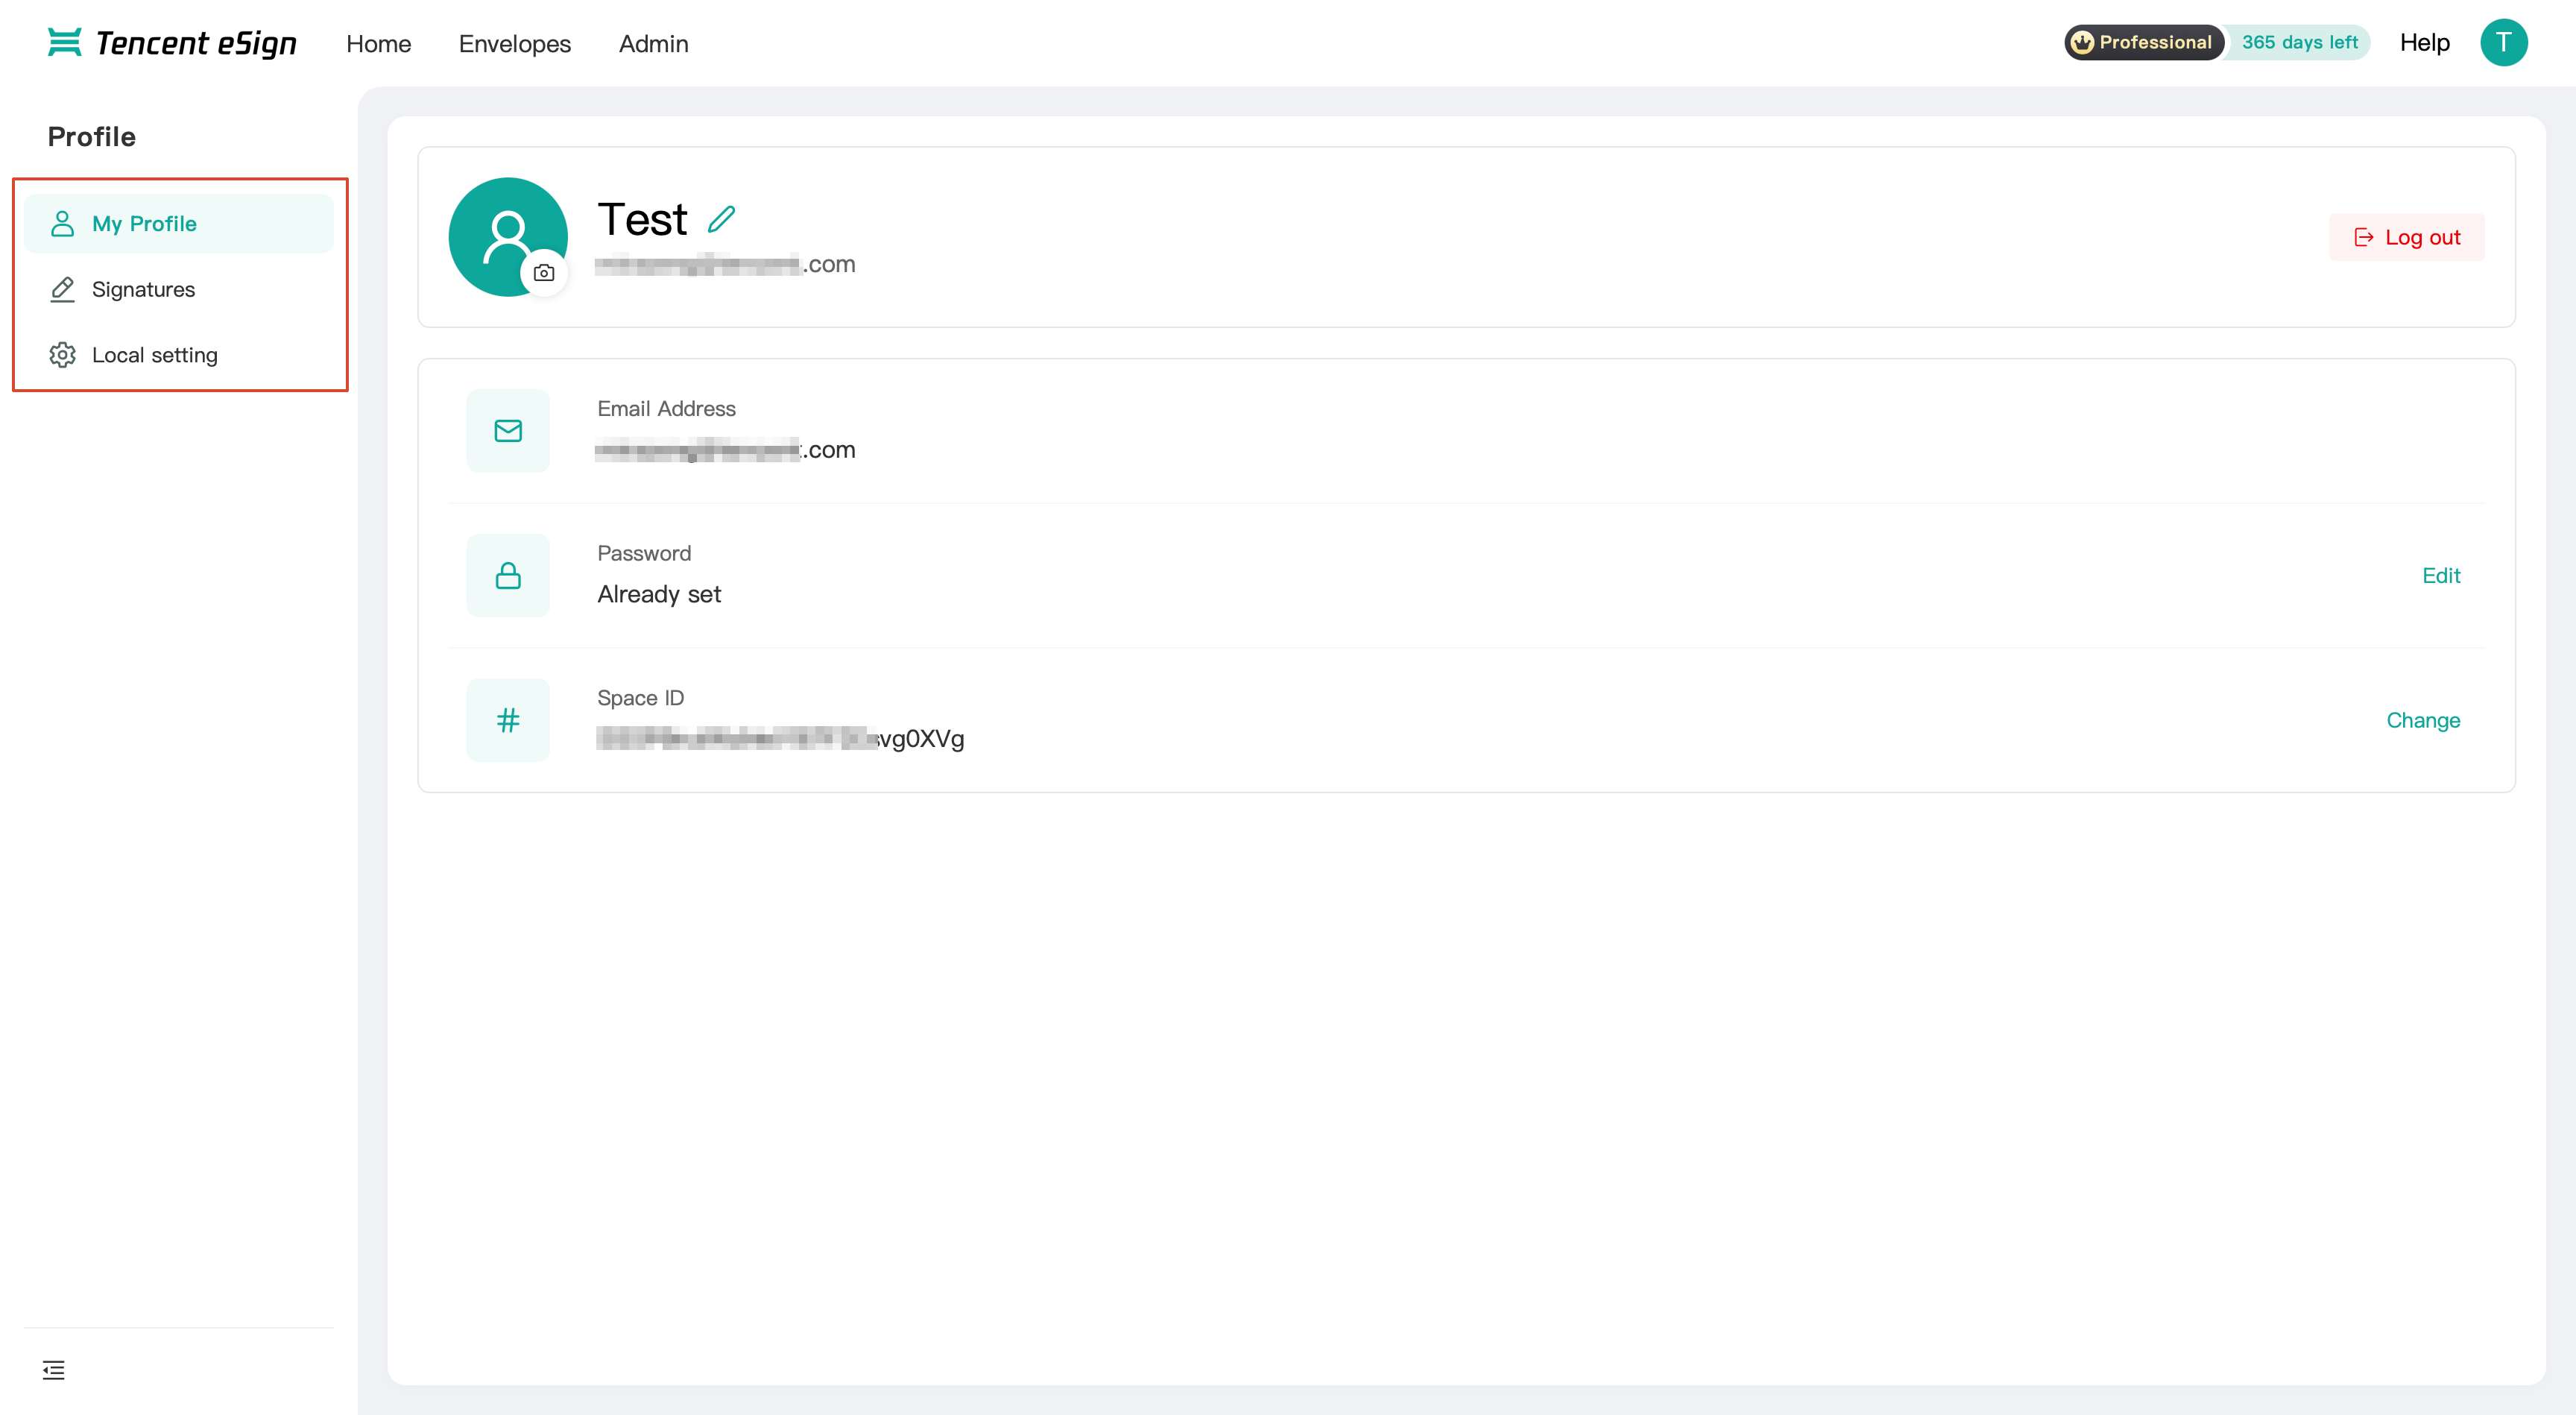
The left sidebar on the page is divided into three submenus: My Profile, Signature, and Local Settings.
My Profile
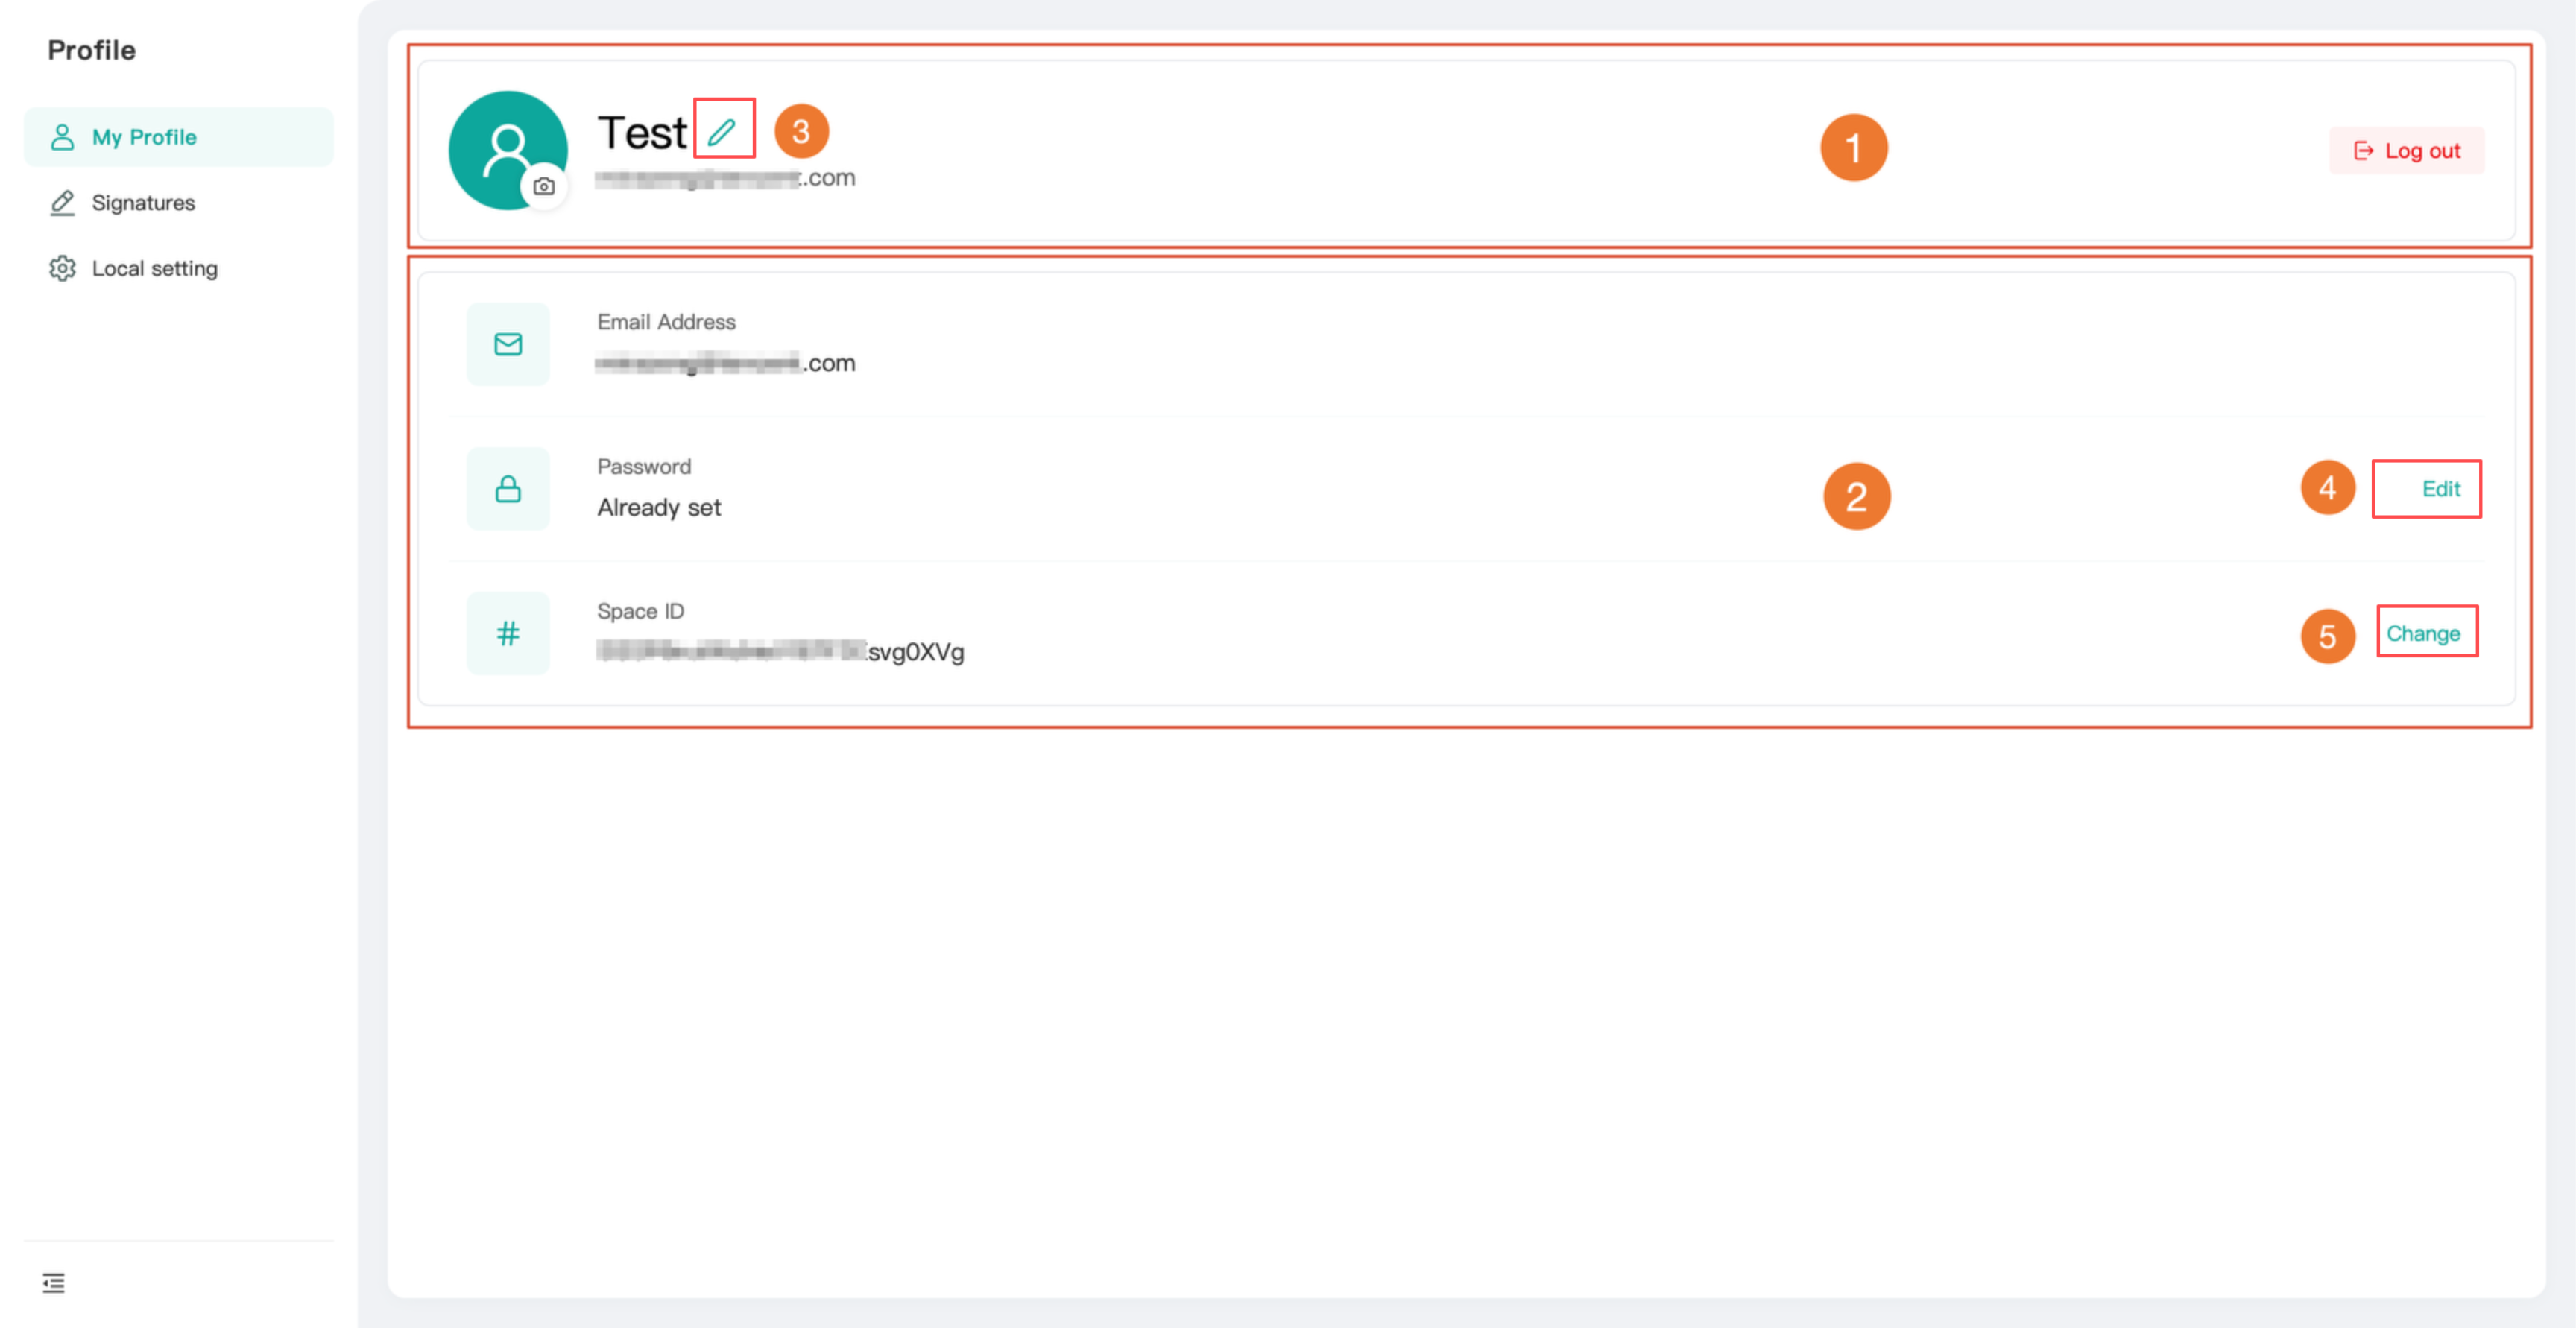
The upper area of the page (as labeled 1) displays the account avatar, account name, and bound email. You can edit the account name by clicking the pencil icon (as labeled 3) to the right of the account name.
The lower area of the page (as labeled 2) displays three basic information configurations:
Email Address: Displays the email address bound to the account.
Password: An Edit button (as labeled 4) is located to the right. Click it to initiate a password change operation.
Space ID: A Change button (as labeled 5) is located to the right. Click it to switch the current workspace.
Signature
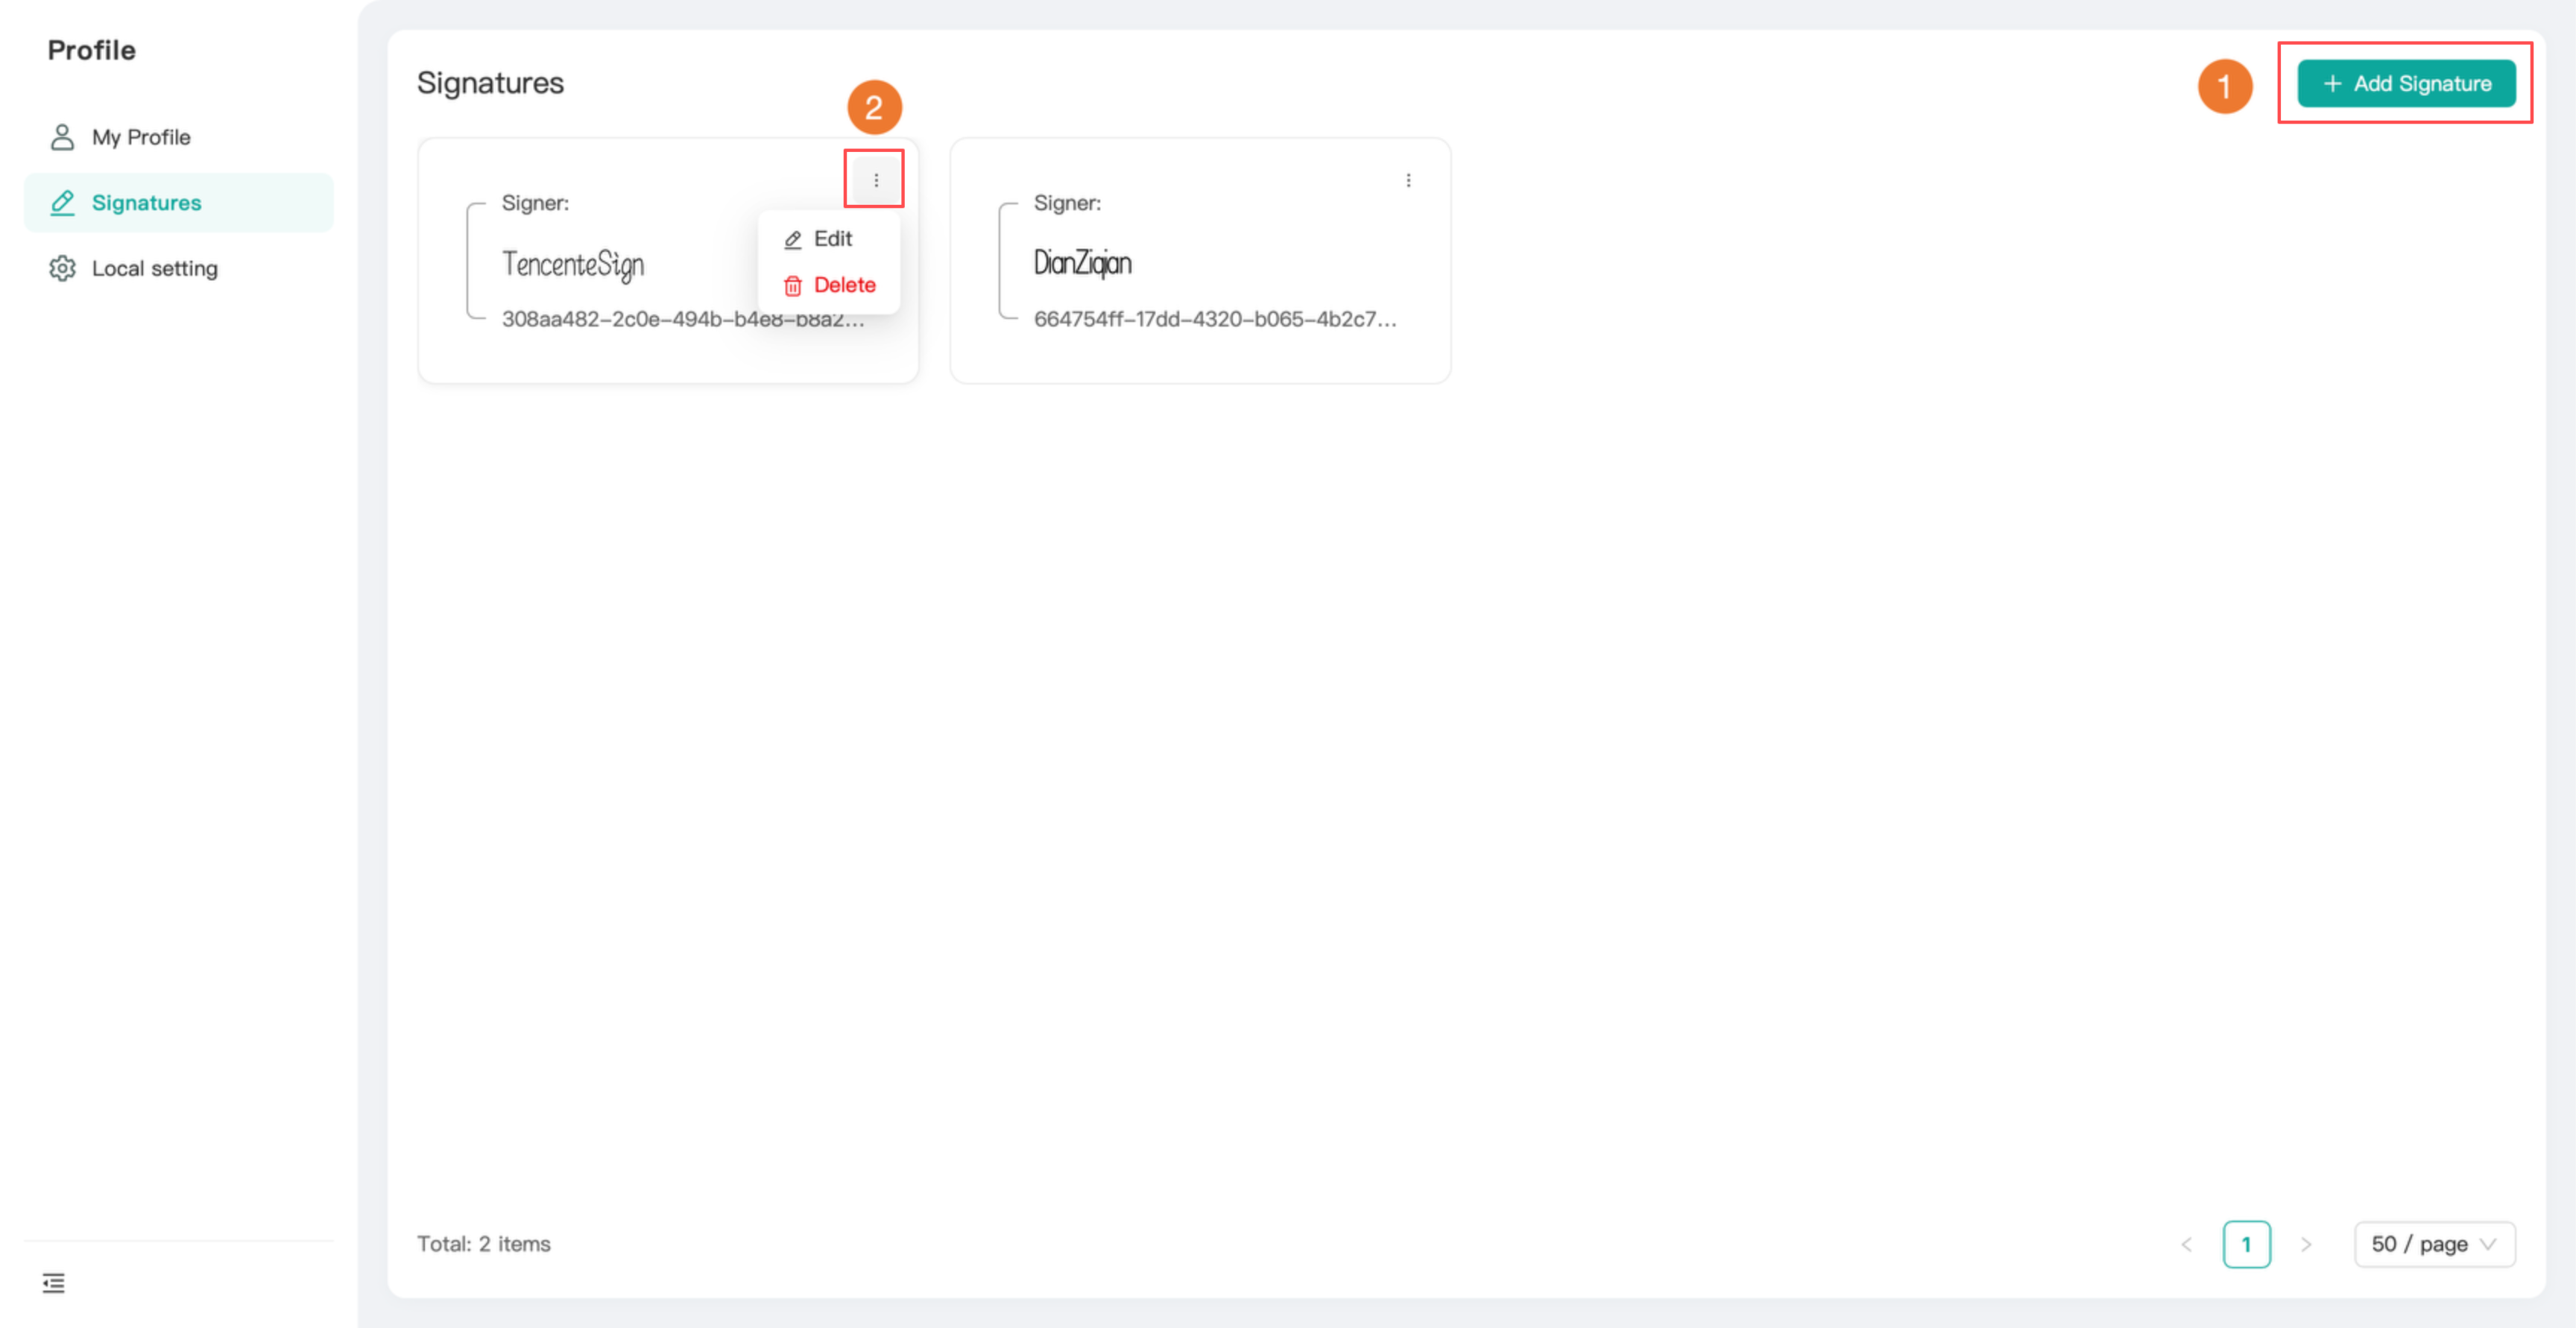
The page uses a card layout to display all created personal signatures.
1. Click Add Signature (as labeled 1) in the upper-right corner of the page to create a new personal signature.
2. A three-dot operation icon (as labeled 2) is located in the upper-right corner of each signature card. Click the icon to Edit or Delete the corresponding signature.
Local Settings
The page is divided into two main configuration sections: Preference and Default Workspace.
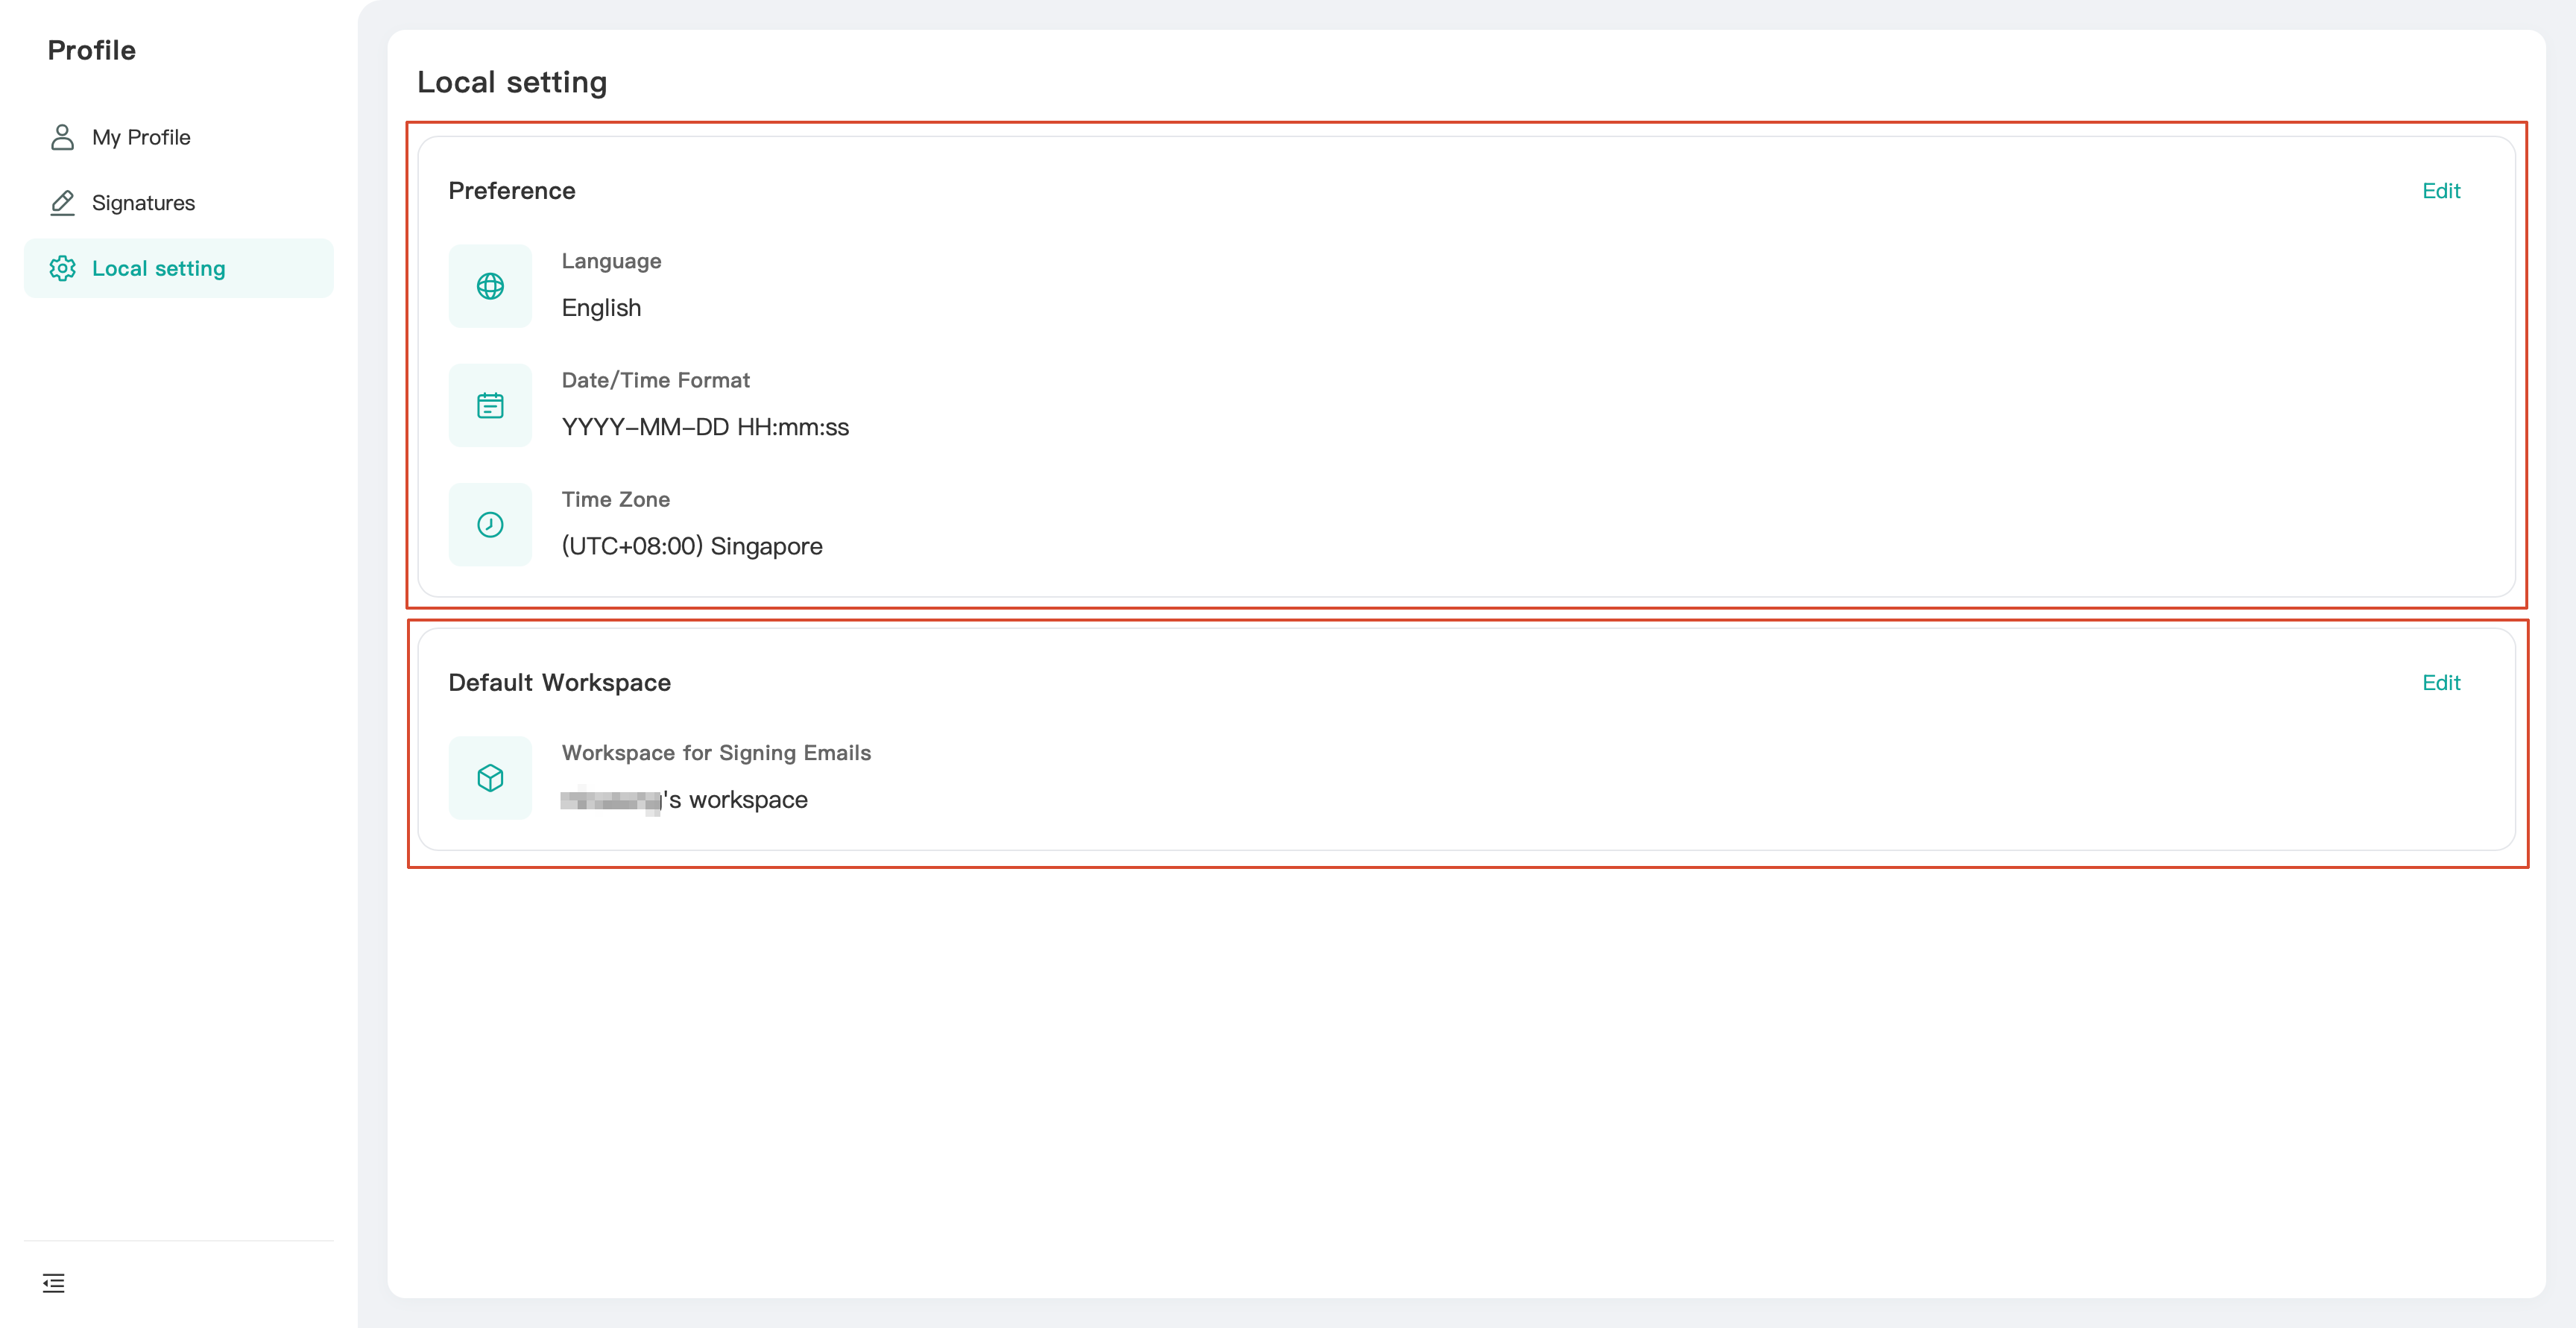
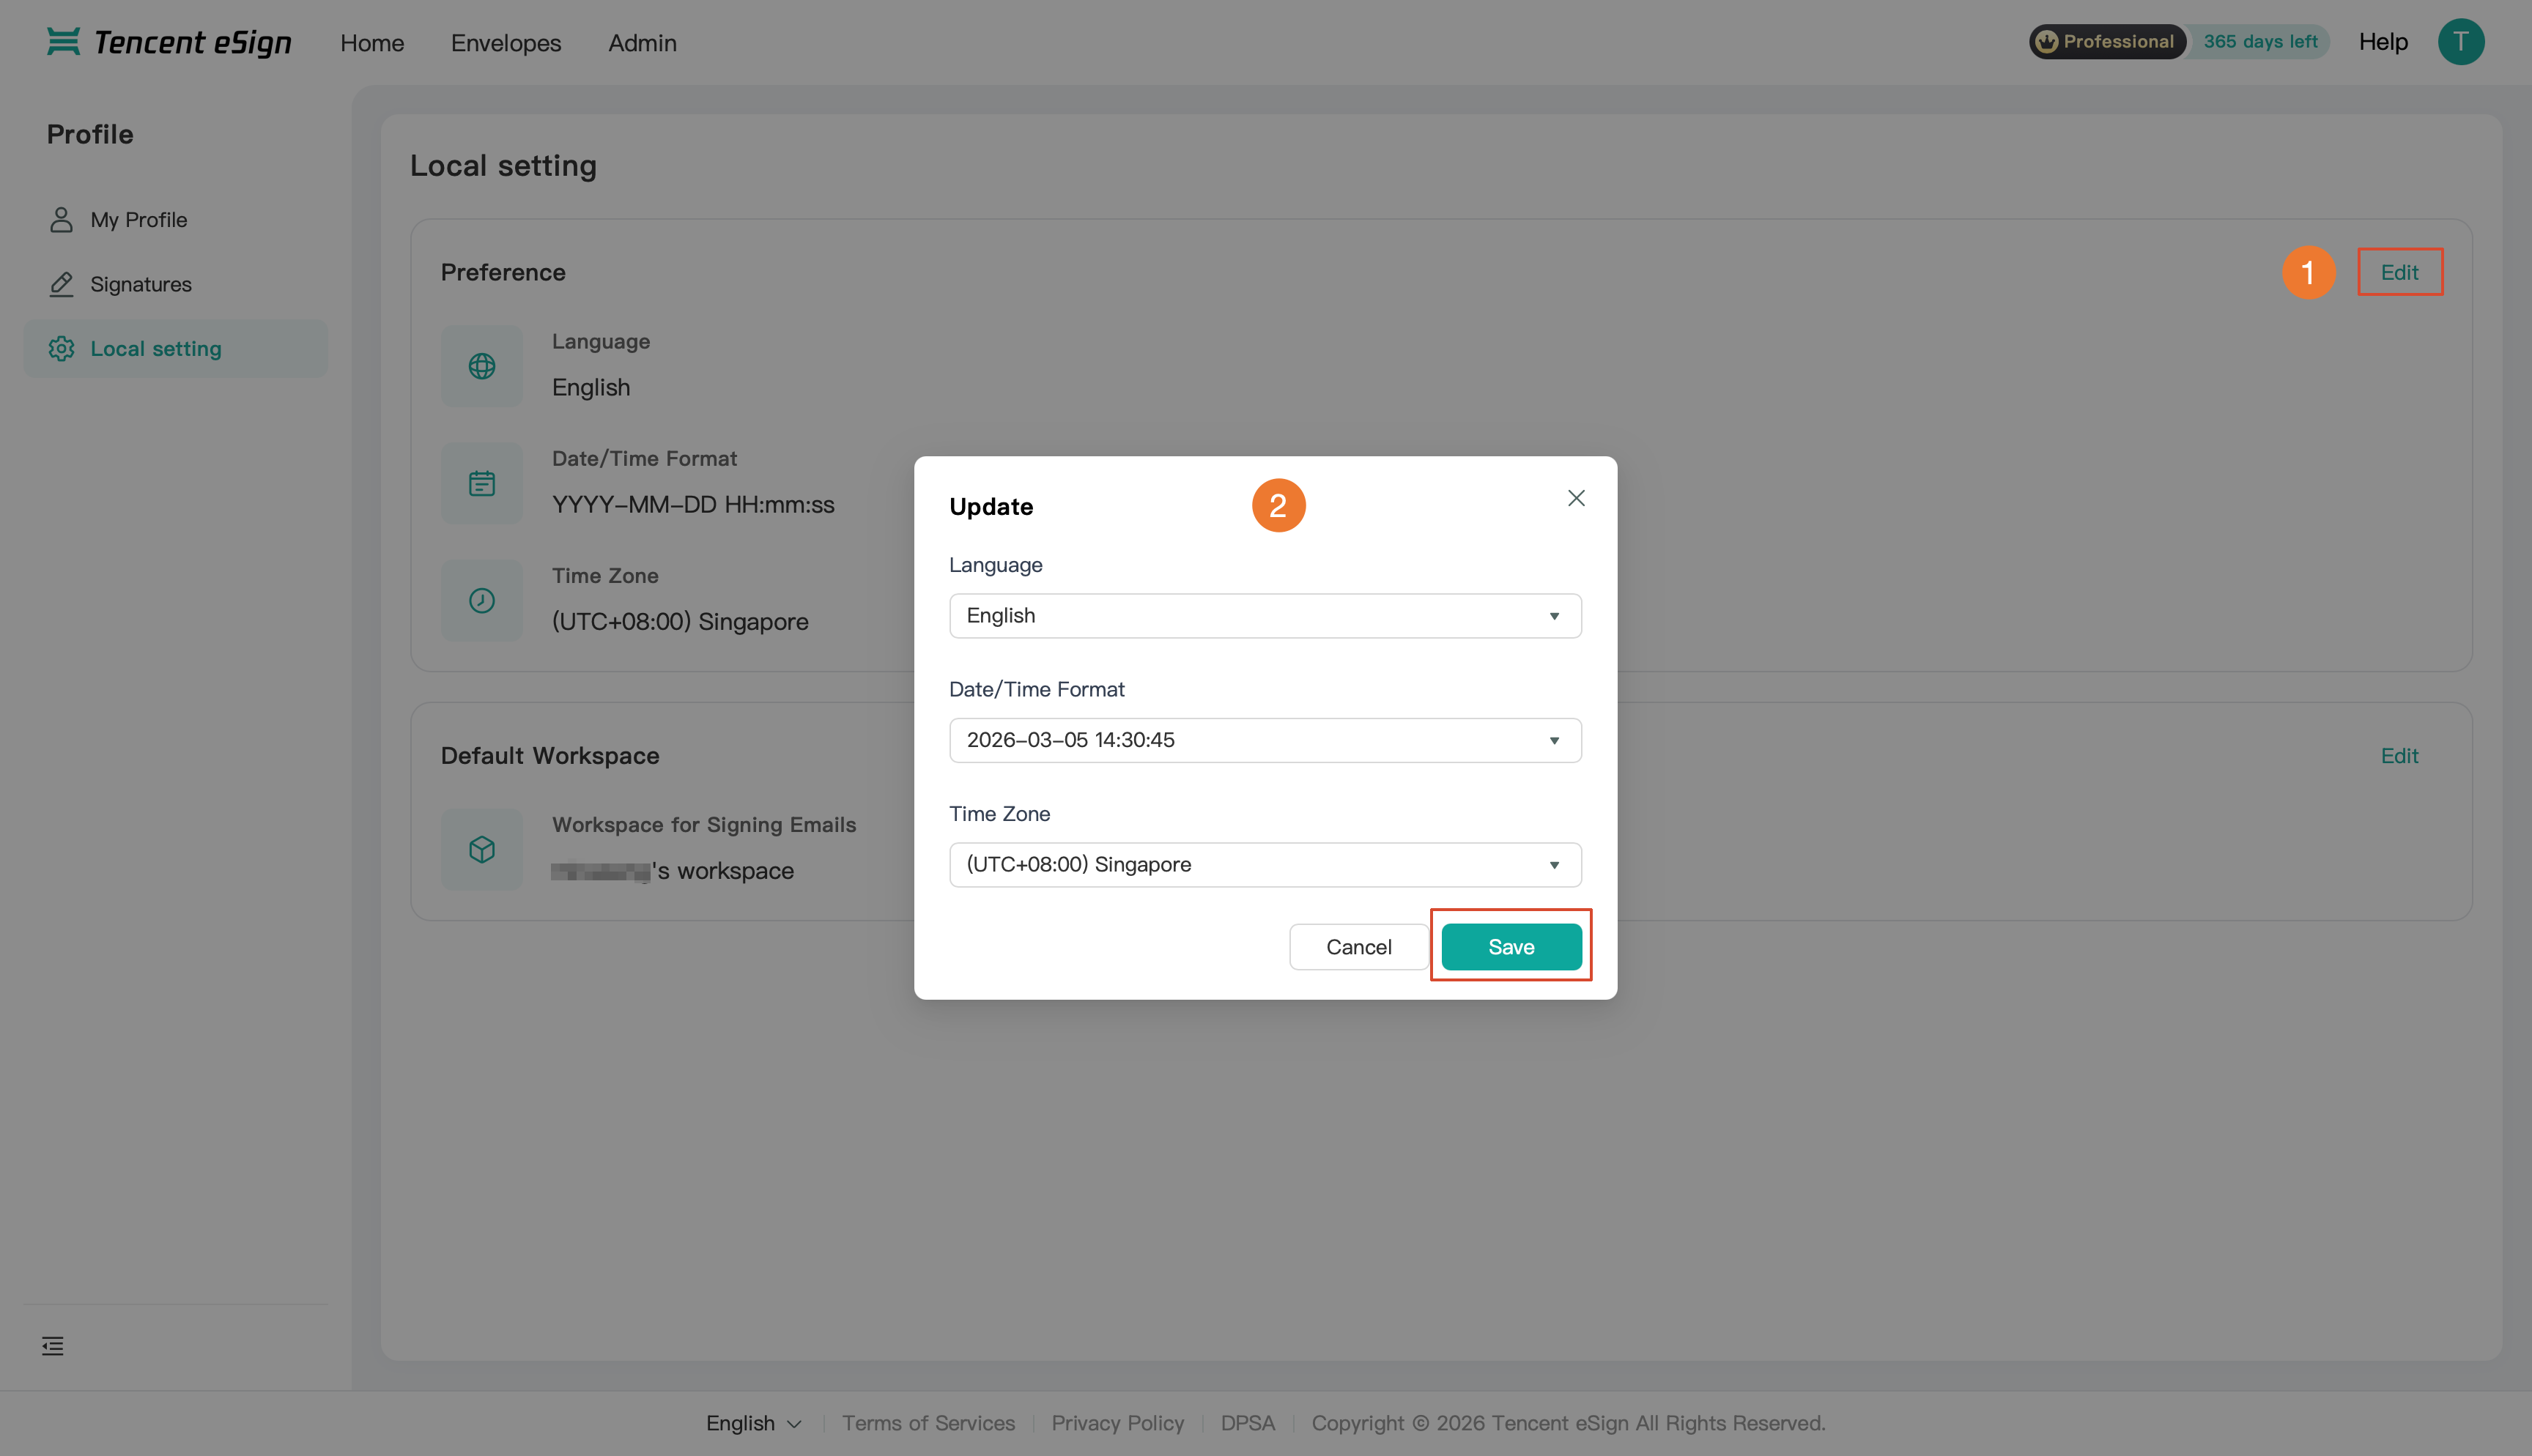
Preference: Contains three configuration items: Language, Date/Time Format, and Time Zone. When you click the Edit button (as labeled 1) in the upper-right corner of the section, an update dialog box (as labeled 2) appears. You can then click the drop-down lists for these three settings to modify their parameters.
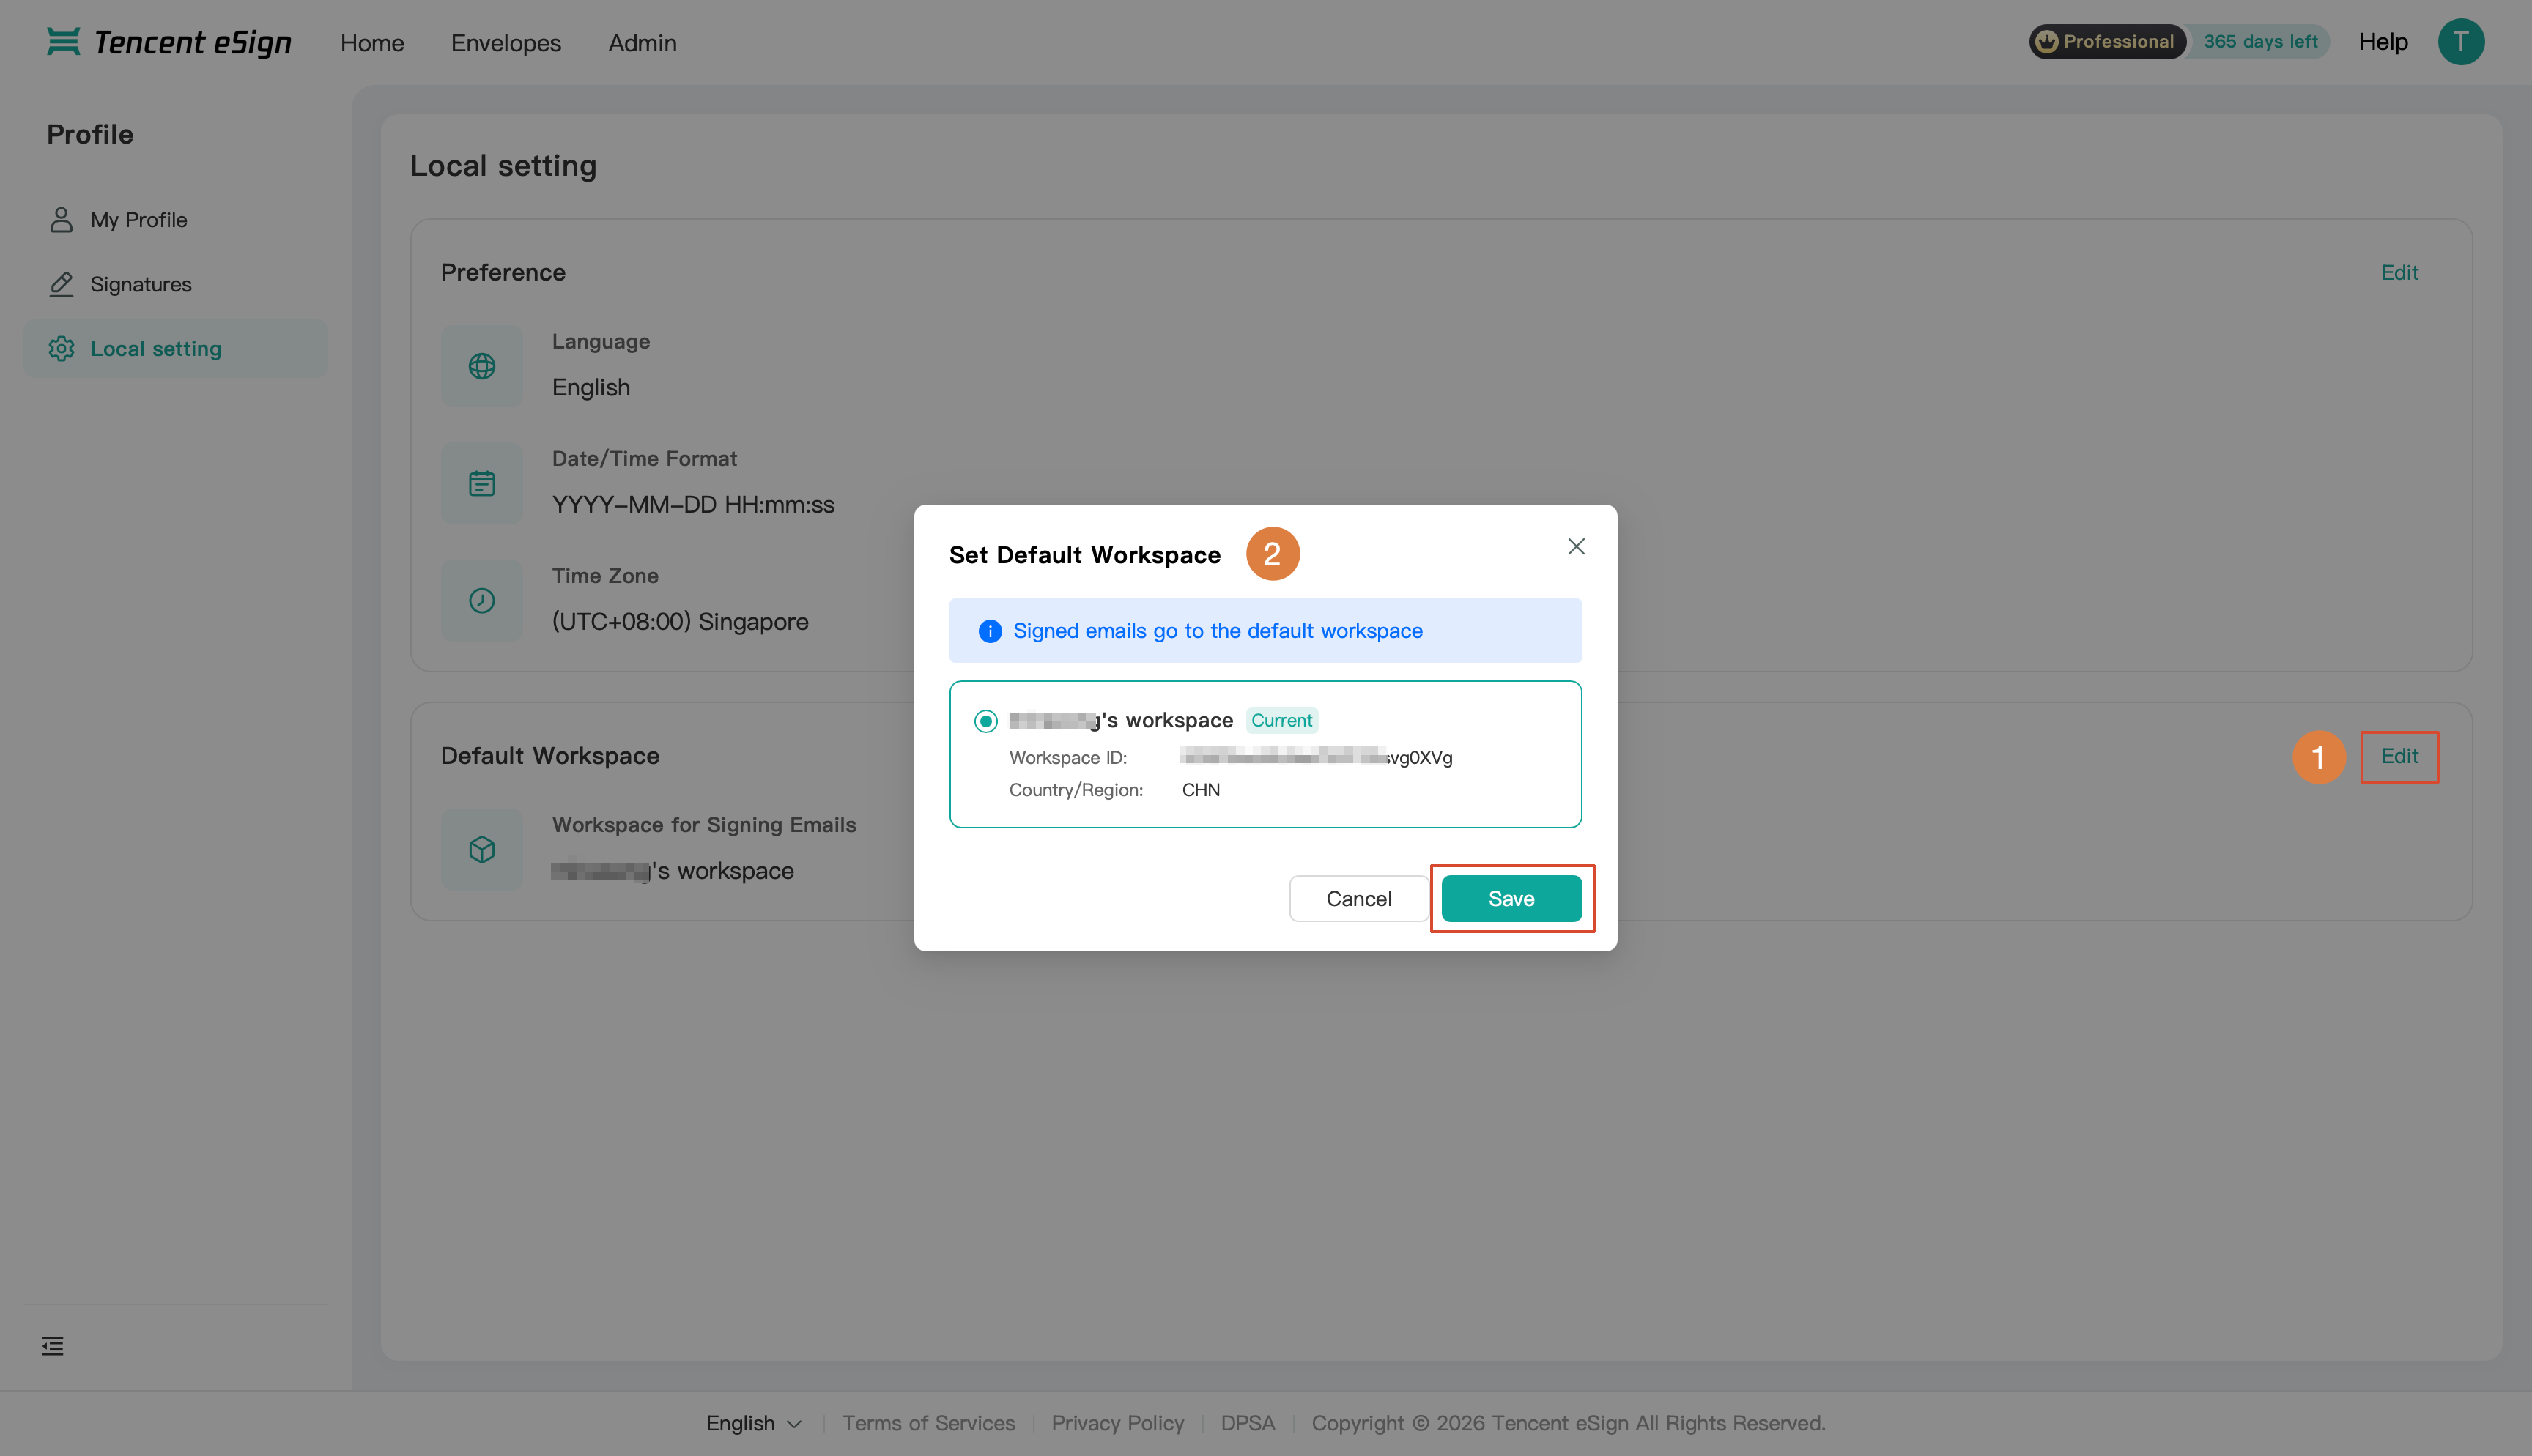
Default Workspace: Displays the currently active default workspace. Click Edit (as labeled 1) to the right of this item to reselect the default workspace.
Note:
System-signed notification emails are uniformly delivered to the selected default workspace.
Workspace
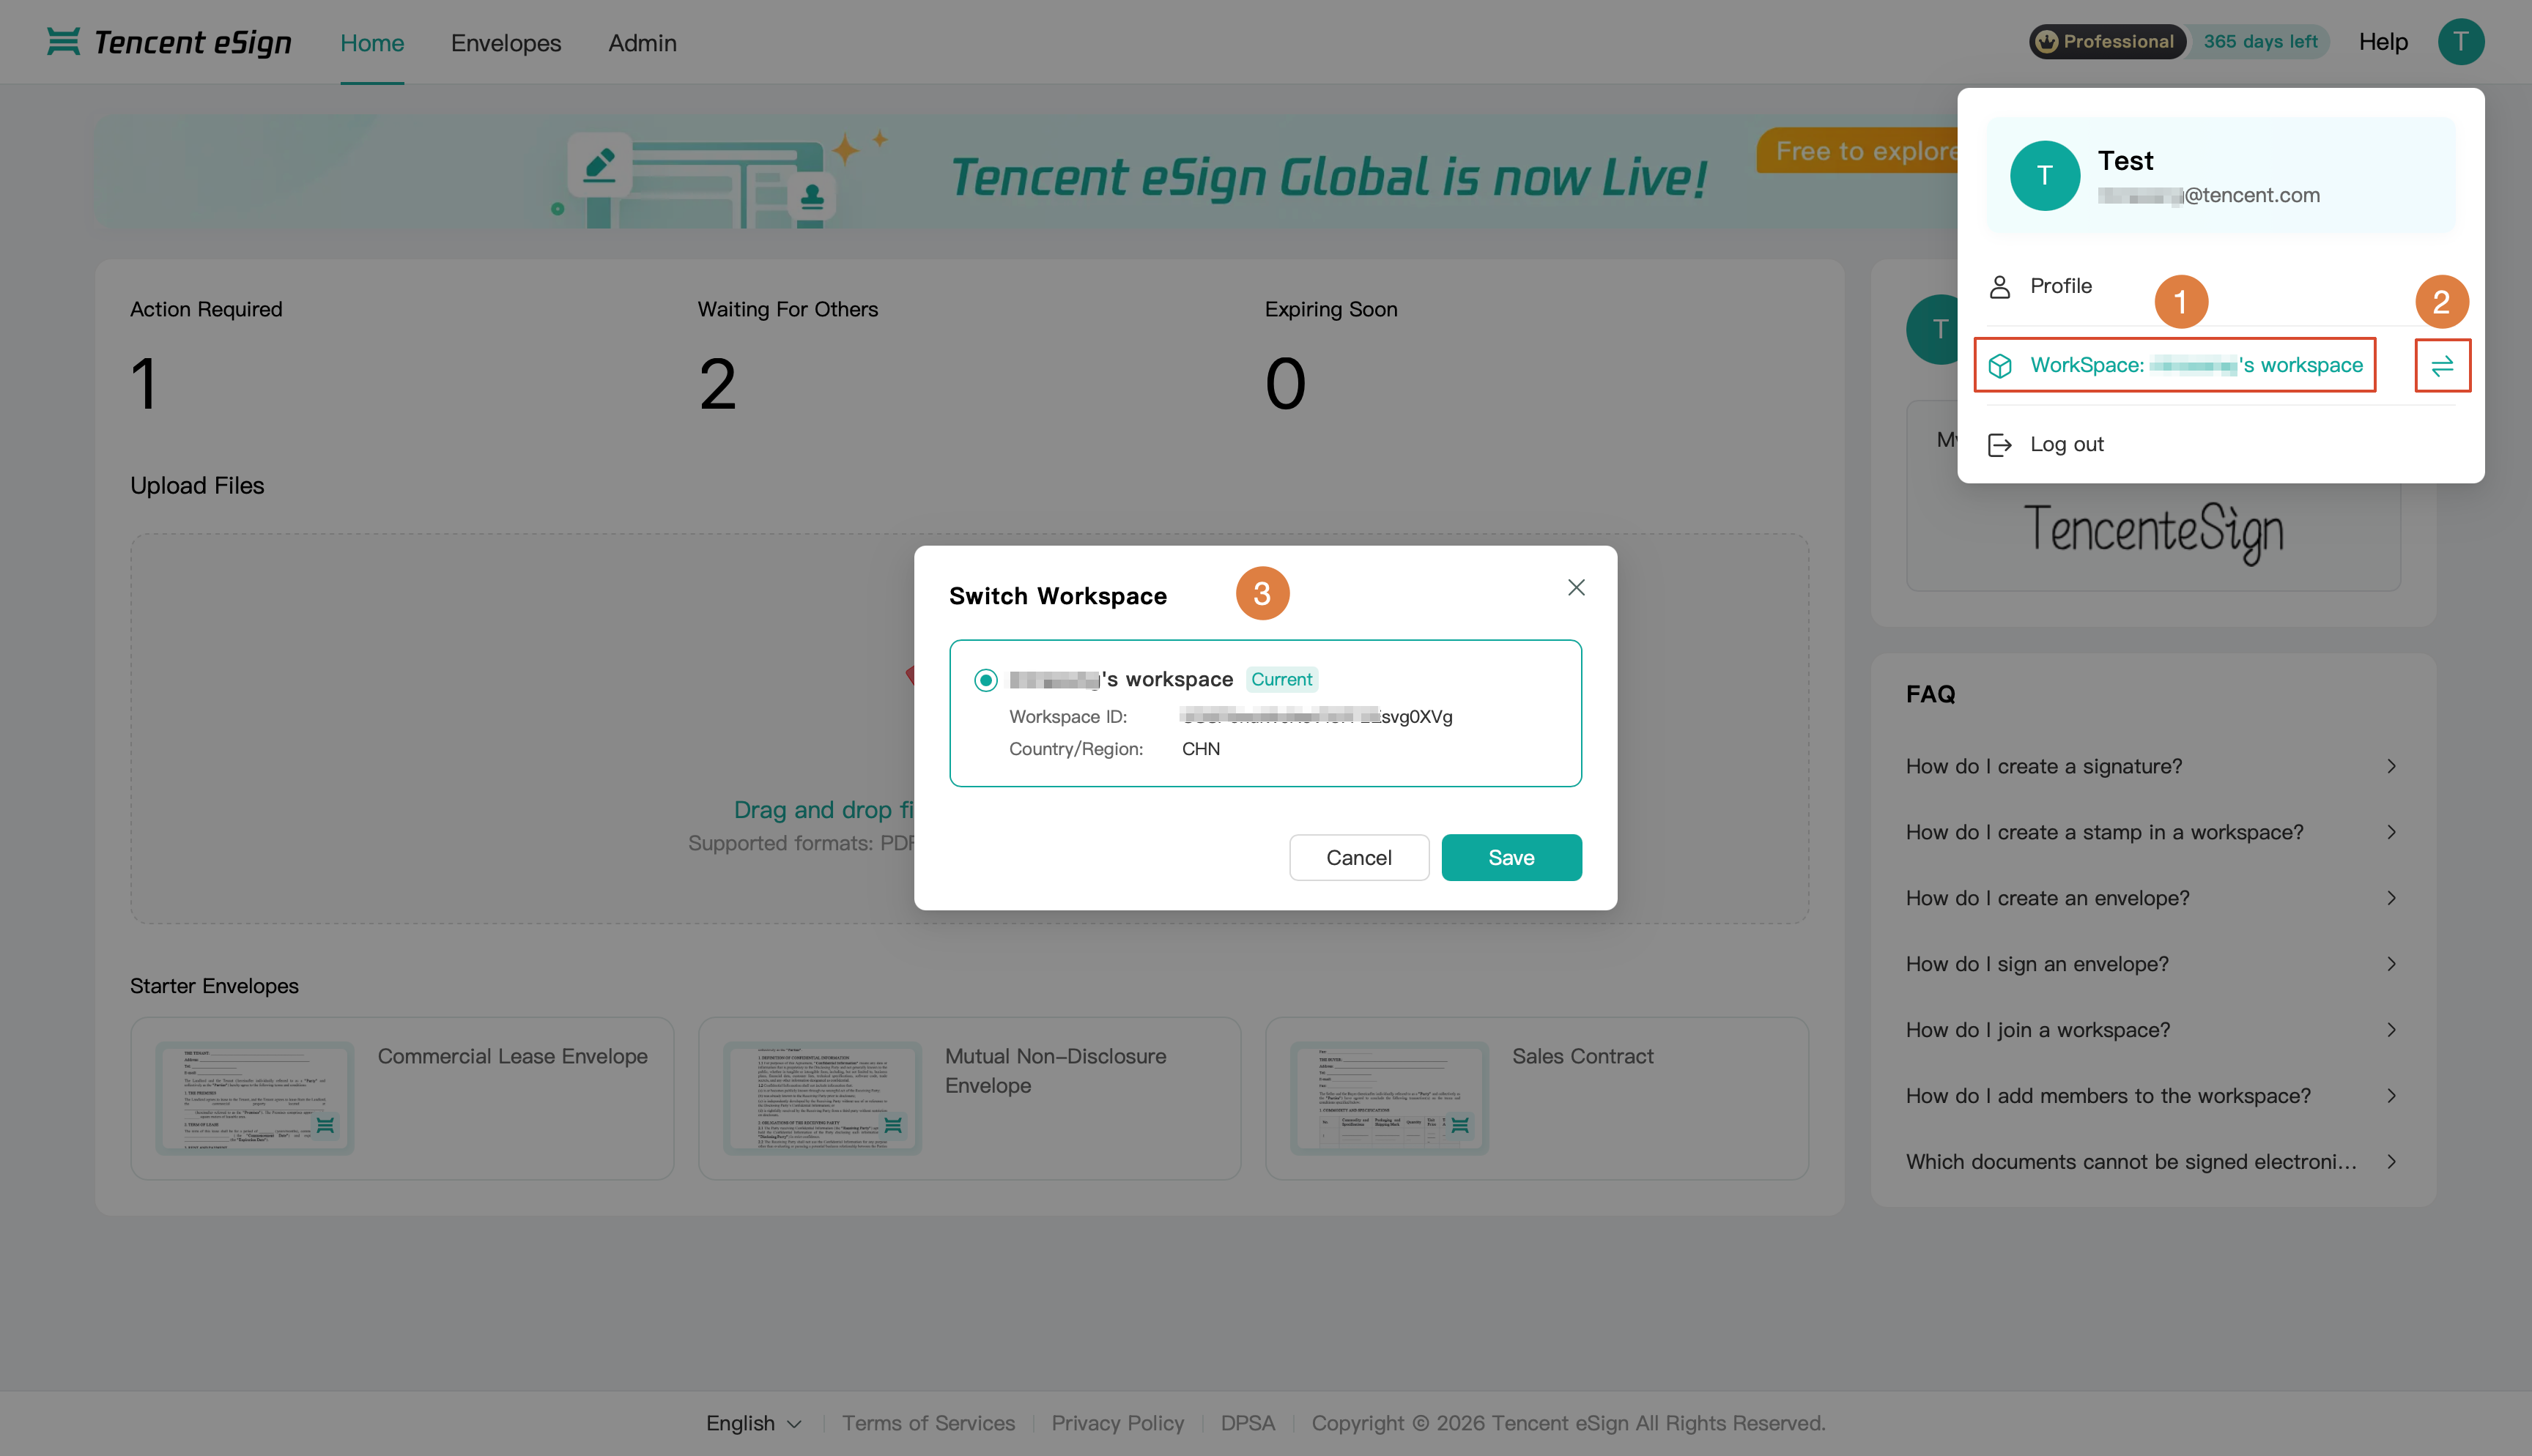
The account drop-down menu displays the name of the workspace where the account is currently located (as labeled 1).
Click the switch icon to the right of the workspace name (as labeled 2). A workspace switch dialog box (as labeled 3) appears. You can then switch between multiple authorized workspaces.
After the workspace switch is completed, data such as Envelopes, members, and Stamps within the console are synchronized and updated to the data of the target workspace.
Log out
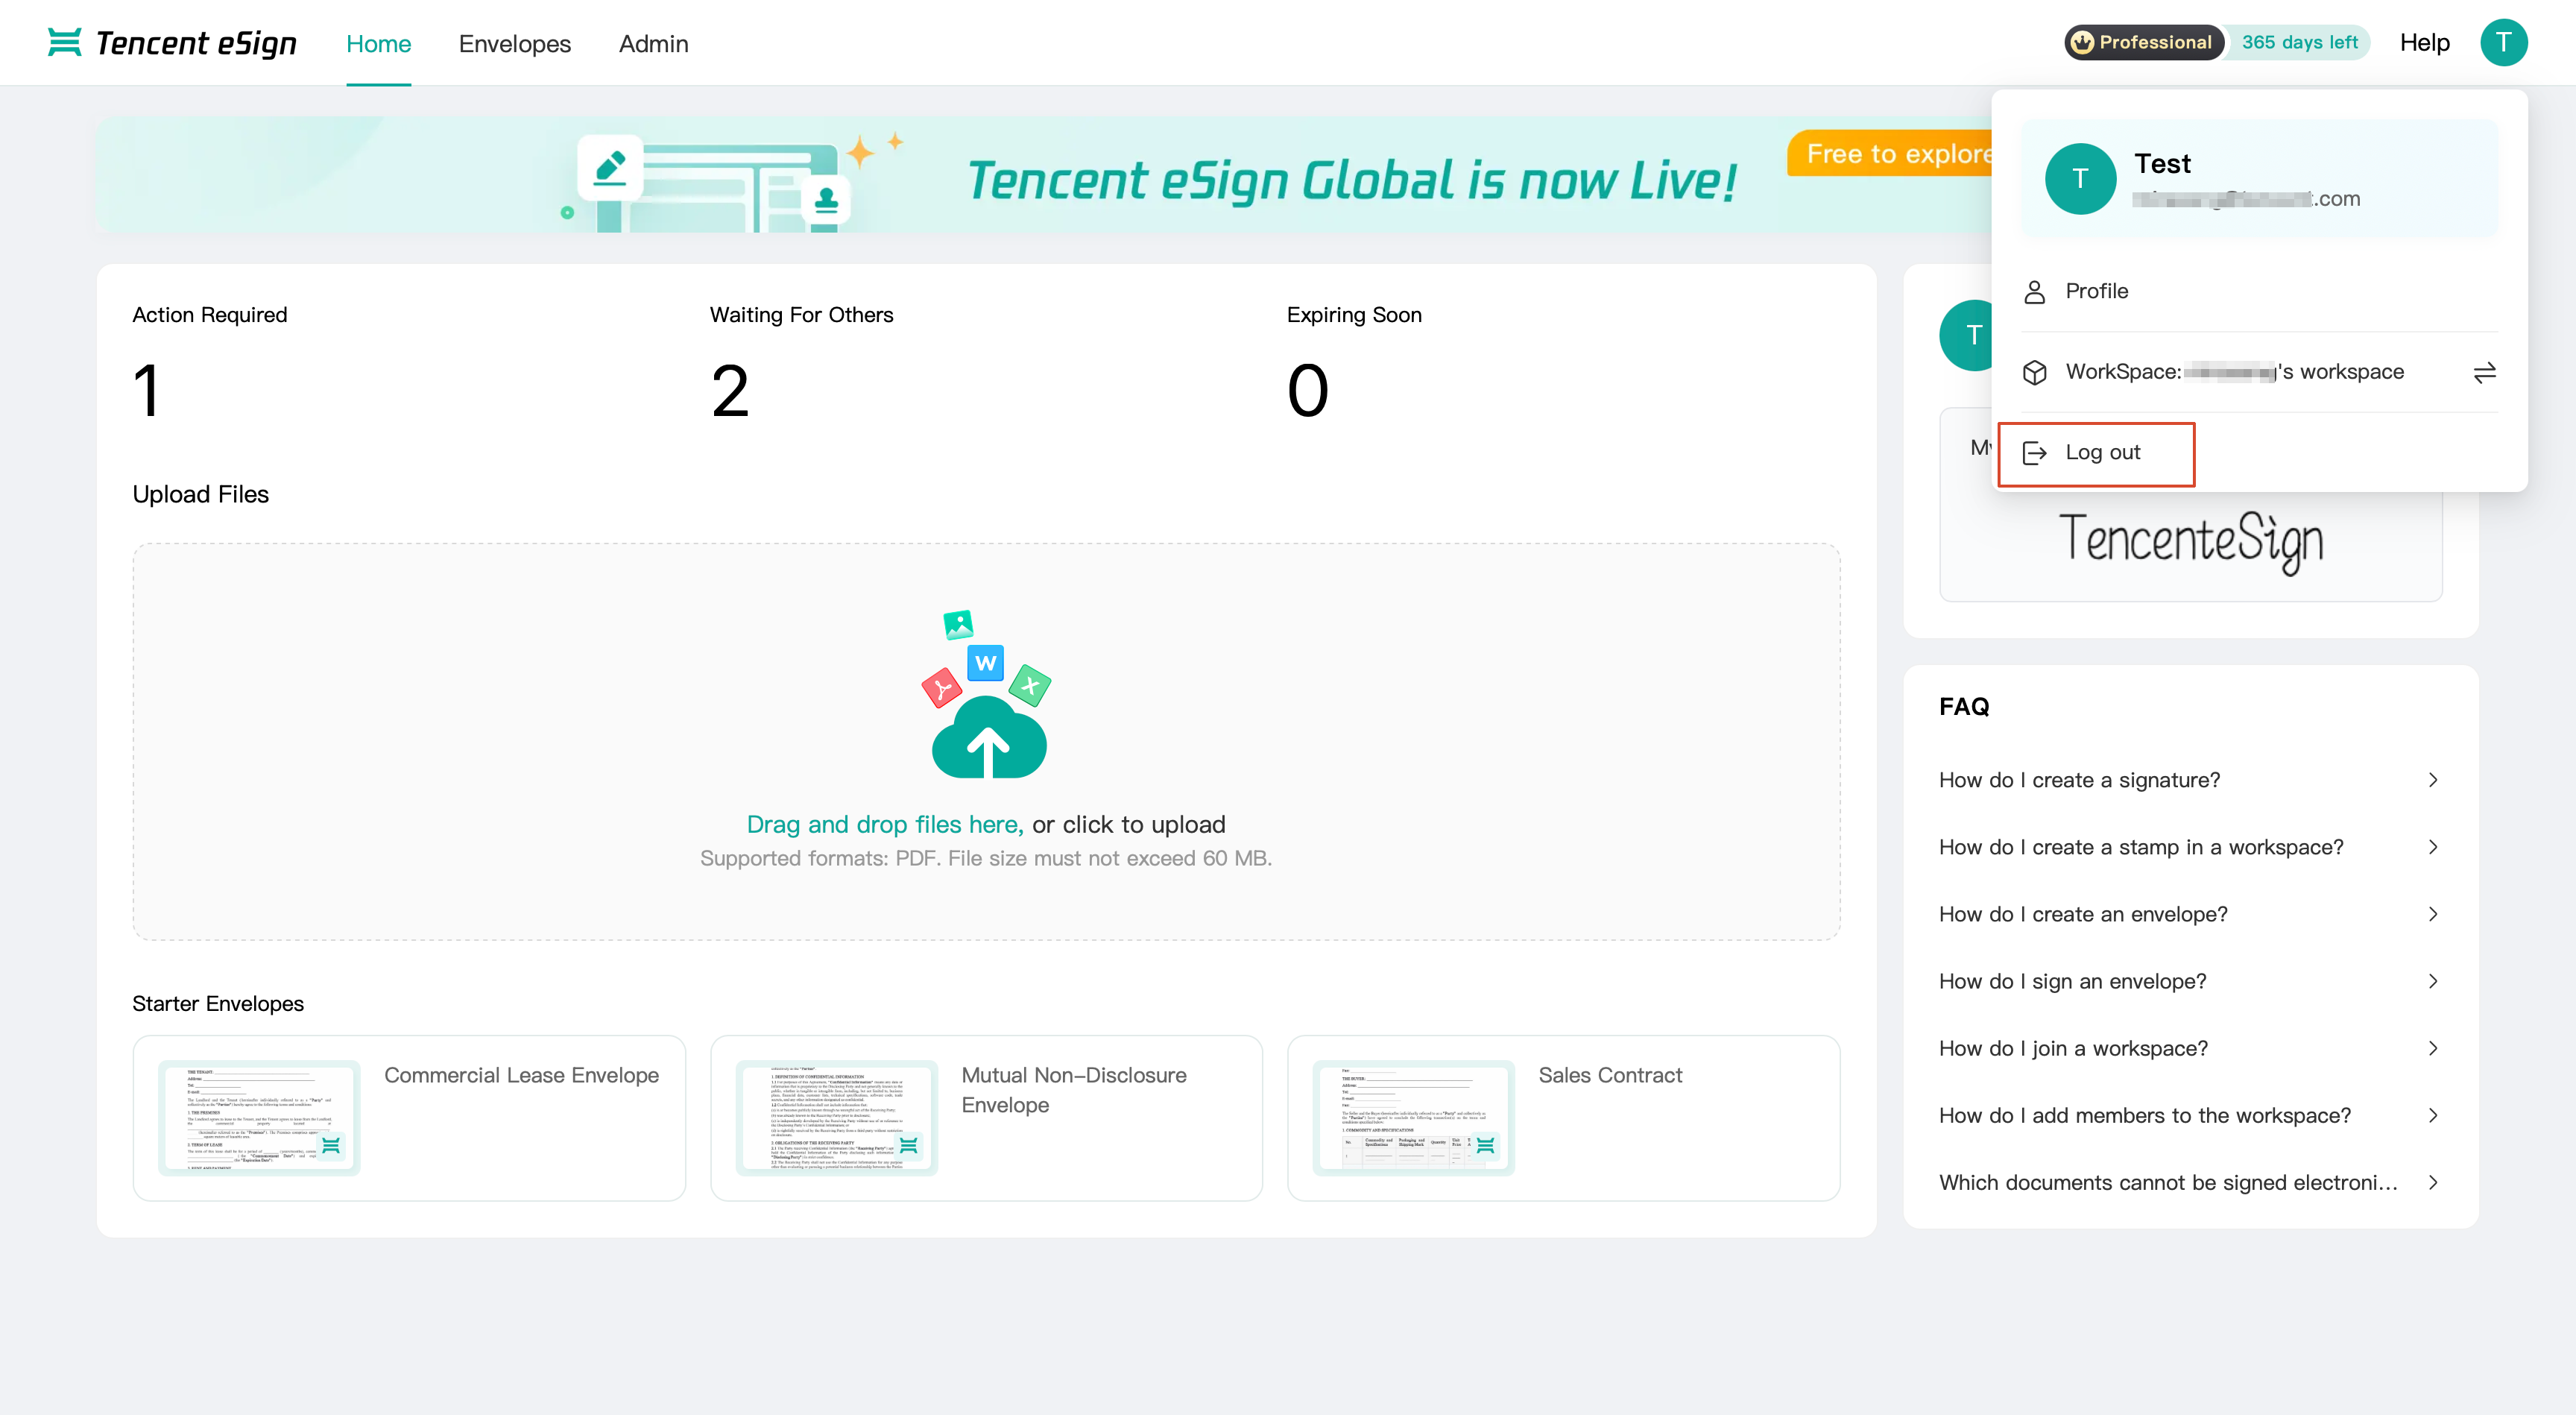
In the account drop-down menu, click Log Out. The system then ends the current login session and redirects the page to the System Login Page.
Bantuan dan Dukungan
Apakah halaman ini membantu?
Anda juga dapat Menghubungi Penjualan atau Mengirimkan Tiket untuk meminta bantuan.
masukan