Member management
Unduh
Mode fokus
Ukuran font
Entry
Go to Admin > Members in the top navigation bar. On this page, you can centrally manage all members in the current workspace.
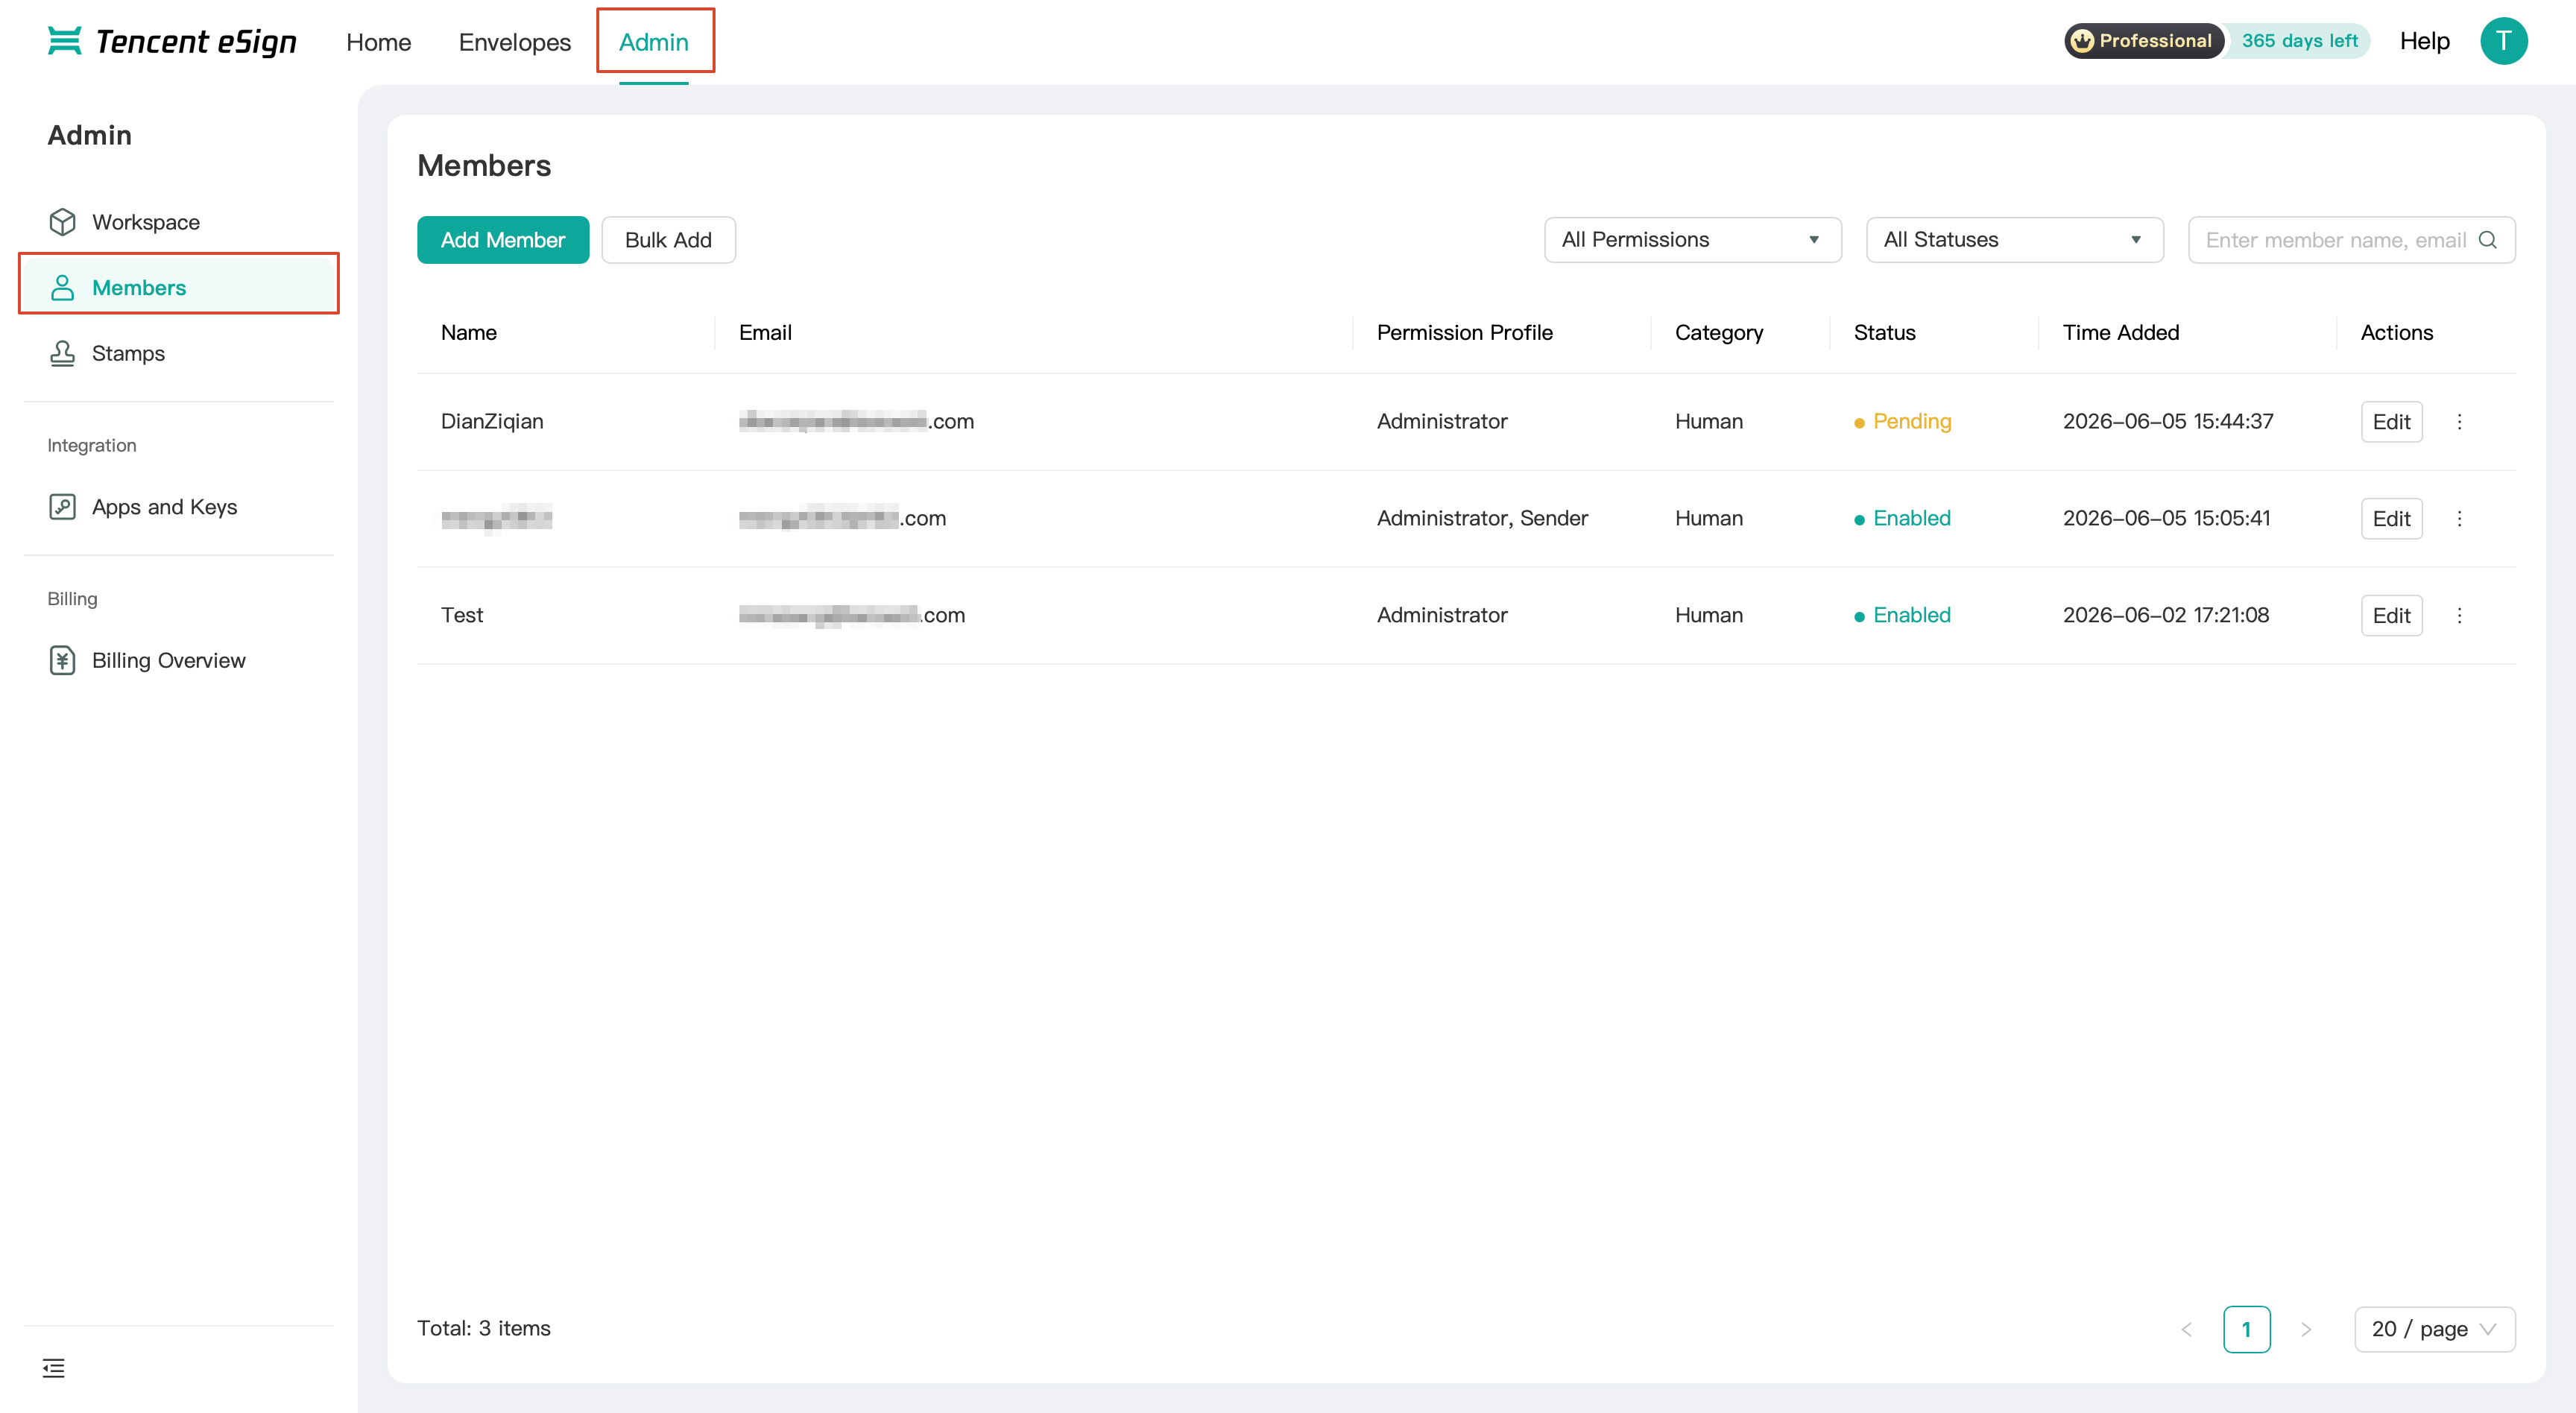
Member List Field Descriptions
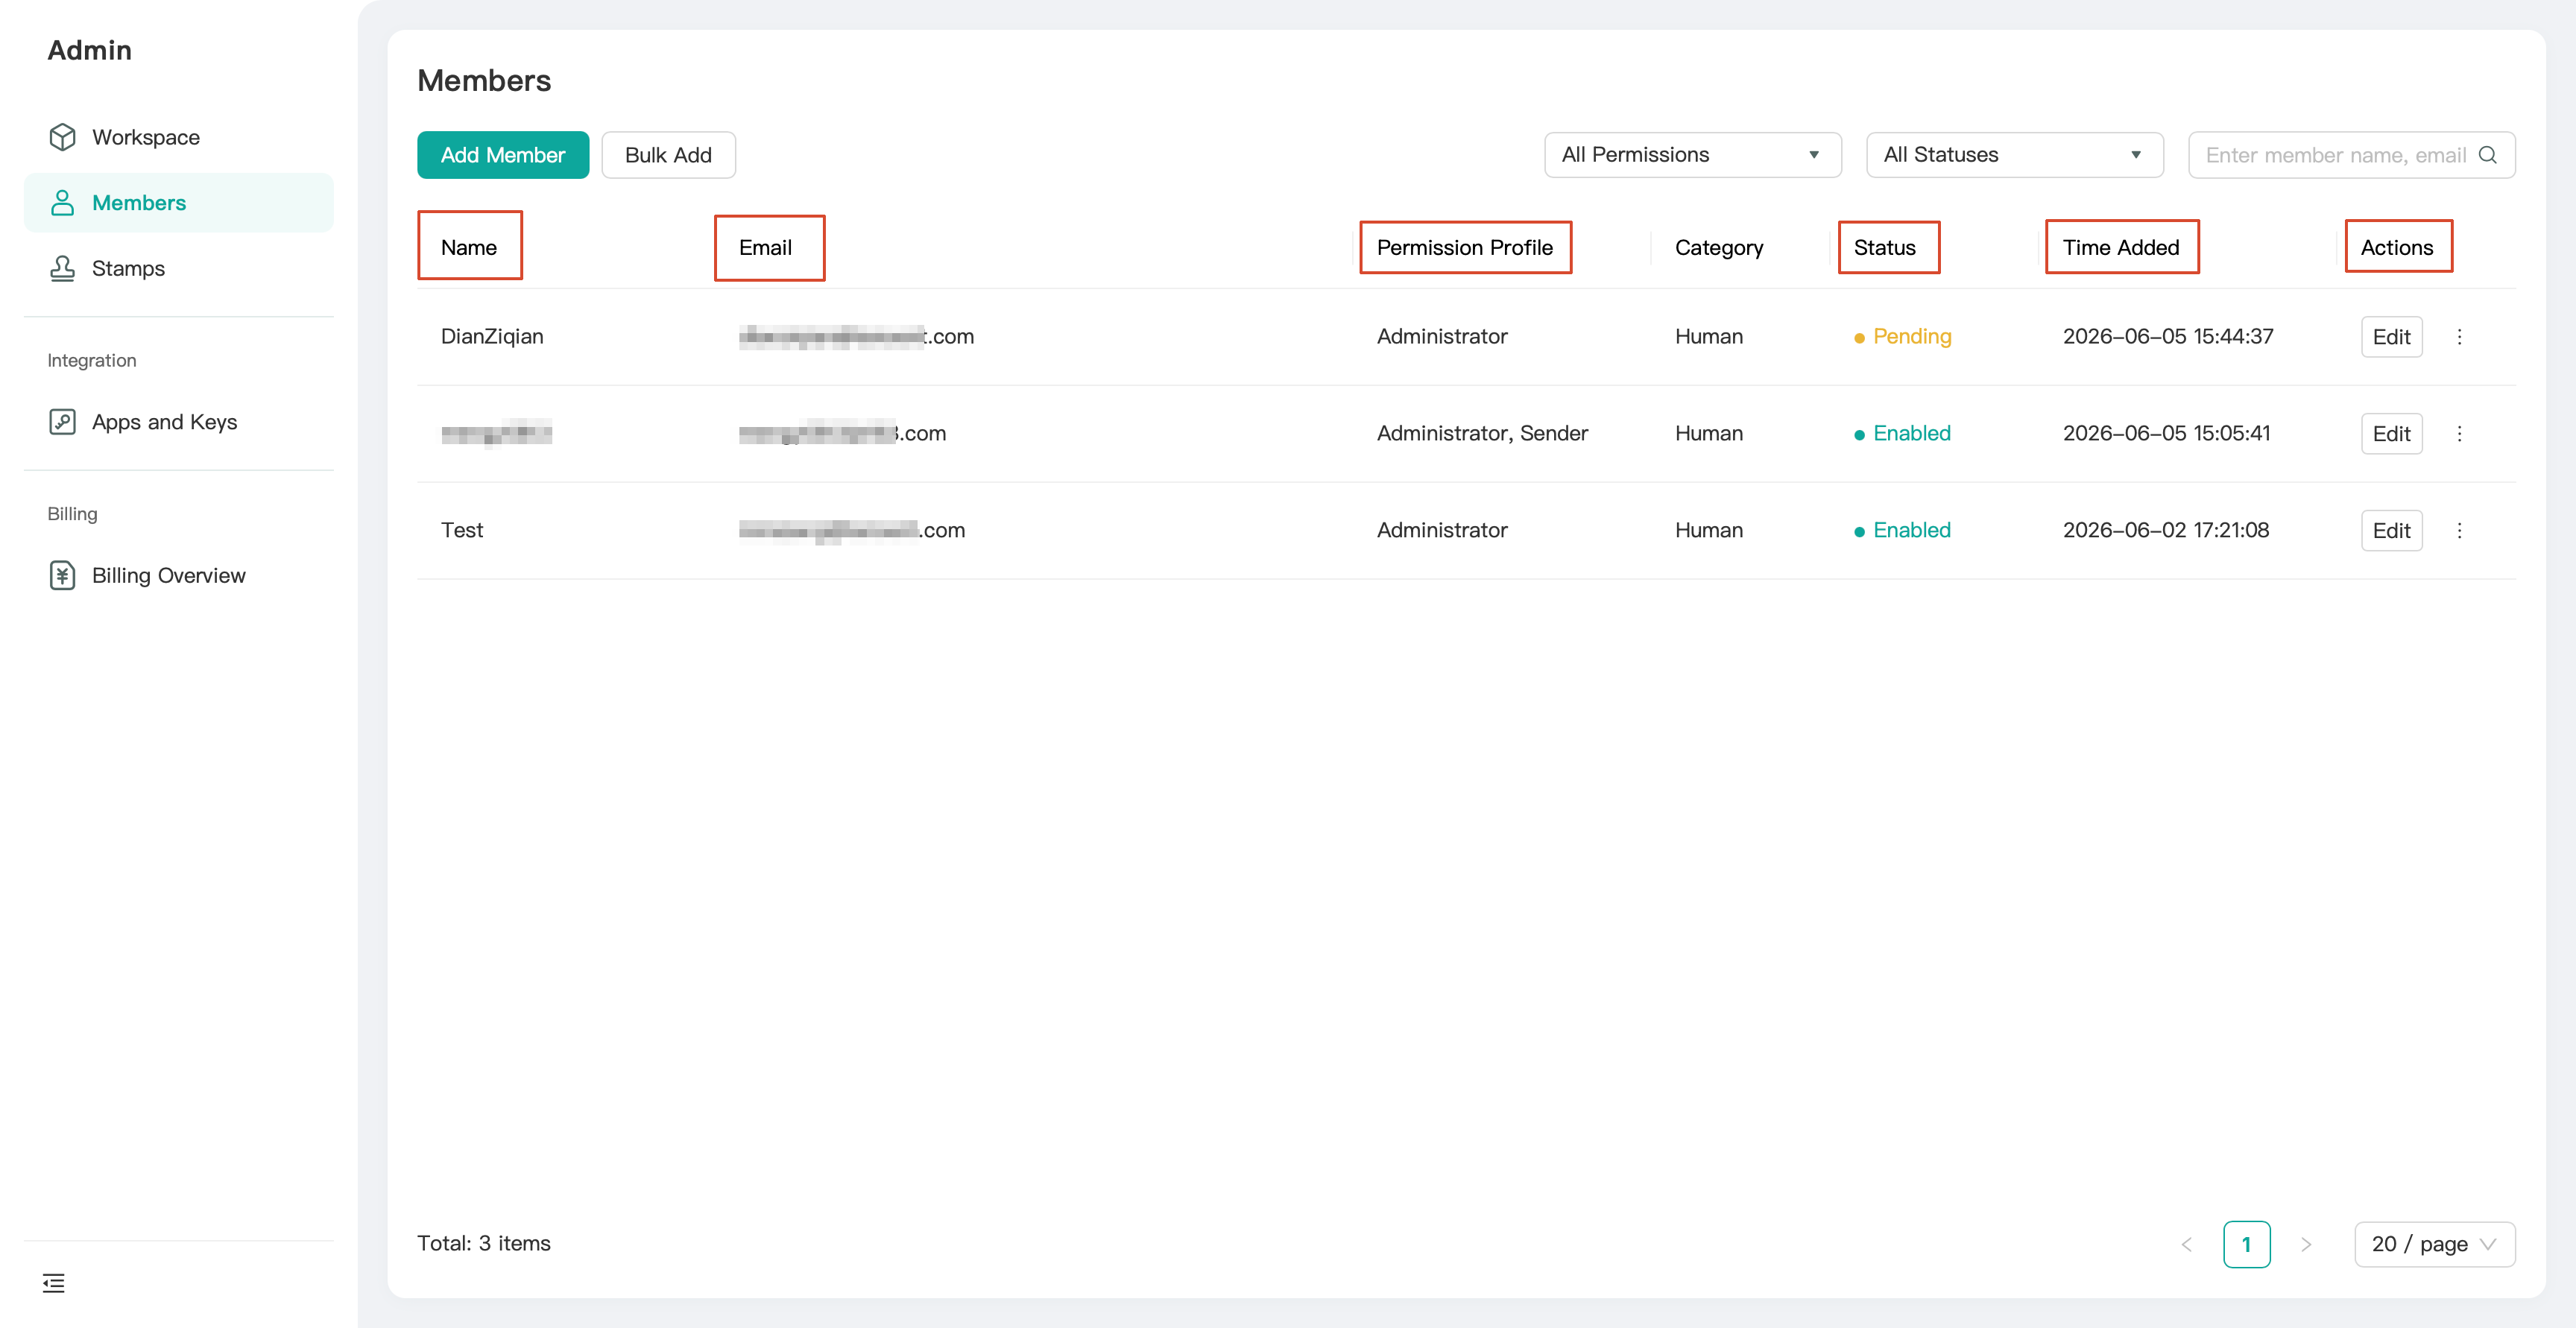
Column Name | Description |
Name | Member name |
Email | Email address bound during member registration. |
Permission Profile | System permissions for members, with two role options: administrator/sender. Administrator: Has full permission to view all envelopes within the workspace, with no scope restrictions. Sender: The permission is subject to a viewing scope restriction. An snder can only view envelopes they sended or that require their signature, and cannot view envelopes related to others. |
Status | Three member statuses: enabled/disabled/pending. |
Time Added | The time when a member is invited to join the workspace. |
Actions | Entry point for editing individual member information. |
Page Feature
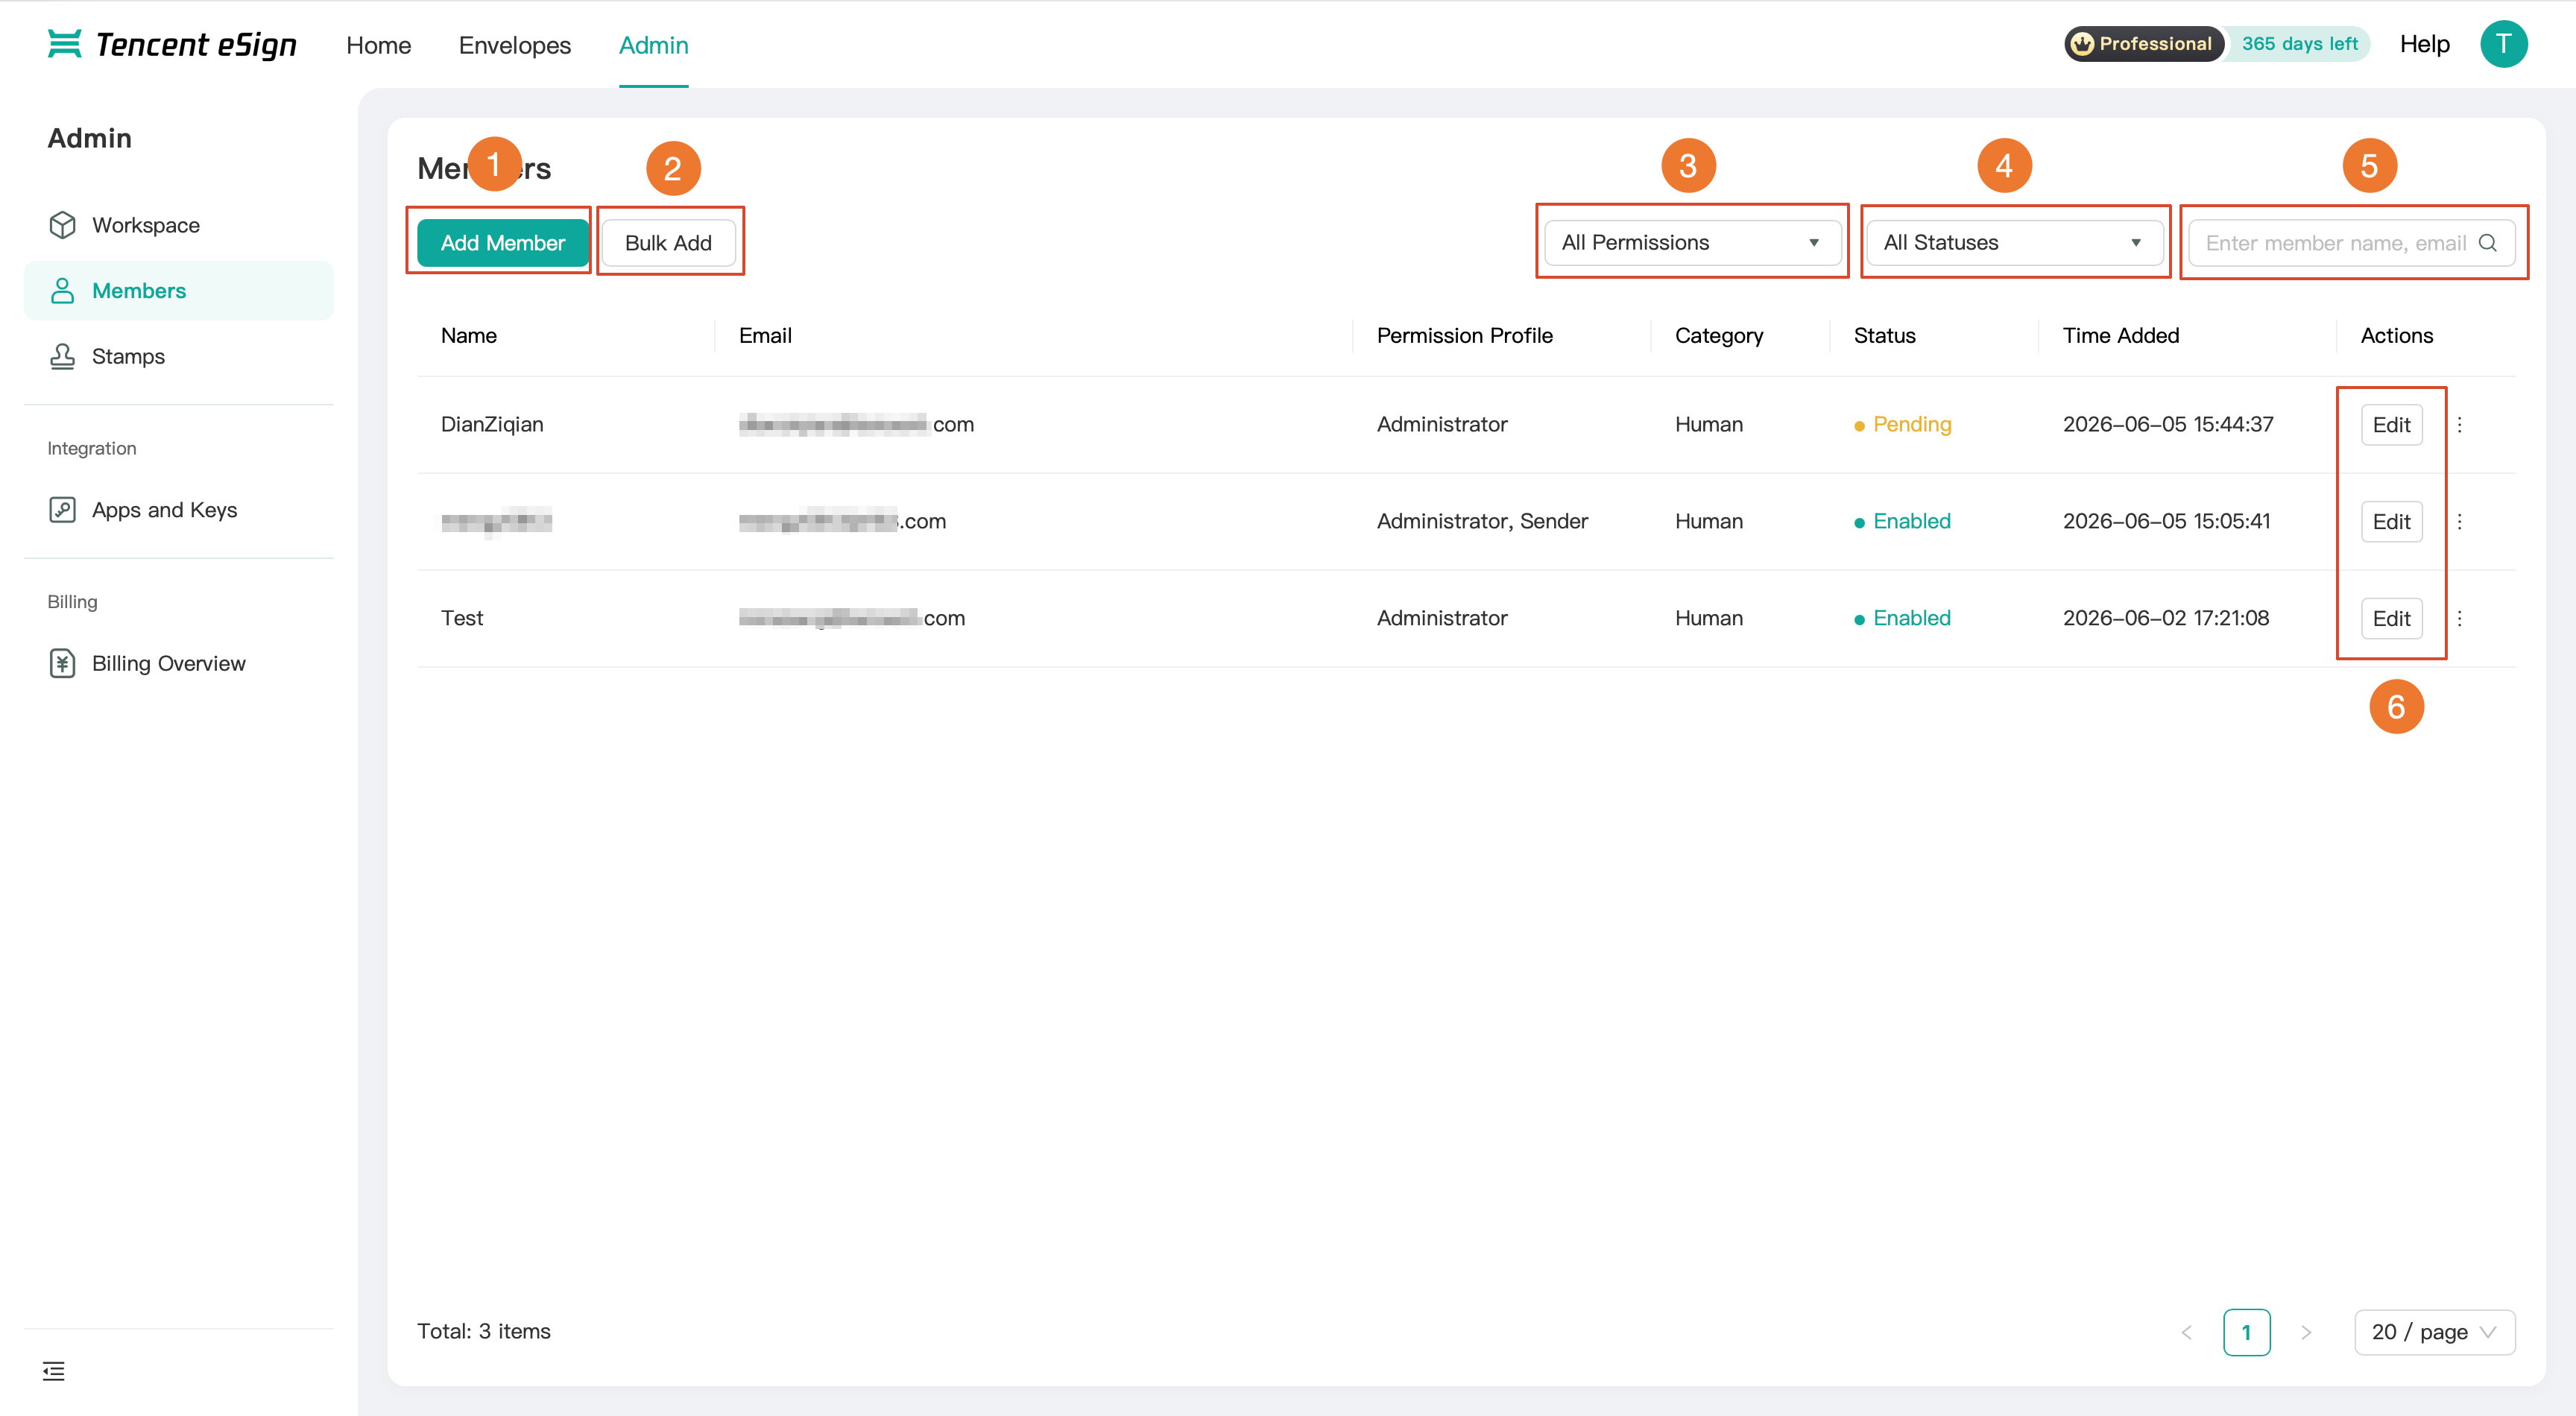
No. | Function | Description |
1 | Add workspace members one by one. | |
2 | Bulk entry of multiple members, including two addition modes: manual addition and bulk import. | |
3 | Permission filter | Filter the member list based on permission roles 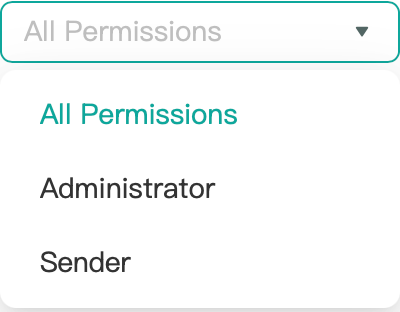 |
4 | Status filter | Filter the member list based on the enabled/ to be activated/disabled status. 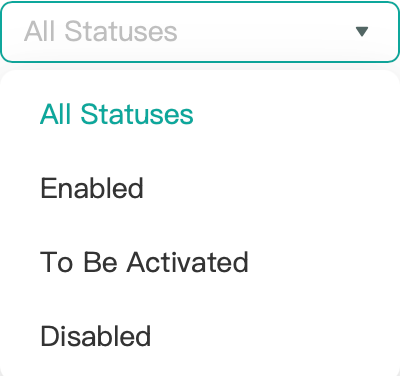 |
5 | Search box | Search for members by member name or email keywords. |
6 | Edit | Click Edit, and an edit pop-up window will appear, where you can modify the basic information and permission roles of a single member. 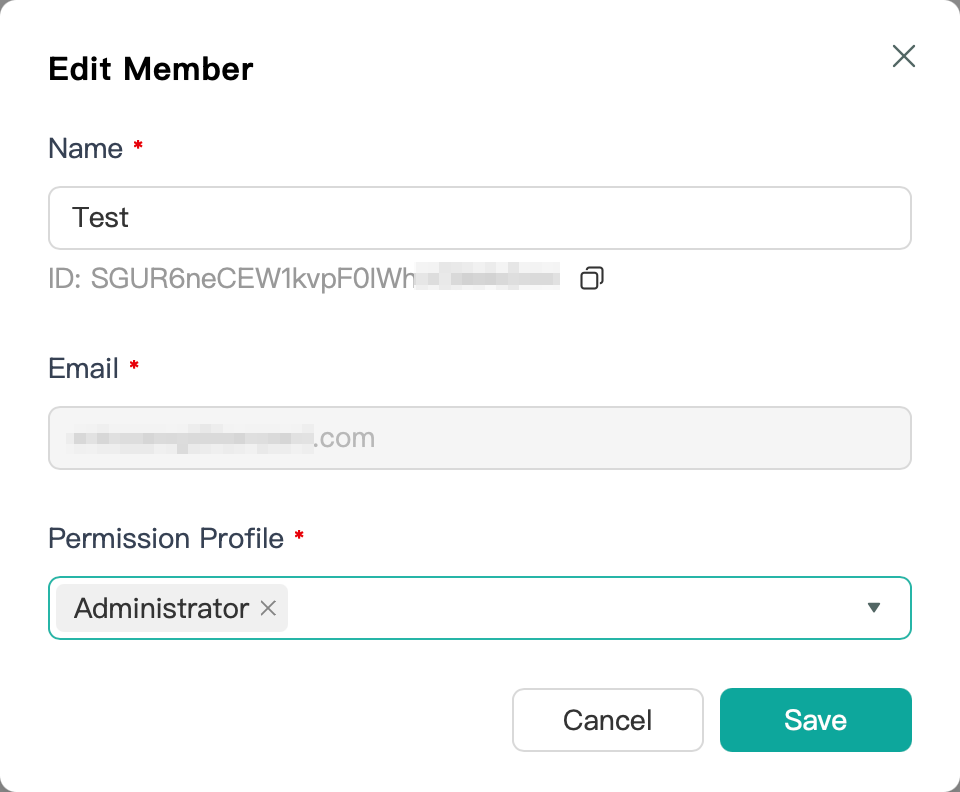 |
Adding a Single Member
1. Click Add Member. The Add Member dialog box appears.
2. Enter the member's Name and Email, and select the corresponding Permission Profile for the member.
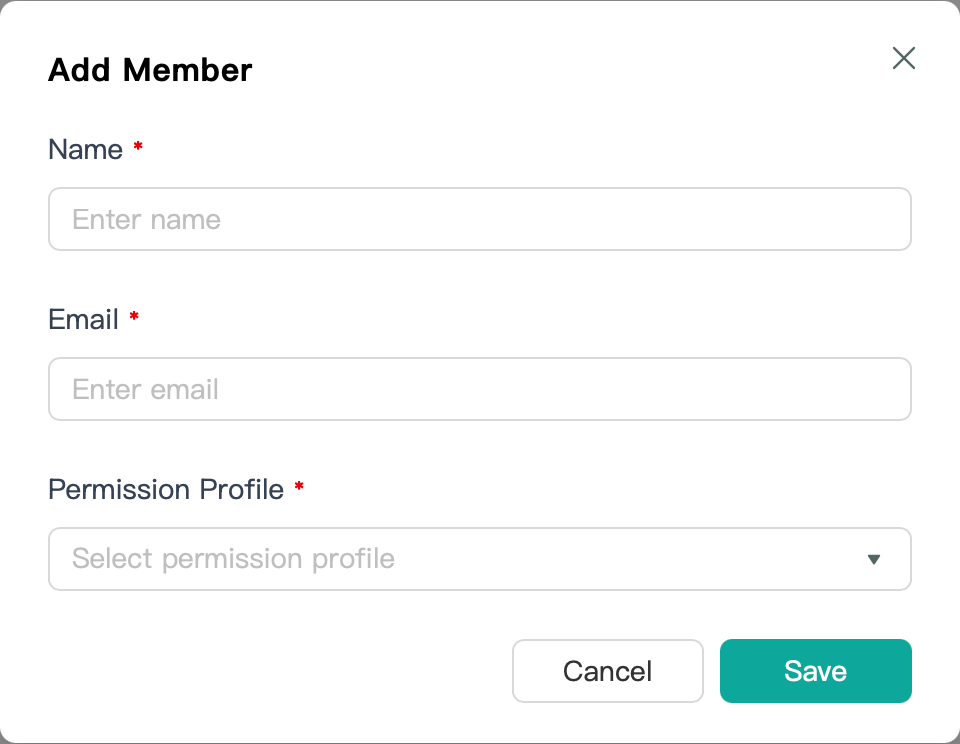
3. Click Save to confirm the addition. The system automatically sends an onboarding invitation email to the target member.
Bulk Adding Members
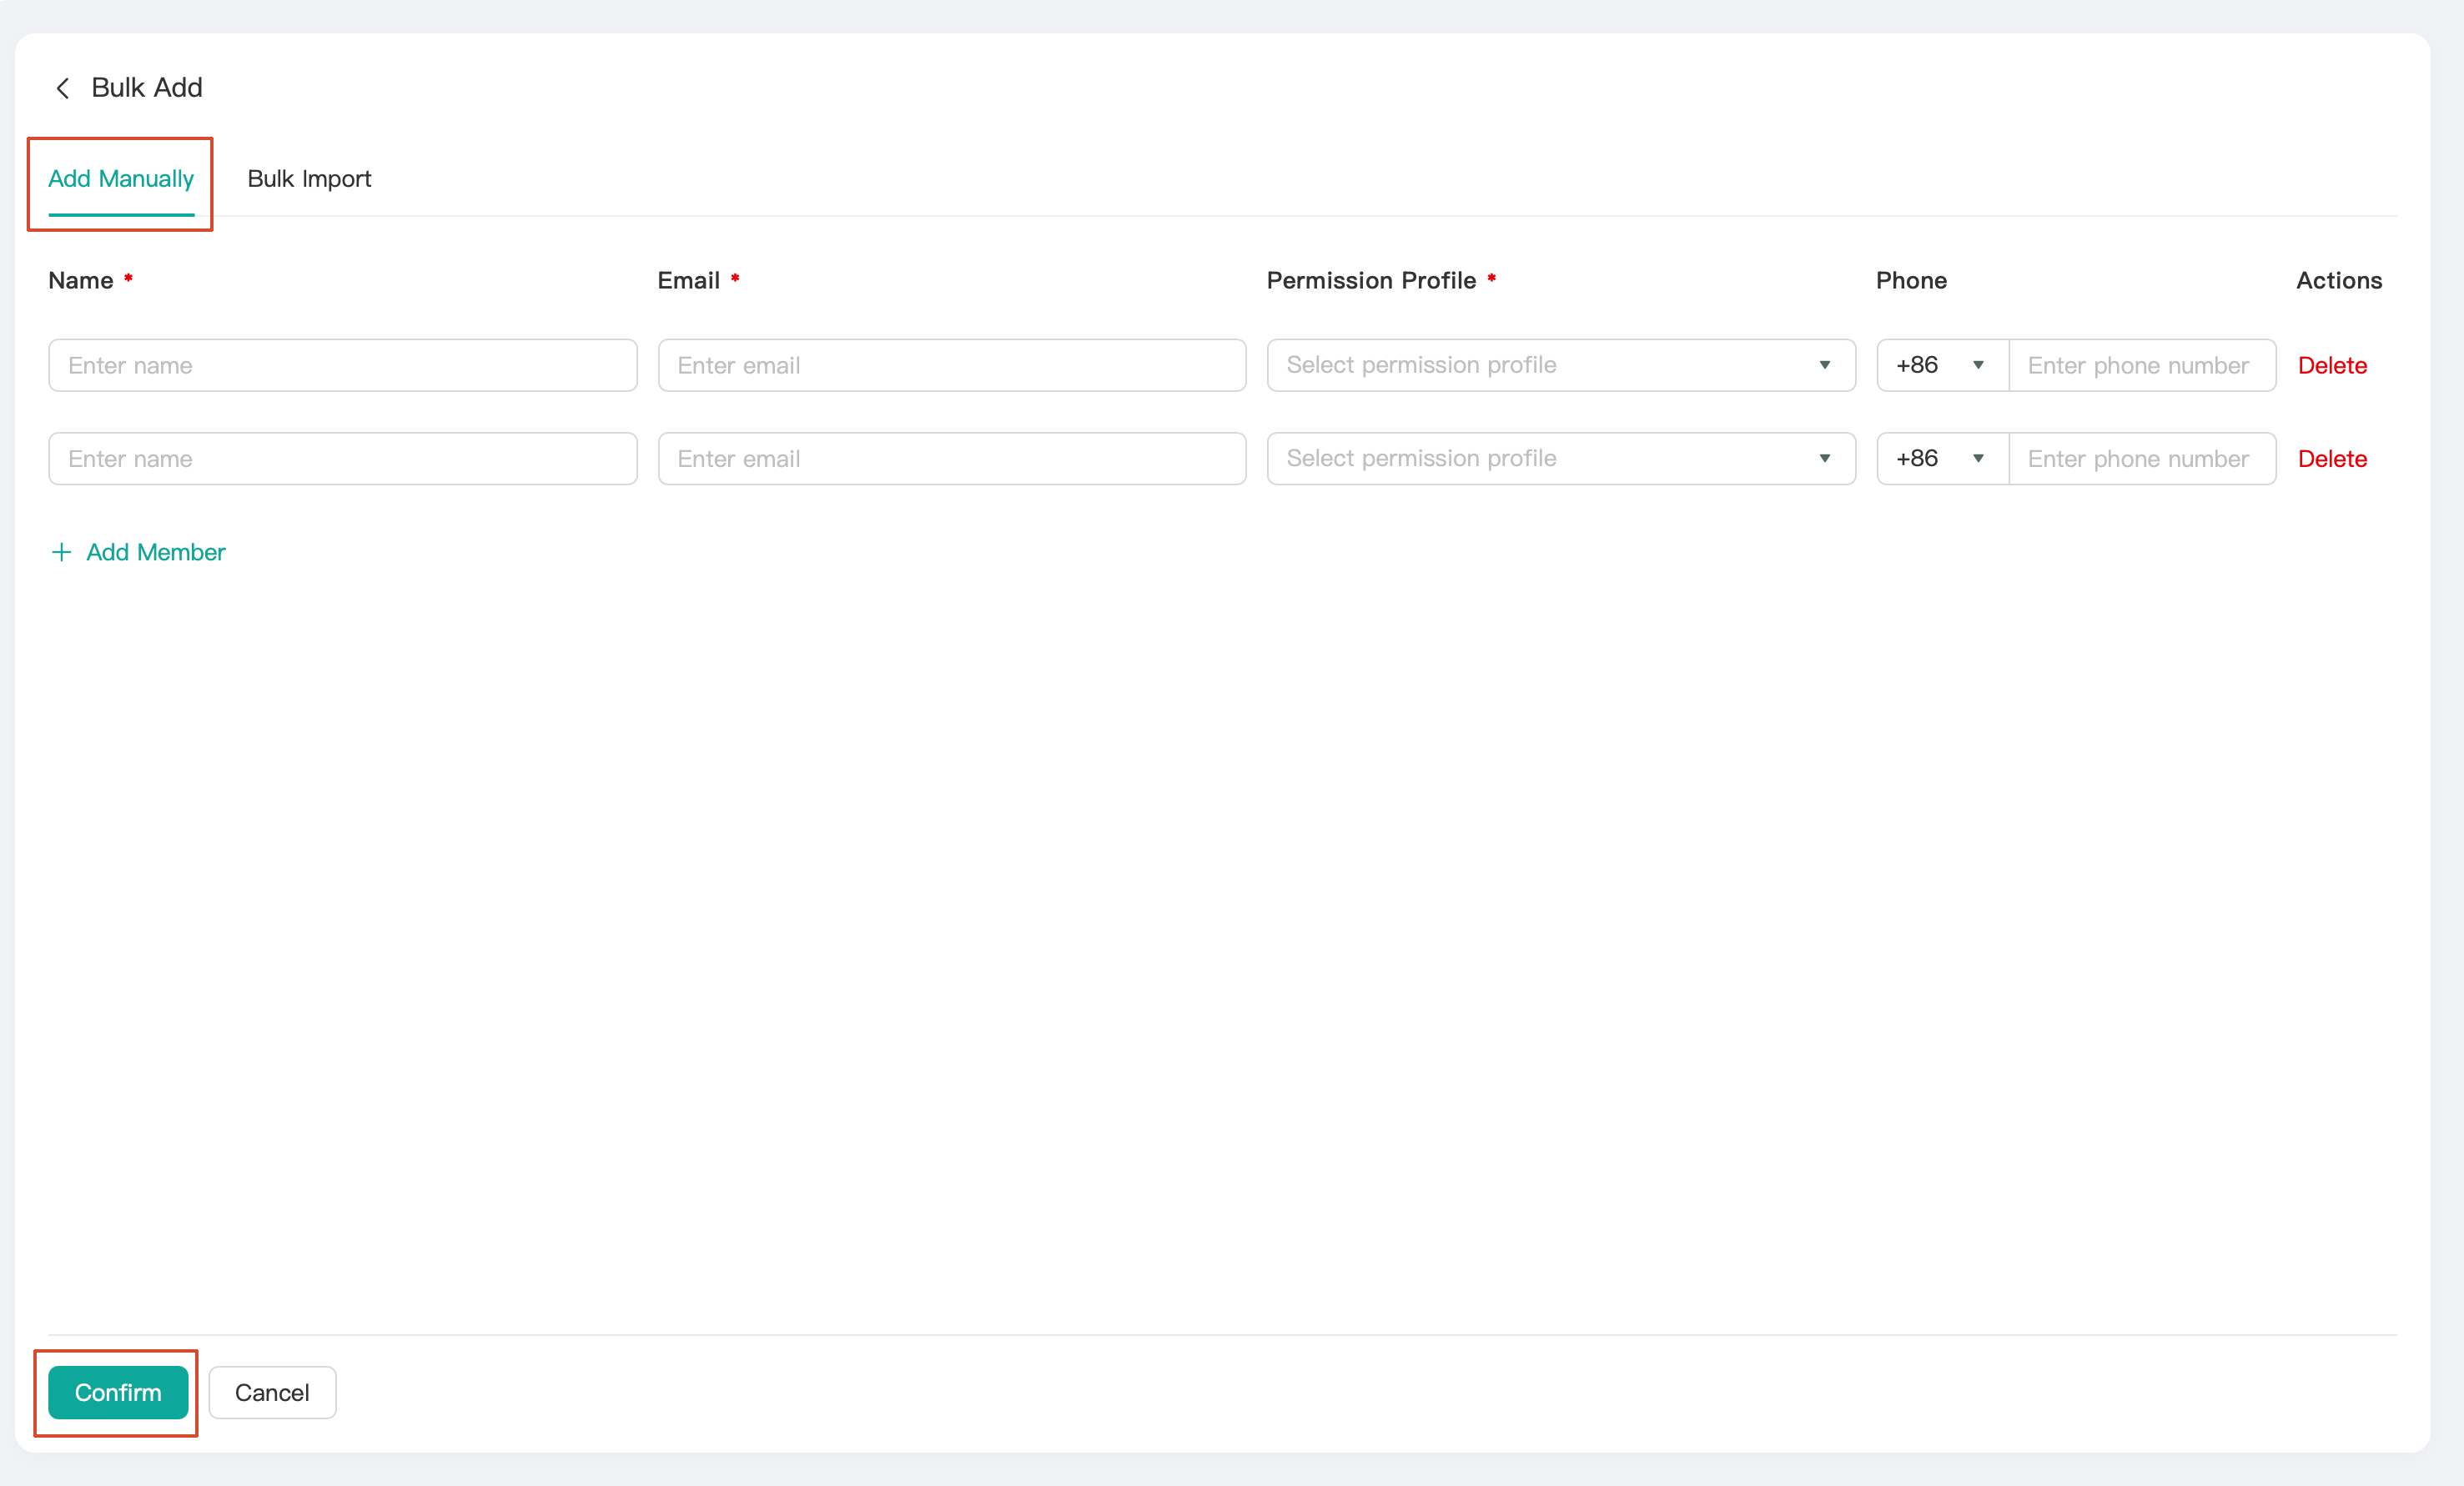
After clicking Bulk Add, you can choose between two entry methods: Manual Add or Bulk import.
Manual Add: Enter the member's name and email, select the corresponding permission role for the member, and optionally provide a phone number. Then click Confirm. The system automatically sends an onboarding invitation email to the target member.
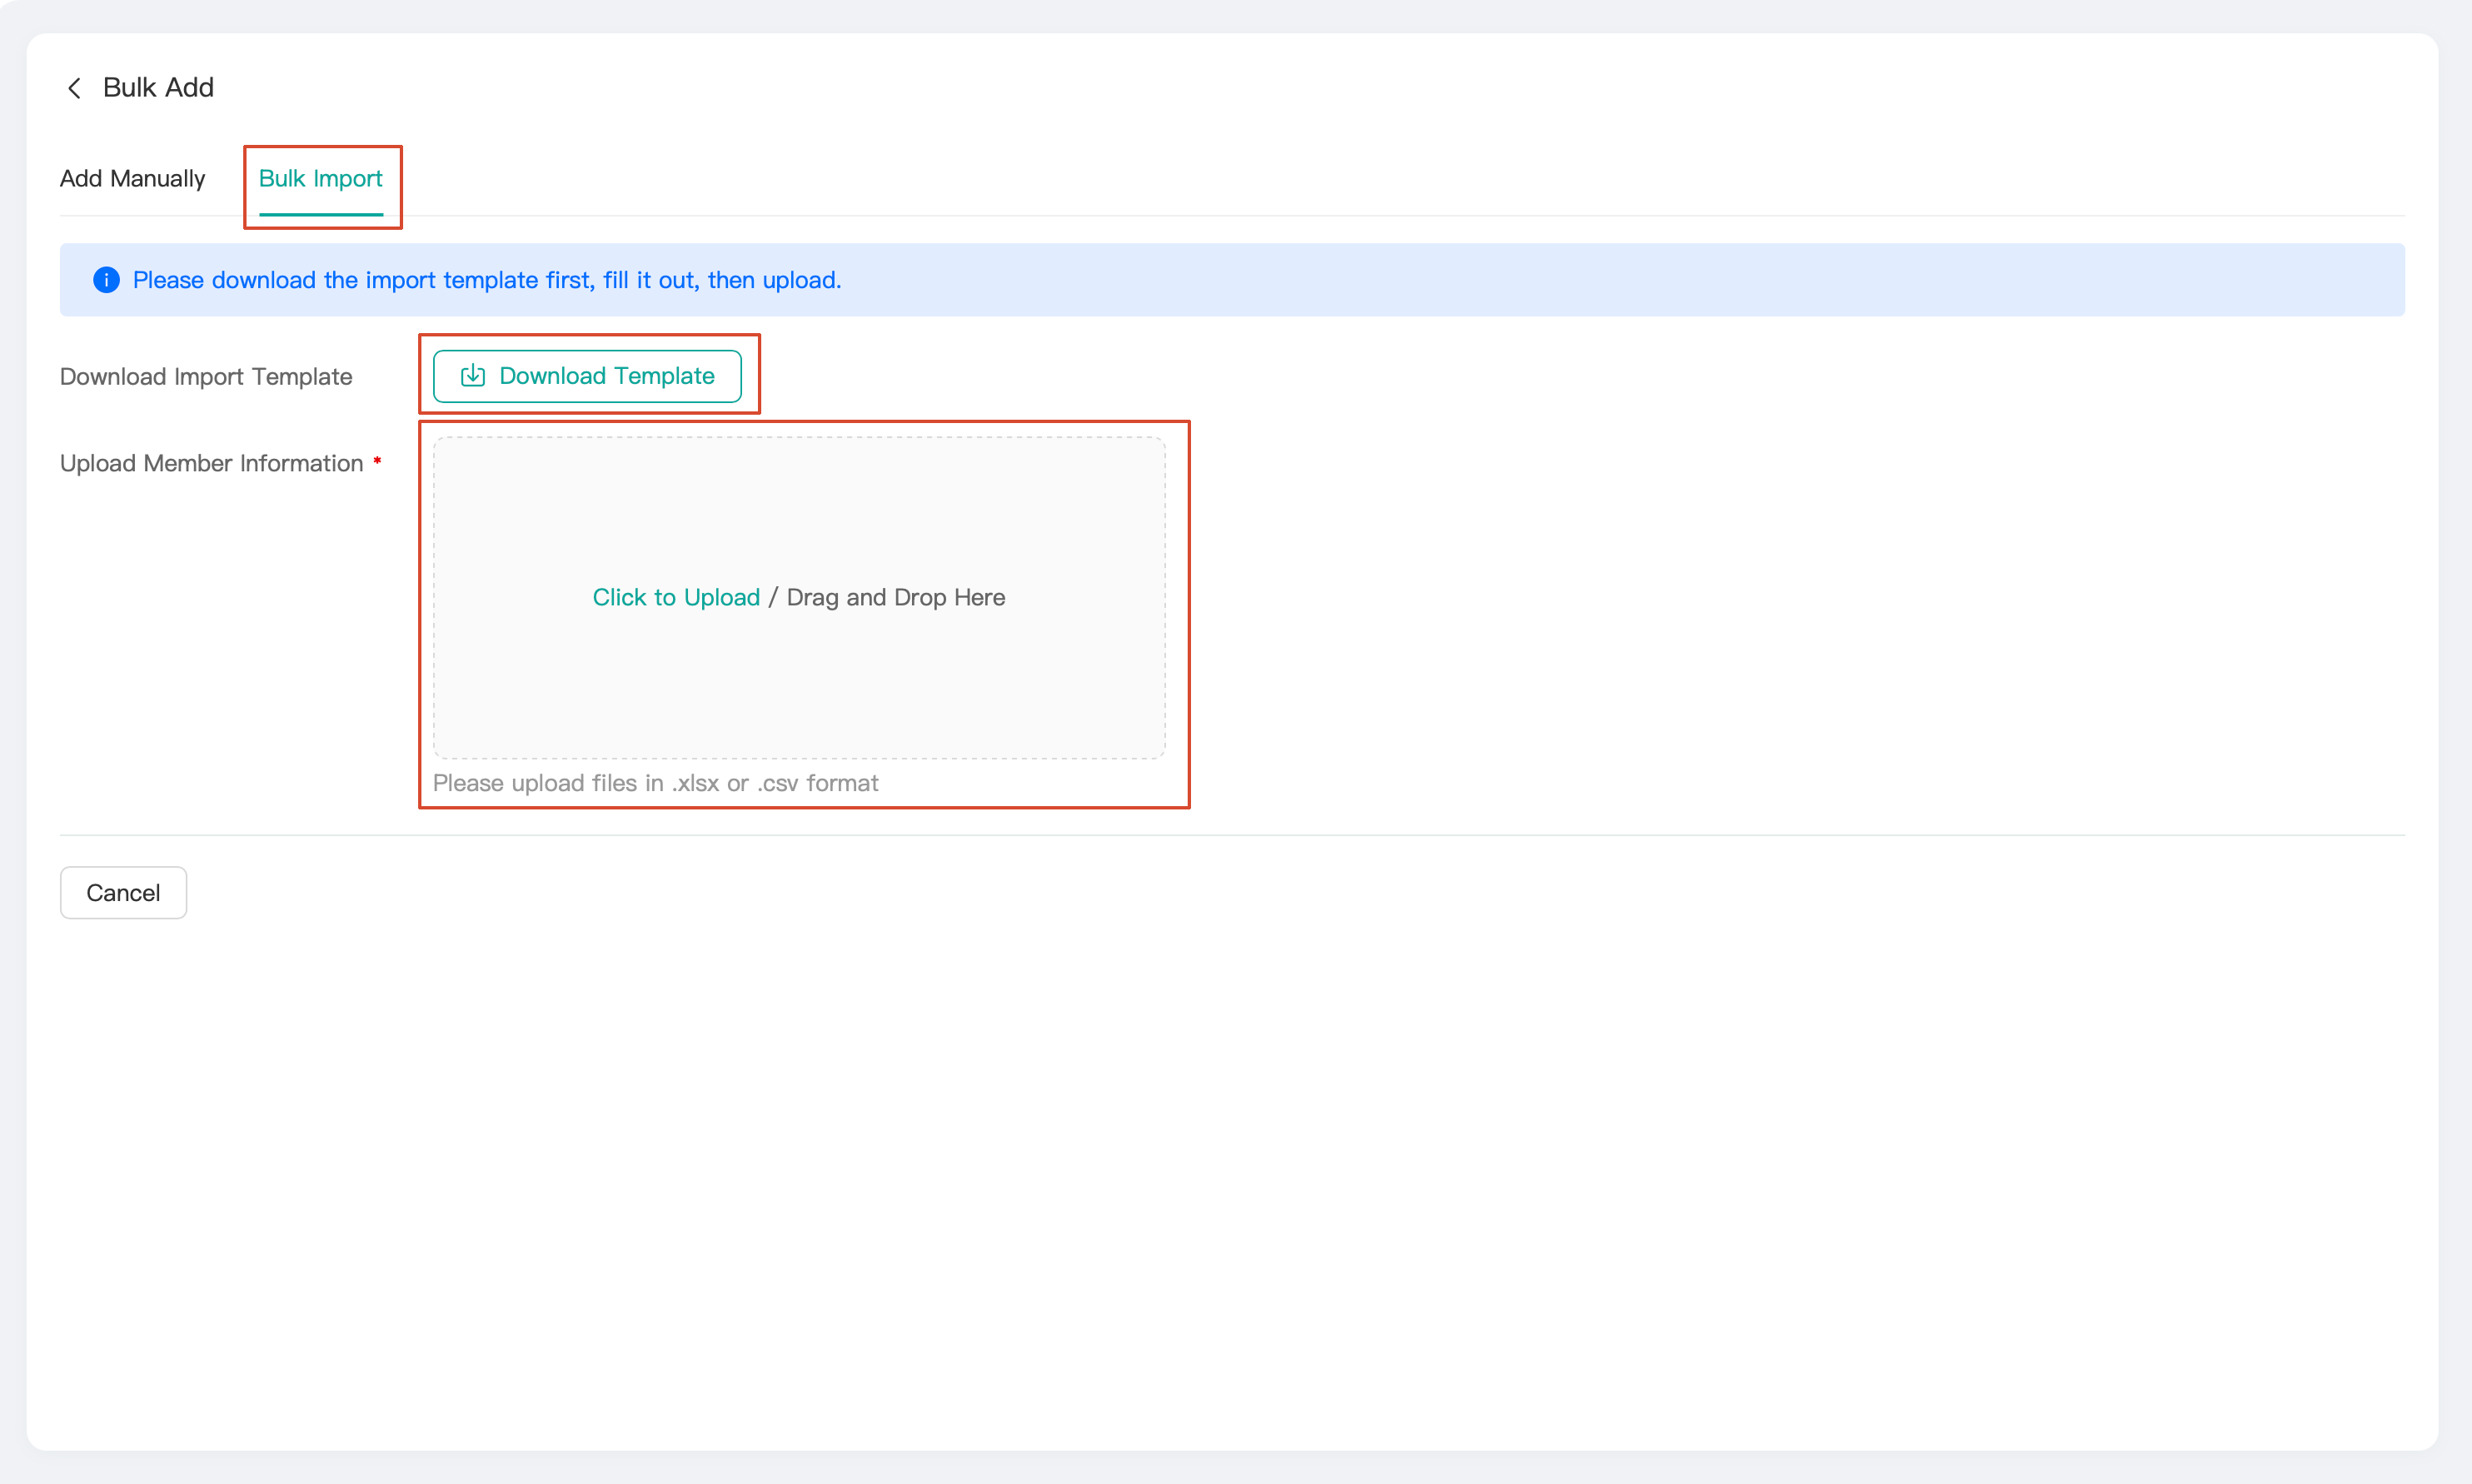
Bulk Import:
First, download the system's standard import template. Then, complete the template information locally and upload the file.
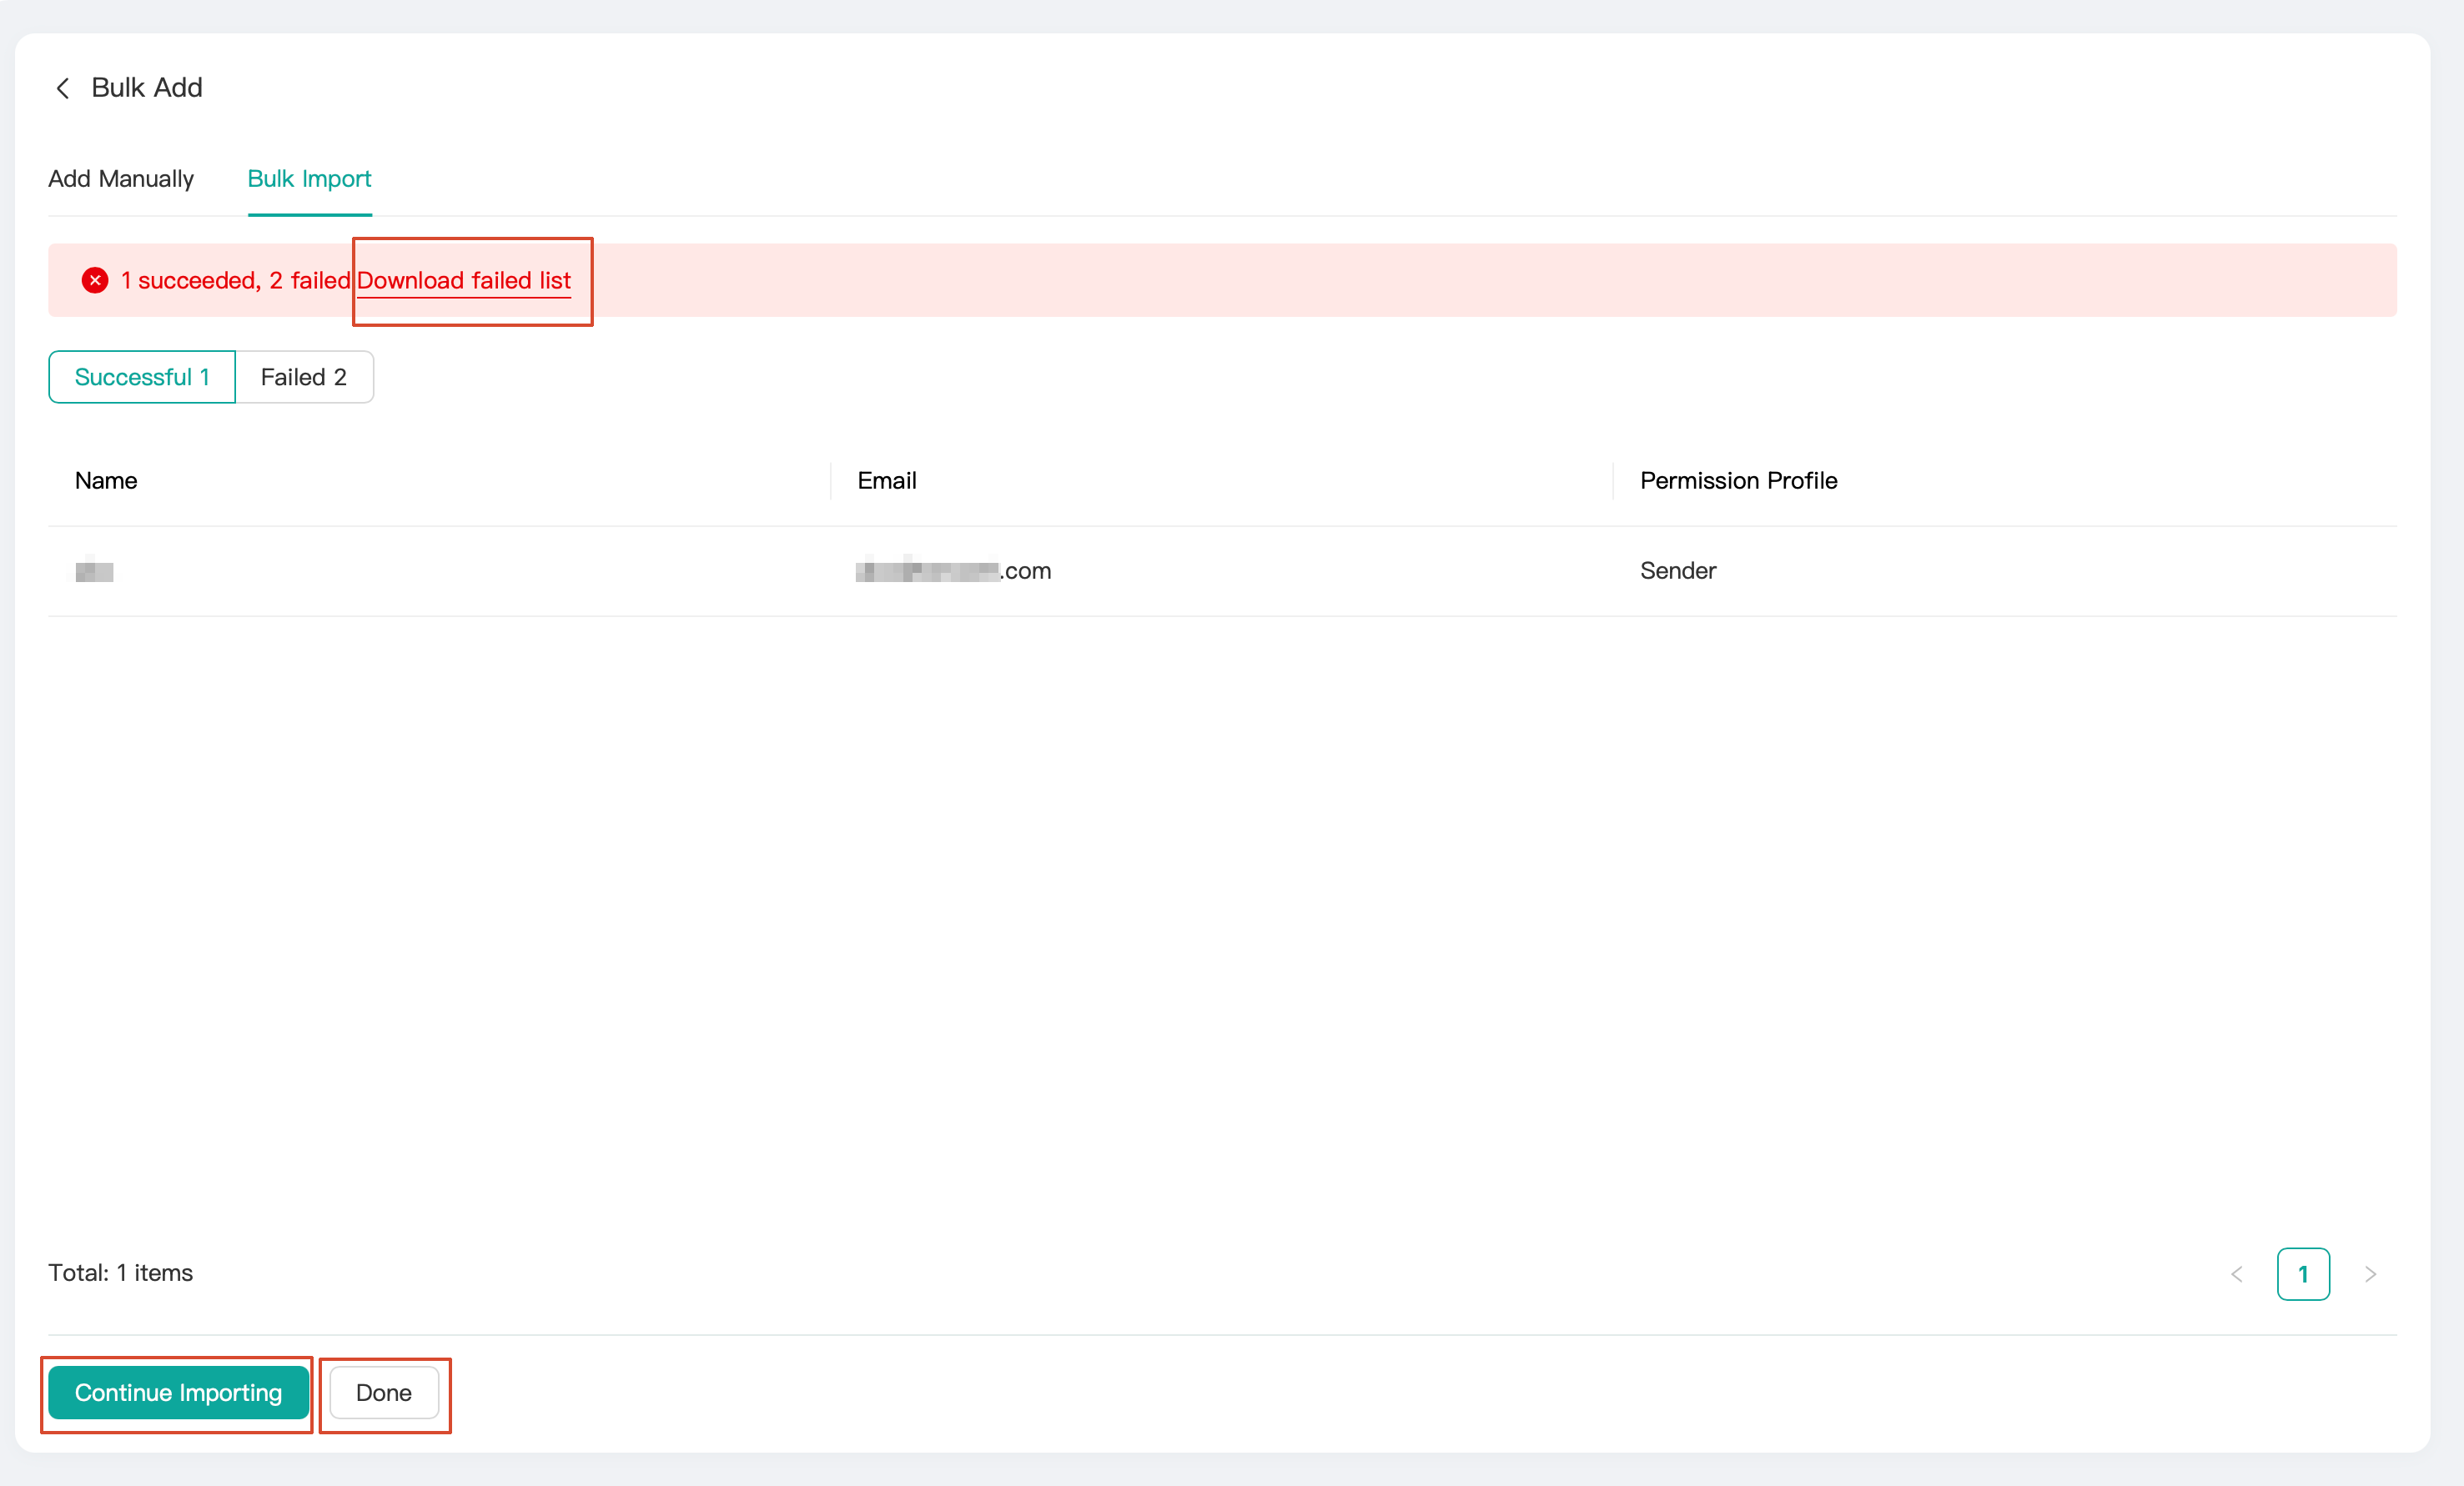
The system automatically parses the file content and displays the members to be added, categorized as Successful/Failed. You can click the Download failed list field to view the reasons for member addition failures.
After verifying the member addition list, click Continue Importing to upload the file again and add members. Click Done, and the system will send invitation emails in bulk to the members on the list.
Bantuan dan Dukungan
Apakah halaman ini membantu?
Anda juga dapat Menghubungi Penjualan atau Mengirimkan Tiket untuk meminta bantuan.
masukan