Envelope Sending
Unduh
Mode fokus
Ukuran font
Envelope Sending is a core feature of Tencent eSign. The entire process consists of three steps: uploading files, setting signing areas, and confirming initiation.
Operation Steps
Step 1: Uploading a File
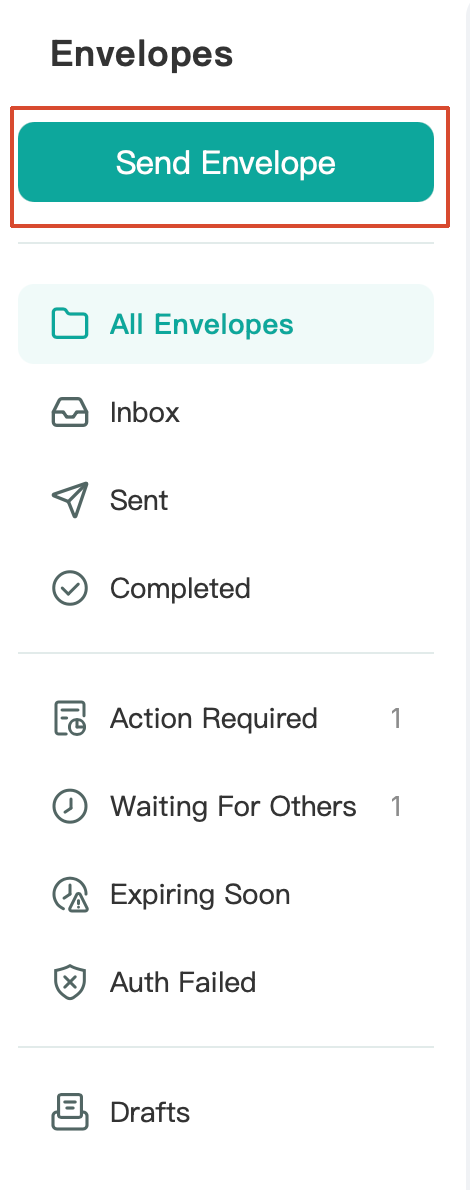
1. On the Envelope List page, click Send Envelope to enter the first step of envelope sending. You can also initiate a envelope from the Upload File or Starter Envelopes area on the Home. For detailed steps, see Home Overview.
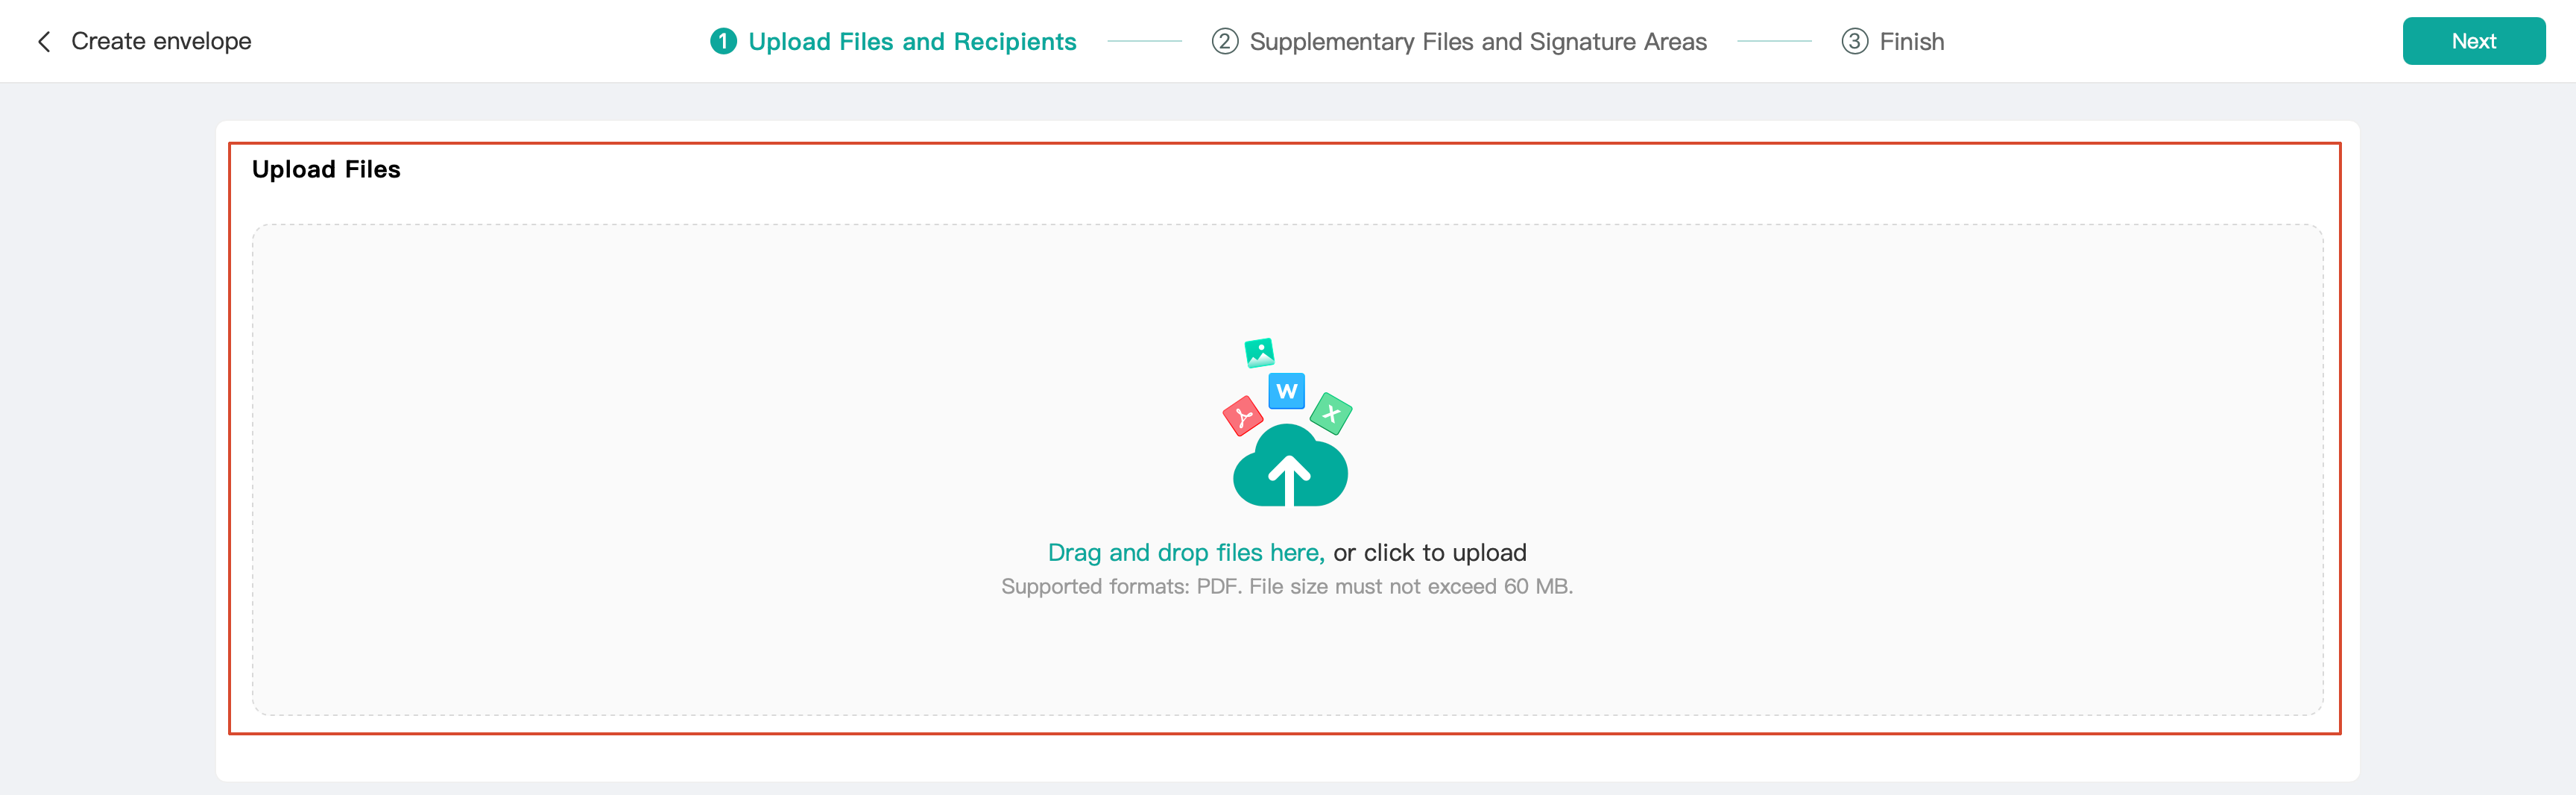
2. Drag a PDF file to the upload area, or click the upload area to select a file. The supported format is PDF, and the maximum file size is 60 MB.
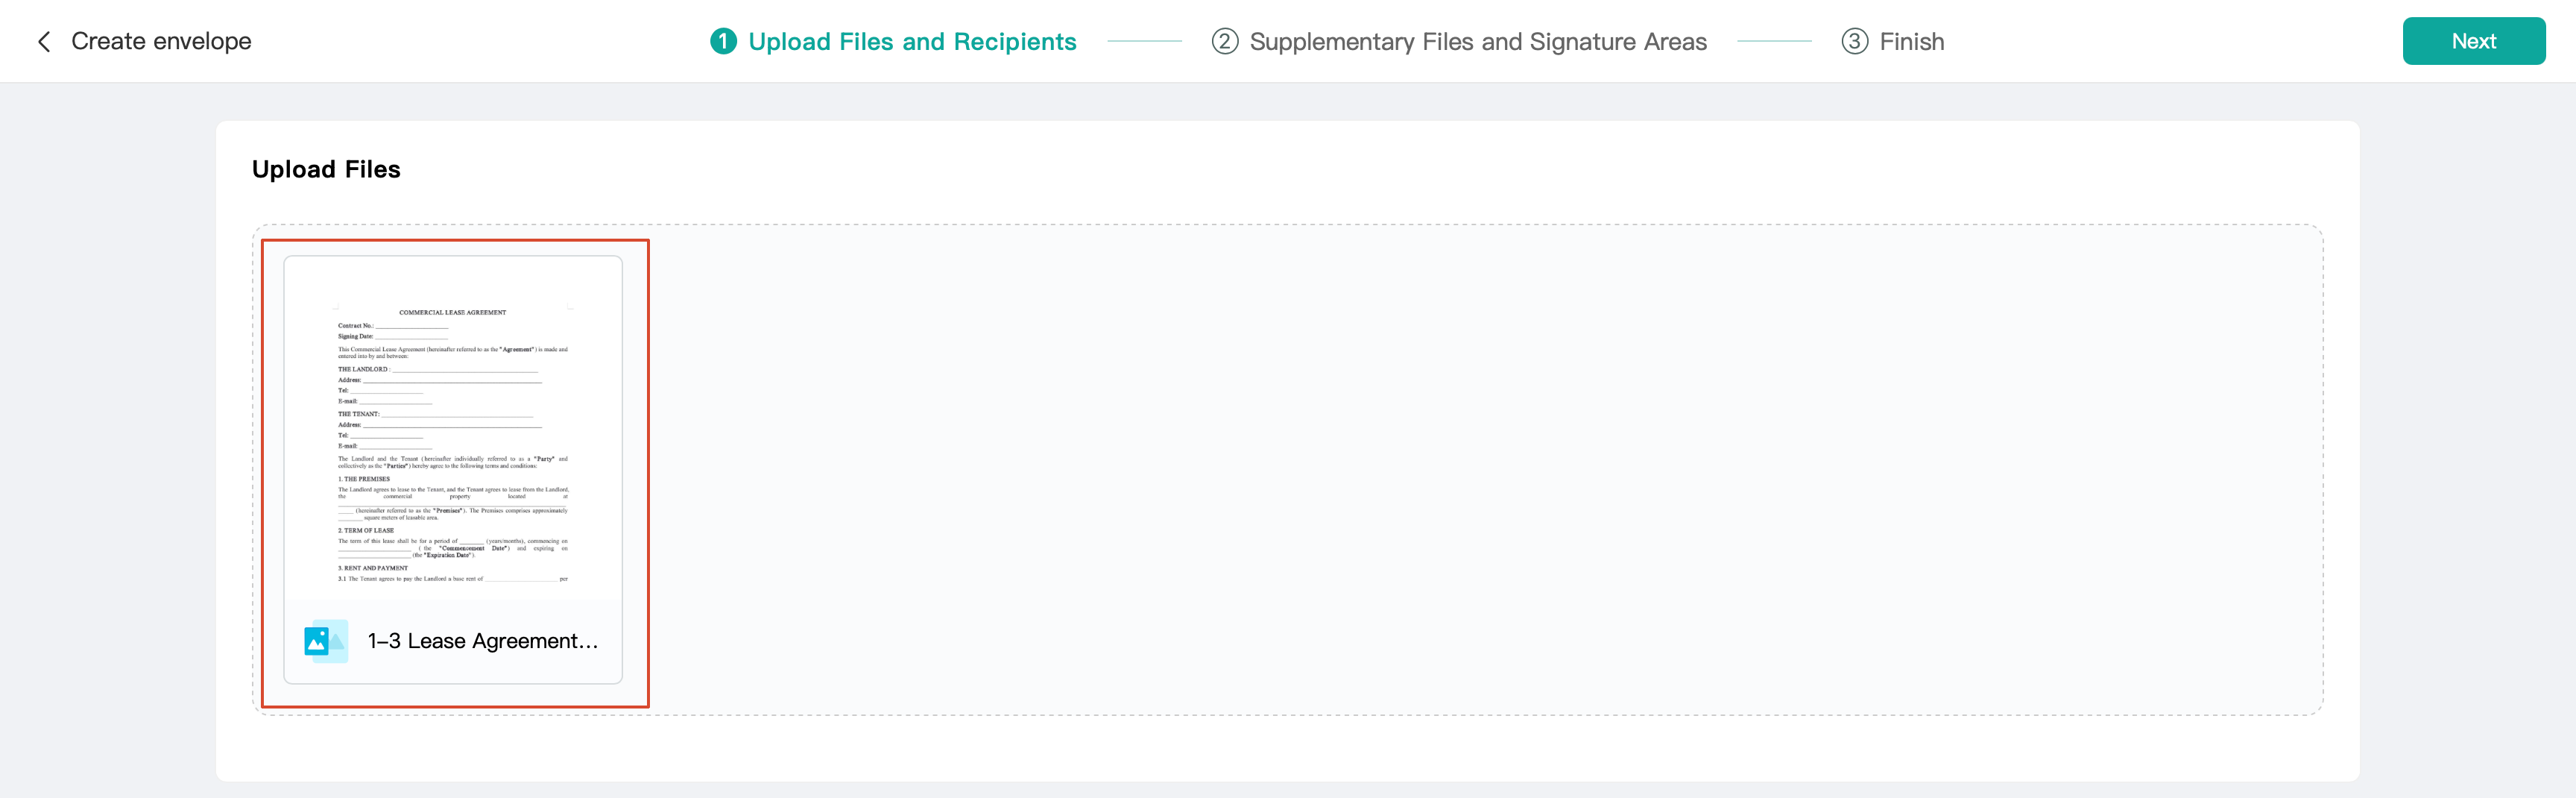
3. After the file is uploaded successfully, a preview of the file is displayed on the page.
4. Scroll down to the Recipient and Envelope Settings area and fill in the relevant information.
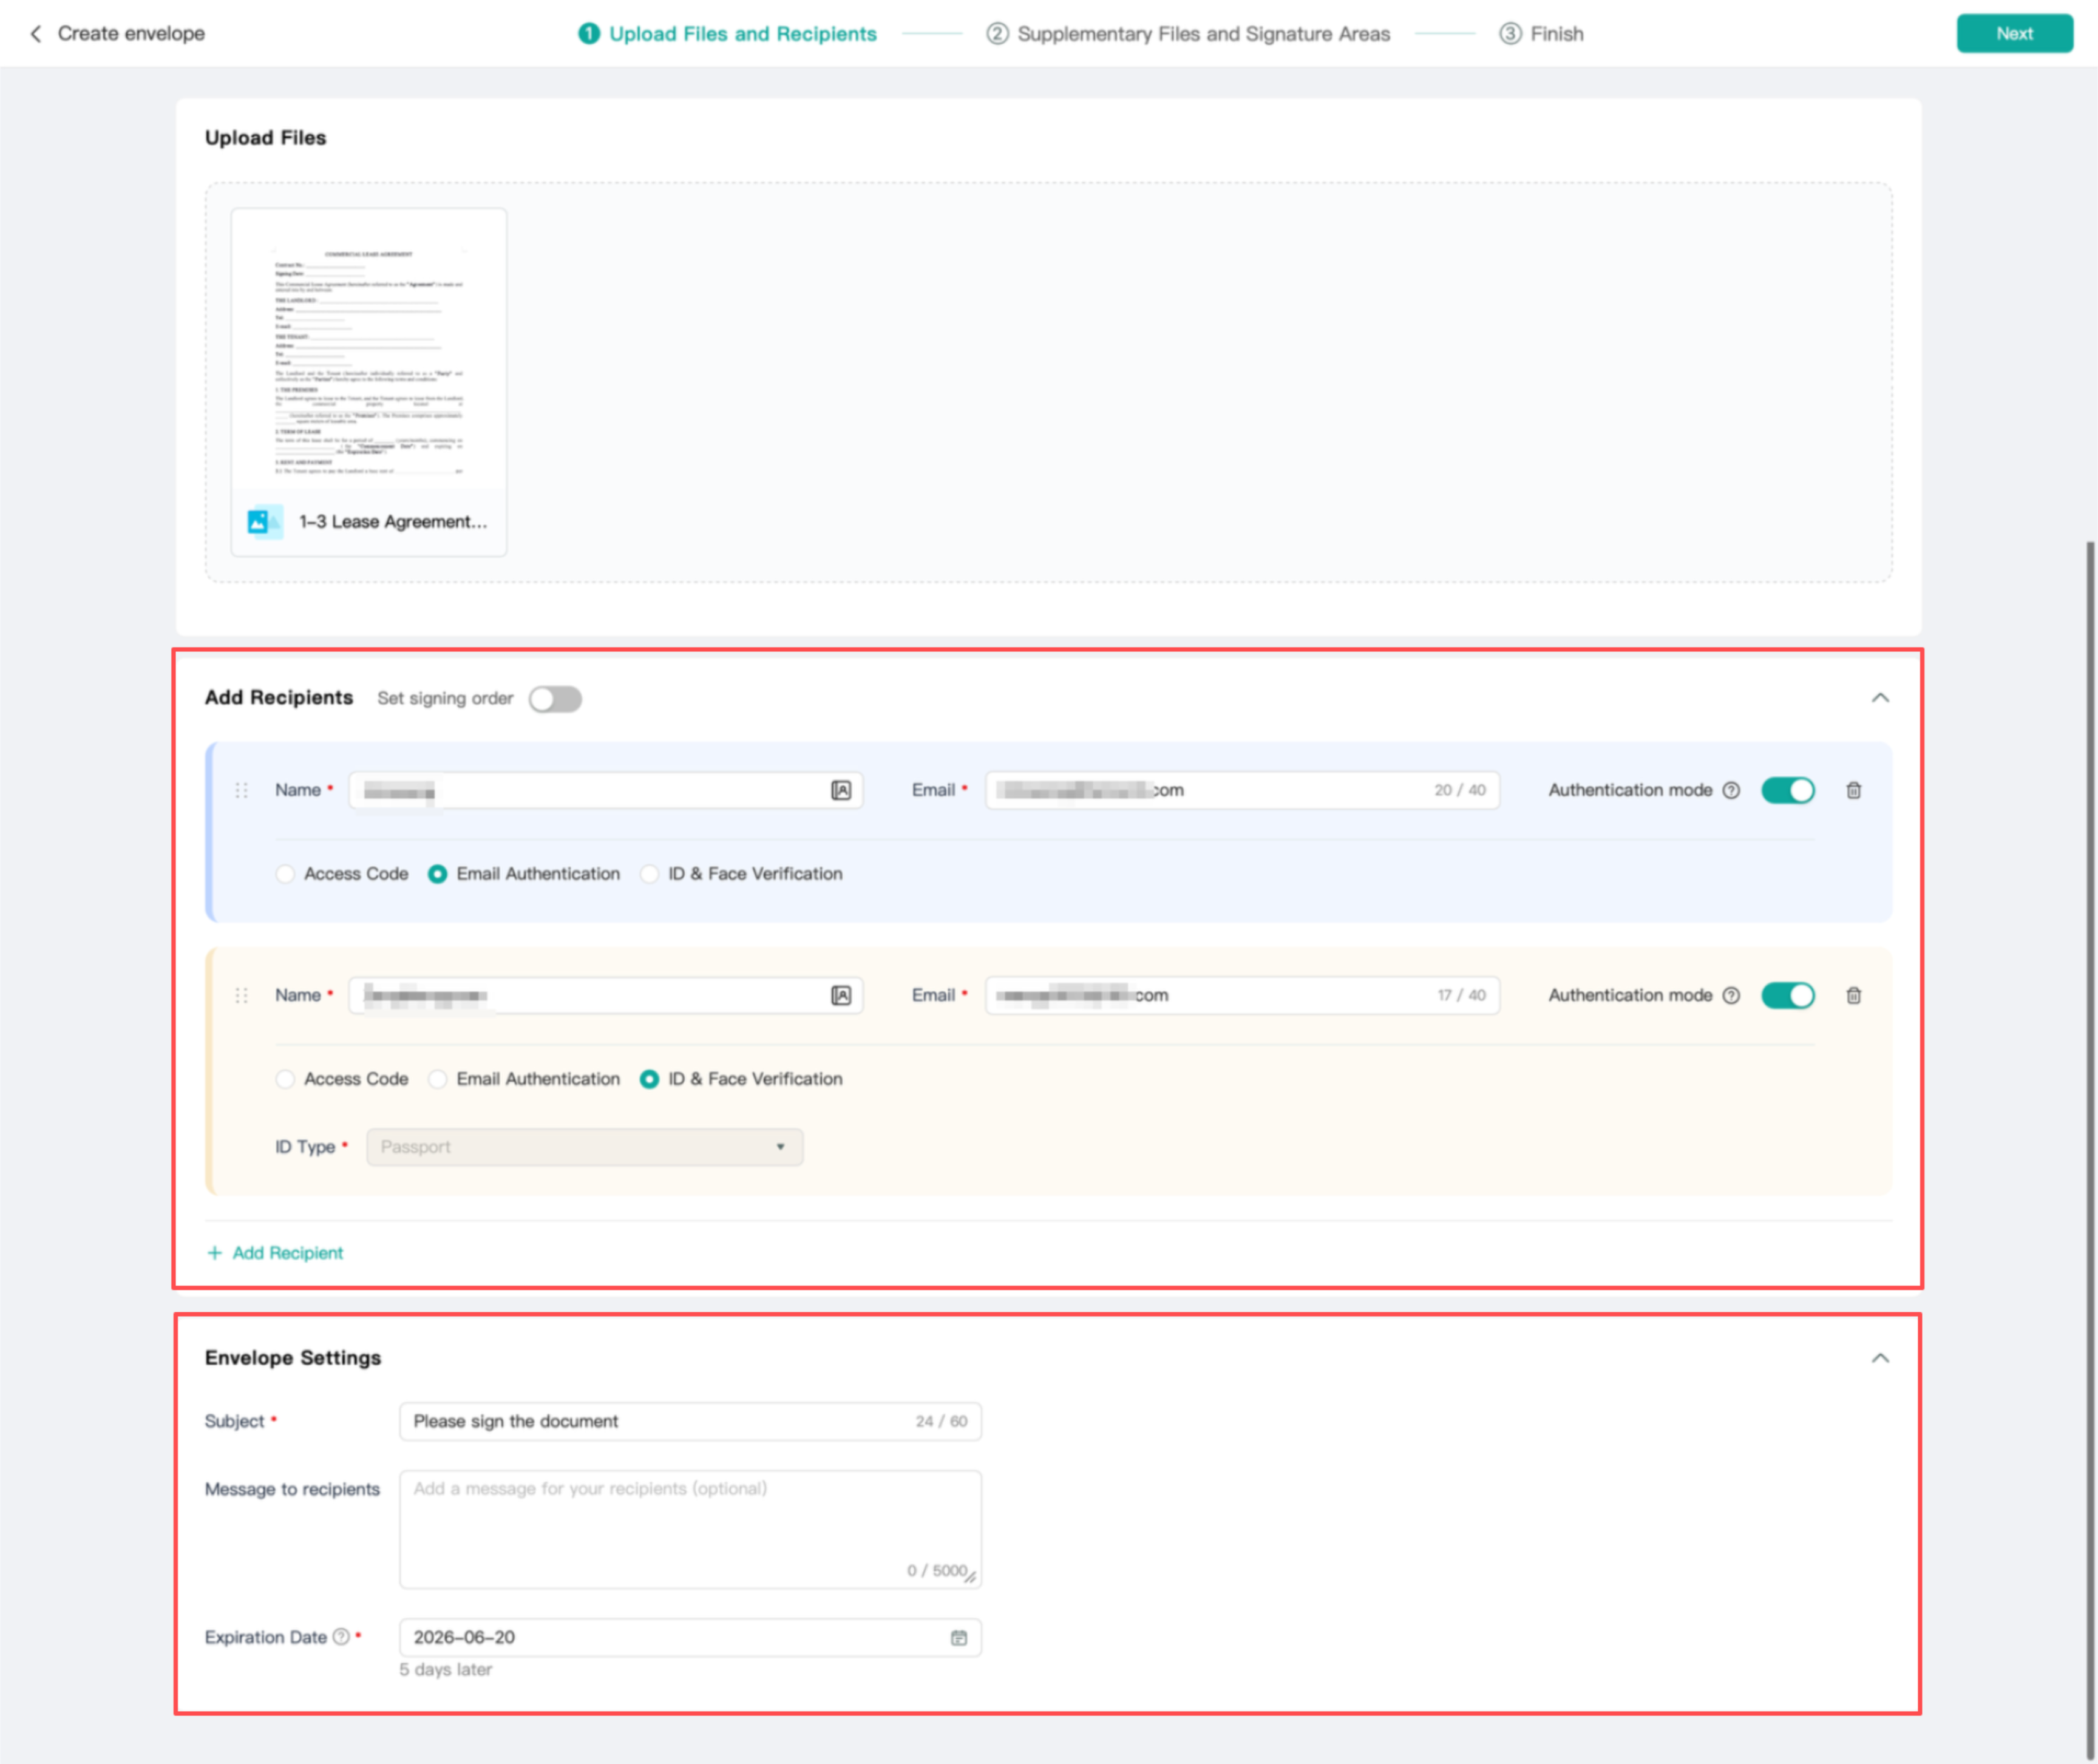
Recipient field:
Field | Description | Required |
Name | Signatory's name. | Required |
Email | Signatory's email address, used to receive signing notifications. | Required |
Authentication Mode | Three authentication modes are supported: Access Code: The signatory must enter the letter / number combination access code preset by thesender. Only after successful verification can the signatory enter the signing process to complete identity verification. Sender: 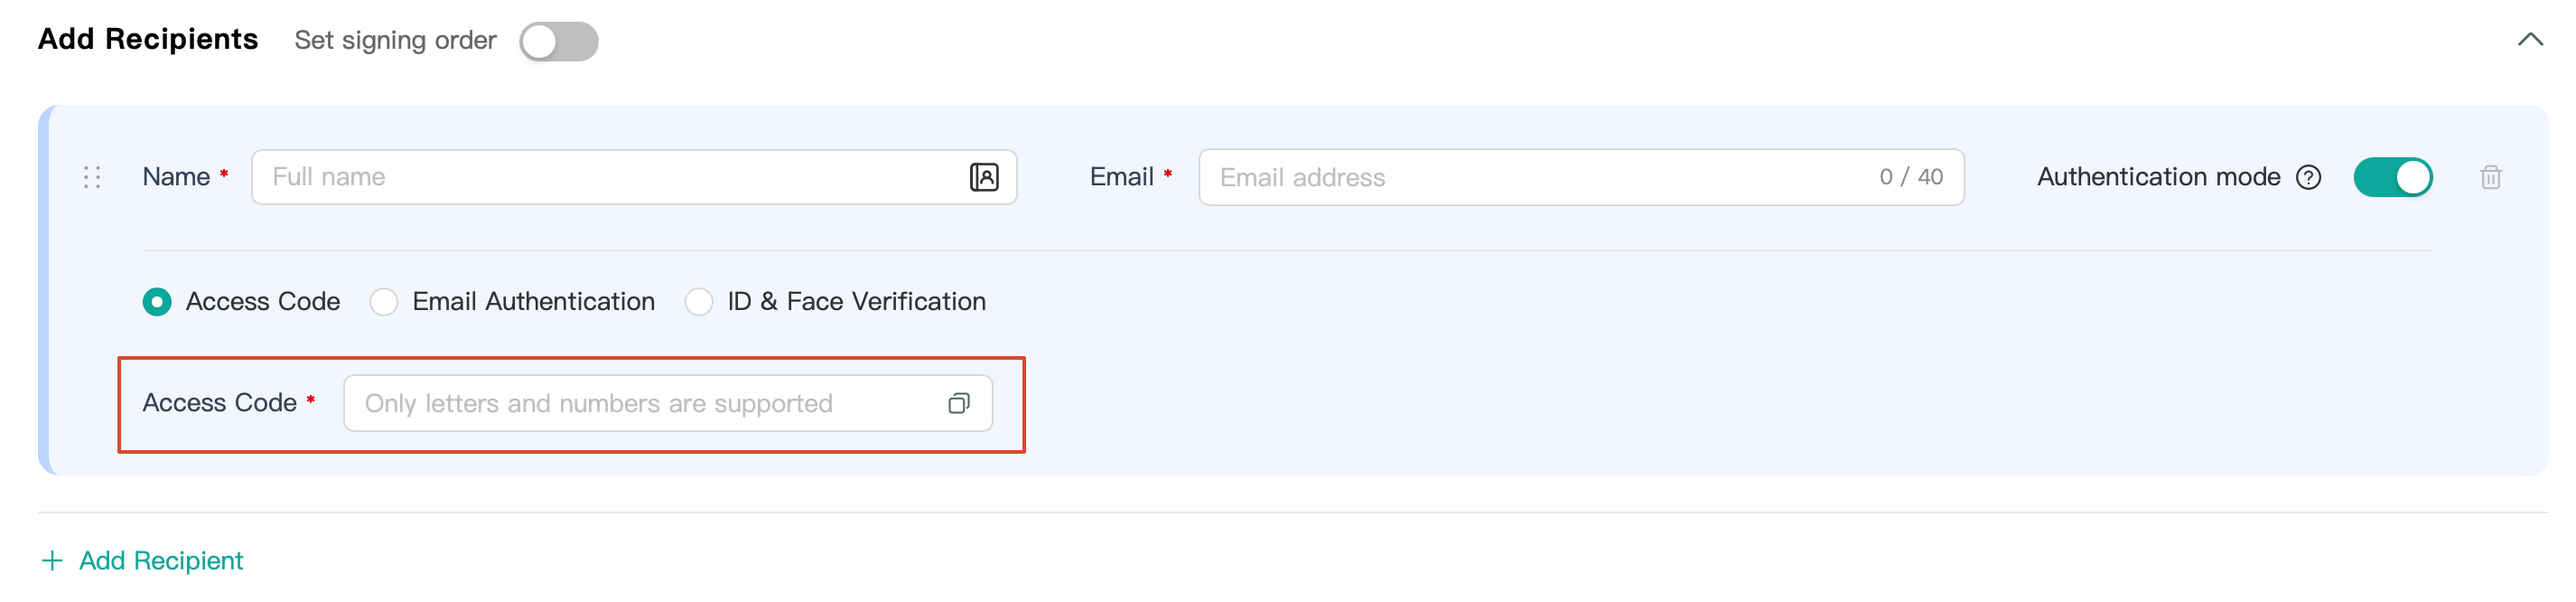 Signatory: 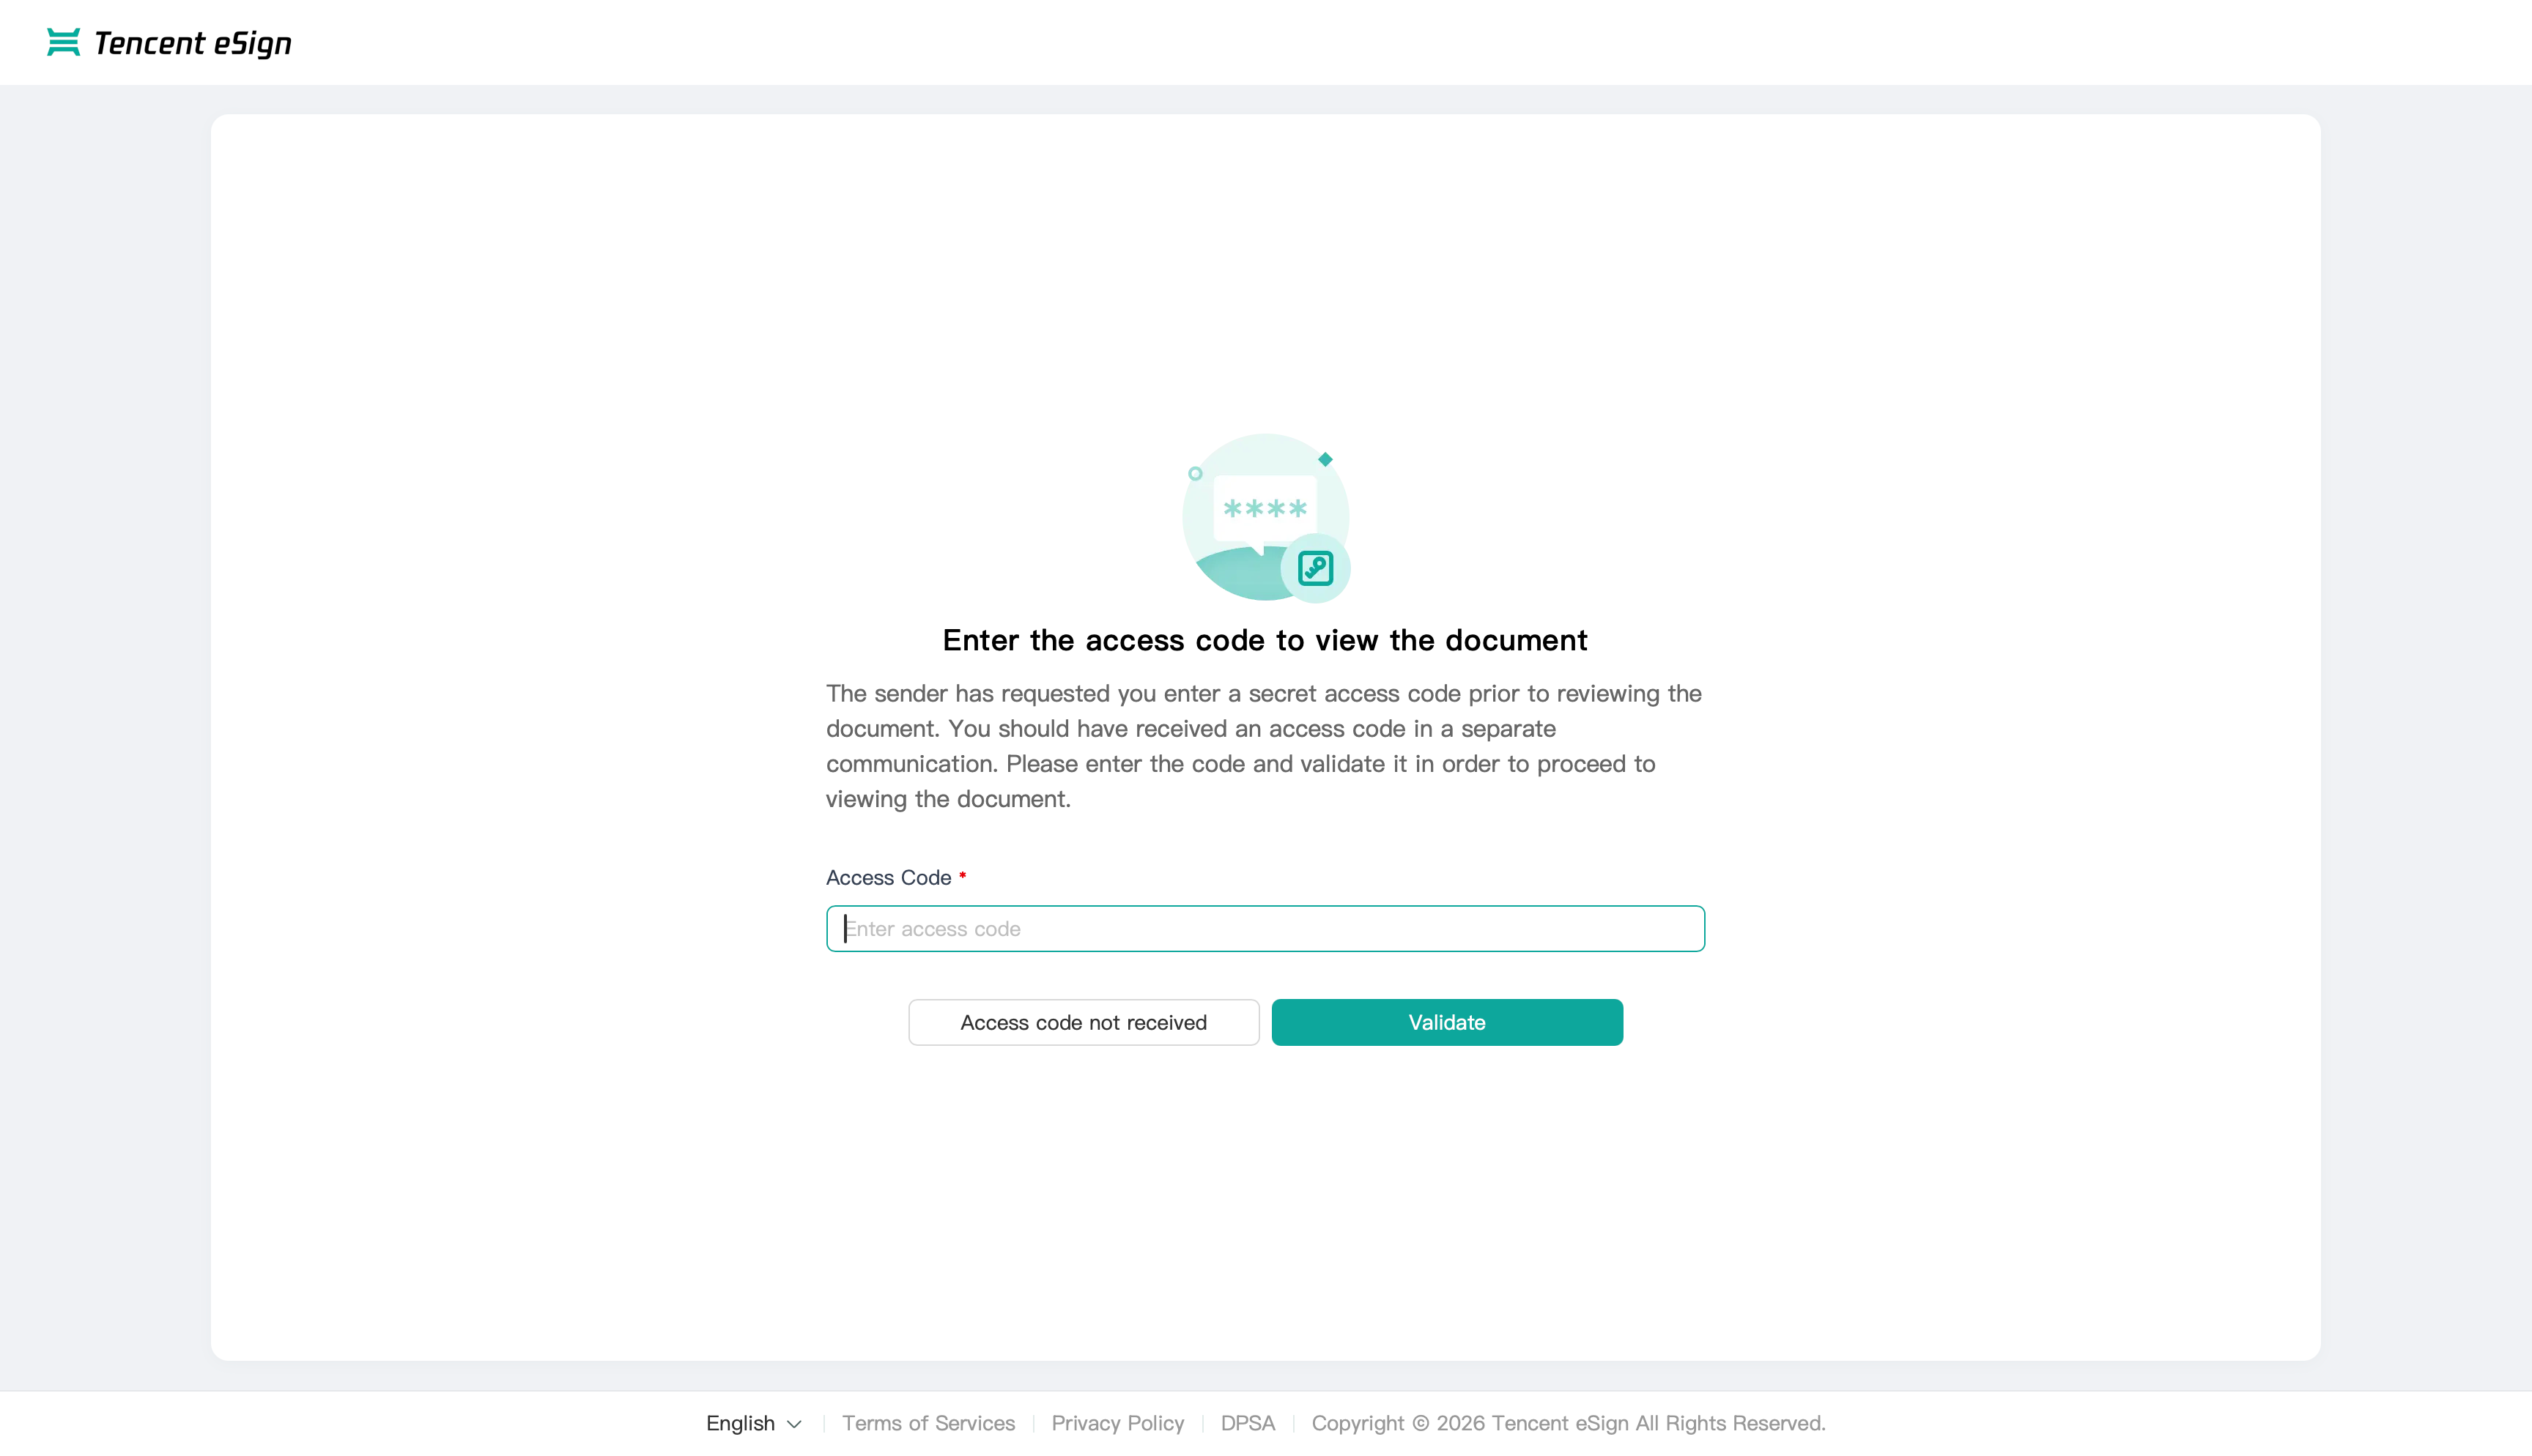 Email Authentication: The system sends a Verification Code to the signatory's email. After entering the correct code, the signatory completes identity verification and enters the signing process. 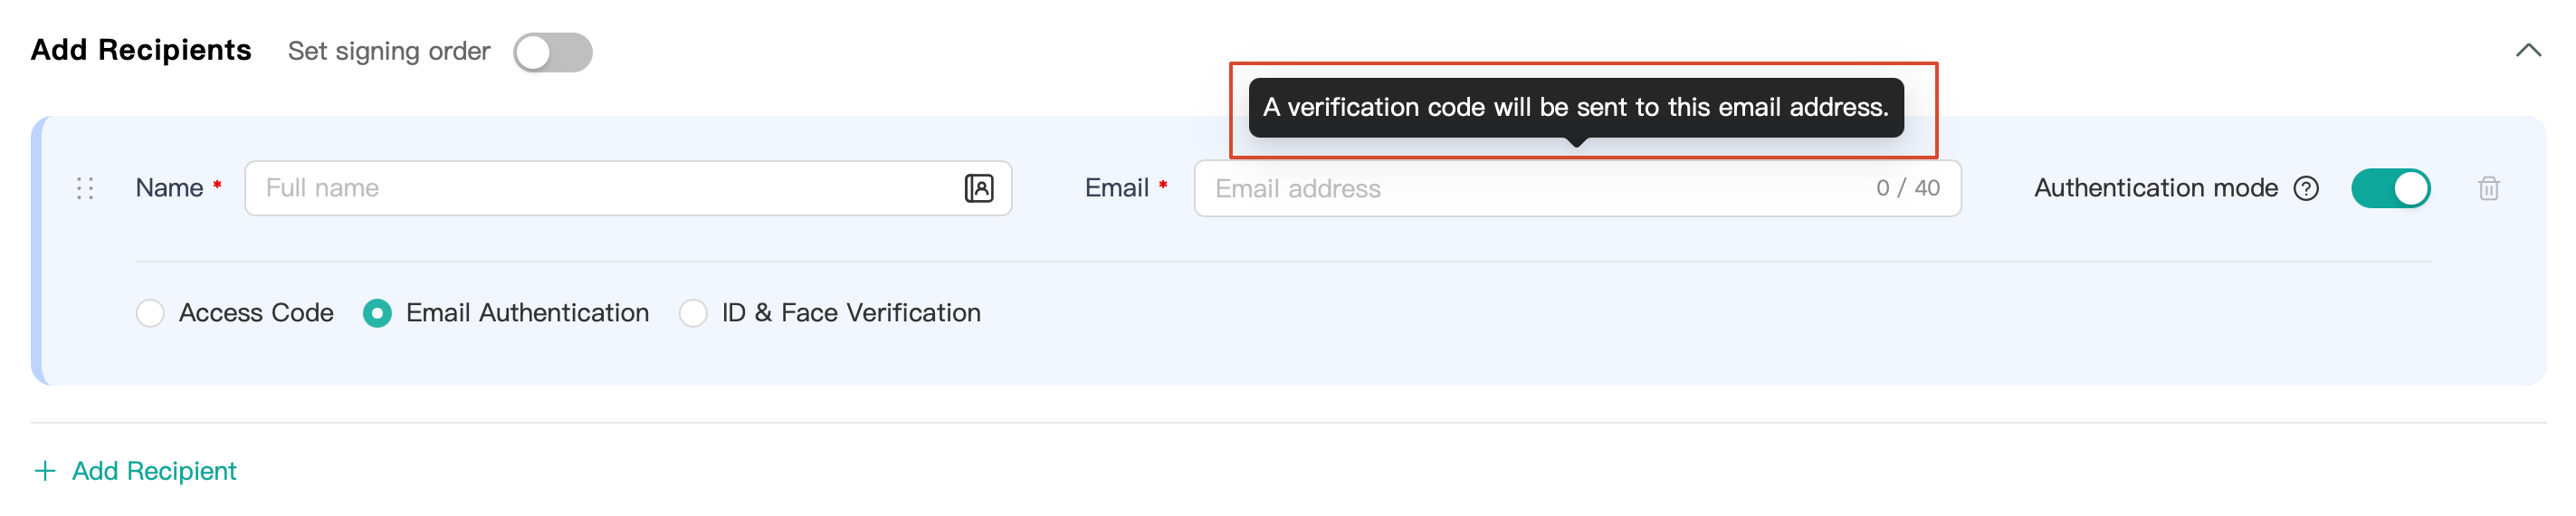 ID & Face Authentication: The signatory must provide valid identification document (such as passport) information and complete a live facial detection. The system verifies the identity by comparing the document information with the facial image. Only after successful verification can the signatory enter the signing process. 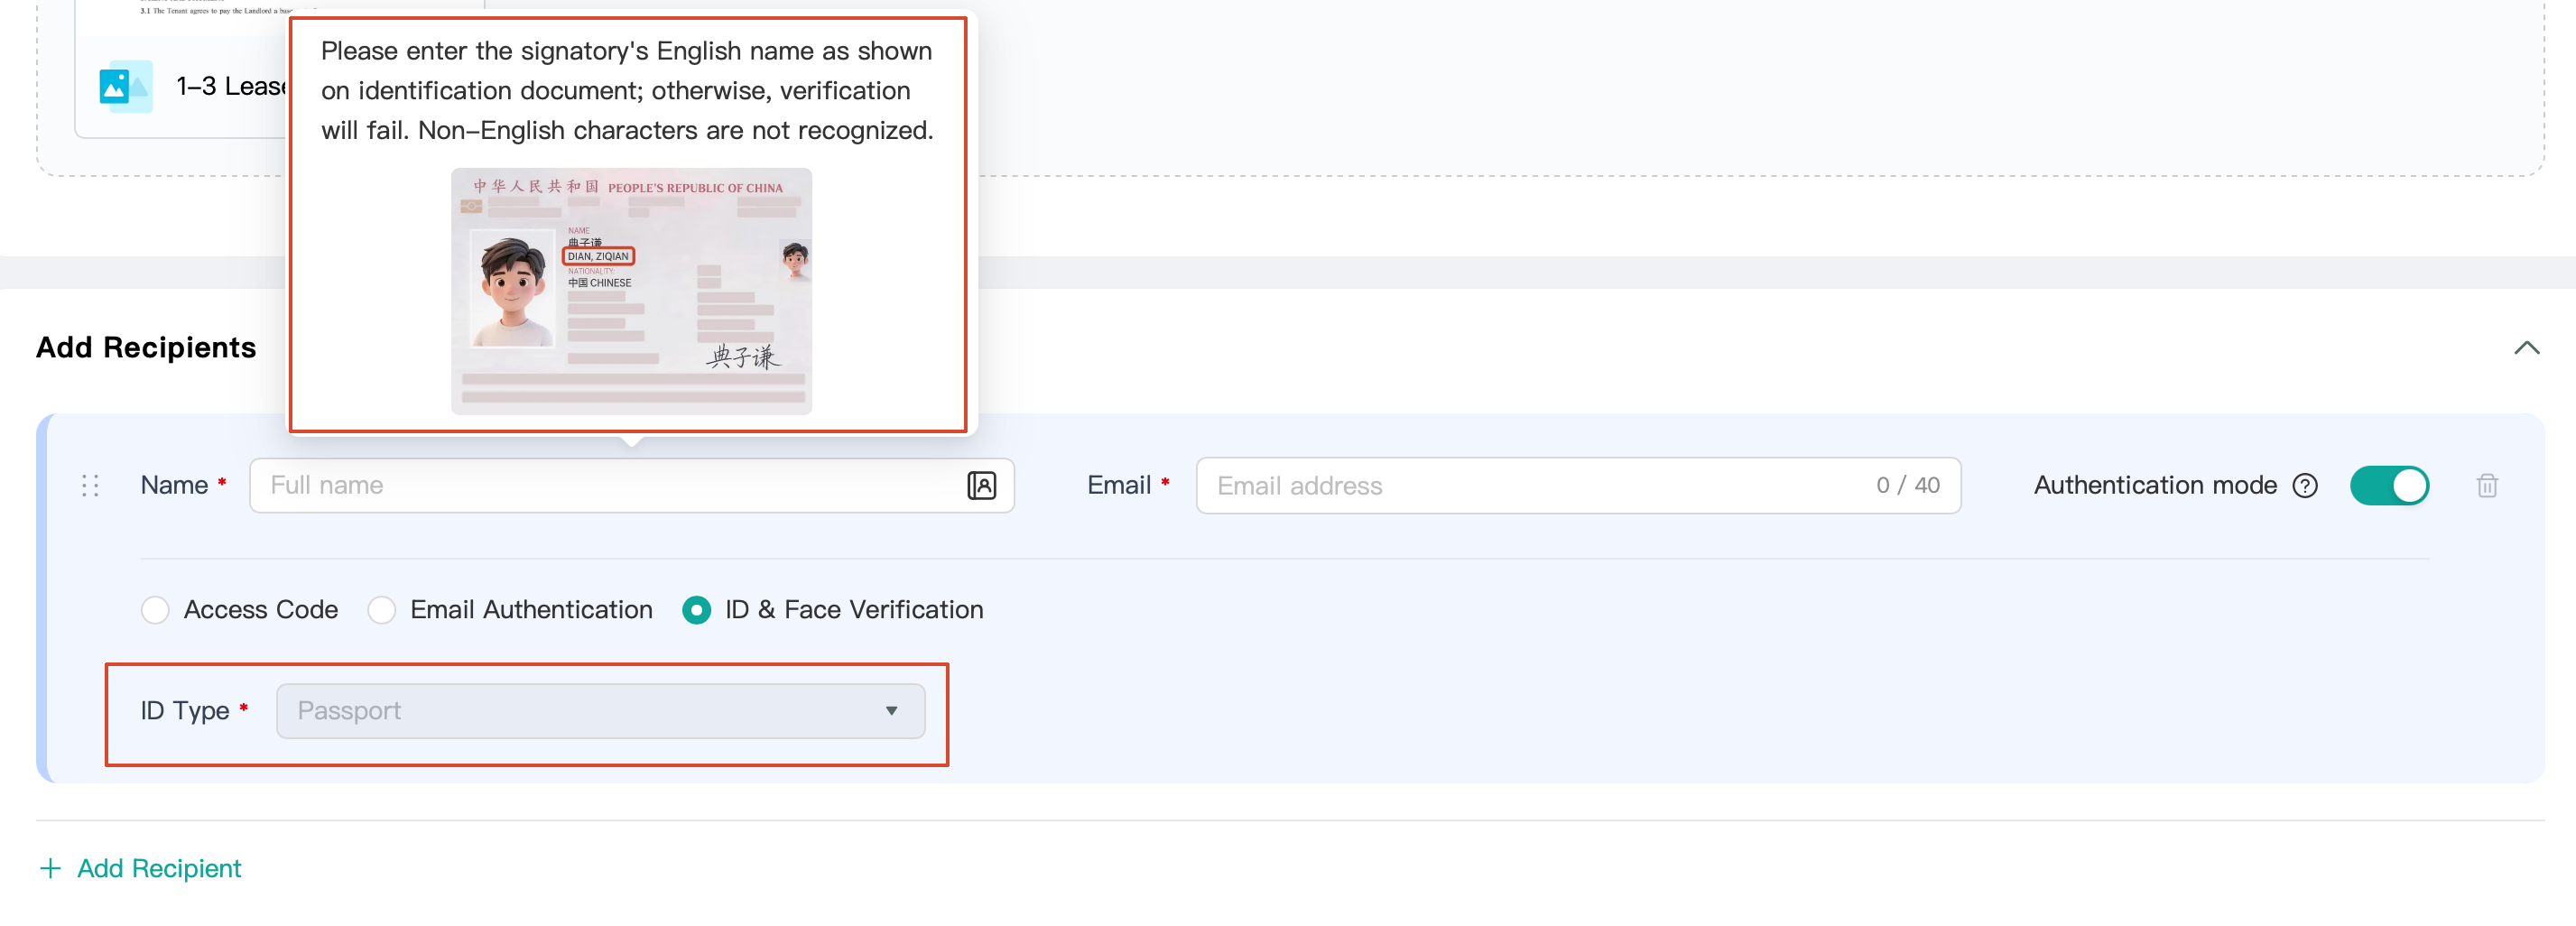 | Optional |
Set Signing Order | Add information for all recipients who need to sign, and select a signing method based on business requirements. Sequential Signing: Signatories complete the signing process in the preset order. Unordered Signing: All signatories can complete the signing process independently and simultaneously, with no sequential order restriction. | |
Agreement Settings field:
Field | Description | Required |
Subject | Email subject, which is displayed in the email received by the signatory and defaults to "Please sign the document". | Required |
Message to recipients | Message to the signatory. | Optional |
Expiration Date | Envelope signing deadline. | Required |
5. After completing the form, click Next in the upper-right corner to proceed to the next step.
Step 2: Setting Signature Areas
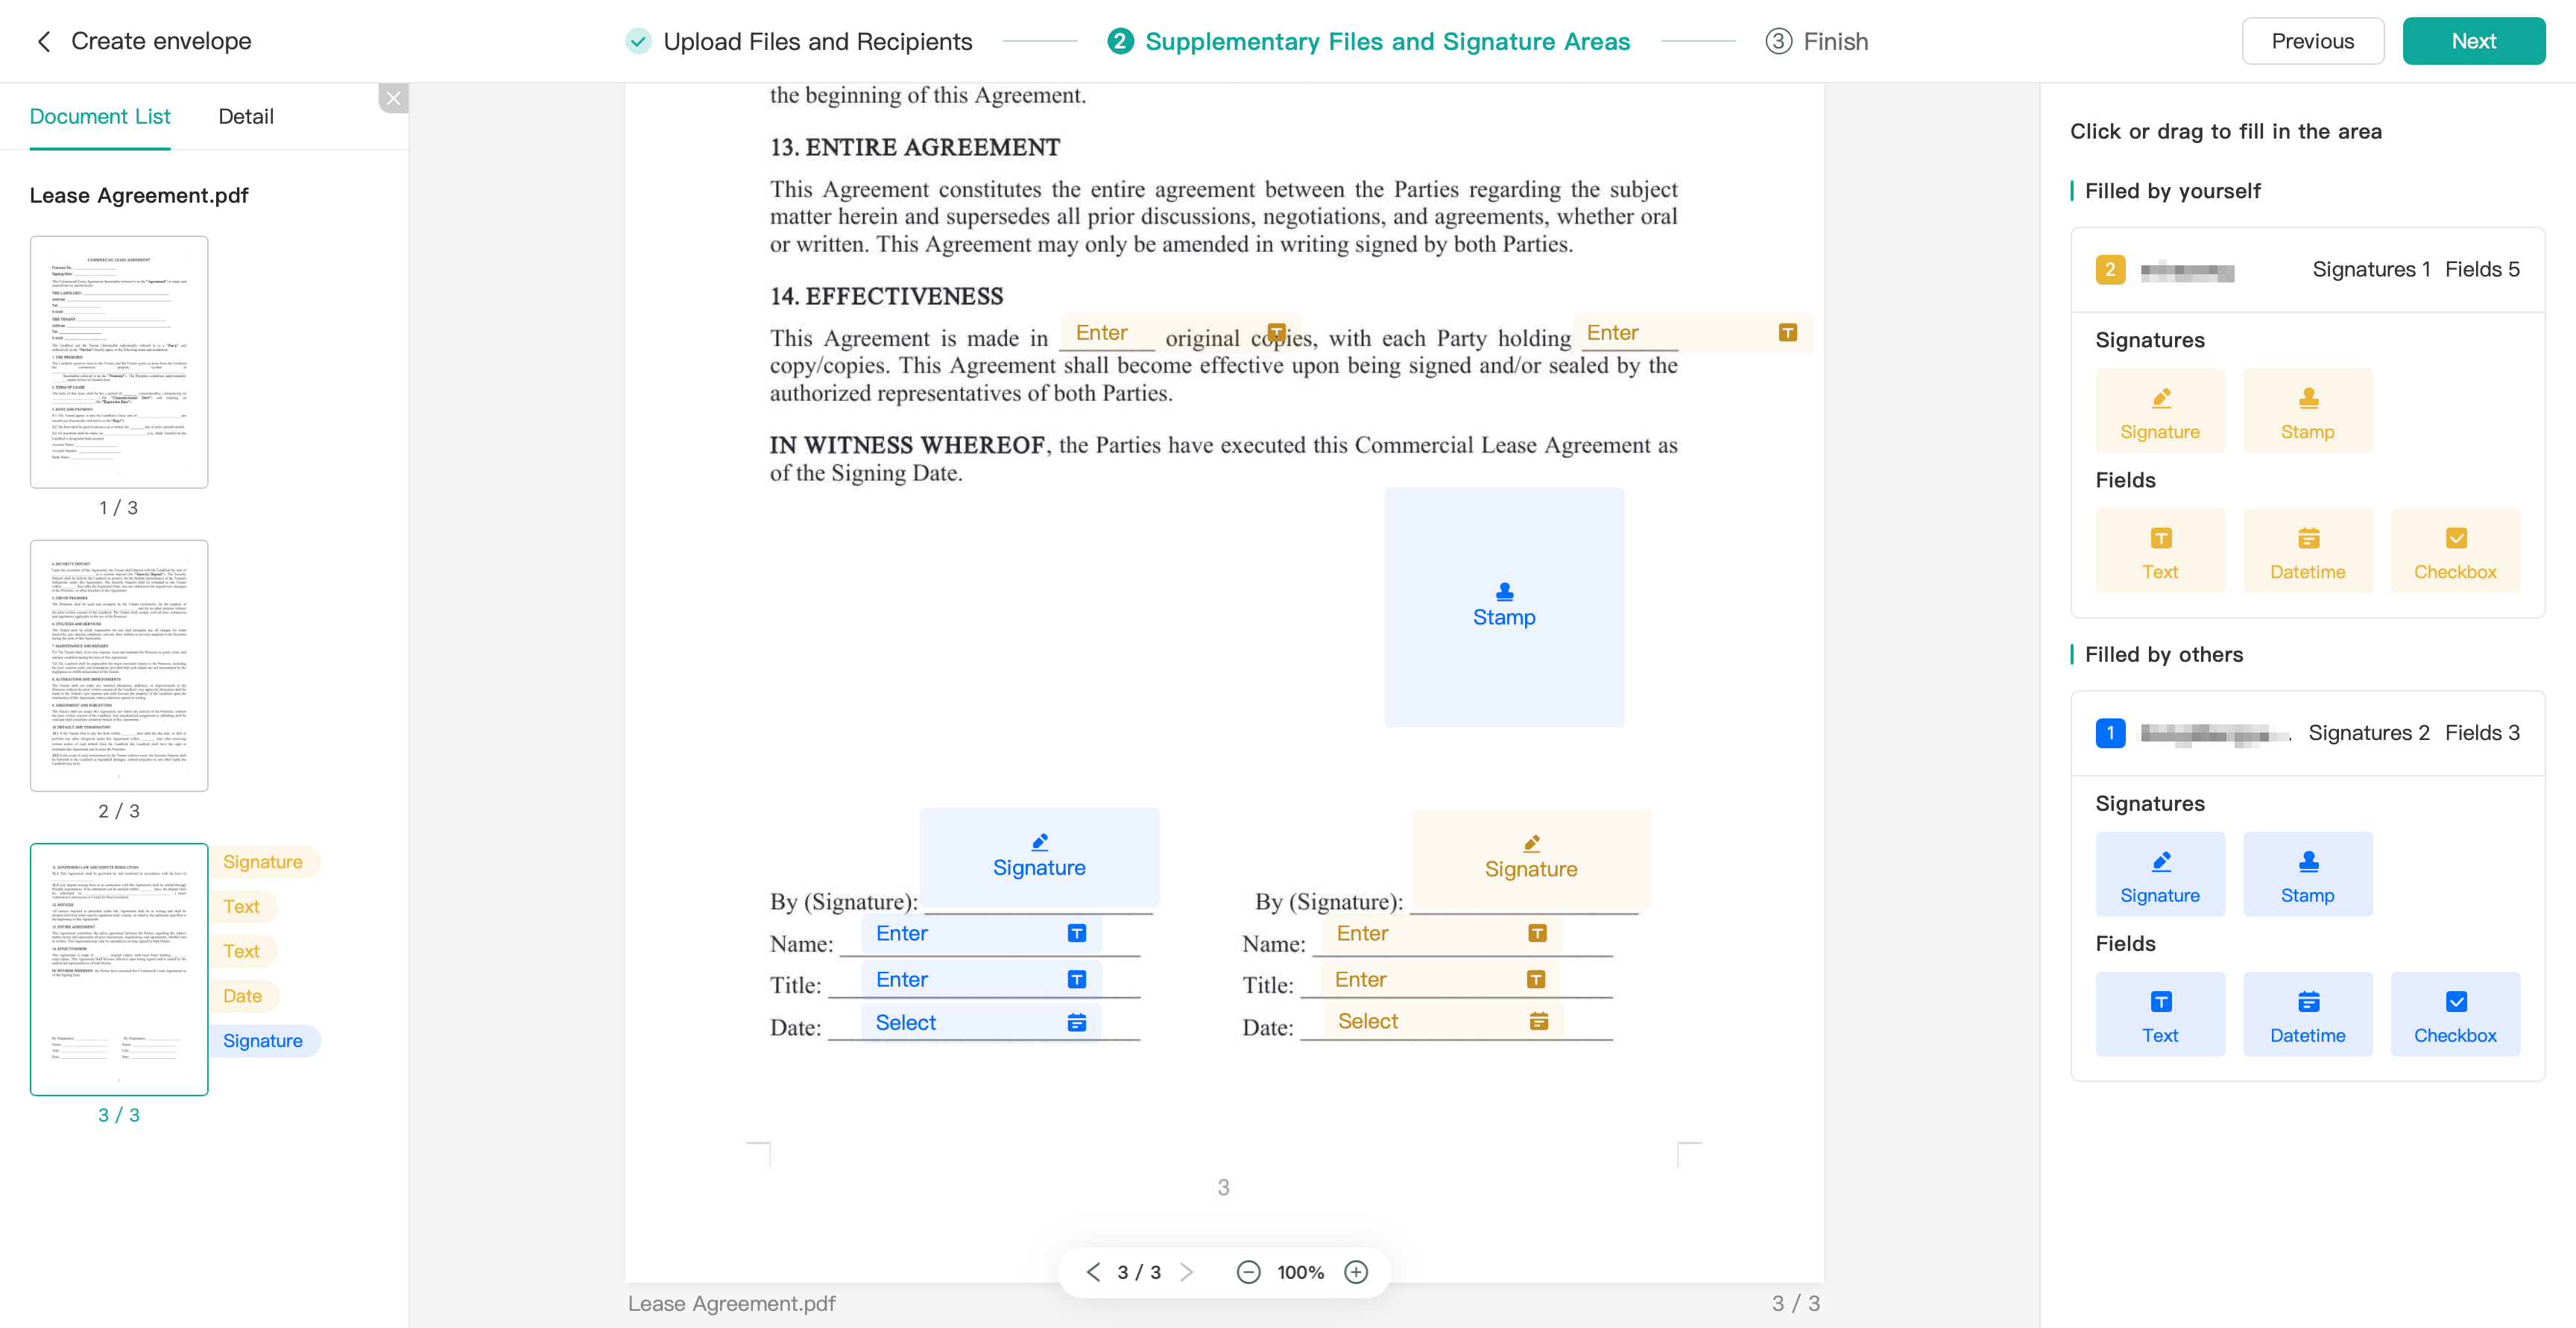
This step is used to place signature areas and other controls on the document. The page for this step presents a left-center-right structure, as shown in the following figure:
Page Details
Area | Description |
Left Document List & Details | Document List: Displays the list of uploaded documents and page thumbnails. Detail: Displays key envelope information, such as ID, status, and deadline. 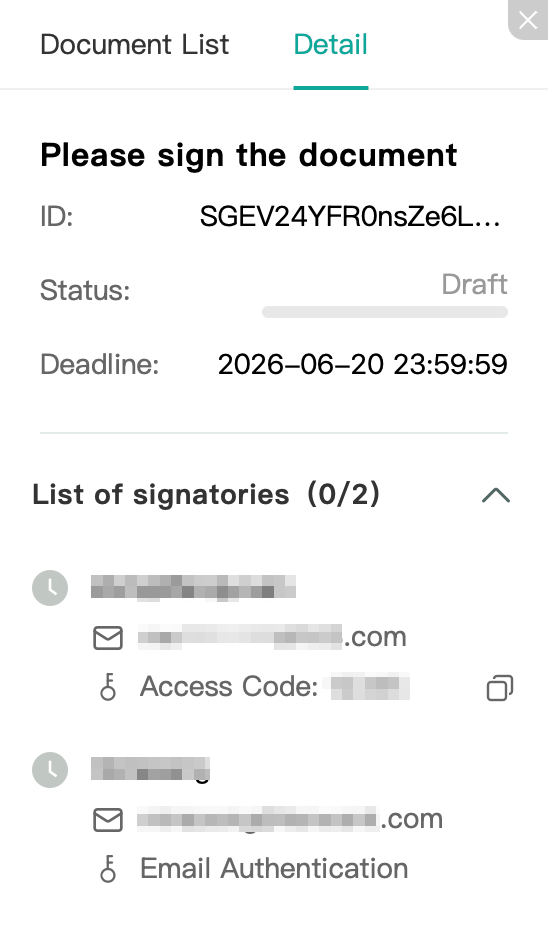 |
Center Document Preview | Document content preview area, supporting zooming and page turning. |
Right Control Panel | Signature components and fields that can be dragged onto the document. |
Available Controls
Control | Function |
Signature | Signature area where the signatory signs. |
Stamp | Stamp area where the signatory stamps. |
Text | Text input box where the signatory enters text. |
Date and time | Date/time field where the signatory selects a date. |
Checkbox | Checkbox where the signatory selects to confirm. |
Operation Method
Drag a component (such as a signature) from the right-side control panel to the target location in the document preview area to place it.
Note:
Each signatory must set at least one signature area; otherwise, the process cannot proceed to the next step.
After completing the settings, click the Next button to proceed to the final step.
Step 3: Confirming Initiation
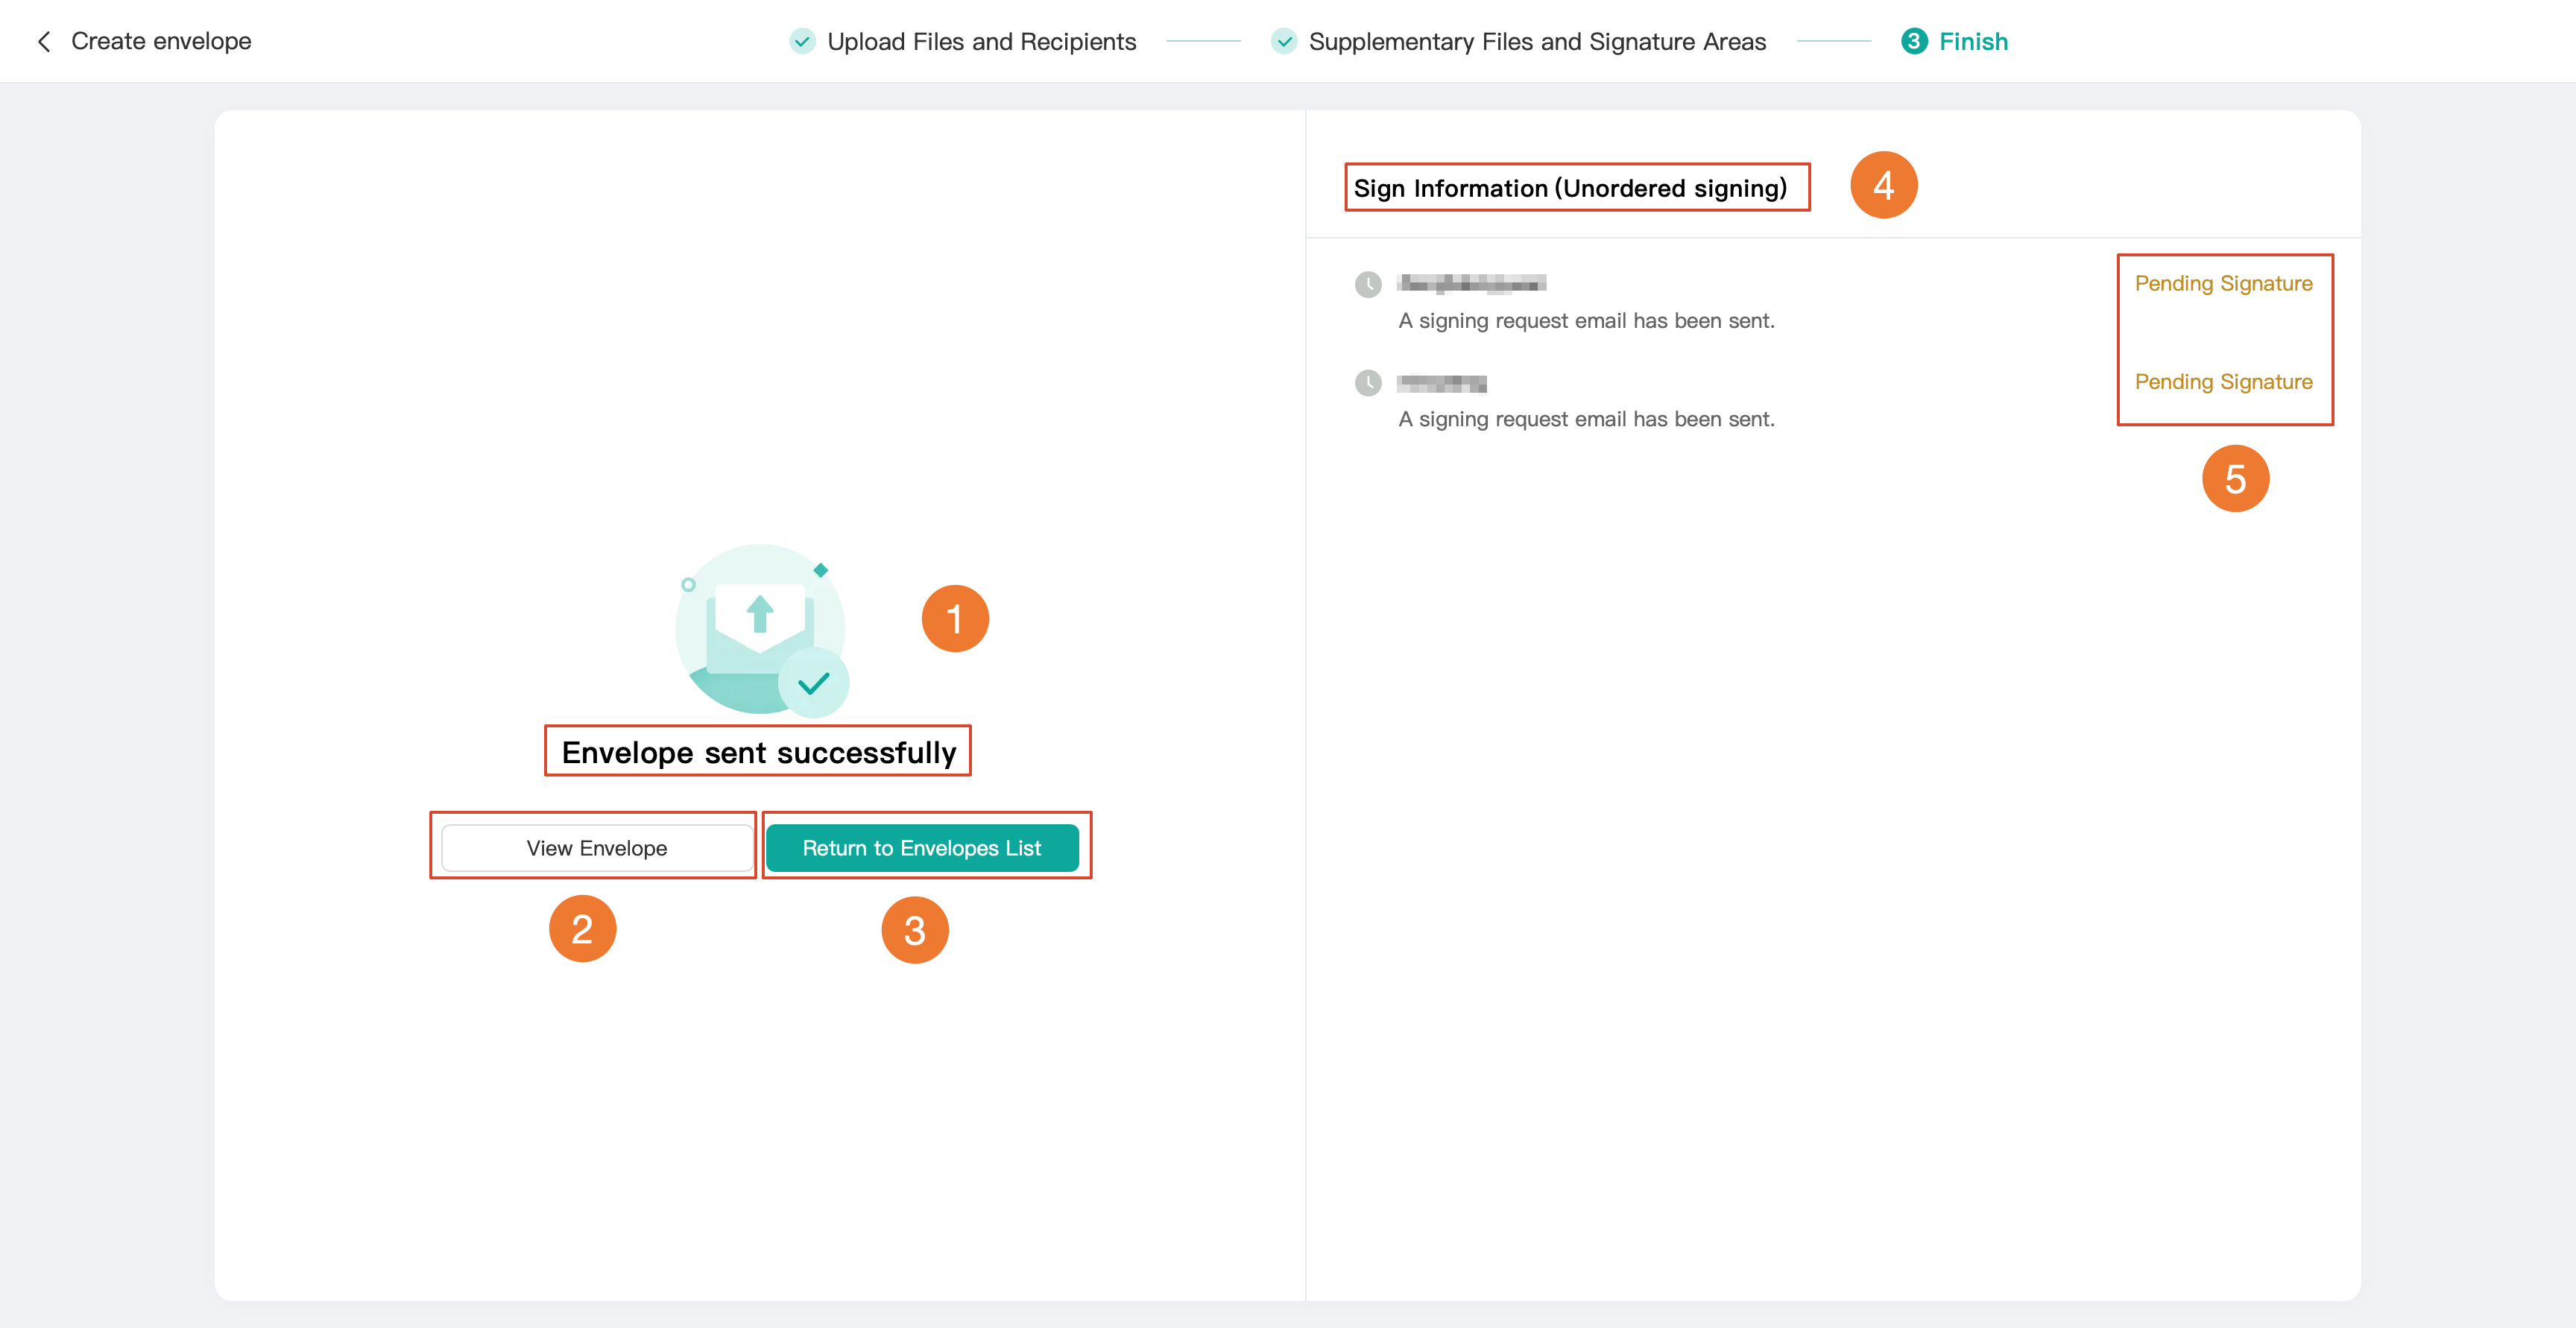
After you proceed to this step, the system automatically sends the envelope to all signatories. The following information is displayed on the Success page:
No. | Information | Description |
1 | Envelope sent successfully | Confirm that the envelope has been sent successfully. |
2 | View Envelope | Click to view envelope details. |
3 | Return to Envelopes list | Return to the envelopes list. |
4 | Sign Information | Displays the signing method (sequential signing / unordered signing). |
5 | Signatory status | If the status is "Pending Signature", it is annotated that the signing request email has been sent. |
Bantuan dan Dukungan
Apakah halaman ini membantu?
Anda juga dapat Menghubungi Penjualan atau Mengirimkan Tiket untuk meminta bantuan.
masukan