Binding a CVM to Multiple EIPs
ダウンロード
フォーカスモード
フォントサイズ
A single CVM can be bound to multiple public IP addresses (including common public IP addresses and EIPs), the number of which does not exceed the limit. In this way, you can migrate traffic and improve the CVM utilization. This document describes how to bind multiple ENIs and EIPs to both Linux and Windows CVMs.
Prerequisites
You have purchased Linux CVM and Windows CVM, and the ICMP protocol is enabled in the security group.
Ensure that your public IP is within the limit. For specific limits, see Limits.
Ensure that the number of private IPs bound to a single network interface is within the limit. For specific limits, see ENI - Limits.
Directions
Step One: Assigning a Private IP Address for the ENI
1. Log in to the CVM console.
2. In the list, click the ID of the CVM instance to be configured, and click the ENI page.
3. On the ENI page, click Allocate Private IP on the right of the primary ENI.
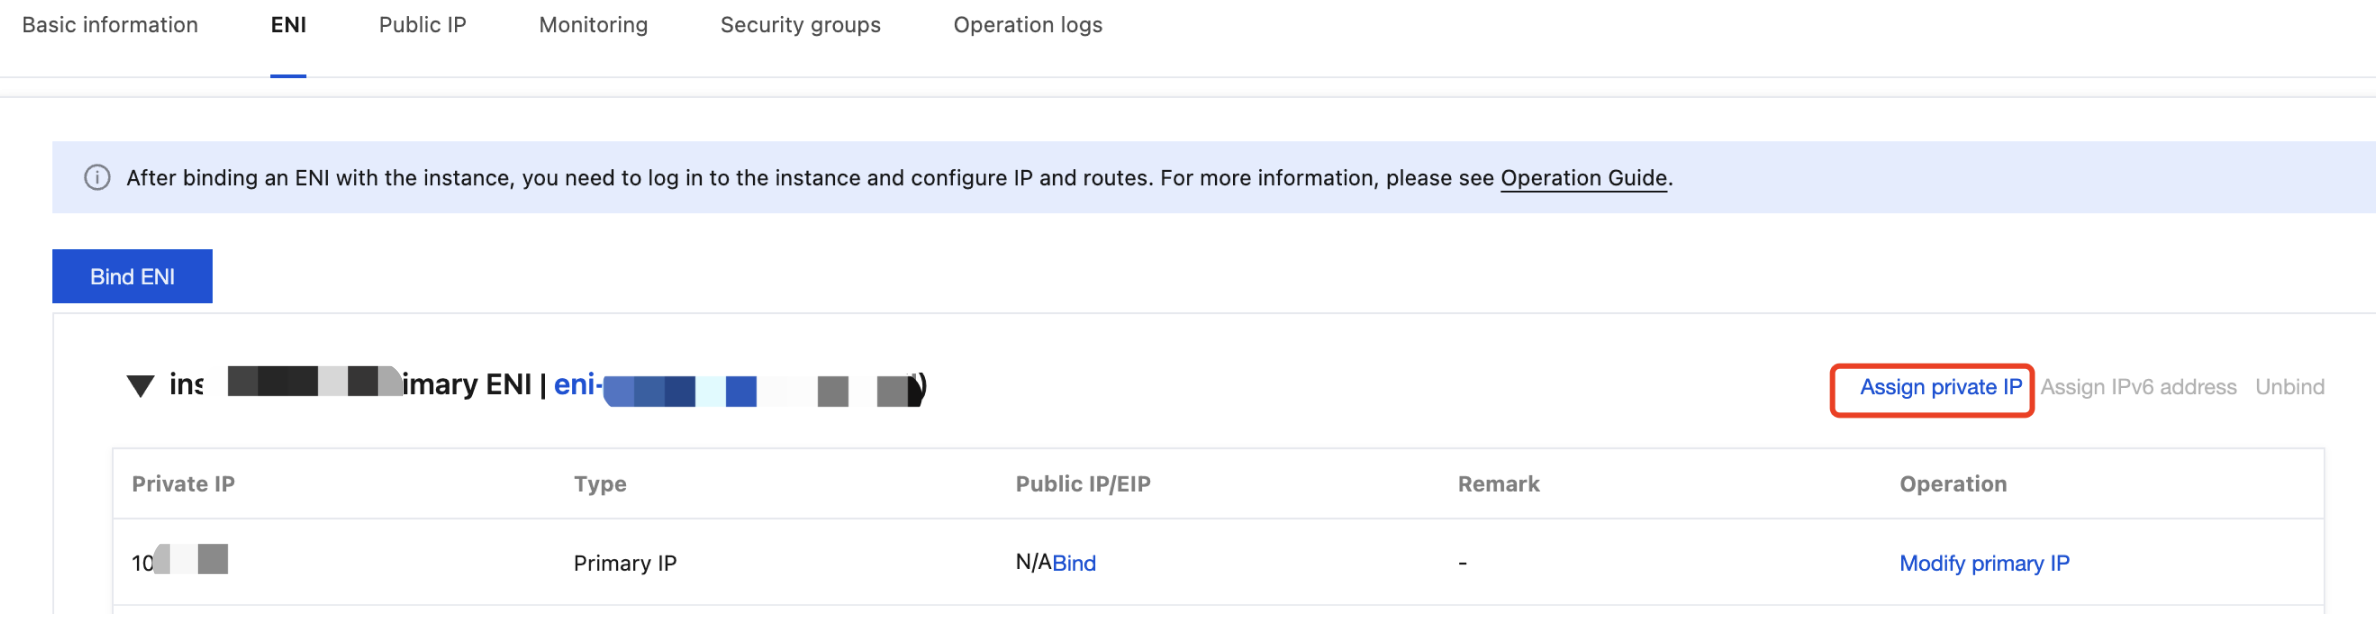
4. In the pop-up Allocate Private IP window, you can select Autofill or Manually Fill In as needed to assign a specific private IP address. If you need to assign multiple private IP addresses, click Add and fill in the private IP addresses to be assigned. After completion, click Confirm.
Note
If you choose to manually fill in the private IP address to be assigned, confirm that the address you fill in is within the subnet IP range and that it is not a system-reserved IP address.
For example, if the subnet IP range is
10.0.3.0/24, the range of the private IP address you can fill in is 10.0.3.2 - 10.0.0.254. In this operation, 10.0.3.99 is manually filled in as an example.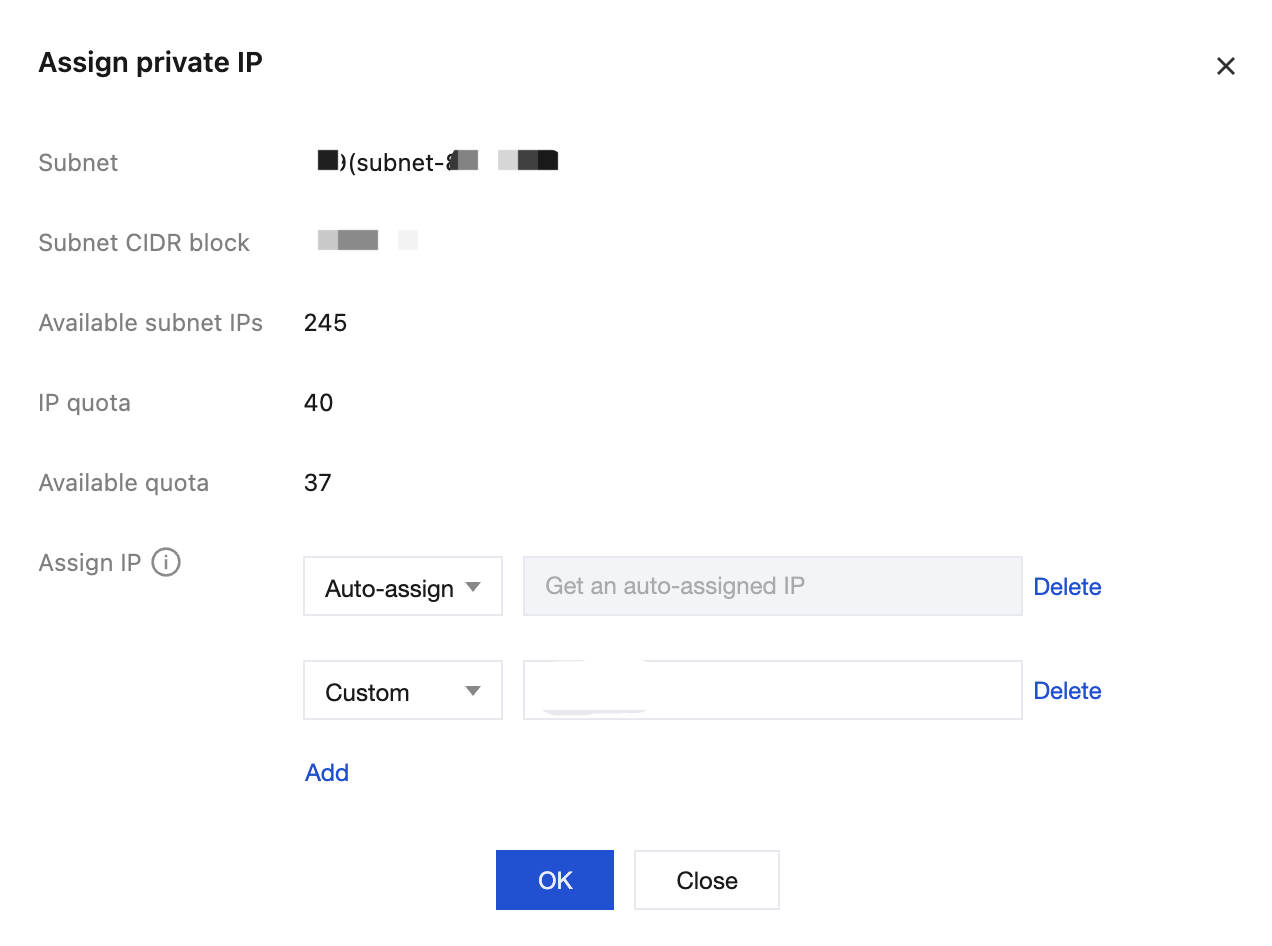
5. On the ENI page, you can see the information on all the private IP addresses assigned for the ENI.
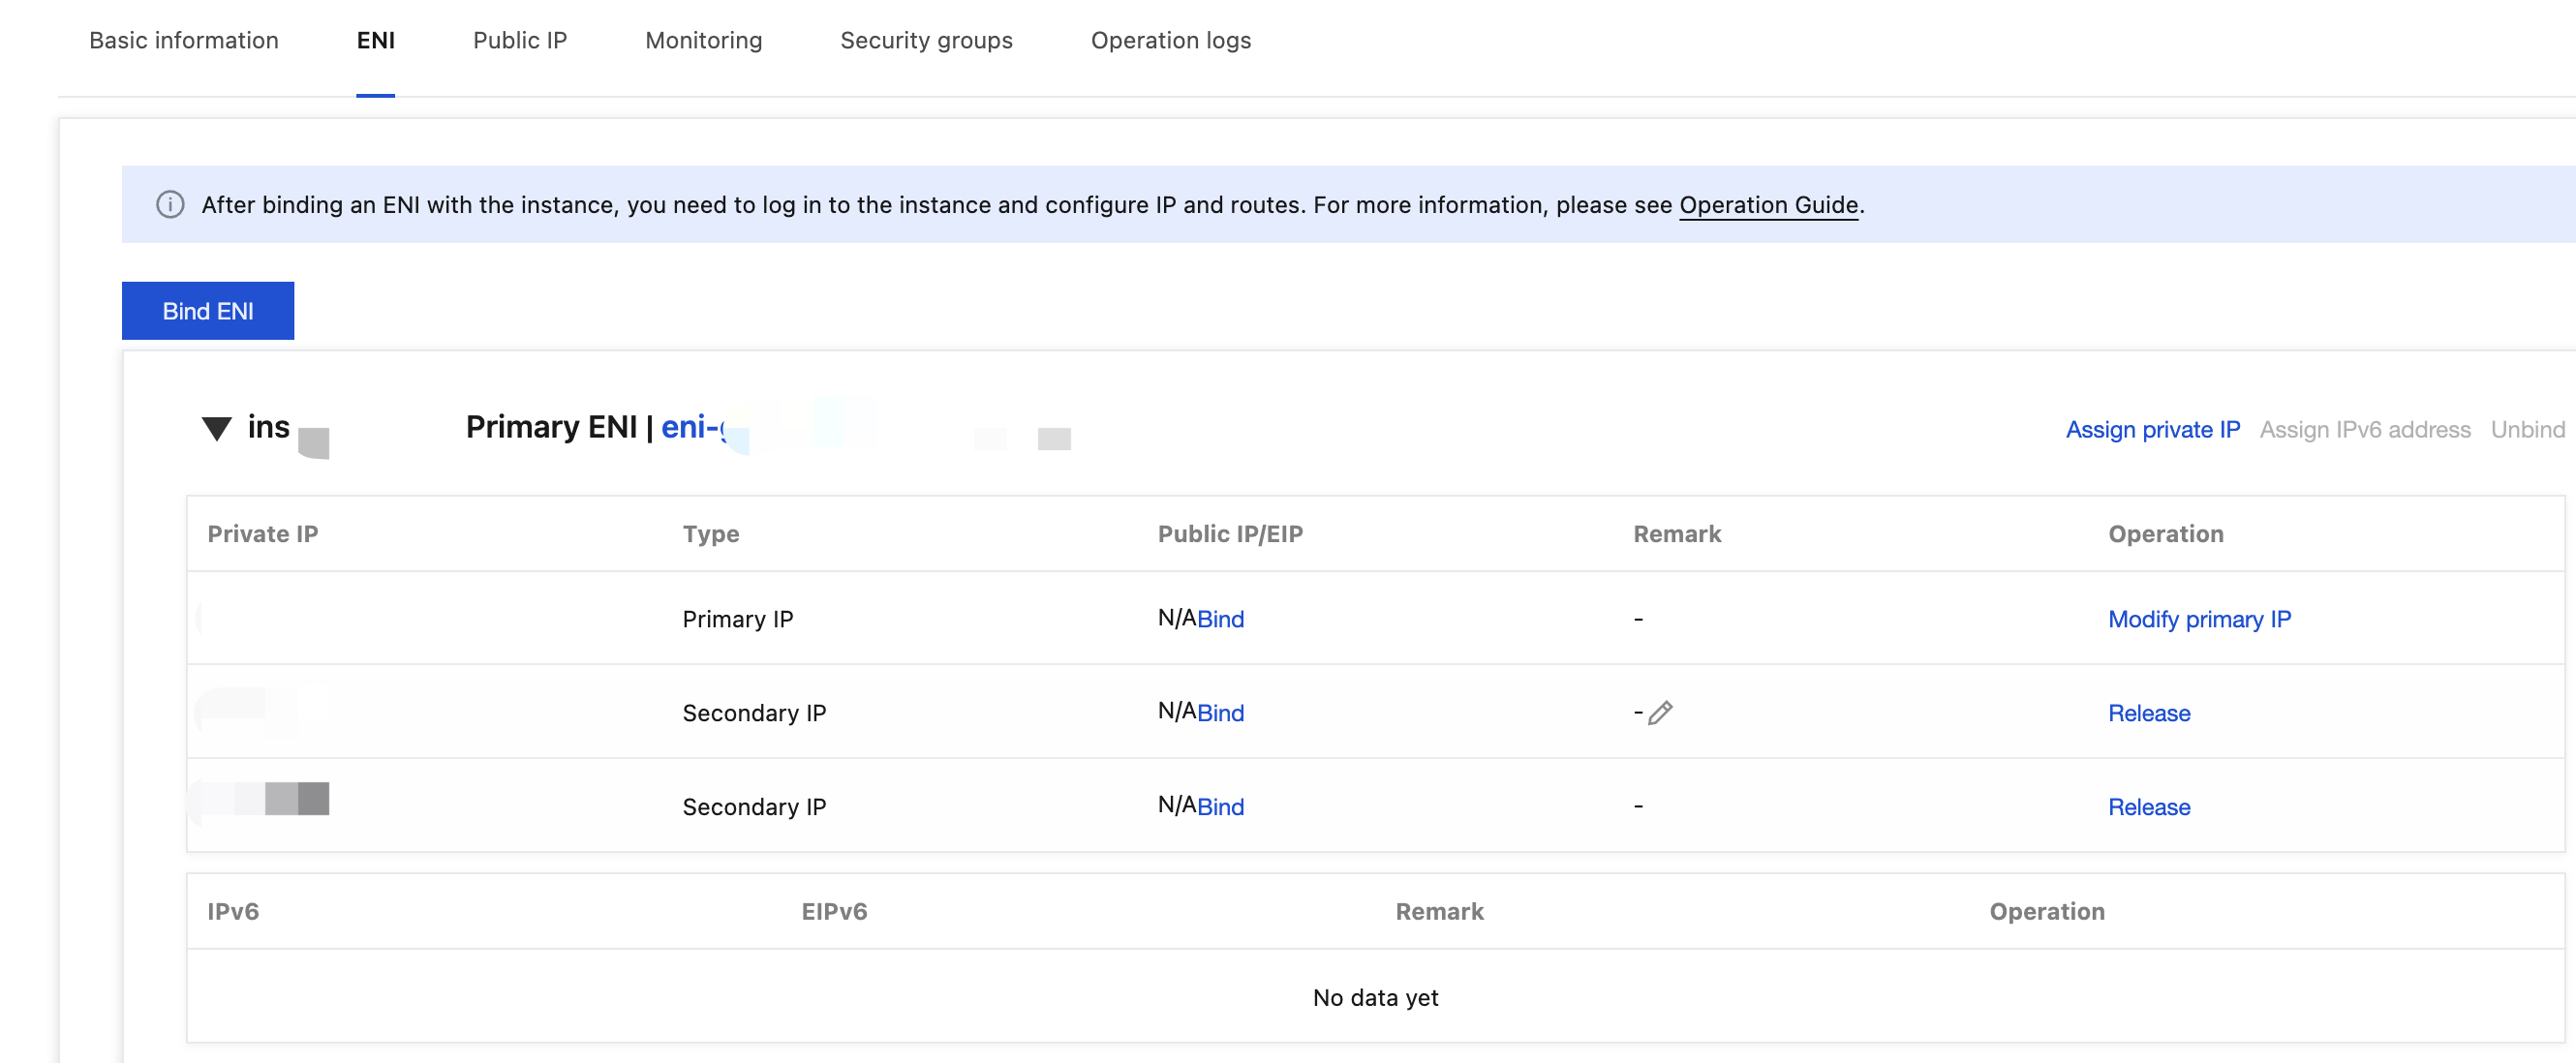
Note:
The above operations are applicable to the primary and secondary ENIs mounted to a CVM. You can also use the ENI console to assign private IP addresses by ENI instance.
Step Two: Binding an EIP
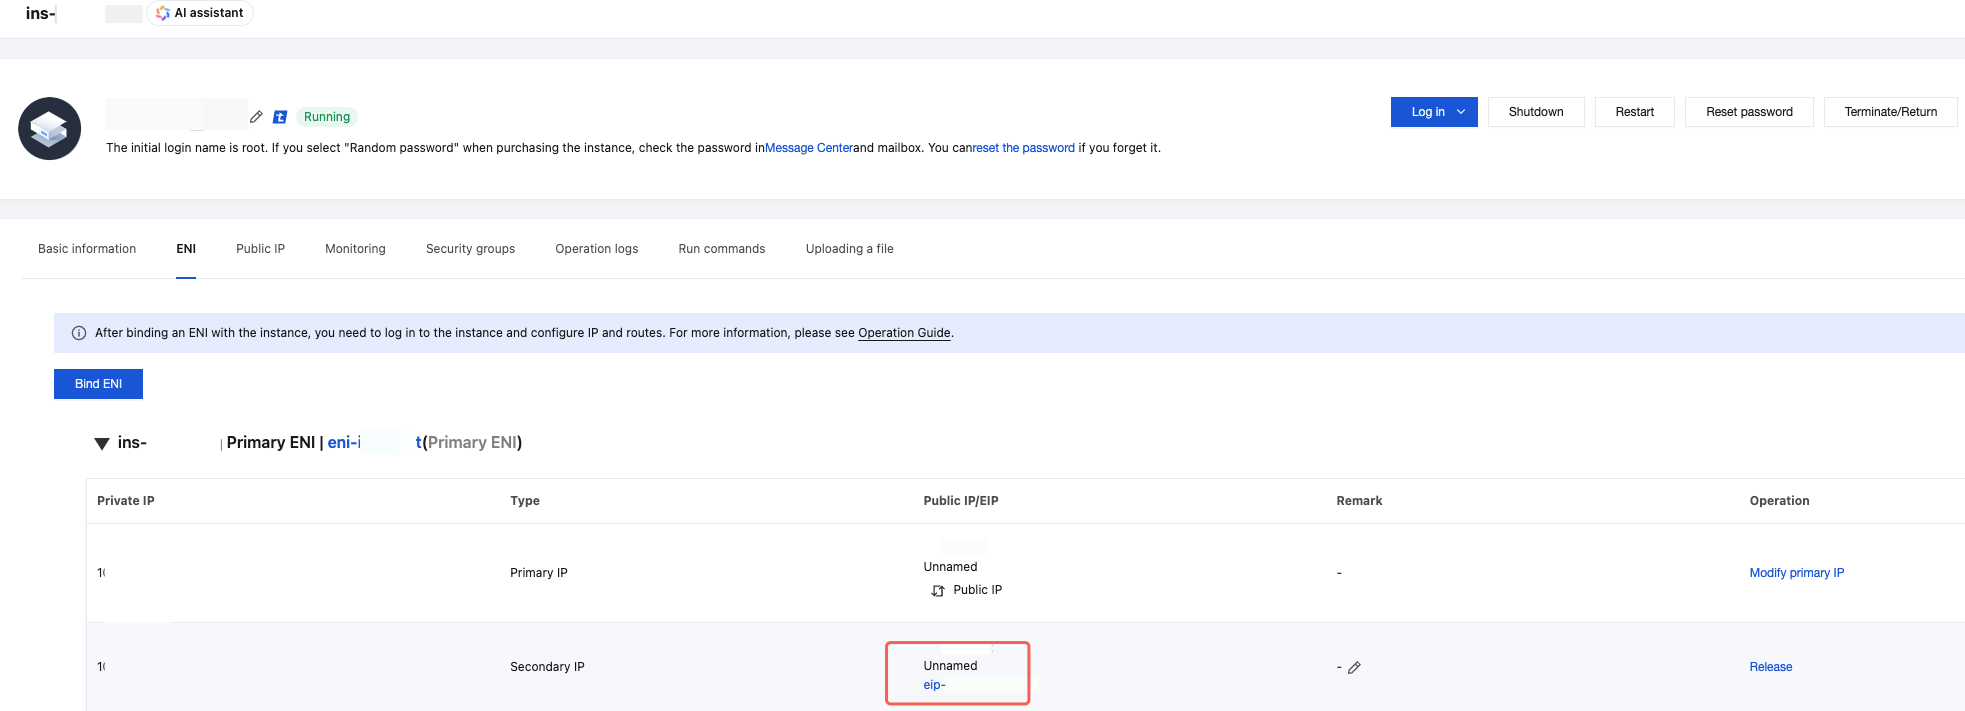
1. On the ENI page of the CVM instance, you can see the primary and secondary ENIs of the CVM.
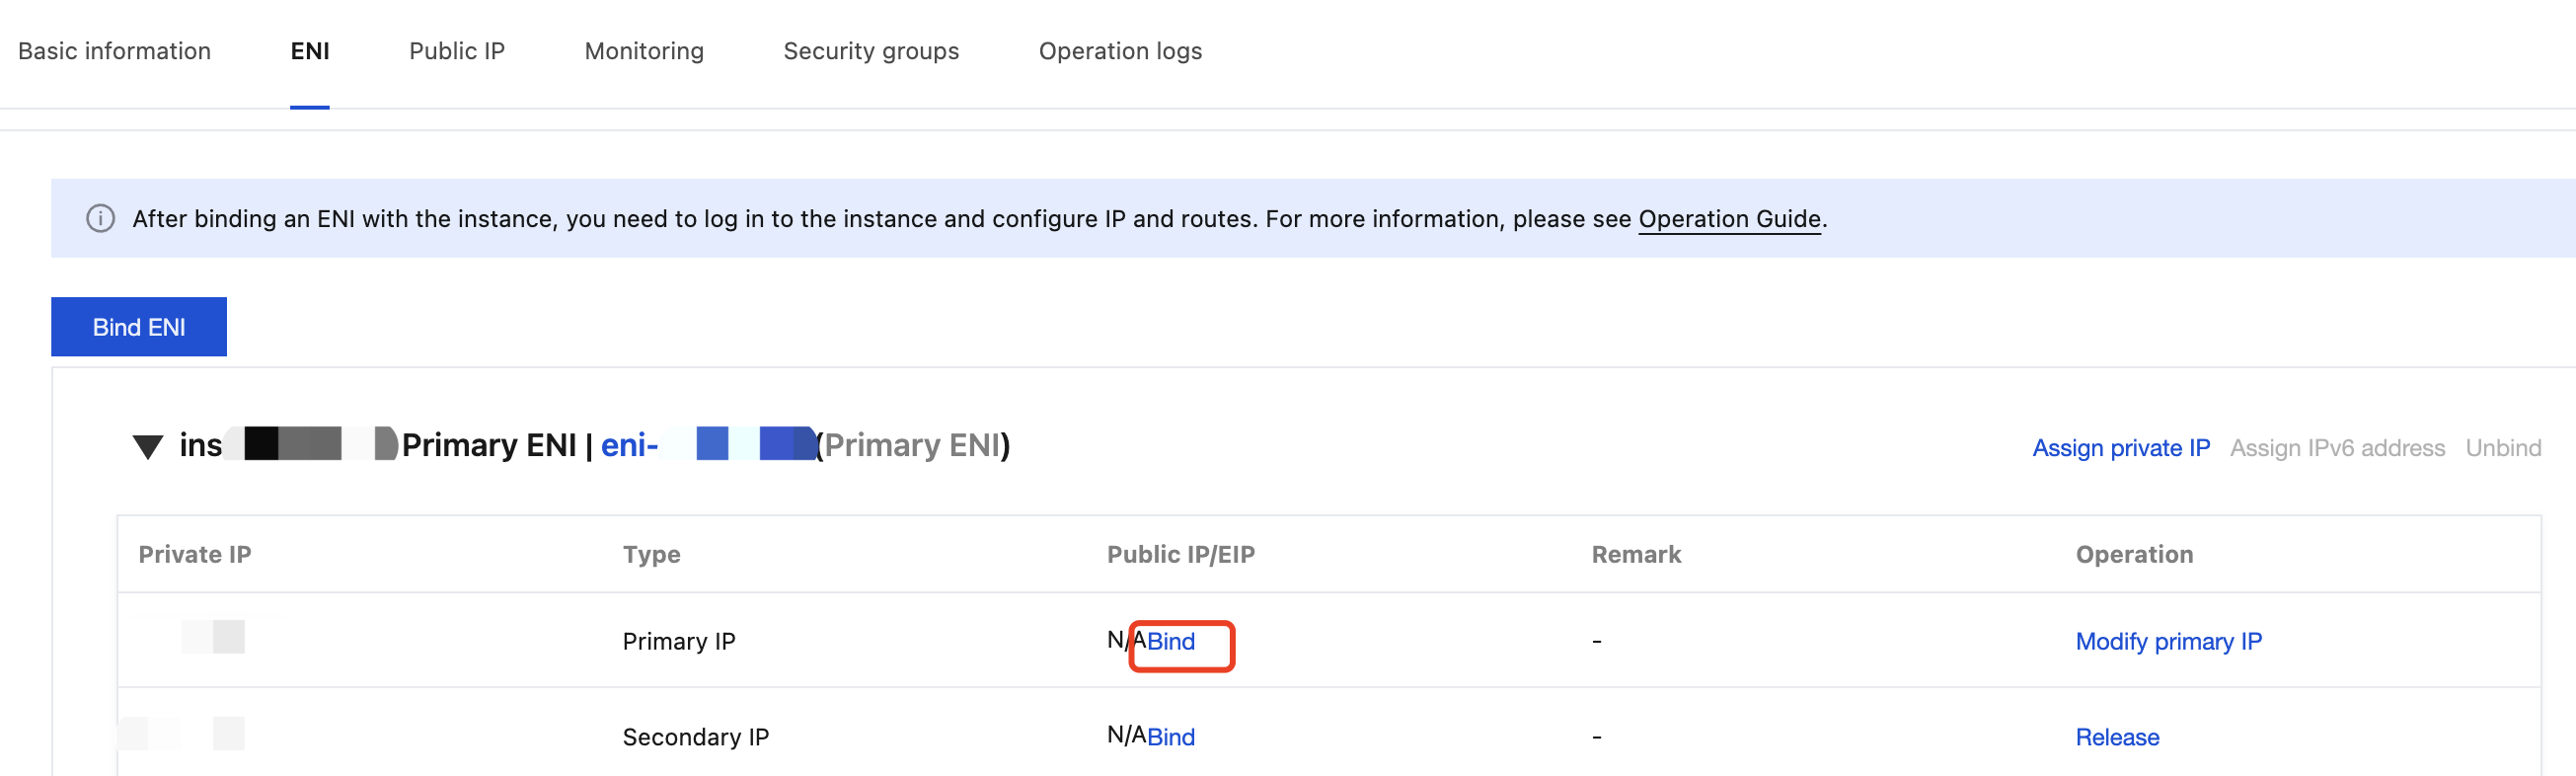
2. In the row of the assigned private IP address, click Bind.
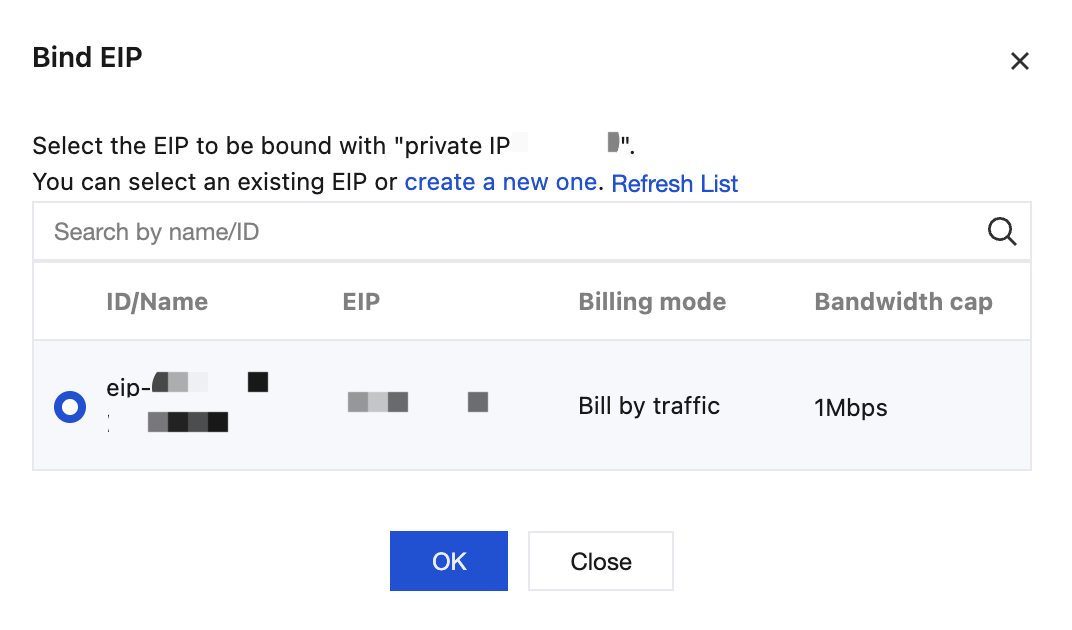
3. In the pop-up Bind Elastic IP window:
If there is an optional EIP, select it and click OK.
If there is no optional EIP, you can click Create at the top of the pop-up to apply for one. For more information, see Applying for an EIP. After the application is successful, return to the pop-up and click Refresh, and you can see the EIP you applied for. Select it and click Confirm.
4. On the ENI page of the CVM instance, you can see the binding configuration of the private IP address and the EIP.
Step Three: Configuring the ENI of the CVM
If you have assigned multiple private IP addresses for the ENI, you also need to perform configuration for it in the operating system of the CVM to ensure that those private IP addresses can be identified and routed by the operating system normally. For more information, see Configuring a Secondary Private IP Address in the ENI product documentation.
If you need to bind multiple secondary ENIs and private IP addresses to a CVM, see Binding and Configuring an ENI.
フィードバック