Configuring Multiple Secondary Private IP Addresses for a CVM Instance
ダウンロード
フォーカスモード
フォントサイズ
最終更新日: 2026-08-04 18:10:57
AI翻訳
By configuring multiple secondary private IP addresses for the ENI of a single CVM, you can increase the number of public IP addresses (including common public IP addresses and EIPs) that can be bound to the ENI to migrate traffic and improve the CVM utilization. This document describes how to configure multiple secondary private IP addresses for both Linux and Windows CVMs.
Prerequisites
You have purchased Linux CVM and Windows CVM, and the ICMP protocol is enabled in the security group.
Ensure that your public IP is within the limit. For specific limits, see Limits.
Ensure that the number of private IP addresses bound to a single network interface is within the limit. For specific limits, see ENI - Limits.
Directions
If you need to bind multiple IP addresses to a single ENI, you can apply for a secondary private IP address for the ENI. The operations are as follows:
2. Click IP and Network Card > ENI to open the ENI list page.
3. Click the instance ID for which you want to request for a secondary private IP to open the details page.
4. Click IPv4 Address Management in the tab to view the information on the private IP address.
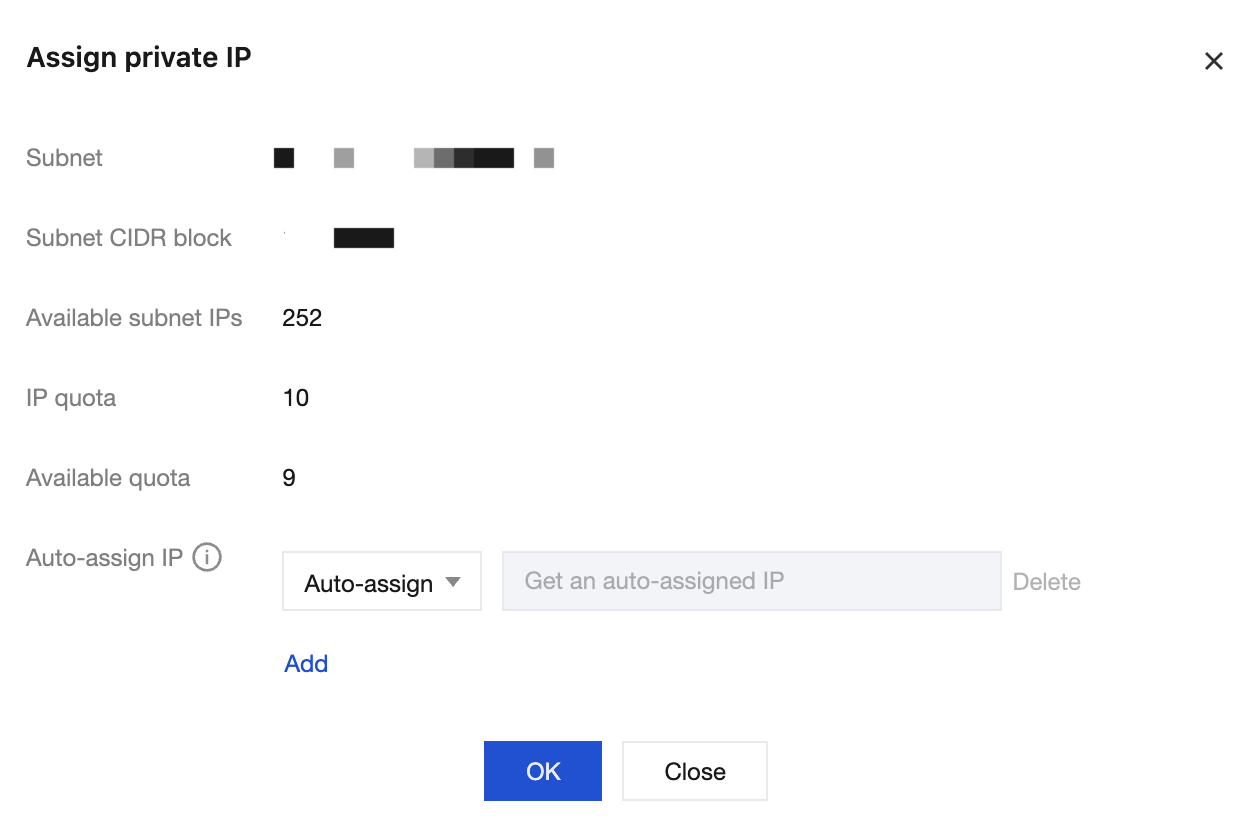
5. Click Allocate Private IP. In the pop-up, select automatic assignment or manually fill in the private IP address to be assigned, and click Confirm.
Note:
If you choose to manually fill in the private IP address, confirm that it is within the subnet IP range and that it is not a system-reserved IP address.
For example, if the subnet IP range is 10.0.0.0/24, the range of the private IP address you can fill in is 10.0.0.2 - 10.0.0.254.
Step 2: Configuring a Secondary Private IP Address
Log in to the CVM bound to the above ENI, configure a secondary private IP address, and make it take effect. You can see the following operations:
Linux CVM
RHEL Series Operating Systems
Applicable operating systems: TencentOS, CentOS 6/7/8, Red Hat 6/7/8, AlmaLinux, Rocky Linux, and OpenCloudOS.
Sample ENI: The primary ENI eth0 is taken as an example to demonstrate the operations. If your operation object is a secondary ENI, modify the ENI identifier based on the actual situation.
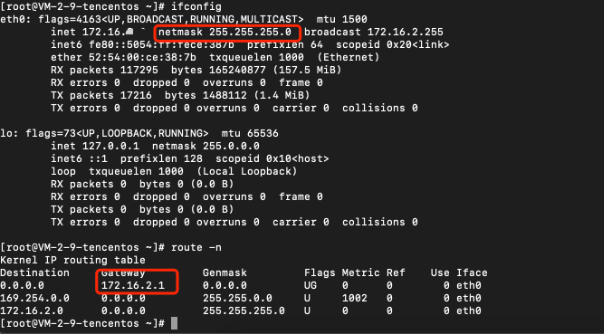
1. View the current network information on the CVM and use the route -n command to query the default gateway. Here, netmask is 255.255.255.0, and Gateway (the default gateway) is 172.16.2.1.
2. Modify the network configuration file.
3. If you want to configure a single private IPv4 address, run the vi /etc/sysconfig/network-scripts/ifcfg-eth0:0 command and add the corresponding configuration items.
4. The configuration information of the file is as follows:
[root@mufei /]# vi /etc/sysconfig/network-scripts/ifcfg-eth0:0
DEVICE=eth0:0 # It is modified to eth0:0 to be consistent with the filename.
BOOTPROTO=static # The protocol is static, and none can also be used.
HWADDR=00:0C:29:6F:62:A7 # MAC address, consistent with eth0.
ONBOOT=yes # Enable this ENI at startup.
IPADDR=172.16.2.6 # Newly bound IP address.
NETMASK=255.255.255.0 # Subnet mask.
GATEWAY=172.16.2.1 # Gateway.
5. Either start the ENI or restart the network service.
6. Restart the ENI, as shown below:
[root@mufei /]# ifup eth0:0
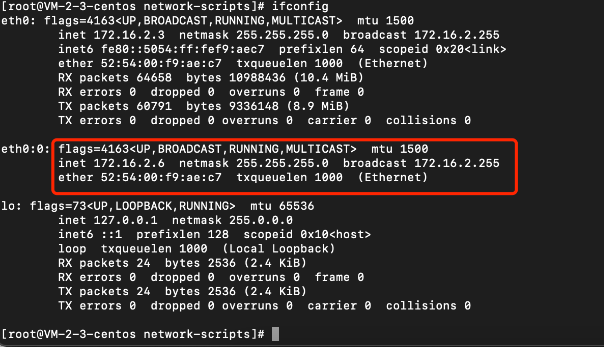
7. Run ifconfig to check the configuration effect.
8. The sample effect of configuring 1 secondary private IP address is shown in the figure below:
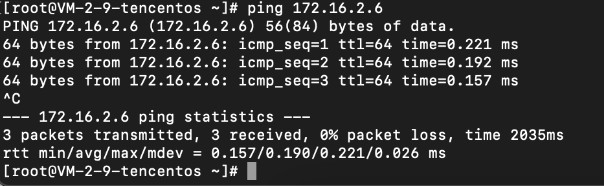
After completing the configuration, ping the secondary IP address from other CVMs in the same VPC to test whether its connectivity is normal.
Debian Series Operating Systems
Operating systems: Ubuntu 18/20/22, Ubuntu 14/16, and Debian 8/9/10.
Sample ENI: The primary ENI eth0 is taken as an example to demonstrate the operations. If your operation object is a secondary ENI, modify the ENI identifier based on the actual situation.
1. View the current network information on the CVM and use the route -n command to query the default gateway.
2. Based on the operating system for the instance, select the method for configuring the secondary private IP address.
Debian series: Ubuntu 18/20/22.
In Ubuntu 18.04, Netplan is used for network configuration management, which differs greatly from that in 16.04 and previous versions.
a. Modify the configuration file: sudo vim /etc/netplan/50-cloud-init.yaml.
The content of the configuration file is shown below:
- 172.16.2.13/24 # Primary IP address, with 24 being the mask of the subnet IP range.
- 172.16.2.17/24 # Secondary IP address, with 24 being the mask of the subnet IP range.
match:
macaddress: 52:54:00:cb:12:30
gateway4: 172.16.2.1
b. After the configuration, run the effective command:
ubuntu@VM-2-13-ubuntu:~$ sudo netplan apply
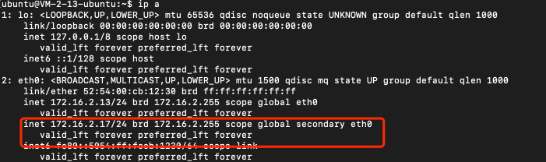
c. Use the "IP a" command to view the ENI information and confirm that the configuration has taken effect.
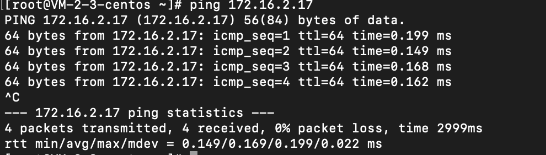
d. Use a CVM in the same VPC to test the secondary IP address and confirm that the connectivity is normal.
Debian series: Ubuntu 14/16 and Debian 8/9/10.
a. Run the vi /etc/network/interfaces command to open the network configuration file and add the corresponding configuration items to it.
auto eth0:0
iface eth0:0 inet static
address 172.16.2.2 # Secondary IP address
mask 255.255.255.0
b. Run /etc/init.d/networking restart to make the ENI configuration take effect.
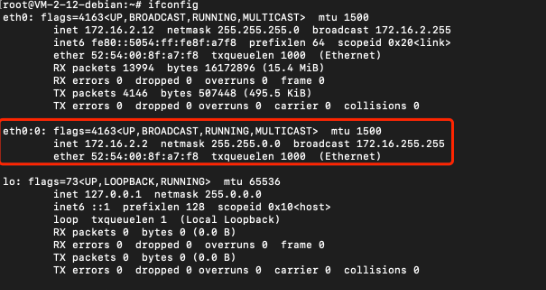
c. Run ifconfig to check the configuration effect.
SLES Series Operating Systems
Applicable operating systems: OpenSUSE Leap 15 and OpenSUSE Leap 42.
Sample ENI: The primary ENI eth0 is taken as an example to demonstrate the operations. If your operation object is a secondary ENI, modify the ENI identifier based on the actual situation.
1. Run the vi /etc/sysconfig/network/ifcfg-eth0 command to open the network configuration file and add the following configuration items to it:
IPADDR_0=172.16.2.8 # Secondary IP address
NETMASK_0=255.255.255.0 # Subnet mask
LABEL_0='0'# Virtual network interface No.
2. Run the service network restart or systemctl restart network command to restart the network service.
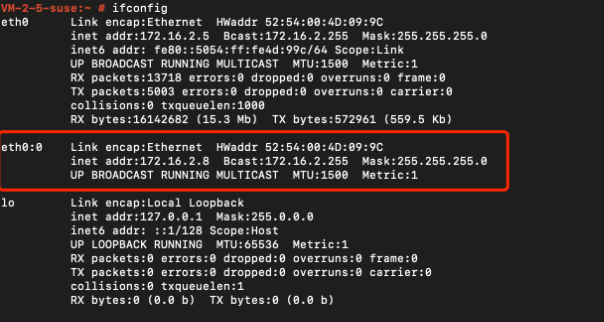
3. Run ifconfig to check the configuration effect:
Windows CVM
This document uses Windows Server 2025 as an example.
1.
Execute the following
steps to view the CVM's IP address, subnet mask, default gateway, and DNS server:
1.1 On the operating system interface, click
in the lower left corner, then click
to open the Windows PowerShell window, and execute the following command:
ipconfig /all
1.2 Record the IPv4 address, subnet mask, default gateway, and DNS server addresses in the output network interface information.
2. Go to the operating system's Control Panel > Network and Internet > Network and Sharing Center, and click the ENI named Ethernet for editing.
3. In the Ethernet Status pop-up window, click Properties.
4. In the Ethernet Properties pop-up window, select Internet Protocol Version 4 (TCP/IPv4) and click Properties.
5. In the Internet Protocol Version 4 (TCP/IPv4) Properties pop-up window, fill in the following information:
The backup DNS server in the above step 1. If no backup DNS server is listed, you do not need to fill in this parameter.
6. Click Advanced to configure the secondary private IP address.
7. Under the IP Address pane in the Advanced TCP/IP Settings pop-up window, click Add.
8. In the TCP/IP Address pop-up window, fill in the secondary private IP address and the subnet mask from the above step 1, and click Add, as shown in the figure below.
9. In the Internet Protocol Version 4 (TCP/IPv4) Properties pop-up window, click Confirm.
10. In the Ethernet Properties pop-up window, click Confirm to complete the configuration.
11. In the Ethernet Status pop-up window, click Detailed Information to view the configured IP address information, as shown in the figure below.