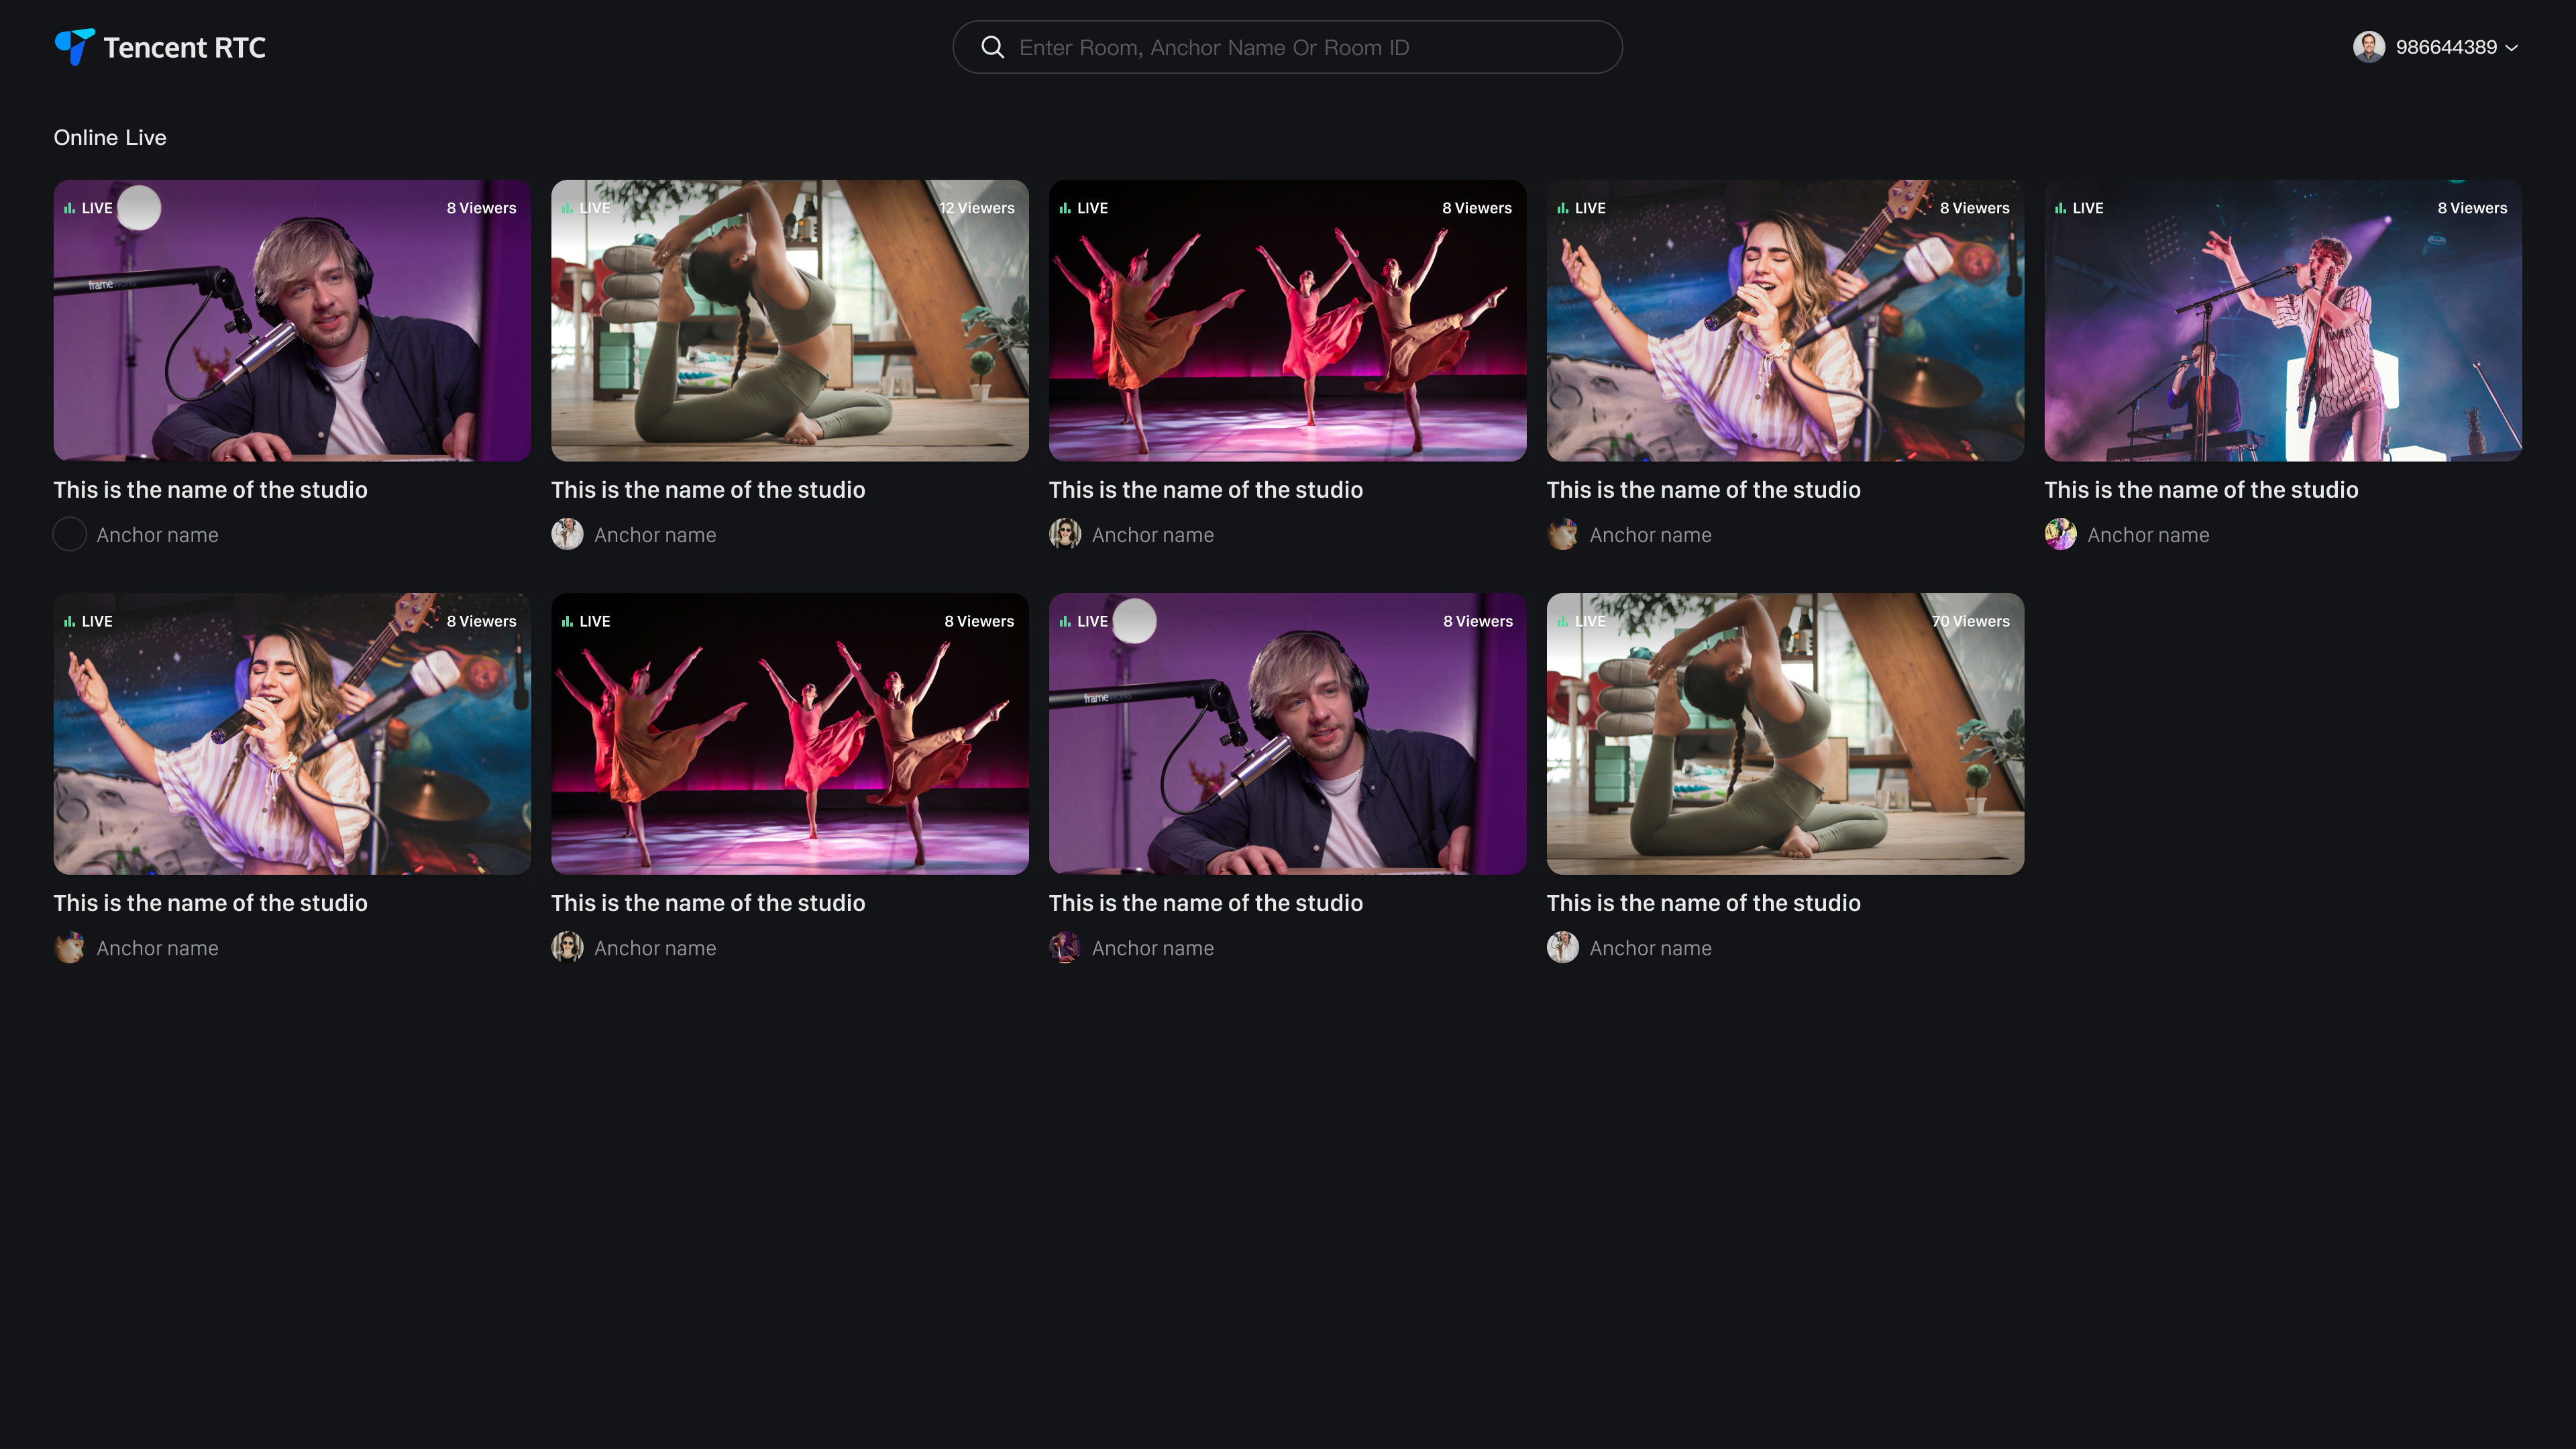
Live Stream List (Web React Desktop Browser)
Download
フォーカスモード
フォントサイズ
Feature Overview
This guide walks you through the live list page in the TUILiveKit React Demo, showing you how to integrate it into your project and customize its styles and features.
Quick Integration
Step 1: Prerequisites
Step 2: Install Dependencies
npm install tuikit-atomicx-react @tencentcloud/uikit-base-component-react --savenpm install sass --save-dev
pnpm add tuikit-atomicx-react @tencentcloud/uikit-base-component-reactpnpm add sass --dev
yarn add tuikit-atomicx-react @tencentcloud/uikit-base-component-reactyarn add sass --dev
Step 3: Integrate the Live List Page
Create
LiveListView.tsx and LiveListView.module.scss files in your project. Copy the code below to integrate the live list page.Note:
You can copy the following code directly, or visit the Audience Viewing source code on GitHub for the complete implementation.
import React, { useEffect, useCallback } from 'react';import { useNavigate, useSearchParams } from 'react-router-dom';import { LiveList, useLoginState } from 'tuikit-atomicx-react';import type { LiveInfo } from 'tuikit-atomicx-react';import { UIKitProvider, MessageBox } from '@tencentcloud/uikit-base-component-react';import styles from './LiveListView.module.scss';const LiveListView: React.FC = () => {const navigate = useNavigate();const [searchParams] = useSearchParams();const { loginUserInfo, login, setSelfInfo } = useLoginState();const handleLiveRoomClick = (liveInfo: LiveInfo) => {if (loginUserInfo?.userId === liveInfo.liveOwner?.userId) {MessageBox.alert({title: 'Warning',content: 'Cannot view your own live room',});return;}if (liveInfo?.liveId) {// You can add business logic here to navigate to the viewing page// // Example of navigating from [Live List Page] to [Audience Viewing Page]// const newParams = new URLSearchParams(searchParams);// newParams.set('liveId', liveInfo.liveId);// // Put the live room ID in URL parameters, so the audience viewing page can enter the corresponding live room based on URL parameters// navigate(`/live-player?${newParams.toString()}`);}};const initLogin = useCallback(async () => {try {await login({SDKAppID: 0, // Please replace with your SDKAppID (obtained when activating service)userID: '', // Please replace with your user IDuserSig: '', // Please replace with your user signature (see [Step 1: Environment Configuration and Service Activation] document for detailed instructions)});await setSelfInfo({userName: '', // User nickname, displayed in member list and chat messages. If not set, user ID will be displayedavatarUrl: '', // User avatar, must be a complete URL image address, e.g.: https://your.domain.com/avatar-default.png});} catch (error) {console.error('Login failed:', error);}}, [login, setSelfInfo]);useEffect(() => {async function init() {await initLogin();}if (!loginUserInfo?.userId) {init();} else {console.log('[LiveList]User already logged in:', loginUserInfo.userId);}}, [initLogin, loginUserInfo?.userId]);return (<UIKitProvider theme="dark"><div className={styles.liveList}>{/* Live list component: set to display 5 columns, register live room click event handler */}<LiveList columnCount={5} onLiveRoomClick={handleLiveRoomClick} /></div></UIKitProvider>);};export default LiveListView;
.liveList {display: flex;flex-direction: column;width: 100%;height: 100%;background-color: var(--bg-color-topbar);color: var(--text-color-primary);overflow: auto;box-sizing: border-box;}
Step 4: Configure Routes
To navigate from the live list to the viewer page, configure React Router. Create or update
src/router/index.tsx in your project, then import and use it in your main file (e.g., main.tsx or App.tsx). See the GitHub Code Example for reference.1. Configure Route Component
Set up the live list page route in your router configuration.
// src/router/index.tsximport { createHashRouter } from 'react-router-dom';import { LiveListView } from '../views/LiveList';import { LivePlayerView } from '../views/LivePlayer';// Route protection componentconst ProtectedRoute = ({ children }: { children: React.ReactNode; }) => {return (<>{children}</>);};const routes = [// Live List{path: '/live-list',element: <LiveListView />,},// // If you need to implement clicking the live room cover in the live list to navigate to the live viewing page, you need to configure the viewing page route// // For viewing page integration, please refer to [Audience Viewing -> Audience Viewing (Web React)]// {// path: '/live-player',// element: <LivePlayerView />,// }];export const router = createHashRouter(routes.map(route => ({...route,element: <ProtectedRoute>{route.element}</ProtectedRoute>,})));
2. Configure App.tsx File
In the
App.tsx file, use the above route component src/router/index.tsx.// src/App.tsximport { RouterProvider } from 'react-router-dom'import { router } from './router'import './App.css'function App() {return (<RouterProvider router={router} />)}export default App
Step 5: Start the Project
Navigate to the project root directory and start the development server. Once running, you can access the live list page.
npm run dev
On first launch, the list may be empty because no live streams exist. Visit our Online Streaming Website, log in with your SDKAppID and user credentials, start a live stream, then refresh the live list page to see the room appear.
Note:
To properly test live streaming features, use different user IDs for streaming and viewing. Otherwise, login conflicts will occur and prevent you from experiencing the features.
Customization
Theme and Language
You can use the UIKitProvider component to modify the default theme and language.
UIKitProvider Parameter | Options | Default Value |
theme | "light" | "dark" | "light" |
language | "zh-CN" | "en-US" | - |
1. Global Setting in App.tsx
In App.tsx, use UIKitProvider as the root element.
import { RouterProvider } from 'react-router-dom'import { UIKitProvider } from '@tencentcloud/uikit-base-component-react'import { router } from './router'import './App.css'function App() {return (<UIKitProvider theme="dark" language='zh-CN'><RouterProvider router={router} /></UIKitProvider>);}export default App
2. Setting in Individual Page or Component
In React components, use UIKitProvider as the root node element. The following sample code is extracted from the code snippet in Quick Integration > Step 3.
// ... other imports omittedimport { UIKitProvider } from '@tencentcloud/uikit-base-component-react'const LiveListView: React.FC = () => {// ... other code omittedreturn (<UIKitProvider theme="dark"><div className={styles.liveList}><LiveList columnCount={5} onLiveRoomClick={handleLiveRoomClick} /></div></UIKitProvider>);};export default LiveListView;
Set Nickname and Avatar
The above Quick Integration > Step 3 already includes nickname and avatar setting code, as shown below. Your display name and avatar will appear in member lists and chat messages across all live rooms. If not set, the nickname defaults to your user ID and the avatar to a default image.
const initLogin = useCallback(async () => {try {await login({SDKAppID: 0, // SDKAppID obtained when activating serviceuserID: '', // UserID user IDuserSig: '', // userSig user signature, see [Preparation] document for detailed instructions});await setSelfInfo({userName: '', // User nickname, displayed in member list and chat messages. If not set, user ID will be displayedavatarUrl: '', // User avatar, must be a complete URL image address, e.g.: https://your.domain.com/avatar-default.png});} catch (error) {console.error('Login failed:', error);}}, [login, setSelfInfo]);
Next Steps
Congratulations! You've successfully integrated the live list page. Next, you can integrate the viewer page:
Feature | Description | Integration Guide |
Audience Viewing | Enable audiences to watch live streams, with features like co-hosting, room information display, online audience list, and live chat. |
フィードバック