弹性微服务应用访问公网(通过 NAT 网关)
Download
聚焦模式
字号
操作场景
运行在 TEM 上的应用,由于业务需求等原因,通常会有访问公网的需求。同时,小程序等场景中通常会有访问白名单的需求,此时要求访问公网的应用有固定的公网 IP。
基于上述需求,本文档将会详细介绍部署在 TEM 上的应用访问公网的方法。
整体思路:
TEM 中的应用部署在用户的环境中,环境和用户的 VPC 关联,即 TEM 中的应用本质上是部署在用户的 VPC 内。可通过为 VPC 配置 NAT 网关,并为 NAT Gateway 关联 EIP,实现 VPC 内的应用访问公网。
操作流程:
1. 部署 TEM 应用
2. 创建 NAT 网关实例
4. 验证公网访问
5. (可选)查询访问公网的 IP
操作步骤
步骤1:部署 TEM 应用
步骤2:创建 NAT 网关实例
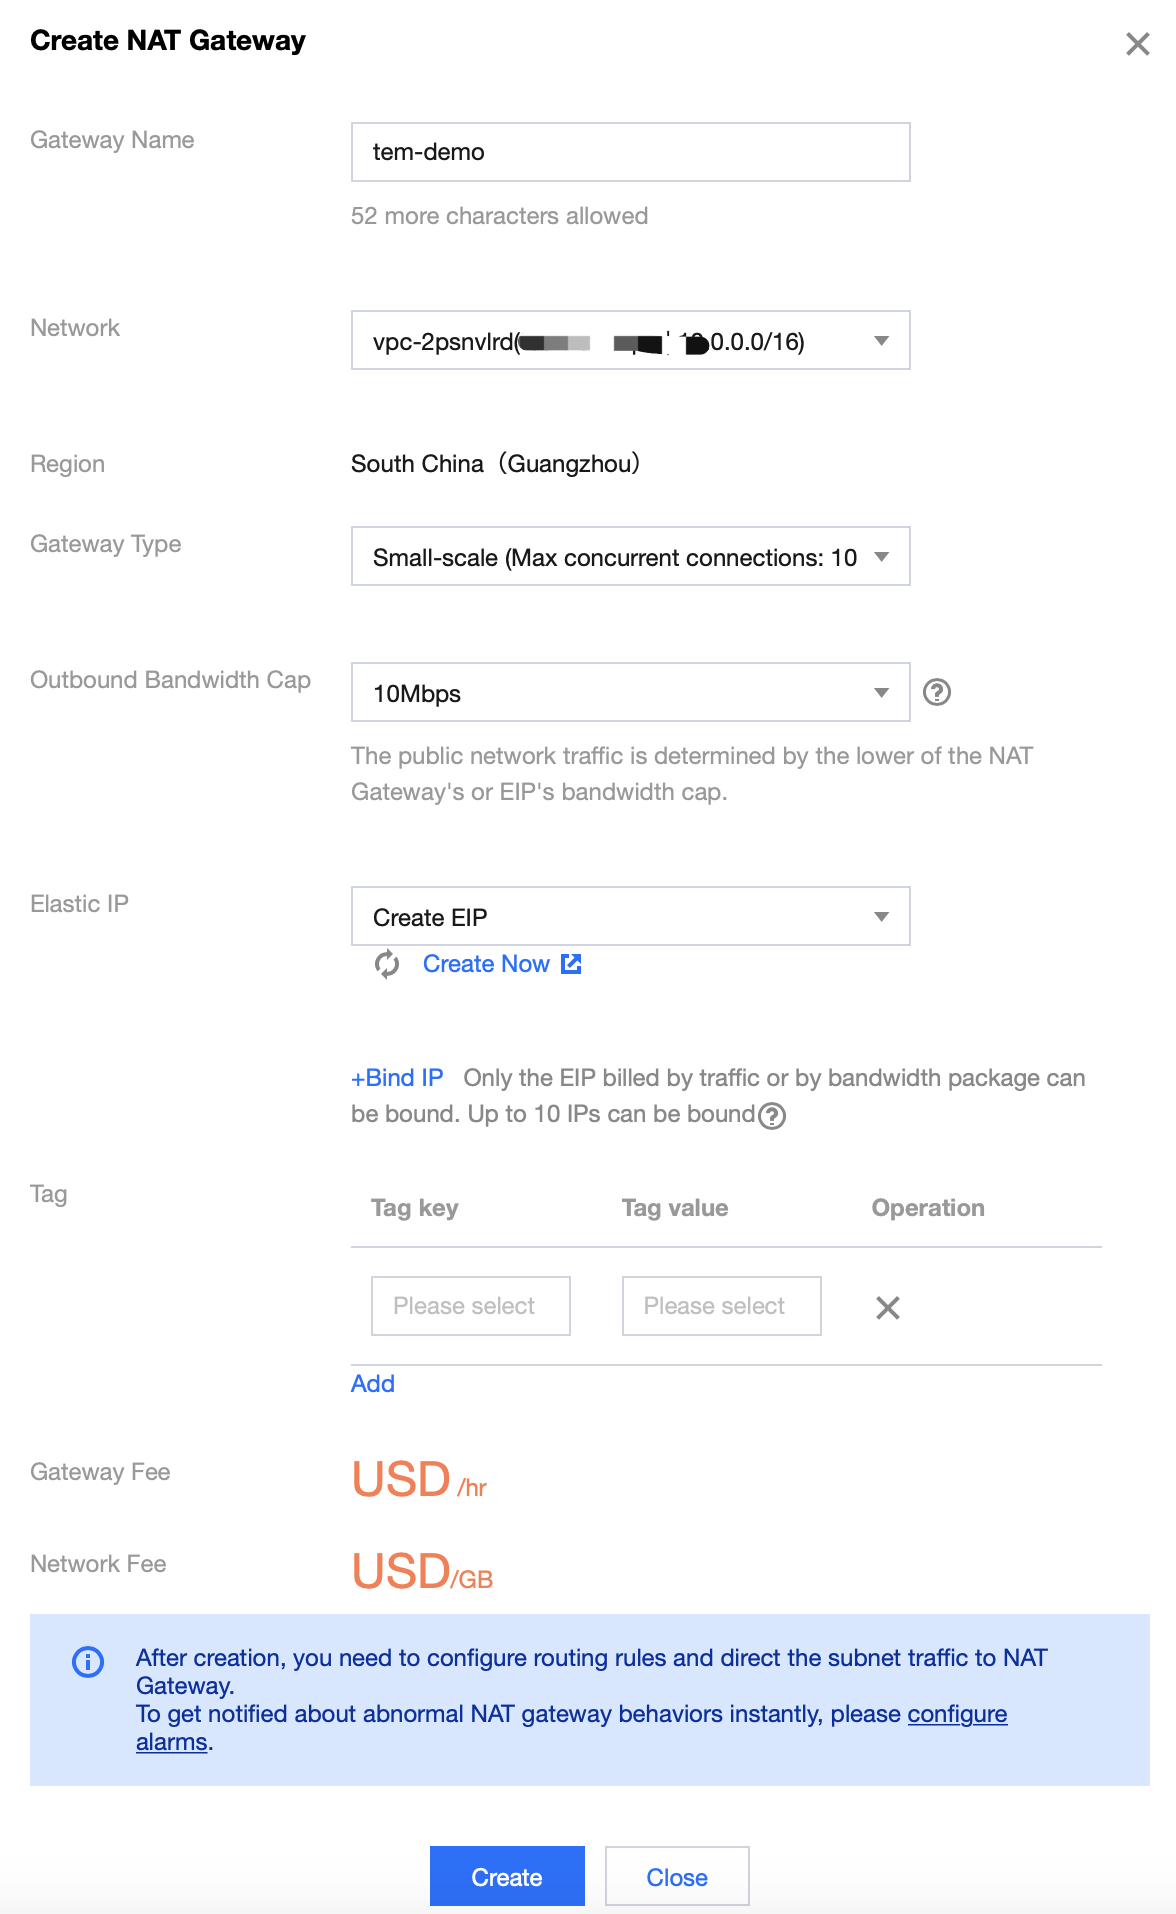
所属网络:与 TEM 应用所在环境的 VPC 保持一致。
弹性IP:若没有可用的公网弹性 IP (EIP),一键跳转进行购买,购买后在 NAT 网关购买页面中刷新即可查到。
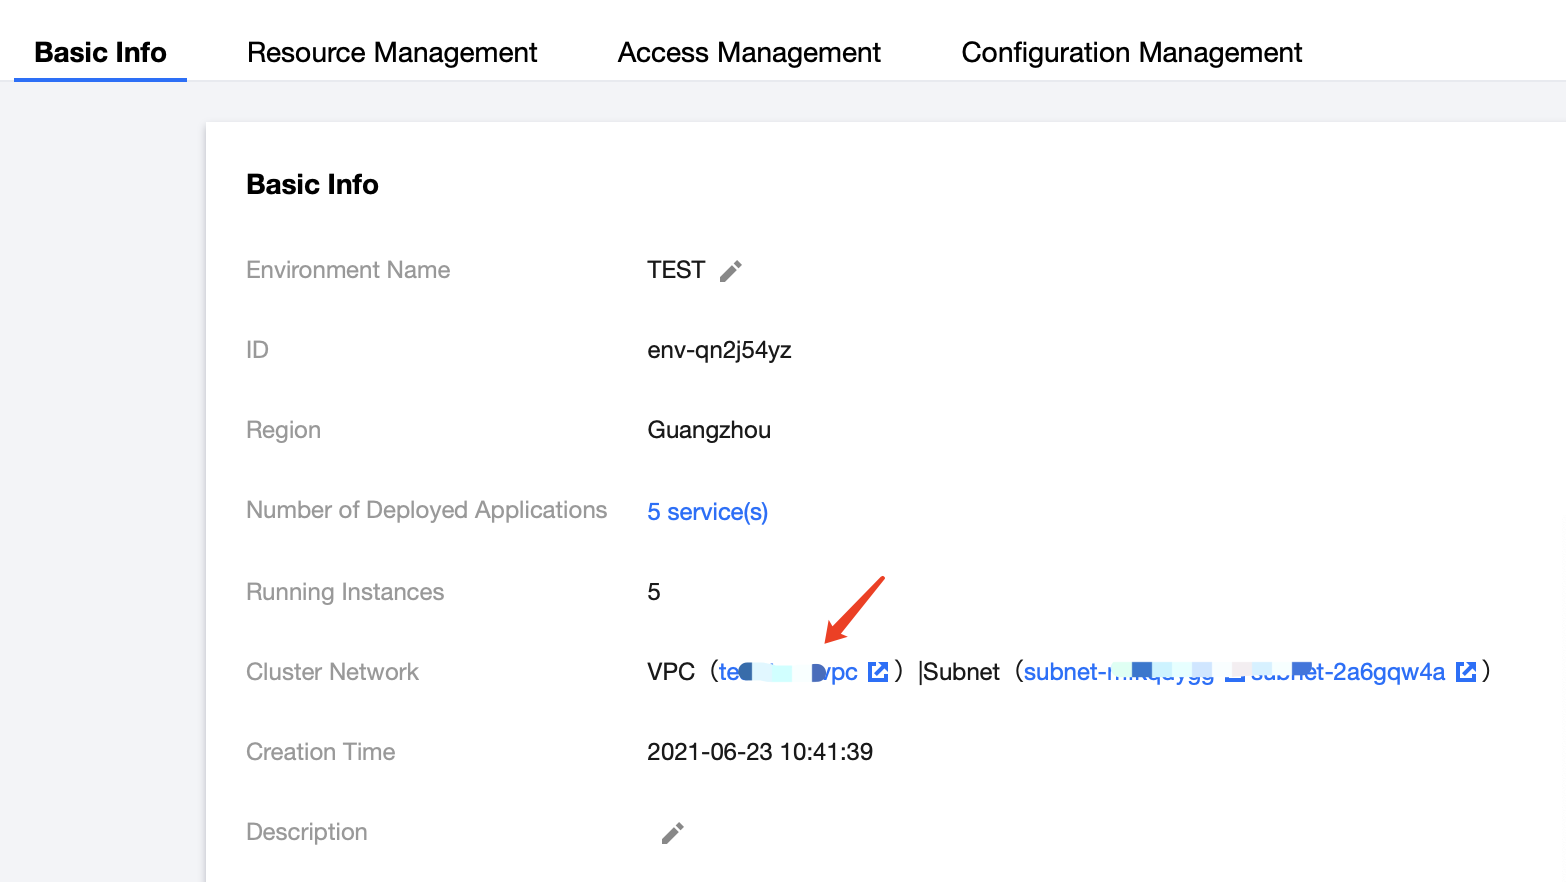
步骤3:在 VPC 控制台中配置 NAT 网关信息
1. 在 TEM 控制台环境页面单击 TEM 应用所在的环境卡片,进入环境基本信息页面。
2. 在集群网络处单击 VPC,跳转至 VPC 网络基本信息页面。
3. 单击路由表模块,进入路由表配置页面。
4. 在路由表页面,单击新建,配置路由表。
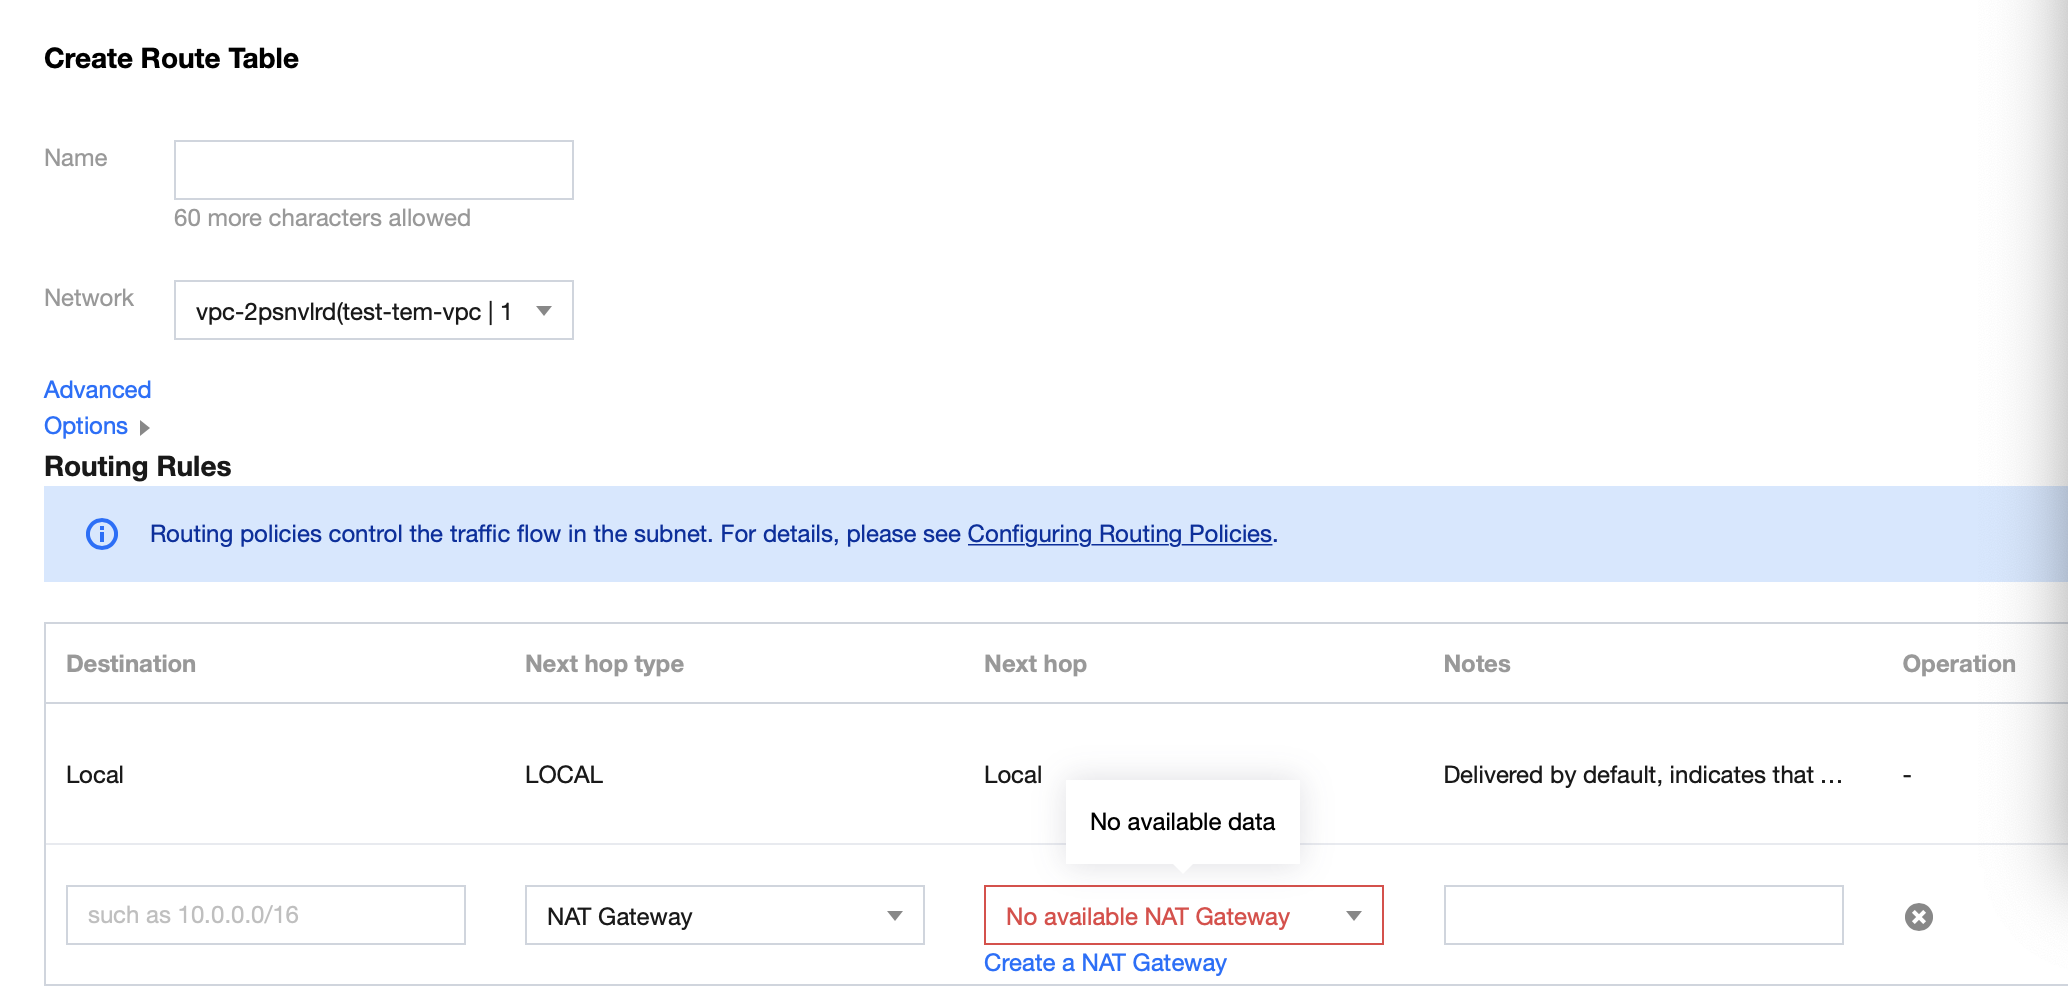
目的端:选择需访问的外网 IP 地址,支持配置 CIDR,例如,填写 0.0.0.0/0 会转发所有流量到 NAT 网关。
下一跳类型:选择NAT 网关。
下一跳:选择步骤2中创建的 NAT 网关。
5. 在创建好的路由表操作栏单击更多 > 关联子网,在关联的子网中选择 TEM 应用所在环境关联的子网。

步骤4:验证公网访问
1. 在 TEM 控制台的 应用管理 页面单击 TEM 应用的“ID”,进入应用实例列表页面。
2. 单击应用实例操作栏的 Webshell,进入到 Webshell 中。

3. 验证是否可以访问公网。

步骤5(可选):查询访问公网的 IP
1. 在 TEM 控制台 环境 页面单击 TEM 应用所在的环境卡片,进入环境基本信息页面。
2. 在集群网络处单击 VPC,跳转至 VPC 网络基本信息页面。

3. 单击NAT 网关模块,进入NAT 网关列表页面。
4. 单击目标NAT网关的“ID”,进入 NAT 网关基本信息页面,选择关联弹性 IP 页签,可获取访问公网的 IP。
额外费用
文档反馈