By default, Customer Identity and Access Management (CIAM) provides each tenant with a free email quota of 50 emails. After a tenant exceeds the free quota, the platform will stop sending emails for the tenant, including console test email OTPs and the OTP emails of authentication sources for portal login. To ensure the normal use of services, administrators need to configure email templates to provide email services for platform services.
Configuring email templates
1. Log in to the CIAM console and select Custom settings -> Template settings -> Email template in the left navigation pane.
2. On the Email template tab, click Edit in the upper right corner.
3. On the edit page, configure the parameters for email service configuration and email template settings, and then click OK.
Note:
Different email service configurations require different parameters. The platform currently only supports Tencent Cloud SES and will allow users to configure other email services in the future. The following parameters are required to configure Tencent Cloud SES.
Configuring Tencent Cloud SES
The email template settings support different email gateways. After you select a supported email service, the page dynamically loads the configuration information required by the email service.
2. On the User List page, select the desired sub-account and click the username to go to the User Details page.
3. On the User Details page, click API Key, select the desired key, and then click
to copy the SecretId of the sub-account. Click Show and verify your identity to view the SecretKey of the sub-account.
Getting the sender address
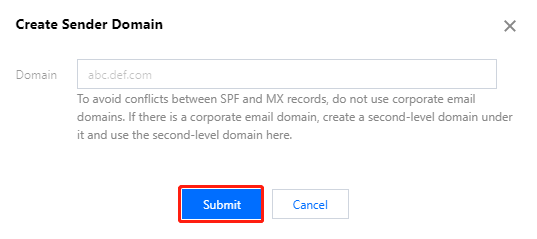
1. Log in to the SES console. In the left navigation pane, click Configuration -> Sender Domain.
2. On the Sender Domain page, click Create, enter a domain name, and then click Submit. The domain name will be used to create the sender address. For more information, please see Sender Domain.
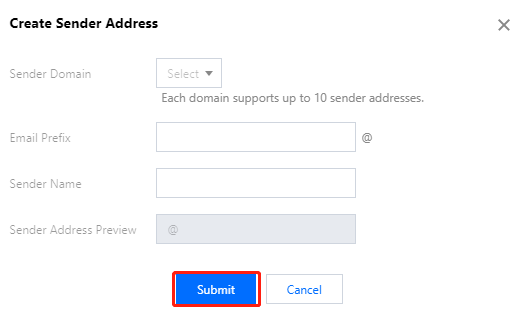
3. On the Sender Address page, click Create, configure the parameters, and then click Submit to create the sender address. The address will be used to send emails from CIAM.
Configuring email templates
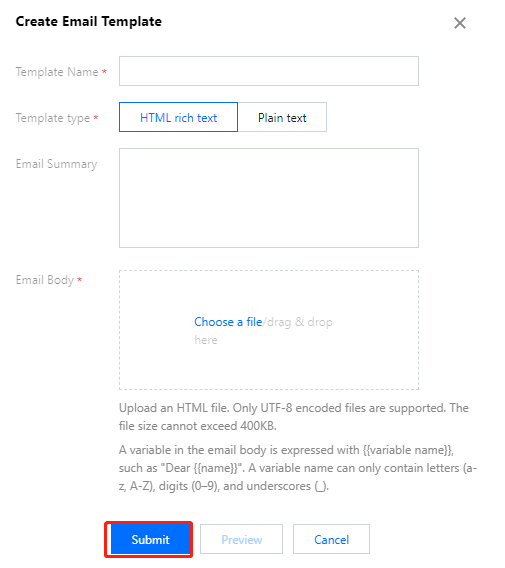
1. On the Email Template page, click Create, configure the parameters, and then click Submit. Then, you can use the template to call SES.
Parameter description:
Parameter
Description
Parameter template
Template name
A custom name.
-
Template type
Choose one as needed.
HTML rich text: Supports more styles to show rich content.
Plain text: Supports text only.
-
Template summary
A custom summary.
-
Email body
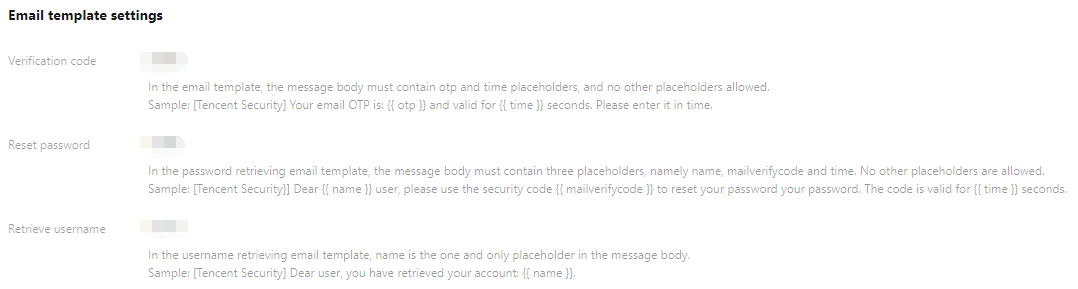
Verification code: When you apply for a verification code email template, the email body must contain only the OTP and time placeholders.
Tencent Security: Your email OTP is {{ otp }}. The OTP is valid for {{ time }} seconds.
Reset password: When you apply for a reset password email template, the email body must contain only the name, mailverifycode, and time placeholders.
Tencent Security: Dear {{ name }}, you have requested to reset your password. The verification code for resetting your password is {{ mailverifycode }}. The code is valid for {{ time }} seconds.
Retrieve username: When you apply for a retrieve username email template, the email body must contain only the name placeholder.
Tencent Security: Dear user, you have requested to retrieve your username {{ name }}.
2. On the Email Template page, you can view the template you just created and copy the template ID.
3. In the Email template settings section of CIAM, you need to fill in the IDs of the three approved sending templates: verification code, reset password, and retrieve username.
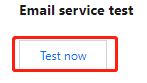
Testing email services
1. After configuring the email template settings, you can click Test now.
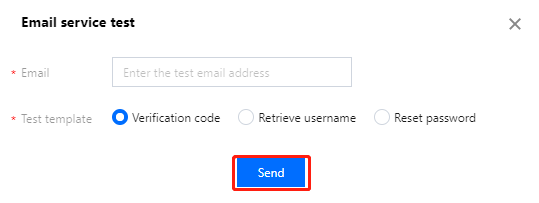
2. In the Email service test window displayed, enter a valid test email address, select a test template, and then click Send to verify the configuration.