When the platform's pre-built connectors cannot meet your enterprise's integration needs, you can create a custom connector based on MCP to integrate your enterprise's own systems, internal services, or third-party SaaS applications into the platform.
Connector Access Based on MCP
MCP Introduction
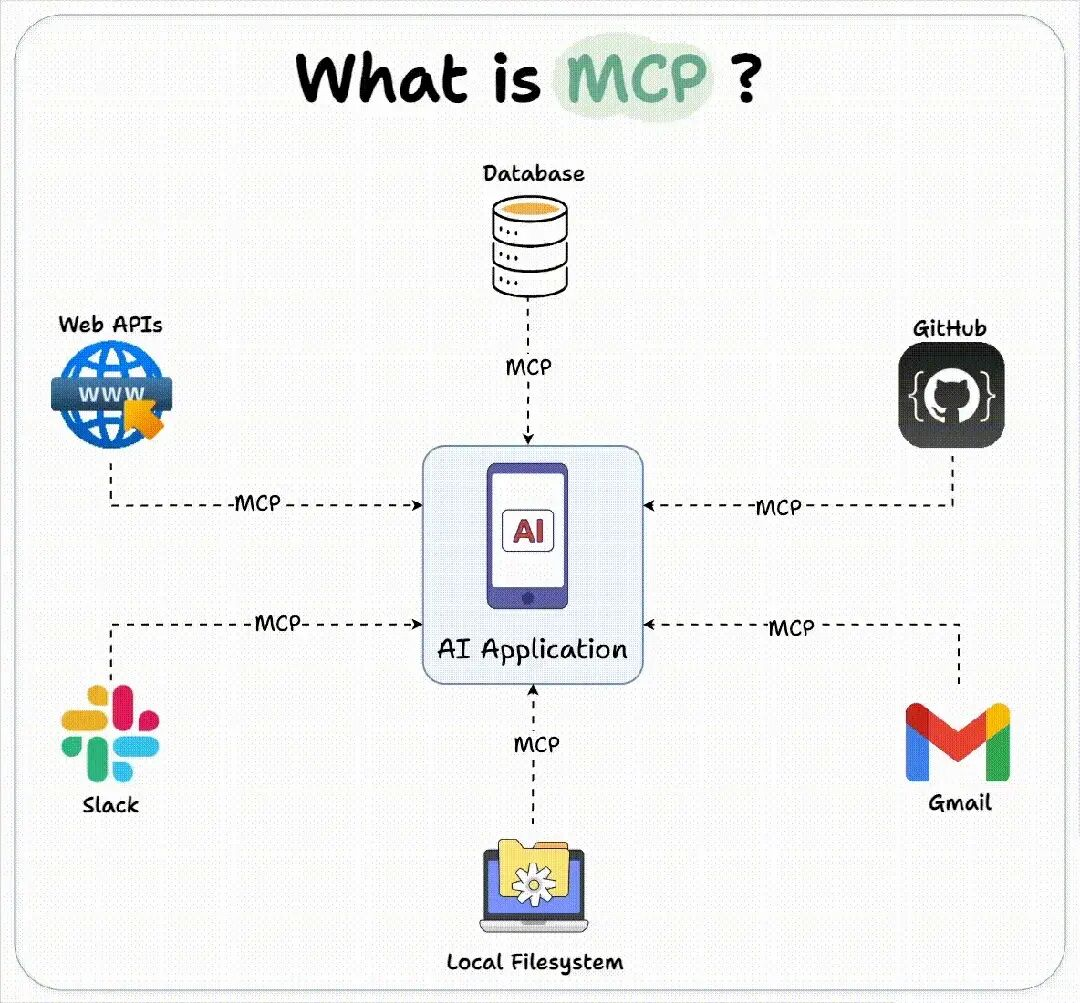
MCP (Model Context Protocol) is an open protocol designed for Large Language Model (LLM) applications. It aims to achieve seamless integration between LLMs and external tools and data sources. Through a unified API specification, it simplifies the integration of previously disparate API tools into a "plug-and-play" model, addressing issues such as multi-protocol adaptation and high development costs found in traditional API tools. For more information, see the MCP official documentation.
The Tencent Cloud Agent Development Platform supports integrating a vast number of tools from the MCP ecosystem under custom connectors to accelerate the development of large model applications.
Accessing a Custom Connector
Creating a Connector
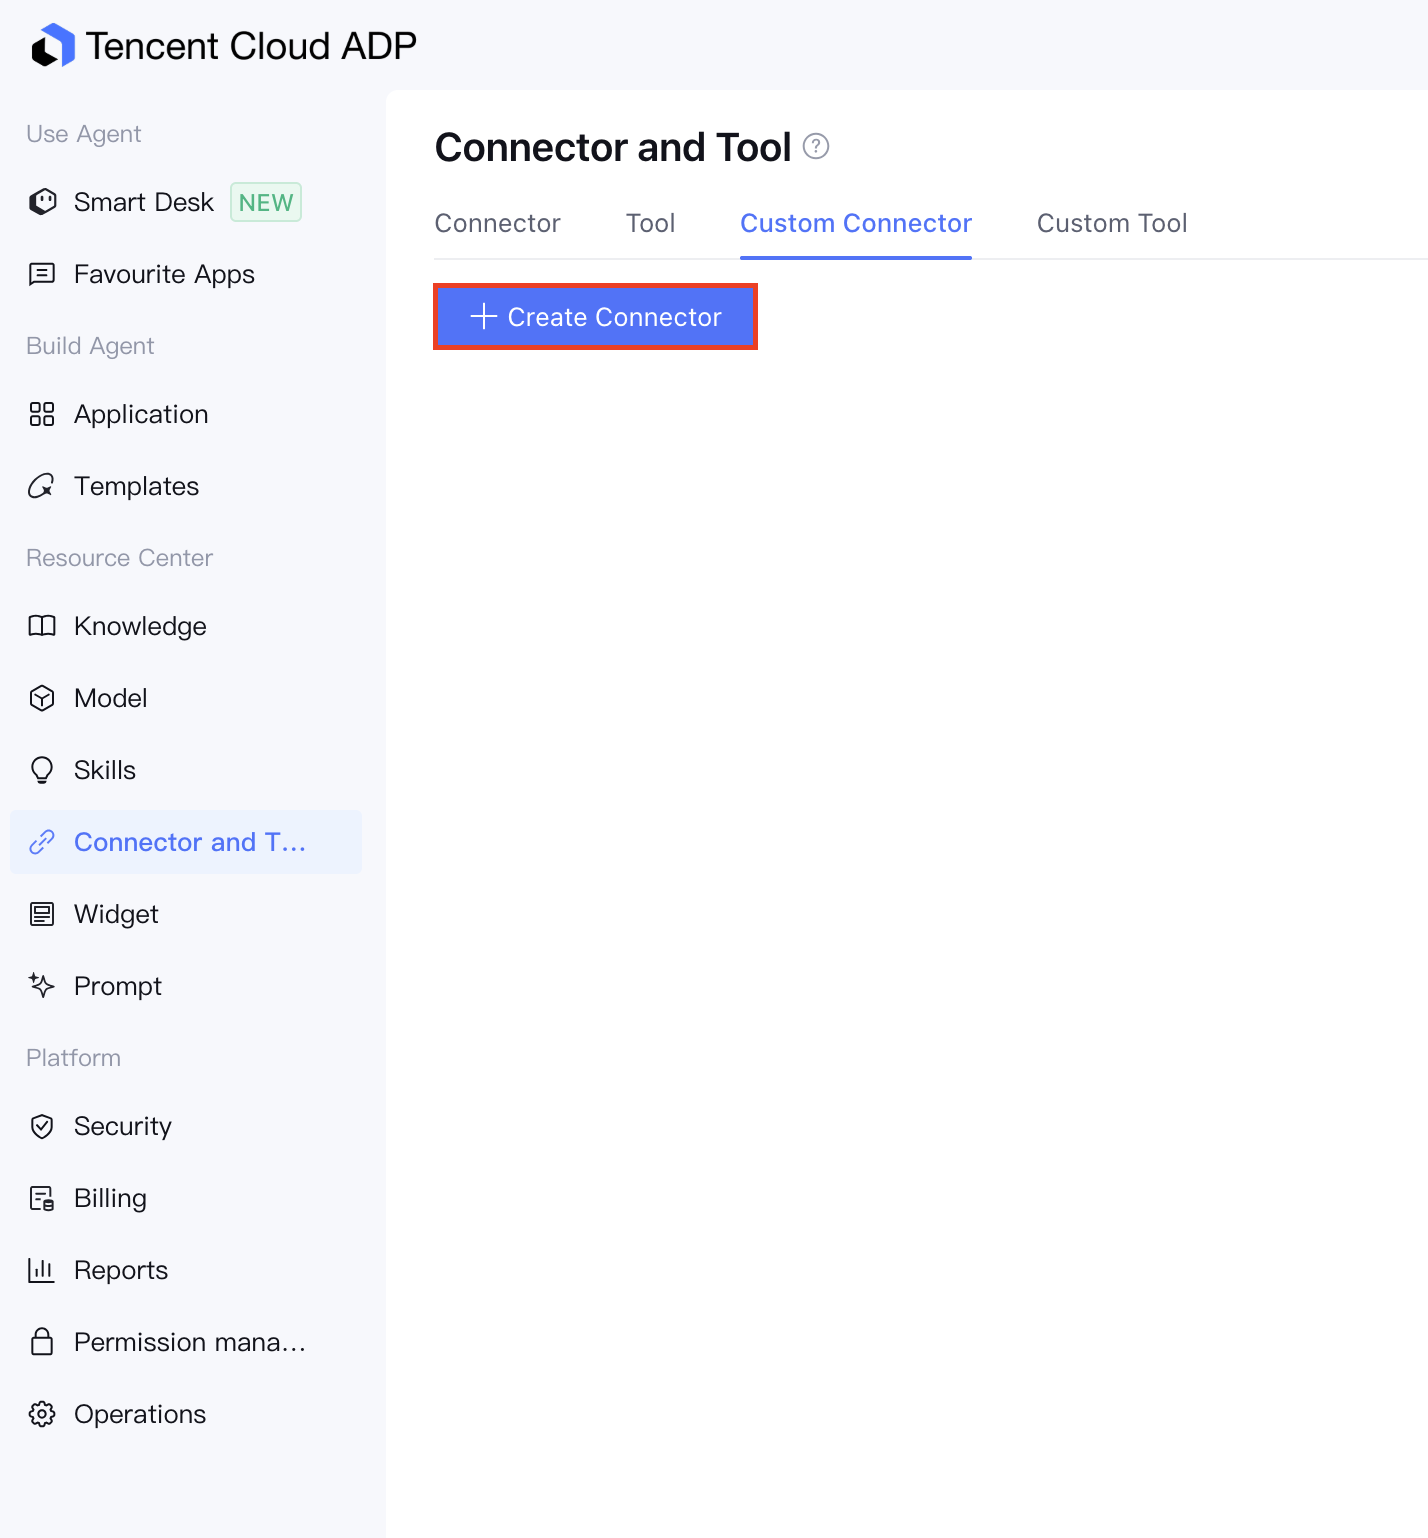
Go to the Custom Connector page and click Create Connector.
Enter the basic information
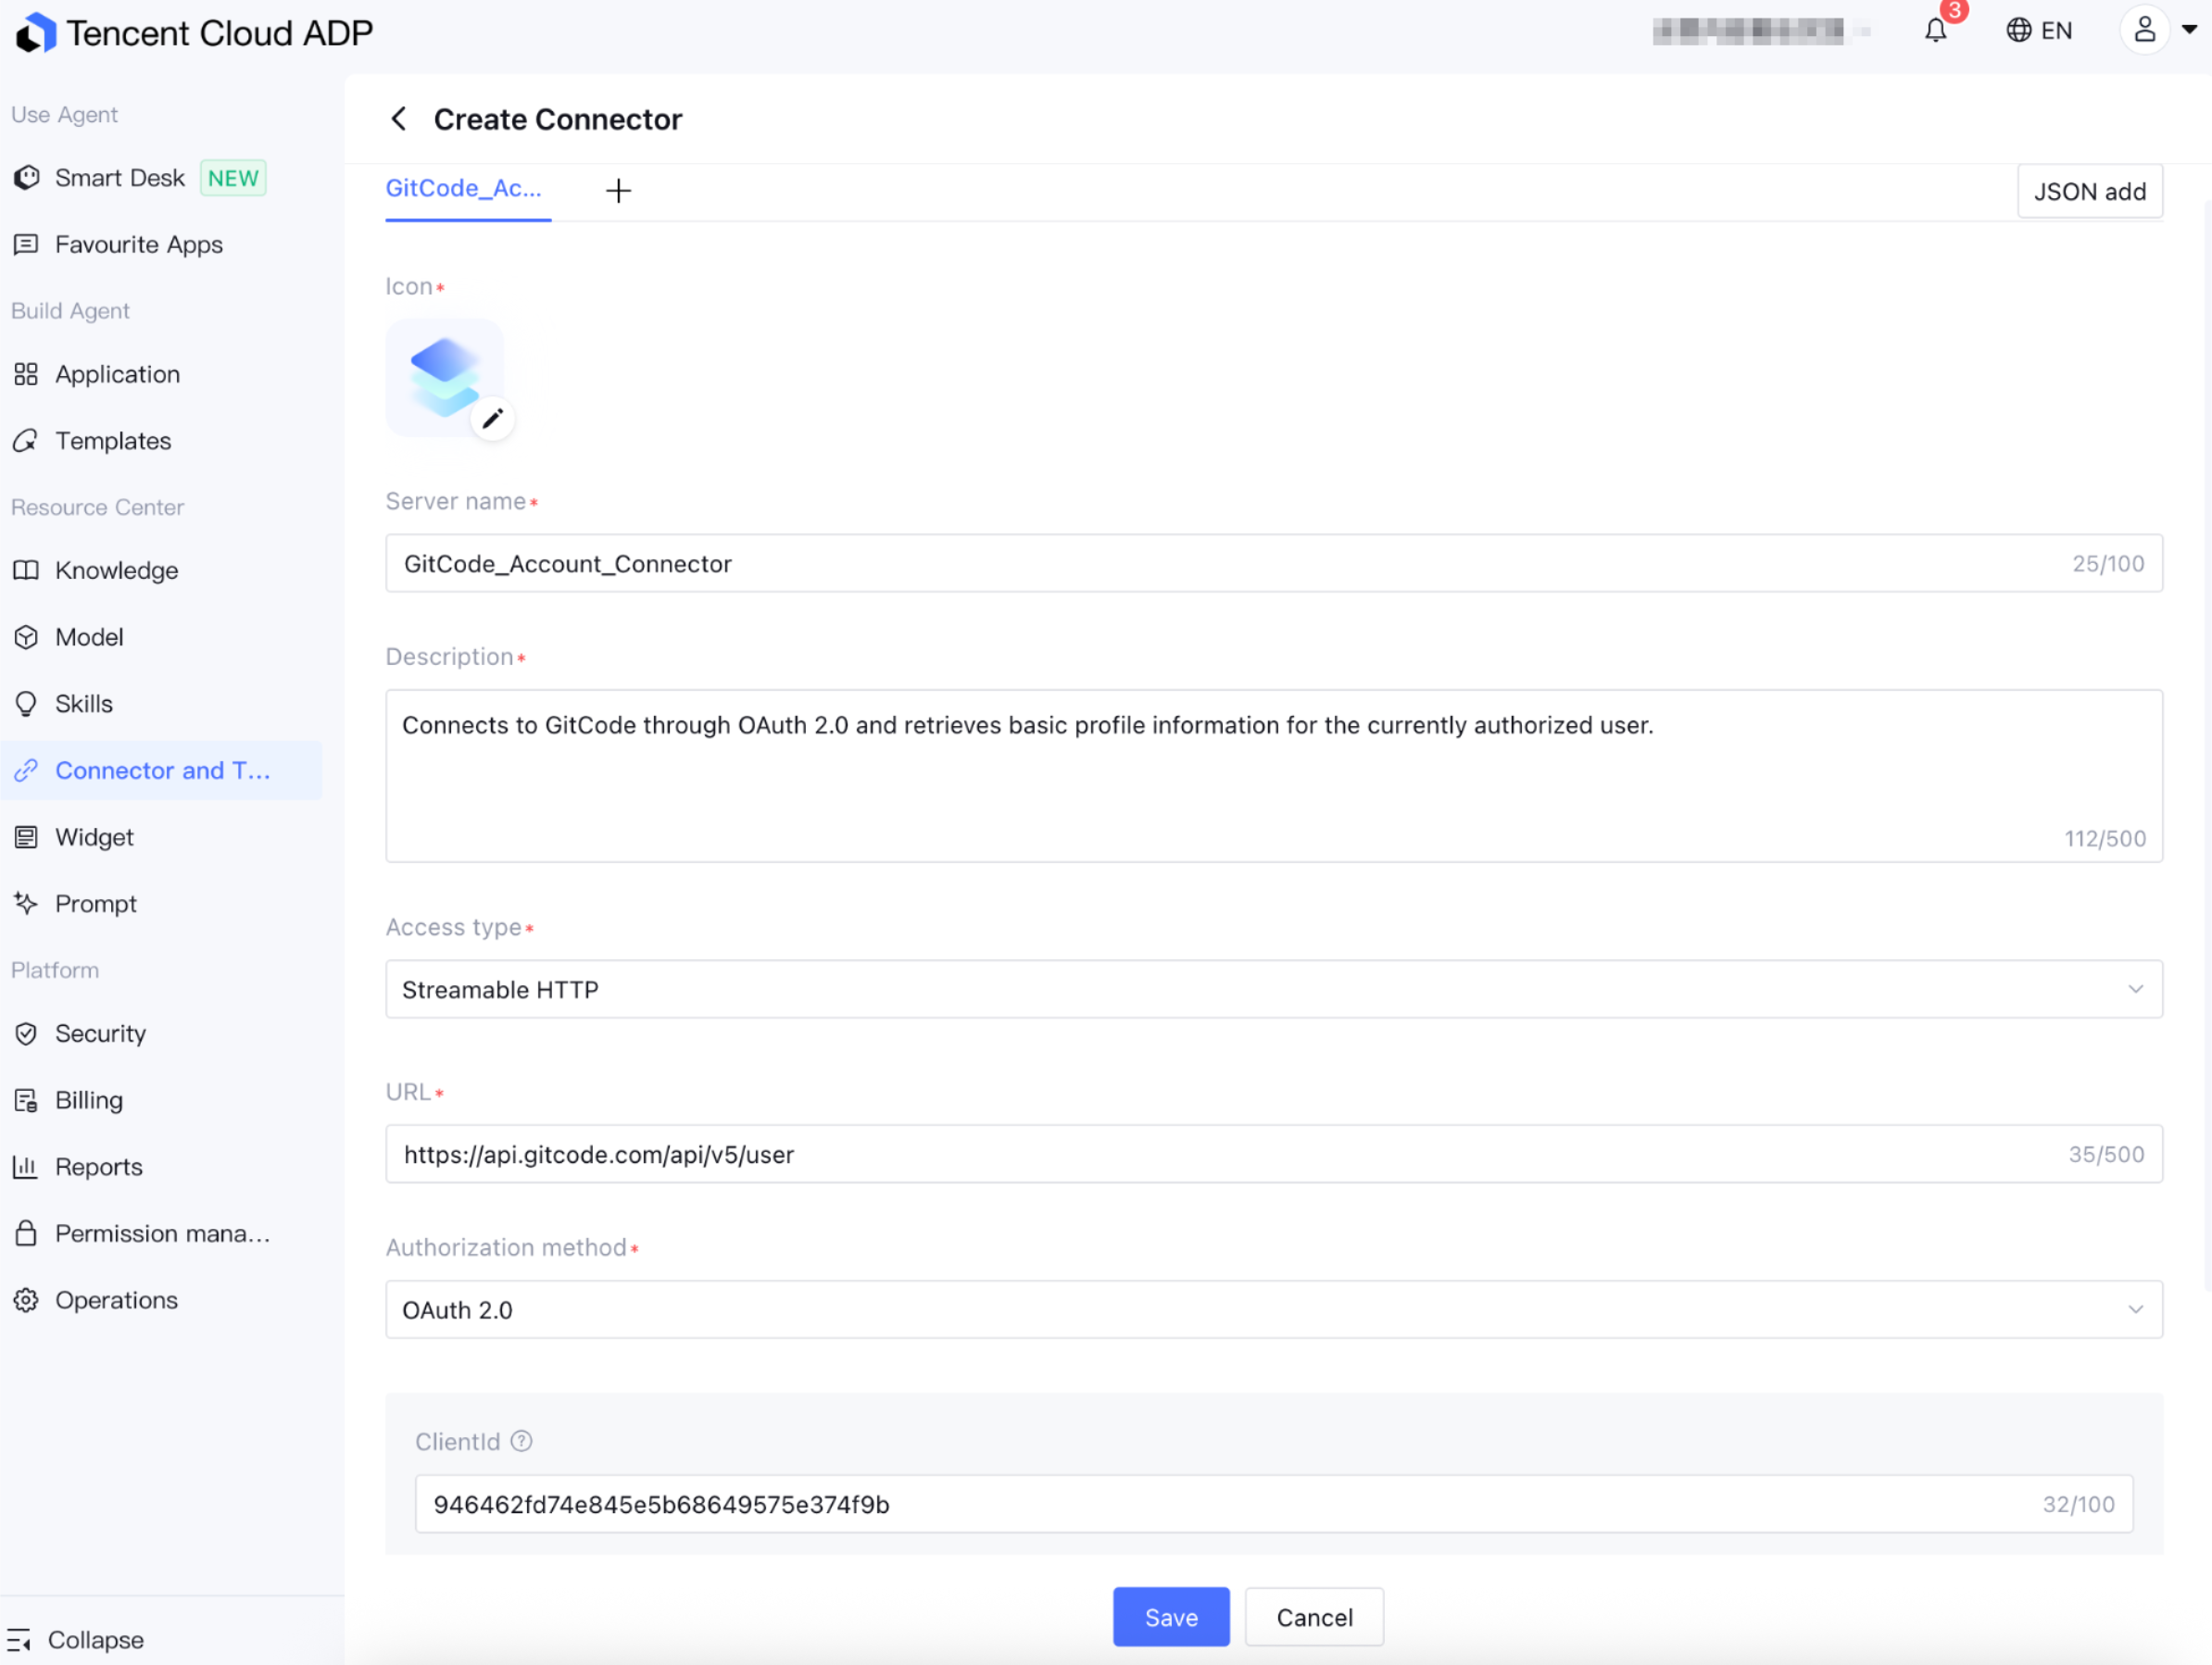
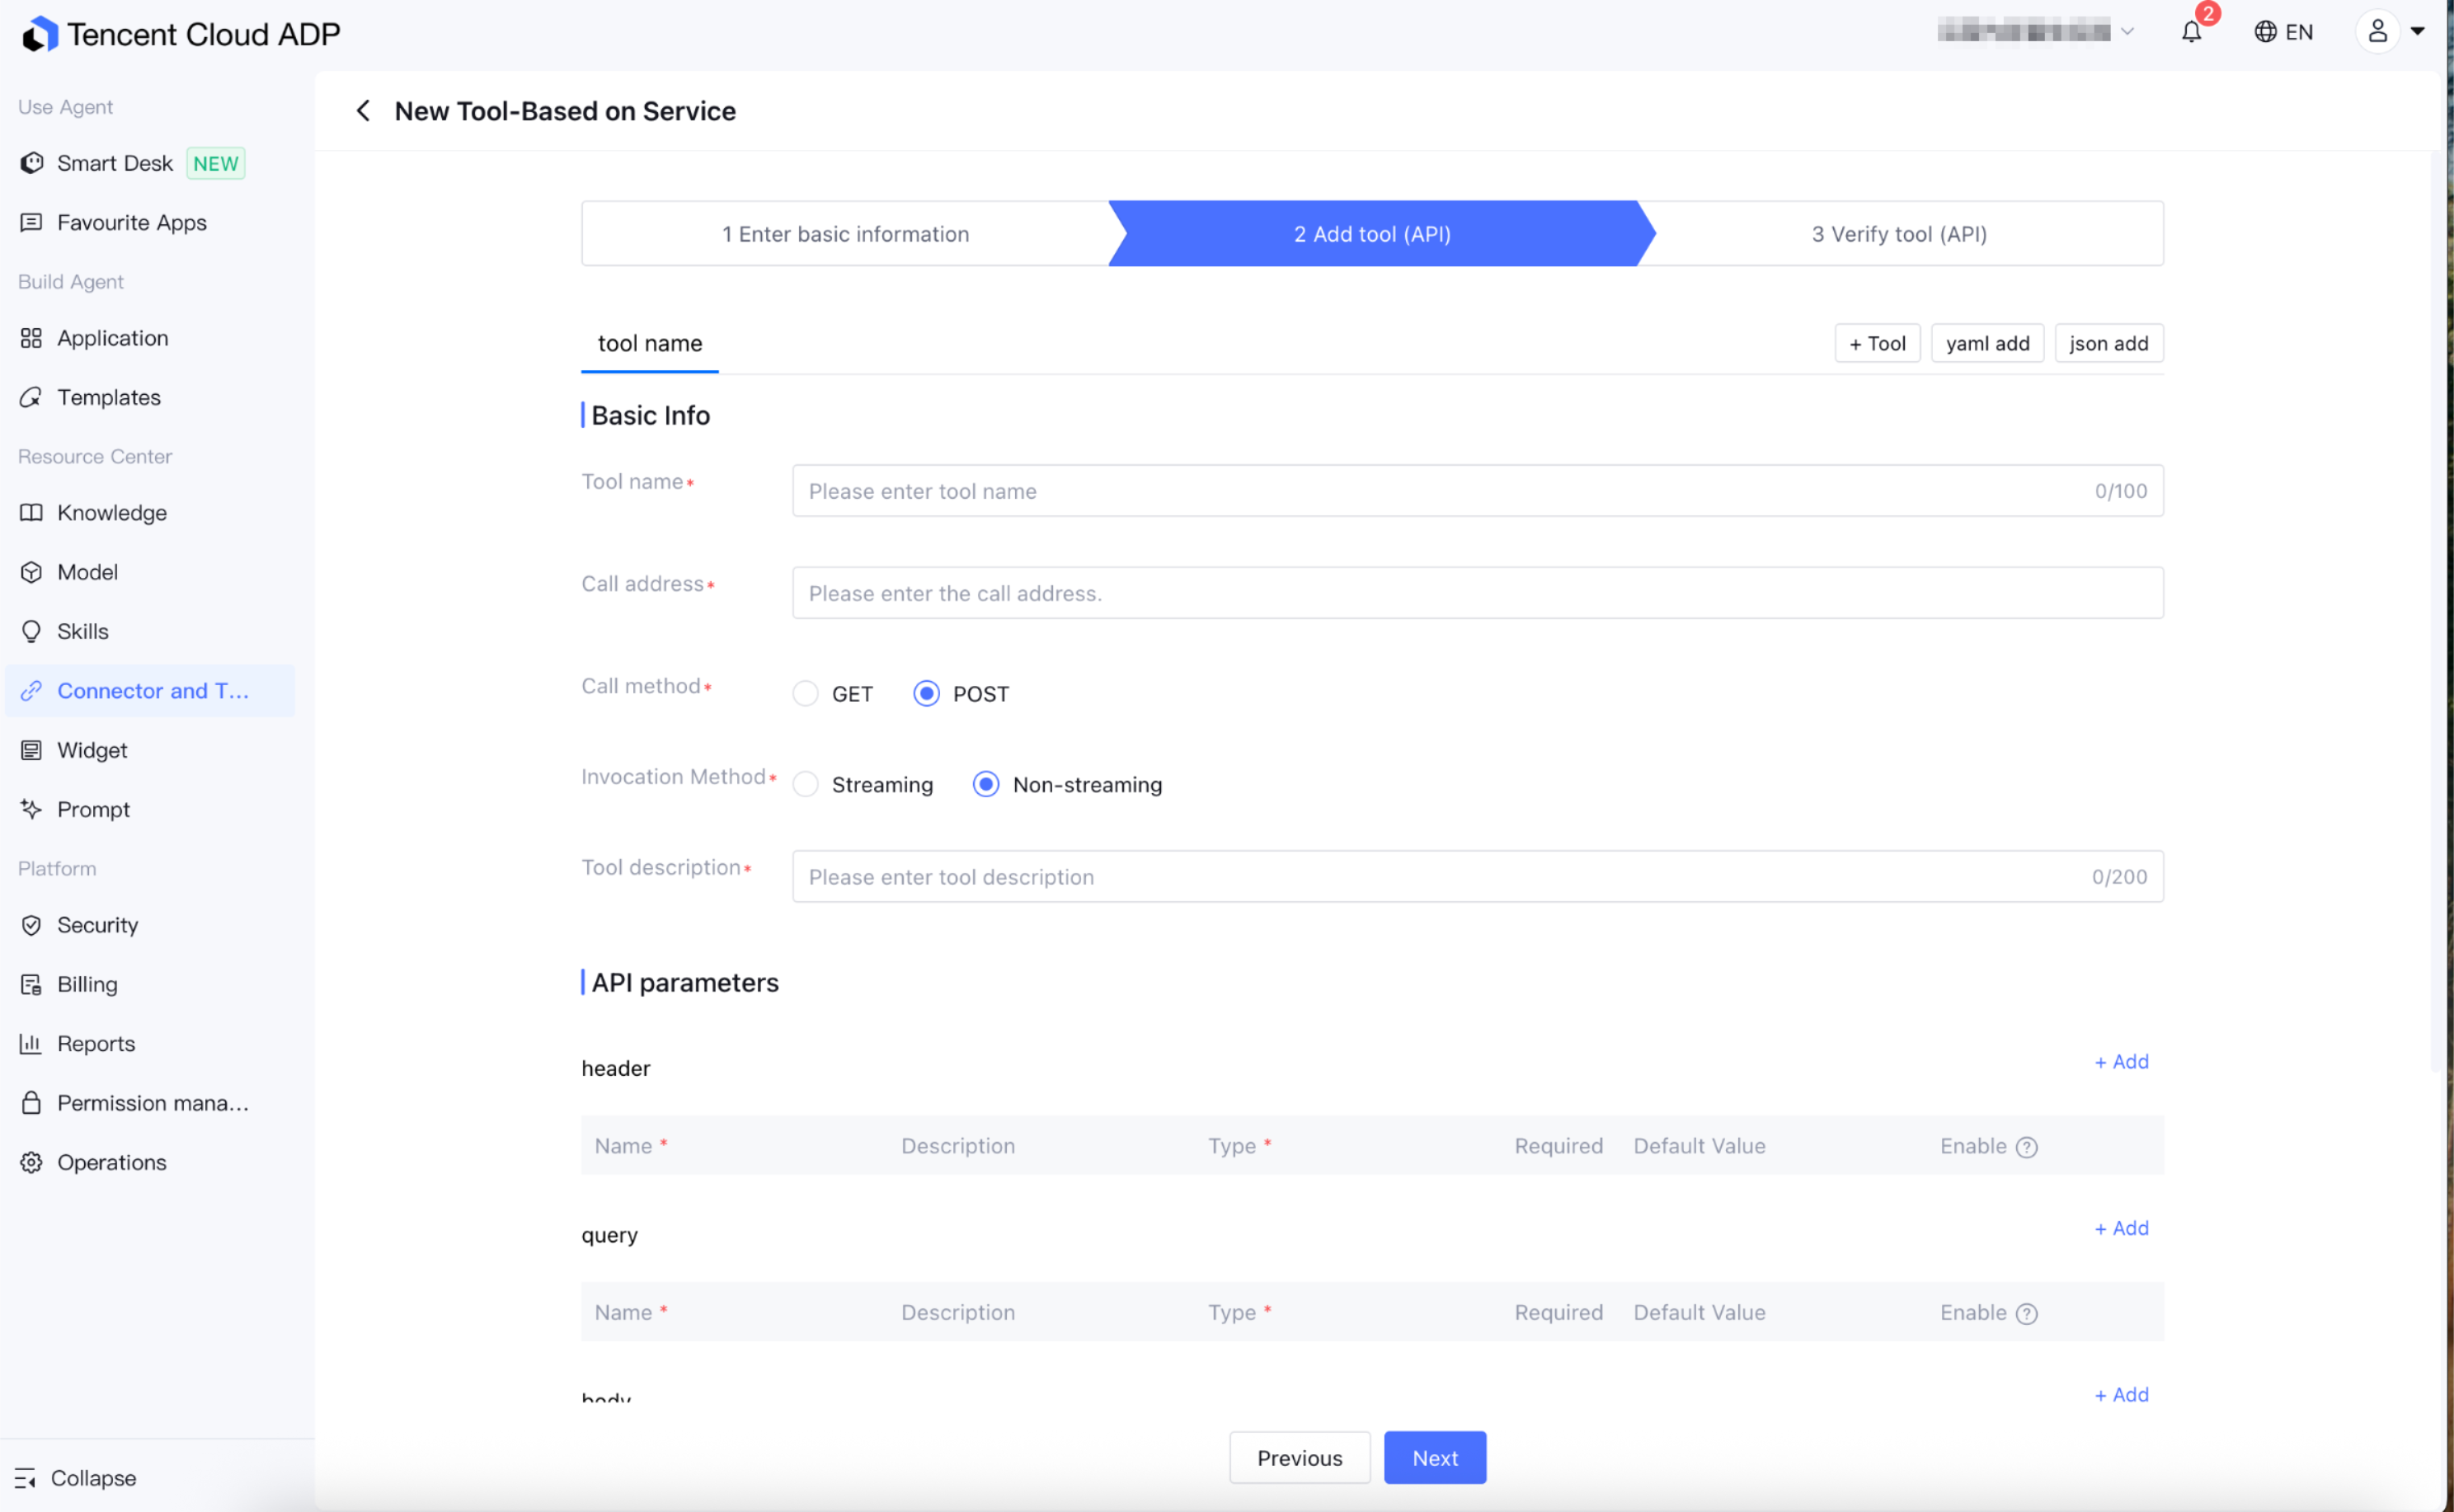
On the integration page, fill in the basic information for the MCP Server, including fields such as name and description. Then, select the integration type and configure the online URL address for the MCP Server.
1. MCP Server Requirements: The integrated MCP Server must comply with the MCP protocol and be capable of completing the initialization, tool list query, and tool invocation processes. The platform establishes a connection with the MCP Server via the configured URL and initiates calls according to the MCP protocol.
Initialization: The Server must support the initialize method and return protocolVersion, capabilities, and serverInfo.
Tool Capability Declaration: If the server is to be used as a tool within a workflow or Multi-Agent, the tools capability must be declared in capabilities and cannot be empty.
Tool List: The Server must support the tools/list method and return a list of callable tools. If tools/list returns an empty array, the platform can complete service integration but will not generate any available tools.
Tool Invocation: The Server must support the tools/call method and return the invocation result according to the MCP protocol.
2. Integration Type: Supports integration of MCPs using the sse and streamableHttp protocols.
SSE: A one-way real-time communication mechanism based on HTTP protocol. The client creates a persistent HTTP connection, and the server can continuously push event data to the client. It is commonly used for real-time messaging and status updates in other scenarios.
streamableHTTP: A streaming transmission mechanism implemented over HTTP protocol, commonly used for AI model output to gradually generate content (such as LLM streaming response). It is not a brand-new protocol, but a flexible use of HTTP persistent connection and chunked transfer capacity to gradually return data to the client during reasoning.
3. In addition to specifying the server type, you can also customize the MCP's Header, request timeout duration, and SSE service timeout duration in Advanced Settings.
Header: The HTTP request header sent to the MCP Server. You can add authentication information or custom fields here.
Request Timeout (seconds): The timeout duration for regular HTTP requests. The request is terminated if no response is received within this period.
SSE Service Timeout (seconds): The timeout duration for SSE persistent connections.
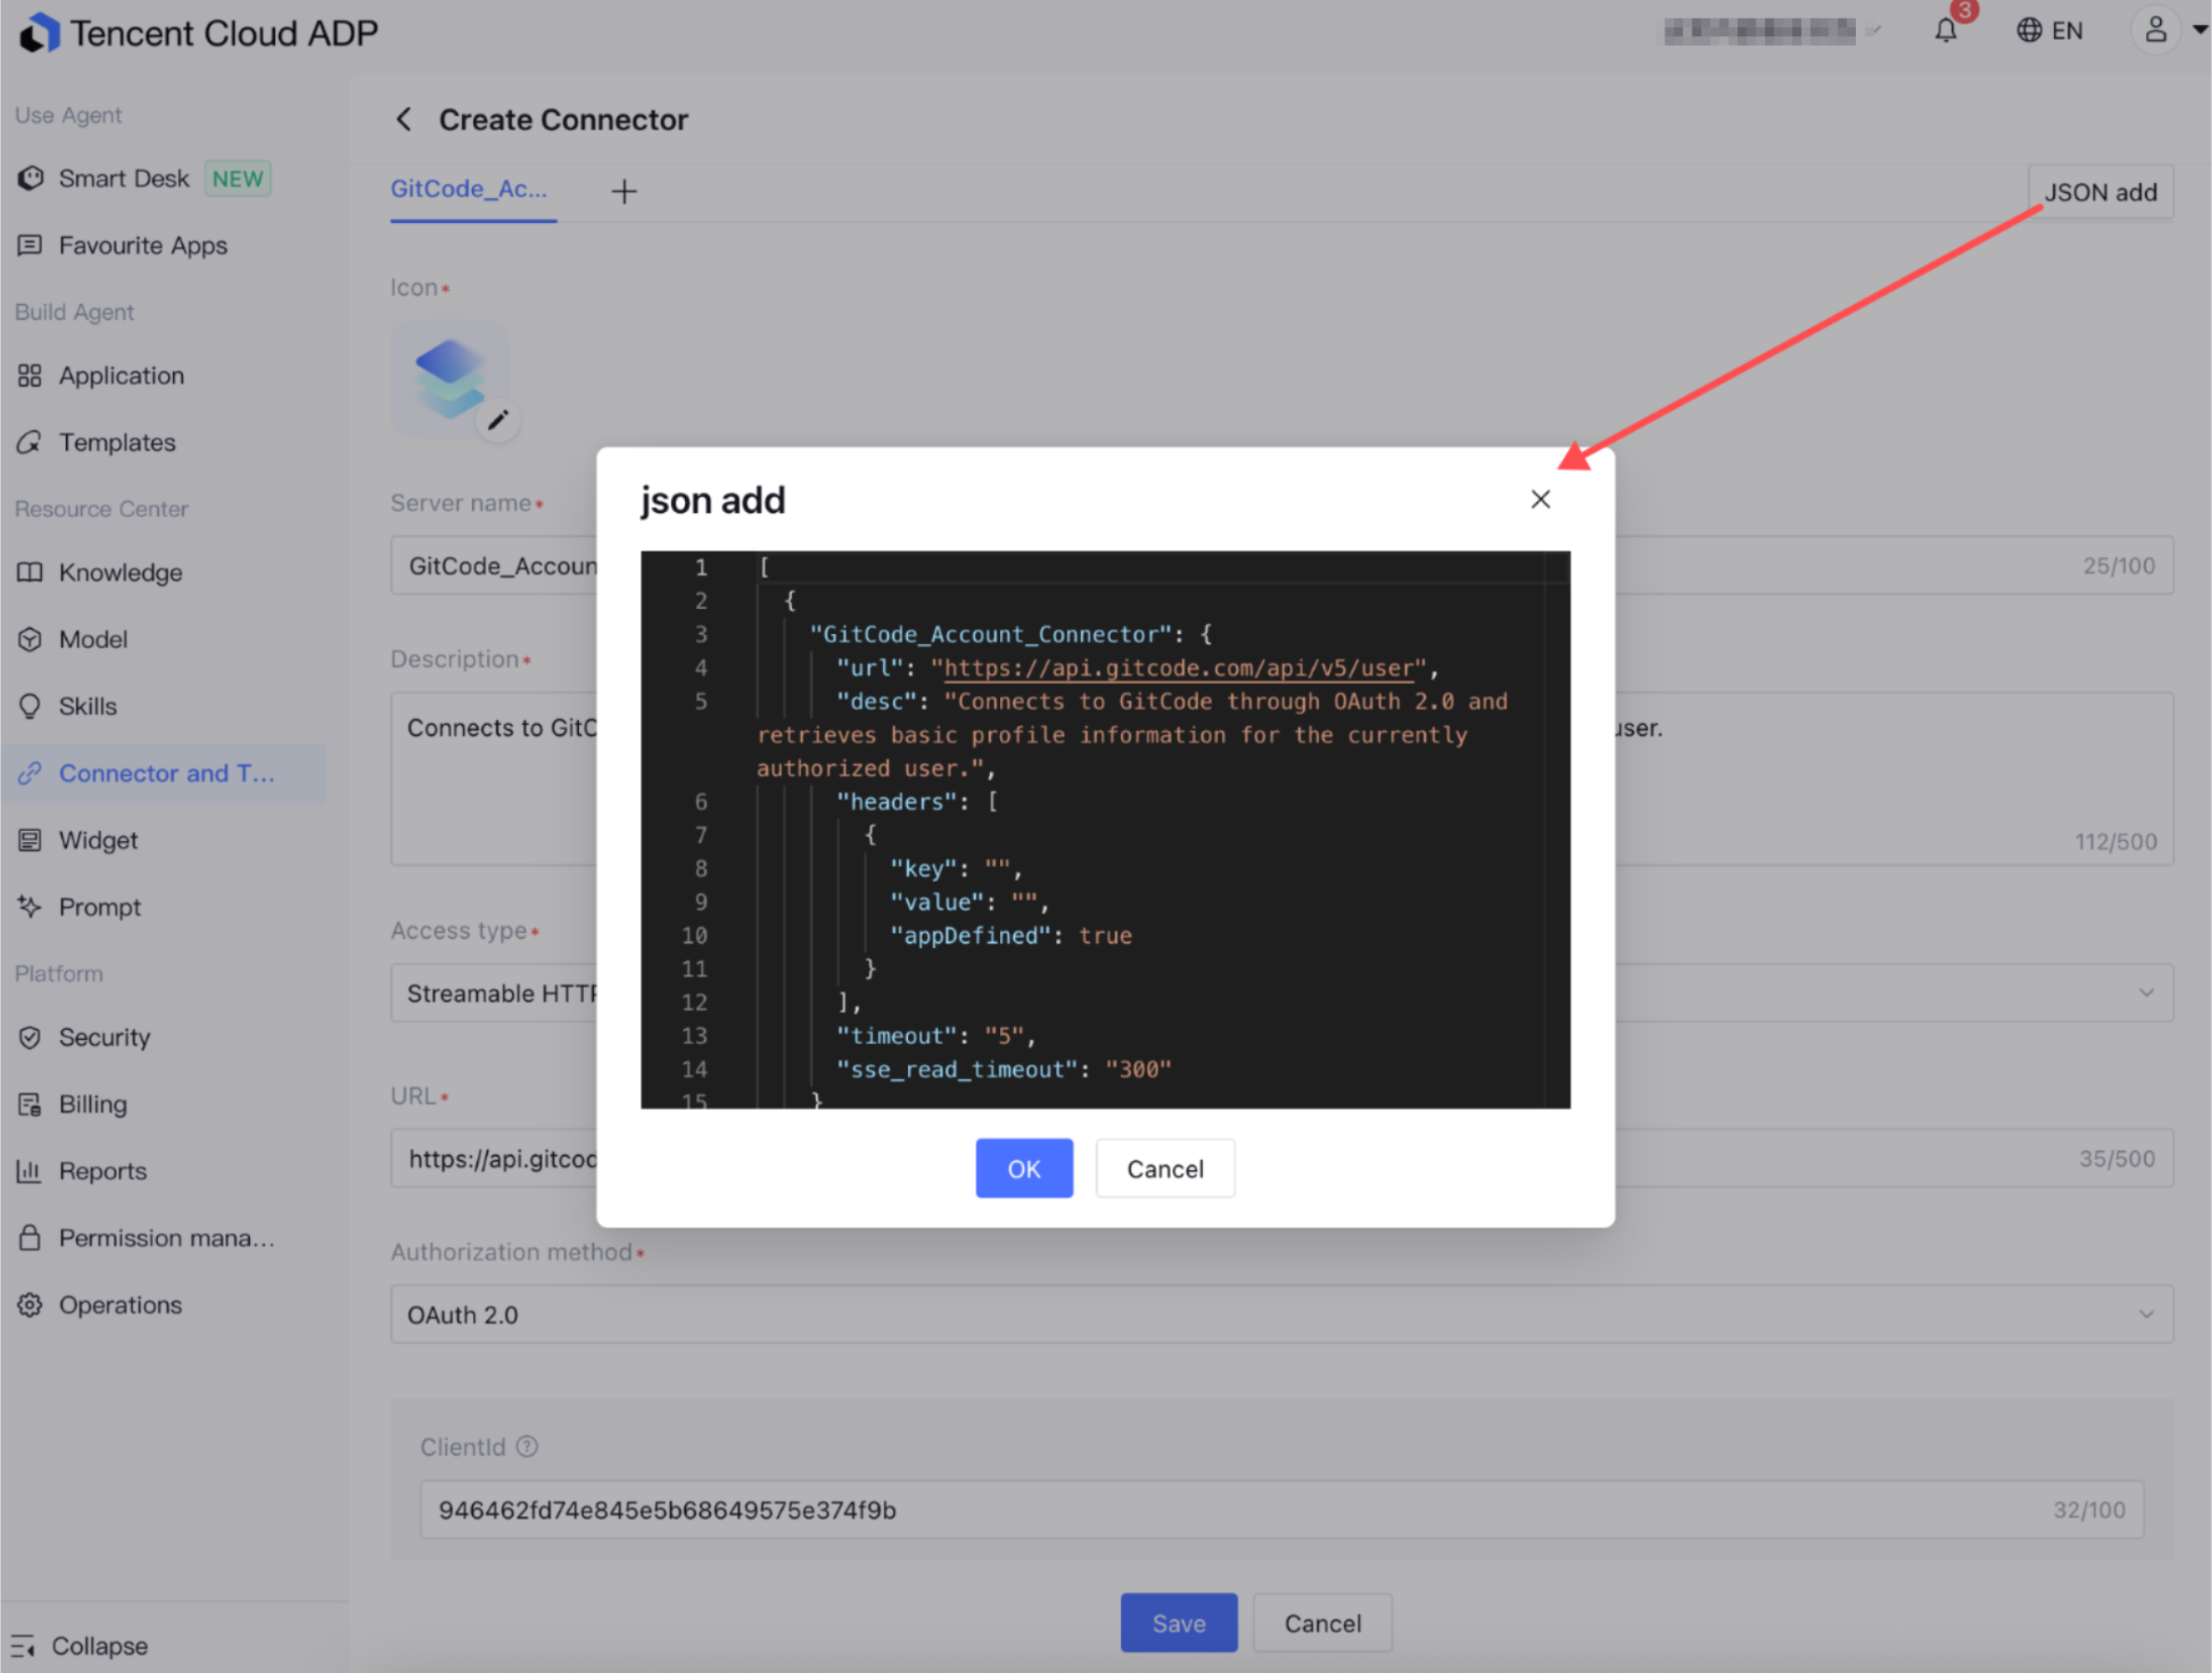
You can also add an MCP Server with one click using JSON code.
Select an Authorization Method
Select the Authorization method based on the connector's actual authentication requirements.
OAuth 2.0 Authorization
When a connector is created, the Agent Development Platform supports configuring the OAuth 2.0 authorization method for integrating with third-party MCP services that require OAuth authentication. OAuth 2.0 is an industry-standard protocol for access authorization. It allows users to authorize ADP to access their information on a website without sharing their account credentials. The platform's unified OAuth configuration and authorization flow simplify tool integration and user experience, enhancing security and usability.
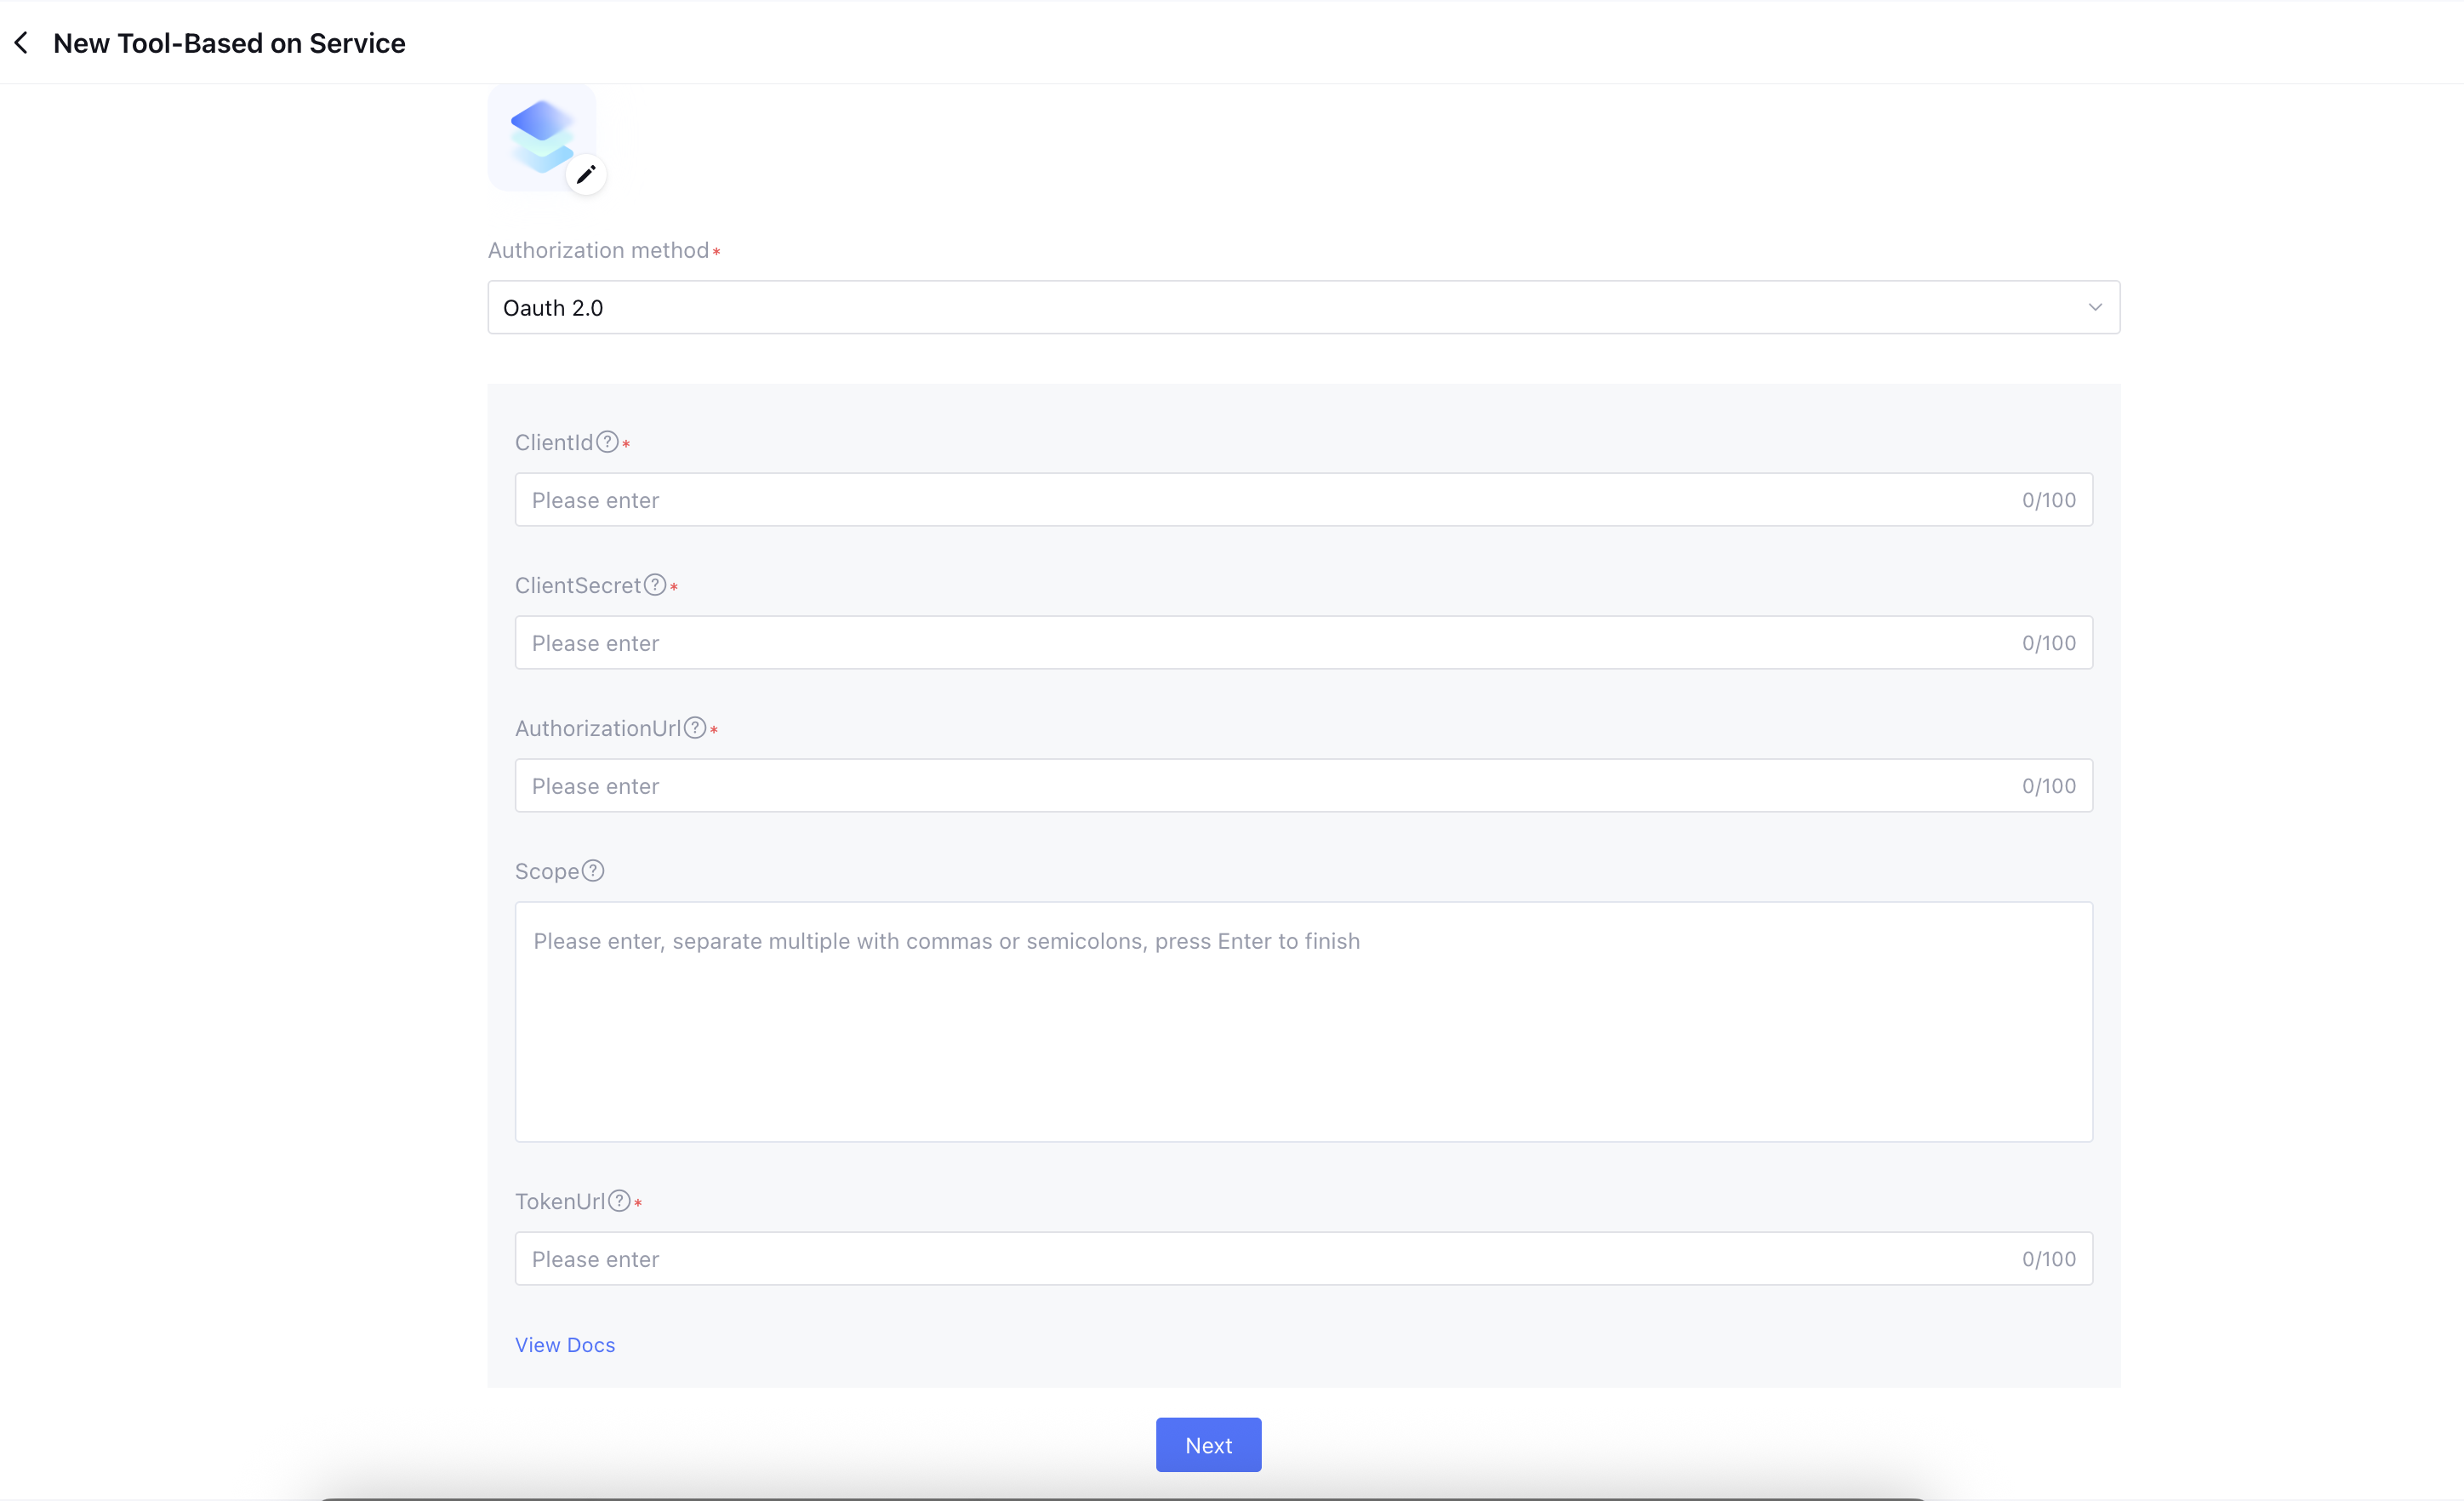
After selecting OAuth 2.0 as the authorization method, configure the relevant fields. All required field information must be obtained from the third-party OAuth application management console.
Field
Required or Not
Description
ClientId
Required
Client ID for third-party OAuth applications
ClientSecret
Required
Client secret for third-party OAuth applications
AuthorizationUrl
Required
Third-party OAuth authorization URL, used to initiate user login authorization
Scope
Optional.
Authorization scope. Multiple scopes can be added as needed, and they can be filled in according to third-party specifications.
TokenUrl
Required
URL for obtaining Access Token from third-party OAuth
Copy the following redirect URL, go to the configuration page of the third-party OAuth application, and enter this URL into the callback address configuration. Incorrect configuration of the redirect URL will cause authorization to fail.
The following section demonstrates the OAuth 2.0 authorization configuration process using GitHub API integration as an example.
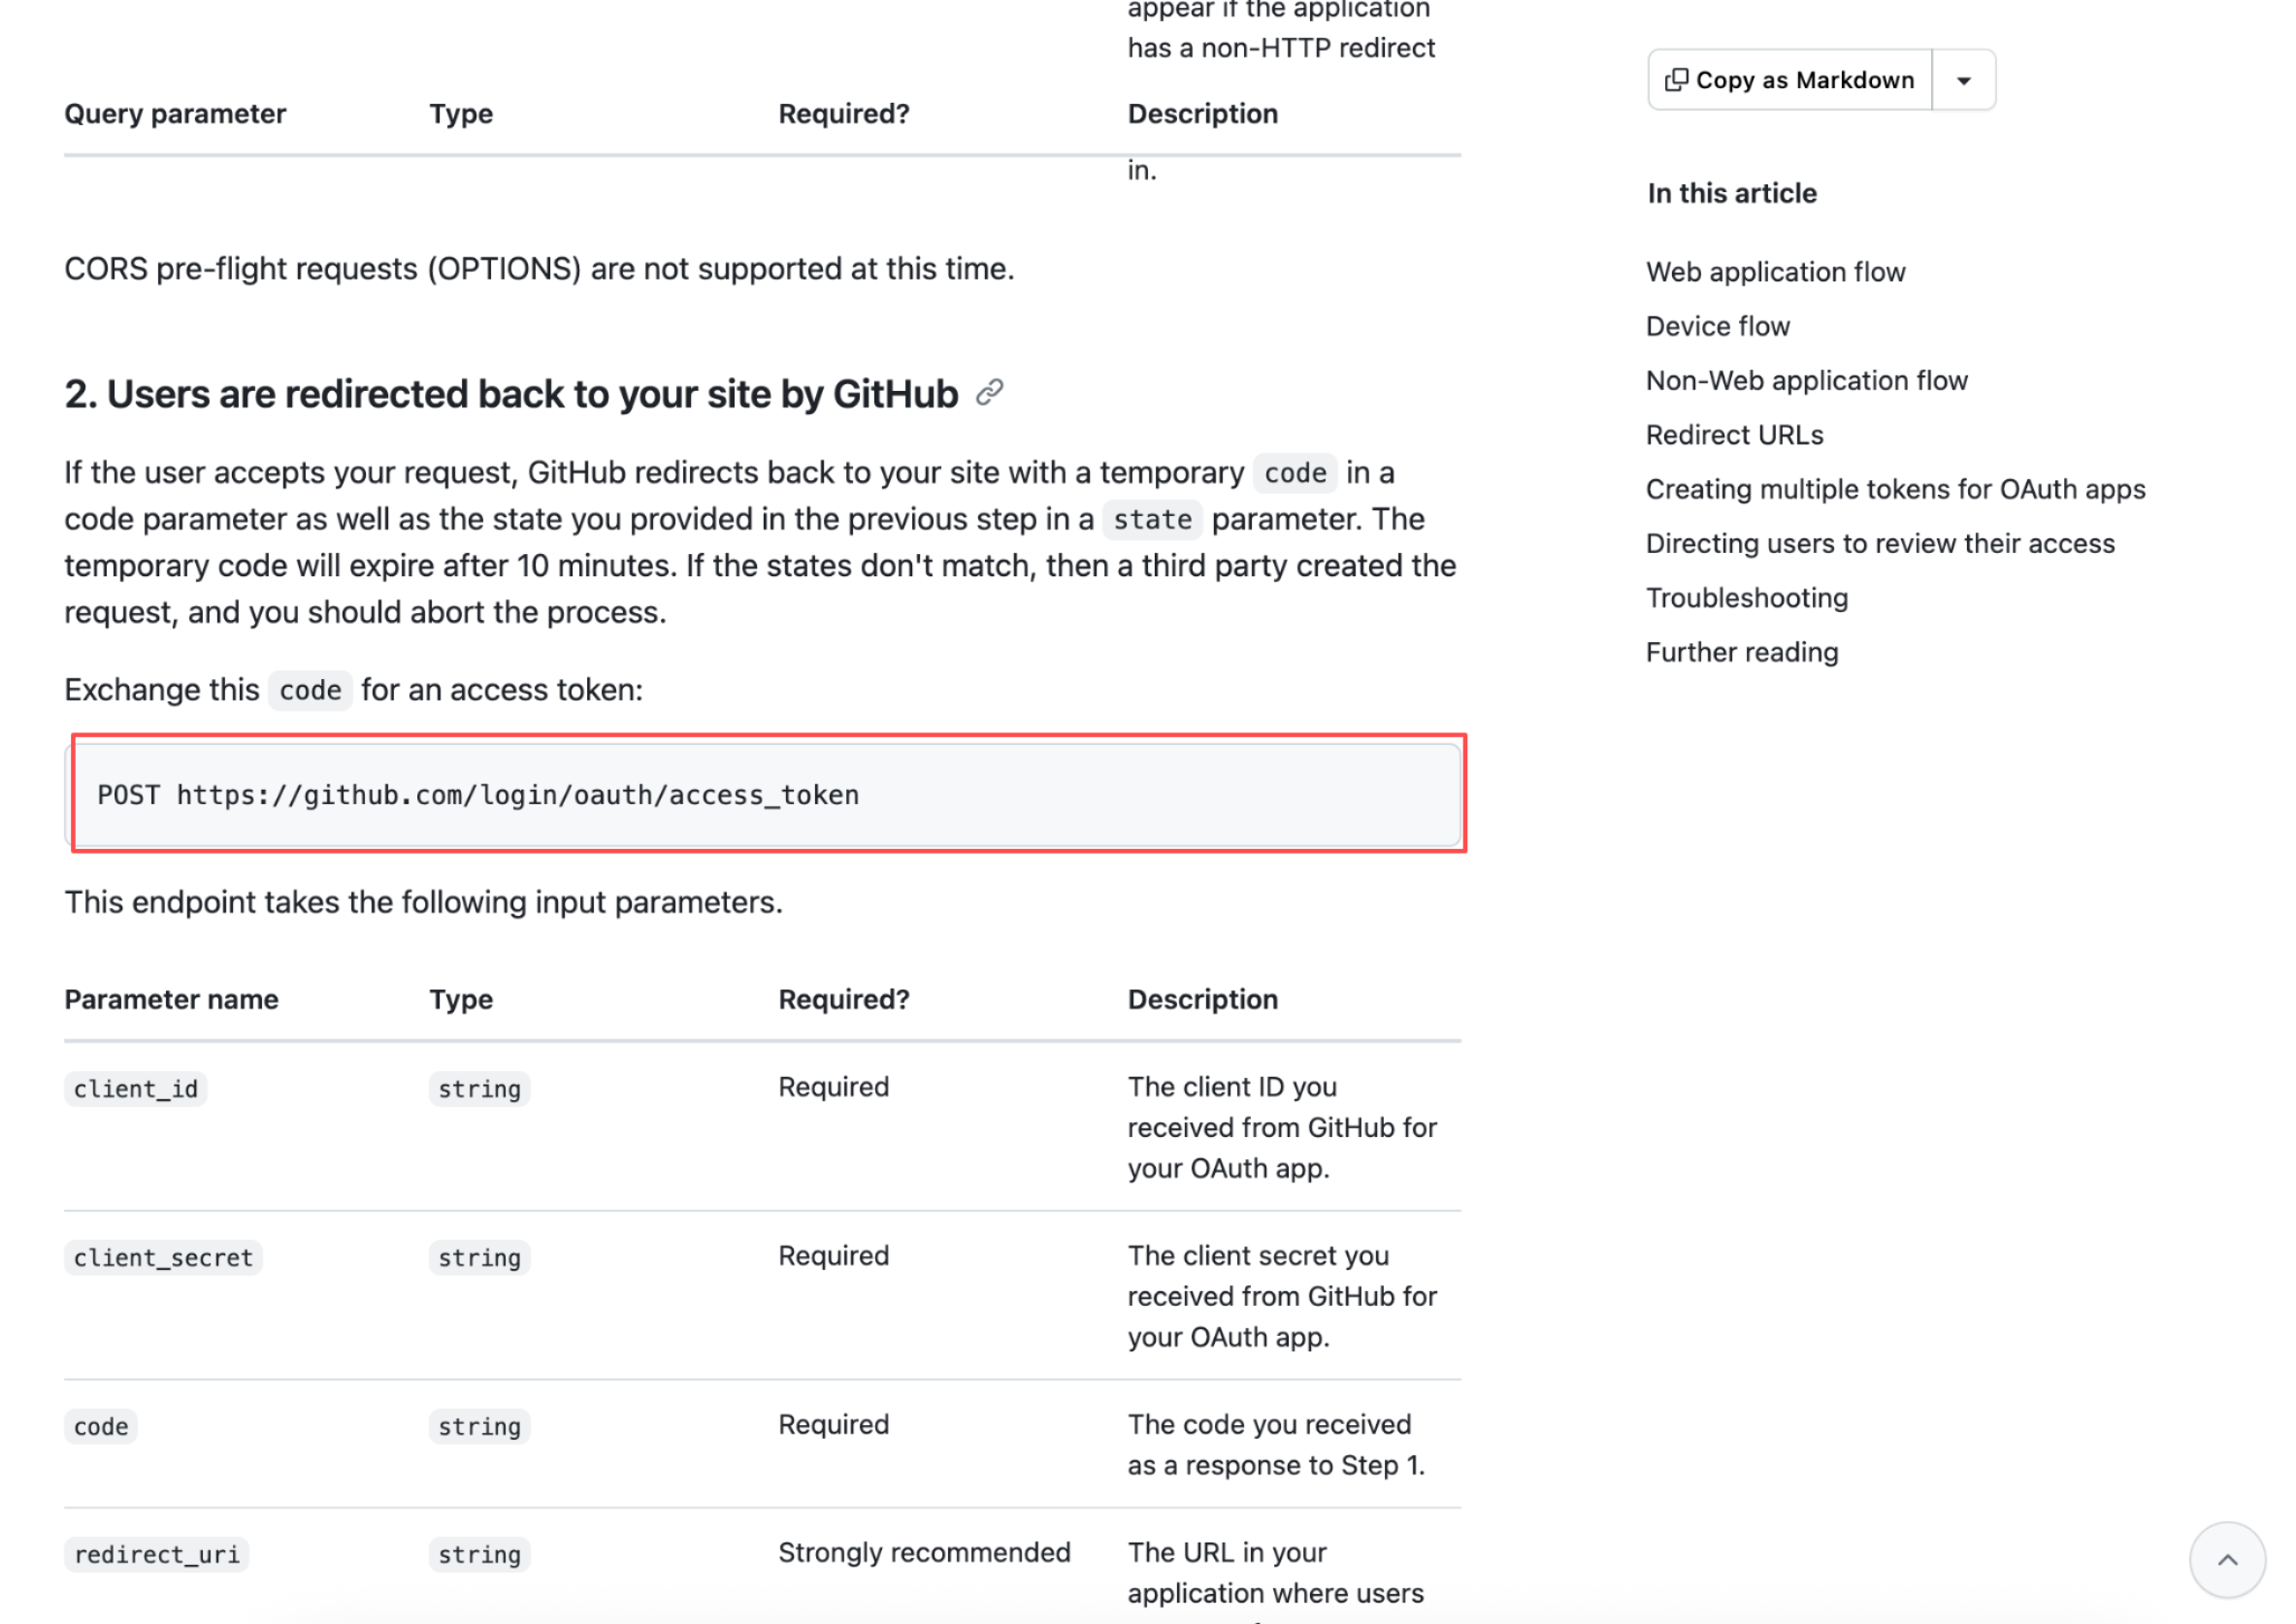
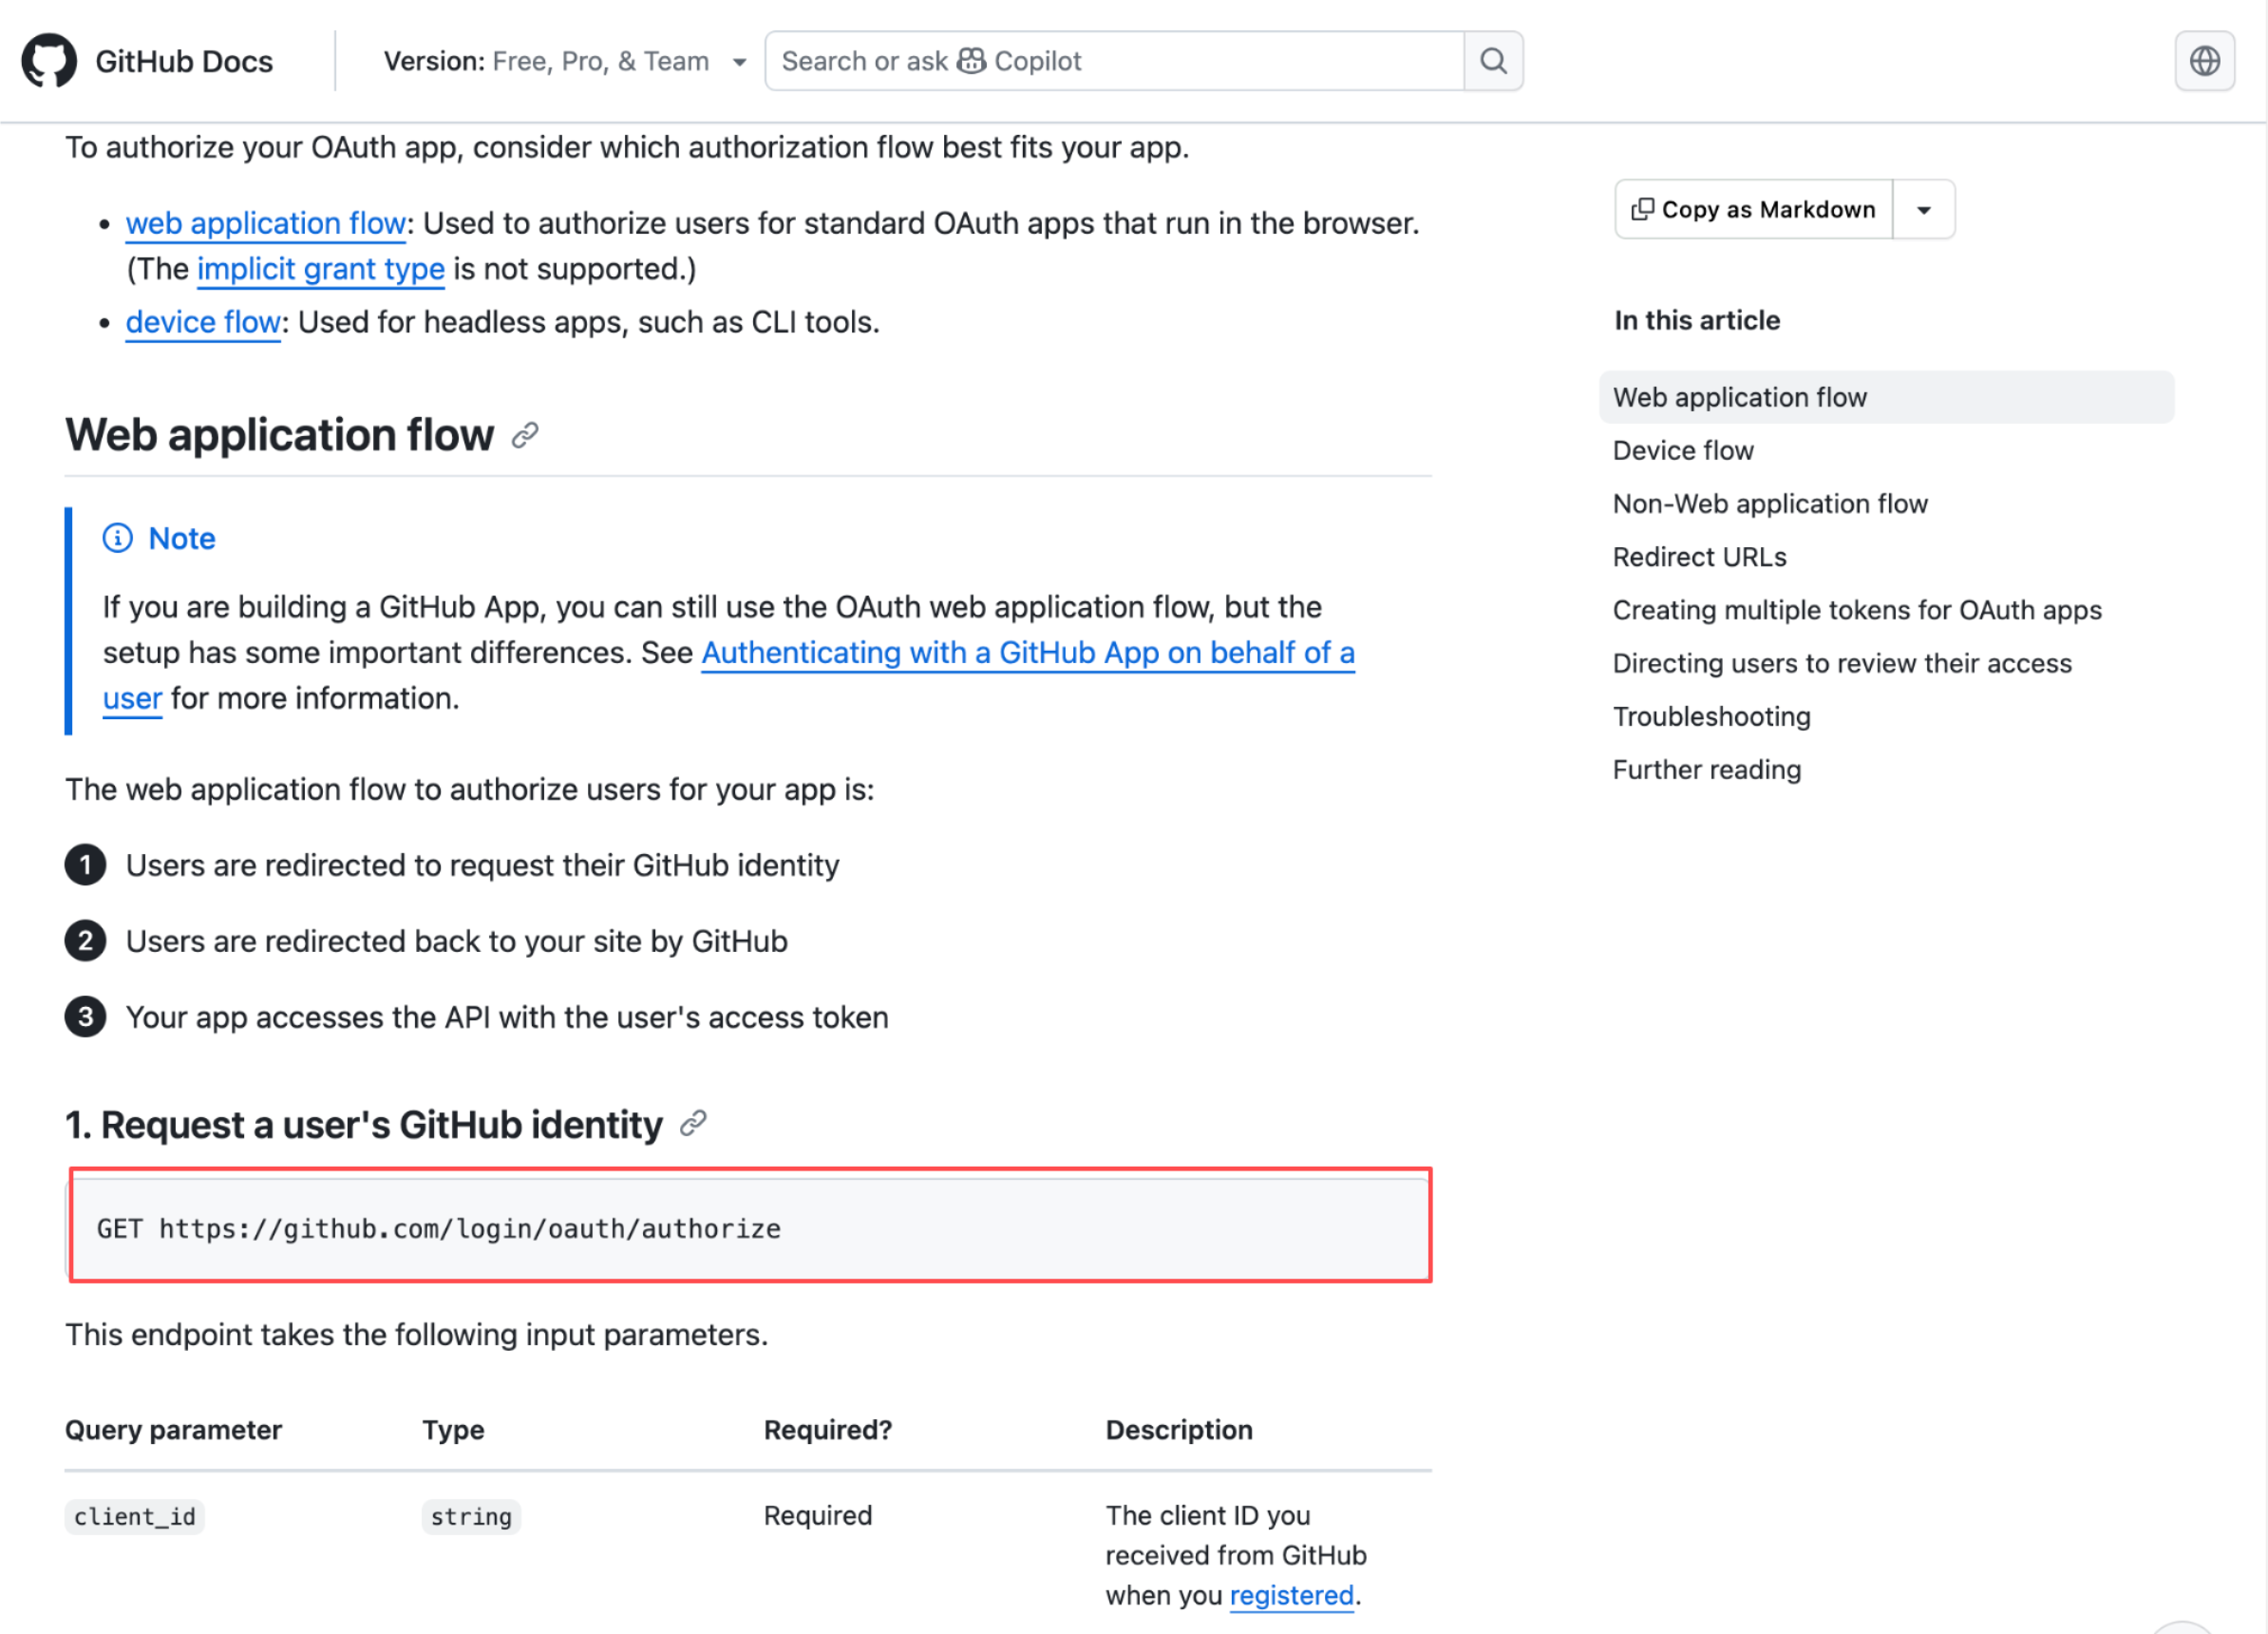
Step 1 In the official GitHub API documentation, locate the OAuth configuration instructions and obtain information such as the AuthorizationUrl and TokenUrl addresses, as well as the Scope.
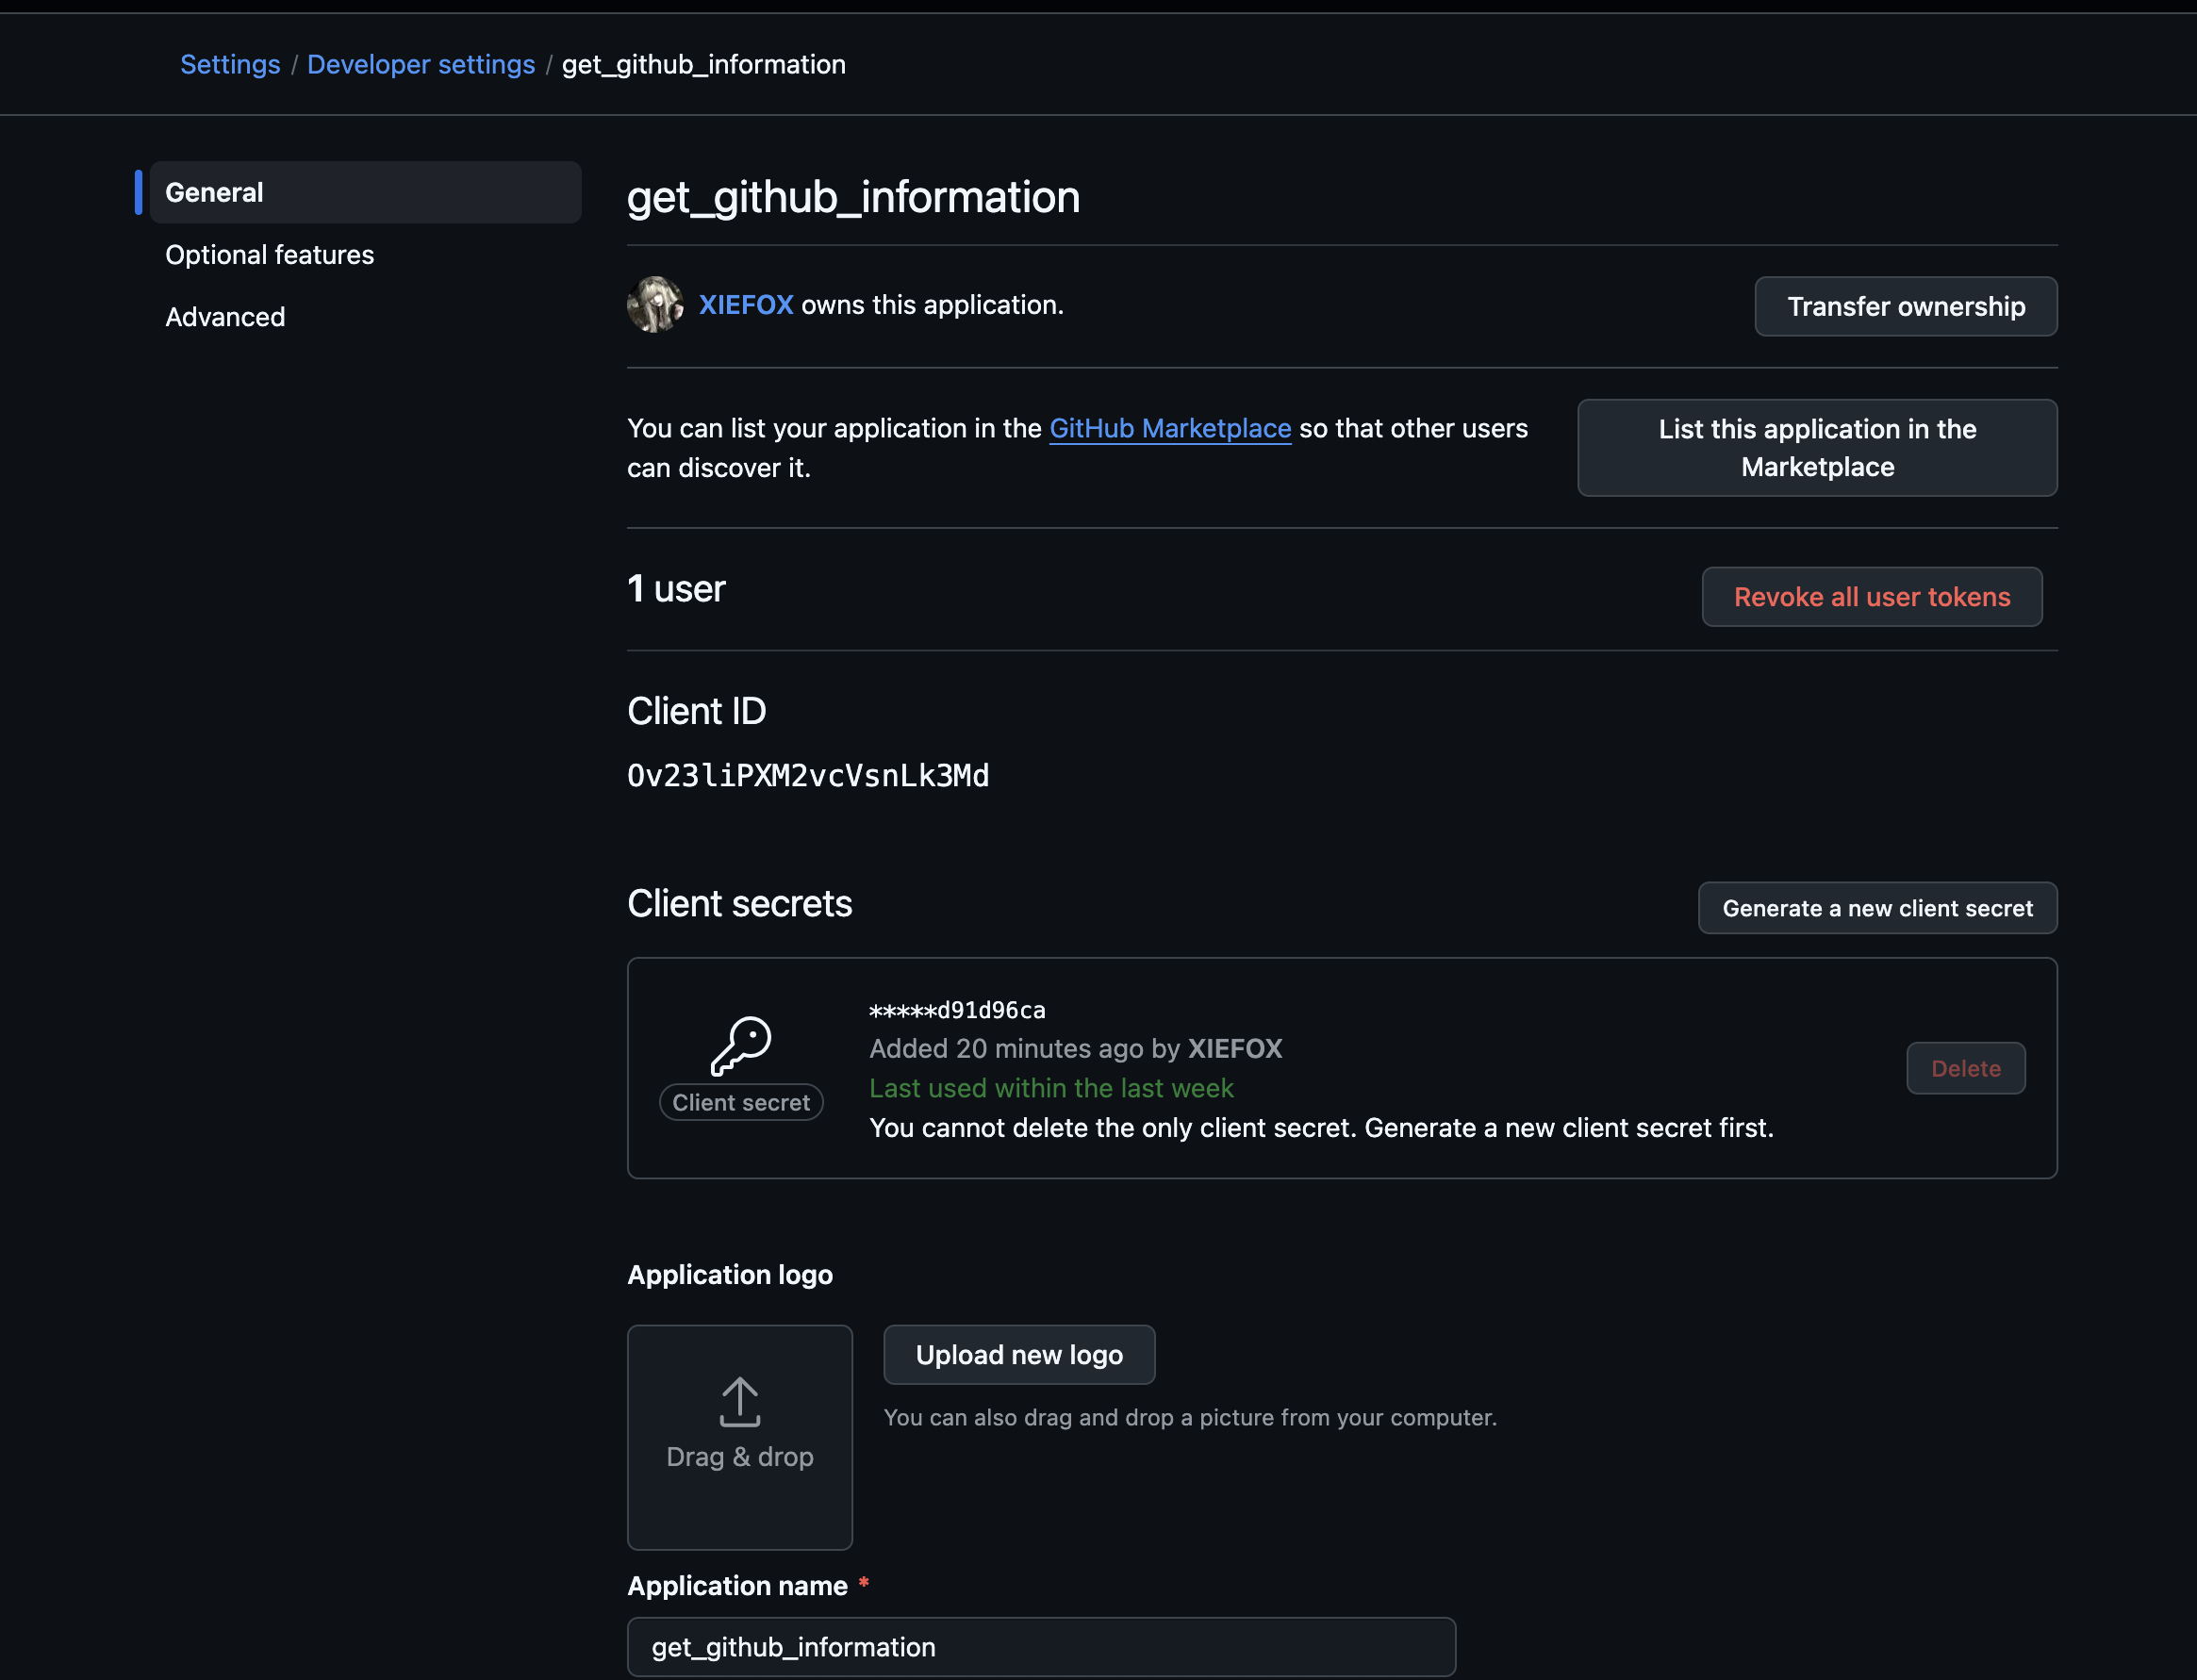
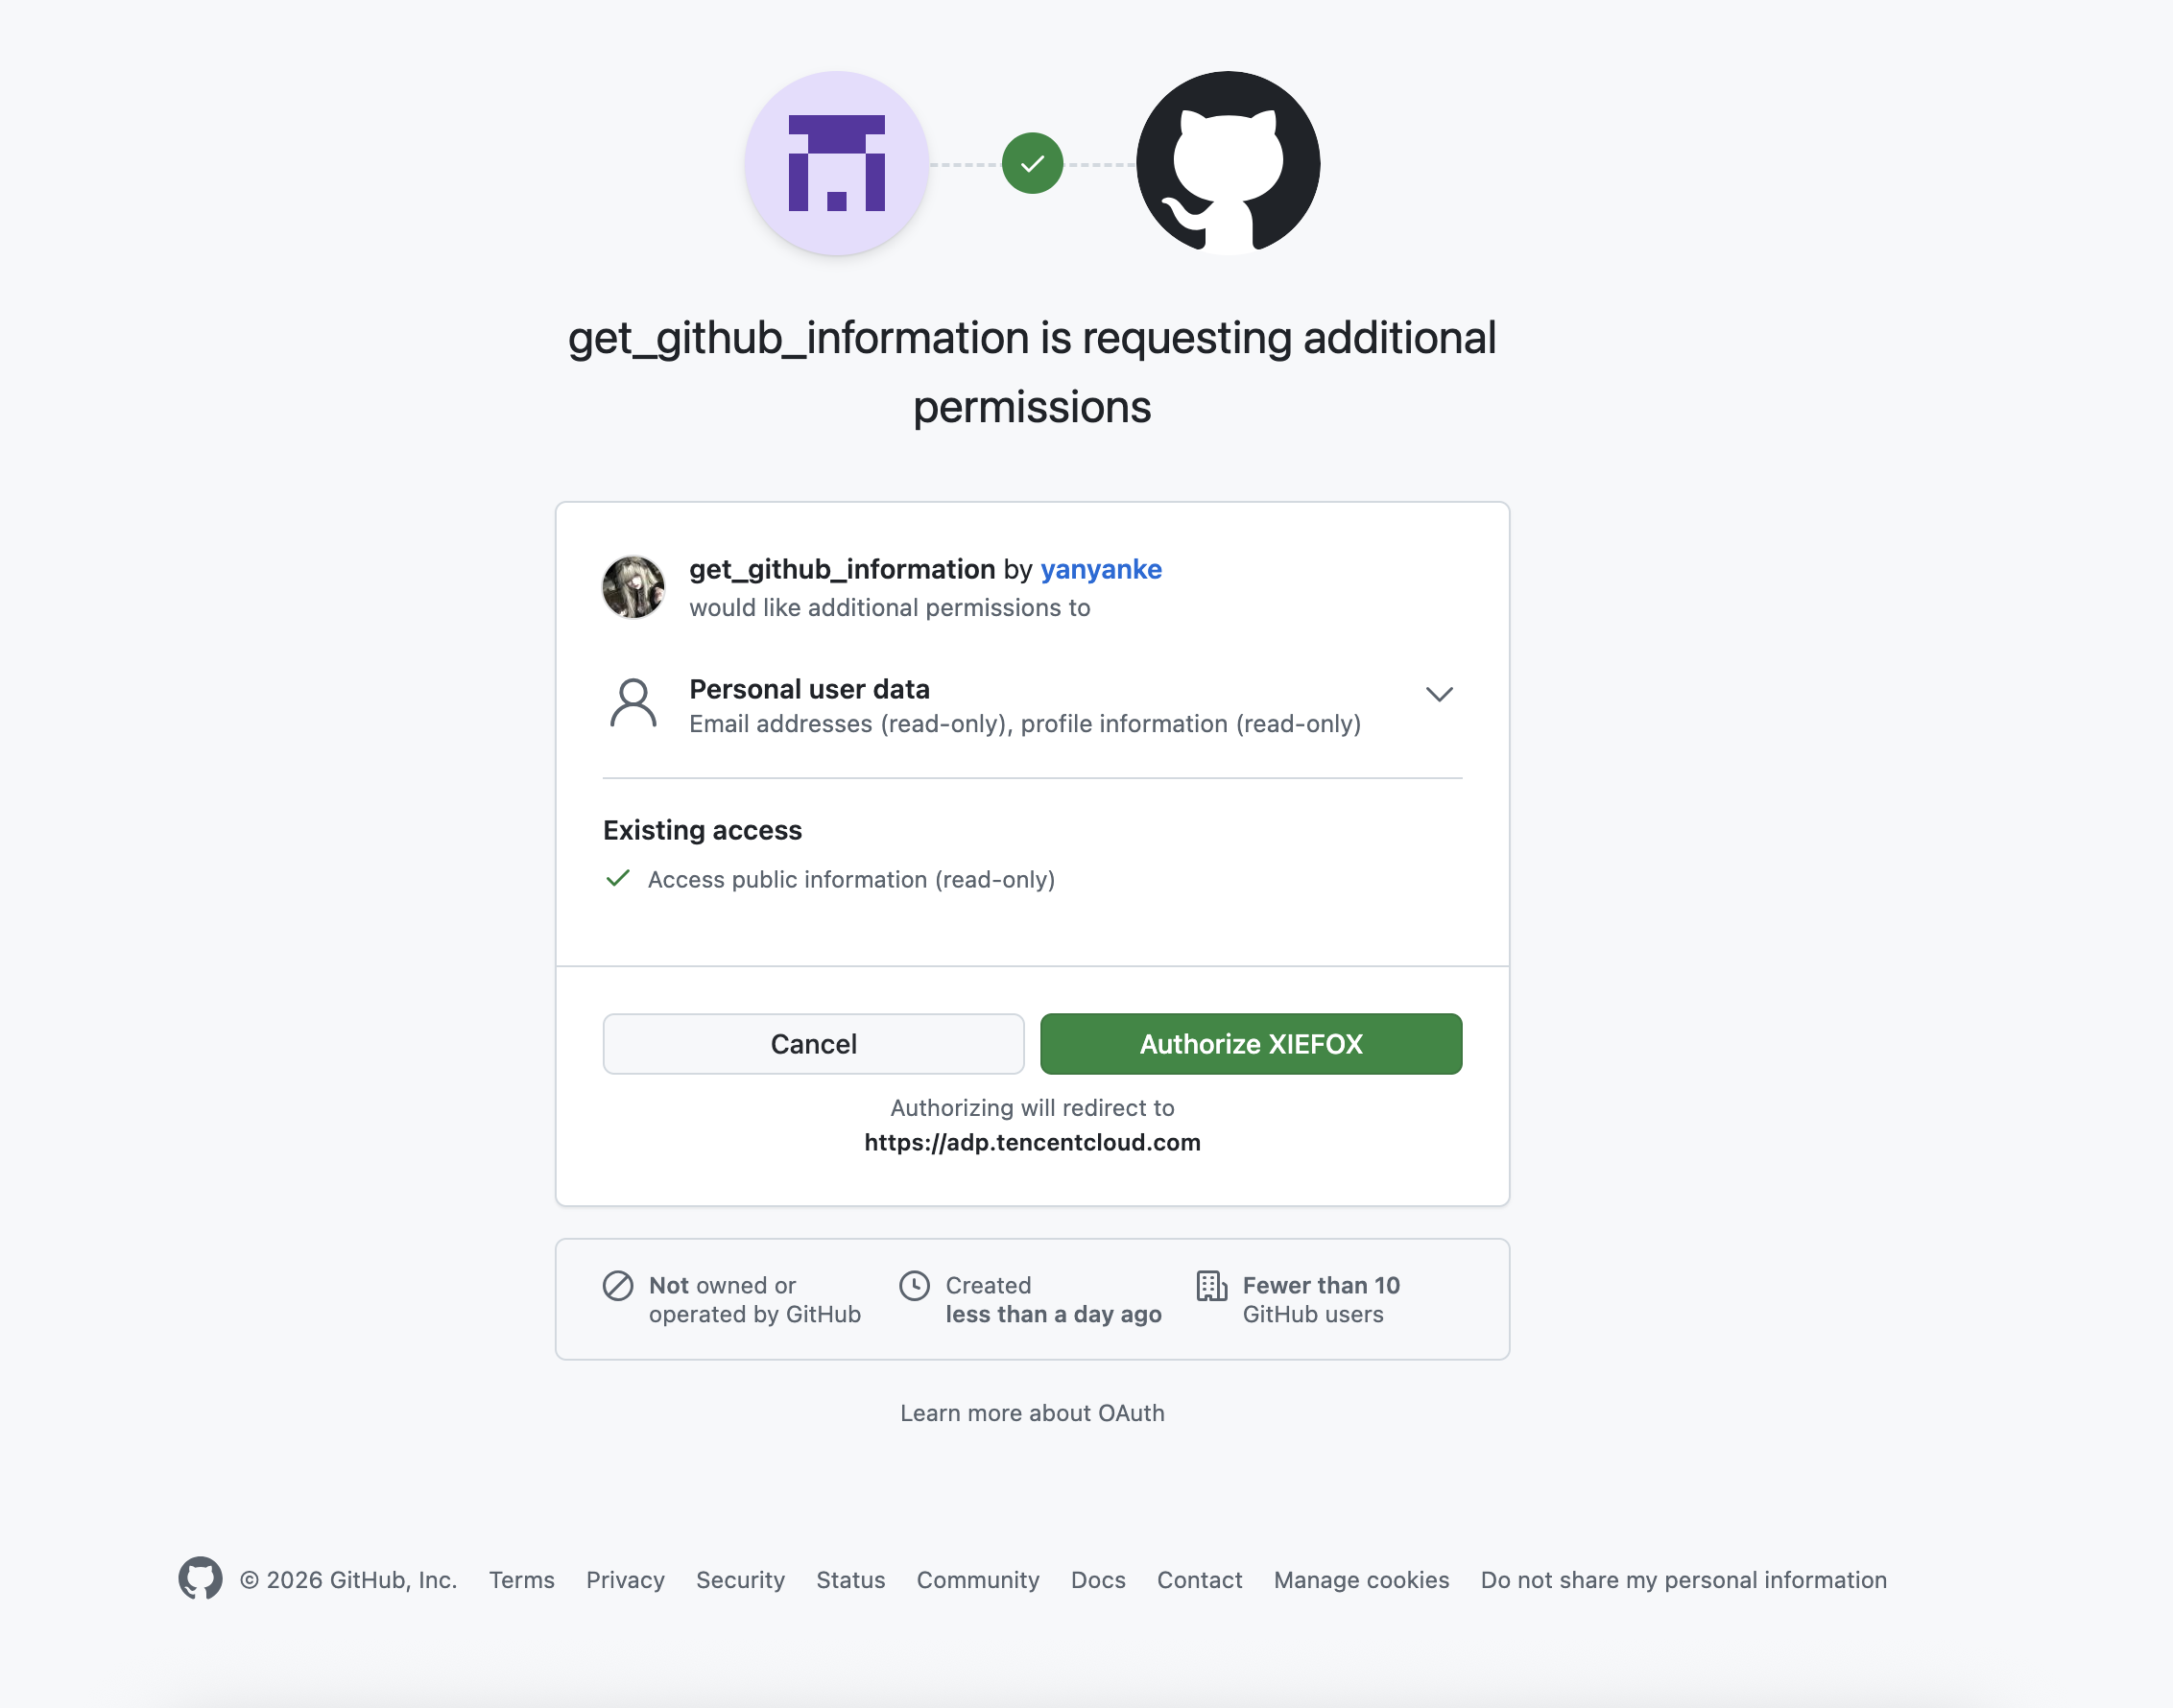
Step 2 Log in to the GitHub platform. Navigate to Personal Settings > Developer Settings, select OAuth Apps, and create an application. After completing operations such as entering application information, configuring the ADP callback address, and selecting application permissions, click Create Application. The GitHub platform will then automatically generate a ClientId and ClientSecret for you.
Step 3 In ADP, create a GitHub API tool, select OAuth 2.0 authorization, and enter the information obtained in the previous two steps.
Step 4 Verify the authorization.
Note:
If the connector uses APIKey for requestor identity verification, you can configure the corresponding parameter name and key value in the Header (request header) or Query (query parameter) under Advanced Settings.
Custom Connector Created
After creating a custom connector, go to the plugin details page and click Configure to pull the tool. You can then add and use it within the Smart Desk, Multi-Agent Mode, and Workflows to expand the Agent's service capabilities. Later, you can view, edit, export, and perform other actions on the created connector.
Attention:
Tools under a custom connector can be successfully pulled only after authorization configuration is completed on the details page.
Using a Custom Connector
To learn how to use tools within the application, see Using Connectors for details.
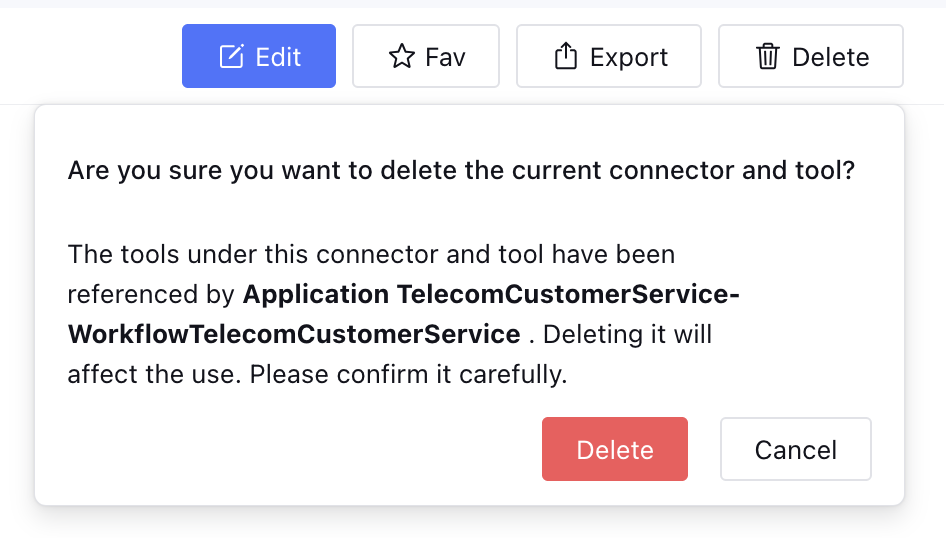
Deleting a Custom Connector
When a custom connector is deleted, a deletion prompt is displayed if the connector has been referenced.