When an agent can no longer rely on the existing capabilities of a large model to complete tasks, connectors can help developers quickly integrate external systems, business data, and general processing capabilities for the agent. Through connectors, an agent can not only perform natural language understanding and generation, but also further query data, invoke systems, execute tasks, process documents, and generate content, building intelligent applications that better align with real business scenarios. You can enable connector capabilities for your Agent application in the following three ways:
Smart Desk: After you add a connector in the Smart Desk, the model can automatically determine whether to invoke the corresponding capability based on the user's question and the tool description.
Claw/Multi-Agent Mode Applications: Add a connector on the Settings page within the Claw/Multi-Agent application mode to enable external capabilities for the agent.
Workflow: Add a Connectors and Tools node within a workflow canvas, and then select this workflow in the workflow management of a Standard mode application. Alternatively, run this workflow canvas in single-workflow mode.
Smart Desk
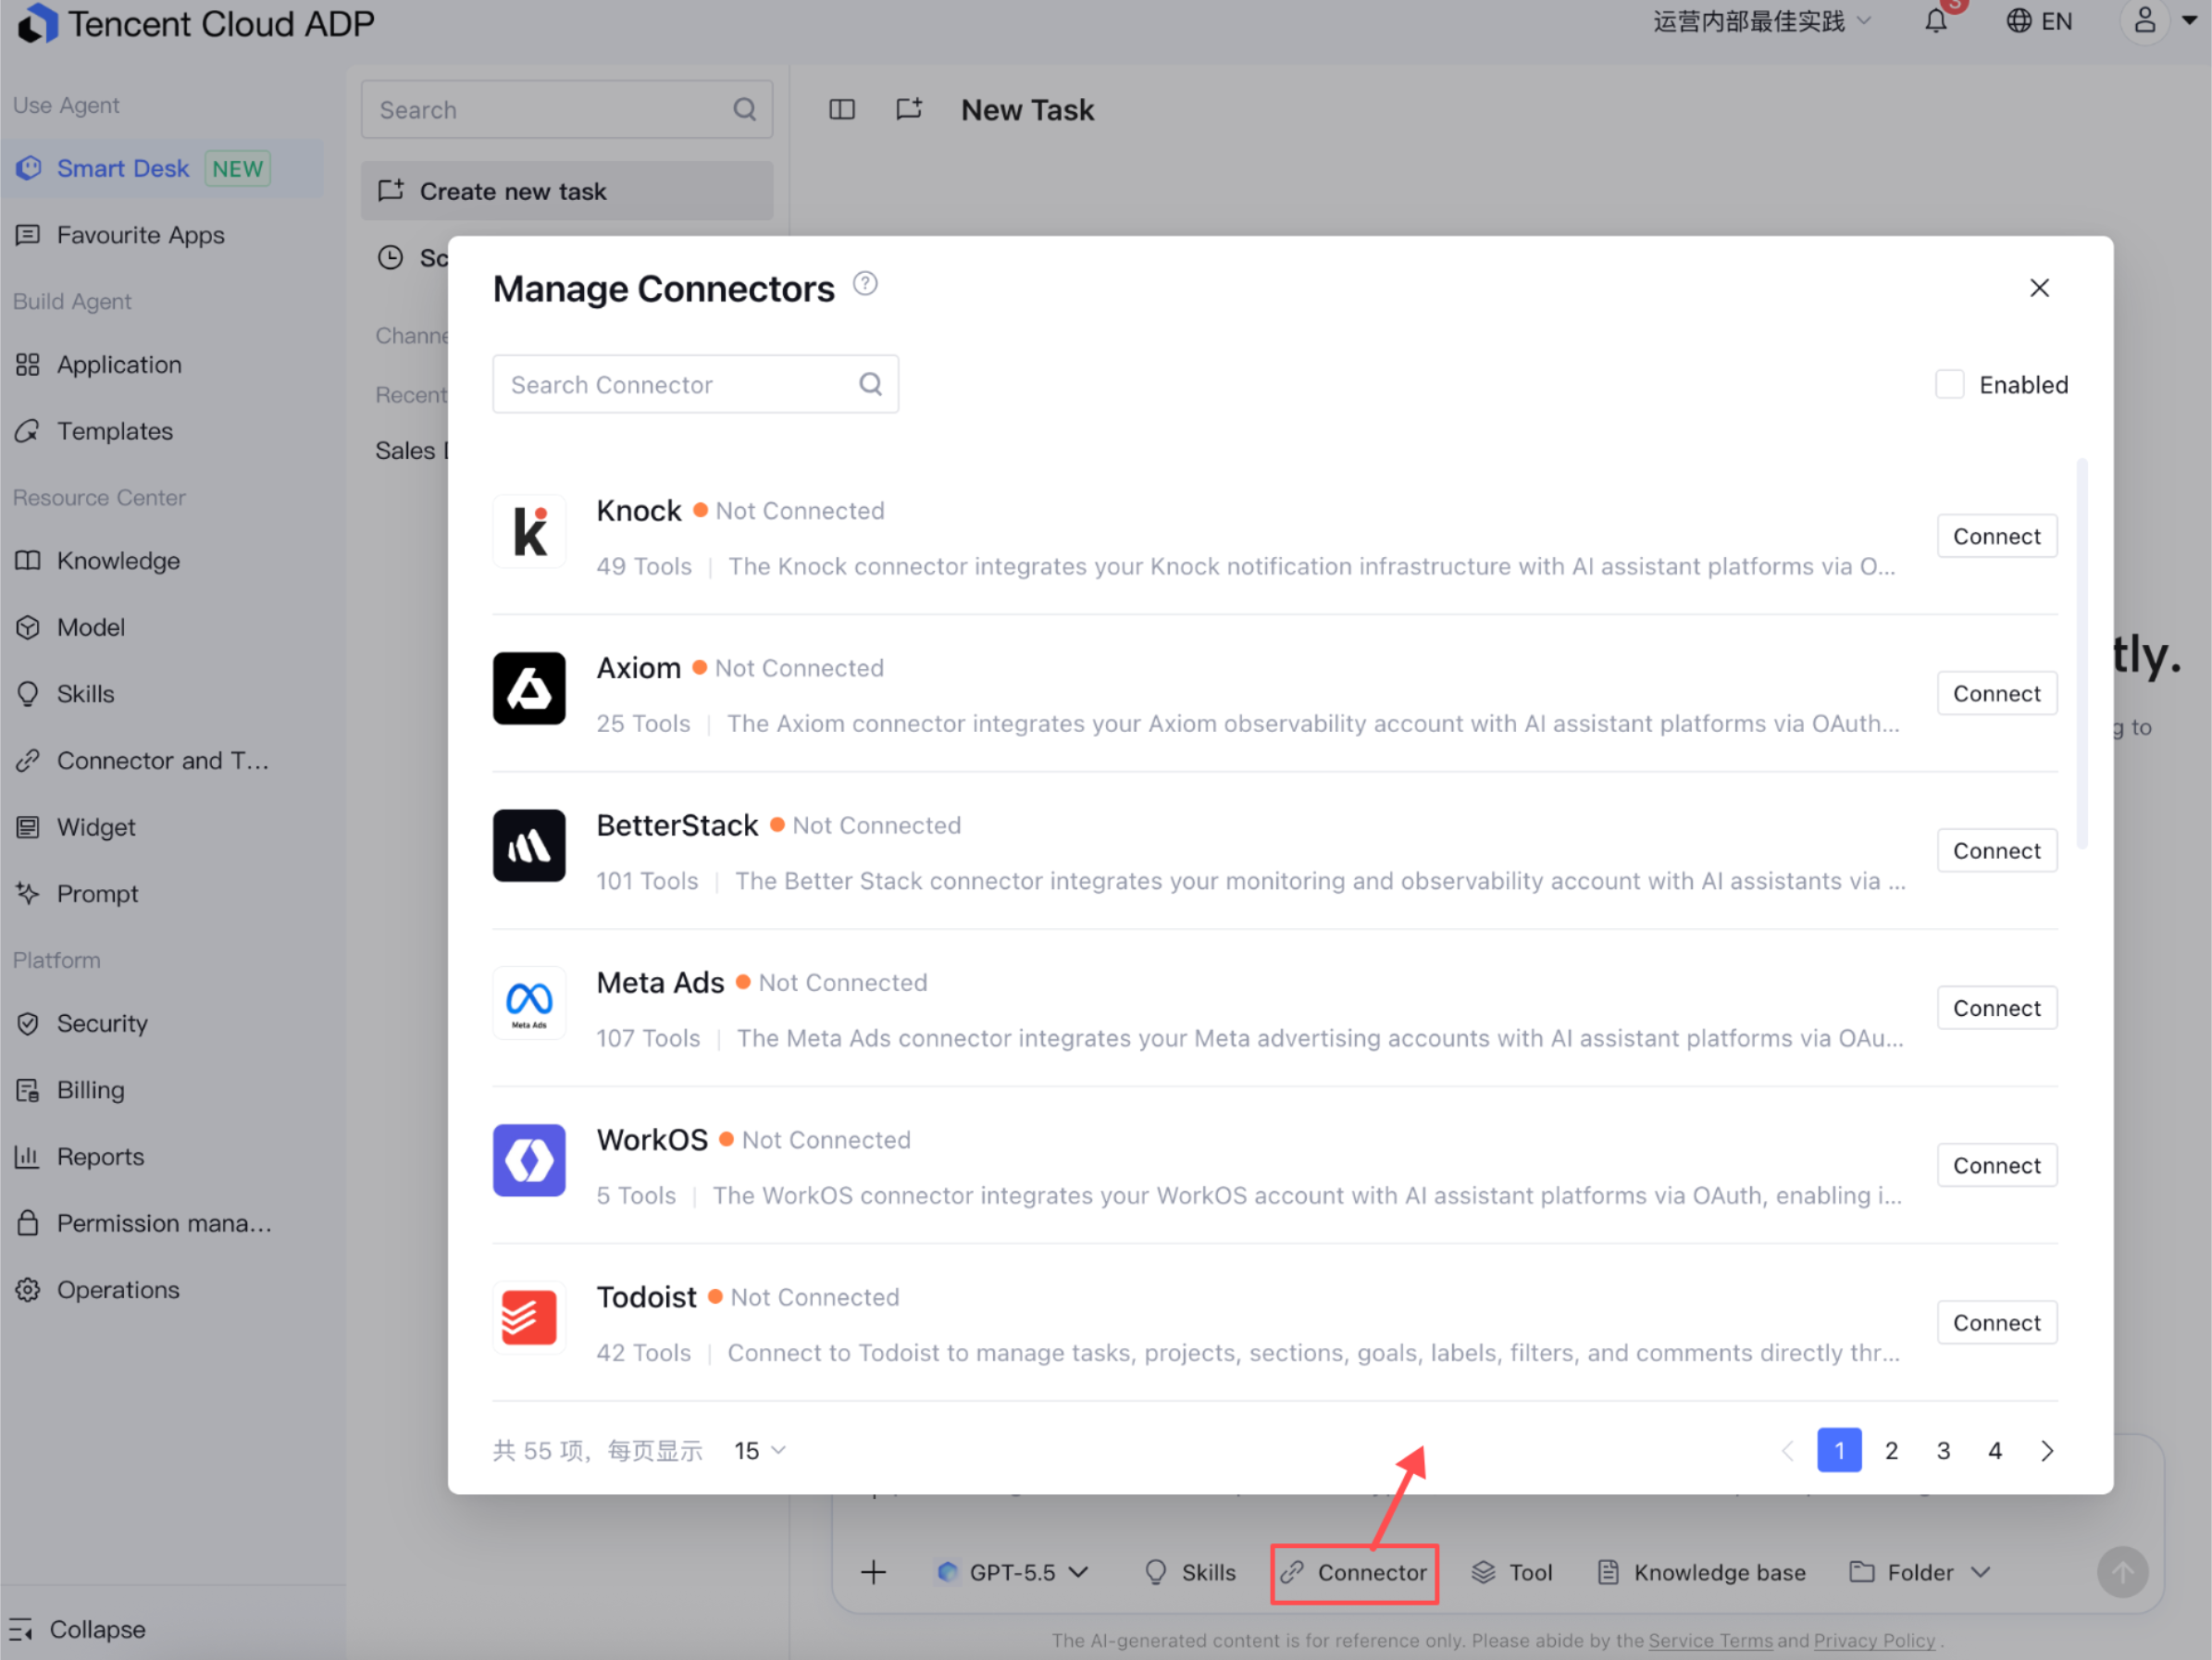
1. Go to the Smart Desk from the left sidebar, and click Connectors in the toolbar of the bottom input box.
2. In the Manage Connectors window that pops up, browse the list of available connectors. The connector name, number of included tools, capability description, and connection status are displayed on the page.
3. For connectors that require authorization or configuration, click Connect on the right and follow the on-page instructions to complete OAuth authorization or key configuration. After completion, the connector status changes to Connected.
4. For connectors that do not require additional authorization, you can enable or disable them directly using the toggle switch. Once enabled, the capability of that connector is added to the current workspace conversation context.
5. Return to the dialog box and directly enter your task requirements. The agent will automatically determine whether to invoke the enabled connectors based on the question content and use the corresponding tools to complete the task when necessary.
Claw/Multi-Agent Mode Applications
Adding a Connector
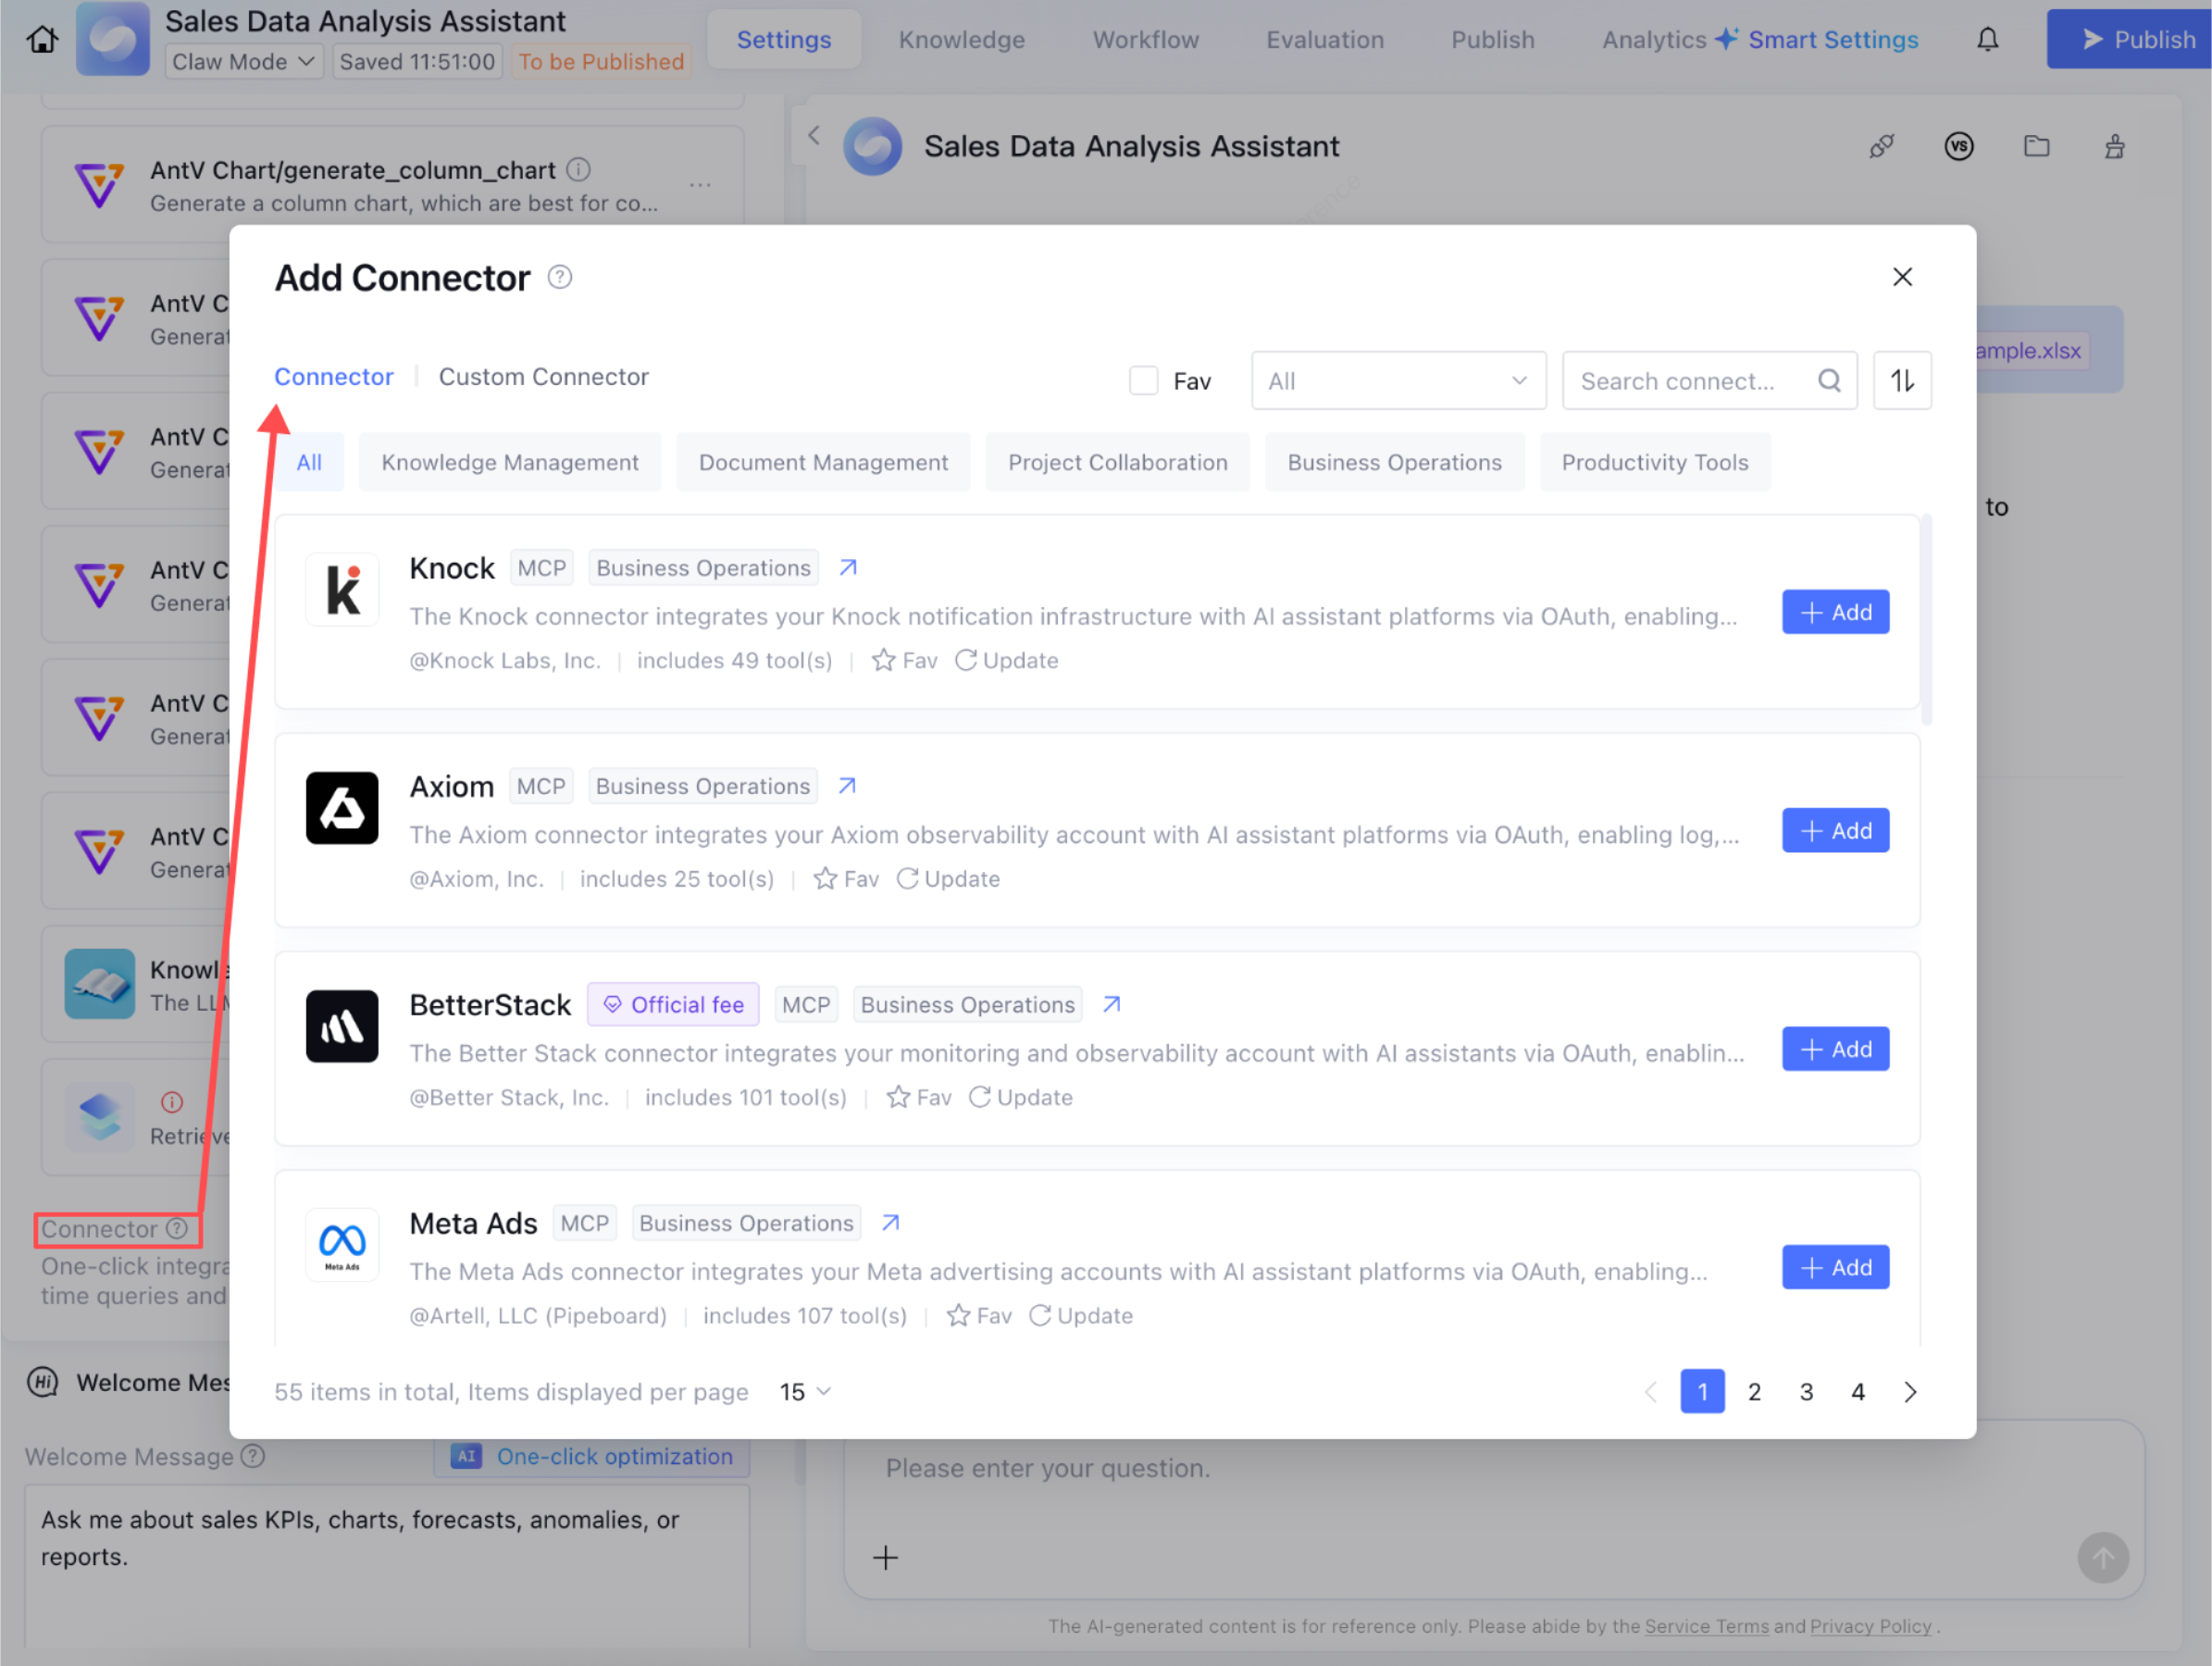
1. Go to the Claw/Multi-Agent mode application development page, locate the Connectors module in the left-side capability configuration area, and click Add to open the Add Connector pop-up window.
2. In the pop-up window, you can browse the list of connectors provided by the platform. You can also quickly locate the required connector using category tags, official filters, favorites filters, or the search box. The connector card displays the connector name, protocol type, category tags, capability description, provider, and number of included tools, helping you determine whether the connector is suitable for your current application scenario.
3. After selecting the target connector, click Add on the right to add the connector to the current application.
Configuring a Connector
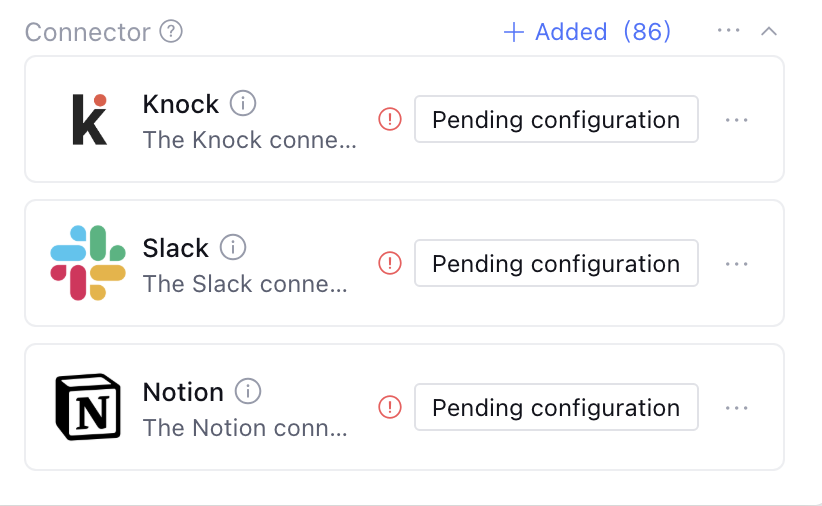
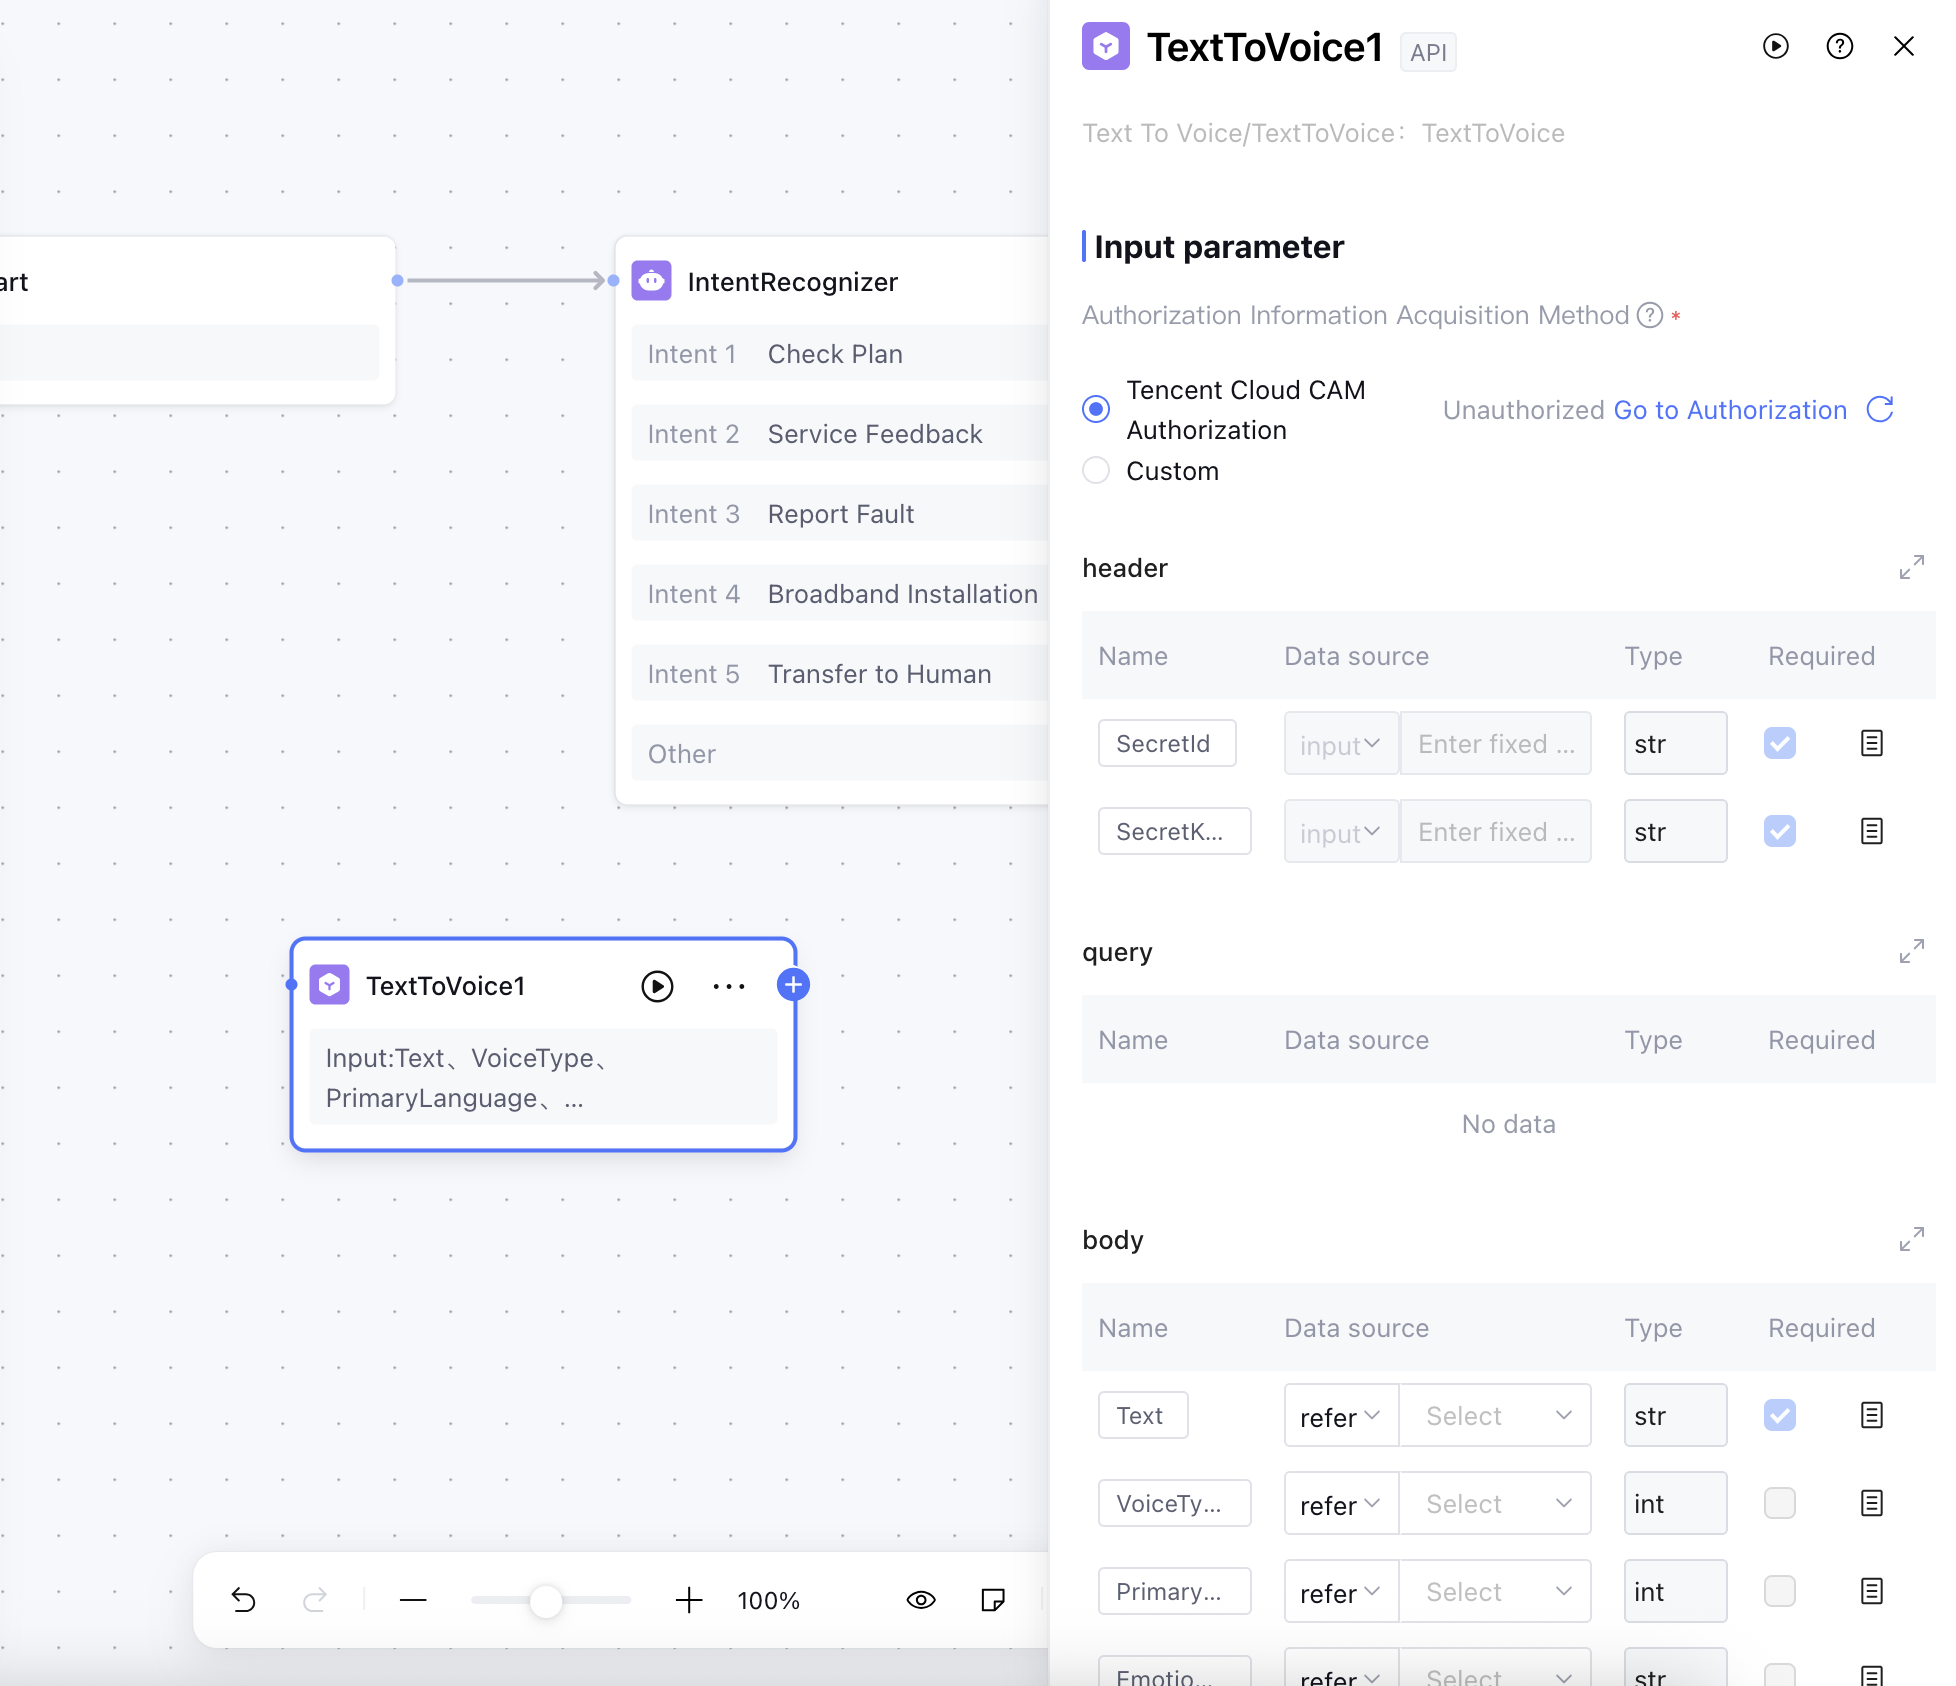
Some connectors require authorization, key entry, or account binding before they can be used normally. After adding a connector, if its status shows as To be configured, click Pending configuration and follow the on-page instructions to complete the relevant configuration.
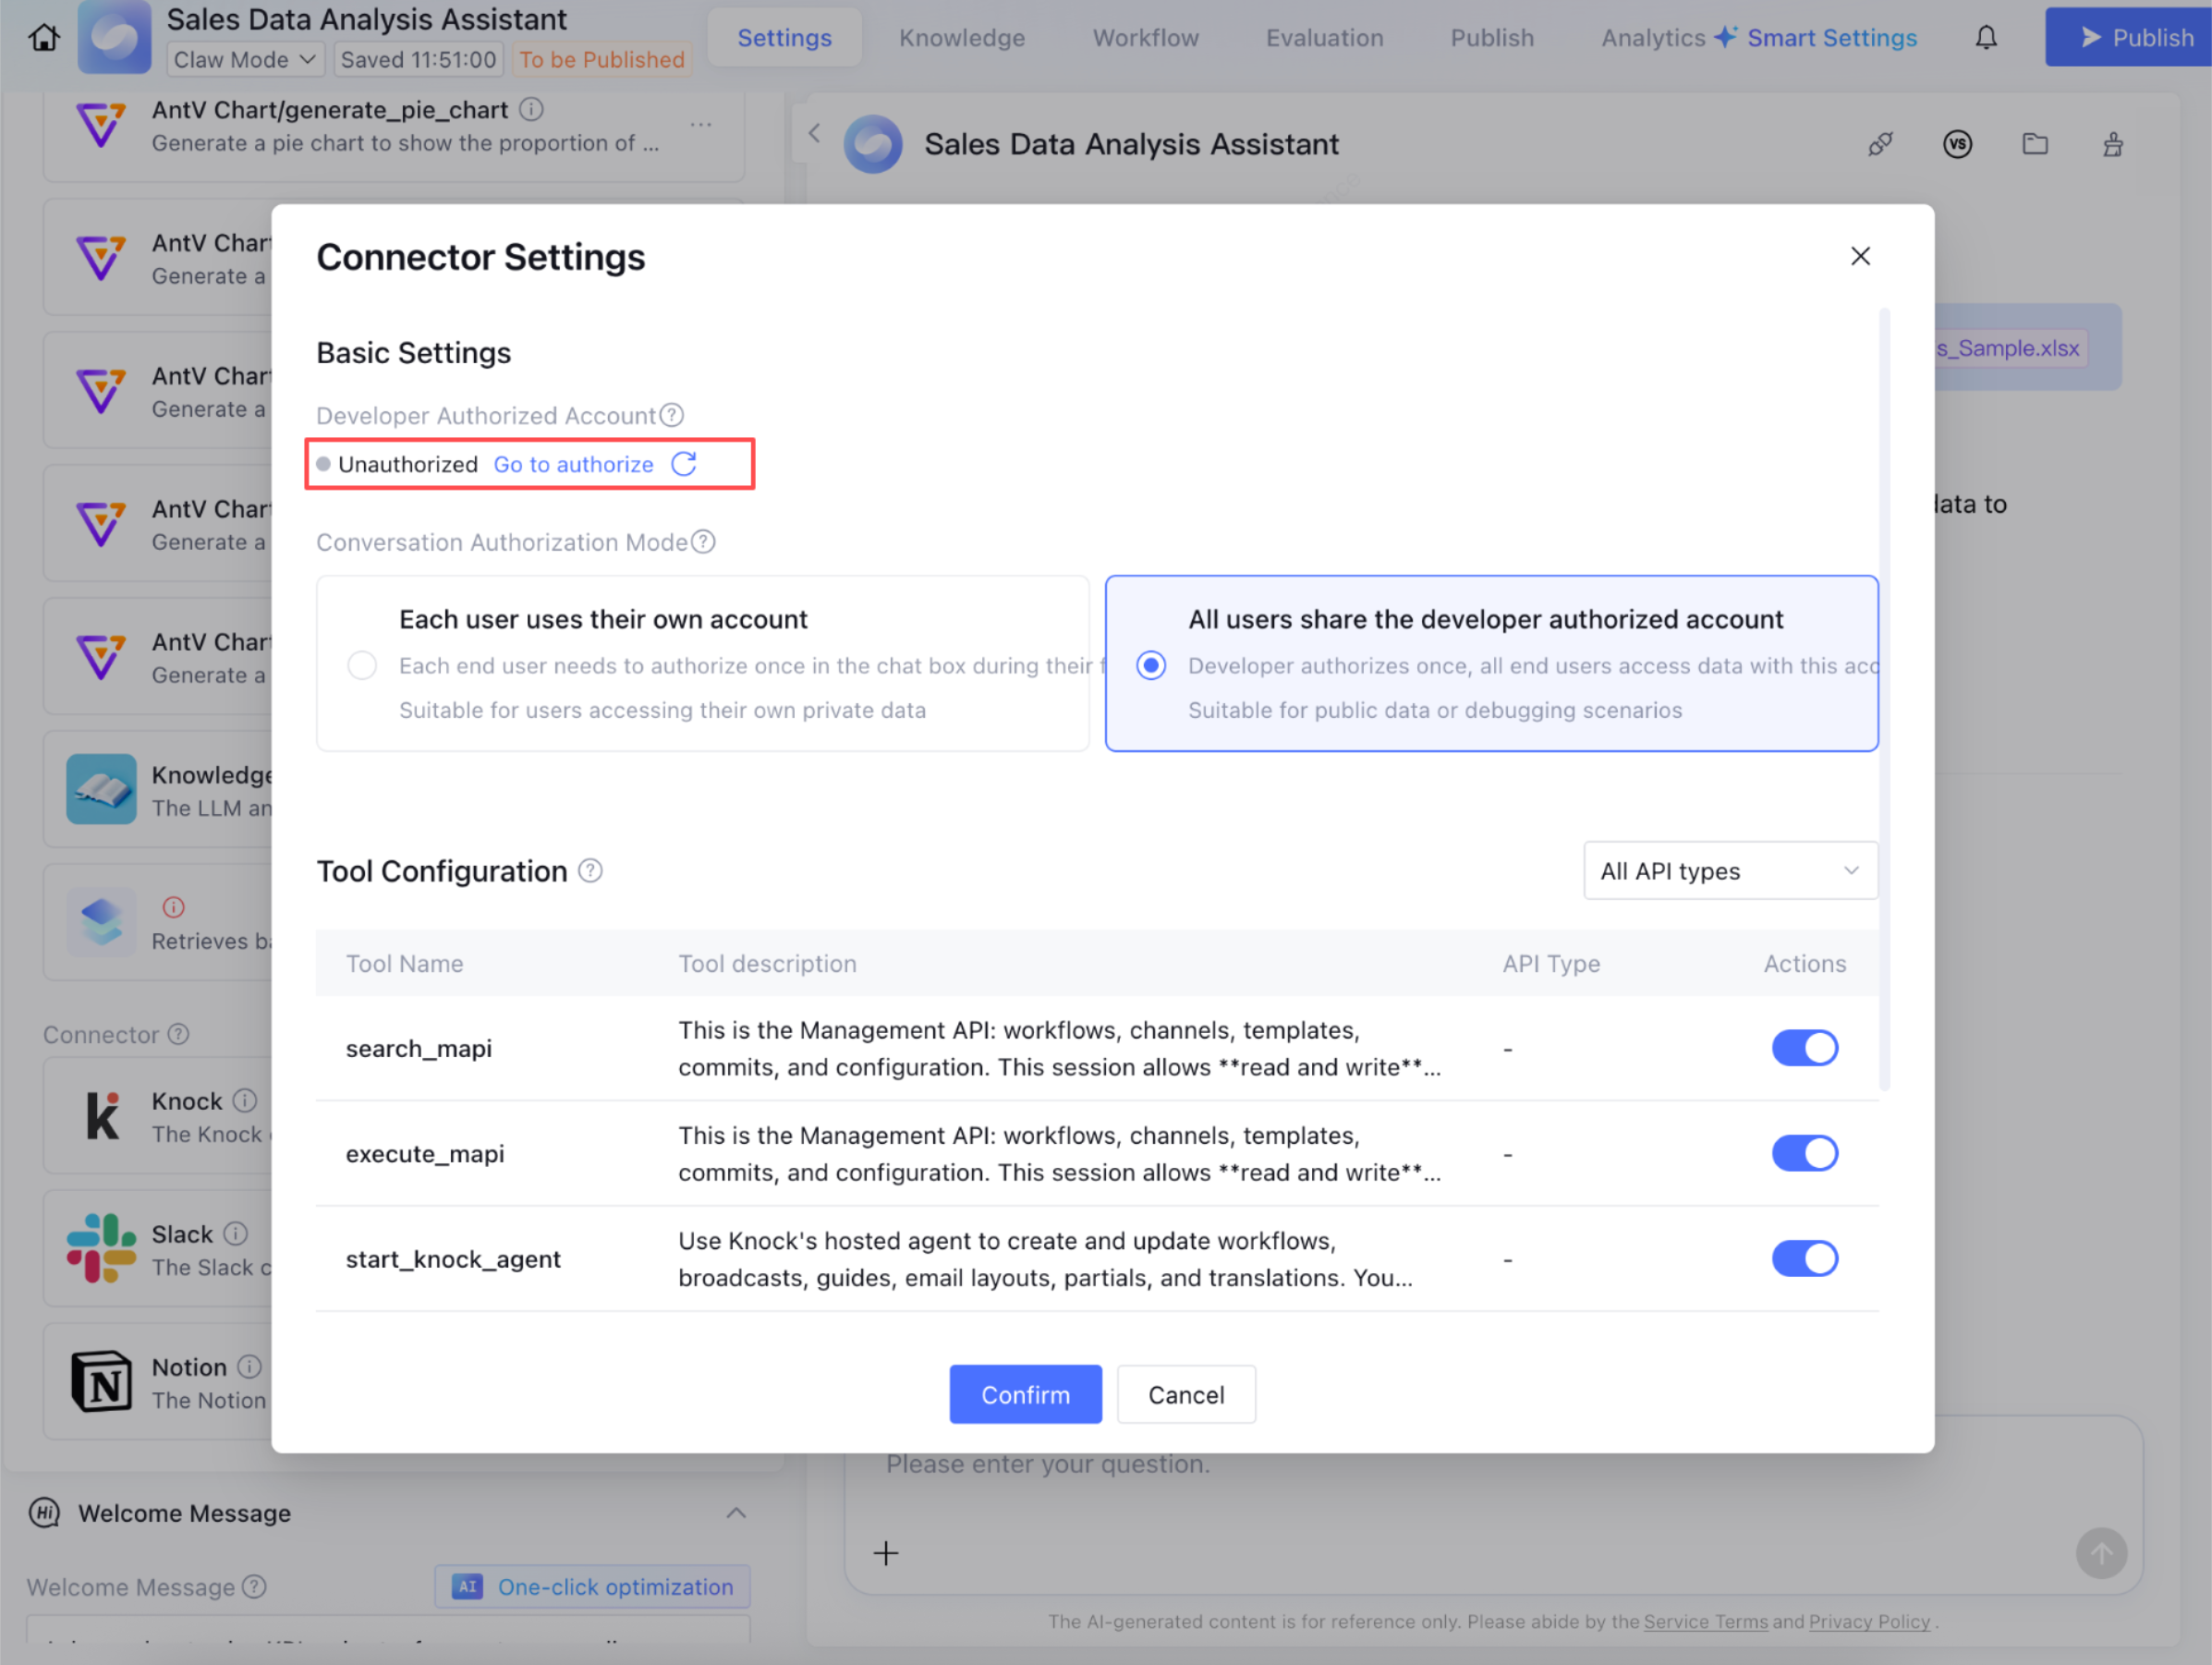
Basic Settings
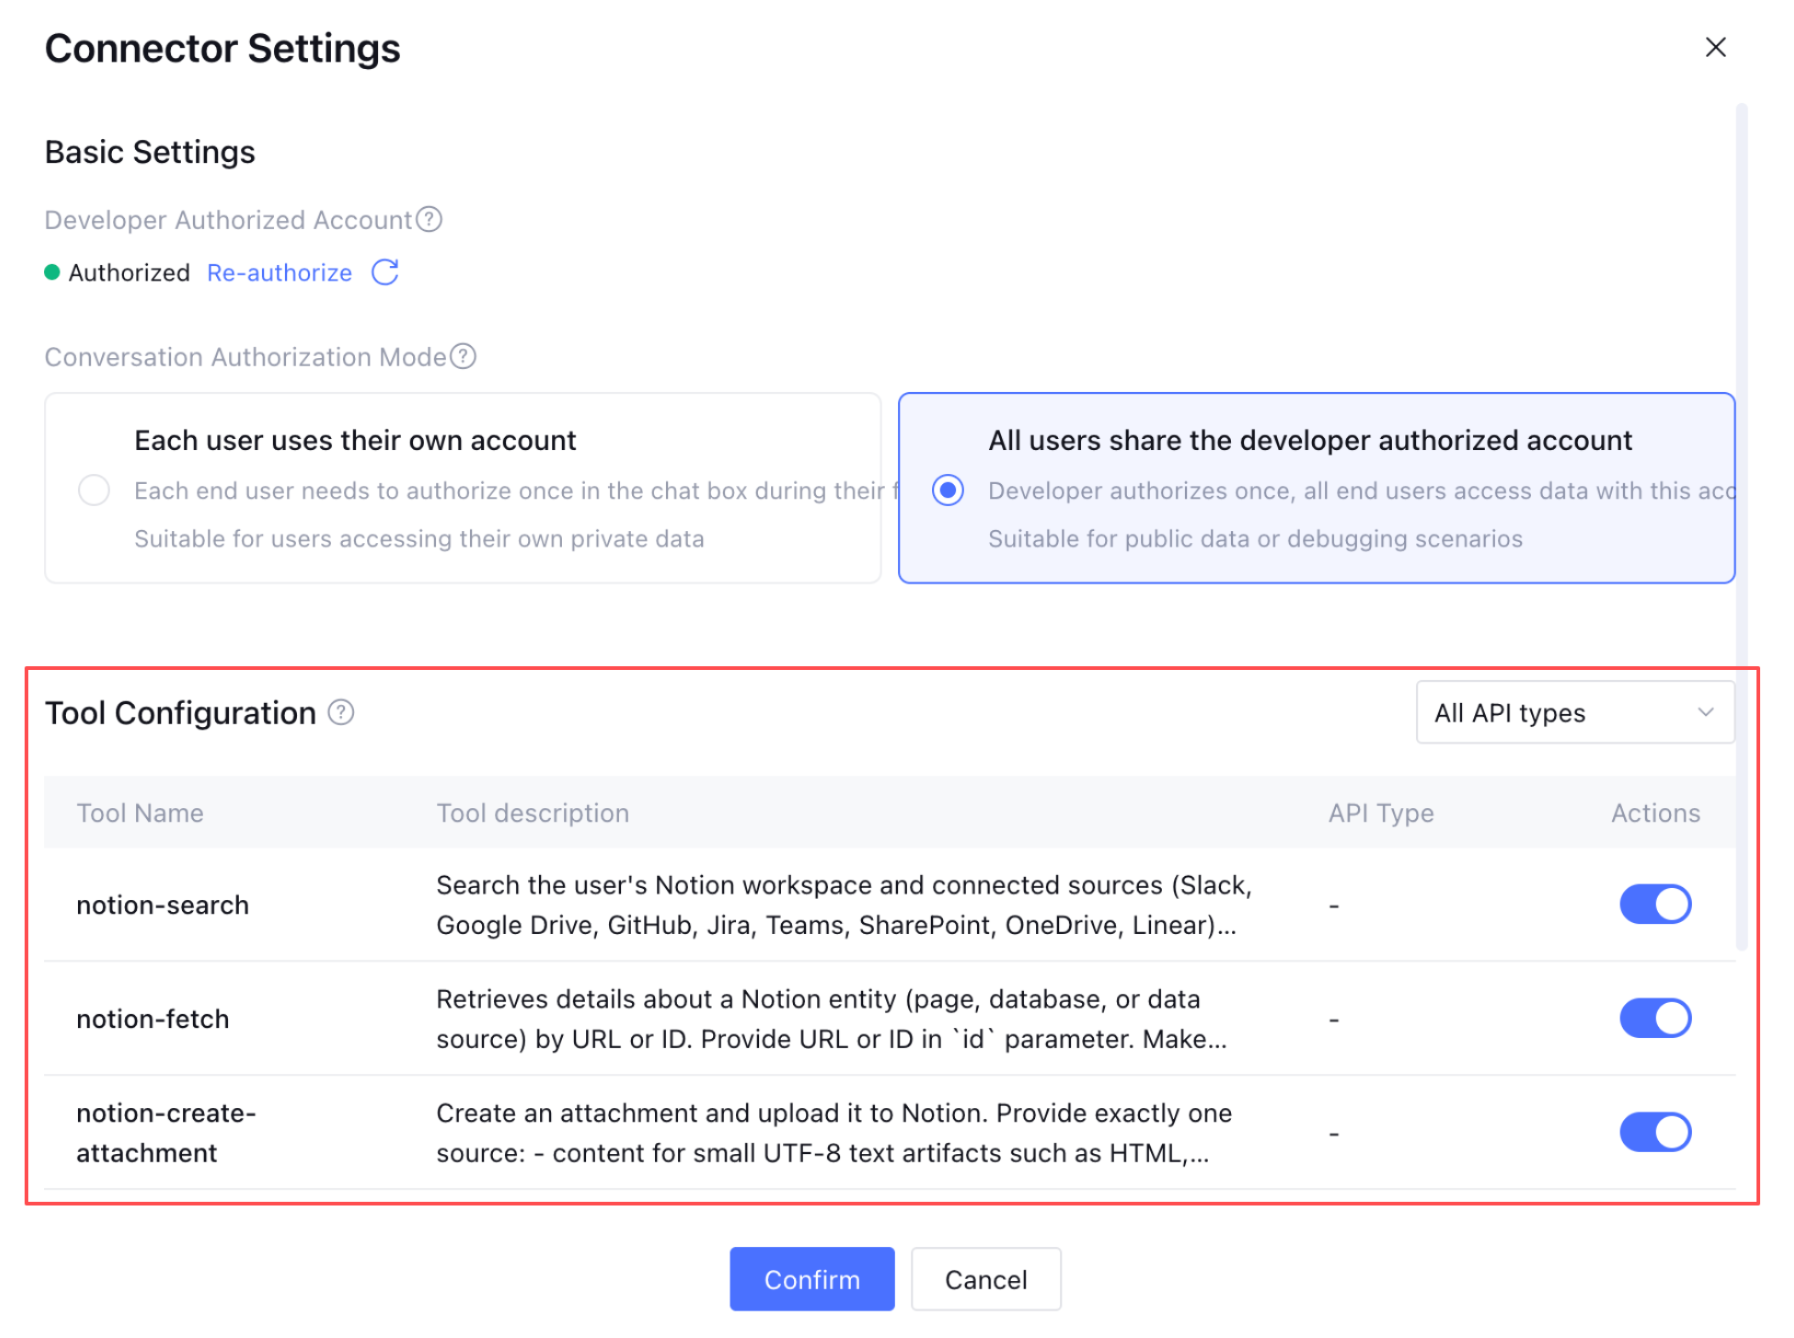
Basic Settings are used to configure the authorization method for connectors. The authorization methods supported by different connectors may vary. The page displays the available options based on the connector's capabilities.
Selecting the OAuth Authorization Mode
When the added connector uses OAuth authorization, you can select an authorization mode to meet the requirements of different security levels and business scenarios.
1. Click Go to Authorization to proceed to the third party for login authorization. Refresh the page to obtain the latest authorization status. (If you select Each user uses their own account in subsequent steps, the authorized credentials here will not be inherited by end users.)
2. You can click Re-authorize to switch the authorized account. The new authorization will overwrite the old one.
3. Select an authorization mode: The authorization mode determines whose data is accessed when end users invoke the connector in a conversation after the application is published. The platform supports two authorization modes: User Authorization and Developer Authorization.
User Authorization
When this mode is selected, each end user must complete their own account authorization when using the application for the first time in a conversation. When the agent invokes the connector, it only accesses data within the scope of that specific user's account permissions.
This mode is suitable for scenarios that require data isolation based on user identity. For example, when User A uses the application, they access their own knowledge base, documents, or workspace. When User B uses the application, they access their own knowledge base, documents, or workspace. Data between different users is isolated from each other and is not mutually visible.
Typical scenarios include:
Personal notes, to-do lists, and document search assistants;
Team members query their own work content.
Applications that require strict access to external system data based on user identity;
Scenarios where different users should not share the same data permissions.
User Authorization is more suitable for applications where "each user queries their own data," as it ensures that data permissions align with user identity.
User Authorization - The authorization is completed by the user during the first conversation.
Developer Authorization
When this mode is selected, the application developer must click Go to authorize during the application configuration phase to bind a fixed account. After the application is published, all end users will access data through the permissions of this fixed account when invoking the connector, and no separate authorization is required for end users.
This mode is suitable for scenarios where all users are expected to access the same shared data. For example, a developer binds an enterprise knowledge base account. All users of the application then access the same company FAQ, product manuals, or public policy documents through this account.
Typical scenarios include:
Company FAQ Q&A bot;
Product manuals, help centers, and knowledge base Q&A;
Public policies and regulations queries;
An application for querying shared materials that is open to all personnel.
When Developer Authorization is used, it is recommended to bind a service account specifically prepared for the application and avoid using the developer's personal account. Otherwise, private content under the developer's personal account may be accessed by all application users.
Tool Configuration
This is used to manage the scope for enabling specific tools under this connector. A connector typically contains multiple tools. Different tools correspond to different operational capabilities, such as query, create, update, delete, upload, and convert.
By default, a connector may enable all tools. It is recommended to enable only the necessary tools based on the actual application scenario. For example, if the application only needs to query the knowledge base content, you can retain only query and read-only tools. If the application needs to create documents, update tasks, or write data, then enable the corresponding write tools.
Adding Connectors to Prompts
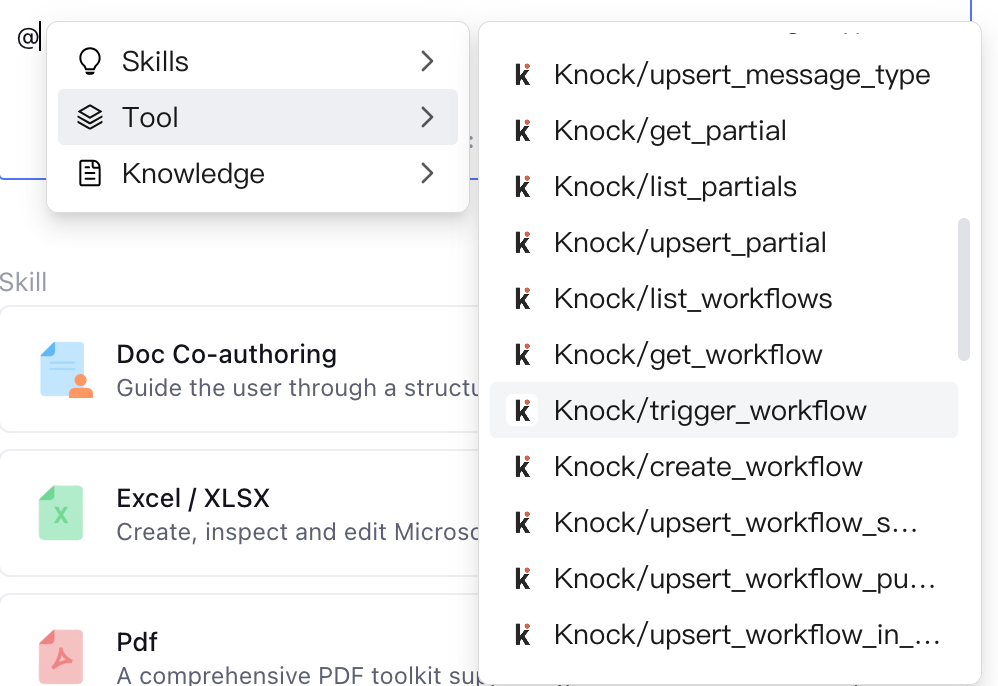
Enabling a large model to understand the feature introductions and specific functions of various connectors in advance helps it correctly invoke connectors. In the application's prompt, you can quickly insert selected connector tools using the shortcut key "@". You can also add descriptions for tool invocation, such as under what circumstances to invoke the current tool, to improve the large model's efficiency in invoking tools.
Adjusting Connectors
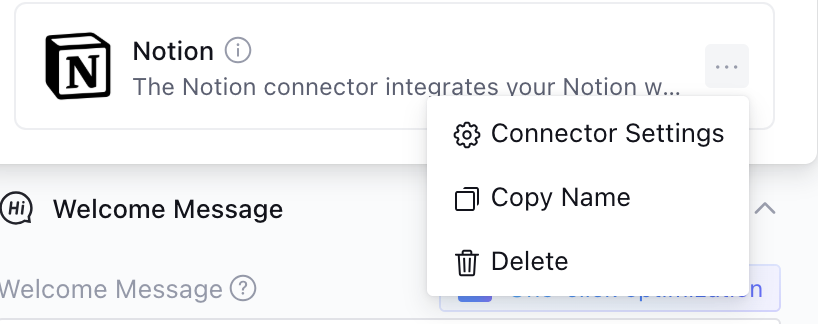
Within the connector box, click the menu button on the right side of the selected connector, such as Adjust Connector Settings, Copy Connector Name, or Delete Connector.
For tools that have been added to the list, Connector Update and Delete All are supported. Click Connector Update to refresh the latest configurations of all tools in the list.
Failed Connectors
If the configured connectors include custom connectors, the application will prompt the user with "This connector is invalid" after a custom connector is deleted.
Workflow
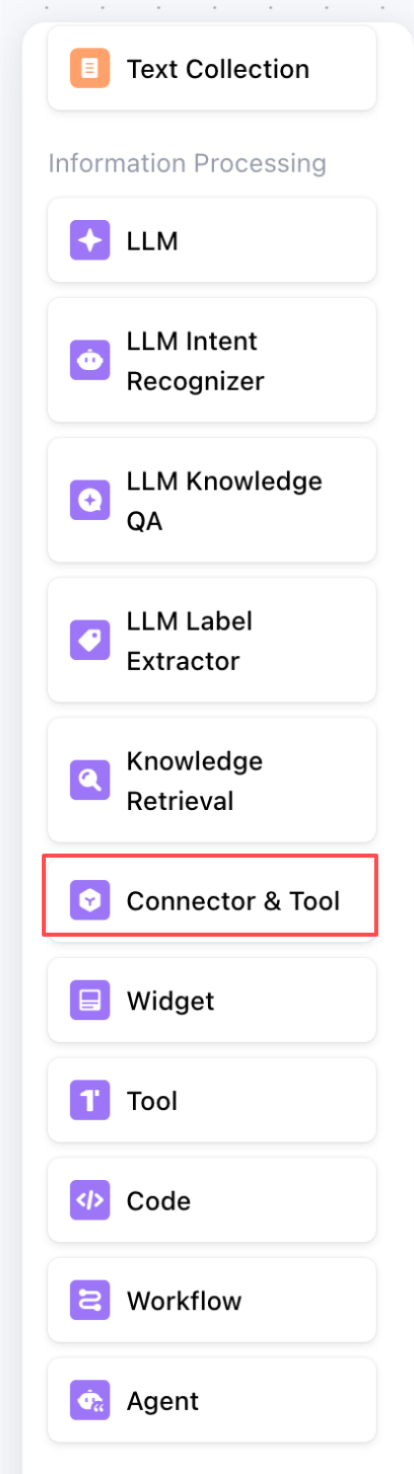
1. You can drag a Connectors and Tools node onto the canvas within a workflow and select the appropriate connector as needed. Only one tool under a connector can be selected for a single node in a workflow.
2. To ensure the features of the tools under a connector can function normally, you can test the tools individually. For example, after filling in the input parameters, click Test to verify the features are working correctly, thereby preventing the entire workflow from failing due to tool service exceptions.
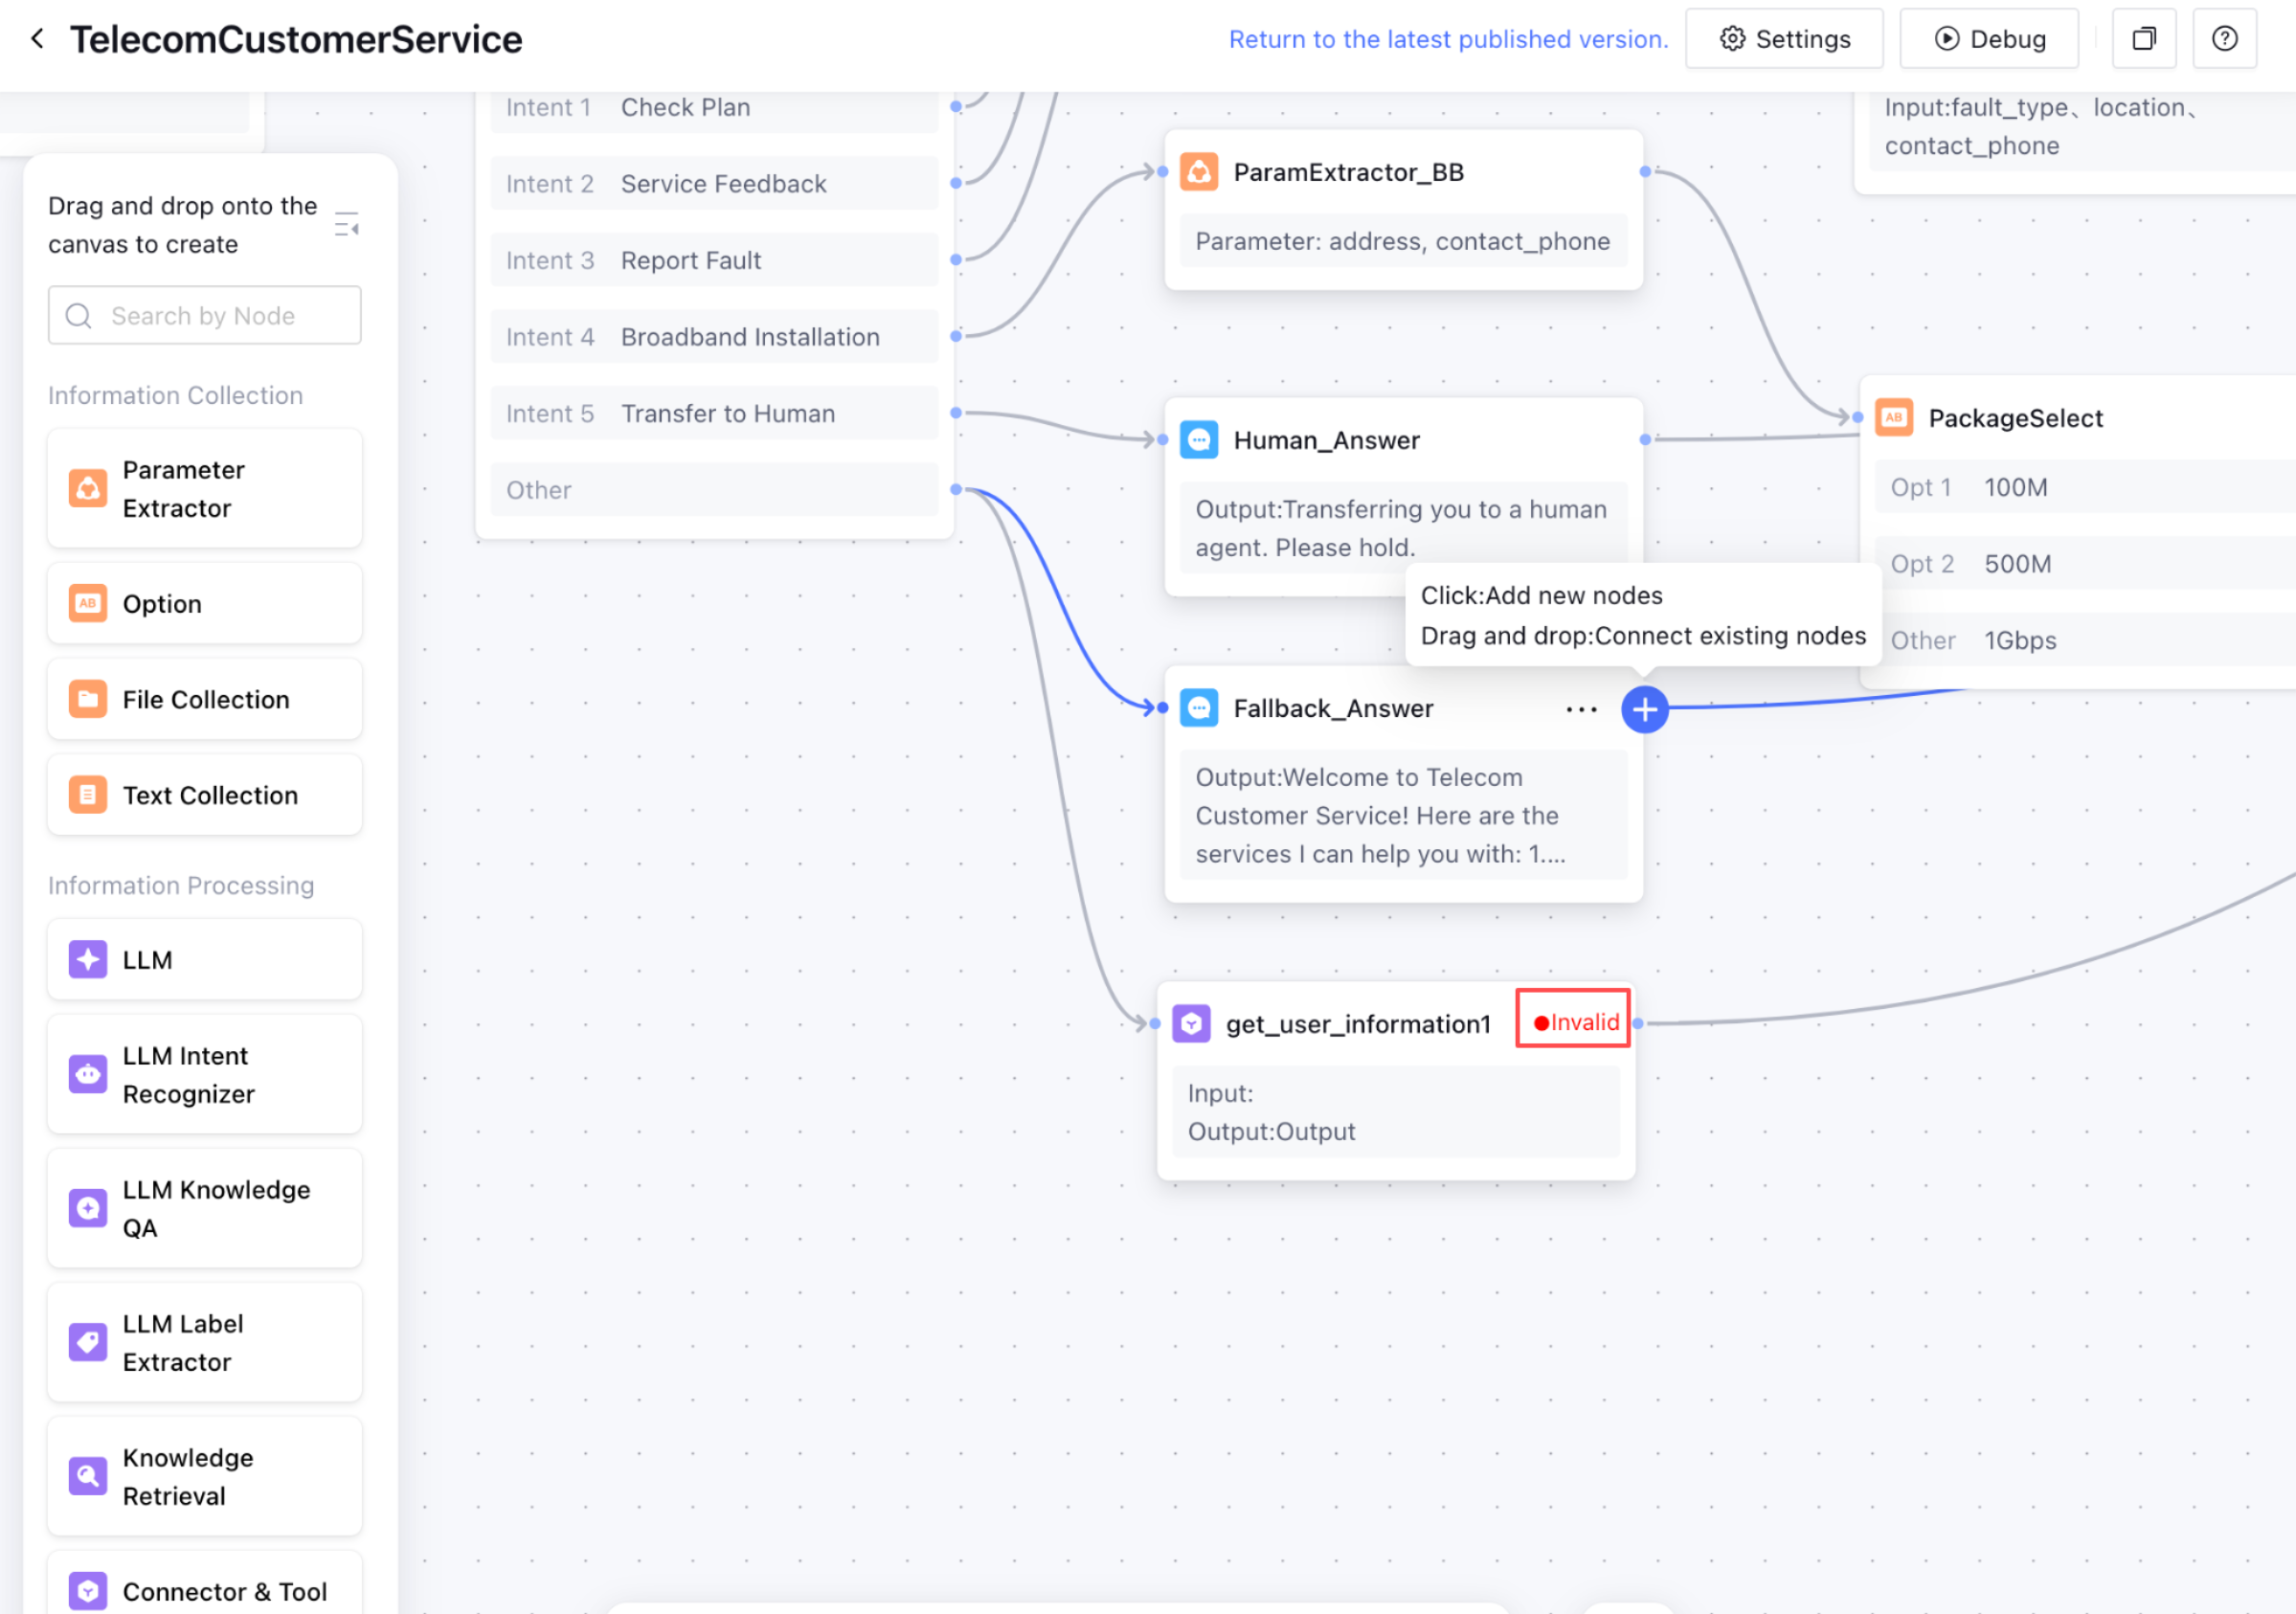
3. If the tools under a configured connector include custom tools, the corresponding tool node on the workflow canvas will display the message "Invalid" to the user after a custom tool is deleted.