Purchasing DNS Plan
Download
Focus Mode
Font Size
Step 1. Log in to the console
Step 2. Add a domain
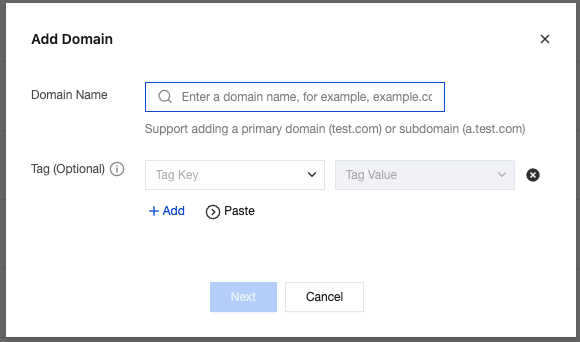
The domain for which to purchase a plan needs to be added to the second-level domain list first. The steps are as follows:
1. On the Authoritative Resolution page, click Add Domain.

2. Enter the domain you need to resolve and click Next.
Note:
After adding a domain, you can purchase a plan first and then modify the DNS server settings at the registrar, as those two operations don't affect each other.
Step 3. Purchase a plan
DNSPod provides the Free plan for newly added domains by default. If you need to upgrade the plan, you can do so in the following steps:
1. On the Authoritative Resolution page, select the domain for which to upgrade the plan and click Upgrade.
Note:

2. On the Purchase Plan page, select a plan according to your actual needs as shown below:
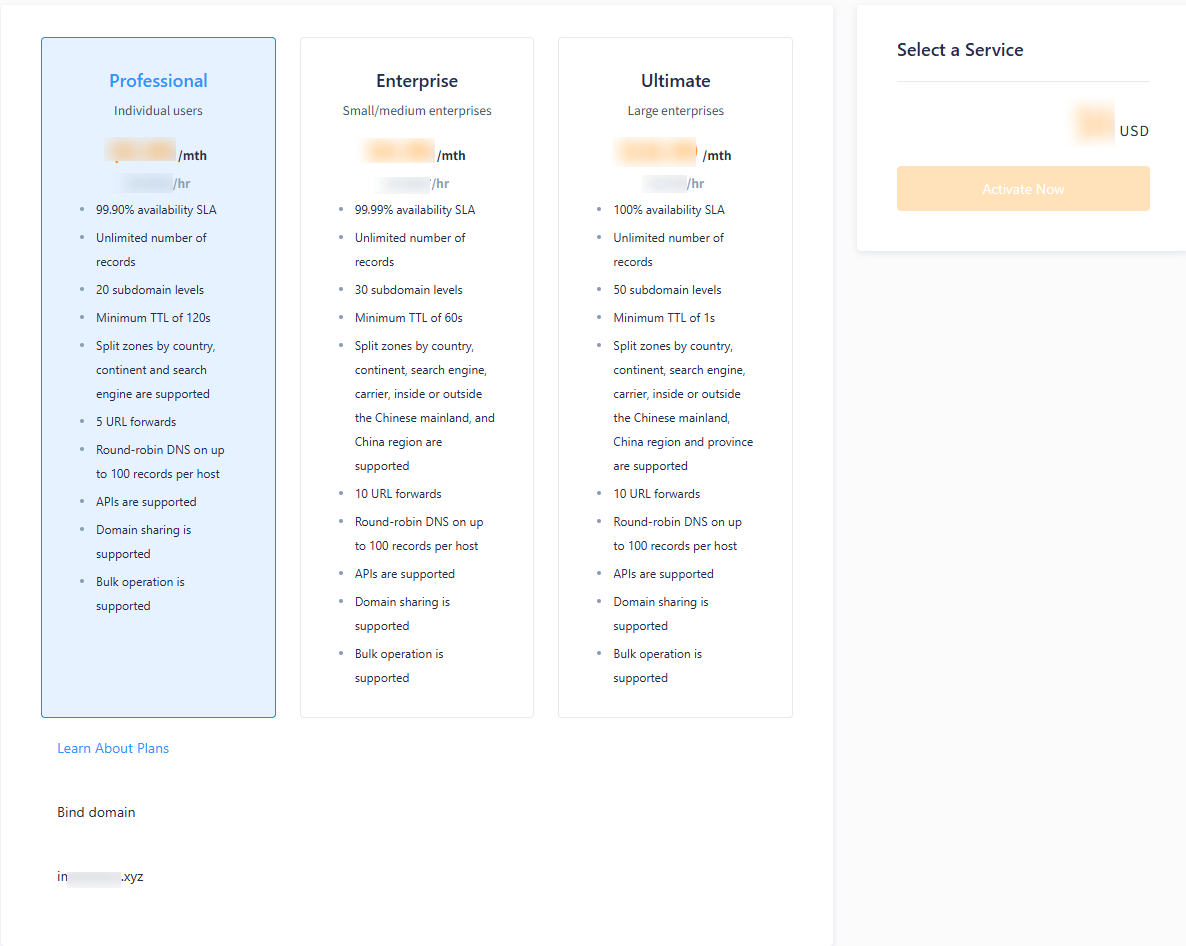
Plan Edition: there are currently three paid plans available. Please choose one according to your actual needs.
Bind domain: select the domain for which to upgrade the plan.
Step 4. Make the payment
After selecting a plan, click Activate Now to enter the payment page and make the payment to successfully upgrade the plan.
Note:
DNS plans currently only support billing by usage duration.
Step 5. Modify the domain DNS address
Help and Support
Was this page helpful?
You can also Contact sales or Submit a Ticket for help.
Help us improve! Rate your documentation experience in 5 mins.
Feedback