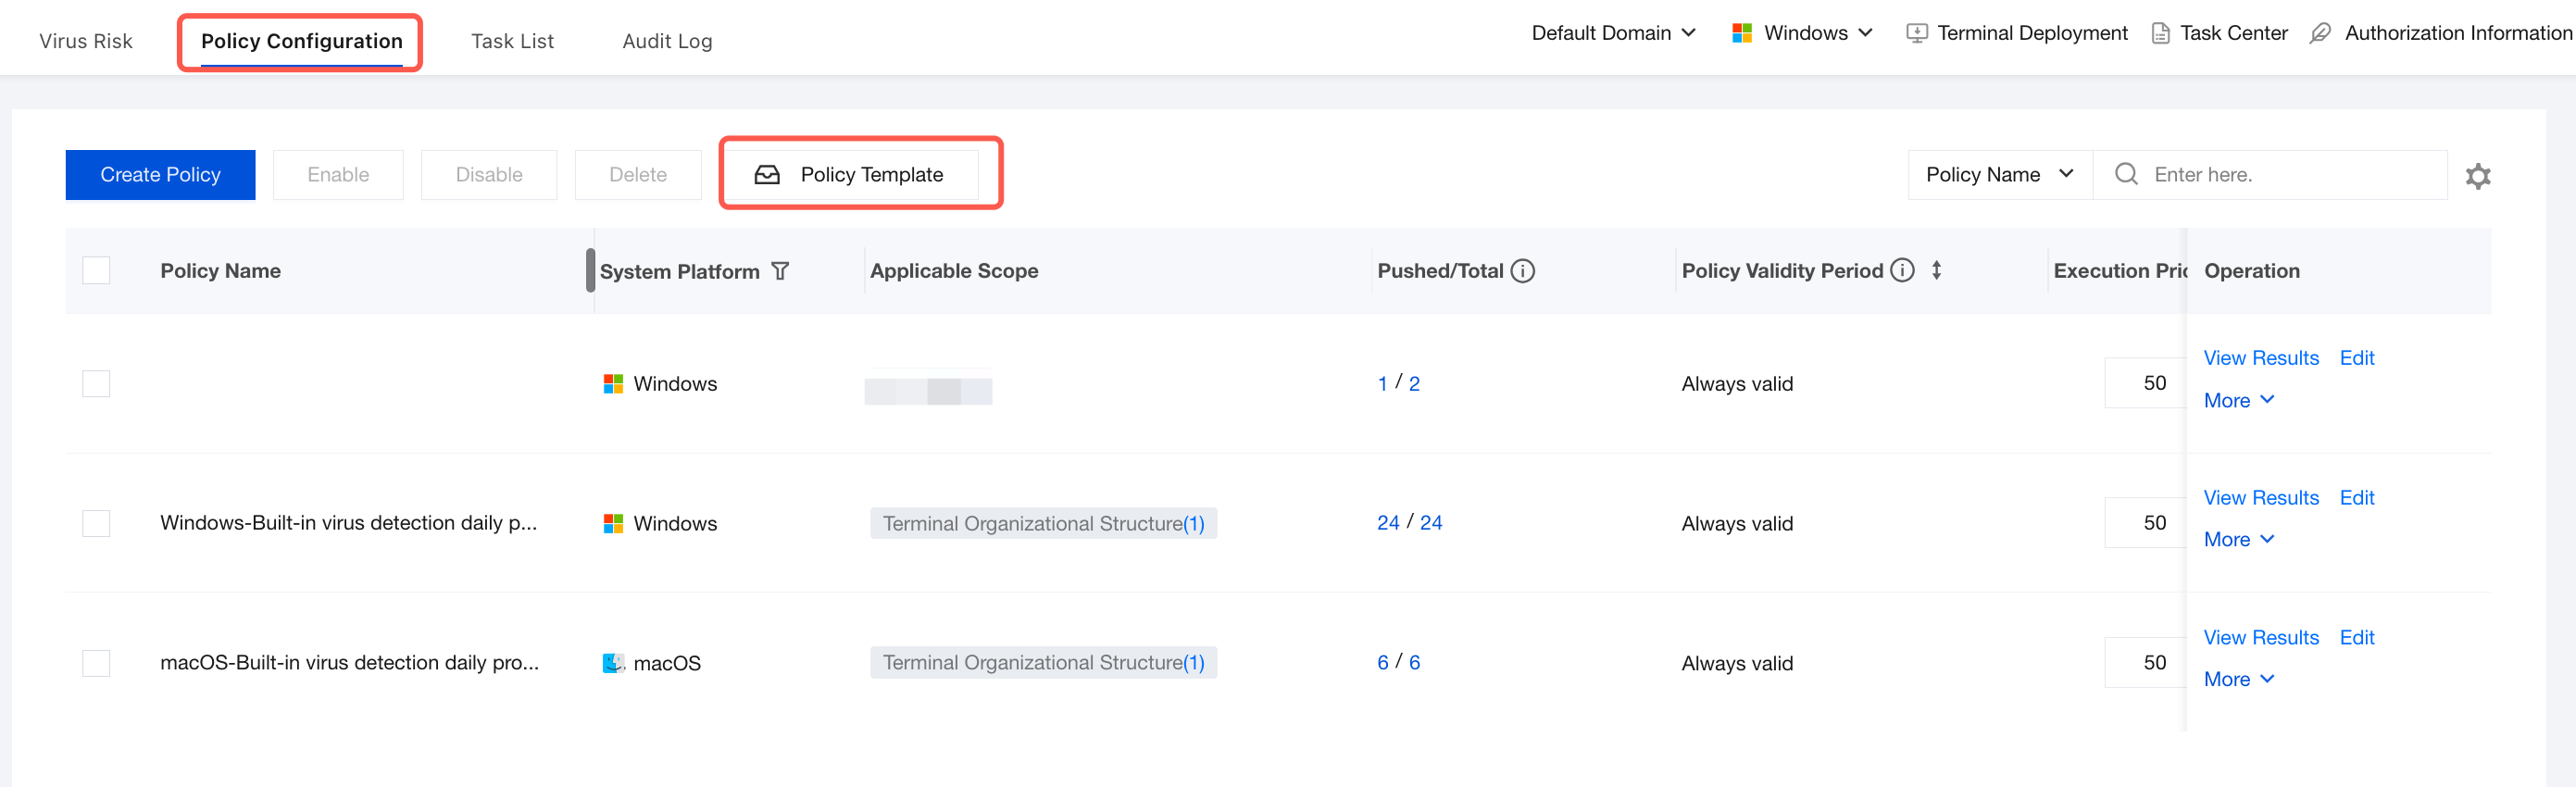
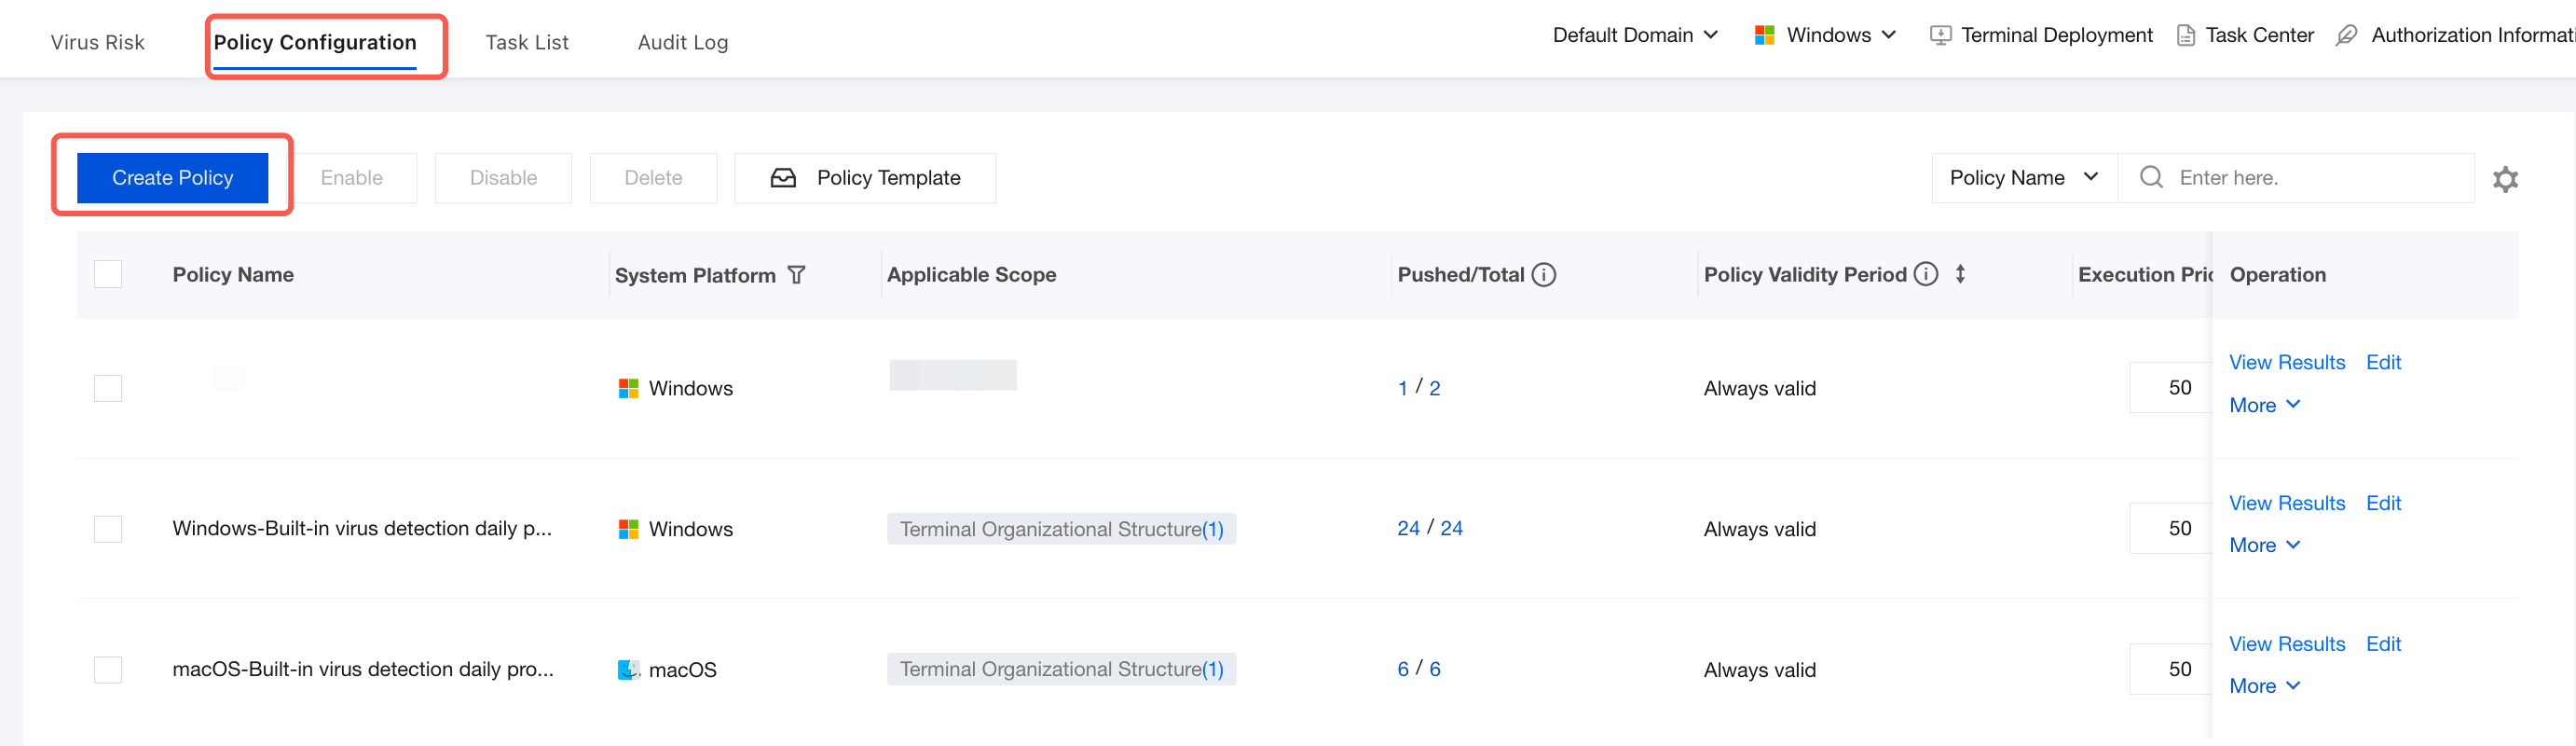
Virus detection is one of the most important security protection policies. iOA has provided a default baseline policy for you, which can be viewed at Virus Detection > Policy Settings. To create a policy, see the following steps.
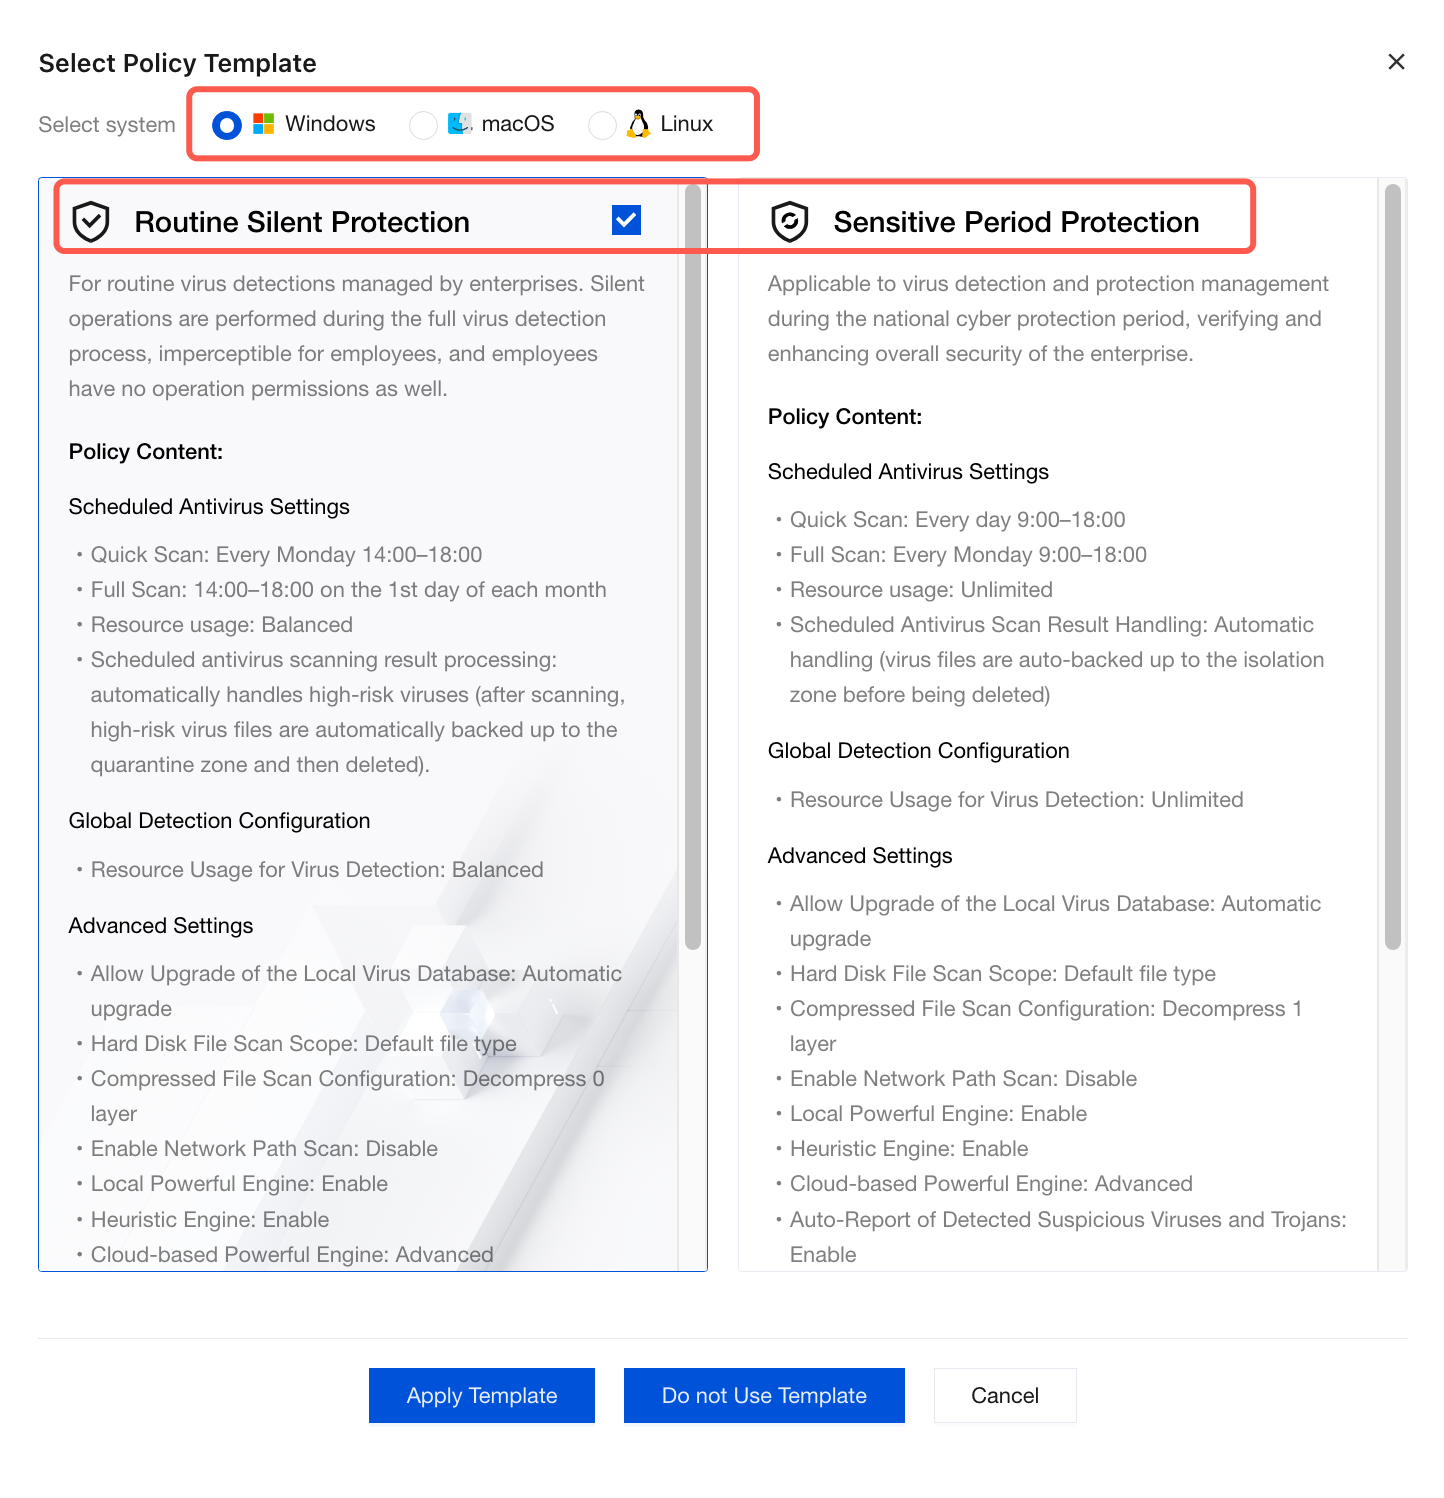
2. Based on your needs, select Windows, macOS, or Linux, choose Routine Silent Protection or Sensitive Period Protection, and then click Apply Template.
Daily Silent Protection: Suitable for routine enterprise virus detection management. The entire virus detection process runs silently, with employees having no operation permissions and no awareness.
Protection for Sensitive Periods: Suitable for virus detection and defense management during cyber defense drills, validating and improving the overall enterprise security posture.
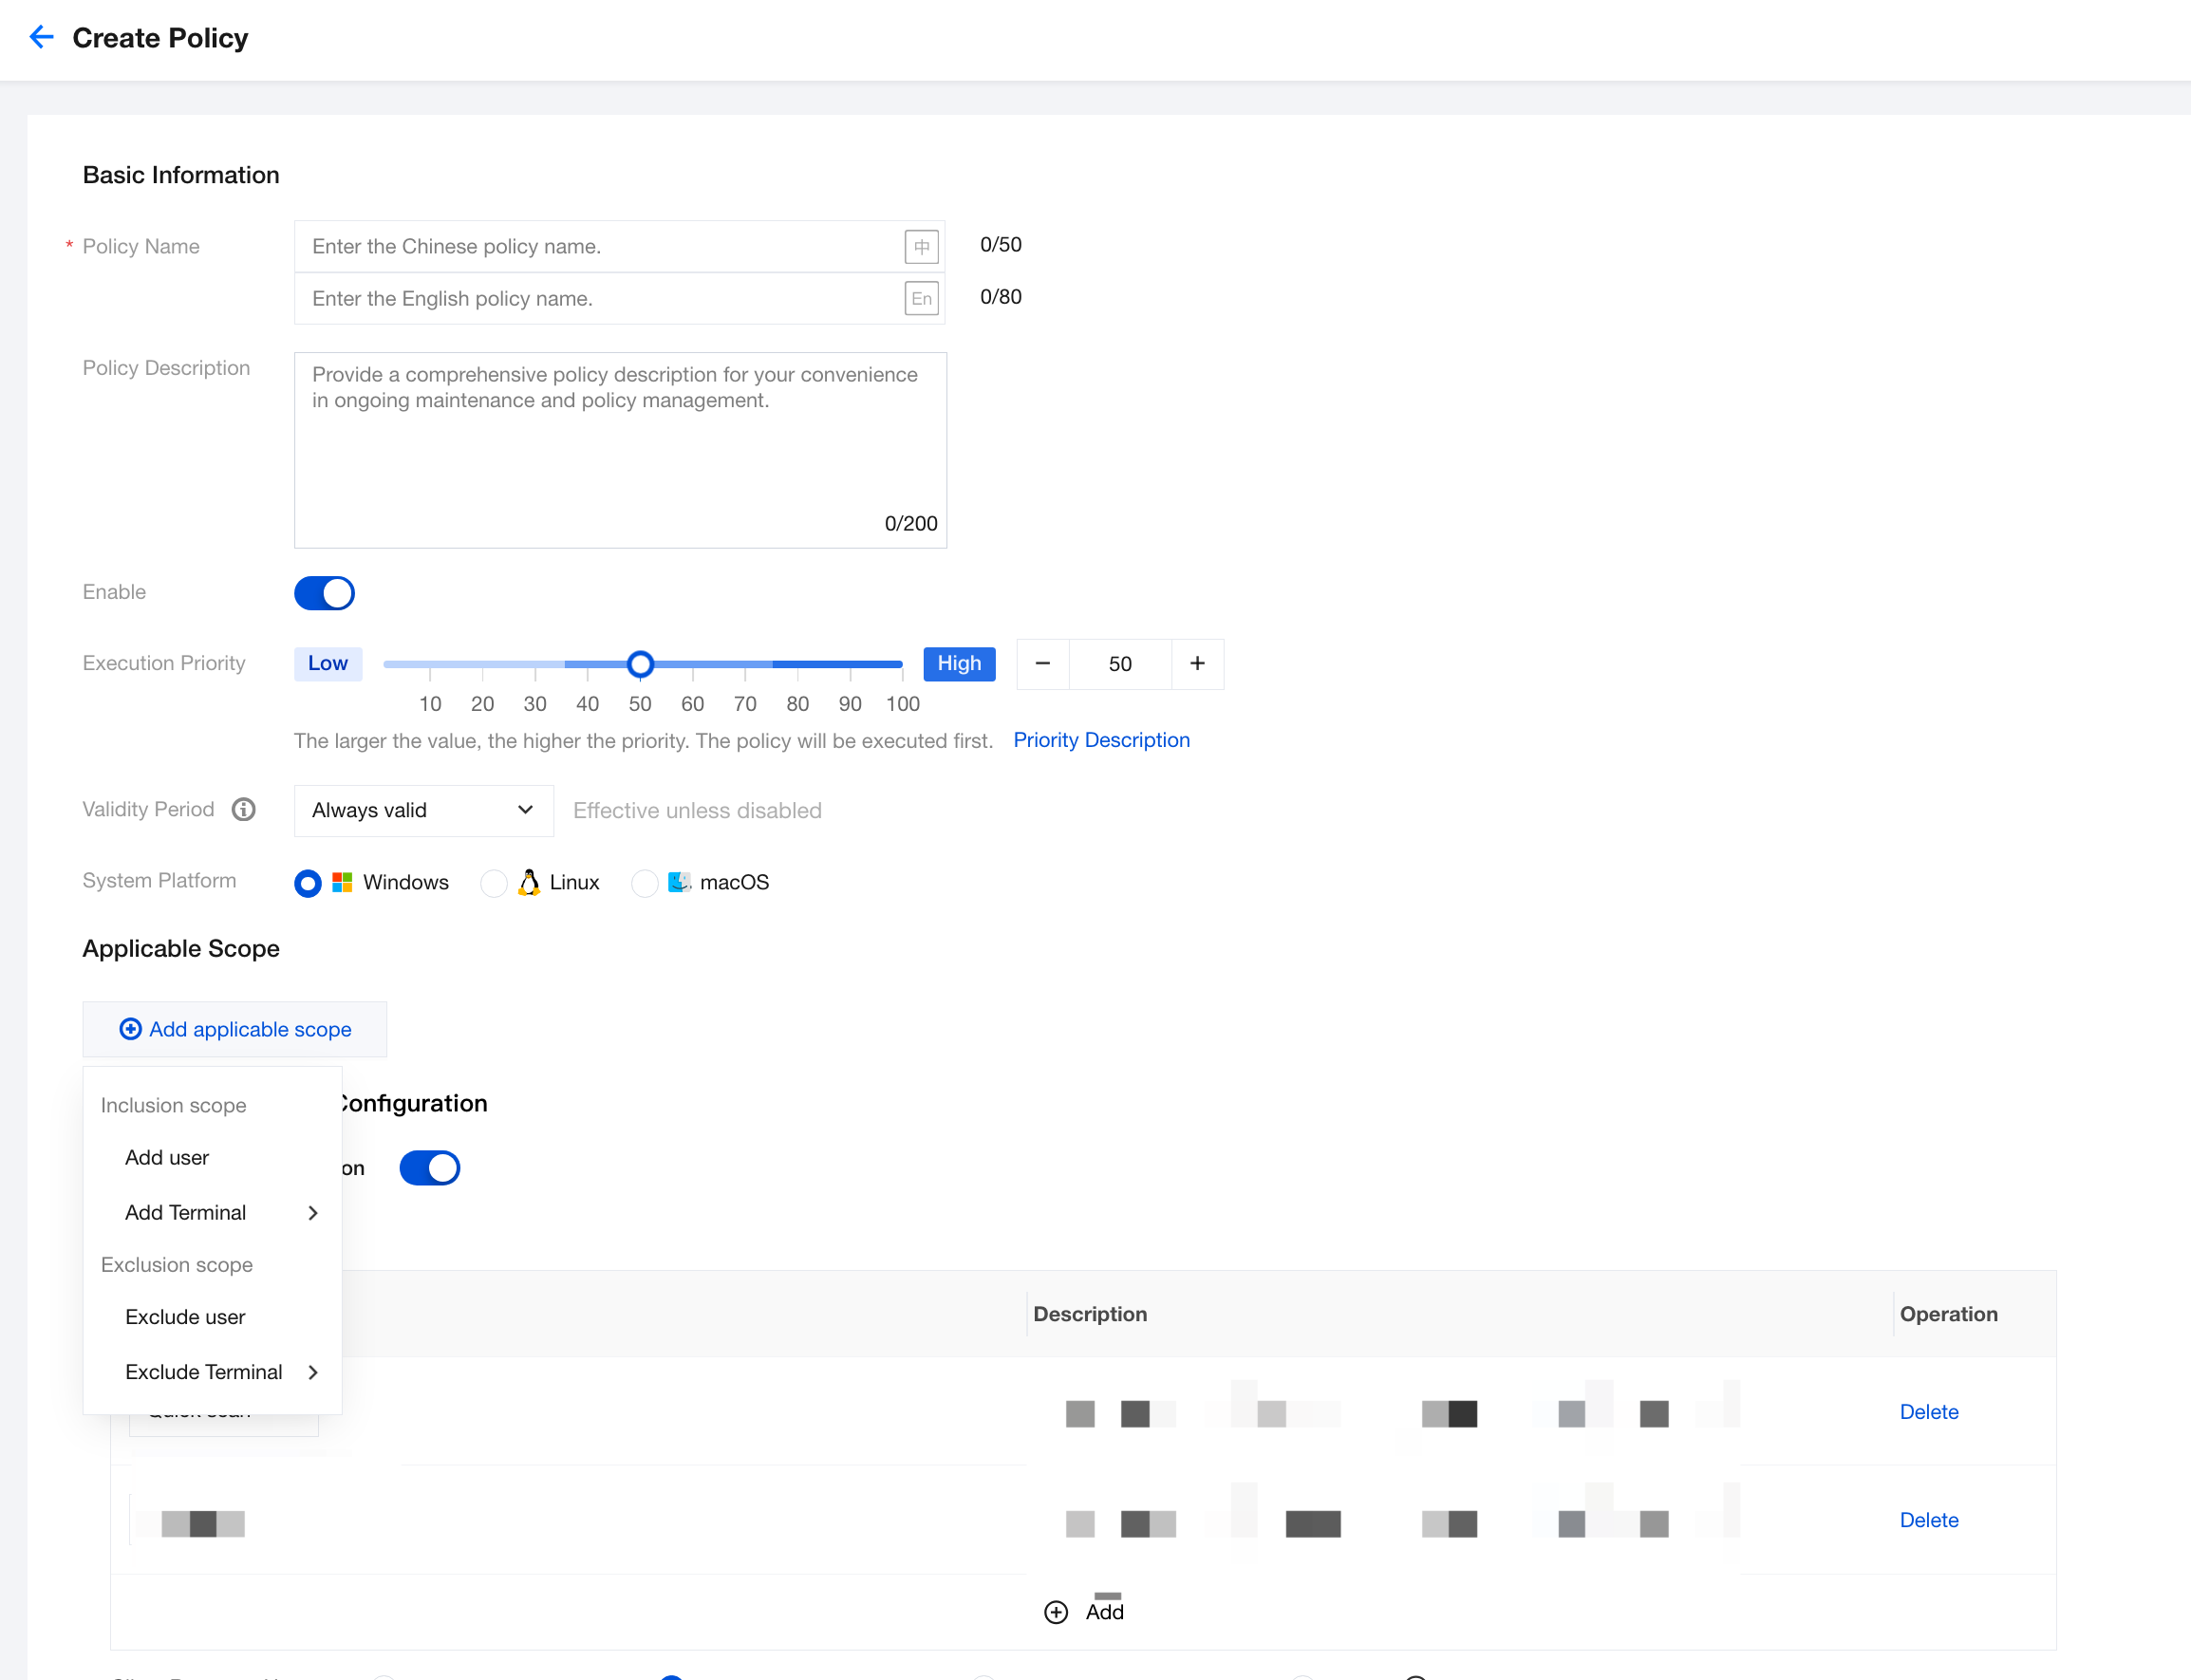
3. On the policy editing page, enter the policy name, policy description, priority, and other parameters. Click Add Applicable Scope, select the users/terminals to be controlled/excluded, and click OK.
4. After configuring the above parameters, click Save. Other related settings can follow the system default recommended configuration.
2. On the policy editing page, enter the policy name, policy description, and execution priority. Select Windows, macOS, or Linux, click Add Applicable Scope, select the users/terminals to be controlled/excluded, and click OK.
3. Configure the following scheduled detection, global detection policy settings, and advanced settings based on your needs.
Scheduled Detection Configuration
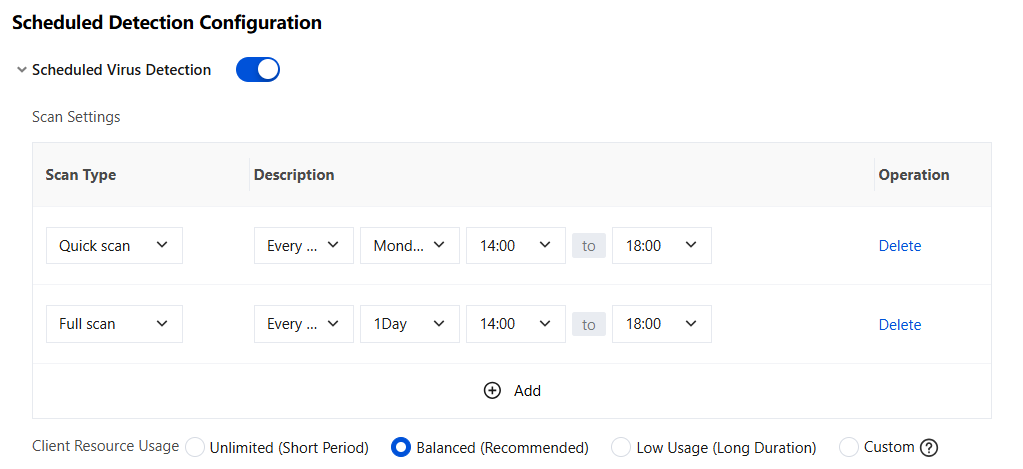
Scheduled tasks for virus detection run automatic scans at specified times and support the following three features:
Quick Scan: Also known as "Lightning Detection", it scans only critical system locations, key memory, the registry, and other active areas. It takes less time. We recommend setting up a daily task for quick scans.
Full Scan: Scans all disk paths, memory, and the registry on the system. It takes a relatively long time, generally about 20 times longer than a quick scan. We recommend setting up a weekly task for full scans.
Client resource usage during scheduled virus detection: Detection consumes client performance. You can use the "Balanced" or "Low Usage" mode to minimize the impact on employee productivity in a smooth manner, but it takes more time. If you need to complete tasks faster and are not concerned about performance loss, use the "Unlimited" mode.
Scheduled detection handling settings:
Automatically handle all viruses: Virus files are automatically backed up to the isolation zone and then deleted. Files backed up to the isolation zone can be restored in the iOA client under Virus Detection > Trust Management > Isolation Zone.
Scan only: After scanning, virus files will not be handled, and the scanning result is only used for risk assessment.
Automatic handling of high-risk viruses (recommended): After scanning, high-risk virus files are automatically backed up to the isolation zone and then deleted, making them inaccessible to employees.
Global Detection Settings
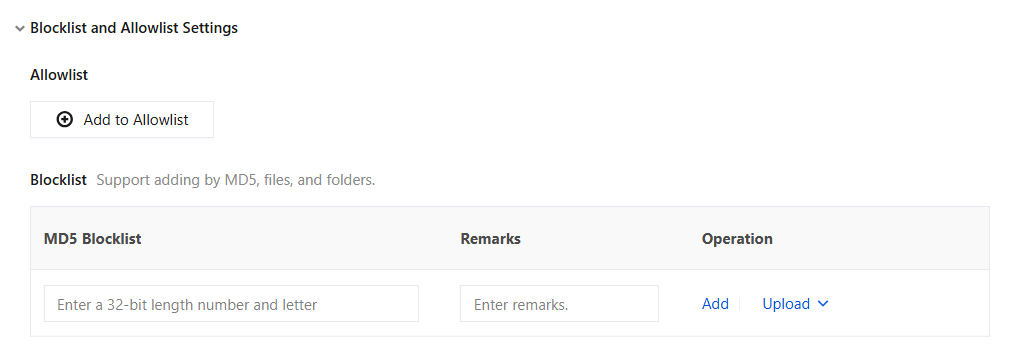
Blocklist and allowlist settings:
To address risks related to virus detection or real-time protection on the iOA client, you can add an allowlist to prevent false positives. The allowlist supports adding recursive subfolders, scanning deeper paths within folders without reporting viruses, and taking effect for anti-phishing policies.
To address risks related to virus detection or real-time protection on the iOA client, you can set up a blocklist to prevent blacklisted samples from spreading within the enterprise.
Parameter description:
Parameter Name
Description
File and path allowlist
Path of the file added to the allowlist. For example: C:\\Program Files\\App\\ (path) and C:\\tool.exe (file).
Extension allowlist
Add file extensions to the allowlist. (For example, .dll, .ps1, .txt, .zip, and so on.)
MD5 allowlist
Supports uploading files to automatically extract MD5 values and add them to the allowlist.
Registry allowlist
Add the registry to the allowlist. For example: HKEY_CURRENT_USER\\Software\\App\\ (path).
URL/IP address allowlist
For example: http://internal-tool.com/10.0.0.1.
Risk name allowlist
Enter the risk name identified by security software. For example: Malware.Win32.Gencirc.abcd.
Typical Use Cases
Scenario Type
Description
Internal tool/script trust
Scenario: An enterprise-developed script (such as a .ps1 file) is falsely reported as a virus.
Allowlisting method: File path allowlist (add the script path) or MD5 allowlist (exact match of the file fingerprint).
Development/test environment exemption
Scenario: A program under development frequently triggers security alerts.
Allowlisting method: Extension allowlist (such as temporary files with the .tmp extension) or registry allowlist (registry key values for debugging).
False positive exclusion
Scenario: Security software reports legitimate software (such as a financial system) as a virus.
Allowlisting method: Risk name allowlist (add the name of the falsely reported virus) or MD5 allowlist (mark trusted files).
Internal service access allowance
Scenario: An internal system URL/IP address is blocked (for example, the monitoring platform at http://192.168.1.50).
Allowlisting method: URL/IP address allowlist (add the service address).
Automated process interference prevention
Scenario: The automatic installation program is interrupted.
Allowlisting method: File and path allowlist (add the installation package path) or registry allowlist (registry entries required for installation).
Resource Usage for Virus Detection:
You can customize the CPU resources used by virus detection. During a manual virus detection on the client, the CPU usage is controllable from the console. Configuring the antivirus resource usage effectively resolves high CPU and disk usage issues.
Advanced Settings
Select the following advanced settings as needed, and then click Save.
Allowing Upgrade of Local Virus Database
Automatic upgrade of the local virus database: An automatic smoothing policy is adopted to attempt updates to the virus database multiple times a day, typically every 4 hours or so.
Scheduled upgrade of the local virus database: Upgrade on a scheduled basis.
Scan settings
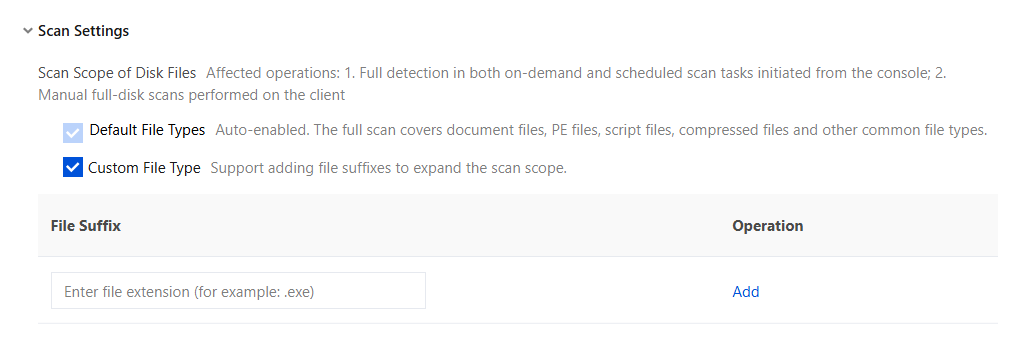
Scan scope for files on hard disk
Supports file write-to-disk detection for files without a suffix or with specific suffixes.
You can add file suffixes to expand the selectable scan scope. This scope affects the following: full-disk detection tasks manually delivered from the console, automatic full-disk detection in scheduled detection policies, and manual full-disk antivirus scans on the client.
Compressed file scan configuration
The scope affected by this configuration:
The full-disk detection mode in detection tasks delivered from the console and in scheduled detection policies (lightning scan does not decompress files for scanning).
Perform a manual full-disk antivirus scan on the client (lightning antivirus scan does not decompress files for scanning).
Antivirus scans at specified locations on the client and scans initiated by right-clicking compressed files are not affected by this configuration. Only scanning with up to 3 levels of decompression is supported.
Description of decompression levels:
When the decompression level is set to 0, compressed files are scanned directly without decompression, resulting in minimal impact on performance.
When the decompression level is set to a value from 1 to 20, compressed files are decompressed level by level before scanning. The more levels that need to be decompressed, the greater the impact on performance.
Scan limitations:
Automatic decompression and scanning of password-protected compressed files is not supported.
Scanning of compressed files larger than 100 MB is not supported. However, this size limit does not apply when users scan compressed files by right-clicking them.
Enable network path scanning.
After this feature is enabled, the client enumerates and displays network mount paths. Administrators can issue tasks from the console, and terminal users can manually start scans on network paths.
Attention:
Avoid multiple users initiating network path scans at the same time.
Virus Detection Engine Settings
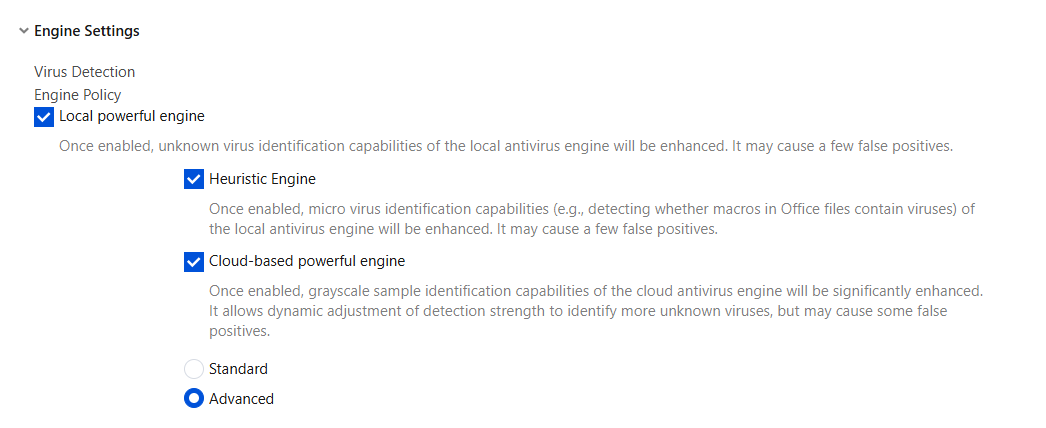
Select a virus detection level. A higher level provides broader protection, but may cause some false positives.
Local powerful engine: After this feature is enabled, the local antivirus engine becomes more capable of identifying unknown virus samples, but may also cause a small number of false positives.
Heuristic engine: After this feature is enabled, the local antivirus engine becomes more capable of detecting macro viruses, such as identifying whether macros in Office files contain viruses, but may also cause a small number of false positives.
Cloud powerful engine: After this feature is enabled, the cloud antivirus engine significantly enhances grayscale sample identification capabilities and can dynamically adjust detection strength to identify more unknown virus samples, but may also cause false positives.
Standard: Detect highly suspicious grayscale samples, with a smaller detection volume.
Advanced: Detect low-suspicion grayscale samples, with a larger detection volume.
Note:
It is recommended to enable this feature. Even if false positives occur, you can restore documents from the isolation zone.
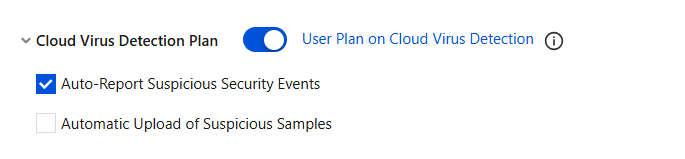
Virus Cloud Detection Plan
When the intelligent behavior engine detects a suspicious virus, whether to allow uploading the virus information to the iOA console without involving user privacy.
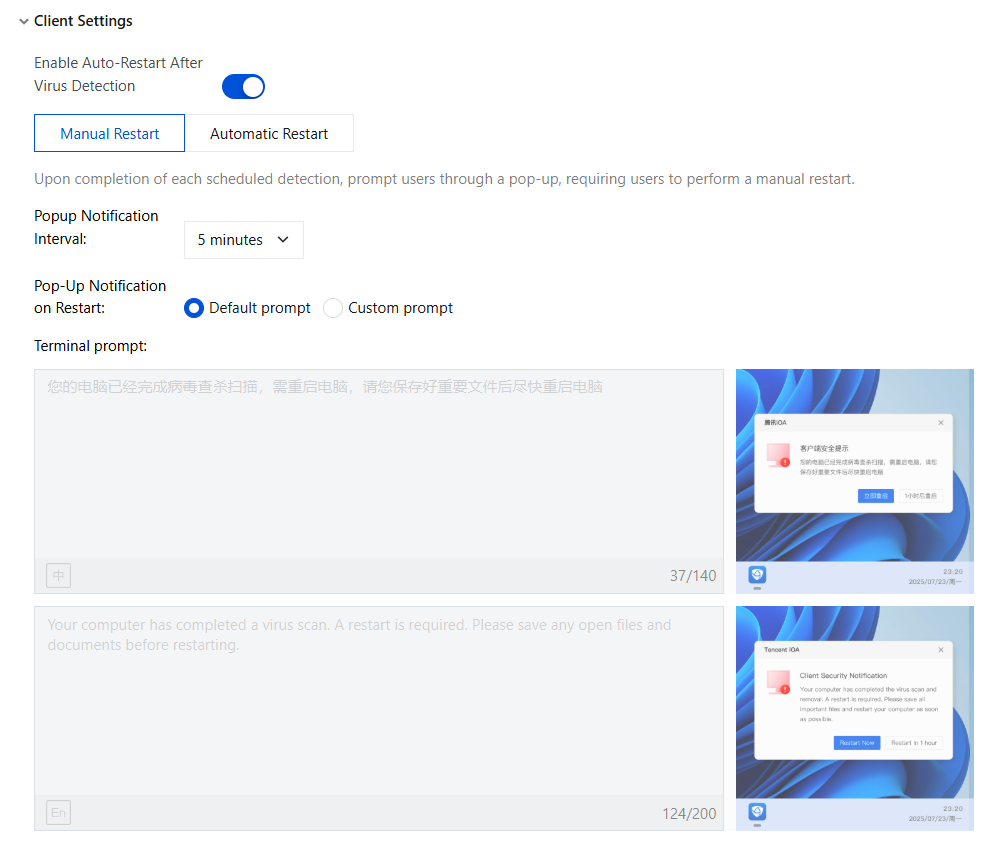
Client Settings
Restart settings after virus detection.
Manual restart: After a scheduled detection scan is completed, prompt users through a pop-up, requiring them to manually restart the computer.
Automatic restart: After a scheduled scan is completed, prompt users through a pop-up. If the user takes no action, the computer is forcibly restarted at the specified time. If the user chooses to be reminded later, the pop-up appears repeatedly at the specified interval before the restart.
Allow clients to perform manual detection.
Risk item trust operation reminder.
Allow the client to modify settings: After this feature is enabled, the client supports permanent deletion/restoration of risk items.
Pop up a reminder when a file is trusted: When a user chooses to trust a detected risky file, a second confirmation reminder appears.
Client trust management permissions.
Allow the client to modify the isolation zone: After a virus is detected and removed, it goes to the isolation zone, where the user can permanently delete/restore it.
Allow the client to modify the trust zone: After a virus is detected, click Allow or Trust to add it to the trust zone. In addition, users can directly access the trust zone for operations.
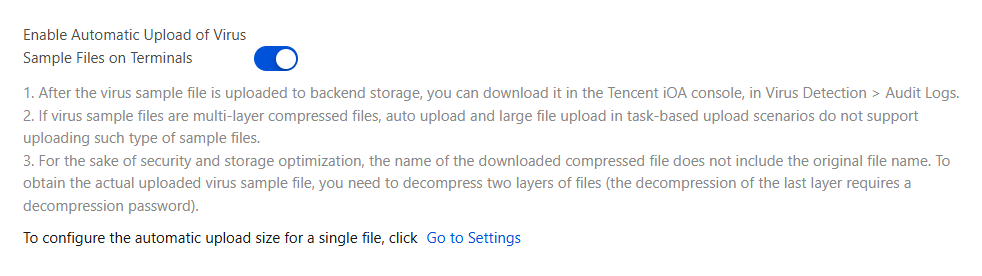
Automatic upload of terminal virus sample files.
Enable automatic upload of terminal virus sample files.
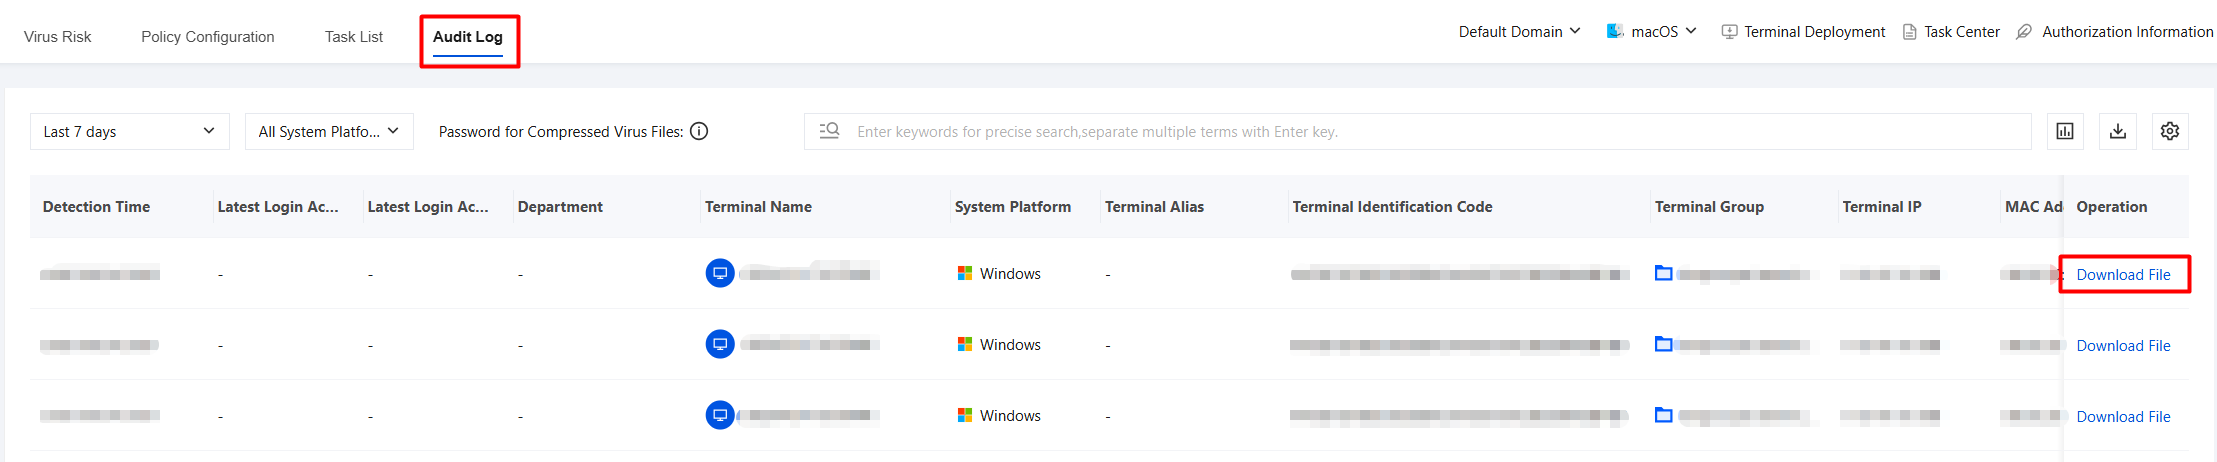
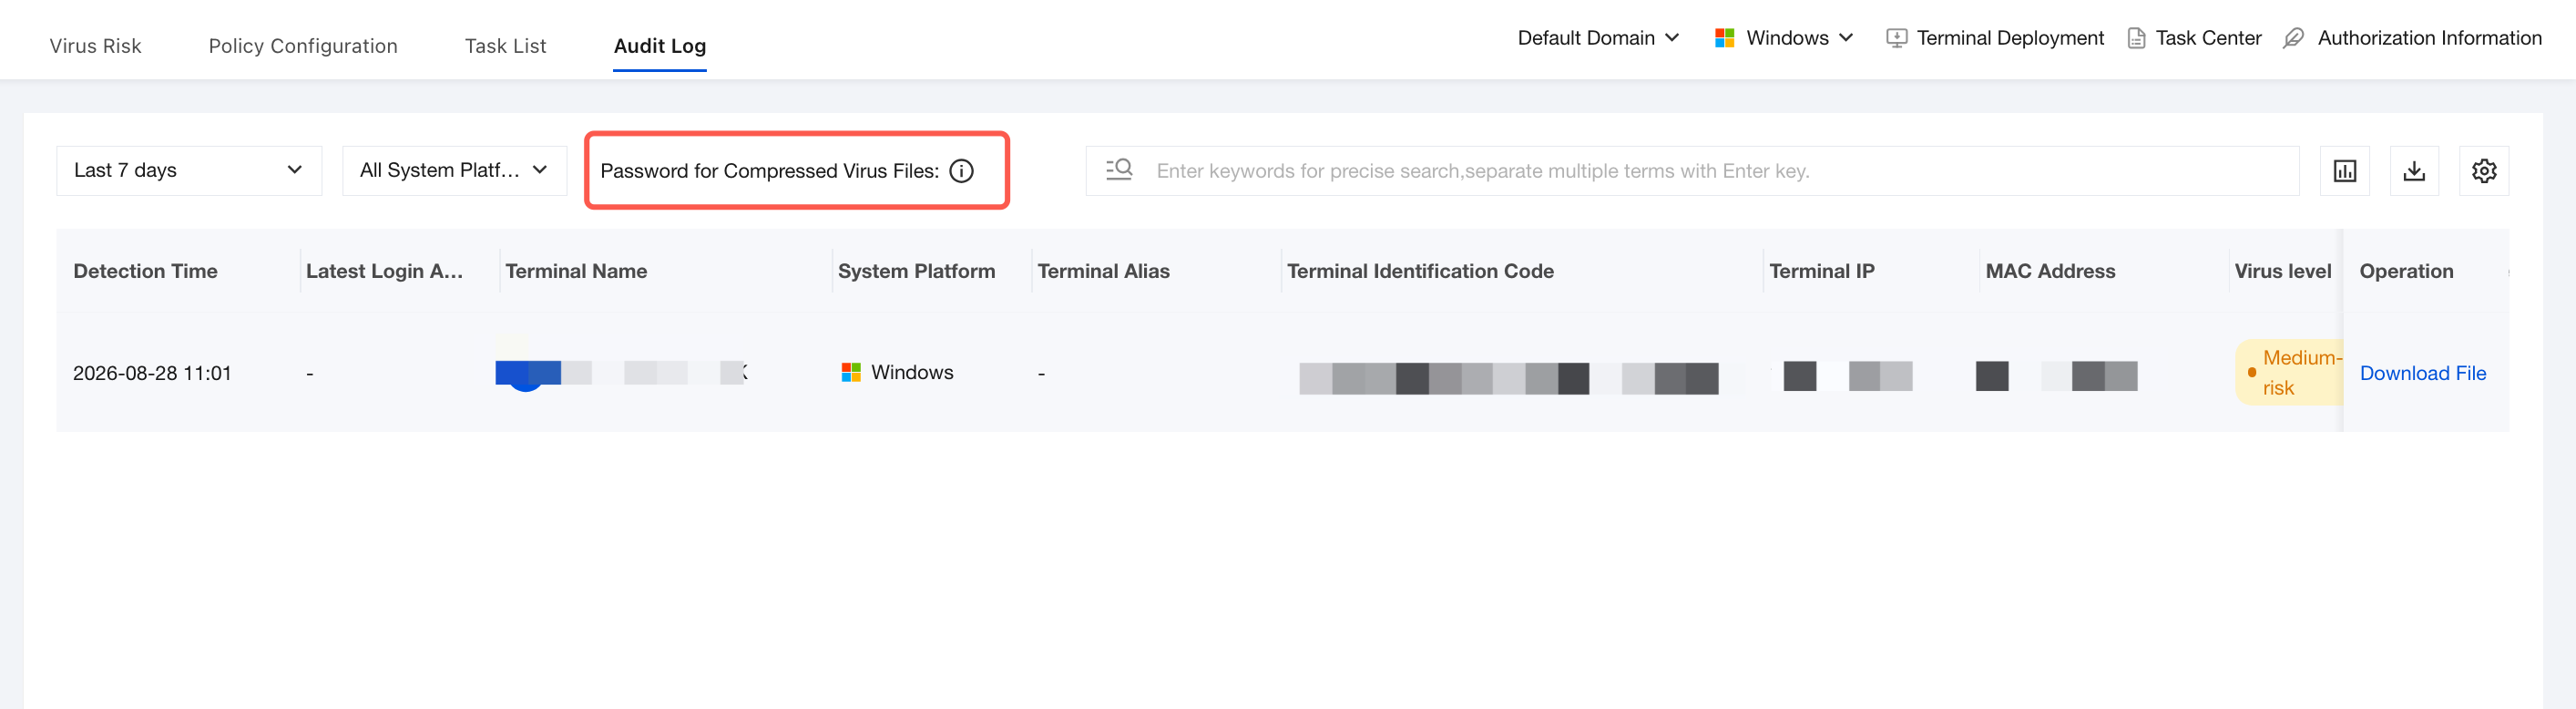
After a virus sample file is uploaded to backend storage, it can be directly downloaded in Virus Detection > Audit Log.
If a virus sample file is a multi-layer compressed archive, neither automatic upload nor large file task-triggered upload supports uploading this type of sample file.
View the decompression password for the virus file ZIP package: For security and storage optimization purposes, the downloaded archive does not contain the original file name in its name. You must decompress two layers (the last layer requires a decompression password) to obtain the actual uploaded virus sample file. View the decompression password next to the exported data.
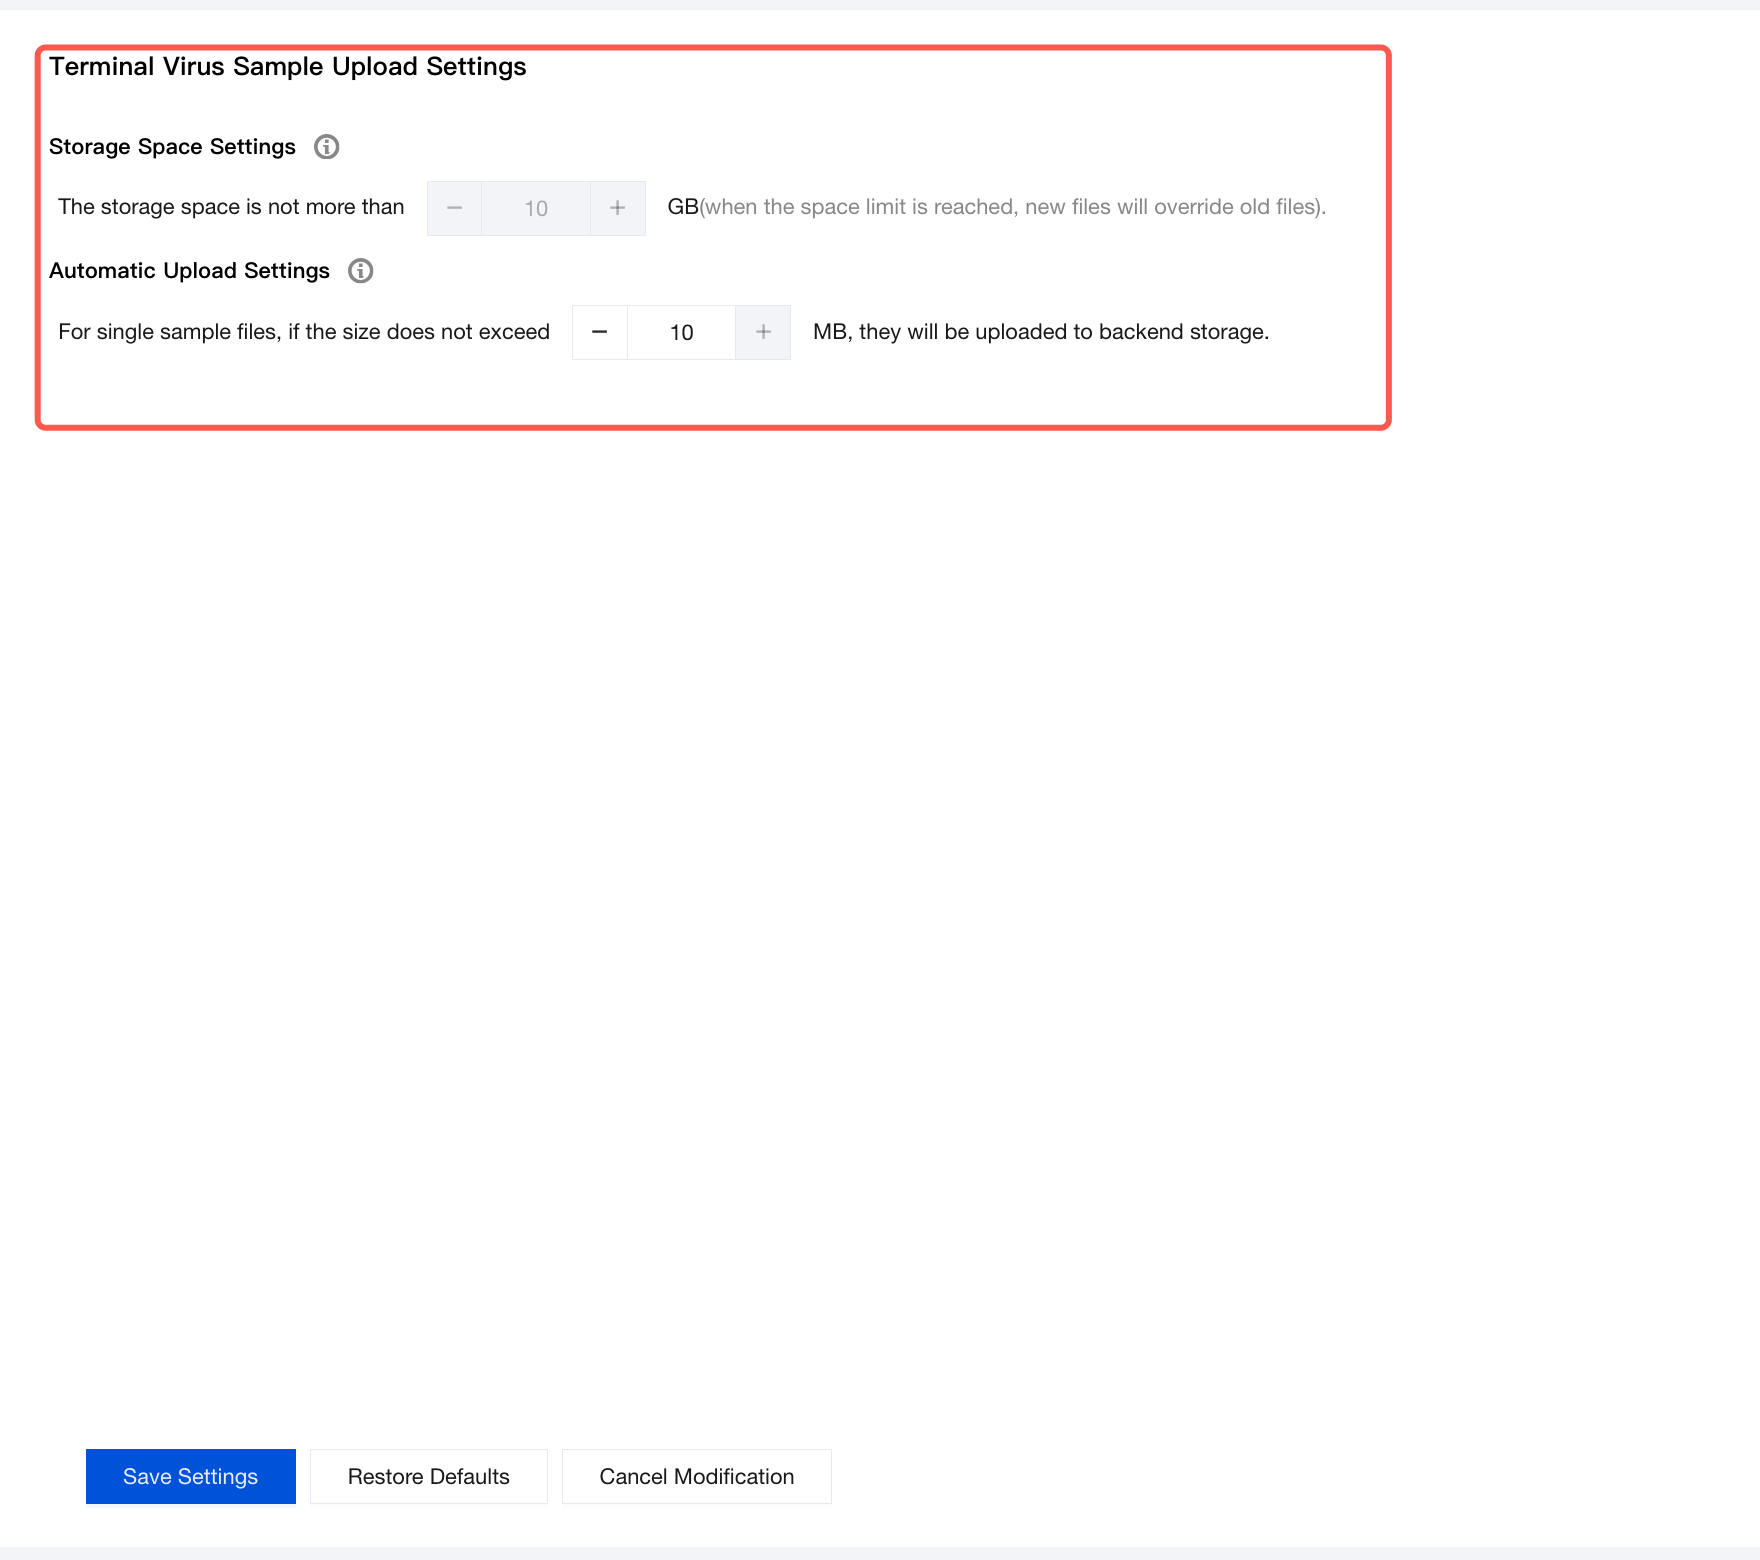
Stored virus sample files are automatically uploaded to the backend bucket. You can configure the upload file size in System General Settings > Terminal Virus Sample Upload Settings.
FAQs
How Do Multiple Policies Take Effect When Created Simultaneously?
When multiple policies exist simultaneously, a user or terminal may match multiple policies at the same time. The system then merges these policies to take effect. If policy items configured in different policies conflict, the system determines how to execute the policies by priority.
For example, if policies A and B are both configured and both match terminal X, where policy A enables "Virus Database Update Settings" and "Resource Usage Settings", and policy B enables only "Virus Database Update Settings", then since "Resource Usage Settings" has no policy conflict, the resource usage policy item for terminal X takes effect according to policy A. However, since "Virus Database Update Settings" has a policy conflict, the virus database update setting item for terminal X takes effect according to the policy with higher priority between policies A and B.
Note:
If the allowlist and blocklist have different settings in policies A and B, both take effect on terminal X, regardless of priority.
What Is the Logic of Execution Priority?
The larger the priority number, the higher the execution priority of the policy.
The configurable priority range is 1 to 100.
Priorities can be the same. The system will then apply its built-in preferred policy to determine execution.
The fallback global baseline policy has a priority of 0 and cannot be modified.
What Is the Logic of Built-in Preferred Policies?
The system's built-in preferred comparison dimensions include policy control objects, policy strictness, and policy creation time.
Policy control object: The more precise the granularity, the higher the priority. Individual terminal/user > custom group > organizational structure.
Policy strictness: The stricter the configuration within a policy item, the higher the priority.
Policy creation time: A newly created policy is executed with higher priority.