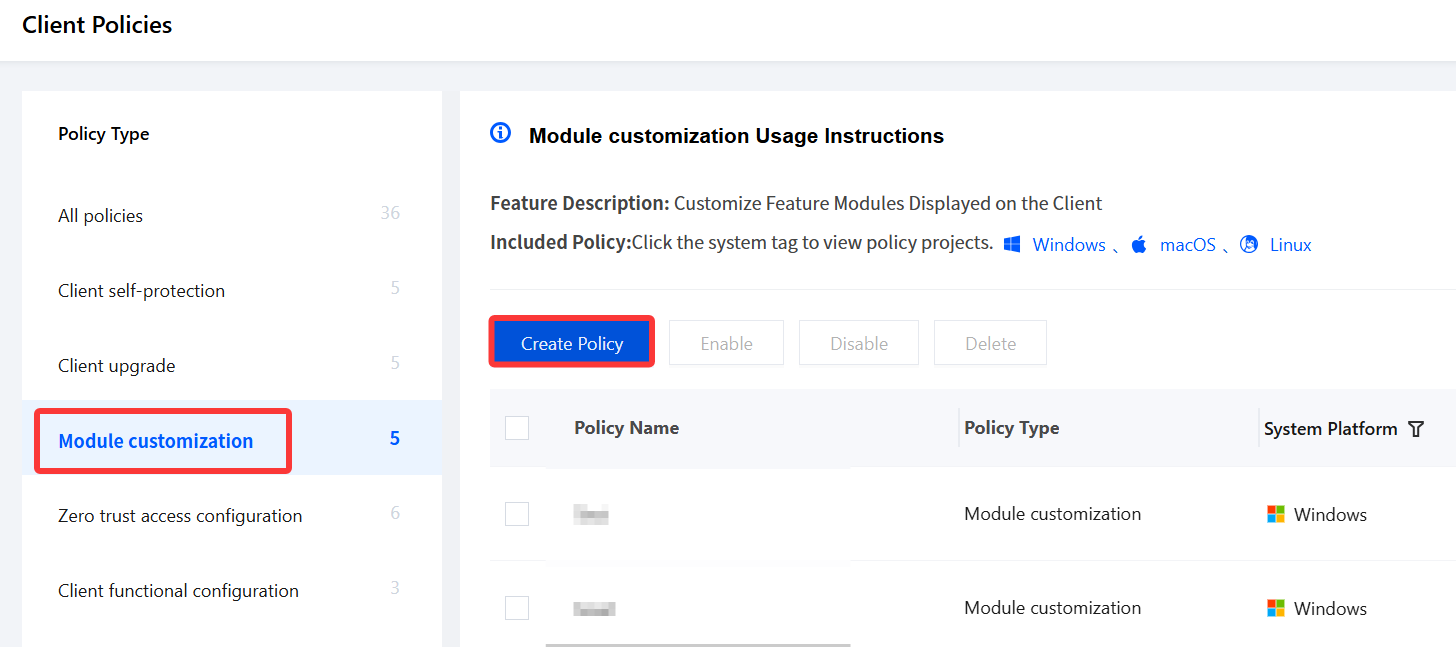
2. On the Client Policy page, select Module customization and click Create Policy.
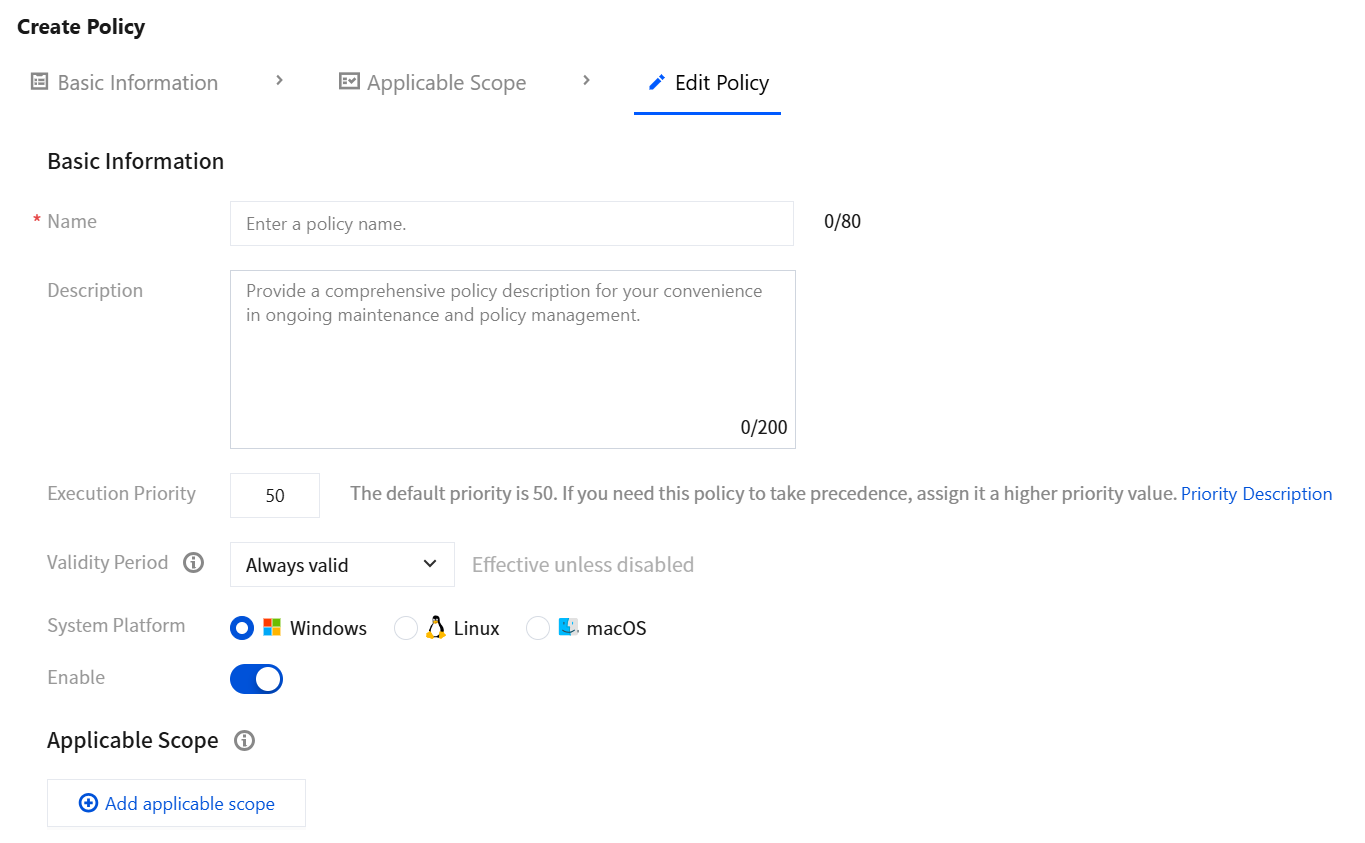
3. On the Create Module Customization Policy page, configure the relevant parameters.
3.1 Enter the policy name and enter parameters such as the policy description.
3.2 Click Add applicable scope, select the terminal names to be controlled/excluded, and click OK.
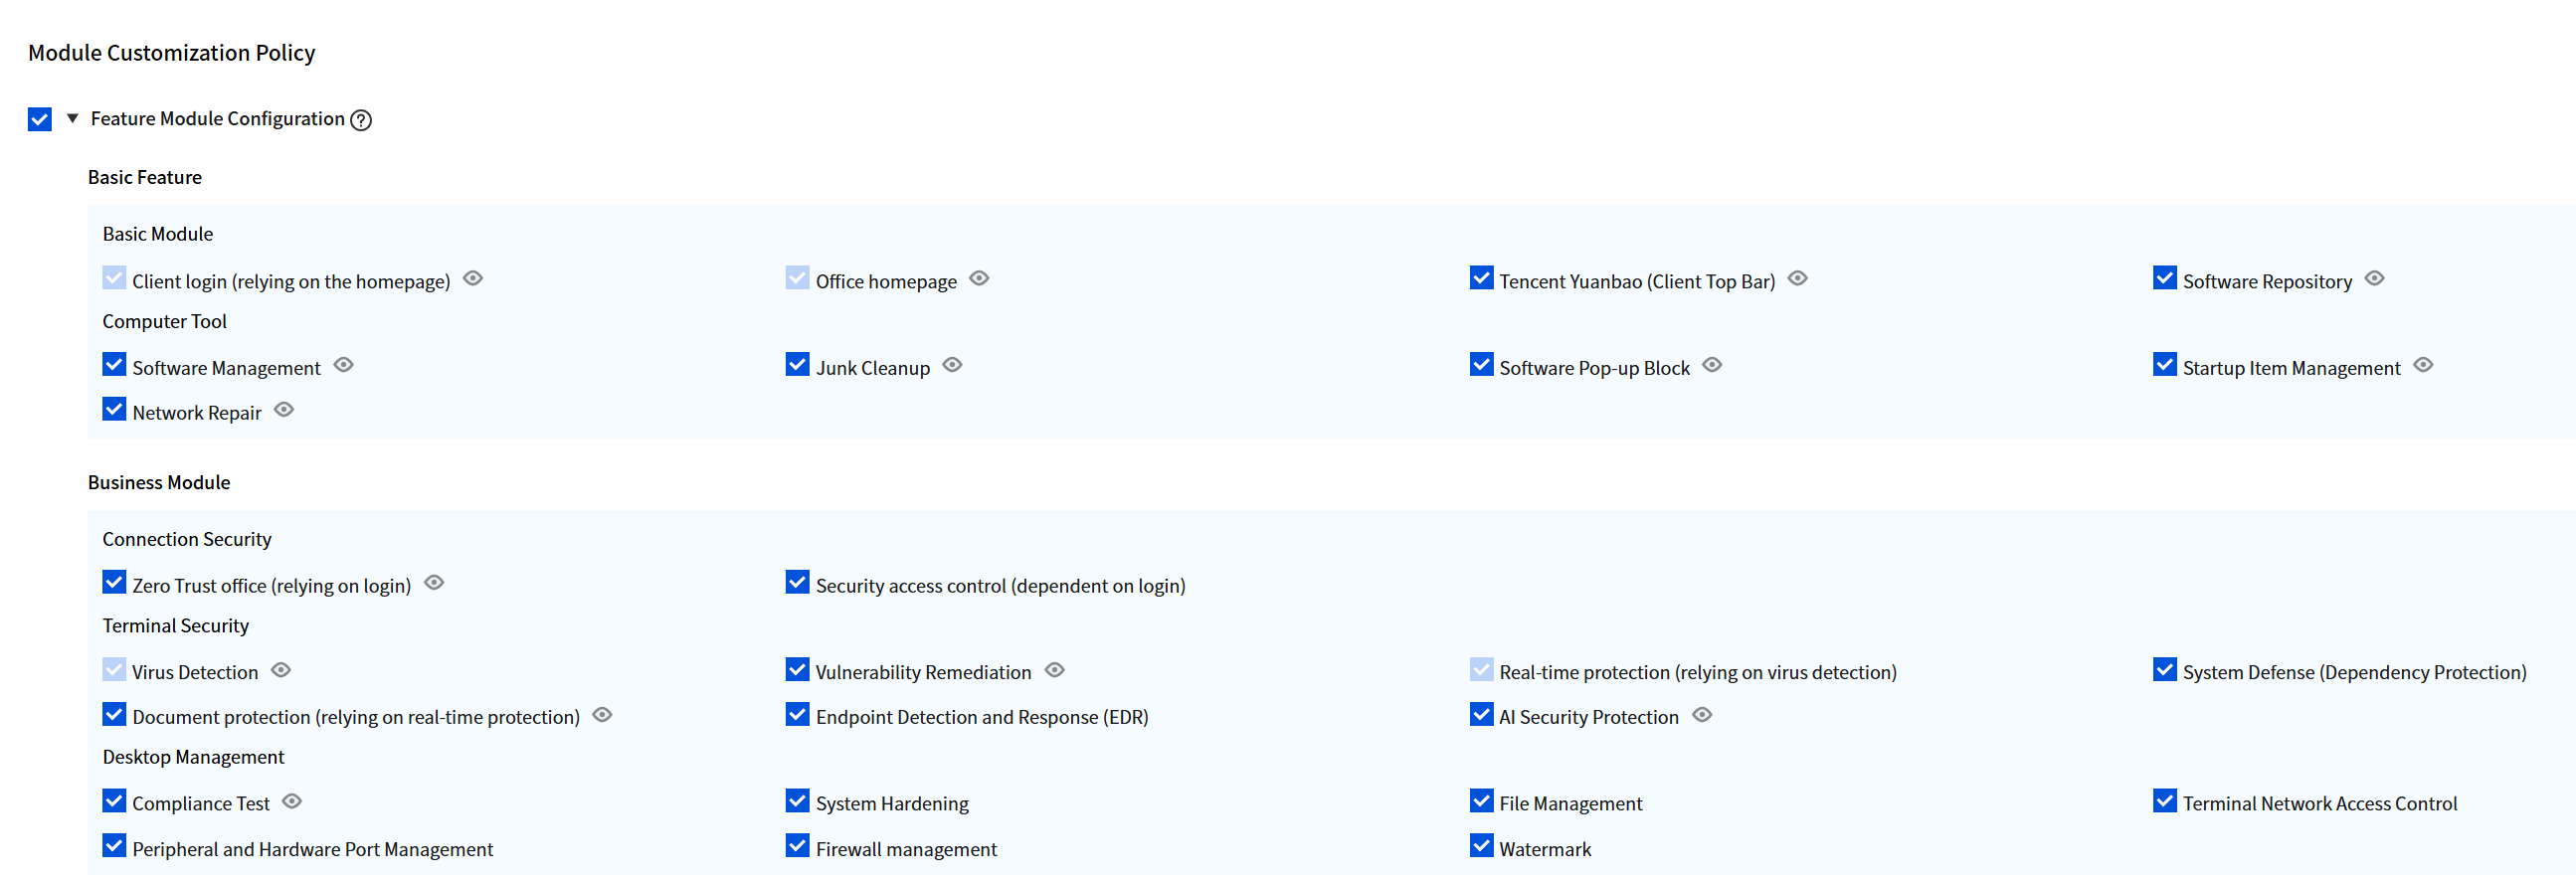
4. Select the following module customization policy based on your actual needs.
Feature Module Configuration
1. Select Feature Module Configuration, select the basic features/business modules to display on the client, and click Save.
Note:
The feature modules that cannot be selected indicate that you are not authorized for those modules.
For feature modules that are not selected, the client does not run the corresponding features and does not display their feature pages.
To ensure the client runs properly, enable at least one feature module that has a feature page with an icon.
When updating authorization and adding new feature modules, manually enable the new feature modules to ensure client compatibility and stability. It is recommended that you follow the grayscale tutorial to perform grayscale tests and gradually enable the modules. If you encounter any issues during the grayscale process, please contact us for support.
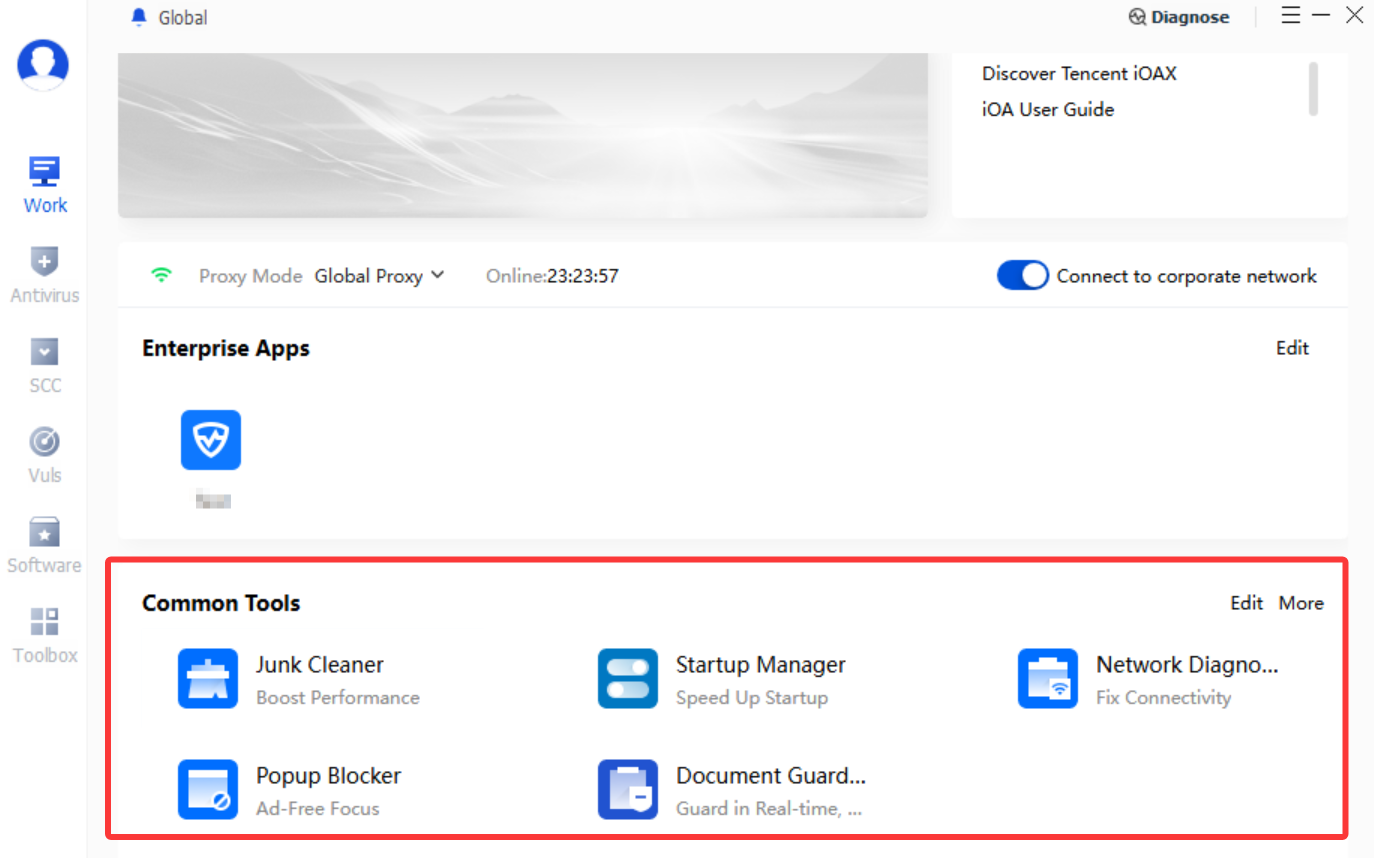
2. After you select the modules, the client displays the configured basic features/business modules.
Client Message Notification Methods
Send a pop-up notification at the bottom-right corner of the page to the specified terminal.
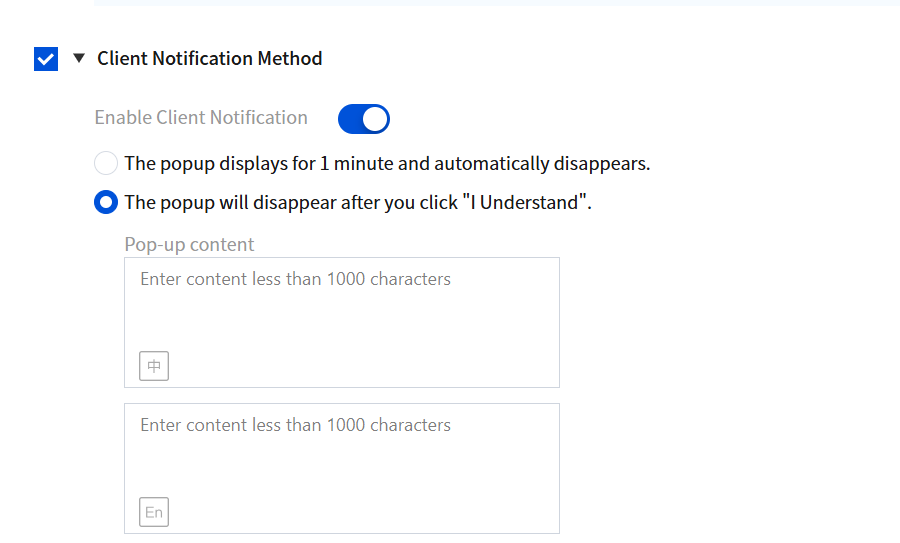
1. Select Client Notification Method, click
Enable Client Notification, select the pop-up mode, and click Save.
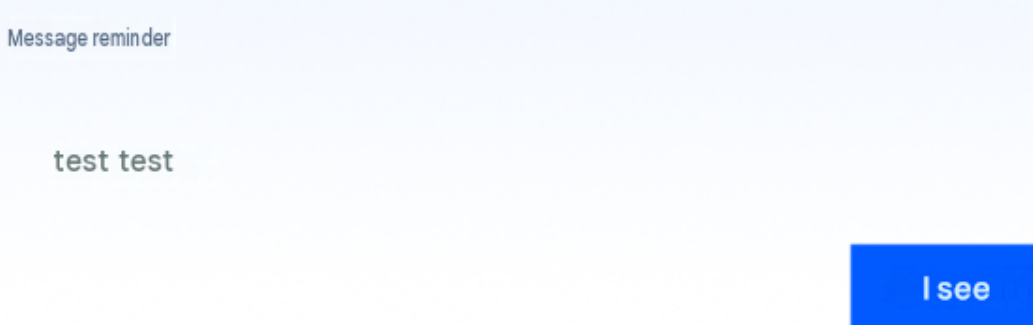
2. The notification style is shown in the following figure, where "test test" is the editable custom pop-up message content.