Client Operation Guide
Unduh
Mode fokus
Ukuran font
This guide helps you quickly complete client installation, login, and network access, and unlocks the use of the client common menu bar, diagnostic tools, and feature modules one by one, making iOA client operations more efficient.
Windows
Client installation
1. Obtain the Tencent iOA client installation package. Contact the administrator to obtain the Tencent iOA client installation package.
2. Double-click the client installation package.
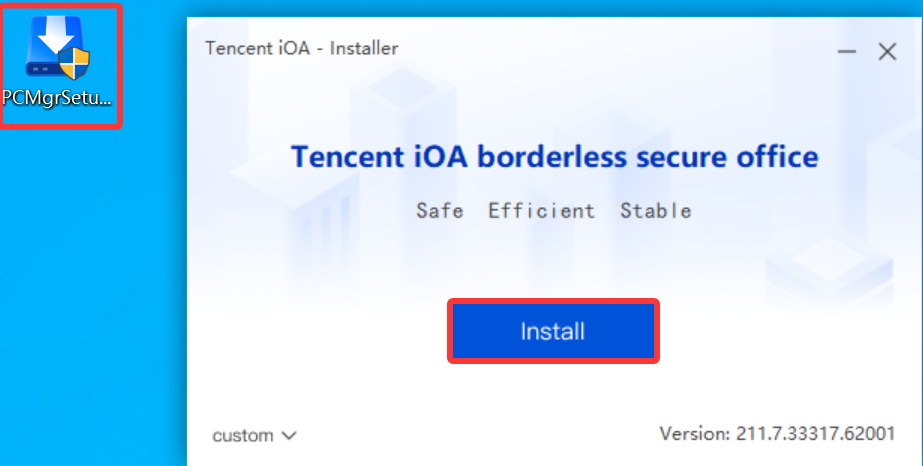
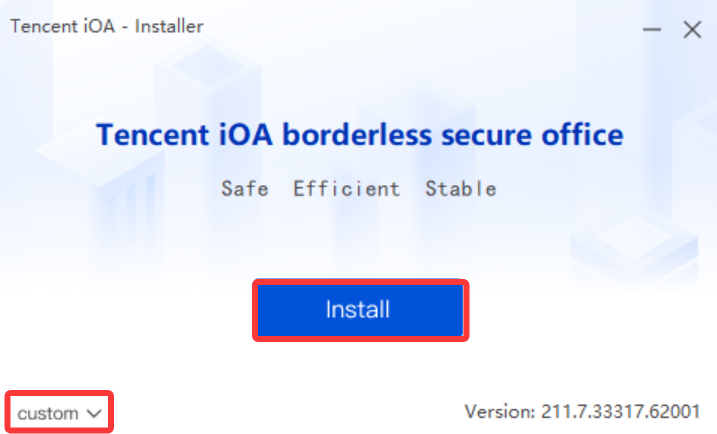
3. Select custom installation or default path installation, and then click Install.
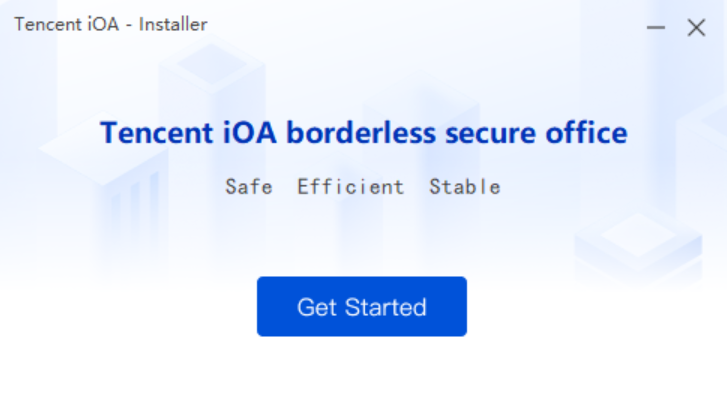
4. After the installation is complete, click Get Started .
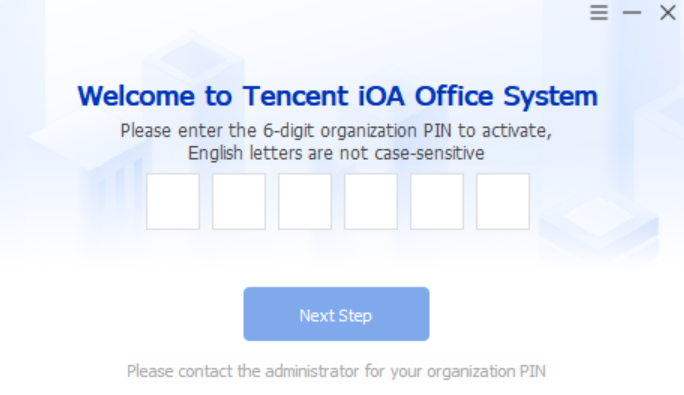
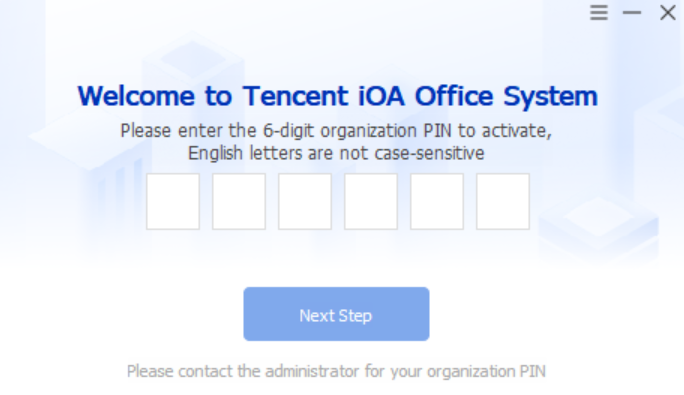
5. Enter the 6-digit organization PIN to activate. PIN letters are not case-sensitive.
Note:
The organization PIN (team PIN) is provided by the administrator. Contact the administrator to obtain it in the iOA console.
If the system does not prompt you to enter a PIN, you can skip this section.
Reasons why no PIN is required:
For users who have completed enterprise authentication (including individual and enterprise users), we provide the "PIN-Preset Installation Package" solution: you can obtain an installation package with a preset PIN directly from the administrator and complete the installation without entering the PIN again.
For users who have not completed enterprise authentication, you still need to use the standard installation package and manually enter the PIN during installation to complete the process.
Client Login
1. After successful installation, double-click the Tencent iOA desktop app to open the client.
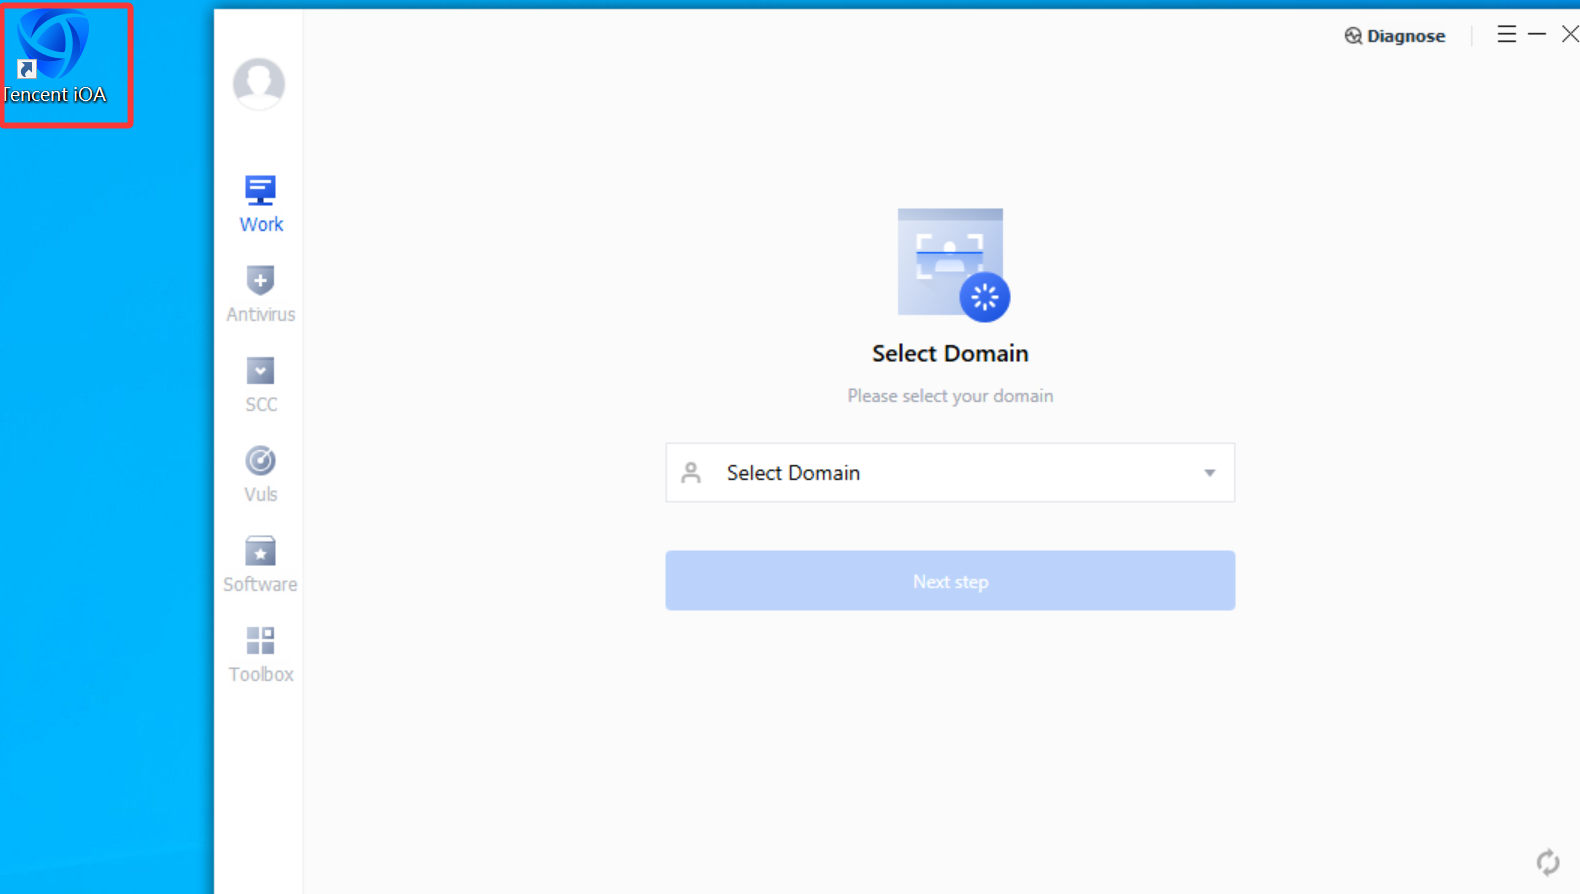
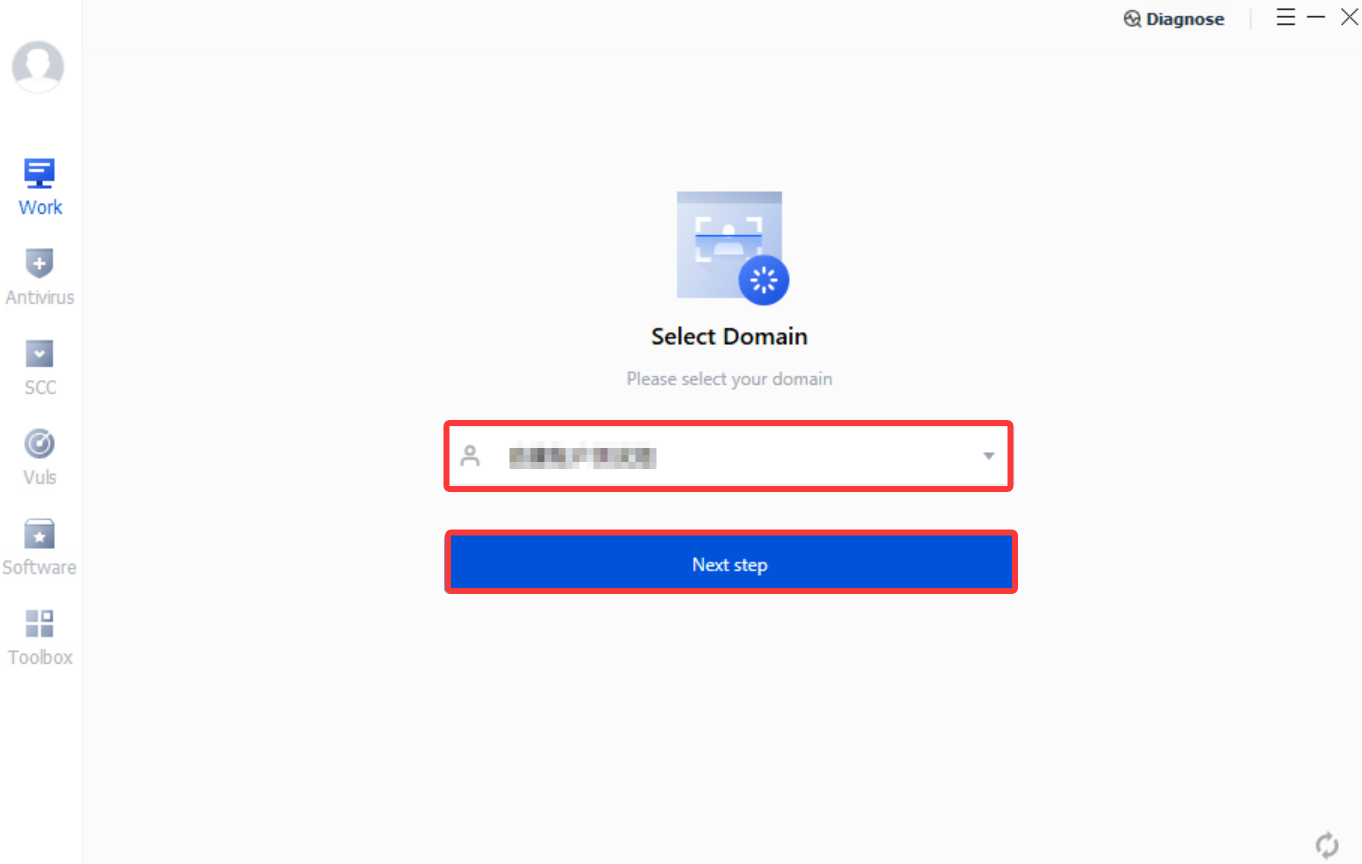
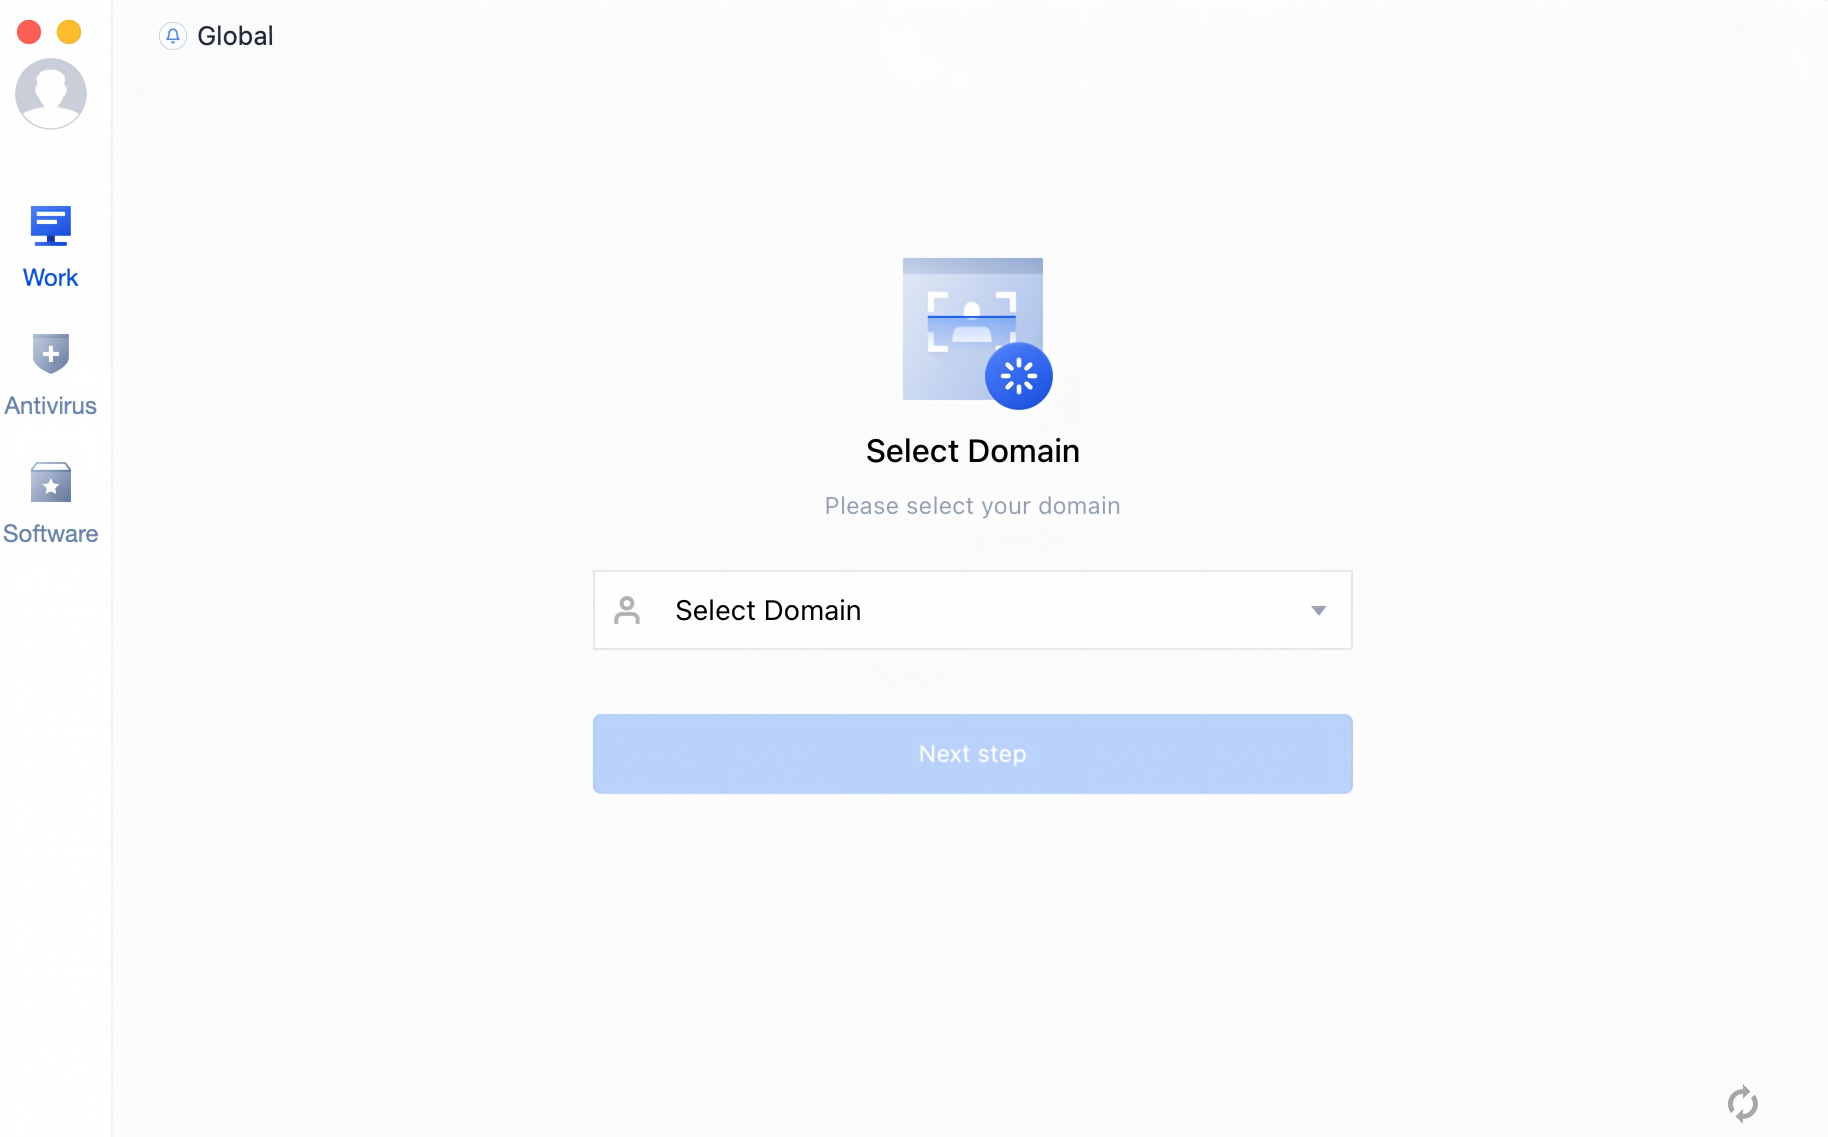
2. After selecting the corresponding organizational structure, you can log in to your account. Obtain the assigned account and password from the administrator, enter them accurately, and then click Next step to log in.
Note:
iOA provides multiple login methods, including QR code login and account-password login. The available login methods depend on the administrator's configuration.
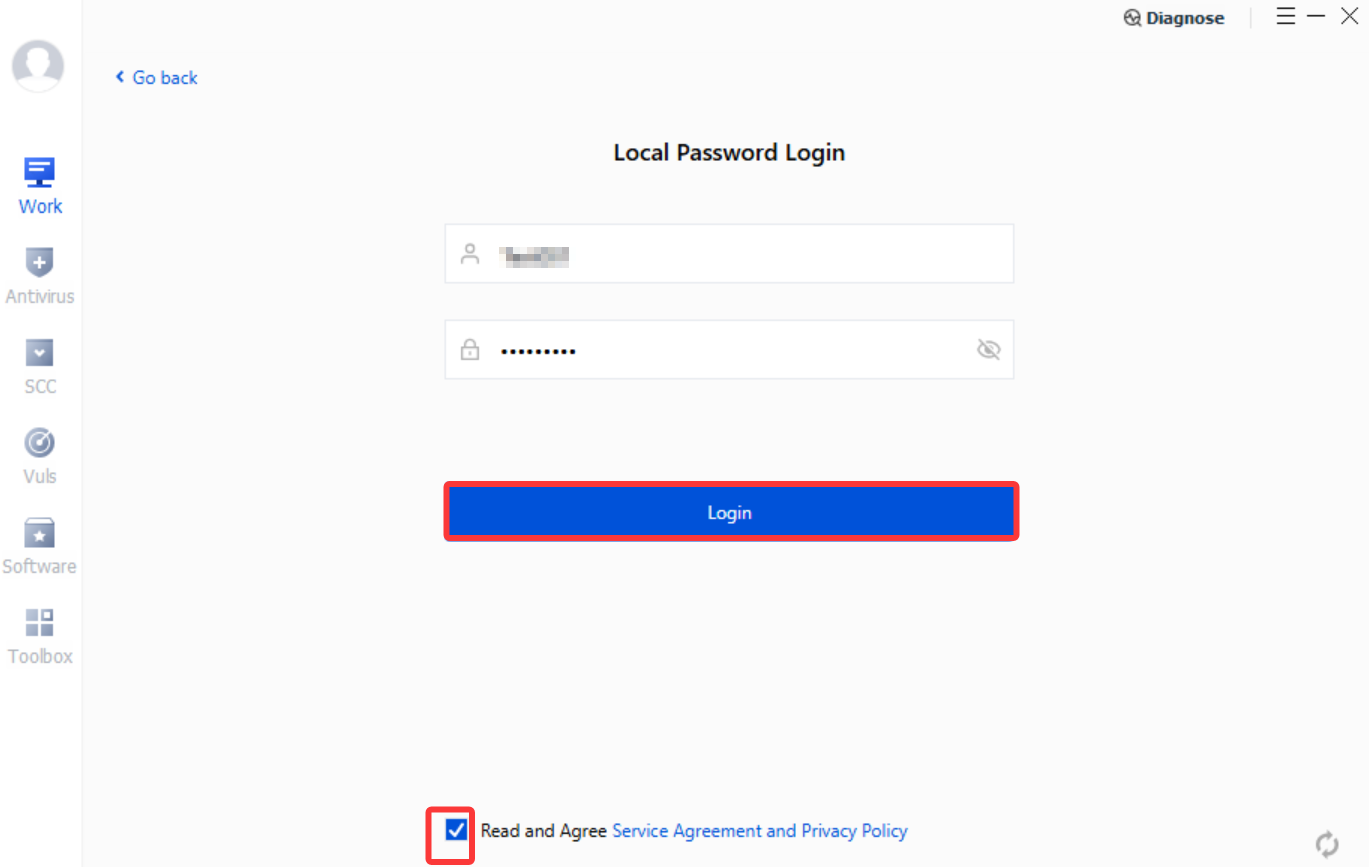
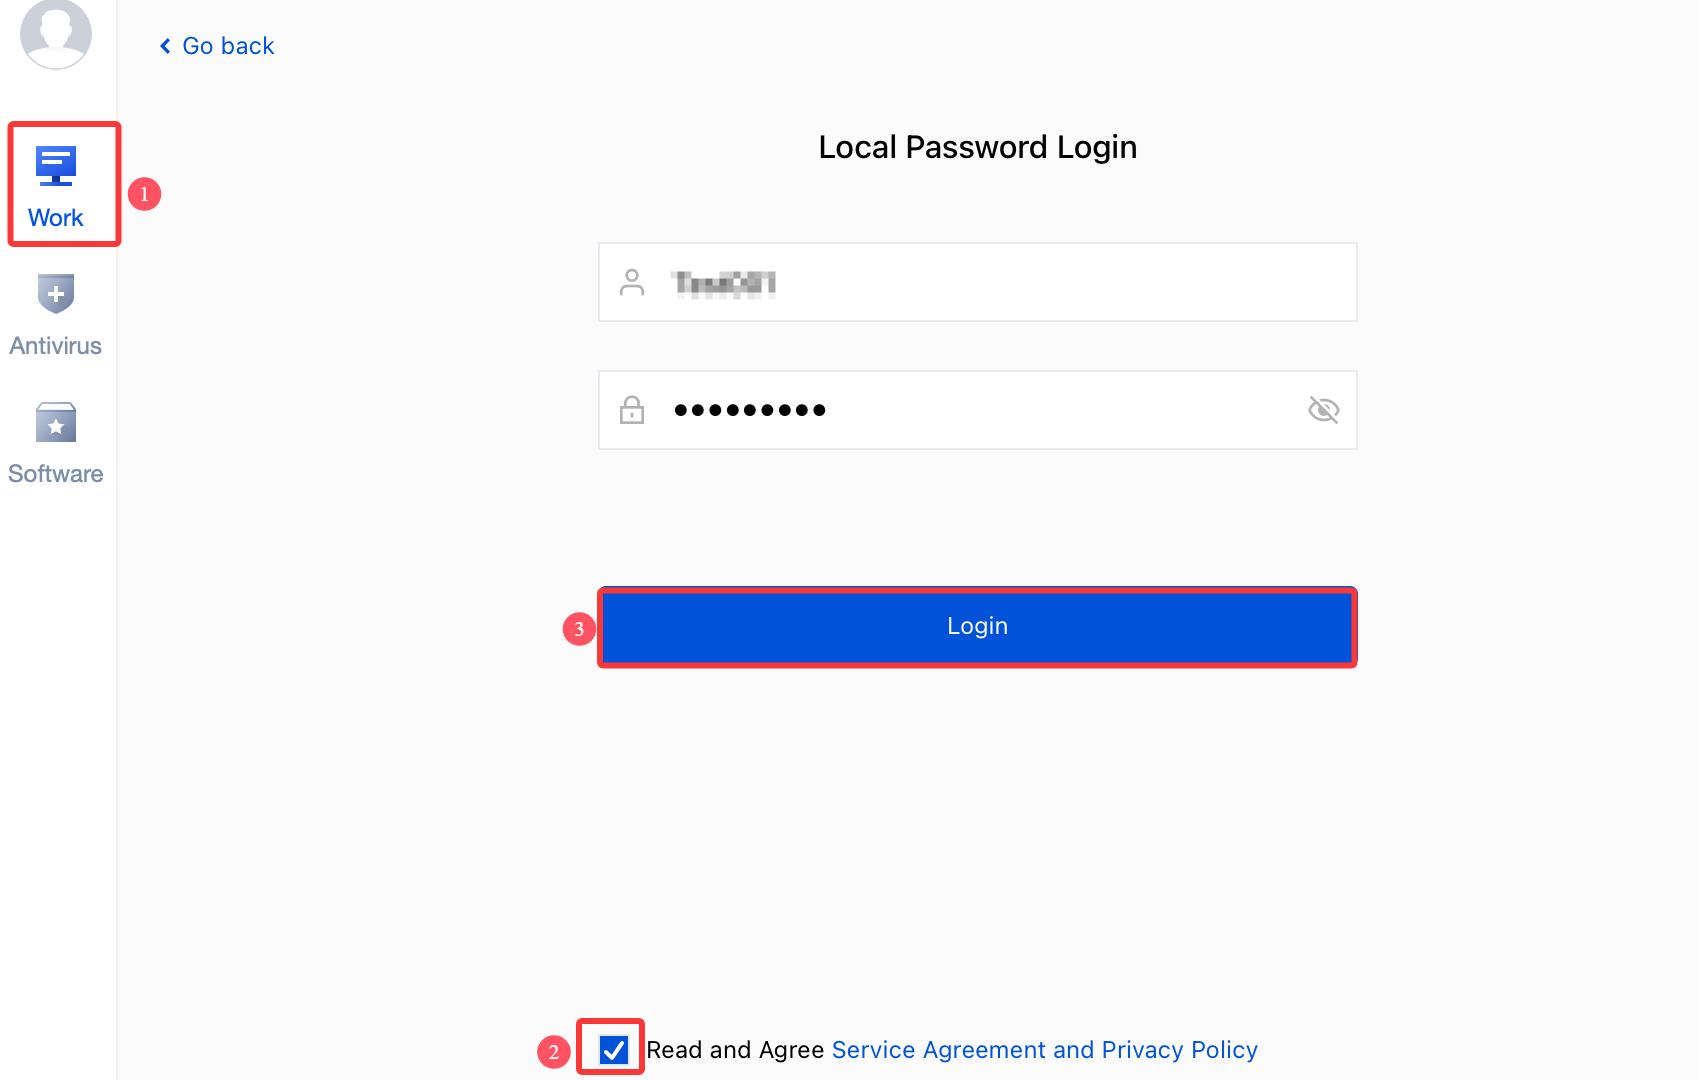
3. Select account-password login or another login method. If you choose account-password login, enter your username and password, select the service agreement, and click Login.
Enabling NGN Access to the Corporate Network
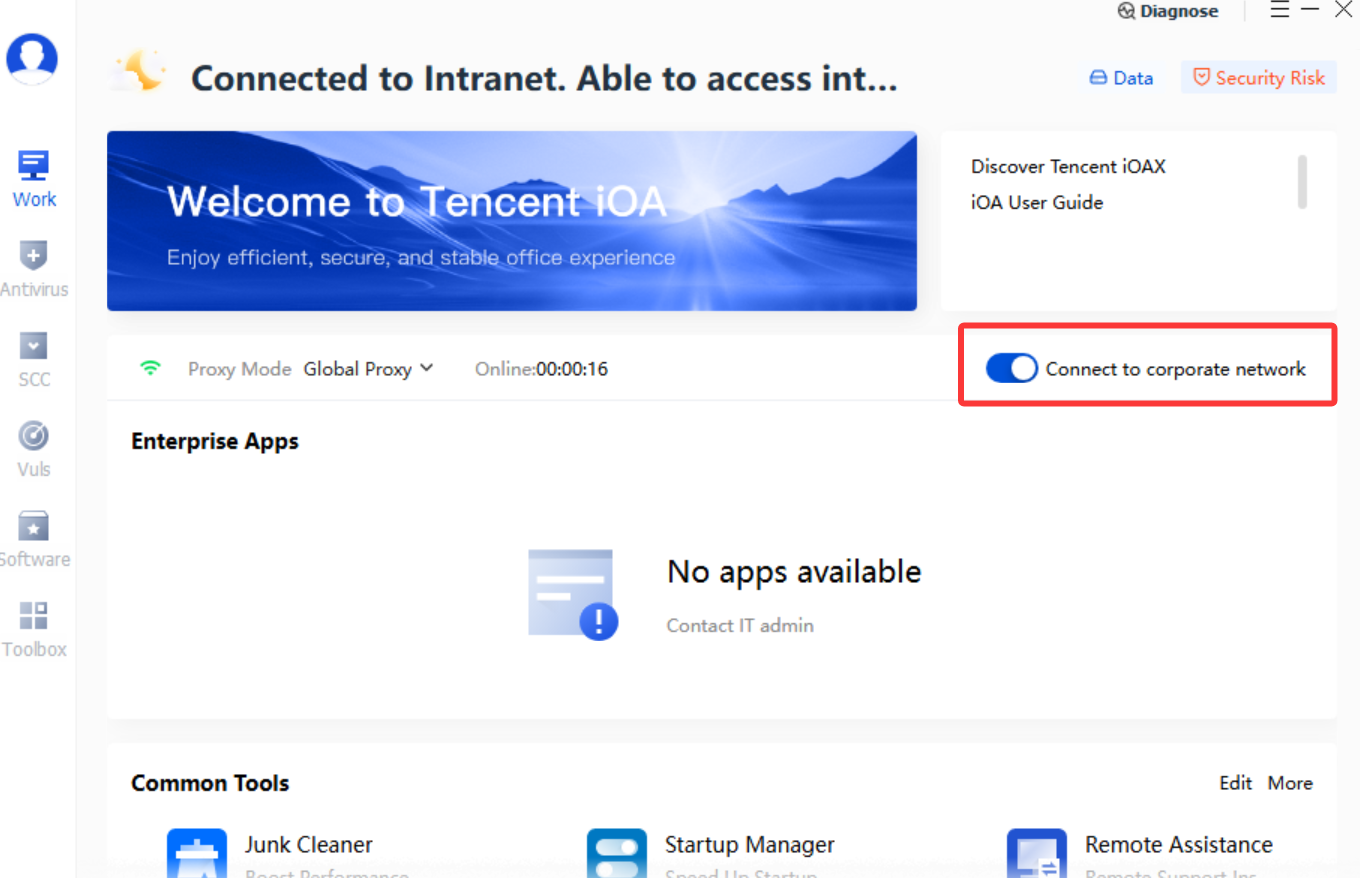
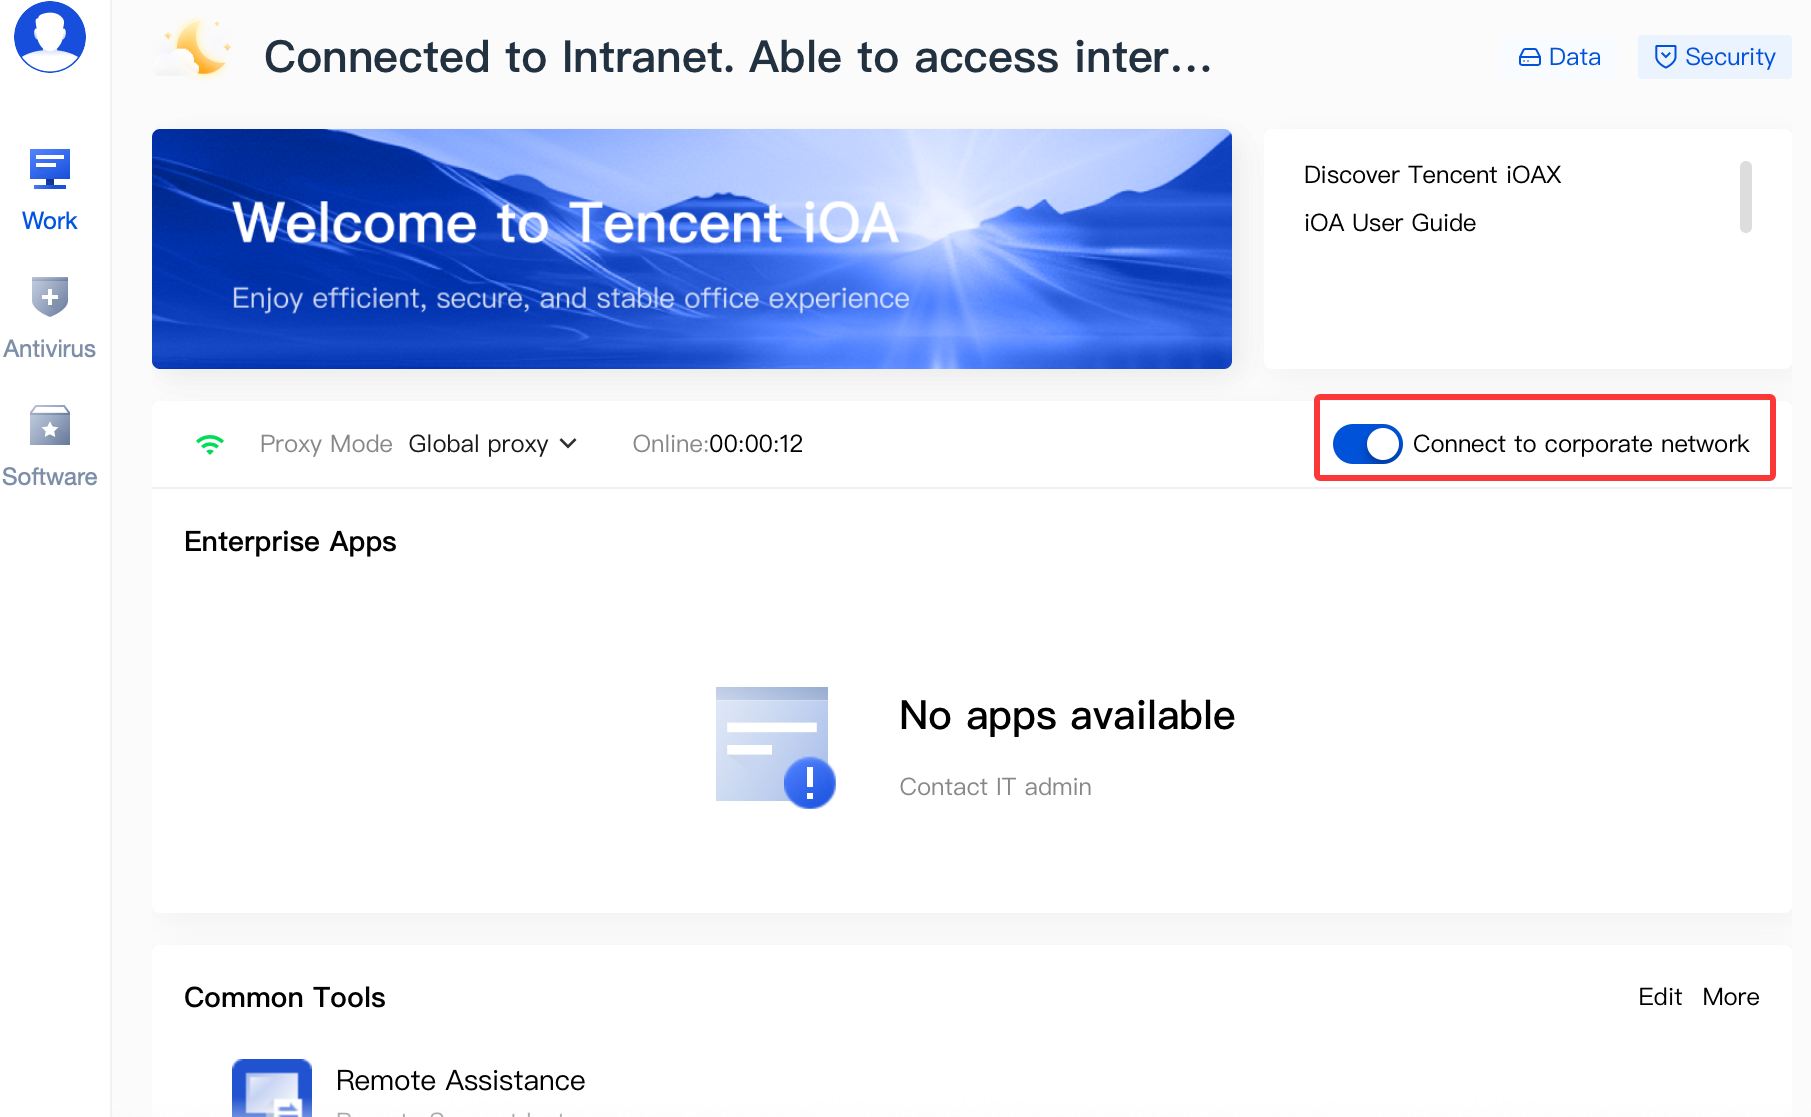
1. After successful login, you will enter the client's main interface. Enable the company network access switch to access internal company resources. When company network access is disabled, the VPN automatically closes.
Note:
The company network access switch on the client is configured by the administrator. If this switch is not displayed on your client, you can skip this section.
User Details
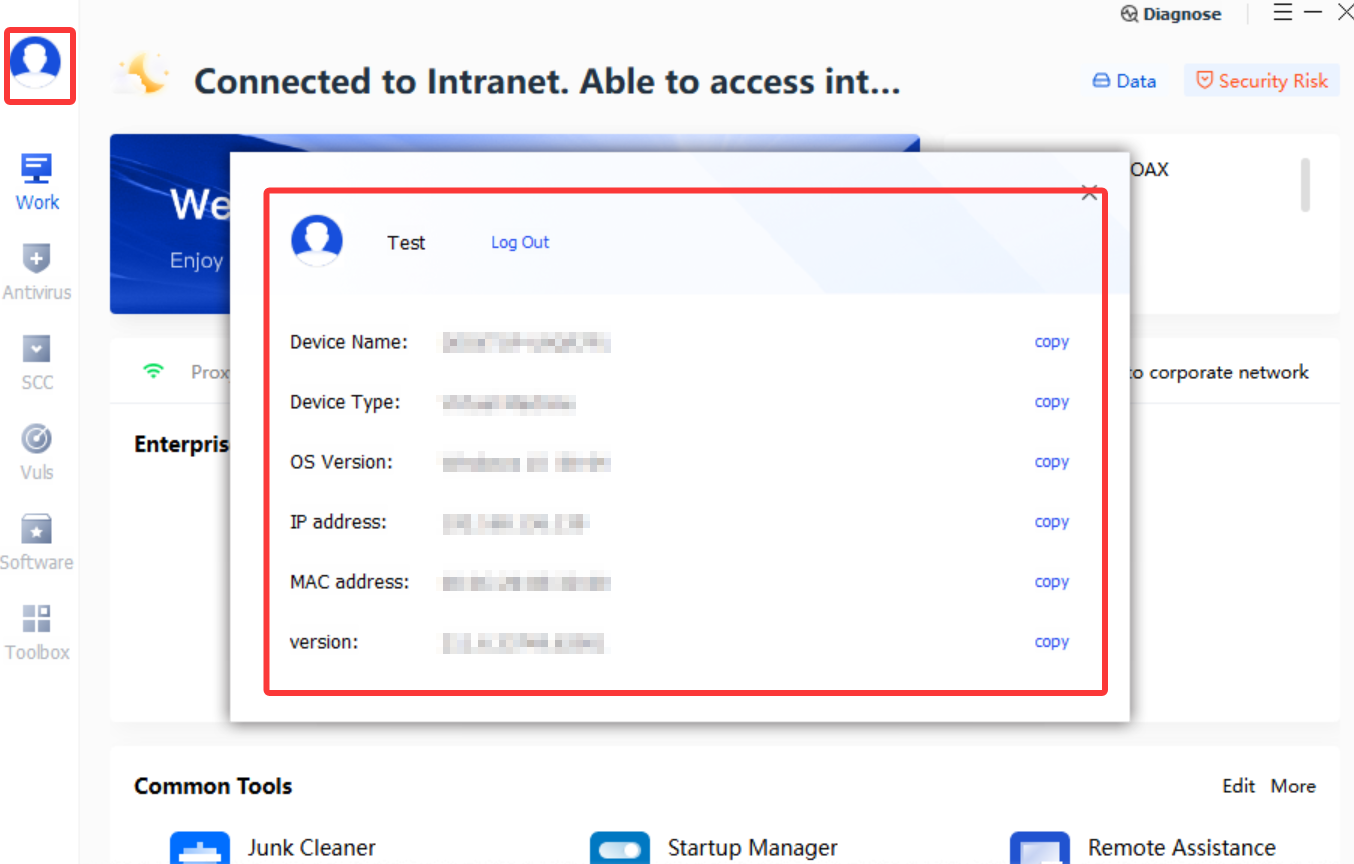
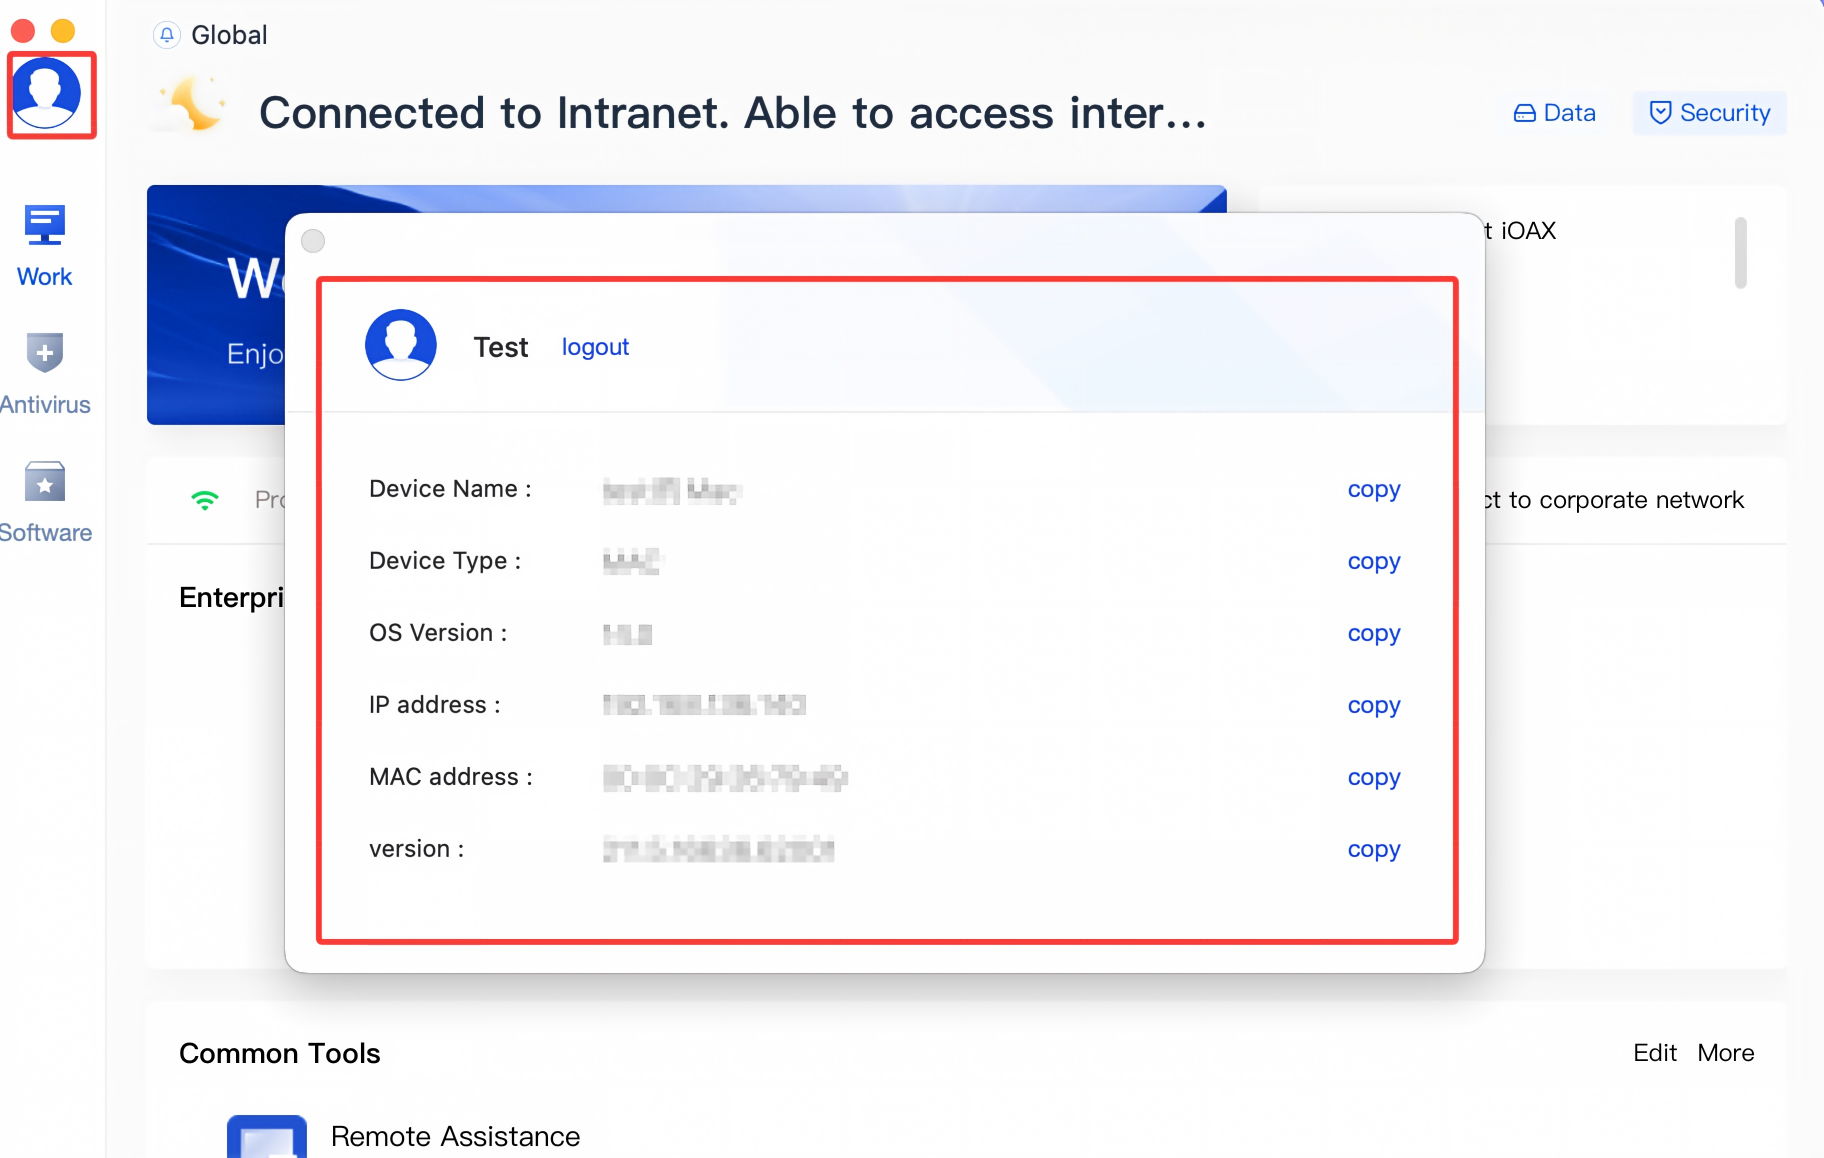
1. Click the user avatar on the left side of the page to view the logged-in user information, including device name, device type, device OS version, IP address, MAC address, and client version. You can copy the information with one click.
2. Click Logout to exit the currently logged-in account.
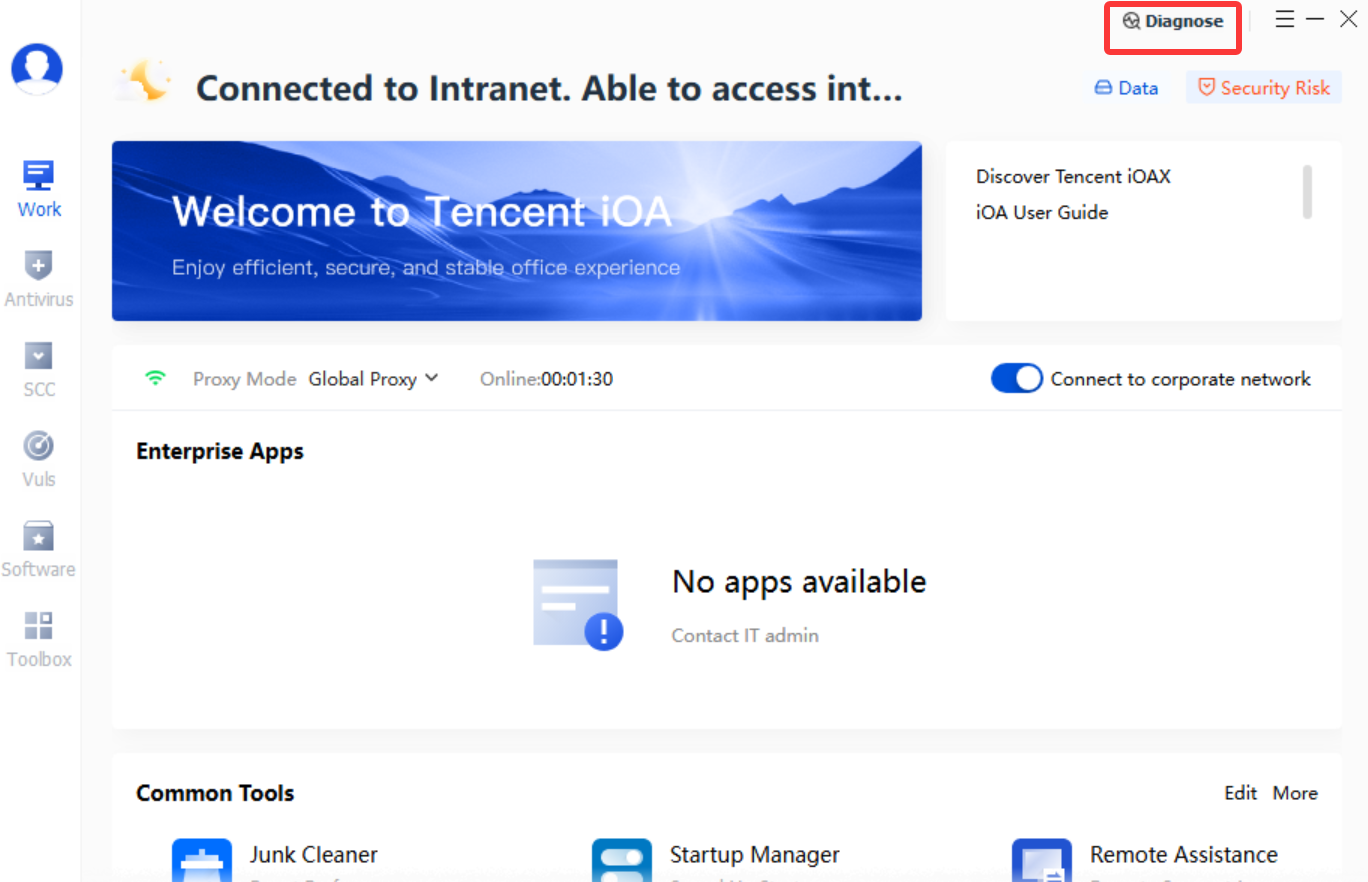
Diagnose
If the iOA client encounters feature exceptions, such as policy synchronization failures, account login failures, or failure to load related feature pages, click Diagnostic Tool.
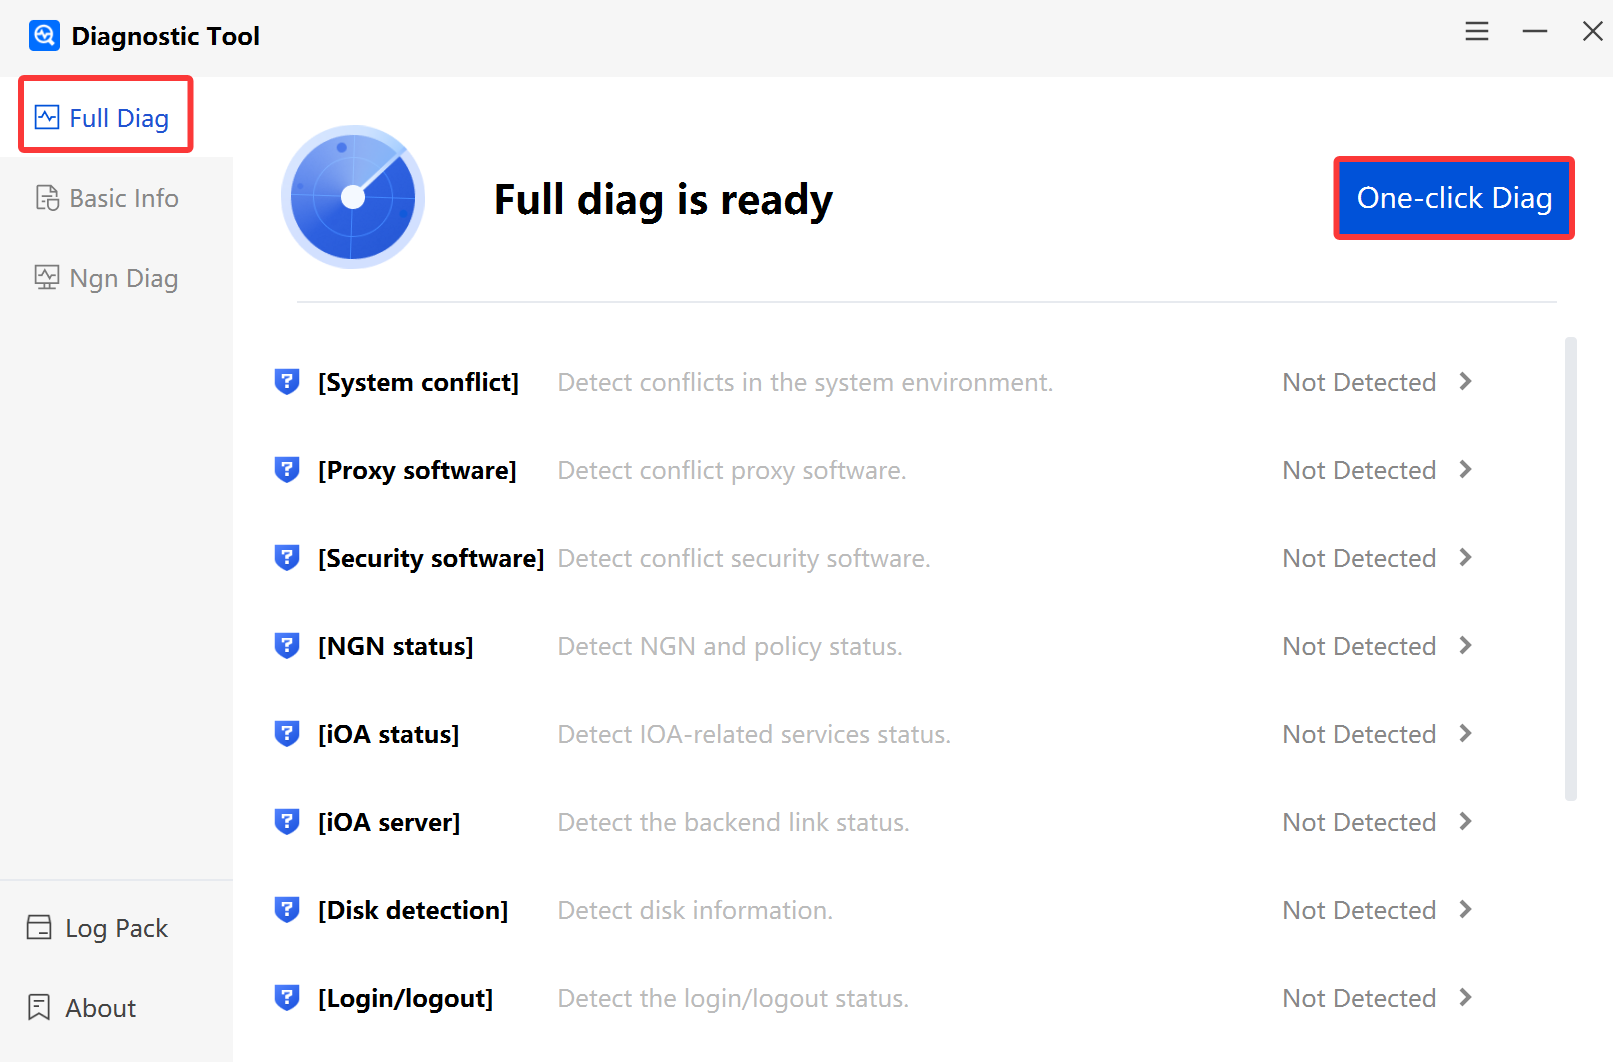
Comprehensive Diagnosis
1. Click One-Click Diagnosis, and the system will automatically run exception diagnostics on the client. The diagnostic results will be displayed on the page. If the client encounters a fault, you can package the diagnostic logs and send them to Ops personnel for troubleshooting.
2. There are two ways to package logs: opening the directory and uploading the logs.
Method 1: Click Open Directory and send the compressed diagnostic log package to Ops personnel for troubleshooting.
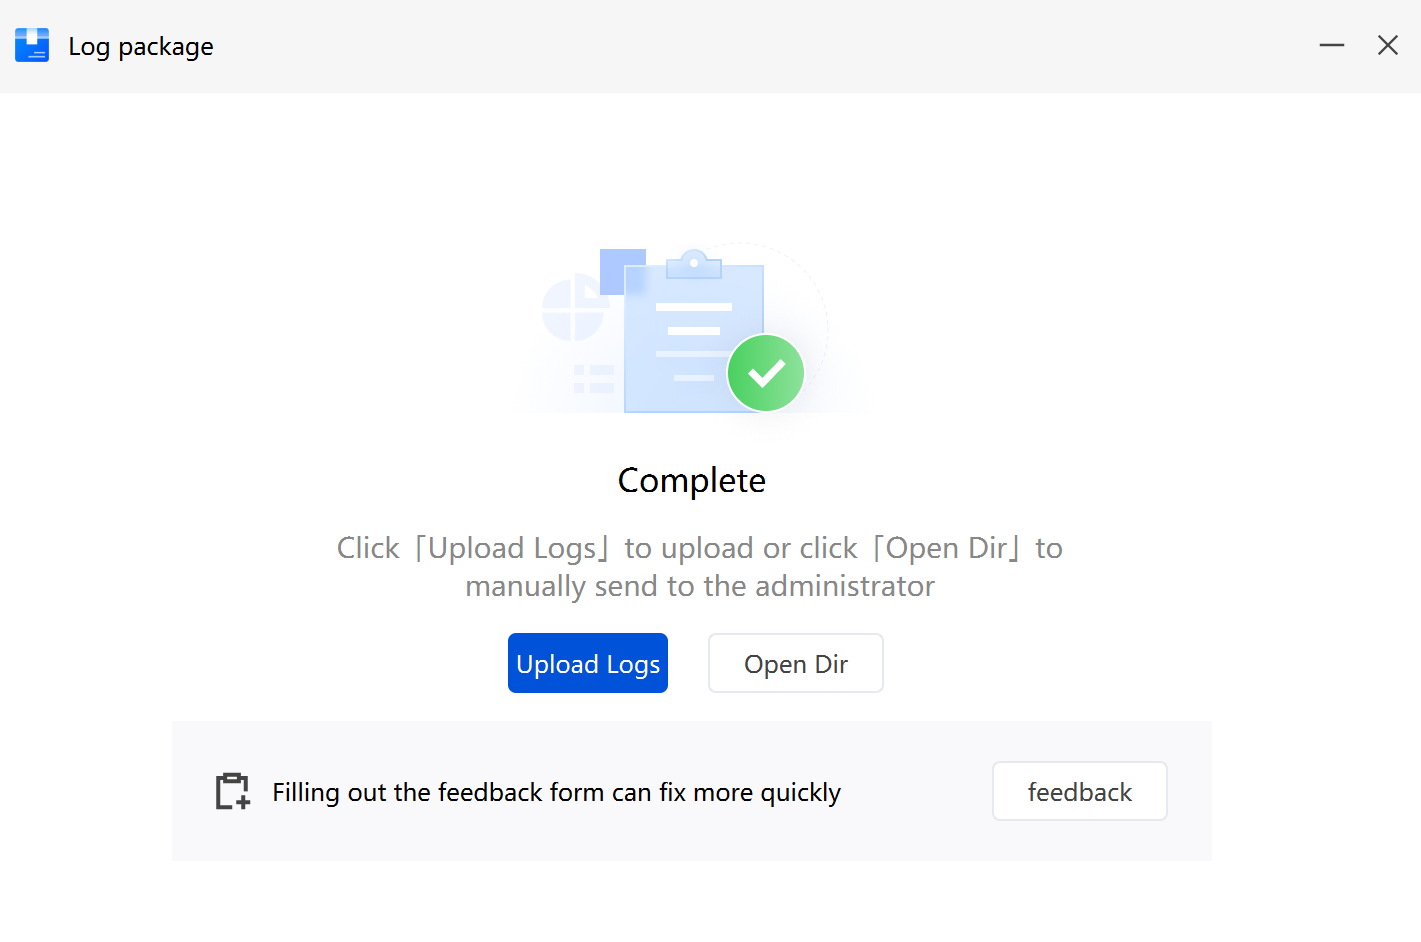
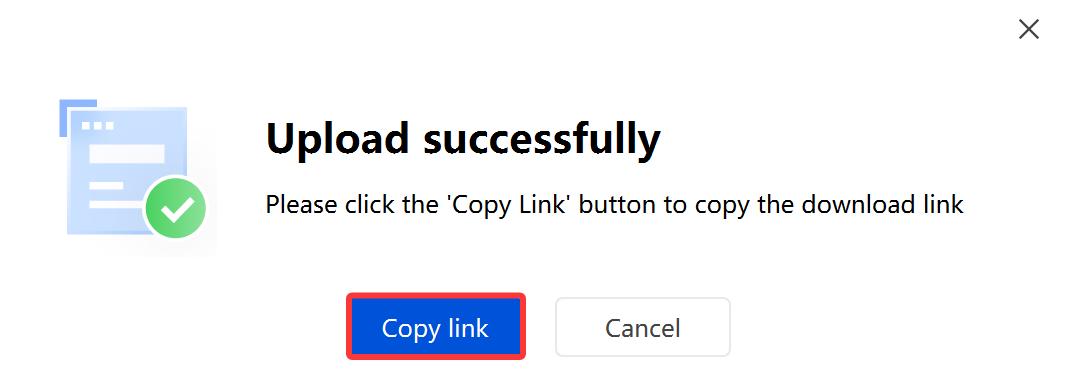
Method 2: Click Upload Logs to generate a copy link. You can send the link directly to Ops personnel, who can then download the diagnostic logs through the link for troubleshooting.
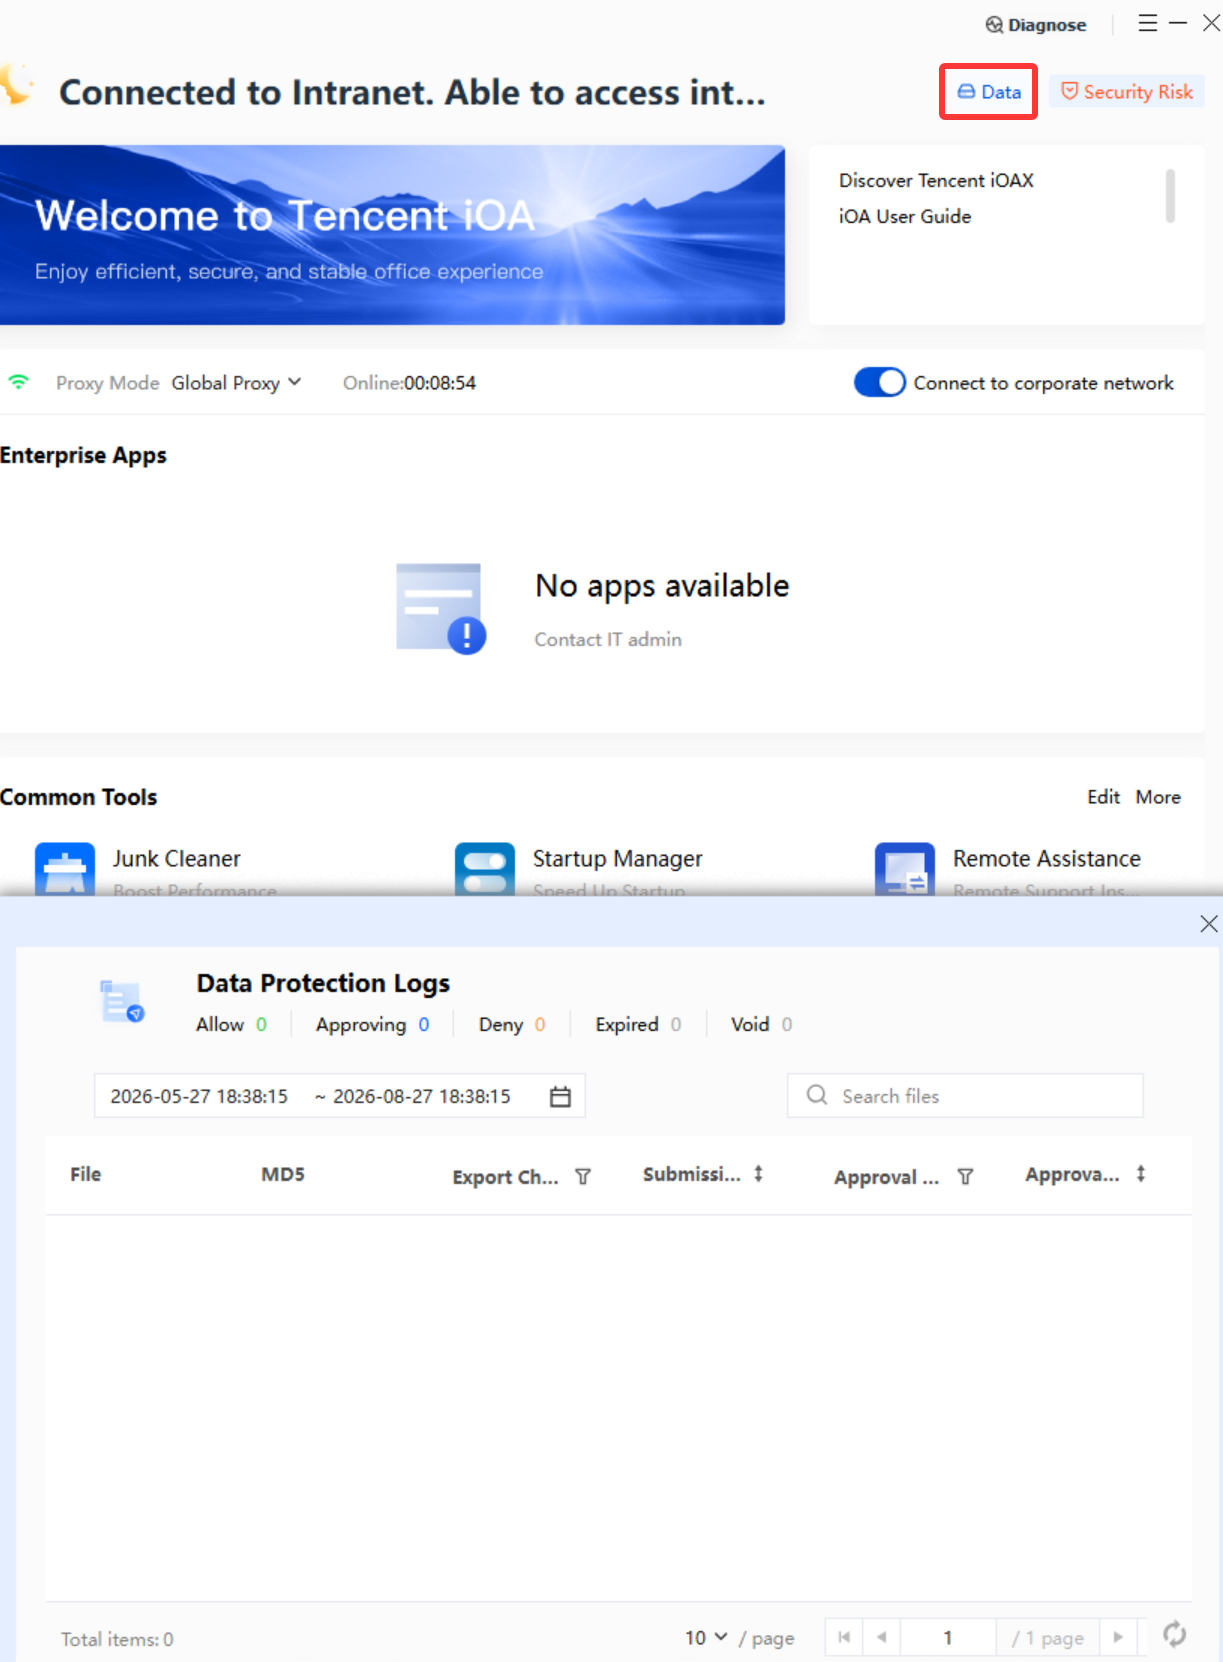
Data
Click Data Protection to view the approval progress of DLP outbound file transfers.
Note:
Administrators can configure approval flows in the console. If data protection is not displayed on your client, it only means that the policy is not currently available to you.
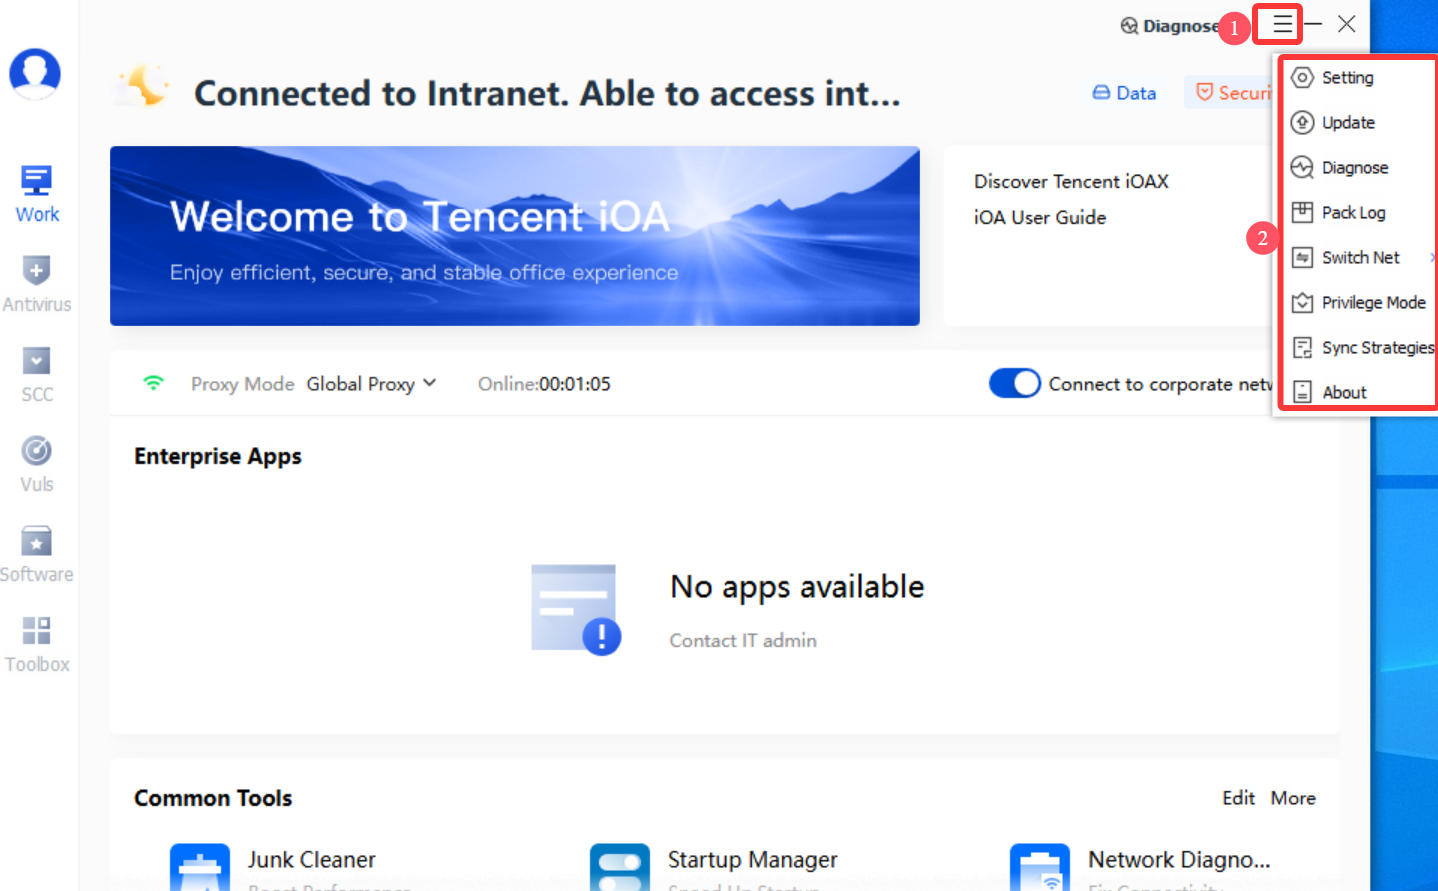
Public Menu Bar
The common menu bar in the upper right corner of the client interface contains items such as Settings, Updates, Diagnostics, Package Logs, Proxy Mode, Remote Assistance, Privileged Mode, Policy Sync, and About.
Note:
Administrators can configure in the console whether the client displays Remote Assistance, Privileged Mode, and other features. If not all features shown in the following figure are displayed on your client, it only means that the policy is not currently available to you.
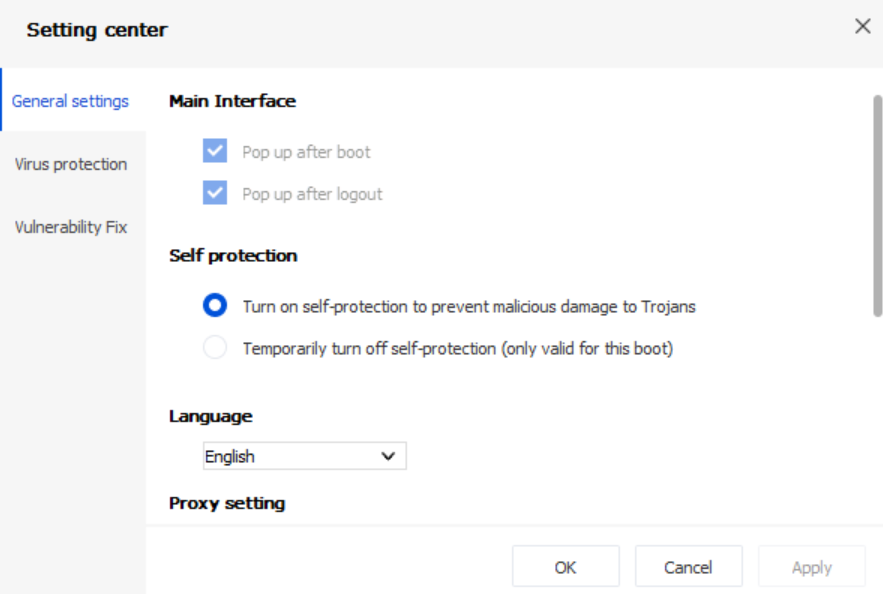
Setting
Settings include three parts: General Settings, Virus Protection Settings, and Vulnerability Remediation Settings. You can adjust the corresponding settings based on your actual needs.
Note:
The settings available on the client are determined by the console configuration. The client displays the corresponding items only after the console enables the items that allow client modification. If these items are not enabled, the client cannot modify the main interface/self-protection settings (grayed out).
Update
Click Update, and the system will detect and update the current client version for the user.
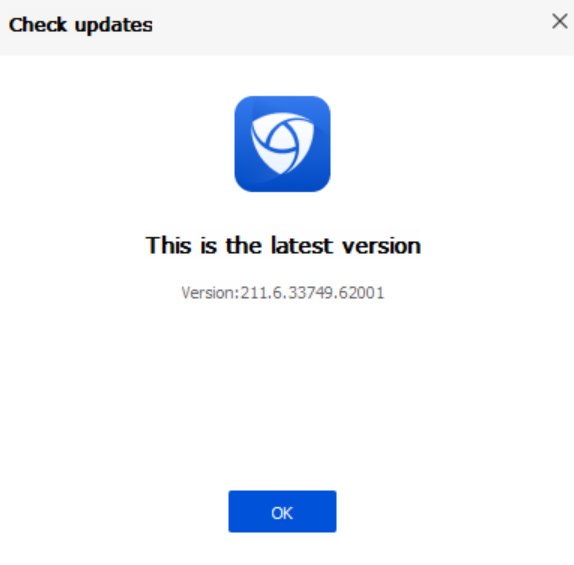
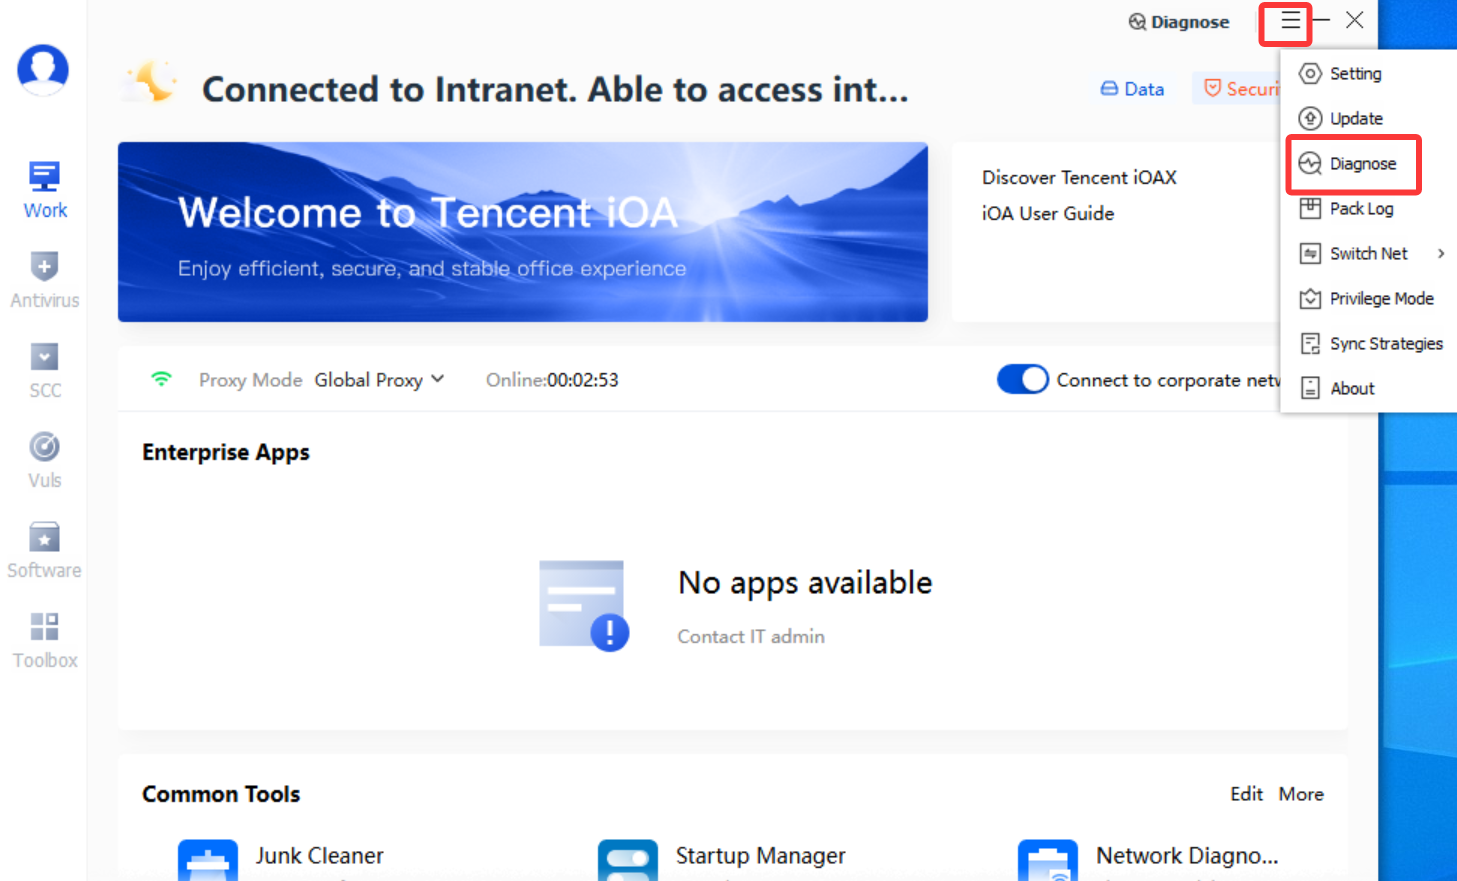
Diagnosis
The Diagnostics feature is consistent with Diagnostic Tool. If the client encounters a fault, you can package the diagnostic logs and send them to Ops personnel for troubleshooting.
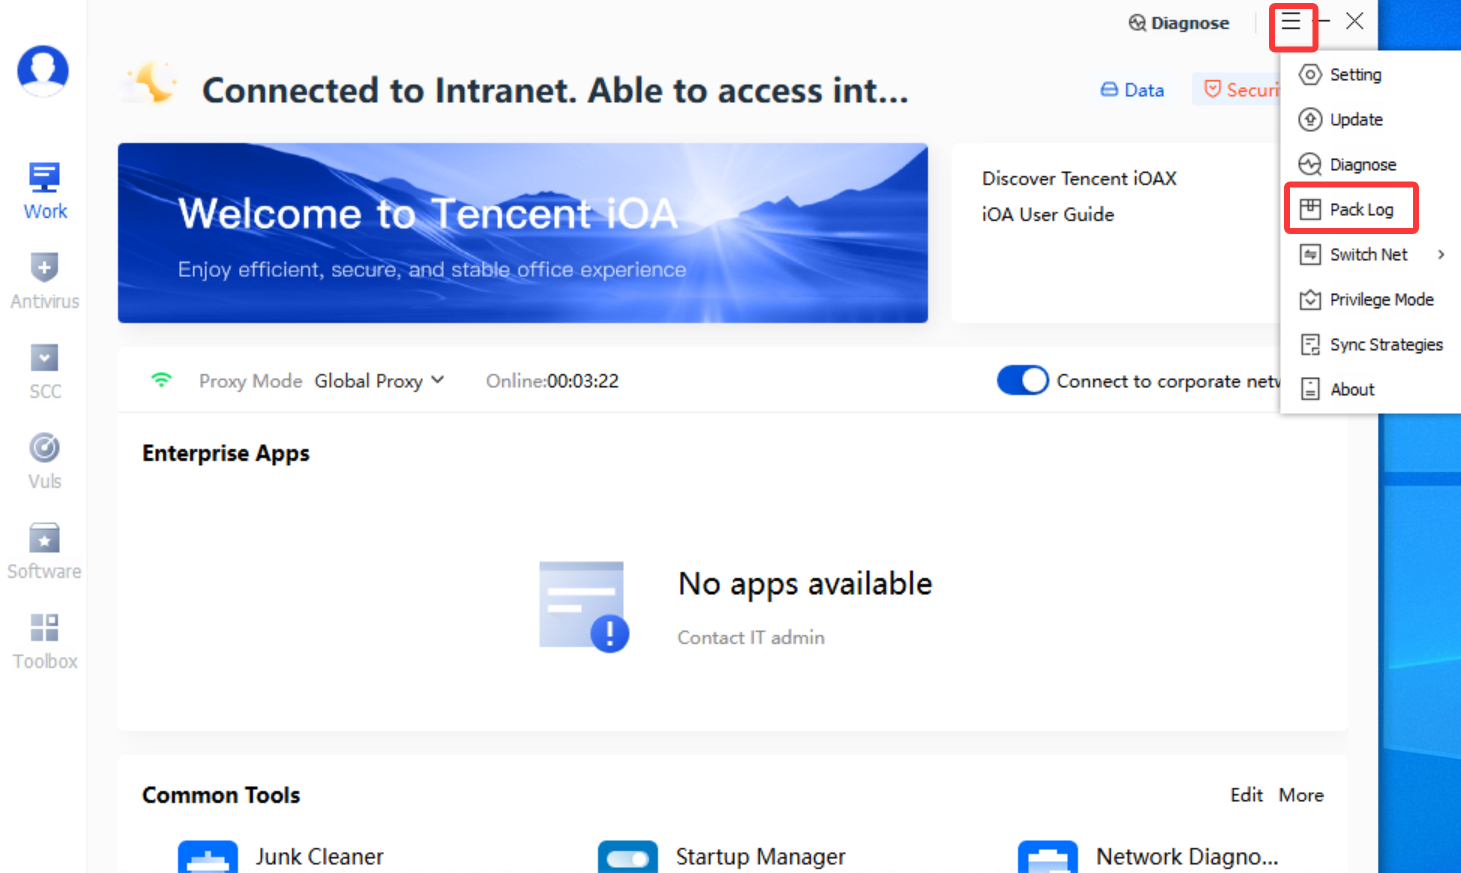
Pack Log
Click Package Log to generate a log archive. Send the logs to Ops personnel for troubleshooting.
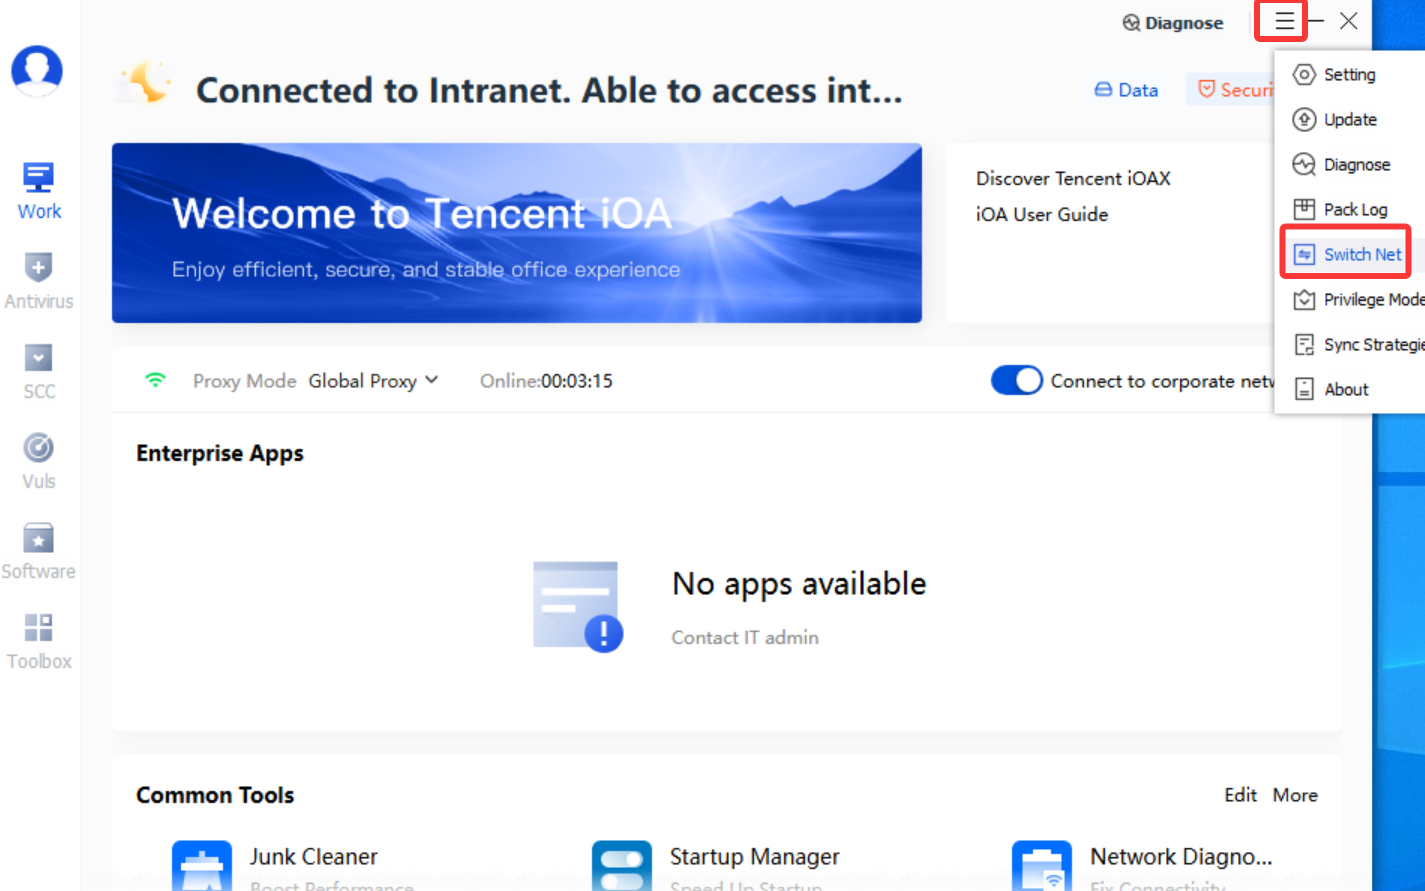
Switch Net
Associate the network access isolation policy configured by the admin. Network access isolation is used to divide the enterprise network into multiple isolated zones, and controls terminal access permissions between different network zones through allowlist and blocklist policies, achieving refined network access management.
Privilege Mode
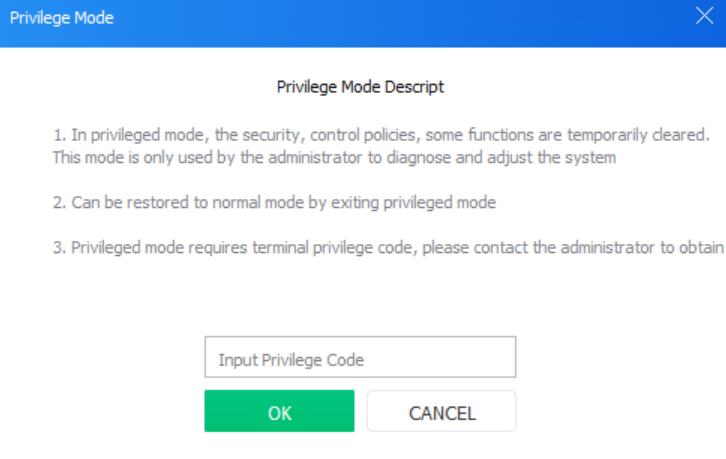
1. Entering privileged mode will completely block all security and management policies to simulate an uninstalled environment for troubleshooting.
Attention:
Privileged mode carries significant risks and hidden dangers. Exercise with caution.
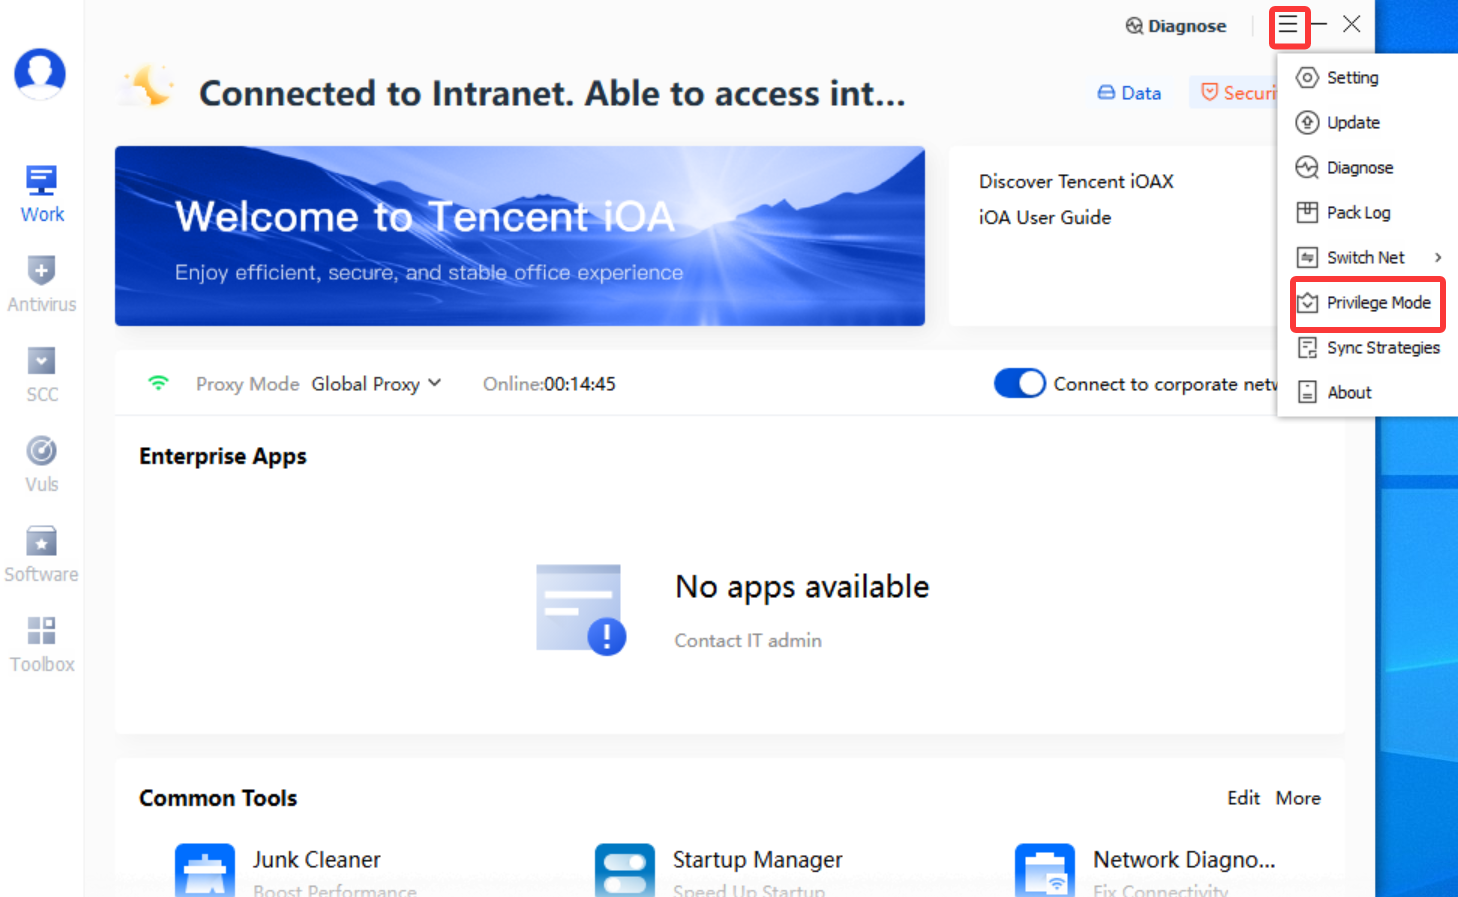
2. How to obtain the privilege code: Contact the administrator.
Sync Strategies
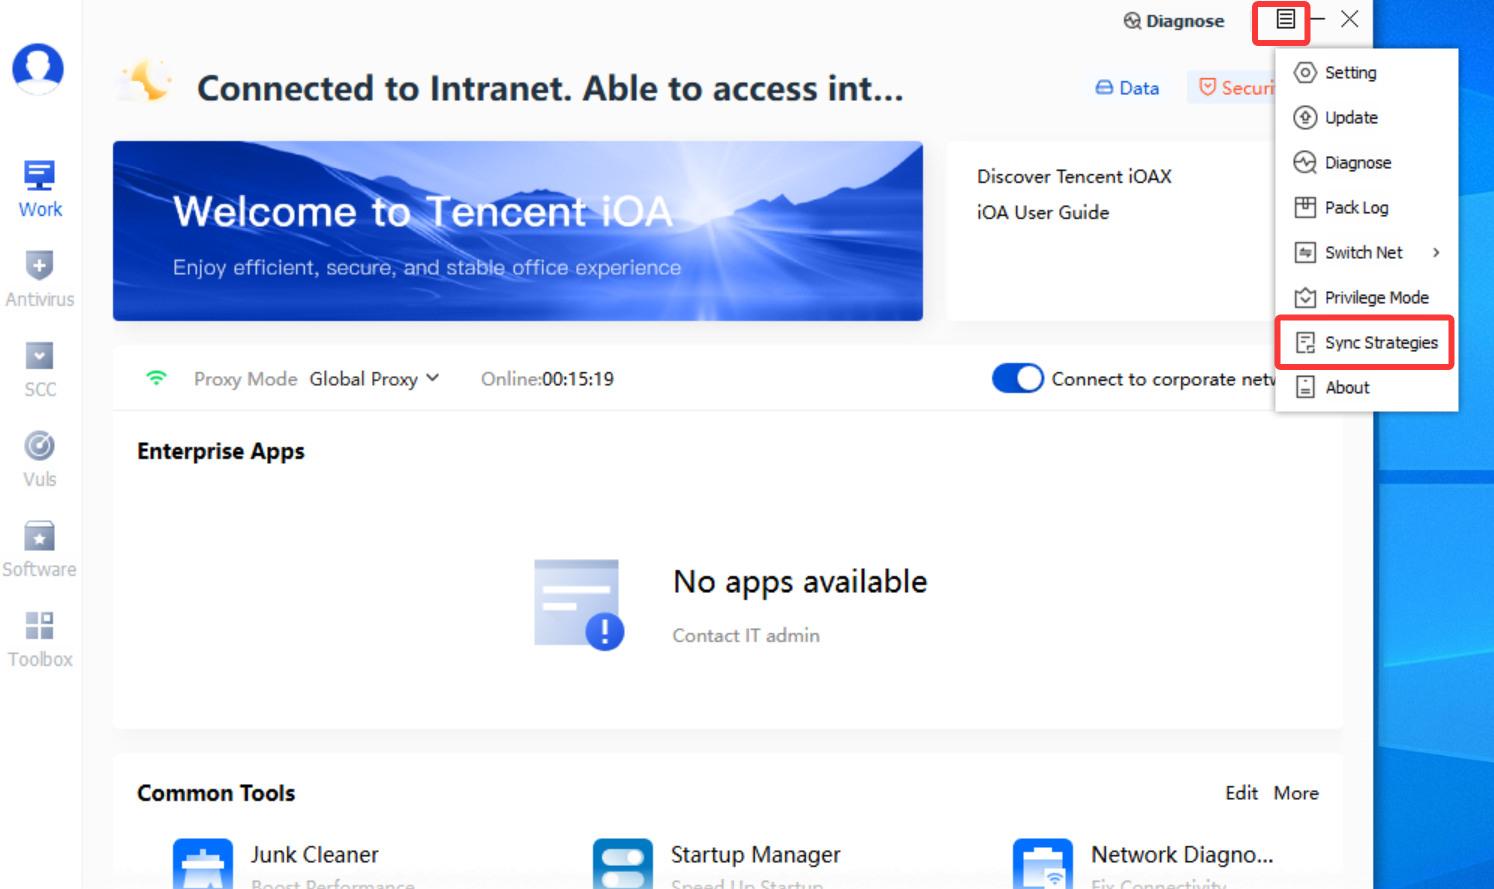
If the administrator has distributed a policy but the client has not pulled it, click Sync Strategies.
About
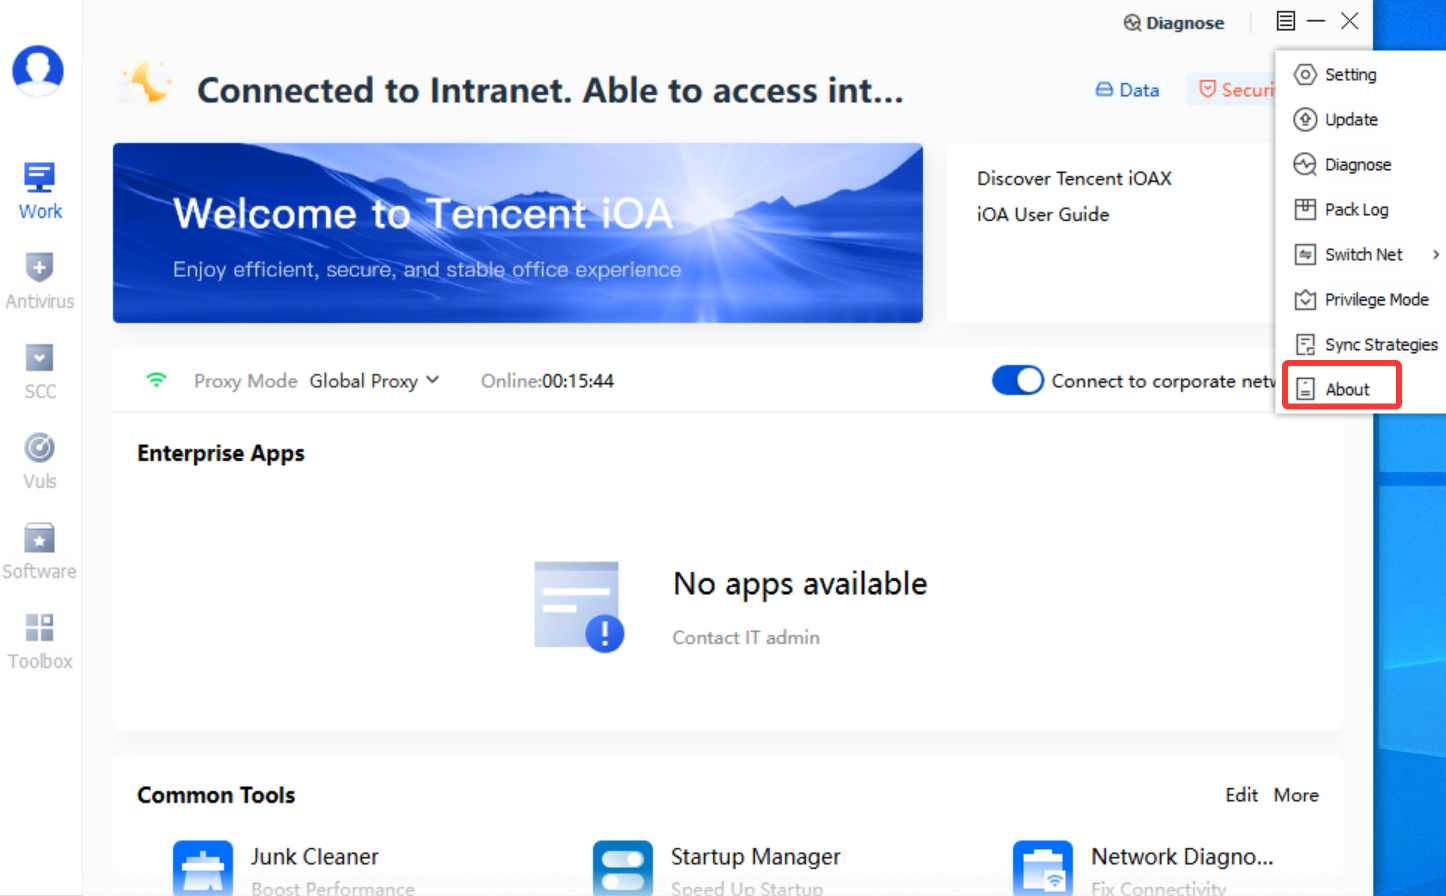
Click About to view information such as the virus database version and user agreement.
Feature Module
Note:
iOA is available in Basic, Terminal Security Professional, Remote Access Professional, and Advanced editions. If a feature module (such as Office, Antivirus, Compliance, or Tools) is not displayed in your client, it only indicates that the policy for that module is not currently available to you or that your company has purchased a different edition.
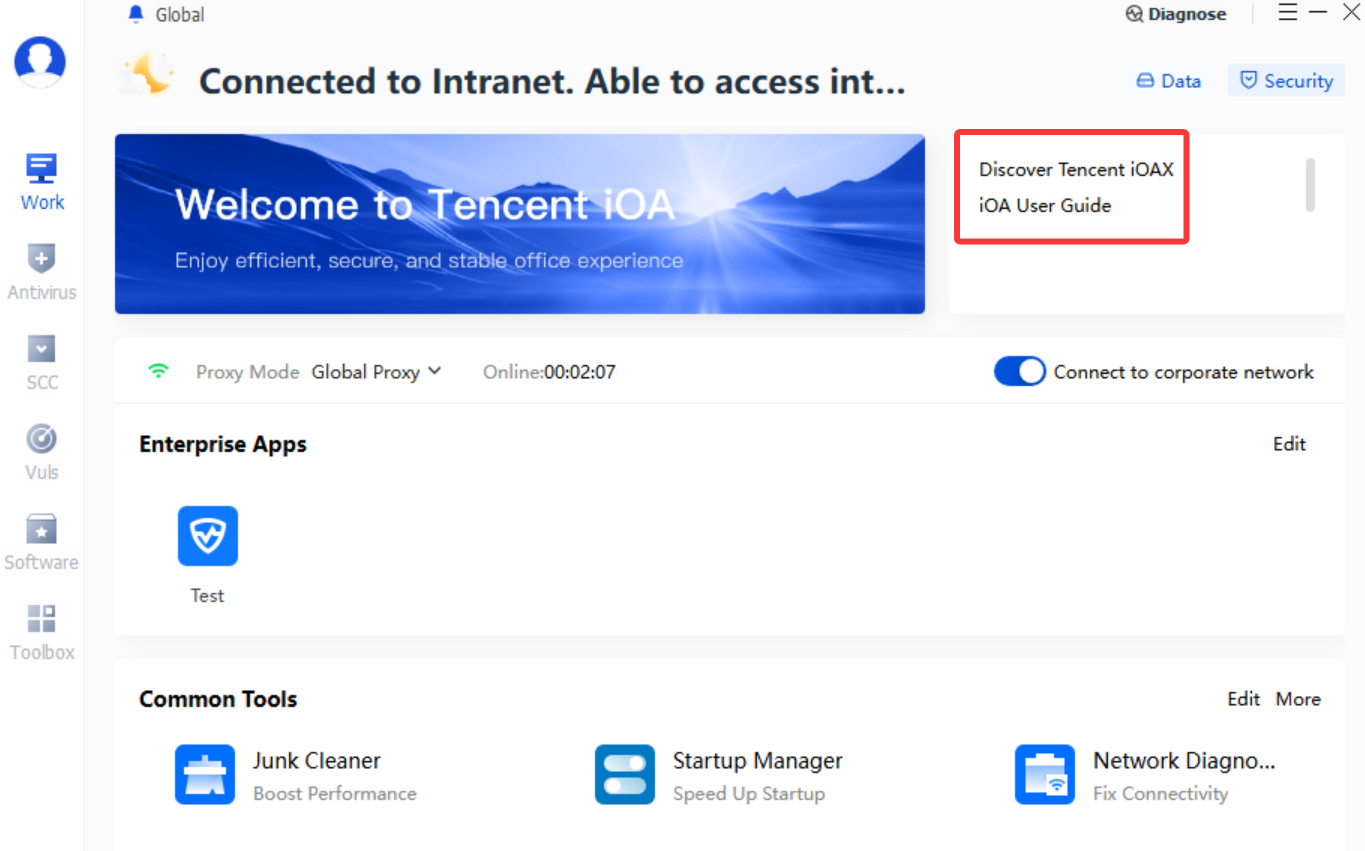
Work
1. Enterprise Applications: View and access the business applications that you have permission to access.
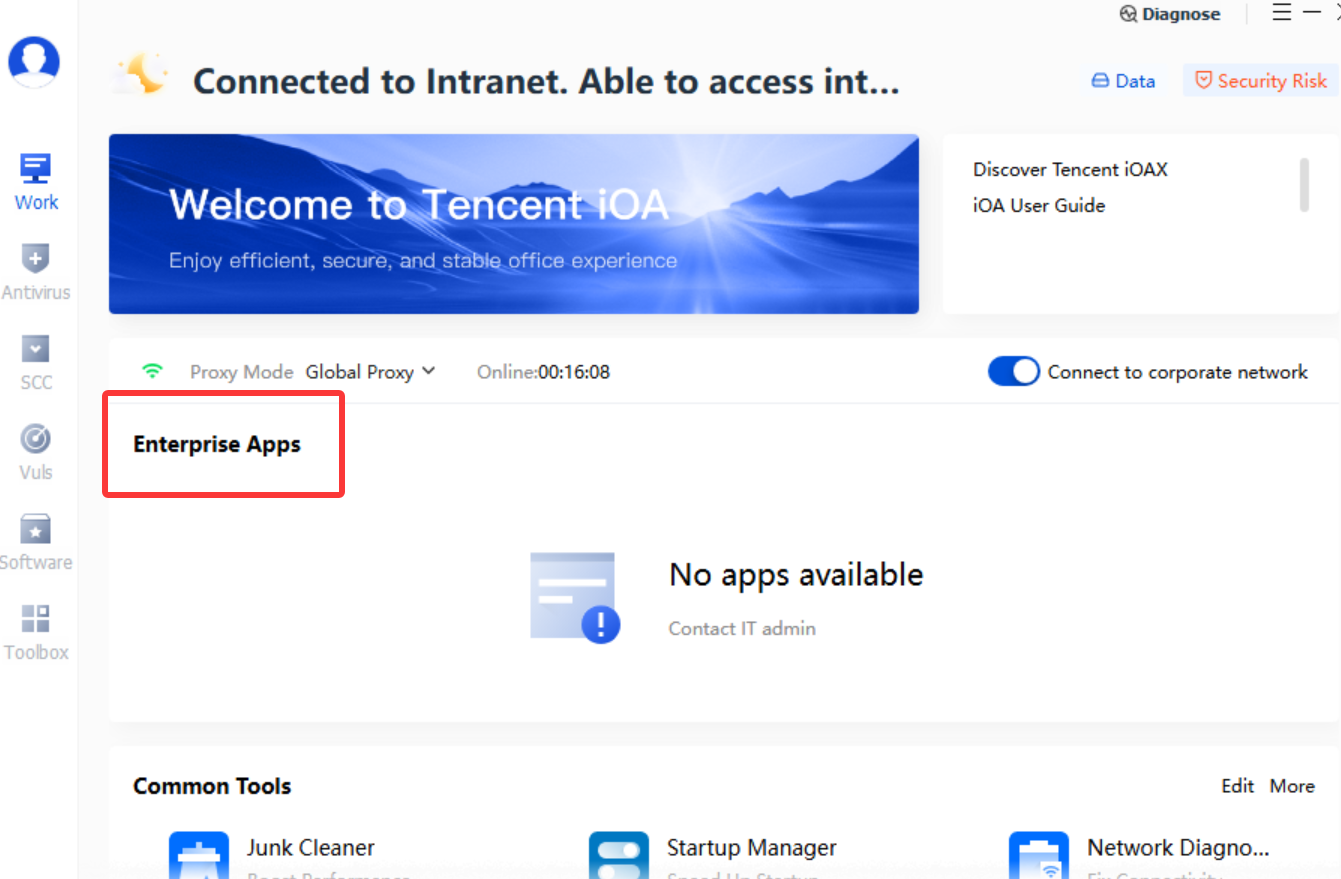
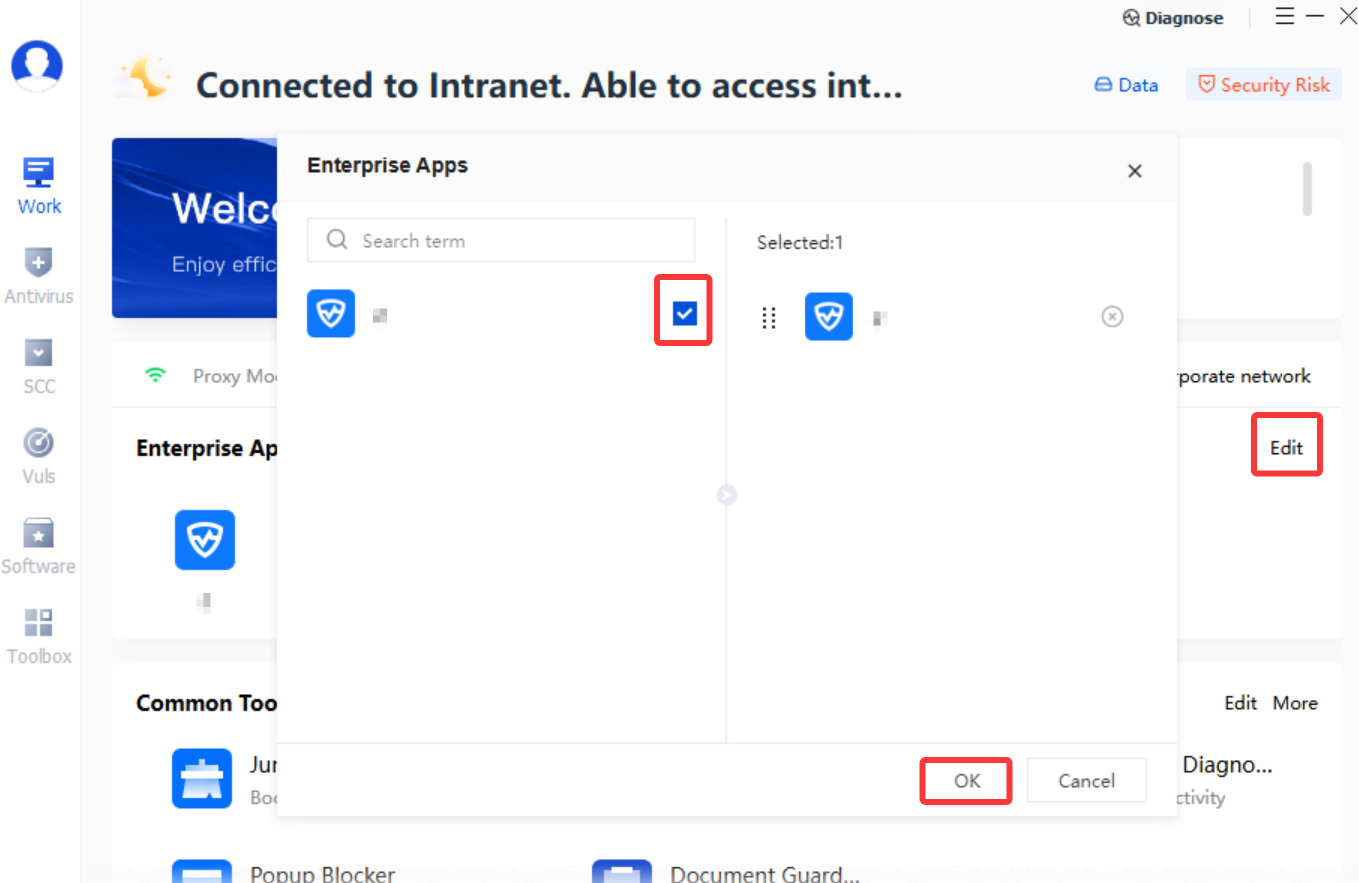
2. Click Edit. Selected enterprise applications will be displayed in Work > Enterprise Apps, while unselected enterprise applications will not be displayed on Office Home.
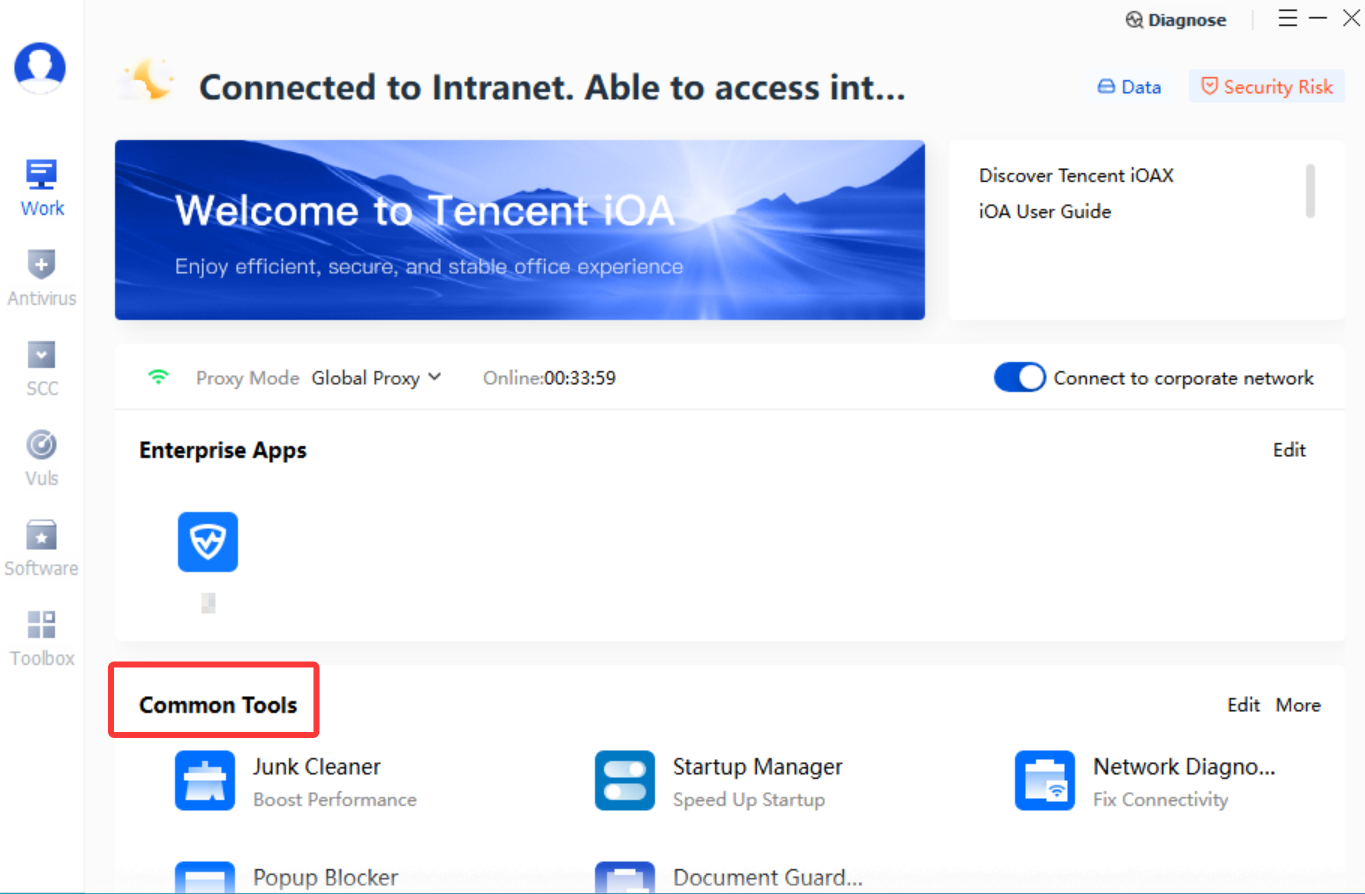
3. Common Tools: After logging in to the iOA client, you can directly use the common tools displayed.
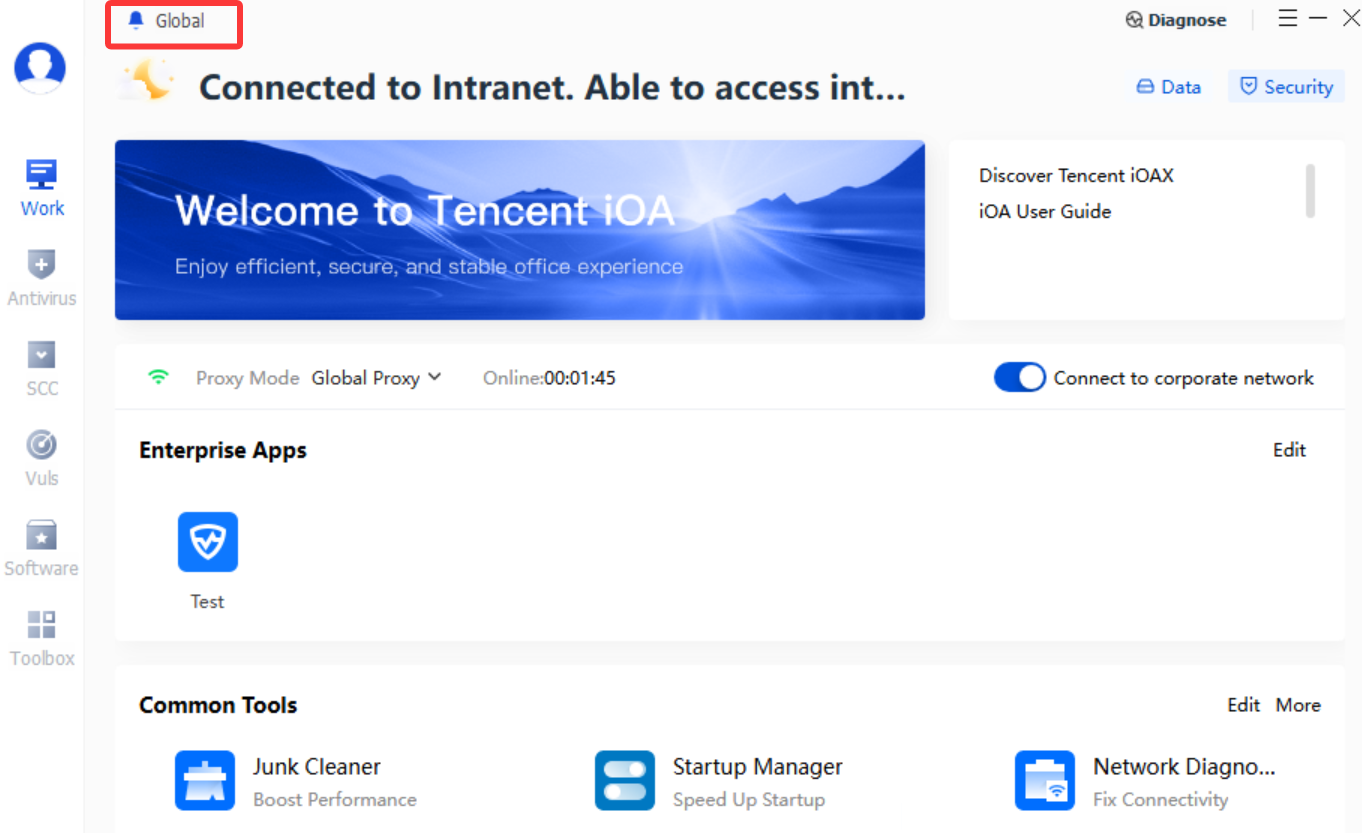
4. Global Announcement: It is located at the top of the client and can be viewed without logging in to iOA.
5. Content Announcement: After logging in to the iOA client, you can view company announcements on the Office Home. iOA has a built-in user survey to further understand your experience and needs, and a built-in client user guide to help you quickly become familiar with and efficiently use the client.
Antivirus
1. Virus detection supports quick scan, full scan, and custom scan.
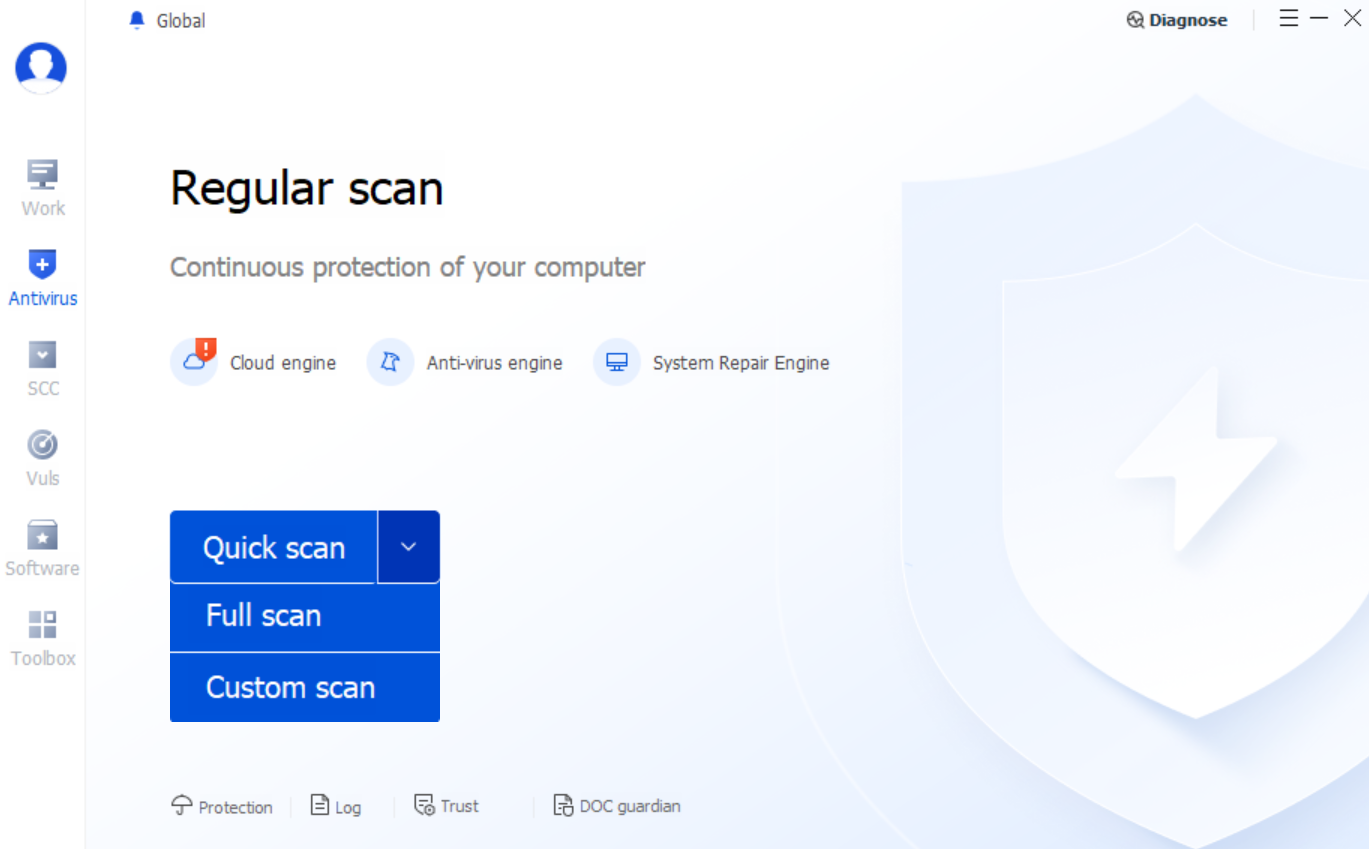
Quick Scan: This scan targets critical locations such as applications, system processes, and startup items to quickly check whether the system is at risk. After you click Quick scan, the system automatically scans and displays the current risk items upon completion.
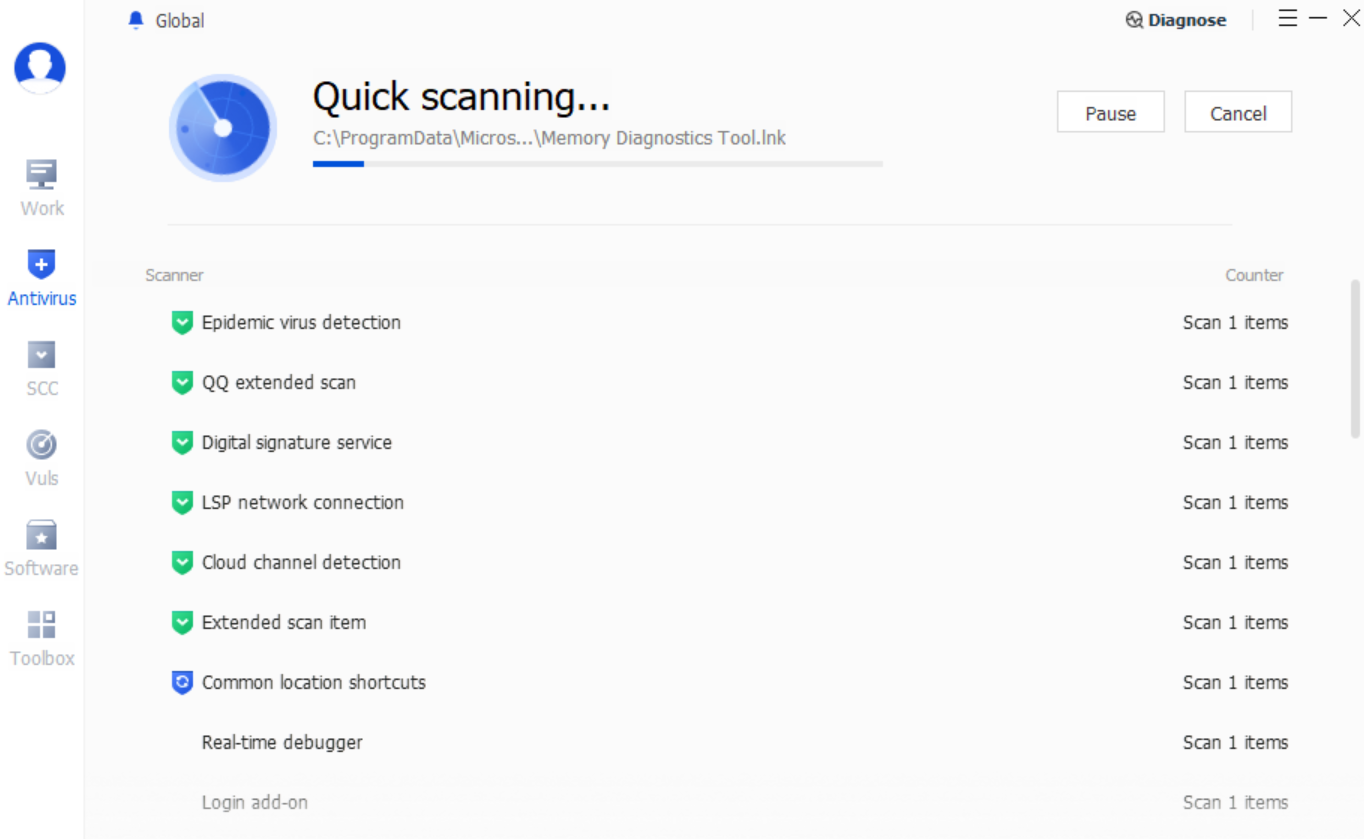
Full Scan: A full scan traverses the entire disk, providing the widest coverage and the most thorough detection, but it also takes the longest time. It is equivalent to performing a deep enumeration check of all files one by one on top of a quick scan.
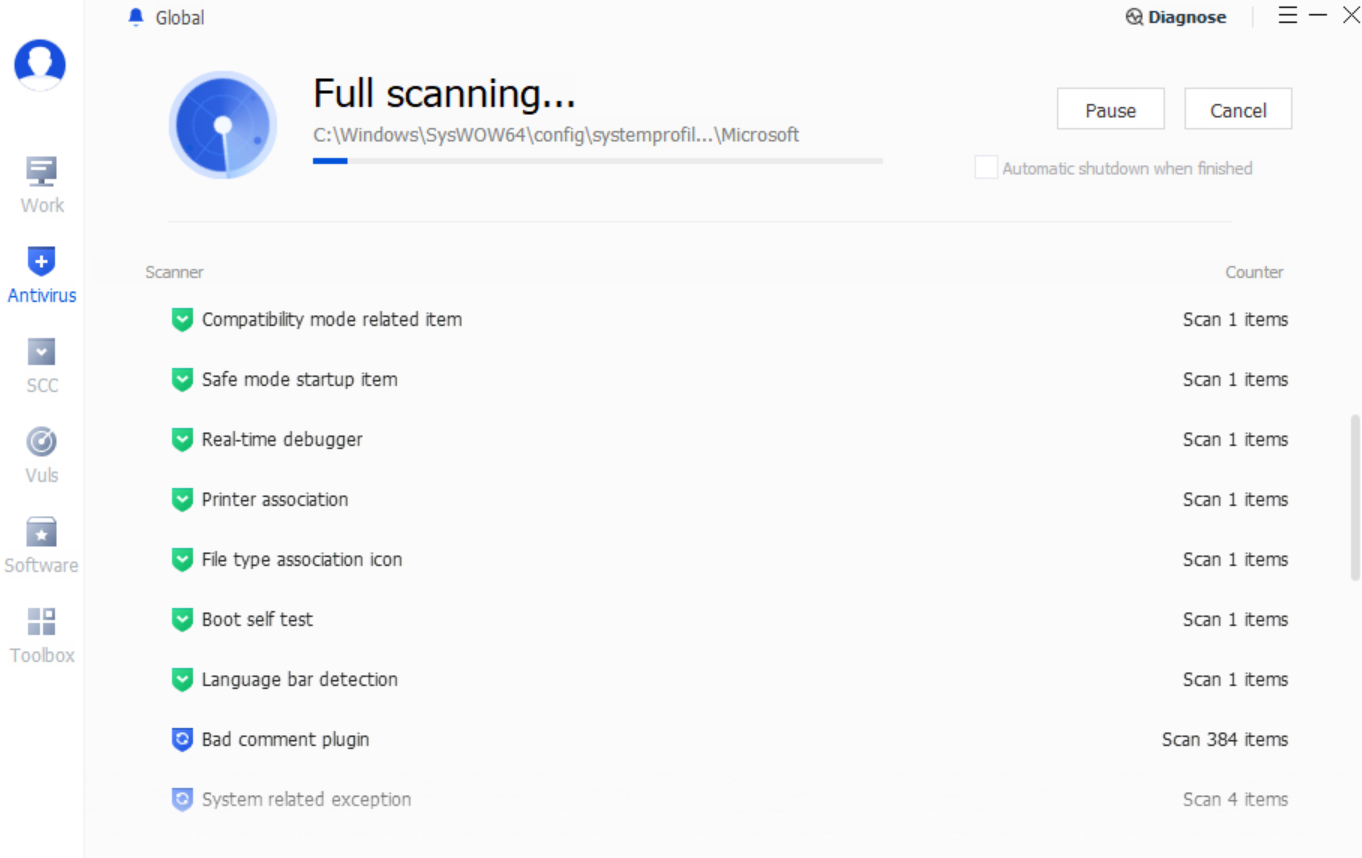
Custom Scan: Specify the folders you want to scan. Multiple folders can be combined.
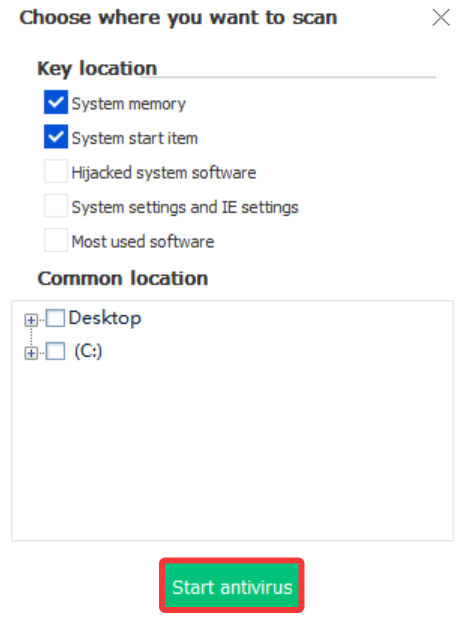
2. After the detection task is completed, if risks are found, select the risk items and click Handle Now to remediate the selected risk items.
SCC
Note:
Client compliance detection items are configured by administrators. This page appears only after administrators configure compliance detection policies for terminals/users. If the compliance feature is not displayed on your client, you can skip this section.
1. Click the corresponding number in X compliance detection items enabled to view the details of the corresponding compliance detection items.
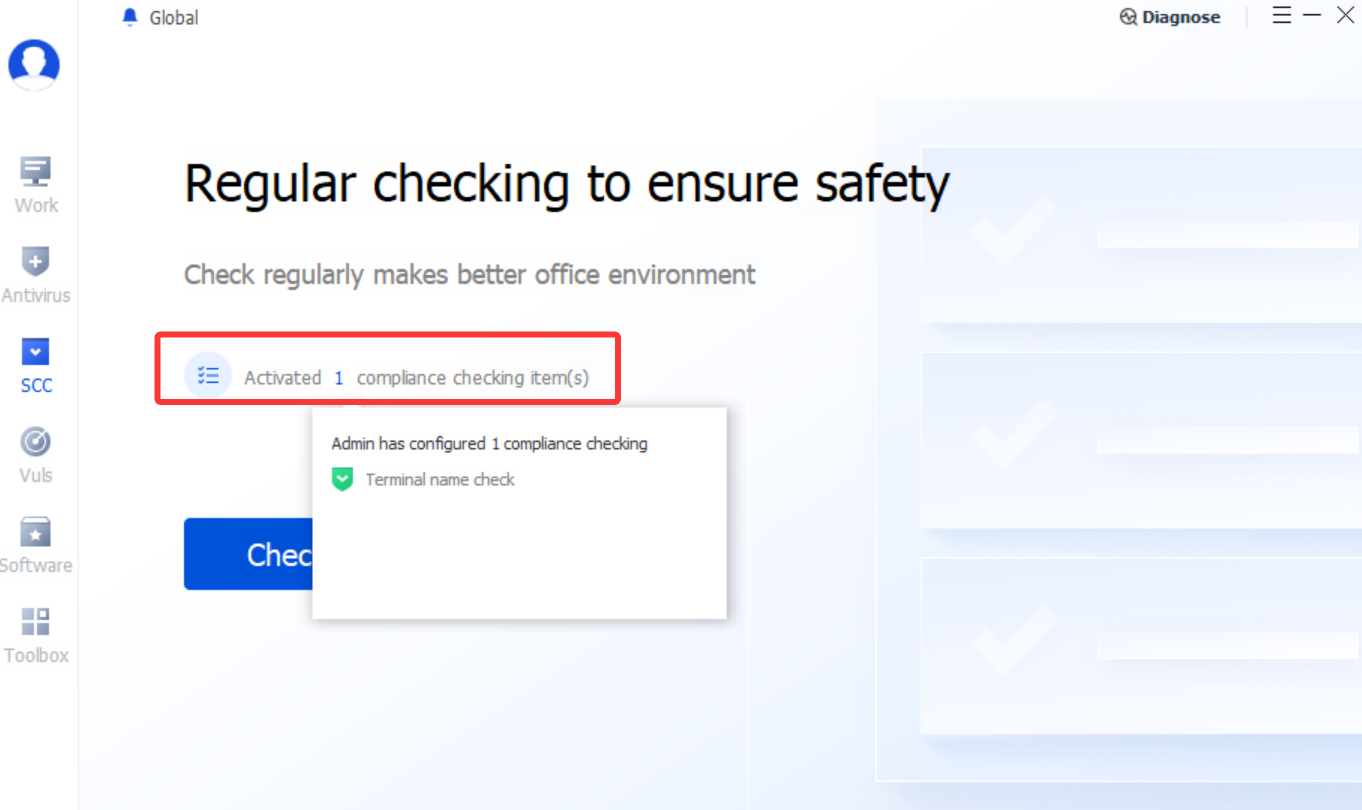
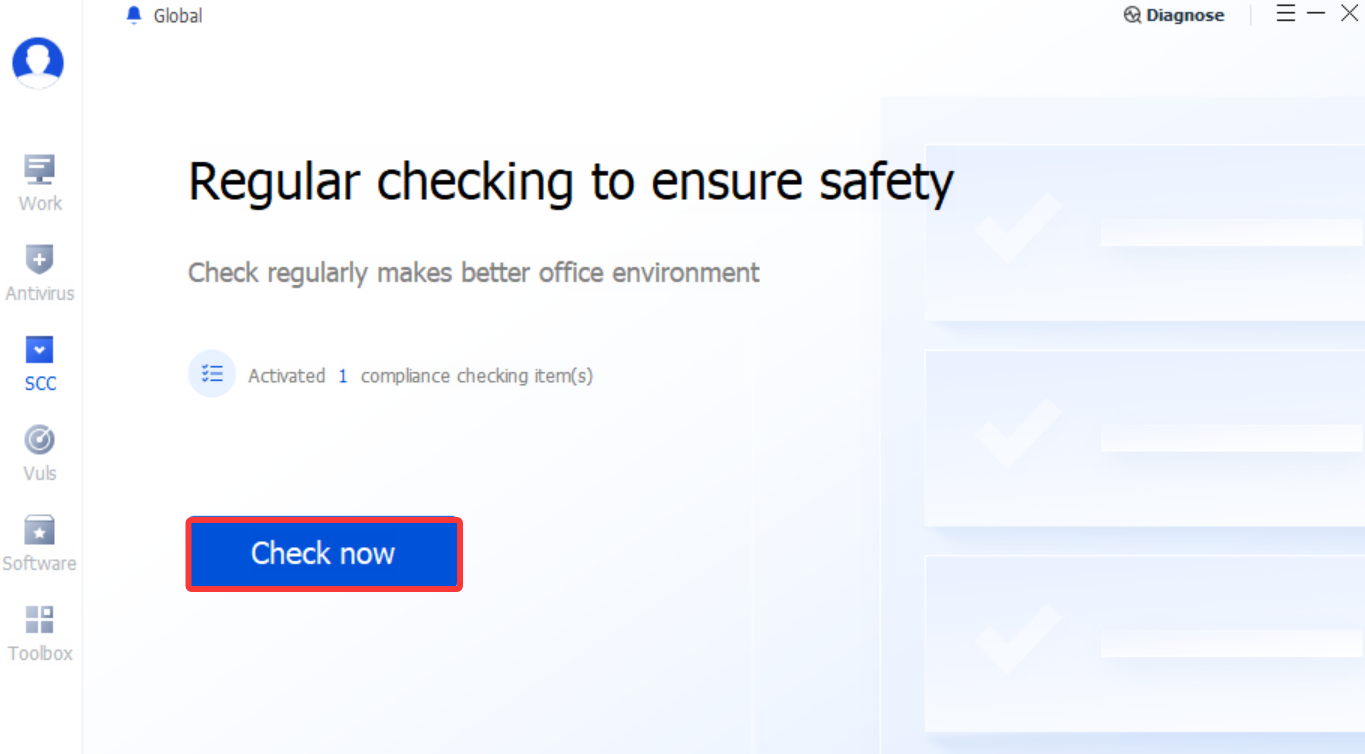
2. Click Detect Now, and the system will perform corresponding compliance detection on the terminal.
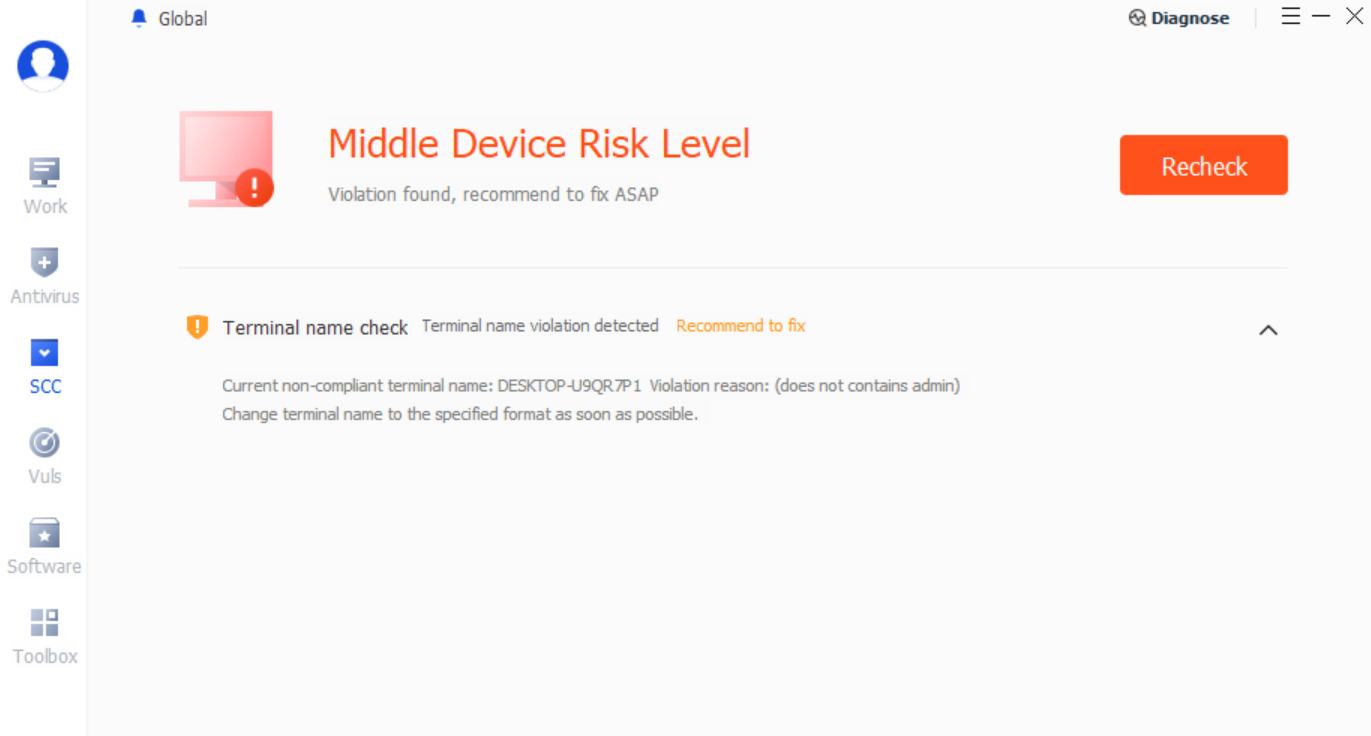
3. After the detection is completed, the client page displays all non-compliant items and remediation suggestions. Click Violation Items to expand and view the specific violation details.
Note:
Compliance detection items are configured by administrators. Detection results are categorized into mandatory fix items and recommended fix items. Mandatory fix items are required fixes, and you must complete the fixes before you can continue to access private network resources.
Vuls
1. It is used to remediate operating system vulnerabilities. Vulnerability remediation can scan Windows system patches, identify missing patches, and recommend downloading and installing corresponding patches based on their severity.
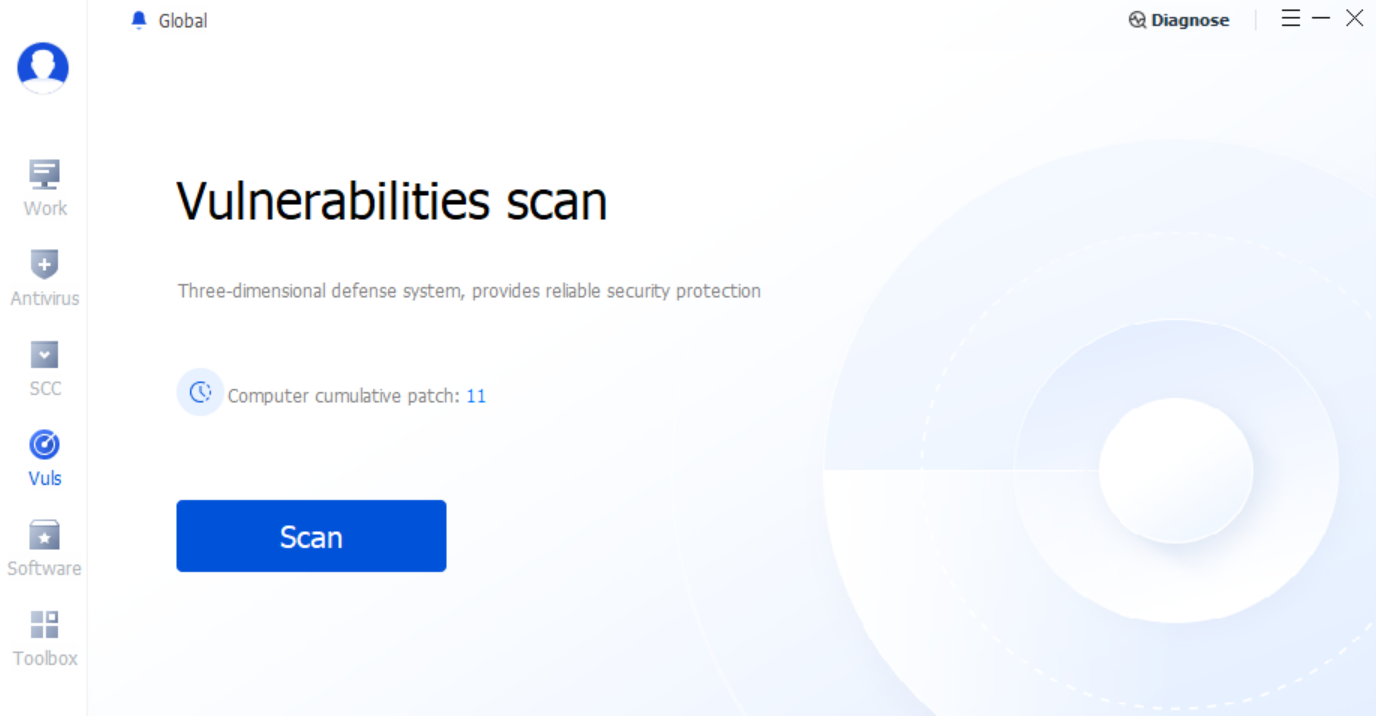
2. Patch Viewing and Download Installation: After the vulnerability scan is completed, you can view the scan results. Click One-Click Repair to download and install patches.
Software
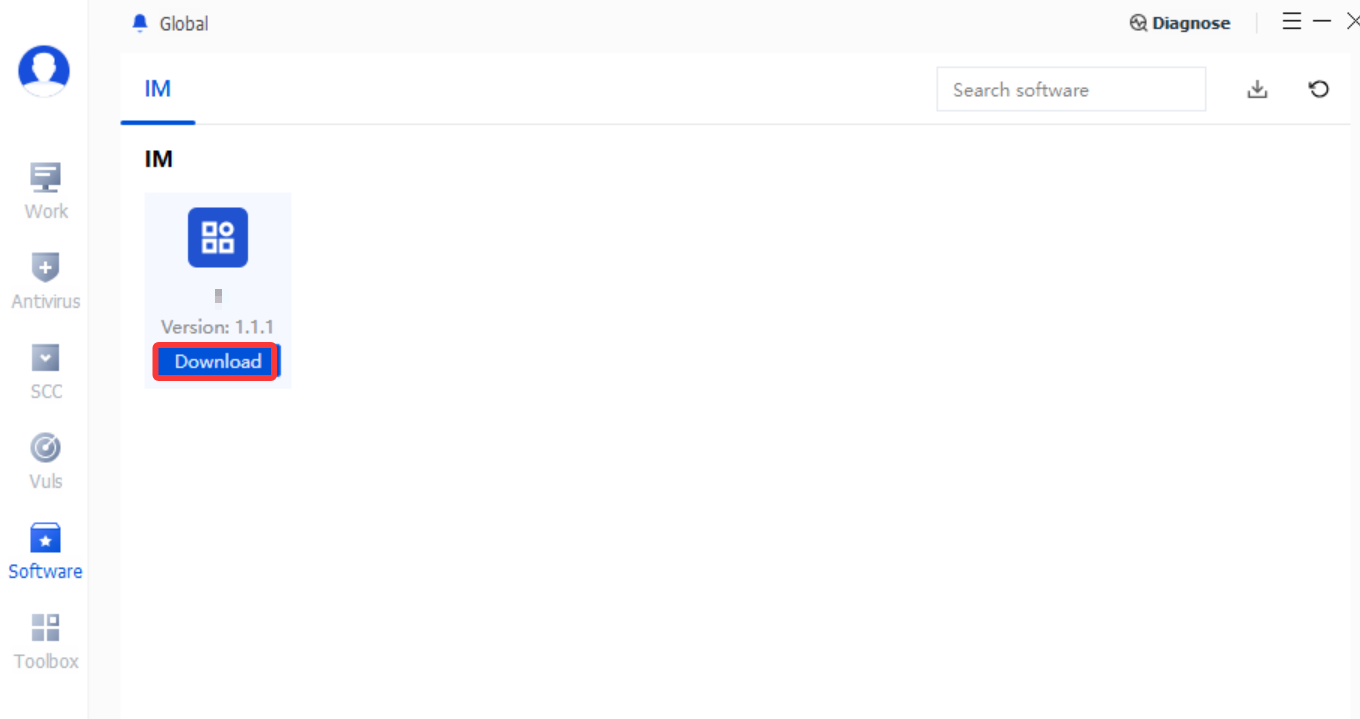
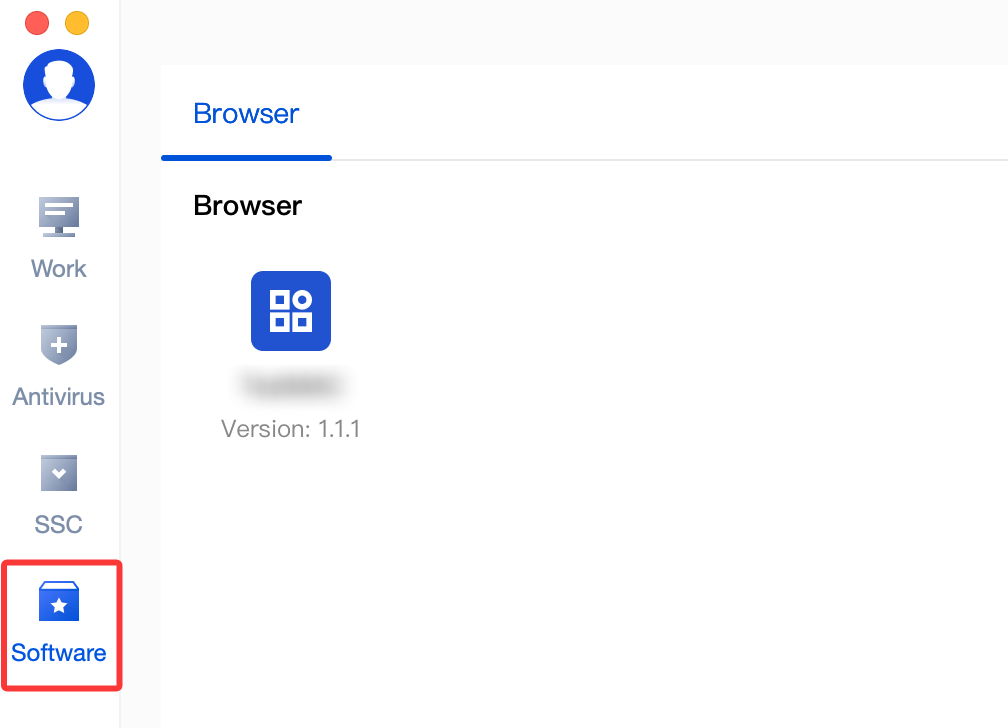
After the administrator publishes the software, you can download the software you need on the Software page.
Note:
The software features are configured by administrators. This page is displayed only after administrators configure the software repository policy for terminals/users. If the software features are not displayed on your client, you can skip this section.
Tools
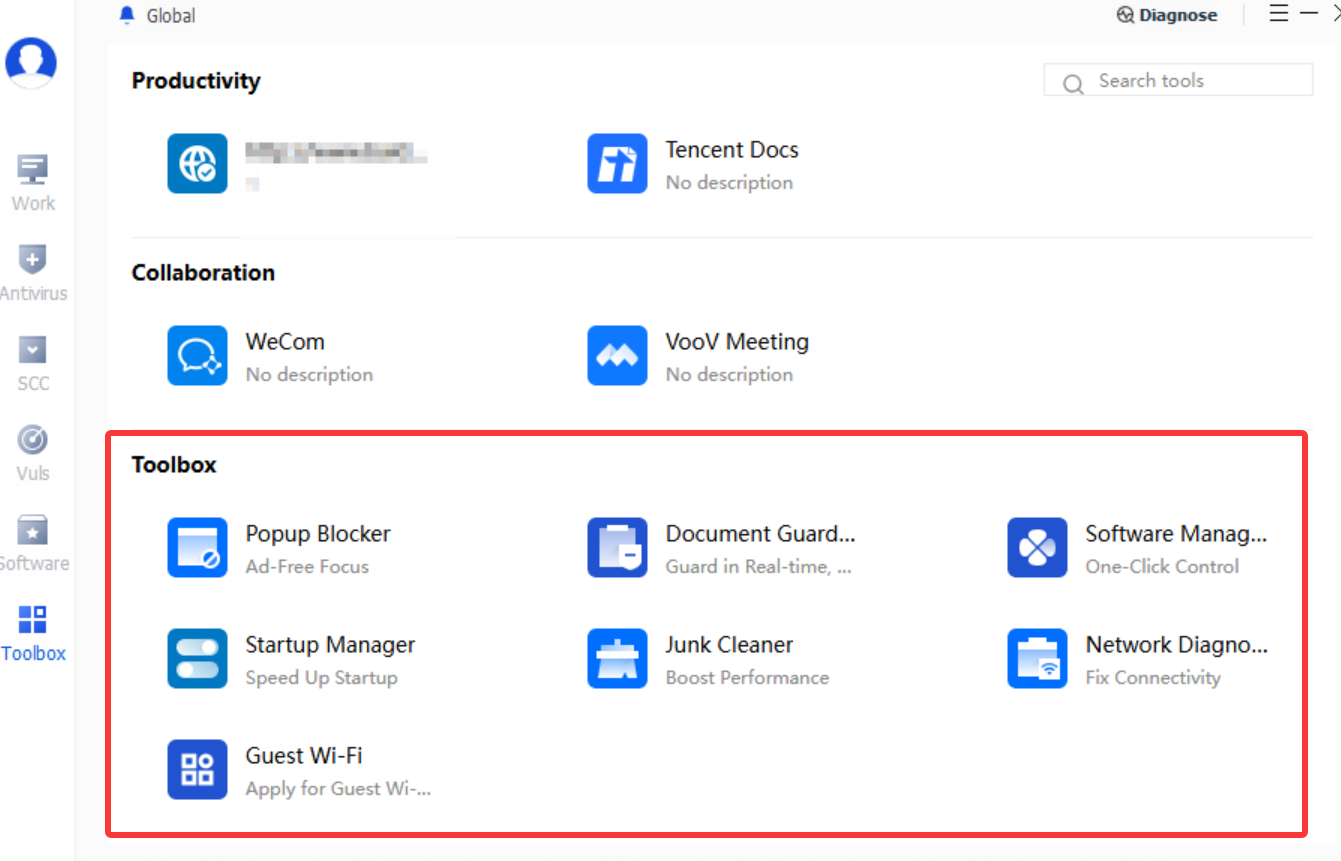
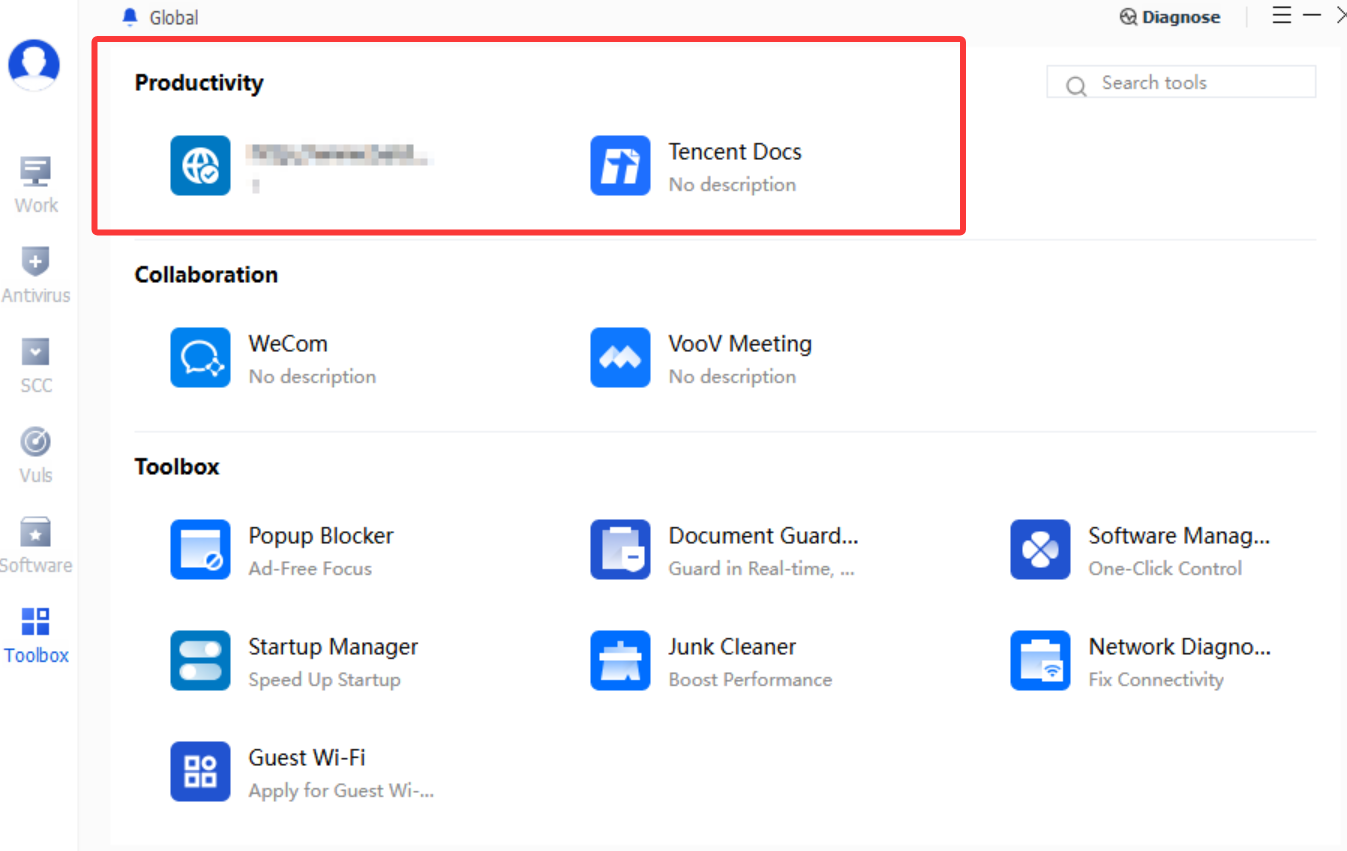
Tools are divided into built-in iOA tools and common tools configured by company administrators for all users.
Built-in tools: Common tools built into the iOA system.
Note:
The display of built-in tools is configured by administrators. If a tool shown in the following figure is not displayed on your client, it only means that the policy is not currently available to you.
Other common tools: Common tools configured by admins for all users.
macOS
Client installation
1. Obtain the Tencent iOA client installation package. Contact the administrator to obtain the Tencent iOA client installation package.
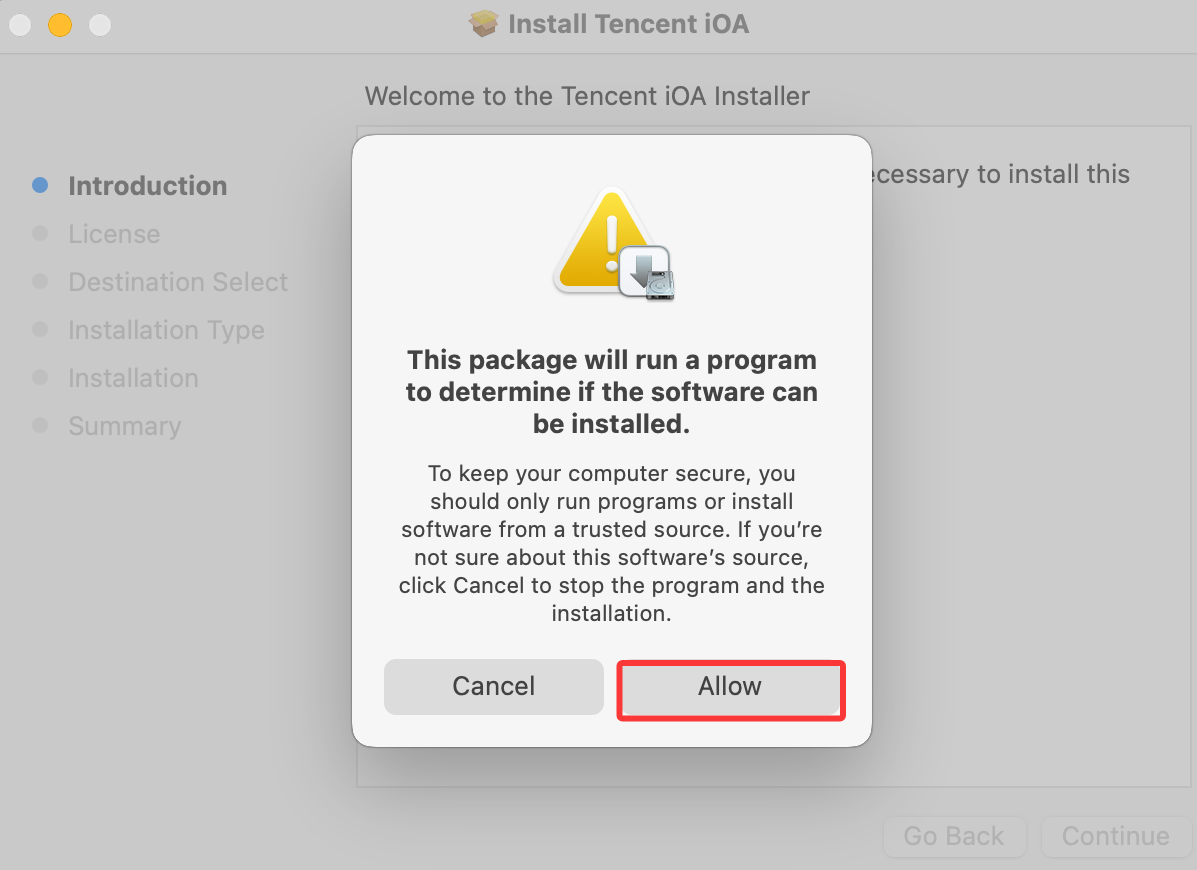
2. Install the iOA client and select Allow.
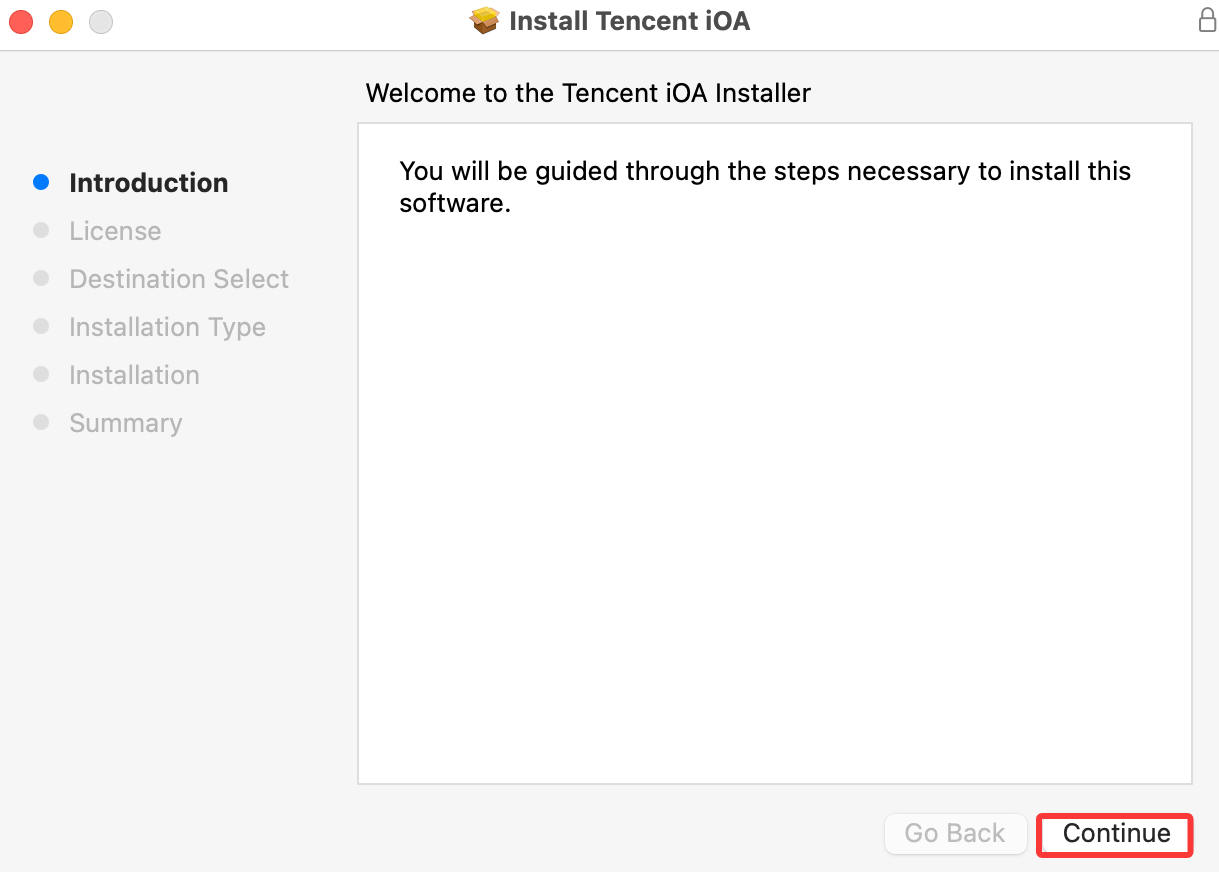
3. Click Continue as prompted.
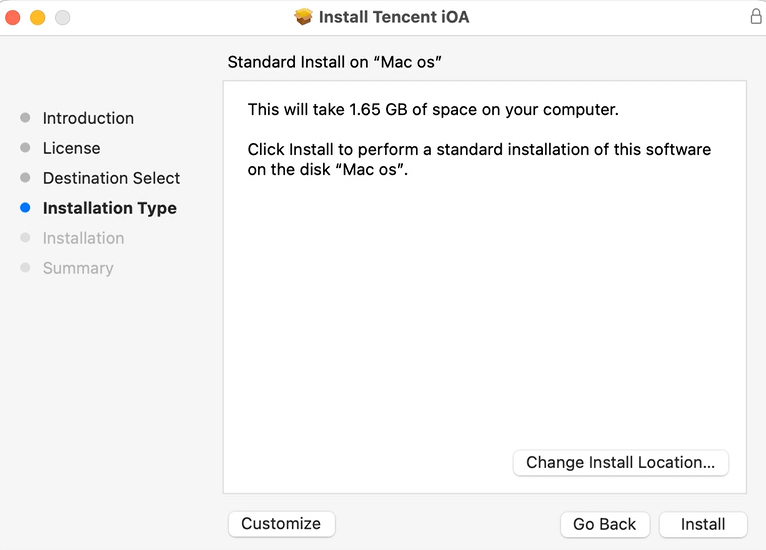
4. Select a custom or default installation path, and then click Install.
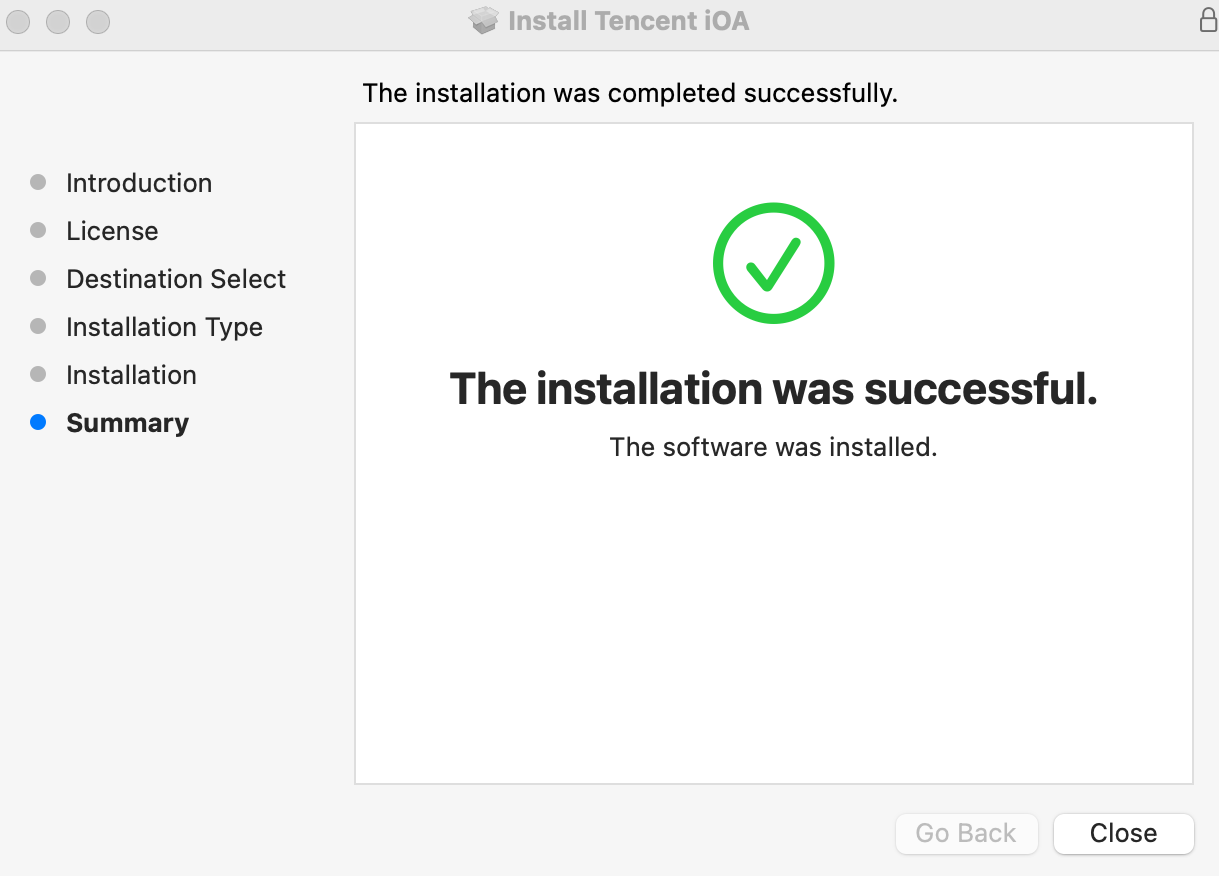
5. After the installation is complete, follow the prompts to accept the terms and open the iOA client.
6. Enter the 6-digit organization PIN to activate. PIN letters are not case-sensitive.
Note:
The organization PIN (team PIN) is provided by the company administrator. Contact the administrator to obtain it in the iOA console.
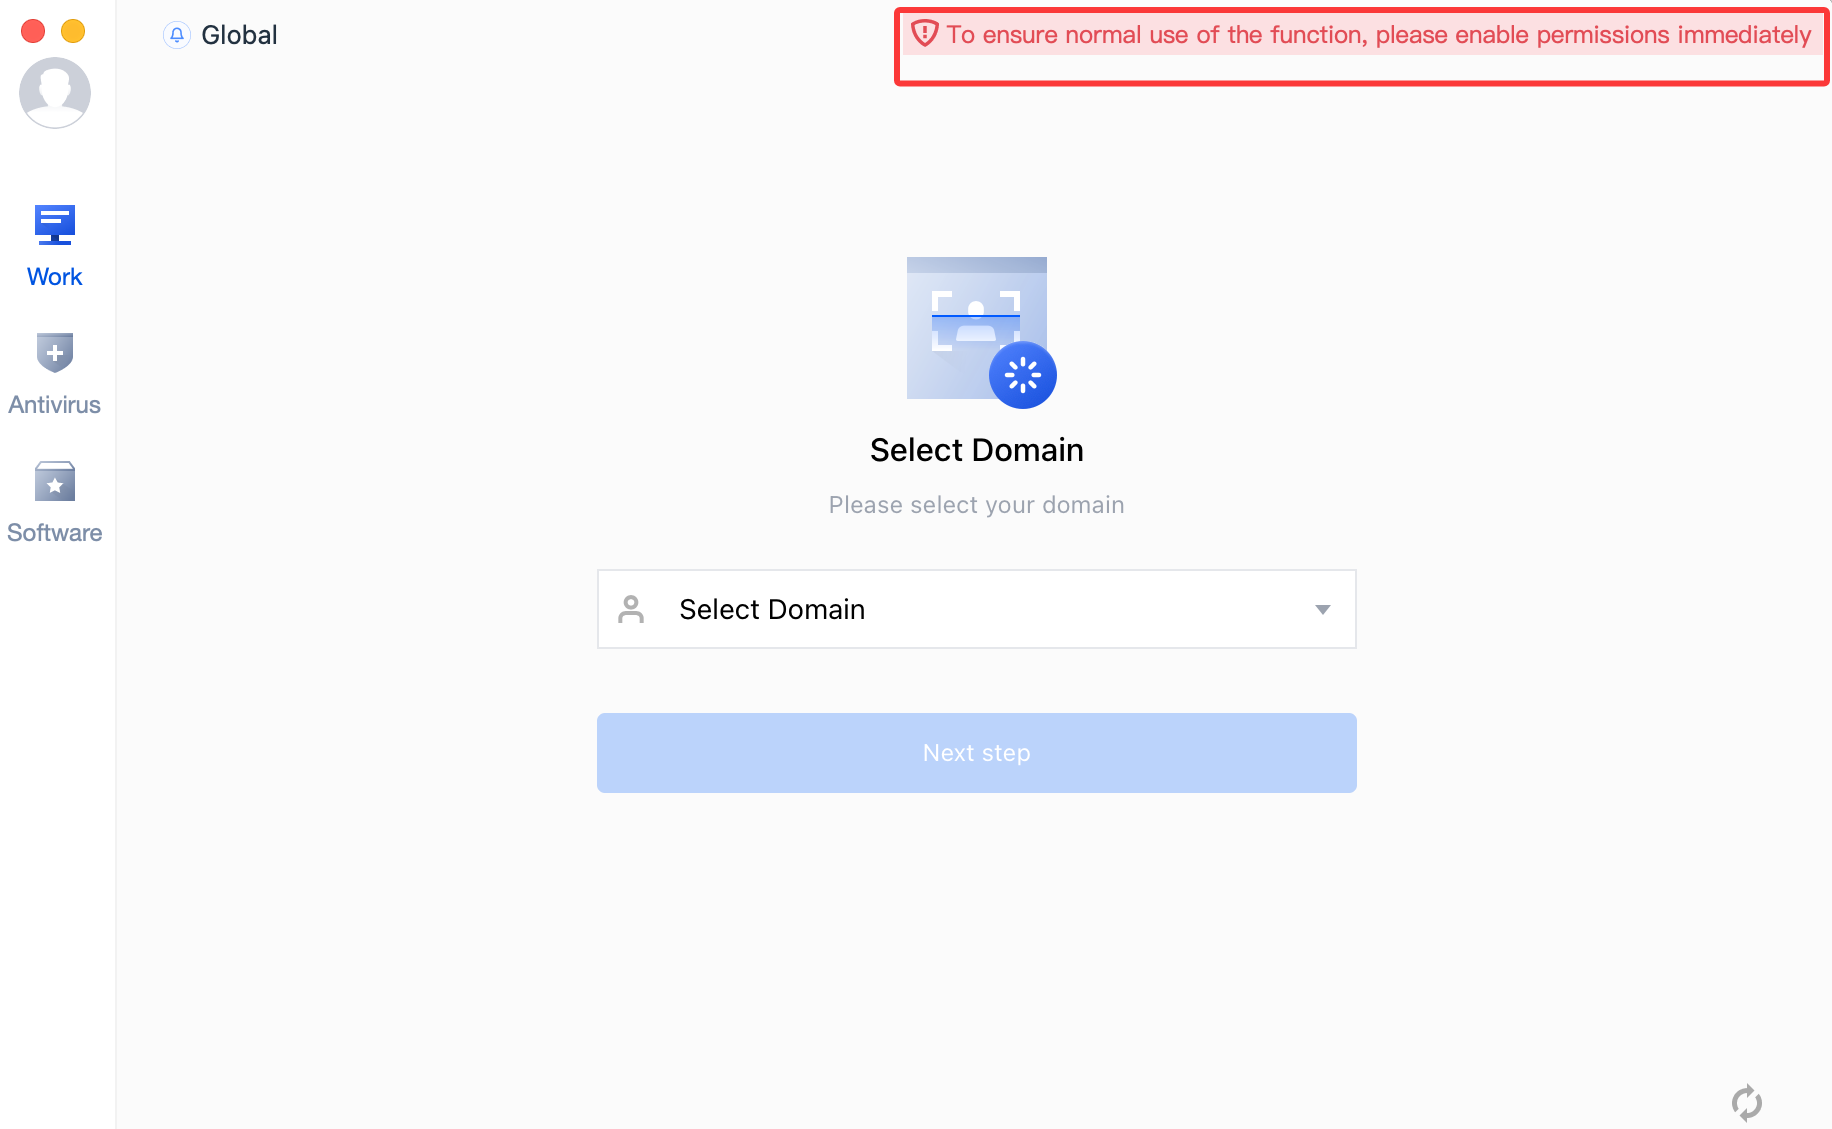
7. A prompt in the upper-right corner of the client indicates that permissions need to be enabled. Click Enable to grant Full Disk Access.
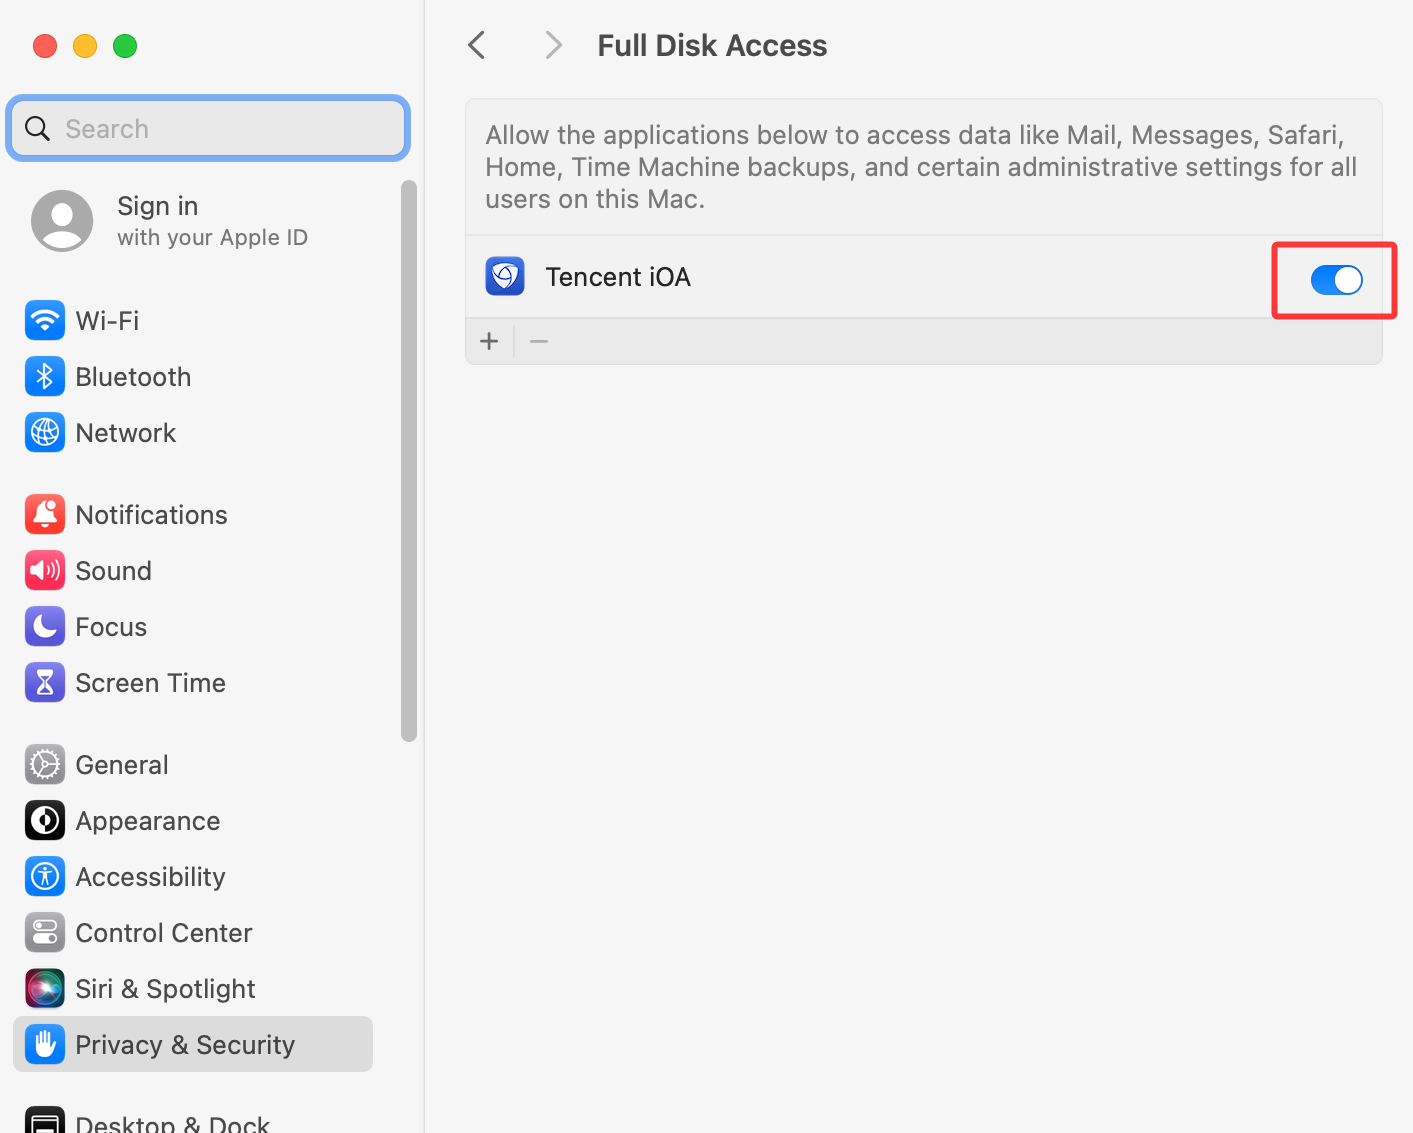
8. You can also enable Full Disk Access by going to System Settings > Privacy & Security > Full Disk Access > Tencent iOA.
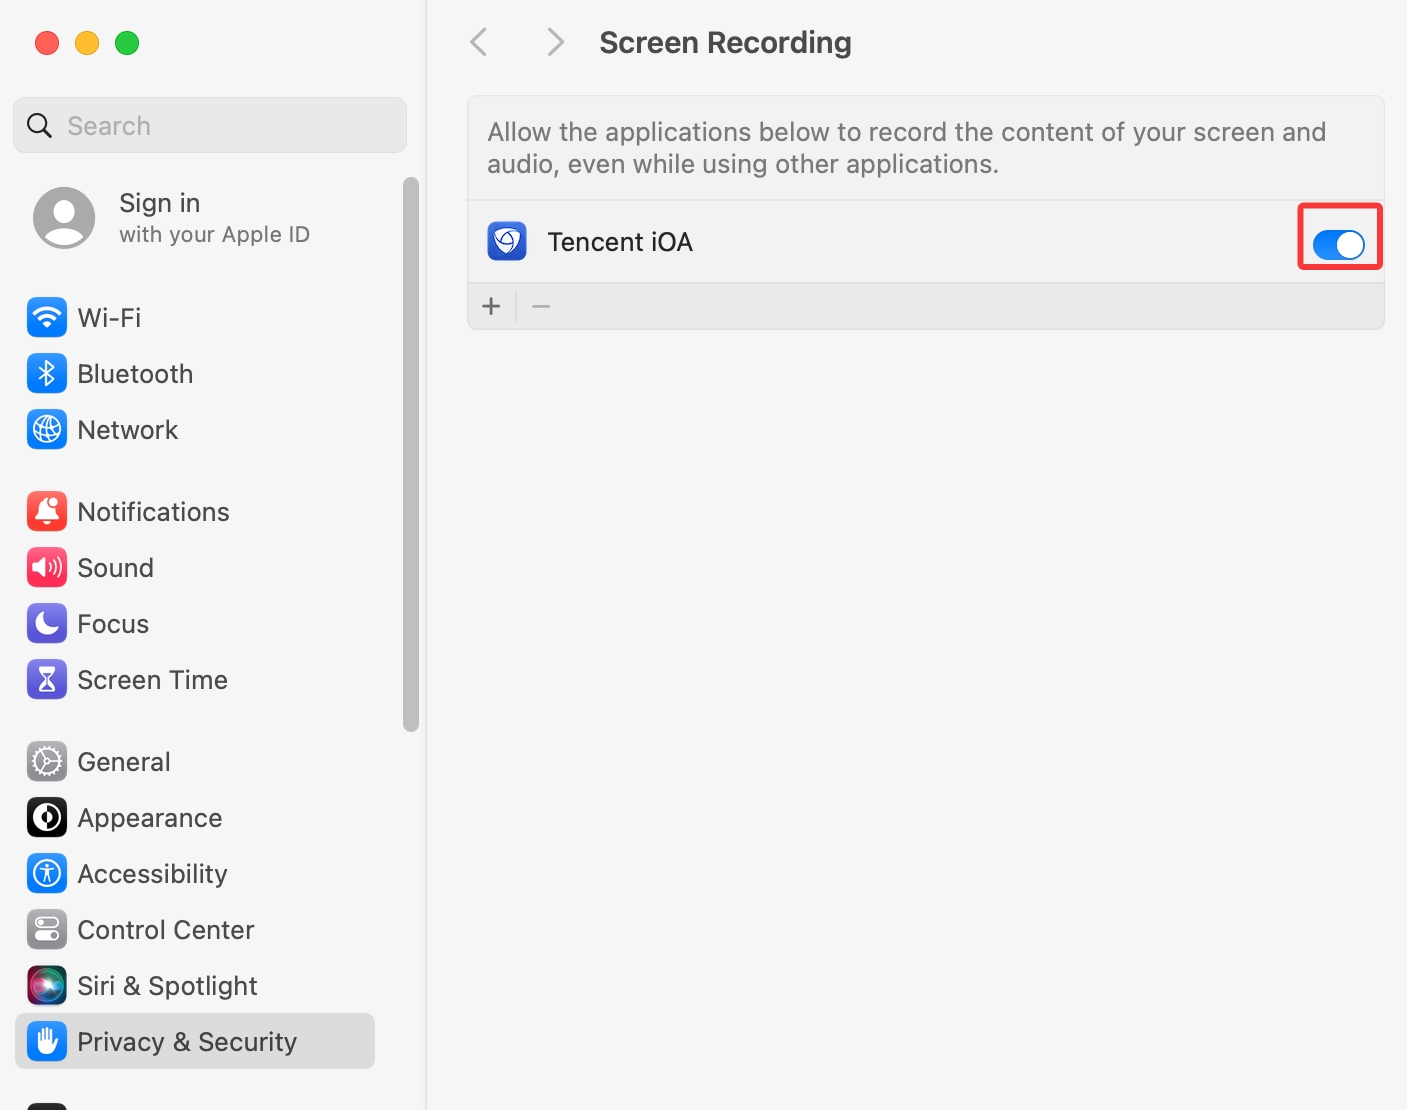
9. Set the system disk access permission. Go to System Settings > Privacy & Security > Screen Recording > Tencent iOA to enable it.
10. Authorization on the Mac client is complete.
Client Login
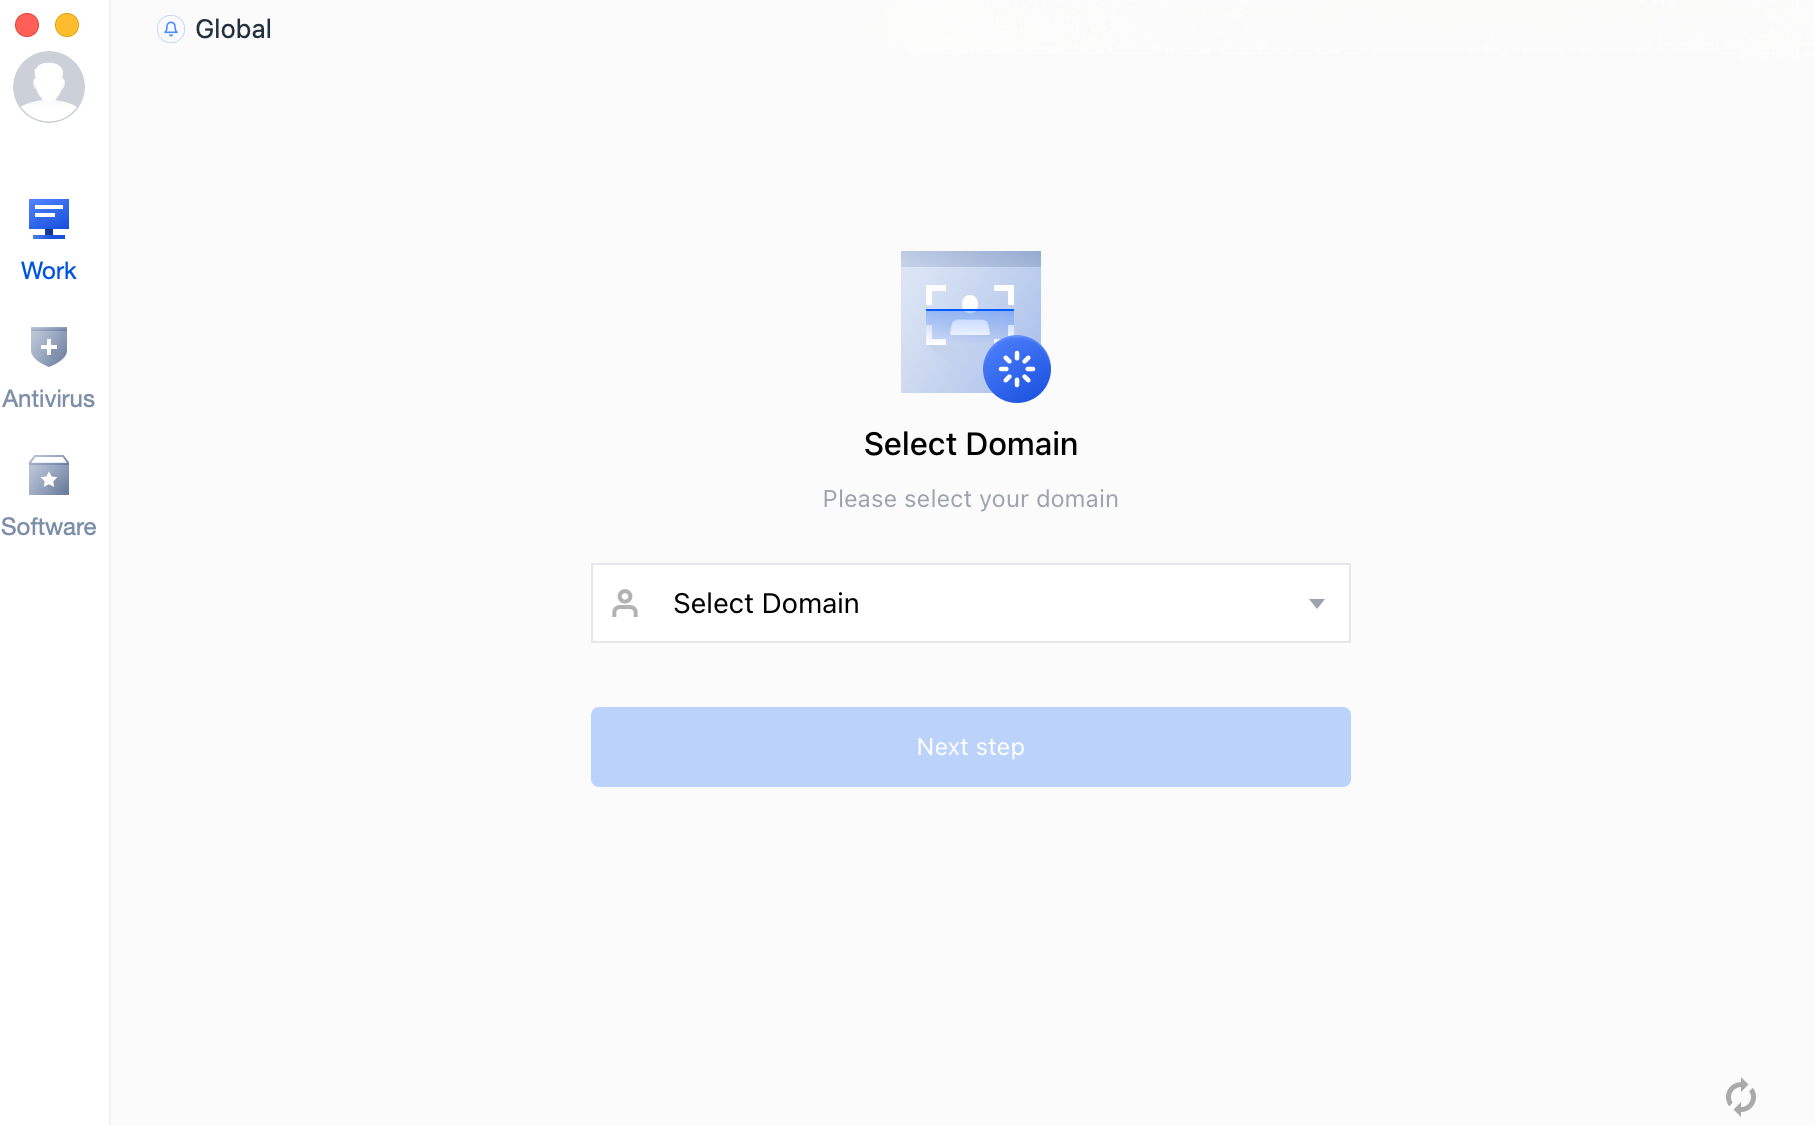
1. After successful installation, open the iOA client in the application list.

2. After selecting the corresponding organizational structure, you can log in to your account. Obtain the assigned account and password from the administrator, select a login method, select the service agreement, and click Login.
Note:
iOA provides multiple login methods, including QR code login and account-password login. The available login methods depend on the administrator's configuration.
Enabling NGN Access to the Corporate Network
After successful login, you can go to the client's main interface. Enable the company network access switch to access internal company resources. When you disable company network access, the VPN automatically closes.
Note:
The company network access switch on the client is configured by the administrator. If this switch is not displayed on your client, you can skip this section.
User Details
1. Click the user avatar on the left side of the page to view the logged-in user information, including device name, device type, device OS version, IP address, MAC address, and client version. You can copy the information with one click.
2. Click Logout to exit the currently logged-in account.
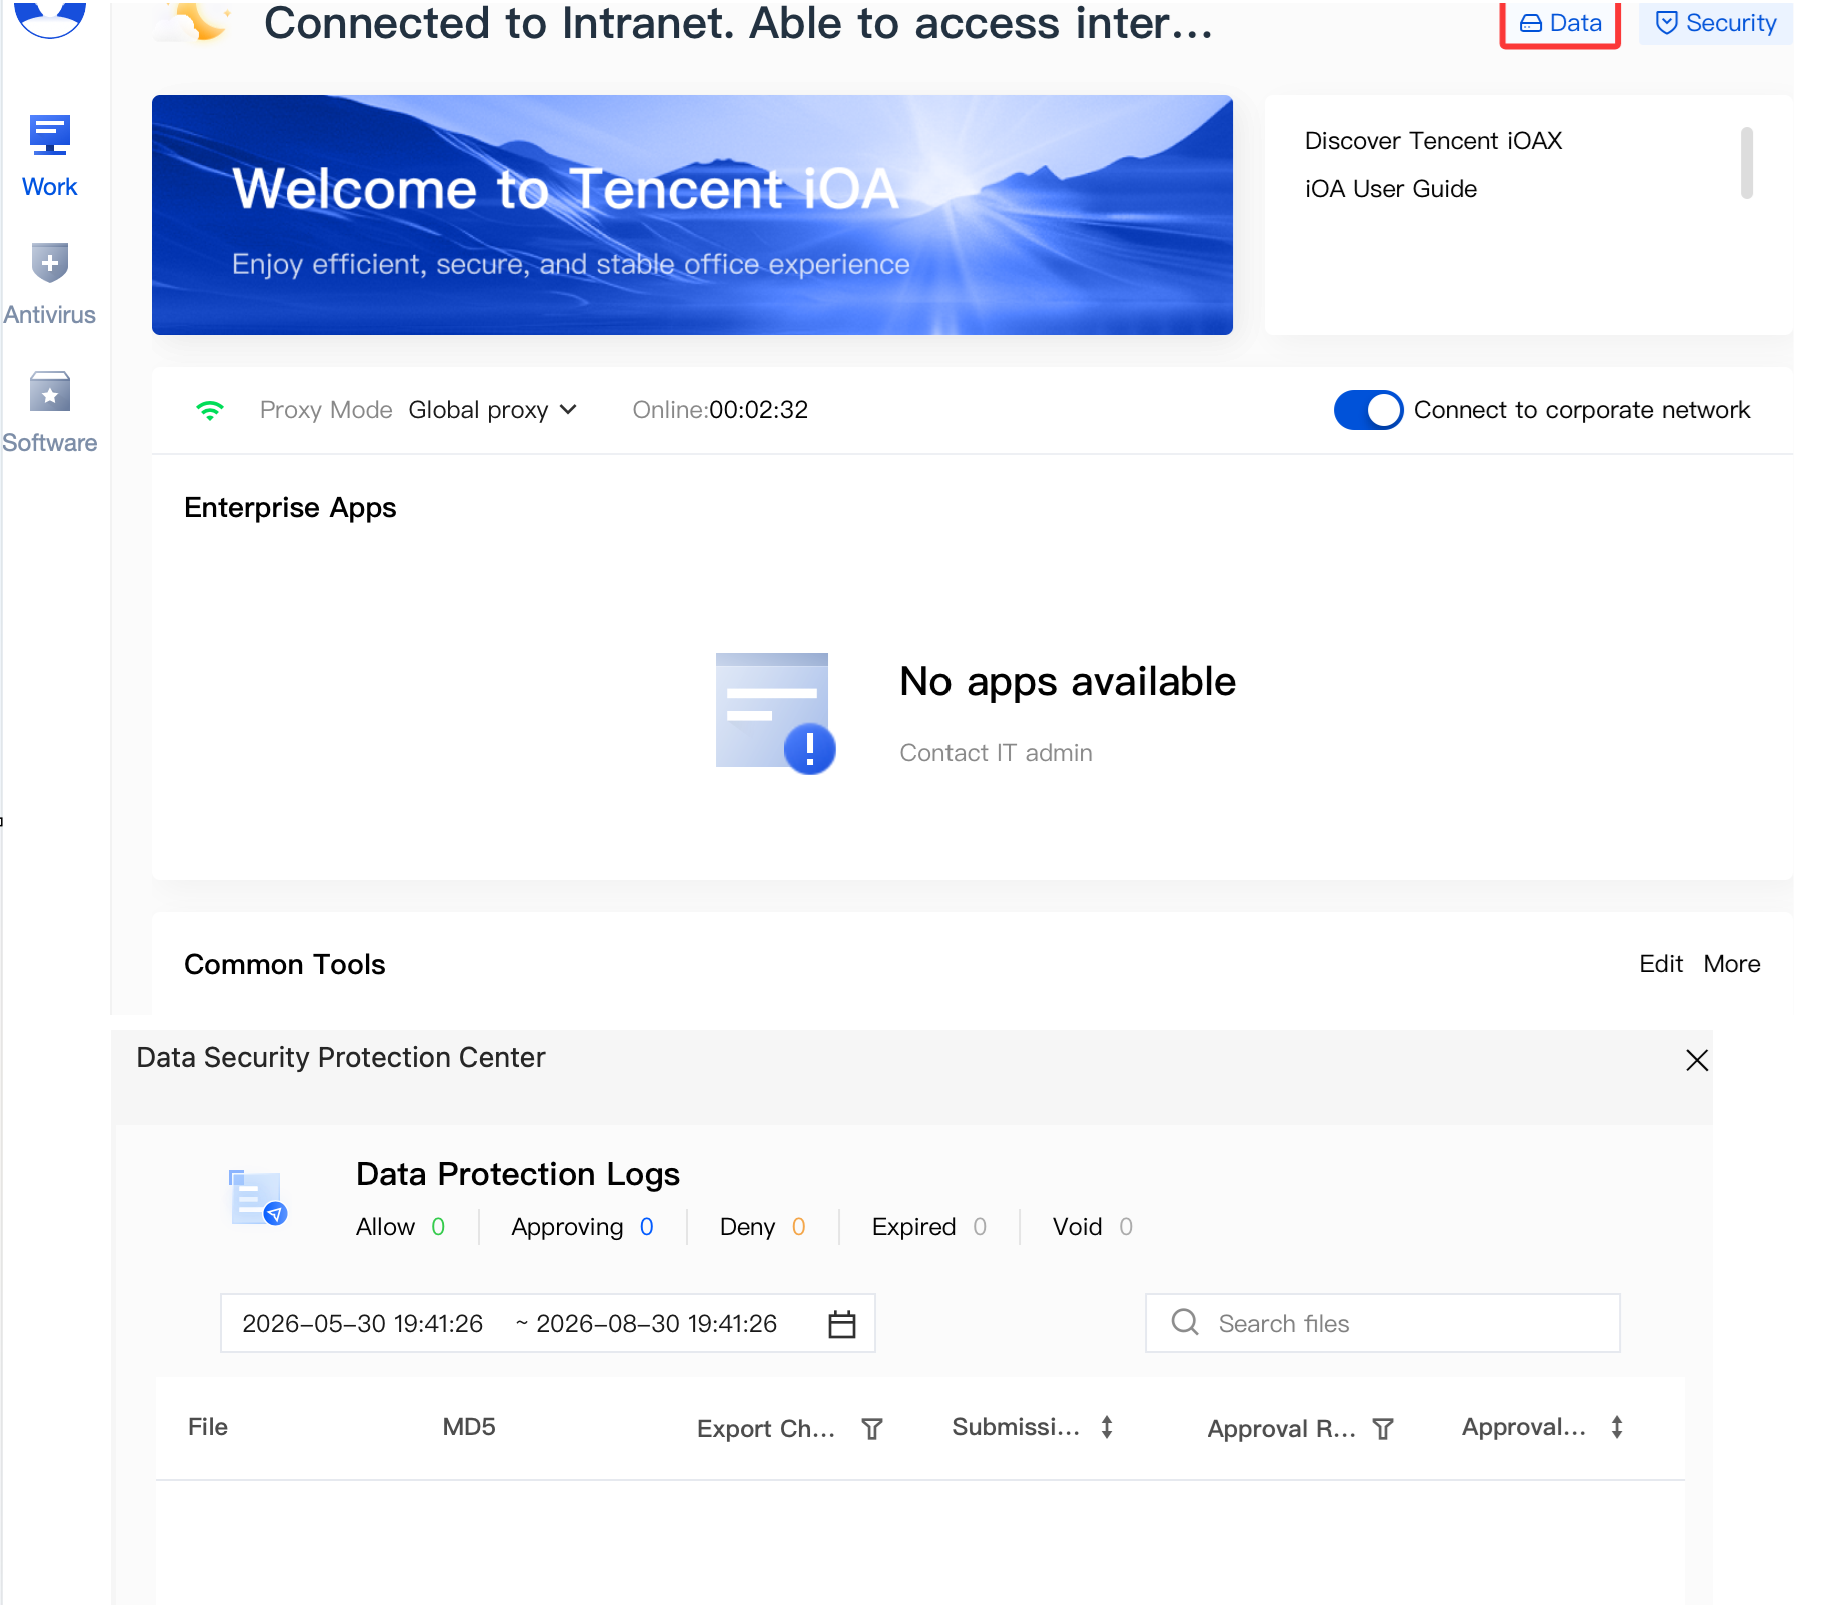
Data
Click Data Protection to view the approval progress of DLP outbound file transfers.
Note:
Administrators can configure approval flows in the console. If data protection is not displayed on your client, it only means that the policy is not currently available to you.
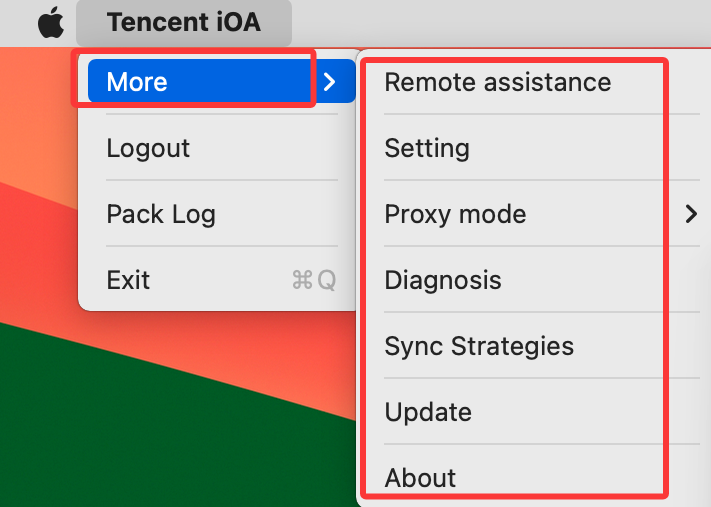
Public Menu Bar
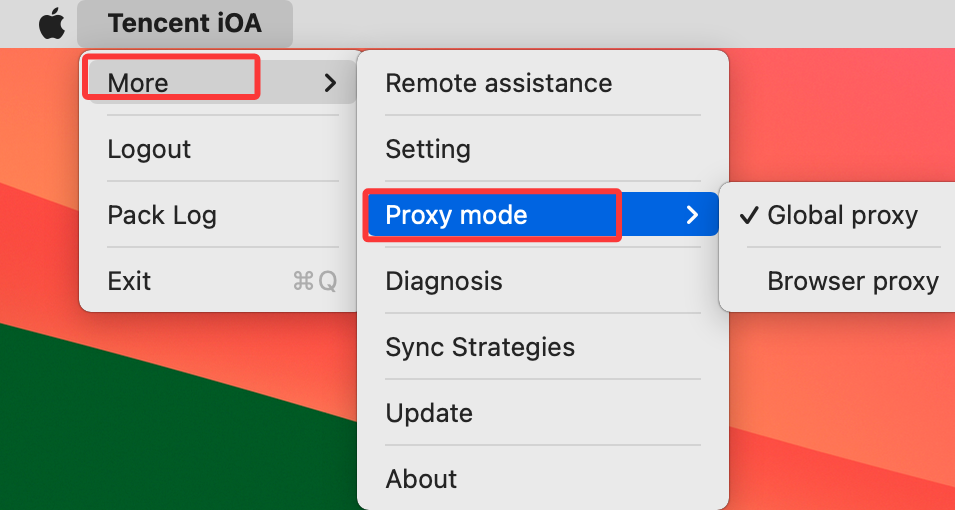
The common menu bar in the upper left corner of the client interface under More contains items such as Remote Assistance, Settings, Diagnostics, Policy Sync, Updates, and About.
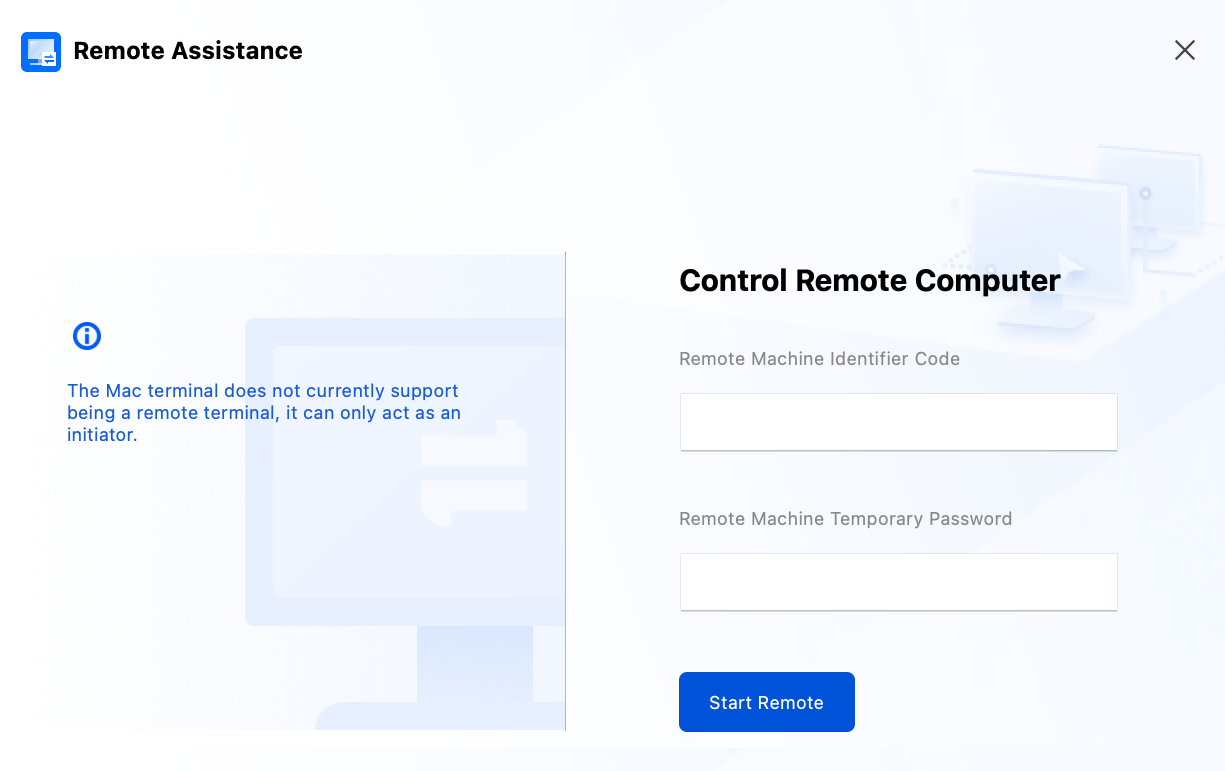
Remote Assistance
Click Remote Assistance. Enter the peer machine ID and temporary password to start the remote session.
Note:
Administrators can configure in the iOA console whether the client displays Remote Assistance. If Remote Assistance is not displayed on your client, you can skip this section.
Remote Assistance uses macOS only as the controlling endpoint. macOS supports initiating remote assistance but does not currently support receiving it. This means that Windows-to-Windows and macOS-to-Windows remote assistance are supported, while Windows-to-macOS and macOS-to-macOS remote assistance are not supported.
The peer machine ID and temporary password must be viewed by the peer in the client - Remote Assistance. Click Copy to obtain the ID and password, and send them to the controlling user. The controlling user enters the controlled machine ID and temporary password (ID and password) to start the remote session.
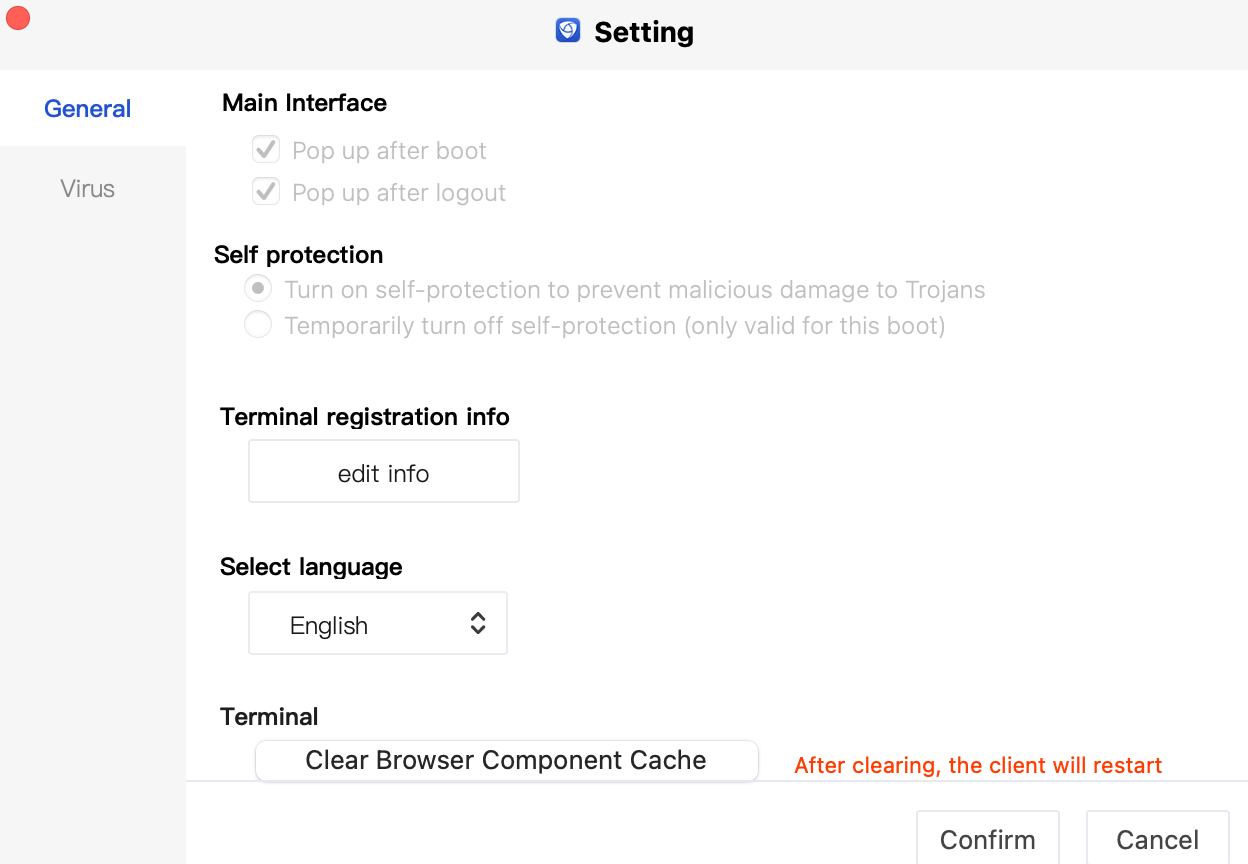
Setting
Setting include General Setting and Virus Protection. You can adjust the corresponding settings based on your actual needs.
Note:
The settings available on the client are determined by the console configuration. The client displays the corresponding items only after the console enables the items that allow client modification. If these items are not enabled, the client cannot modify the main interface/self-protection settings (grayed out).
Proxy mode
Proxy modes are divided into Global Proxy and Browser Proxy.
Global Proxy (Virtual NIC): A virtual NIC is started on the local device, and all traffic passes through the virtual NIC.
Browser Proxy (PAC): A proxy service is started on the local device, and a PAC link is then configured for the system. If the system supports the PAC link, the local service is used as the proxy. Only HTTP-related proxy is supported.
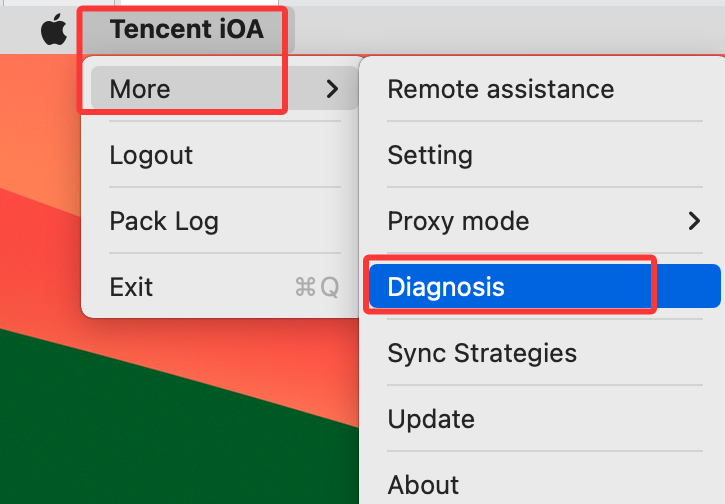
Diagnosis
If the iOA client encounters feature exceptions, such as policy synchronization failures, account login failures, or failure to load related feature pages, click Diagnosis.
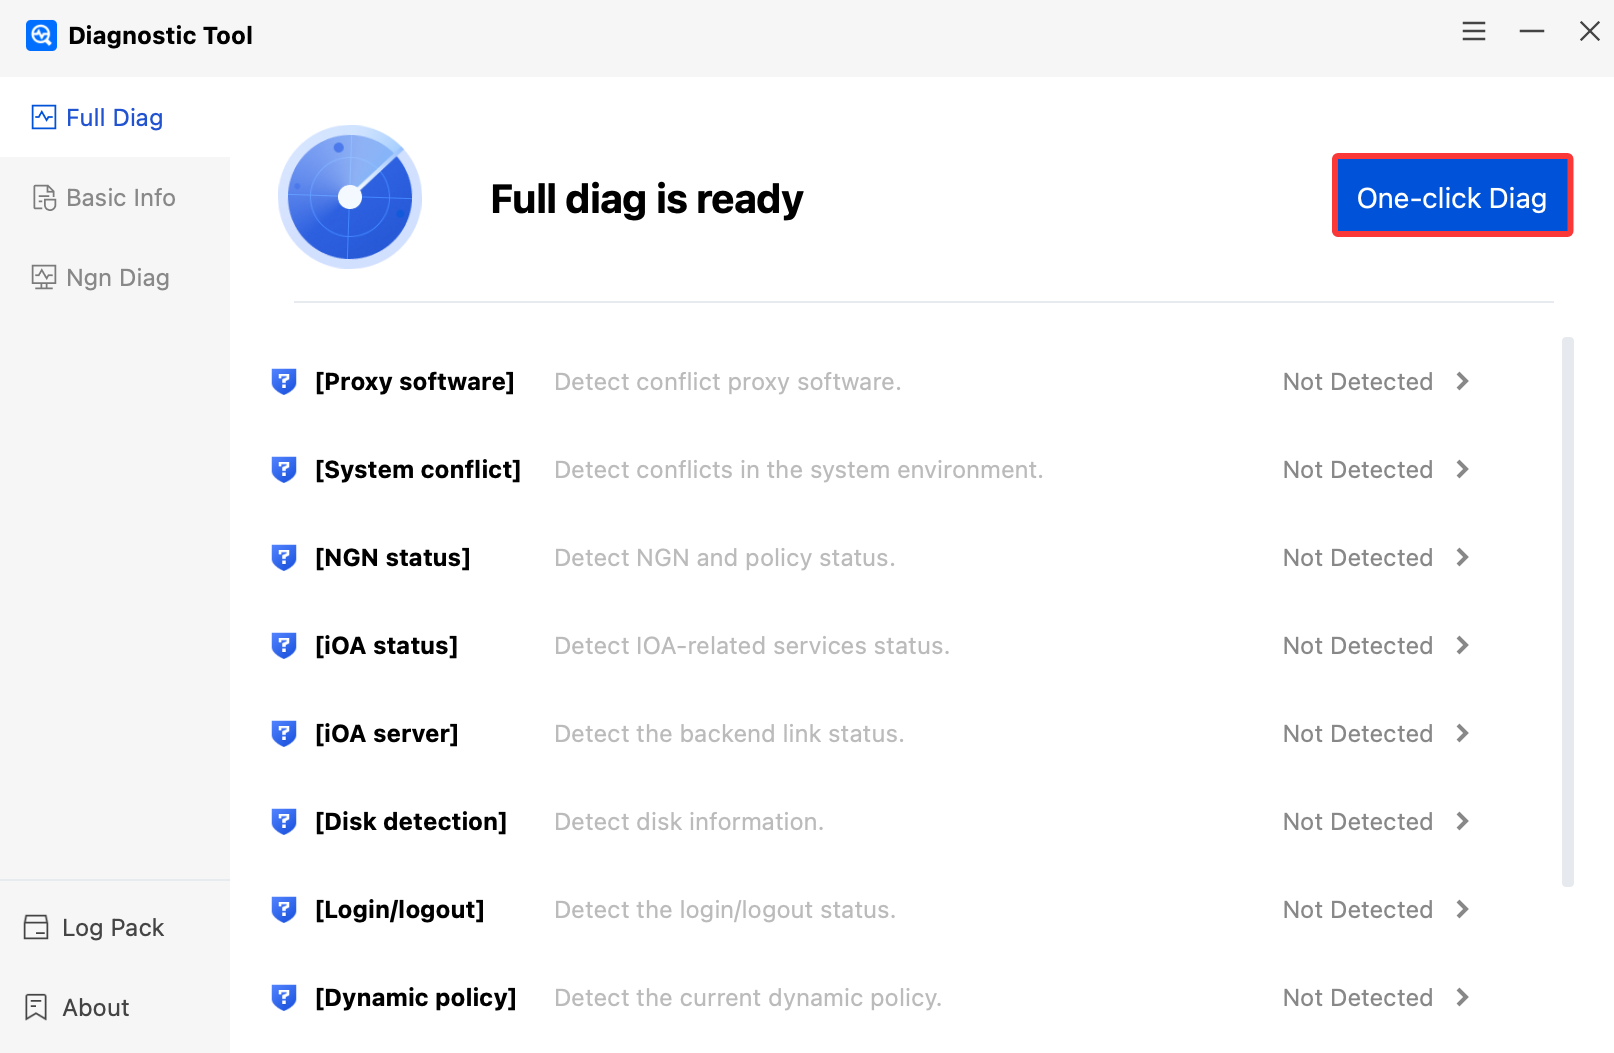
Comprehensive Diagnostics
Click One-click Diag, and the system will automatically run exception diagnostics on the client. The diagnostic results will be displayed on the page. If the client encounters a fault, you can package the diagnostic logs and send them to Ops personnel for troubleshooting.
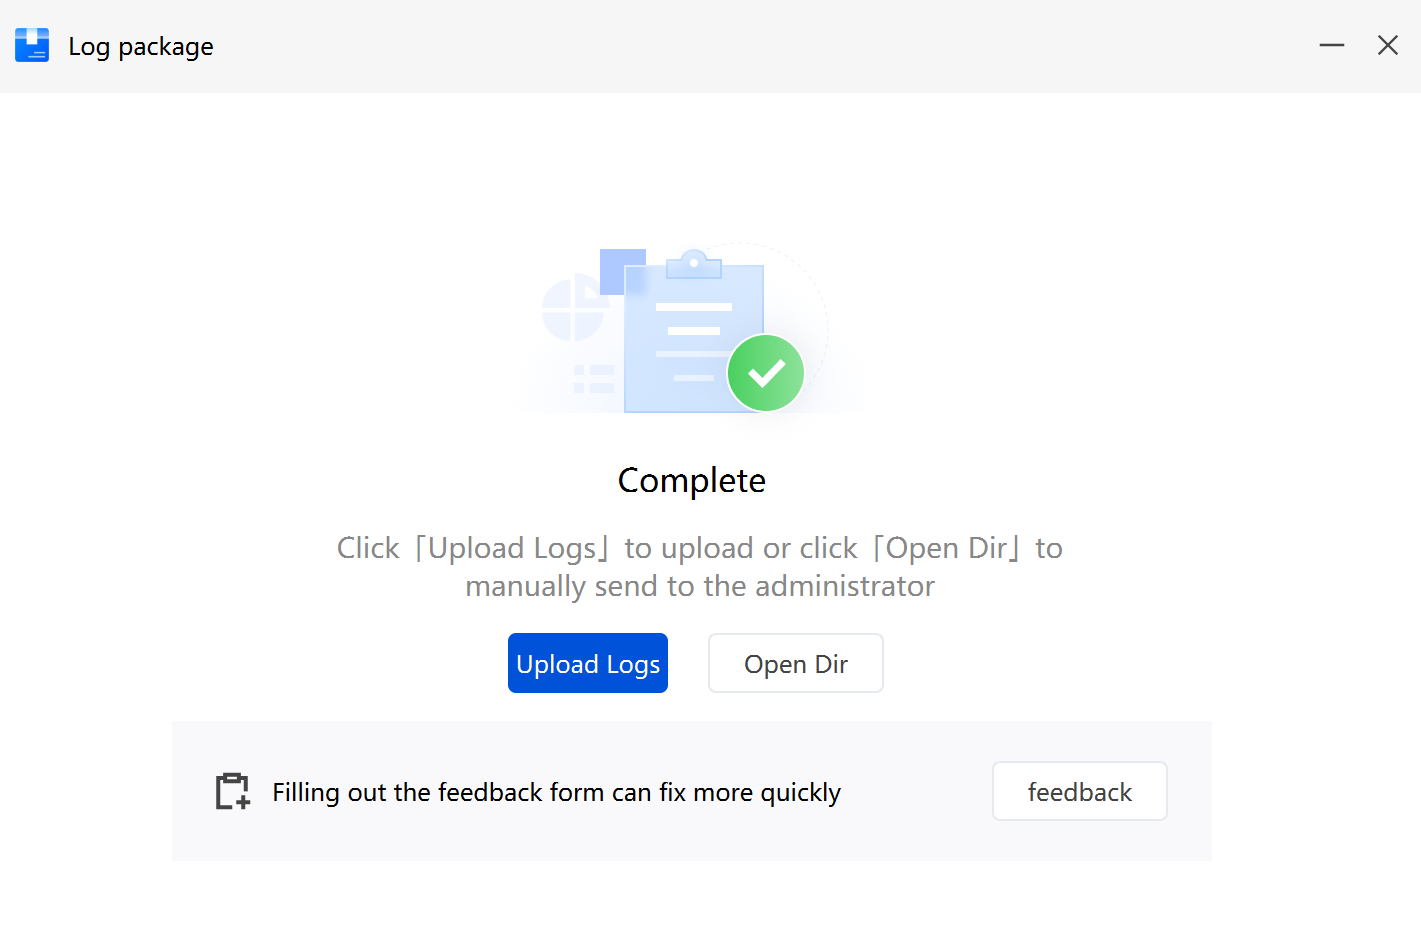
Method 1: Click Open Dir and send the compressed diagnostic log package to Ops personnel for troubleshooting.
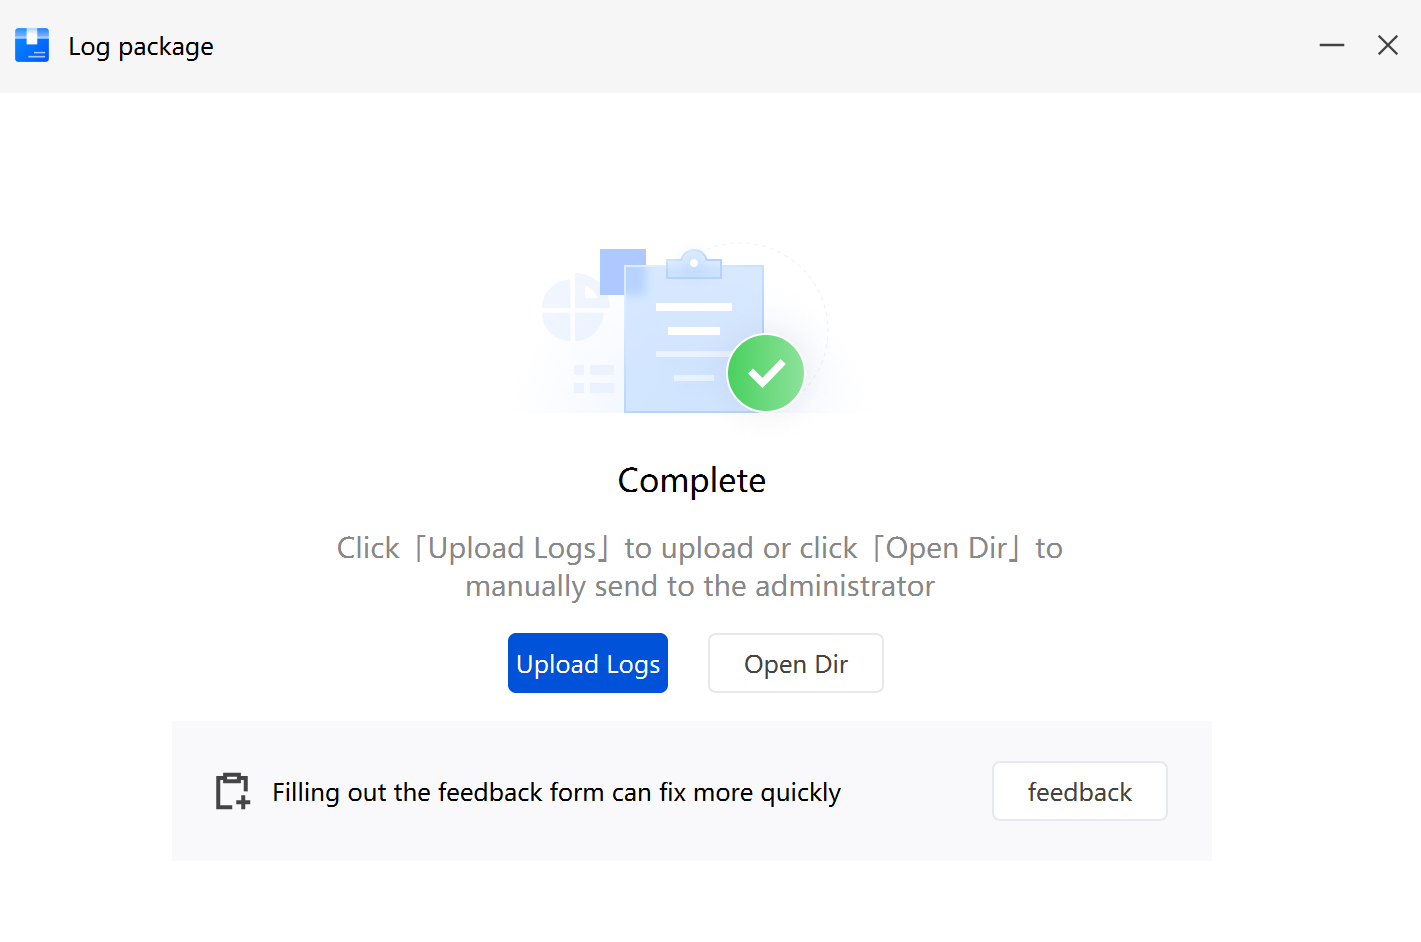
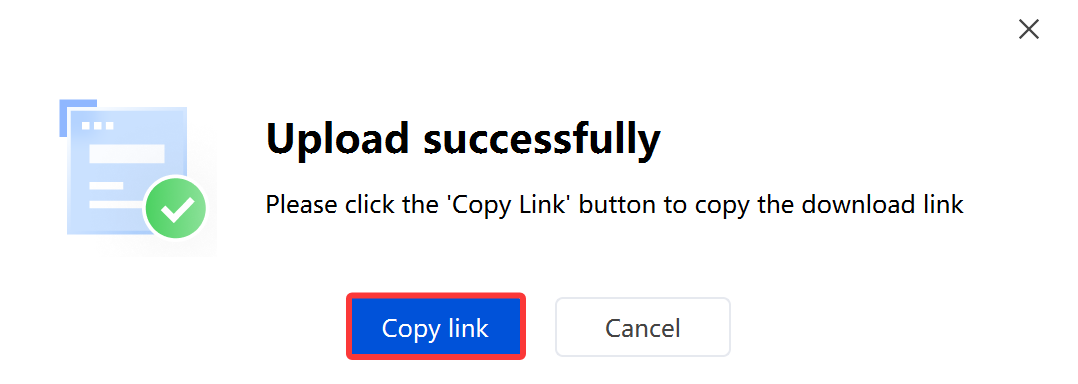
Method 2: Click Upload Logs to generate a copy link. You can send the link directly to Ops personnel, who can then download the diagnostic logs through the link for troubleshooting.
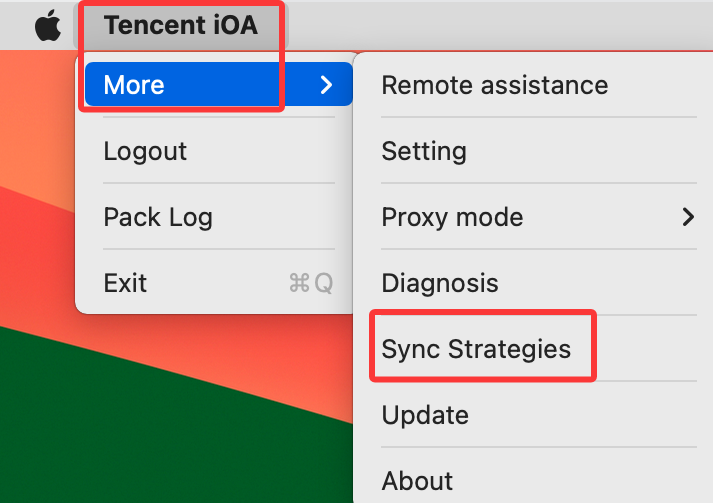
Sync Strategies
If the administrator has distributed a policy but the client has not pulled it, click Sync Strategies.
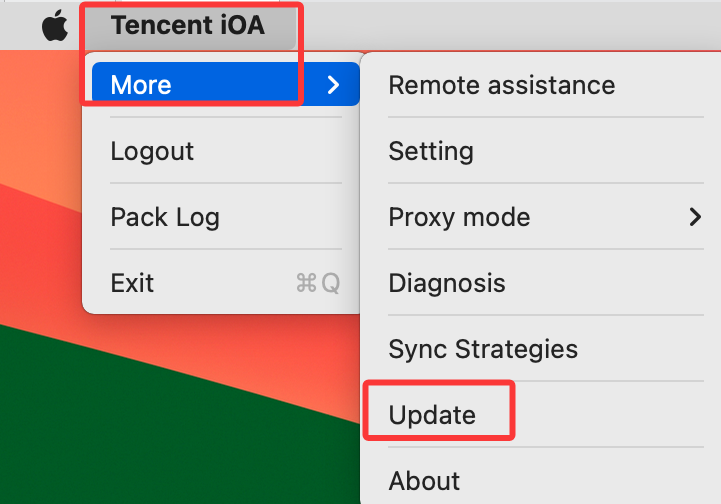
Update
Click Update, and the system will detect and update the current client version for the user.
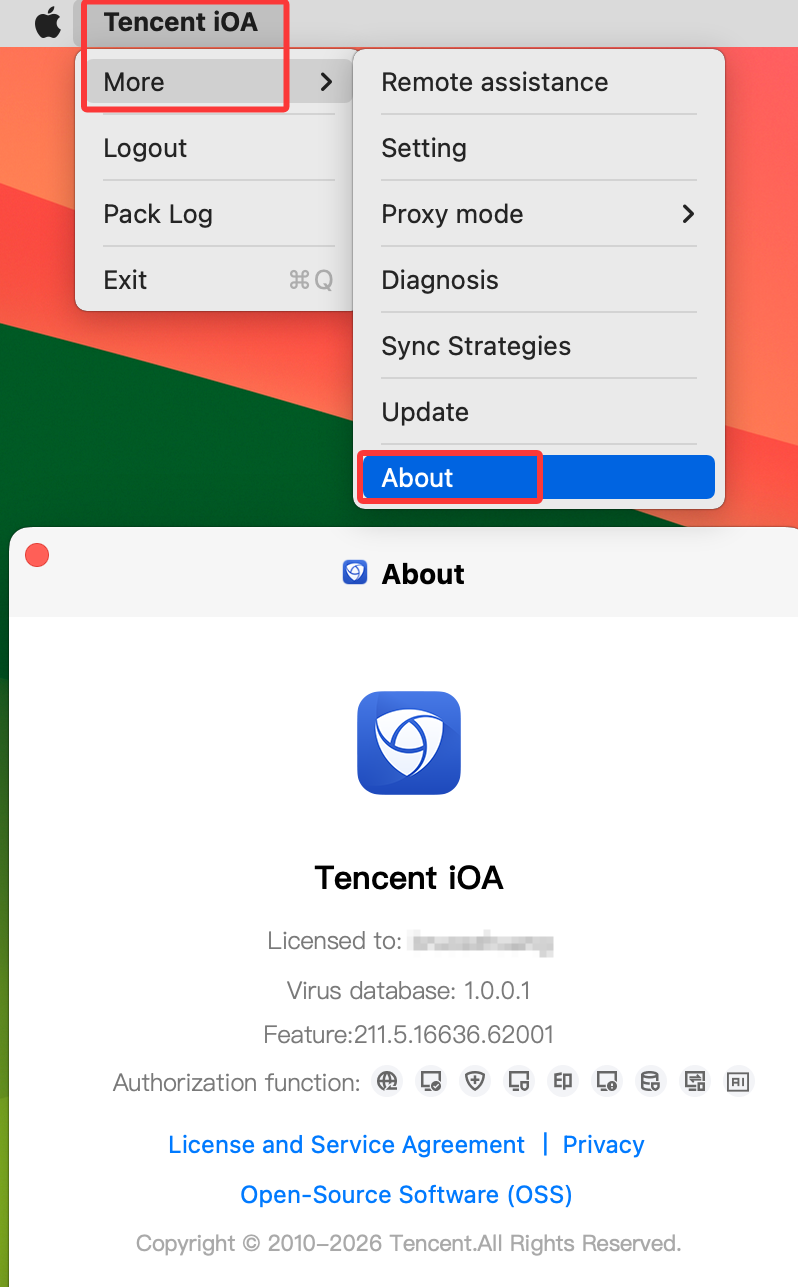
About
Click About to view information such as the virus database version and user agreement.
Logout
Click Logout to exit the currently logged-in account.
Note:
The log-out option is configured by the administrator. If this button is not displayed on your client, you can skip this section.
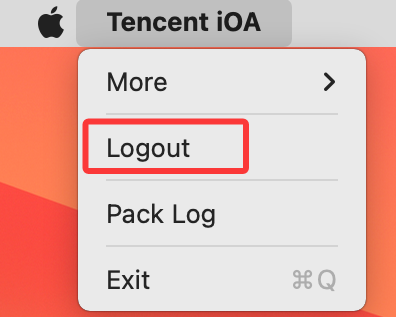
Pack Log
Click Package Logs to generate a log archive. Send the logs to Ops personnel for troubleshooting. This feature is the same as the Package Logs feature in Diagnostics.
Feature Module
Note:
iOA is available in Basic, Terminal Security Professional, Remote Access Professional, and Advanced editions. If a feature module (such as Office, Antivirus, or Compliance) is not displayed in your client, it only indicates that the policy for that module is not currently available to you or that your company has purchased a different edition.
Work
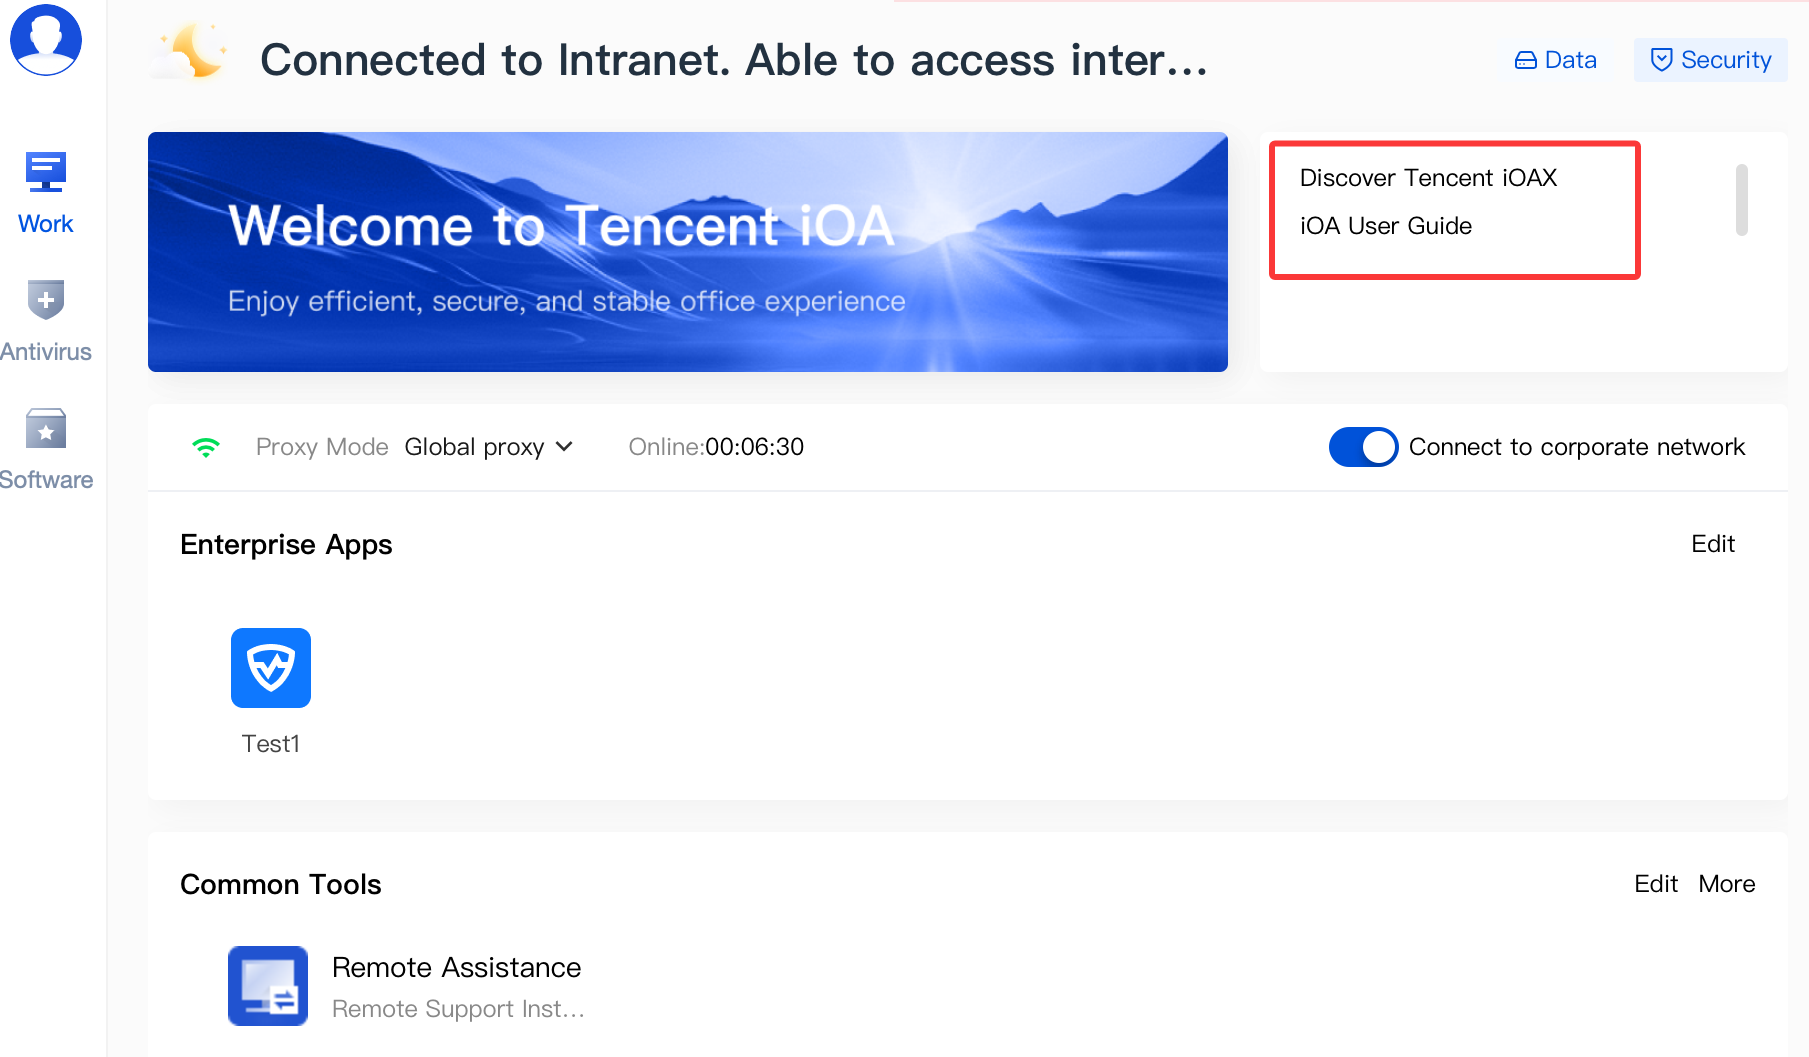
1. Enterprise Applications: View and access the business applications that you have permission to access.
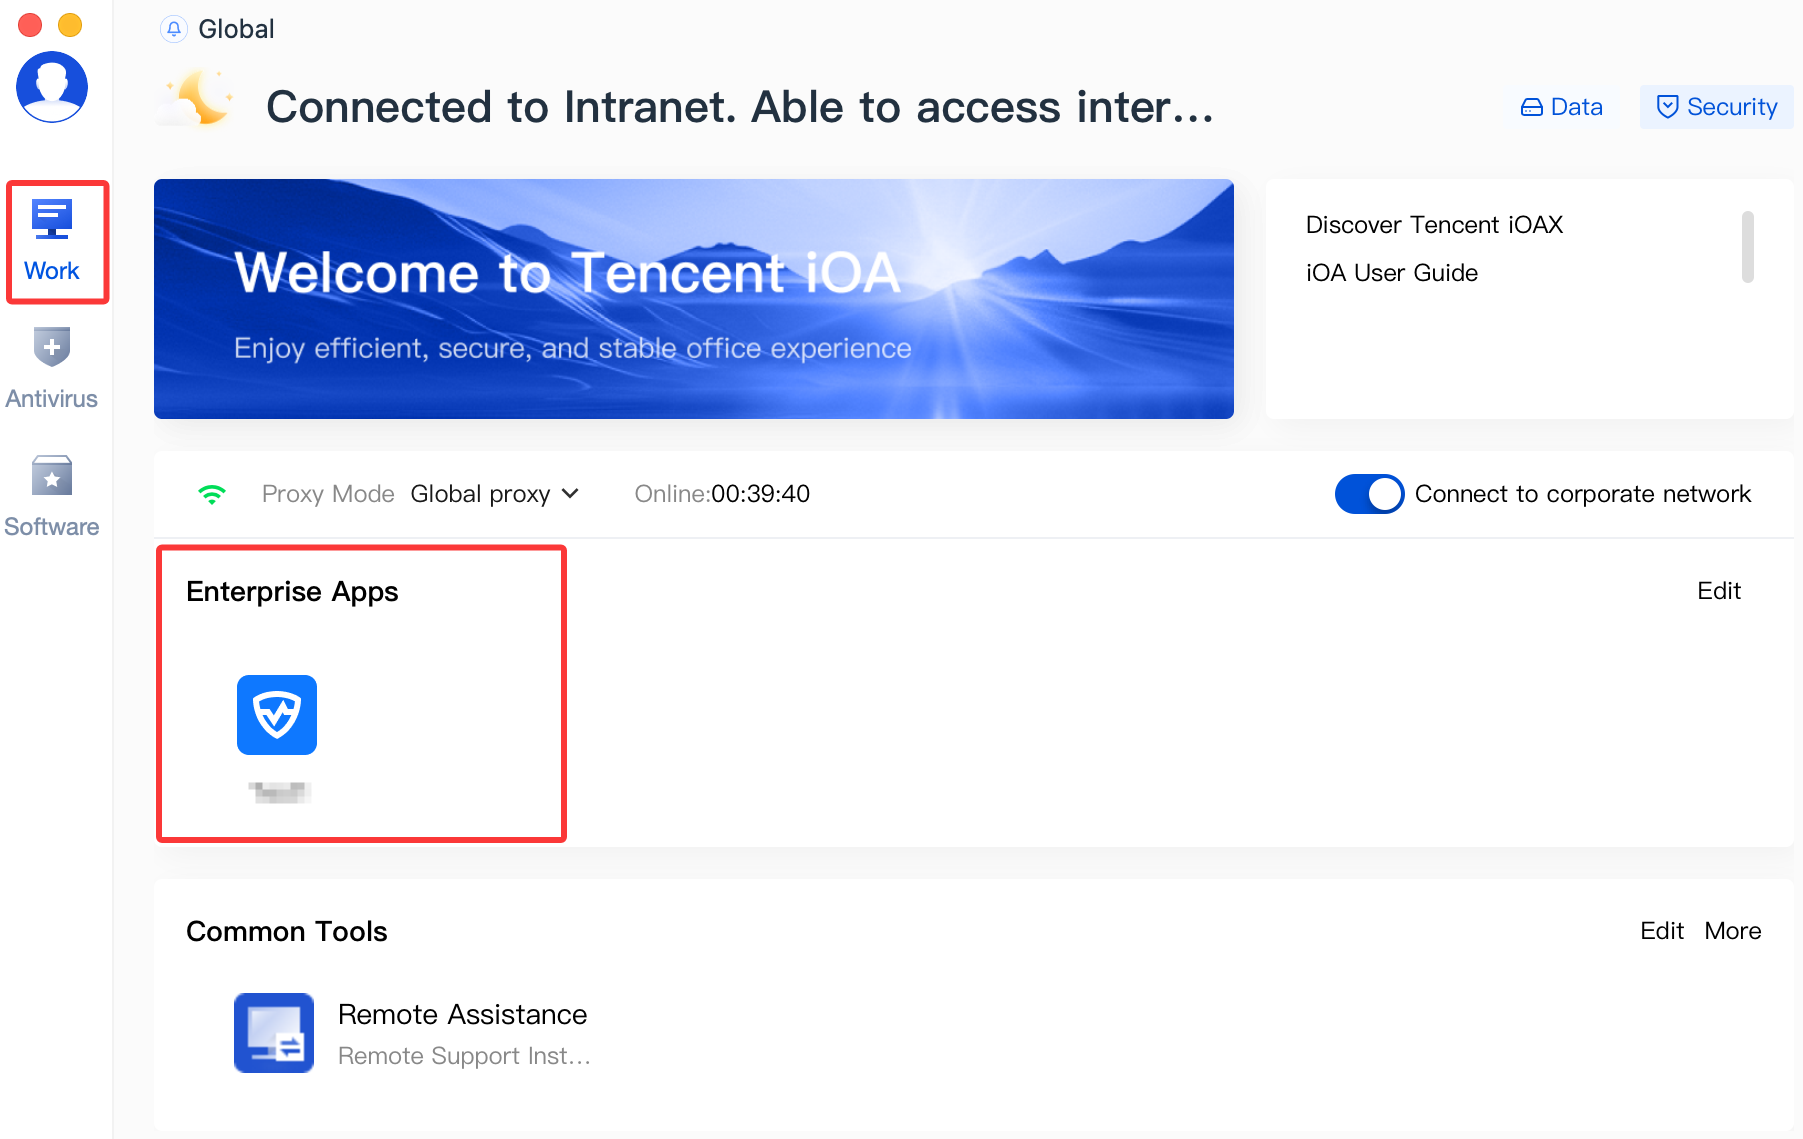
2. Common Tools: After logging in to the iOA client, you can directly use the common tools displayed.
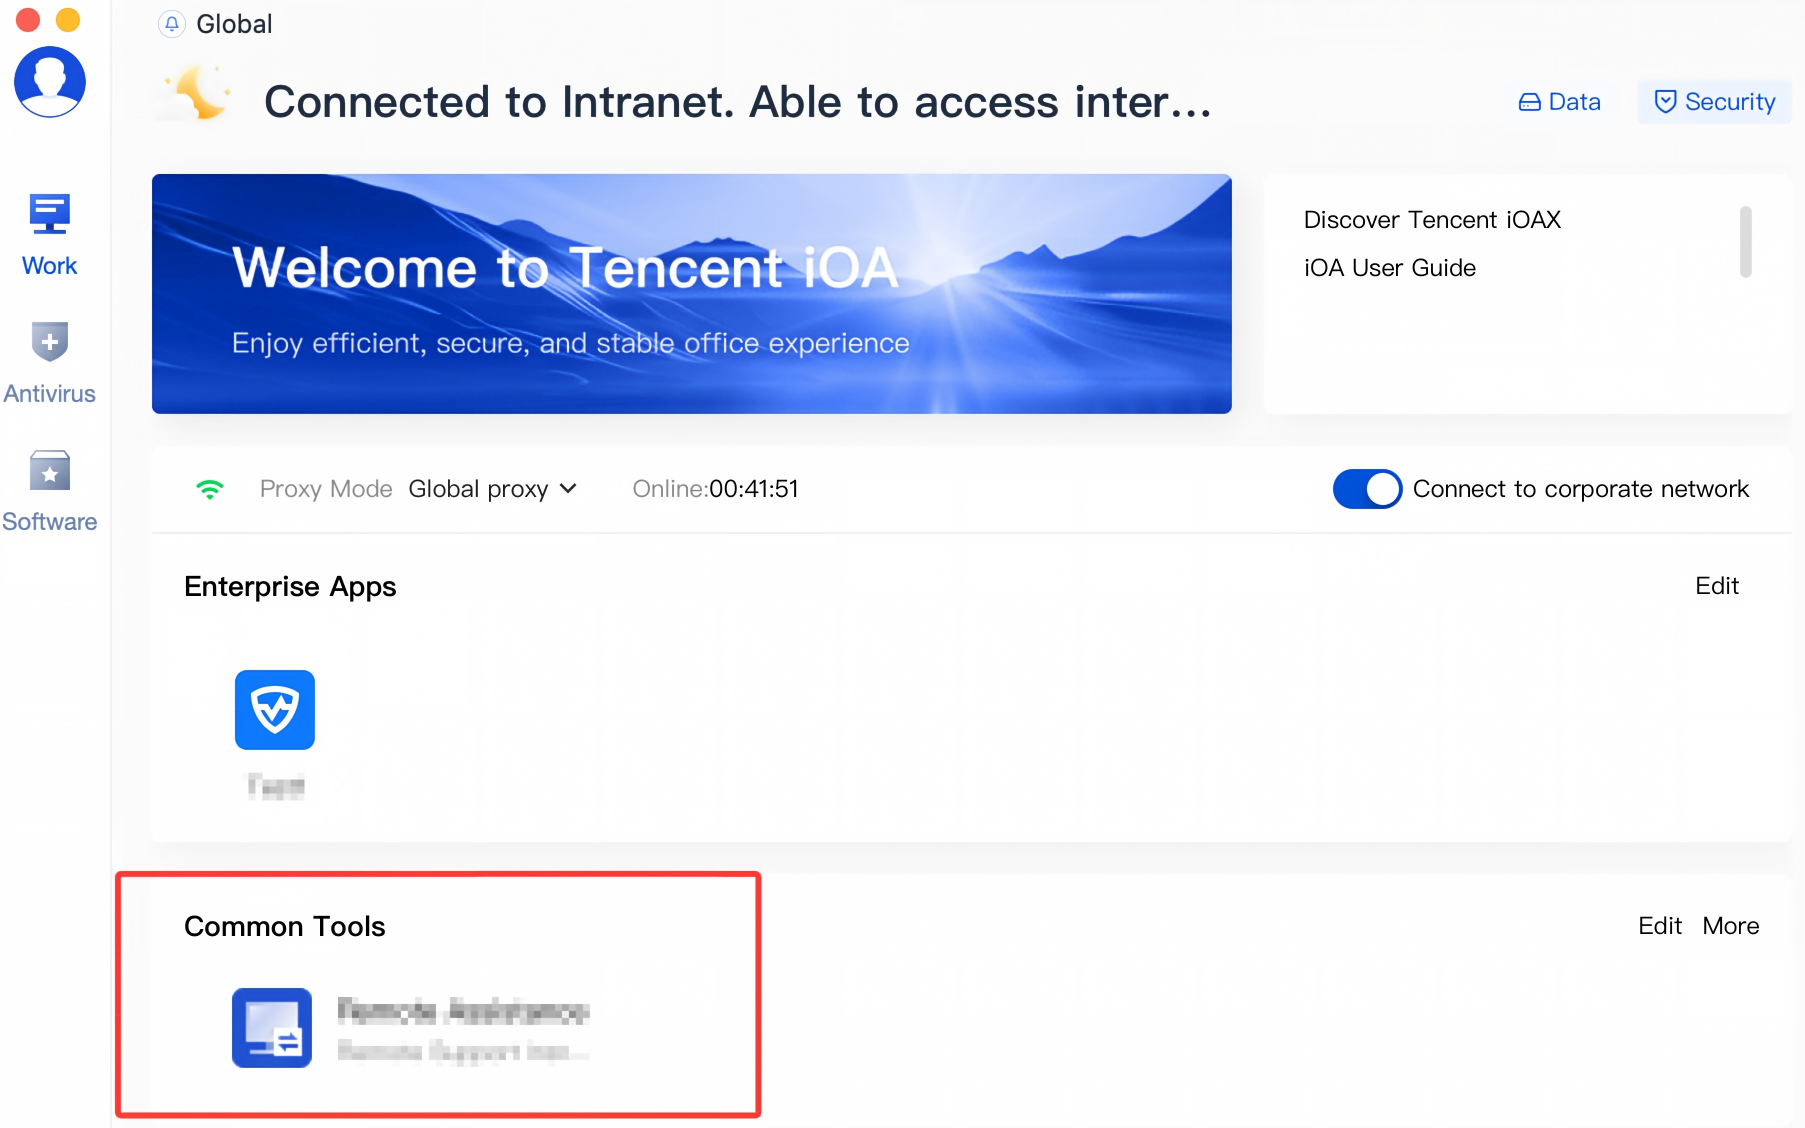
3. The global announcement is located at the top of the client and can be viewed without logging in to iOA.
4. Content Announcement: After logging in to the iOA client, you can view company announcements on the Office Home. iOA has a built-in user survey to further understand your experience and needs, and a built-in client user guide to help you quickly become familiar with and efficiently use the client.
Antivirus
1. Virus detection supports quick scan, full scan, and custom scan.
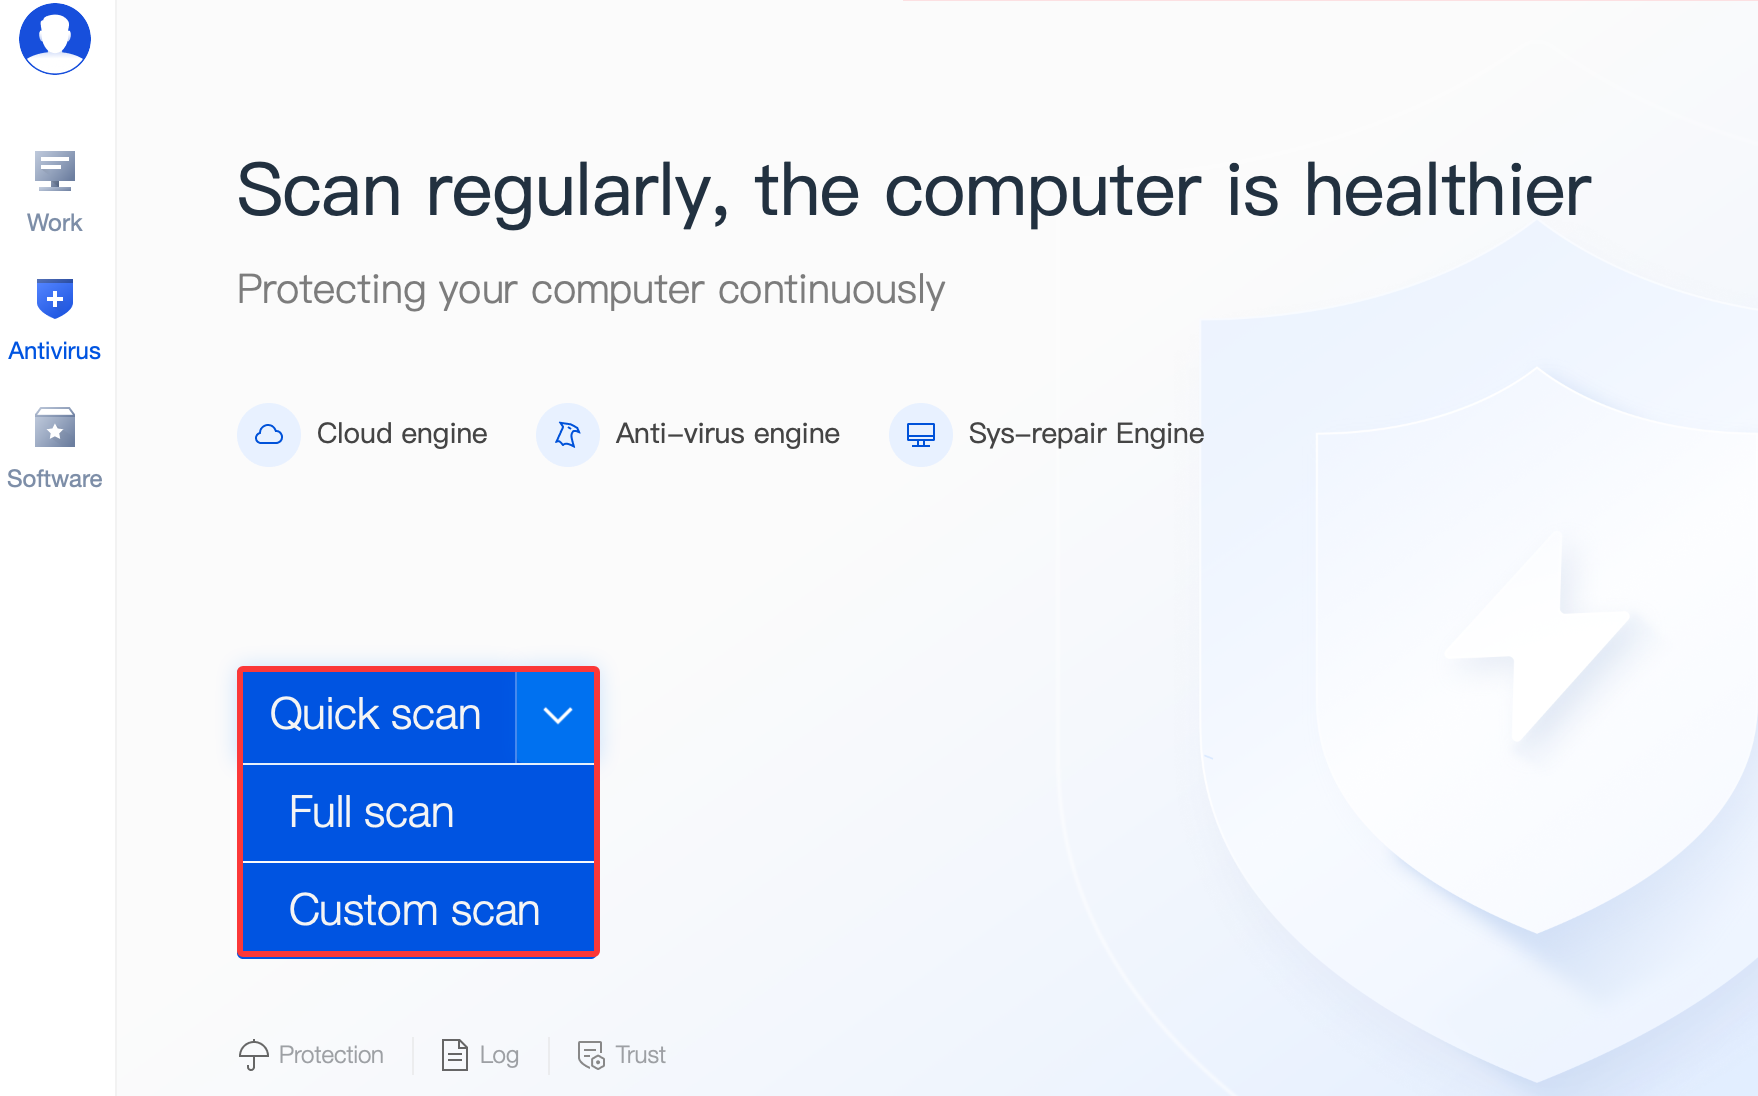
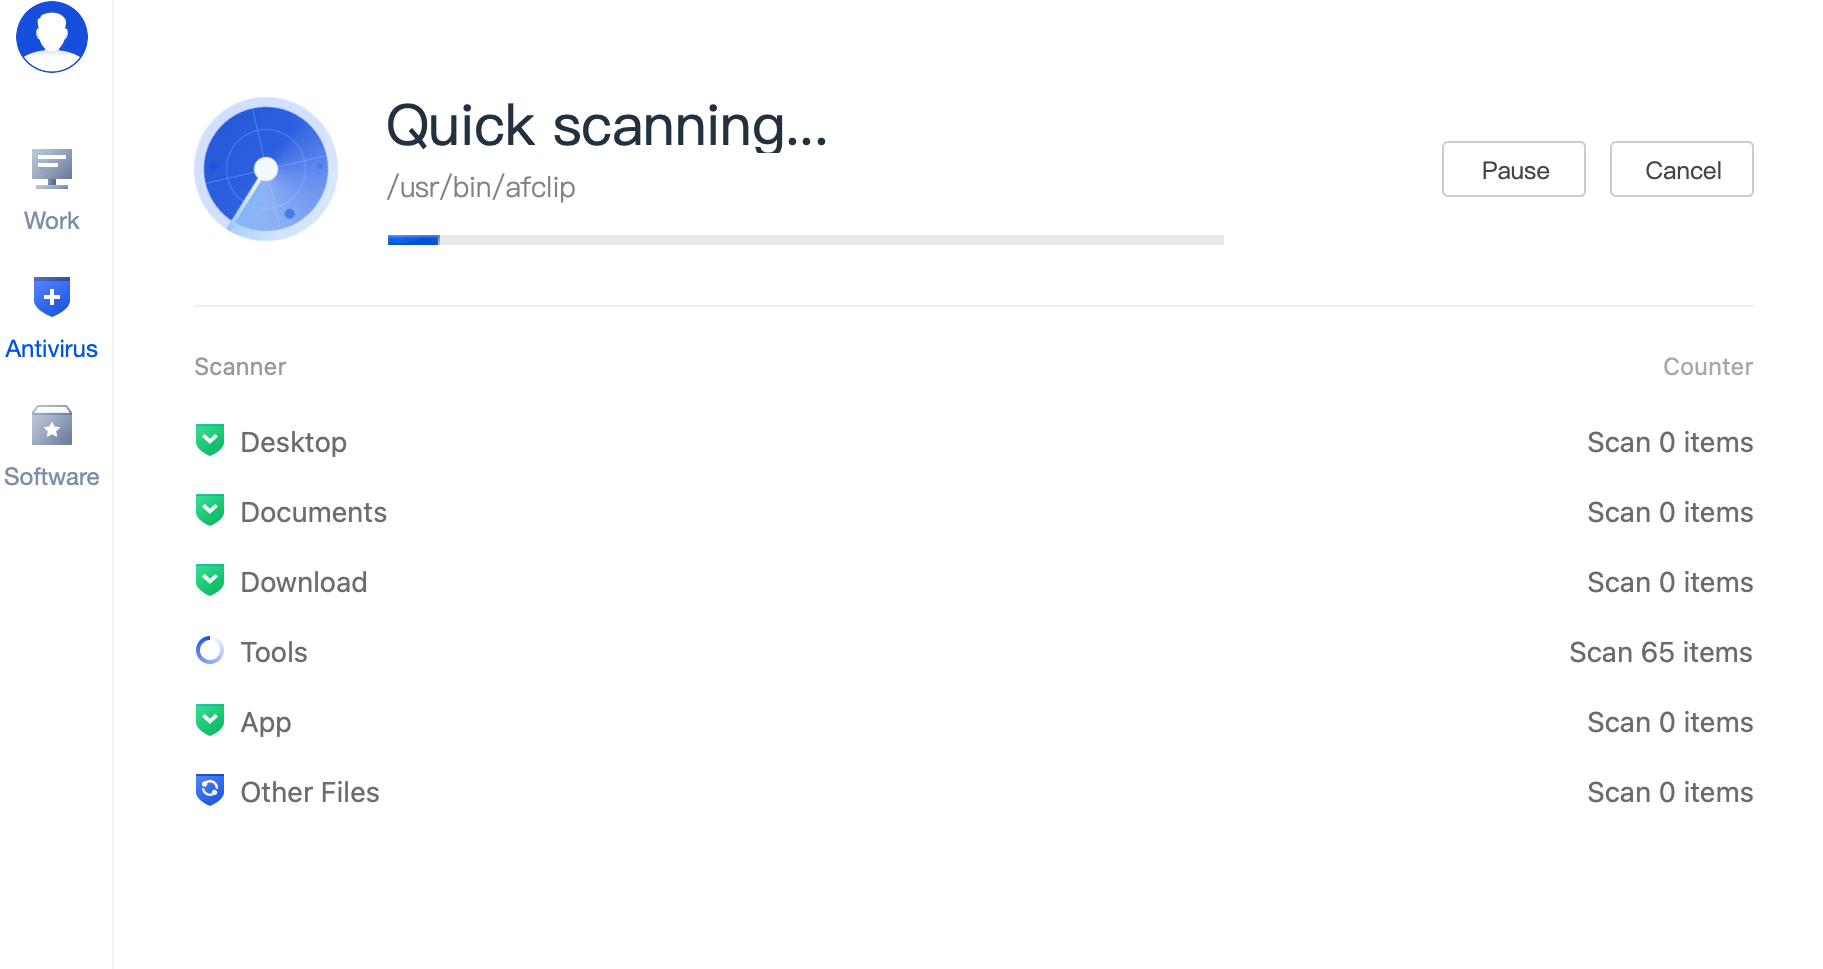
Quick Scan: Targets critical locations such as applications, system processes, and startup items to quickly check whether the system is at risk. After you click Quick Scan, the system automatically scans and displays the current risk items upon completion.
Full Scan: A full scan traverses the entire disk, providing the widest coverage and the most thorough detection, but it also takes the longest time. It is equivalent to performing a deep enumeration check of all files one by one on top of a quick scan.
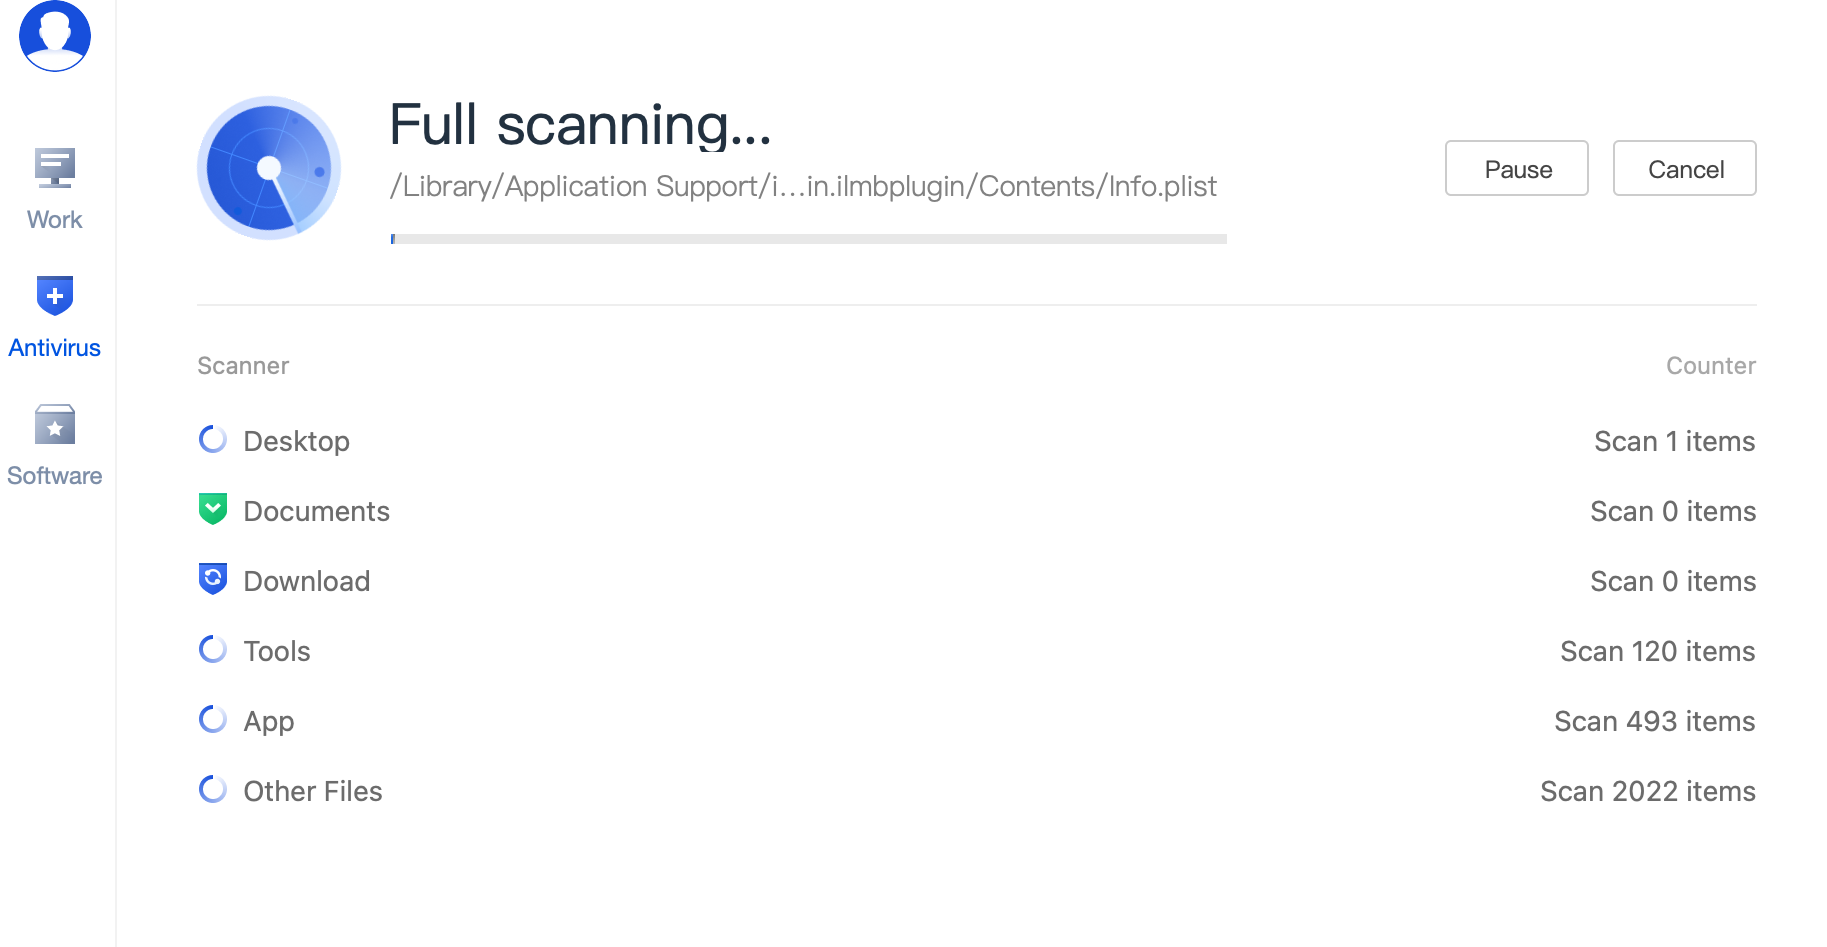
Custom Scan: Specify the folders you want to scan. Multiple folders can be combined.
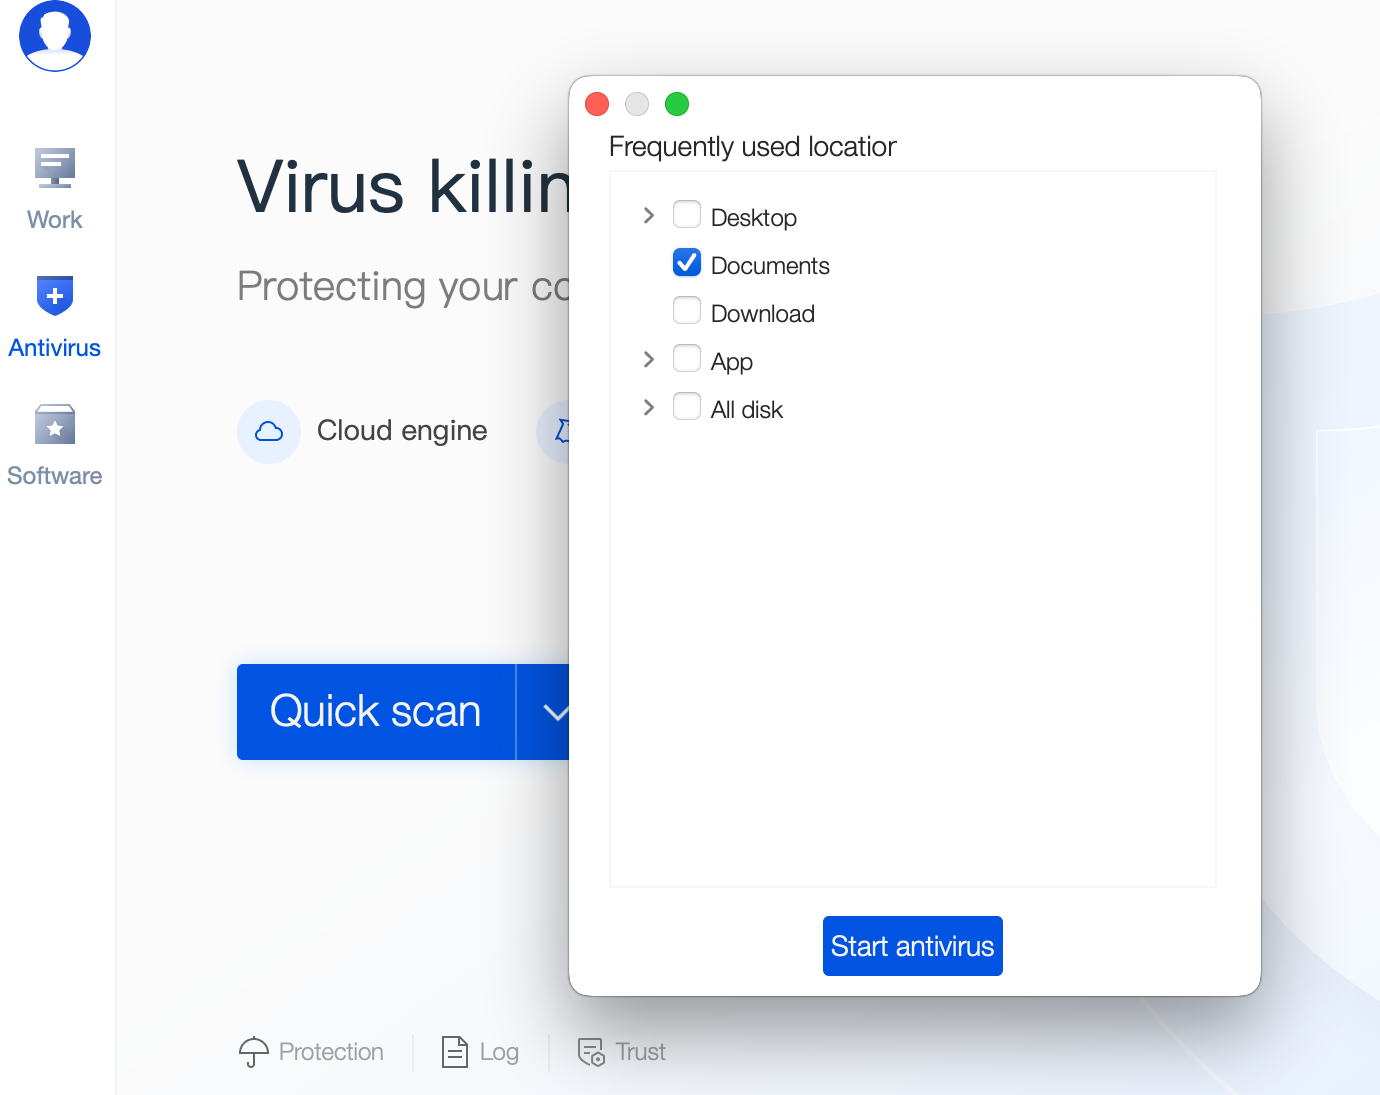
2. After the detection task is completed, if risks are found, select the risk items and click Handle Now to remediate the selected risk items.
SCC
Note:
Client compliance detection items are configured by administrators. This page appears only after administrators configure compliance detection policies for terminals/users. If the compliance feature is not displayed on your client, you can skip this section.
1. Click the corresponding number in X compliance detection items enabled to view the details of the corresponding compliance detection items.
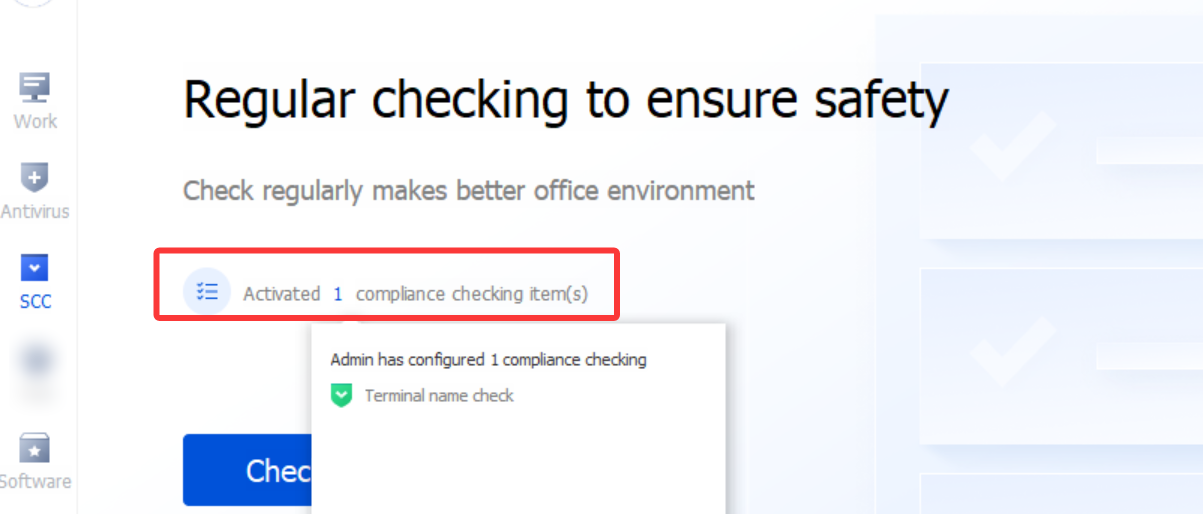
2. Click Detect Now, and the system will perform corresponding compliance detection on the terminal.
Note:
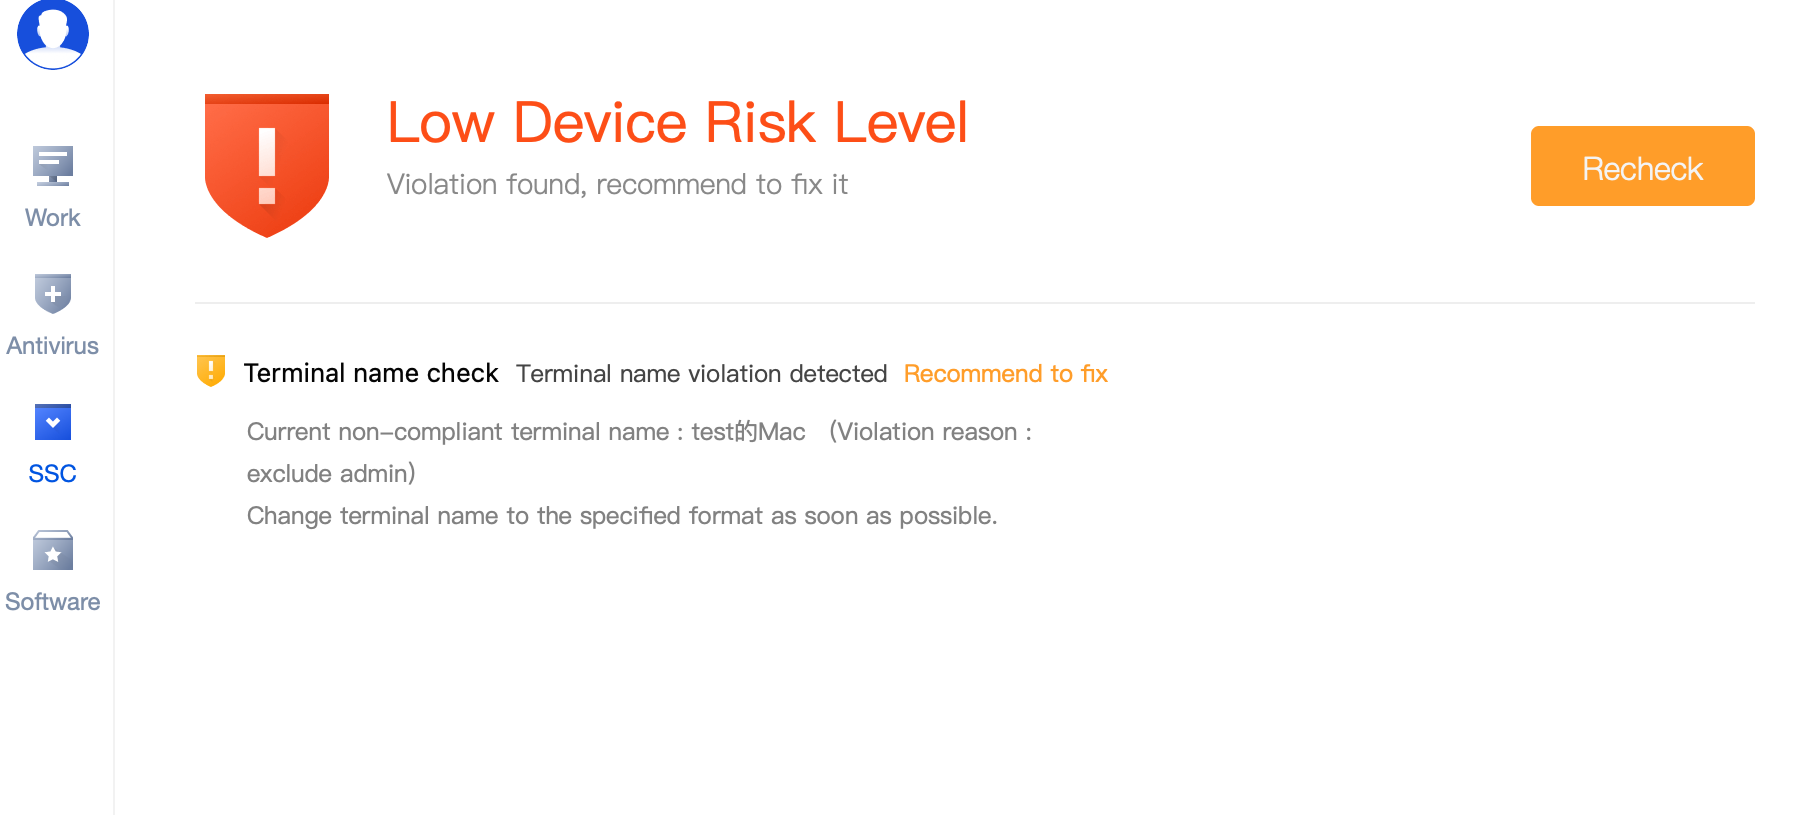
Compliance detection items are configured by administrators. Detection results are categorized into mandatory fix items and recommended fix items. Mandatory fix items are required fixes, and you must complete the fixes before you can continue to access private network resources.
3. After the detection is completed, the client page displays all non-compliant items and remediation suggestions. Click Violation Items to expand and view the specific violation details.
Software
After the administrator publishes the software, you can download the software you need on the Software page.
Note:
The software features are configured by administrators. This page is displayed only after administrators configure the software repository policy for terminals/users. If the software features are not displayed on your client, you can skip this section.
Bantuan dan Dukungan
Apakah halaman ini membantu?
Anda juga dapat Menghubungi Penjualan atau Mengirimkan Tiket untuk meminta bantuan.
masukan