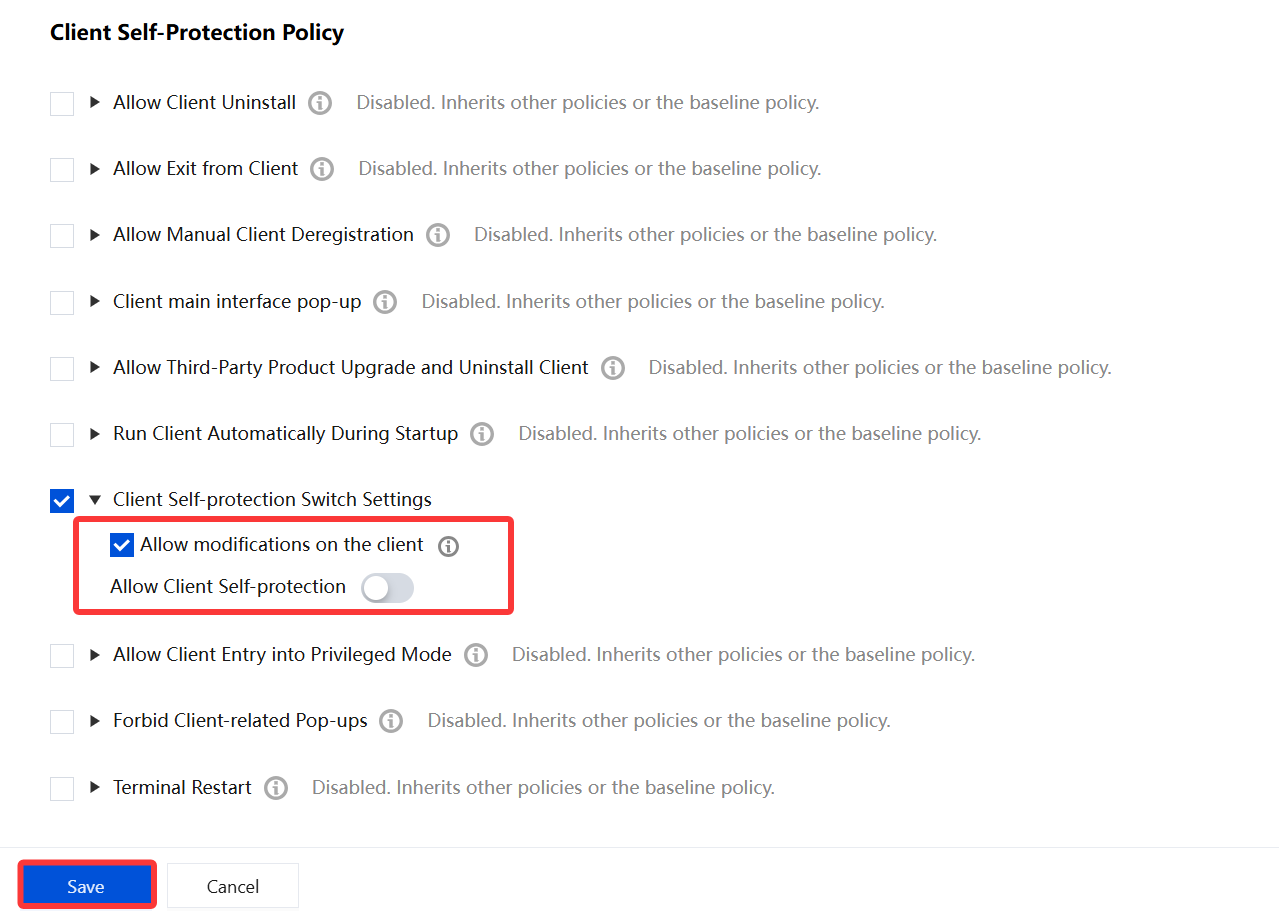
2. On the Client Self-Protection page, click Create Policy, and select Client Self-protection Switch Settings.
3. Make sure that the backend allows the client to modify settings and disable client self-protection. After configuration, click Save.
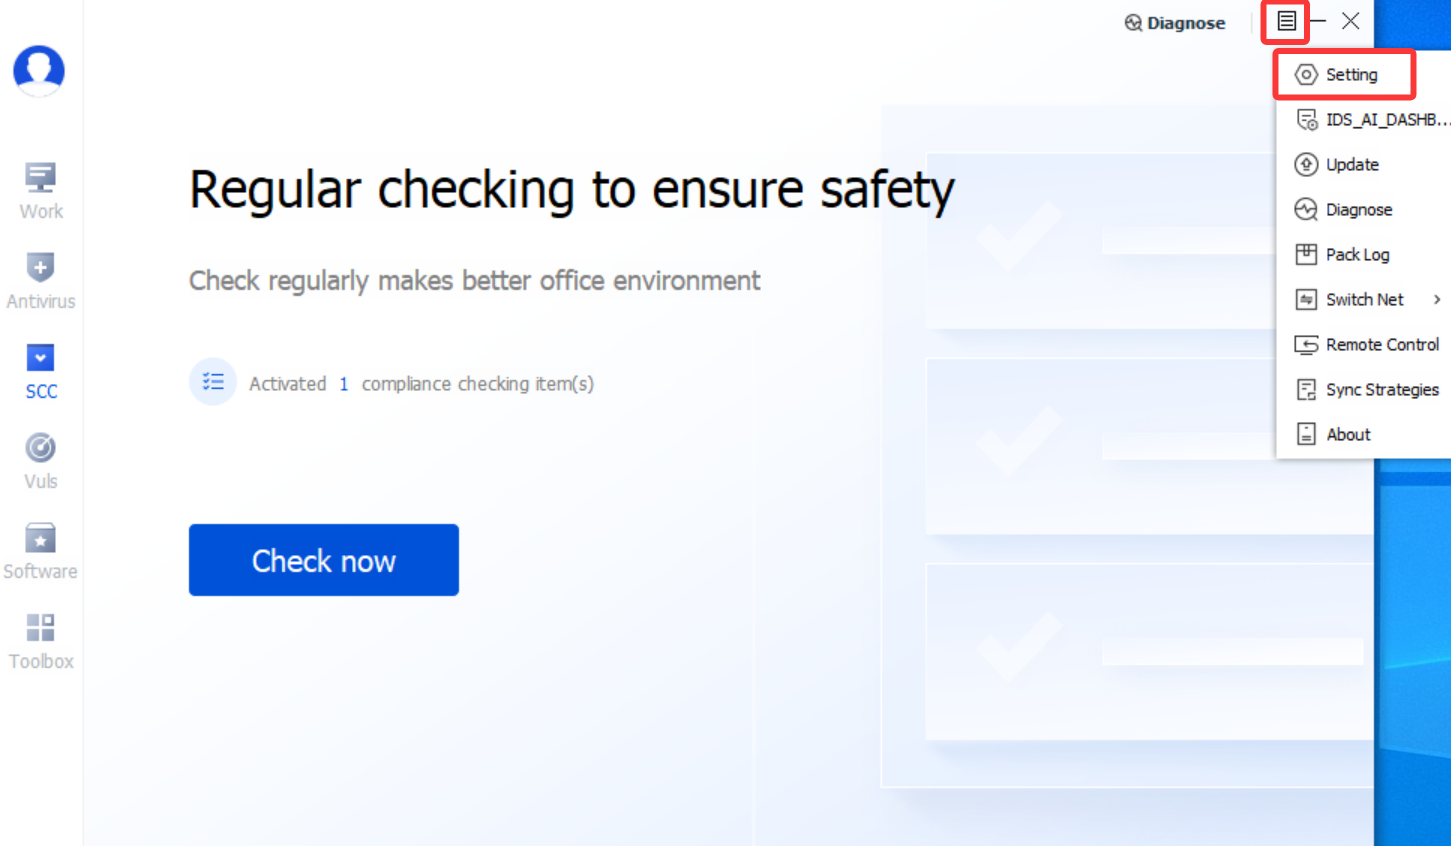
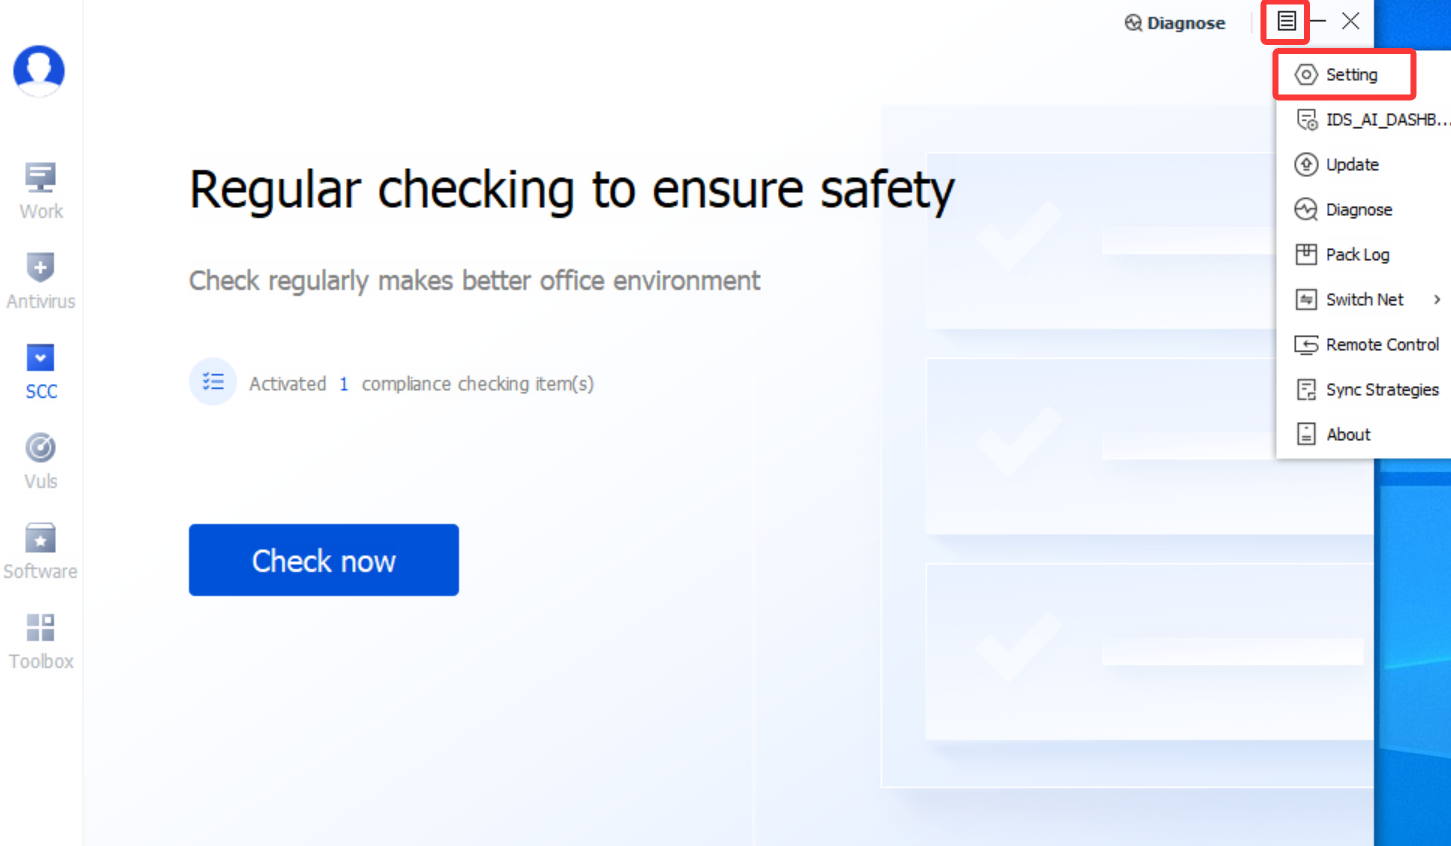
4. On the iOA client, click
> Setting.
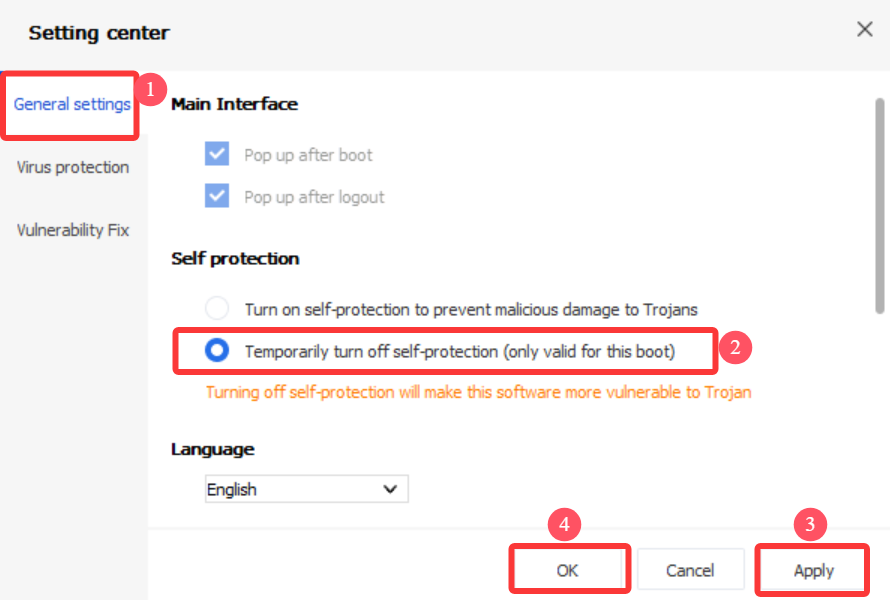
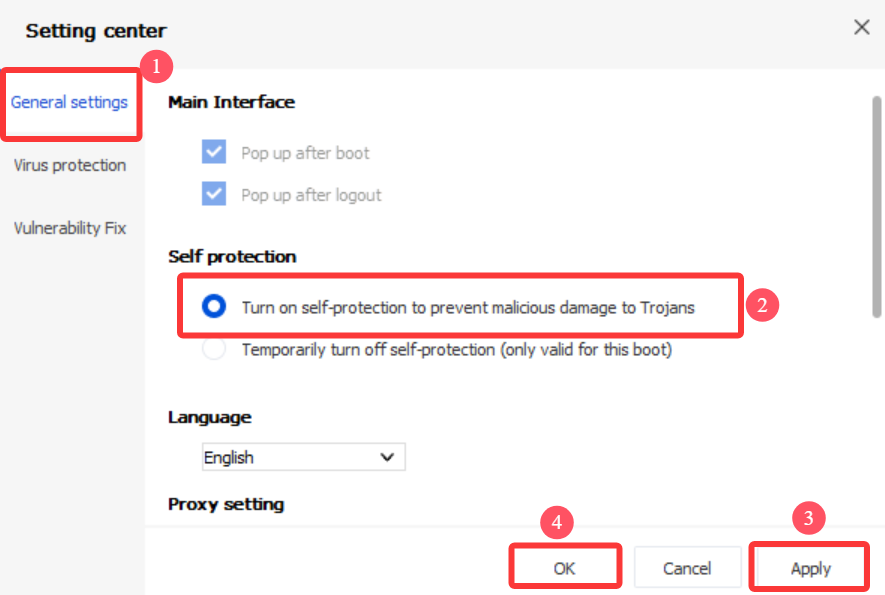
5. Choose General Setting > Self-Protection - Temporarily Disable Self-Protection, click Apply, and then click OK.
6. Run the superKill.bat script on the client.
Note:
Contact us at Contact Us to obtain the superKill.bat script.
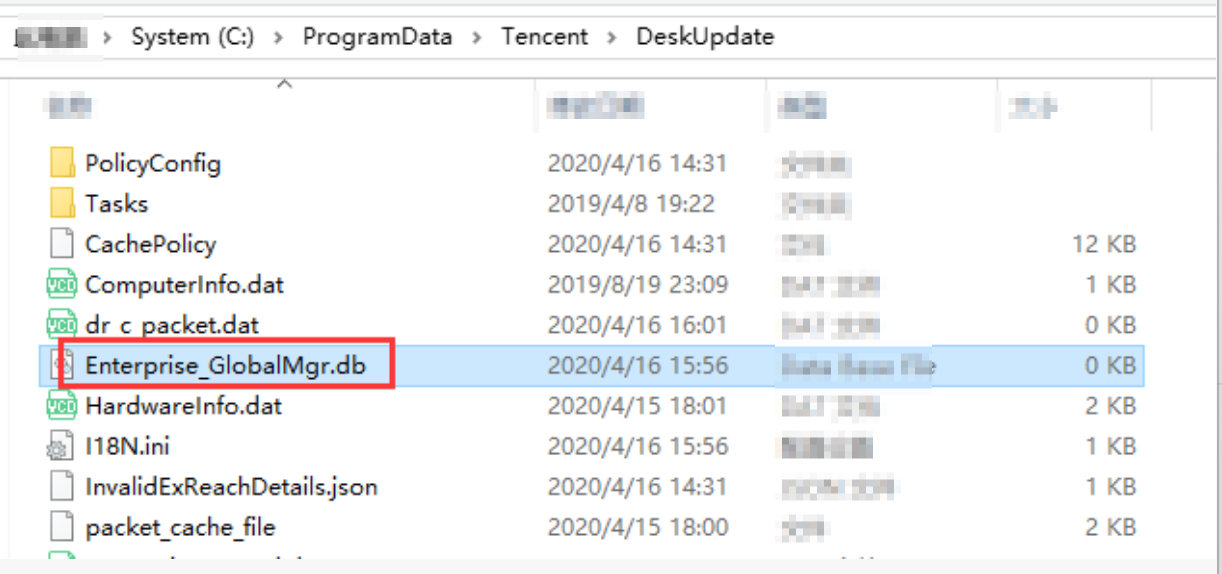
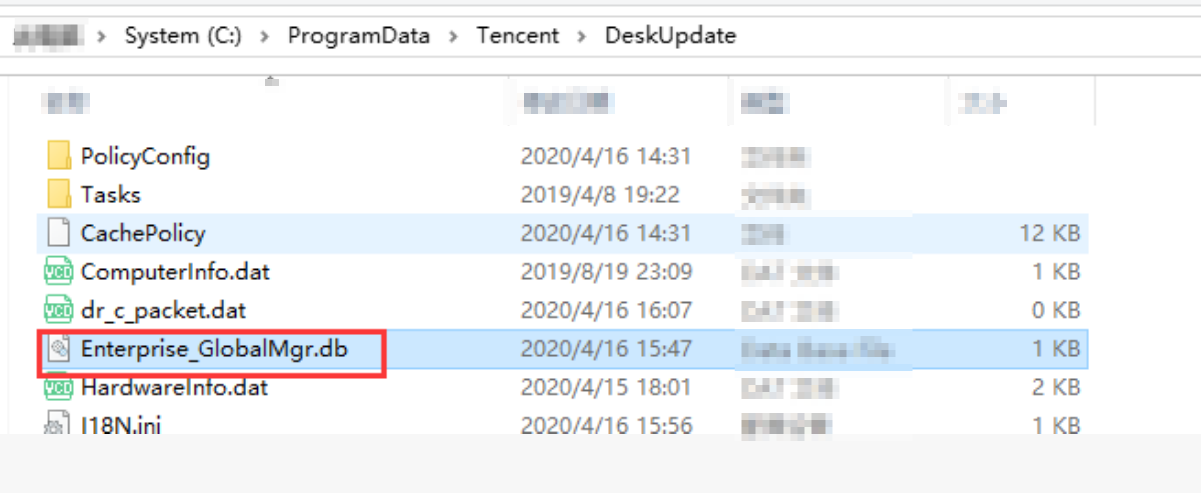
7. Back up the C:\\ProgramData\\ZtsmEnt\\Basic\\Enterprise_GlobalMgr.db file to another location, and then delete it. After the image is created, copy the file back to its original location.
Attention:
When a template machine is created in a CVD environment, it is recommended to disconnect the template machine from the network before deleting the Enterprise_GlobalMgr.db file.
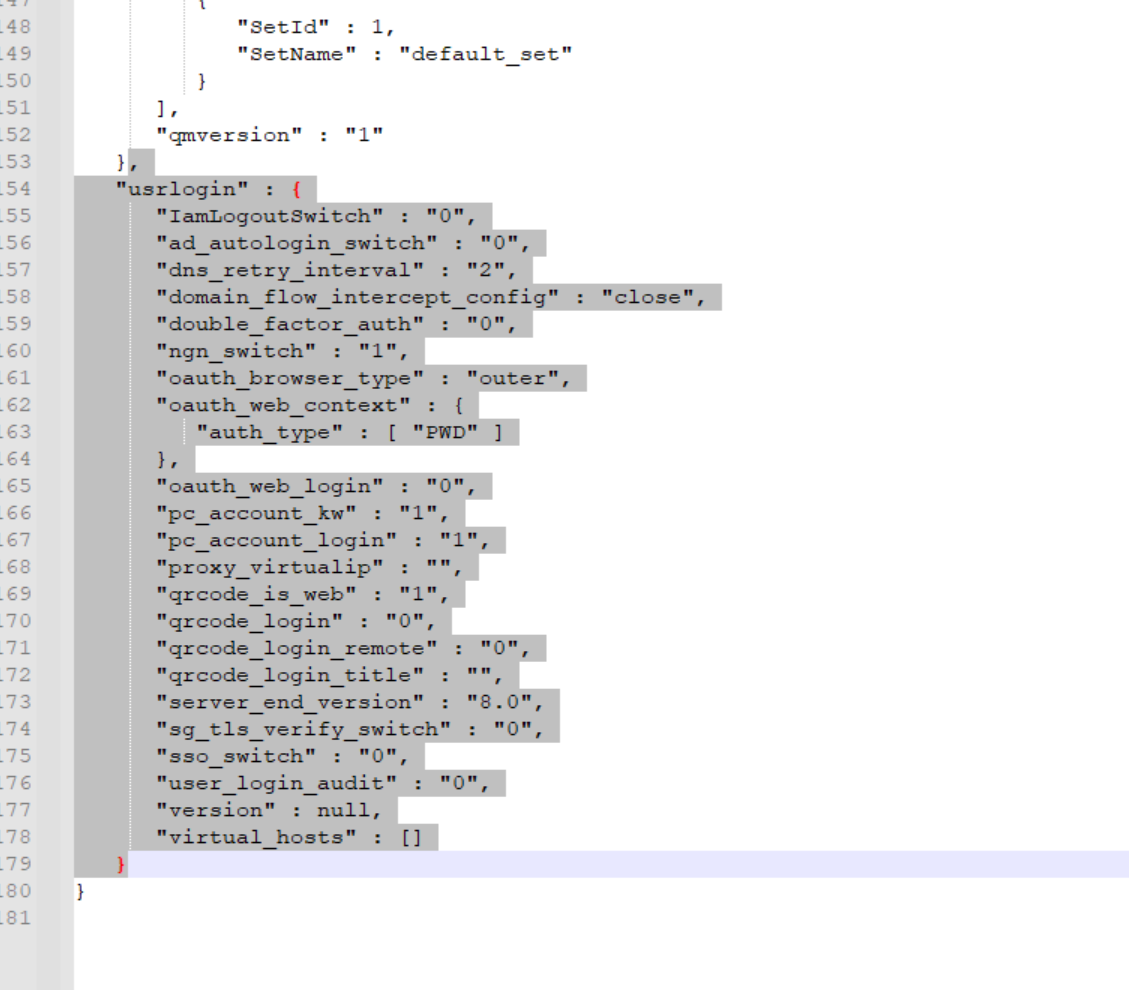
The usrlogin node data in serverconfig.dat must be deleted. Delete all grayed-out sections as shown in the following figure:
Note:
Delete all grayed-out sections as shown in the following figure.
10. Start creating the image and wait until it is completed. (The image has now been created.)
11. The host machine was damaged during the previous image creation process. To restore the host machine, restore the Enterprise_GlobalMgr.db file that was just backed up. If you no longer need this host machine, you can skip this operation.
12. On the iOA client, click
> Setting.
13. Choose General Setting > Self-Protection - Enable Self-Protection, click Apply, and then click OK.
14. At this point, the host machine has been restored.
Guide to the macOS Enterprise Parent Image Ghost Solution (Image Creation)
The client provides the following solution and steps to clear the unique identifier and related fields:
1. Install iOA normally. After startup, confirm that iOA is working properly.
2. Key step: When creating the master image, ensure that the device is disconnected from the network. Disconnect the device from the network.
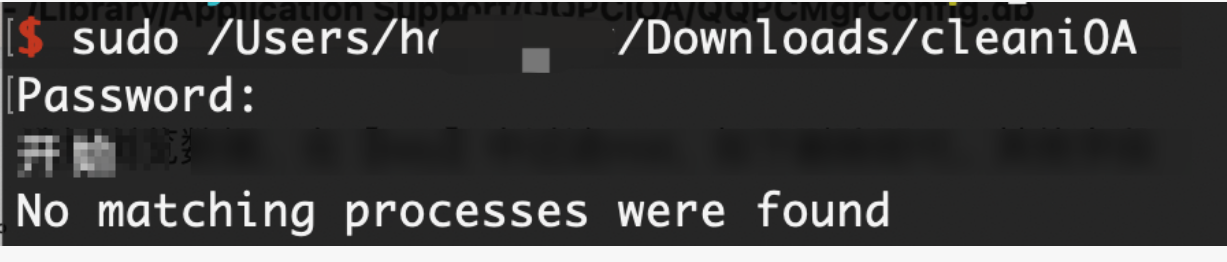
3. Run the master image creation script. Run the following script in the Mac terminal: sudo /Users/aaaa/Downloads/cleaniOA.
4. Key step: Confirm that the values of the unique identifier-related fields currentMid, lastGuid, and lastMacAddress have been cleared. To view them, proceed as follows:
Method 1: Use commands to view.
4.1 In the terminal, use commands to view the value of the corresponding key. For example, view currentMid and lastGuid by replacing the corresponding key value.
sqlite3 /Library/Application\\ Support/QQPCiOA/QQPCMgrConfig.db "select value from config where key='currentMid'"
4.2 If the following is displayed, the clearing is successful.
Method 2: Use a DB tool to view.
4.1 View the cleared content. The database location is as follows. You can use DB Browser to browse the data.
4.2 Key step: For the currentMid field, select Browse Data and filter currentMid/lastGuid/lastMacAddress in the key column. If the data is displayed, it still exists. If nothing is displayed, the clearing is successful. View other fields in the same way.
5. Start creating the master image.
Attention:
During the creation process, the device network must remain disconnected (no internet access) to prevent duplicate device identifiers from being generated.
6. Verify the result: After the master image is created, install it on two or more devices, start iOA, connect the devices to the network, check the iOA working status, and synchronize policies. If the iOA unique identifiers of the two devices are different, the master image is created successfully. You can use Method 1 or Method 2 above to view the identifiers.
Solutions for Preventing Identical MIDs Across Endpoints After Image Installation
Windows
1. Install iOA.
2. Disconnect the network.
3. Delete the file: C:\\ProgramData\\Tencent\\DeskUpdate\\Enterprise_GlobalMgr.db.
4. Create the image.
macOS
1. After iOA is installed normally, the policy is synchronized successfully.
2. Disconnect the current network.
3. Terminate all major iOA processes by running the provided script. To run the script, use the following command: sudo sh /Users/harveyxu/Downloads/restartiOA.
4. Clear the mid content from the iOA database. The database location is as follows. You can use DB Browser to browse the data:
5. For the mid field, select Browse Data, filter mid in the key column, and then delete it.
6. Save the modified value.
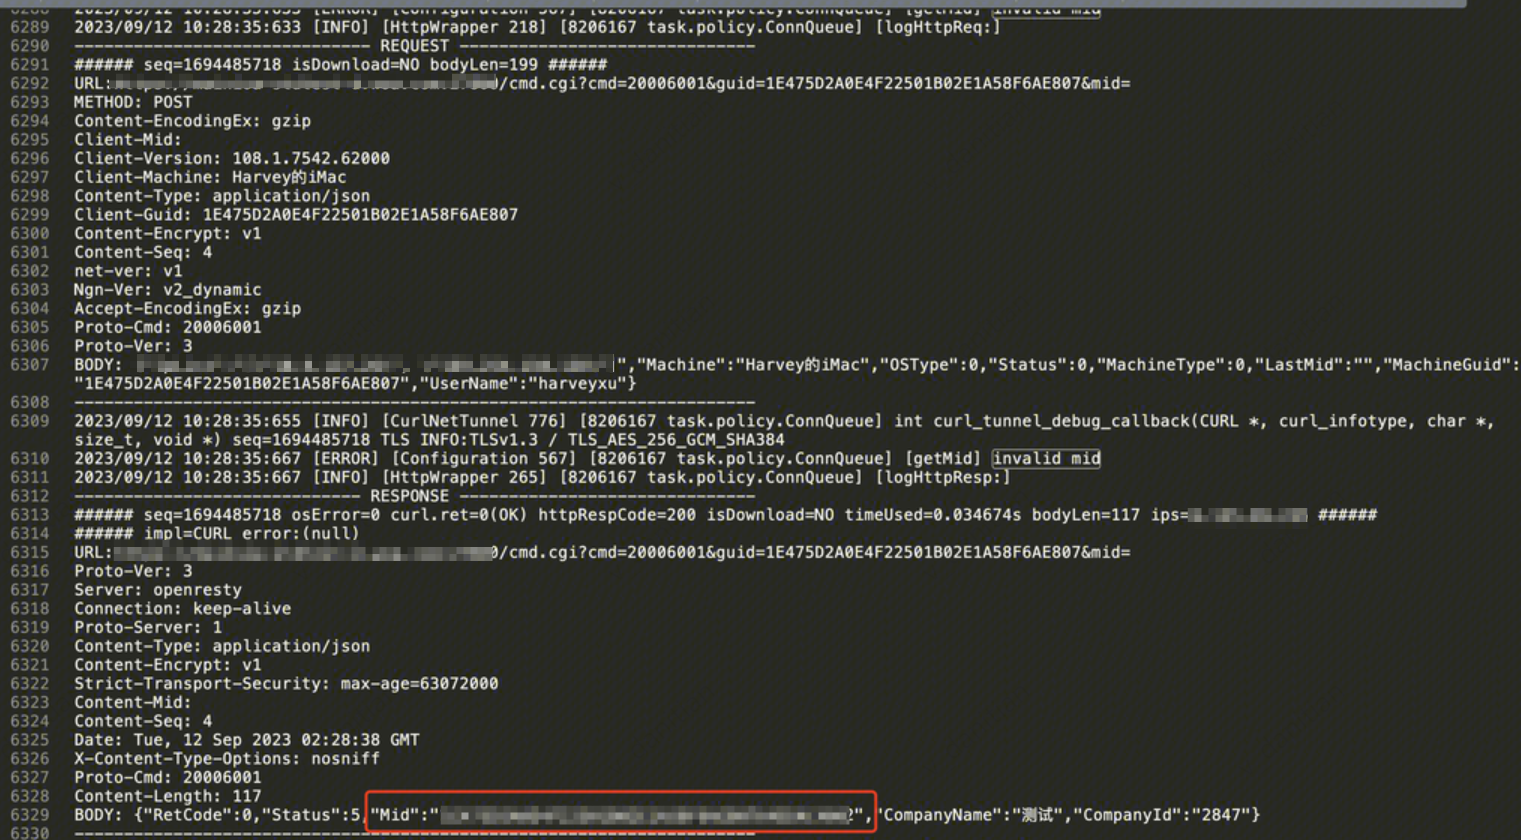
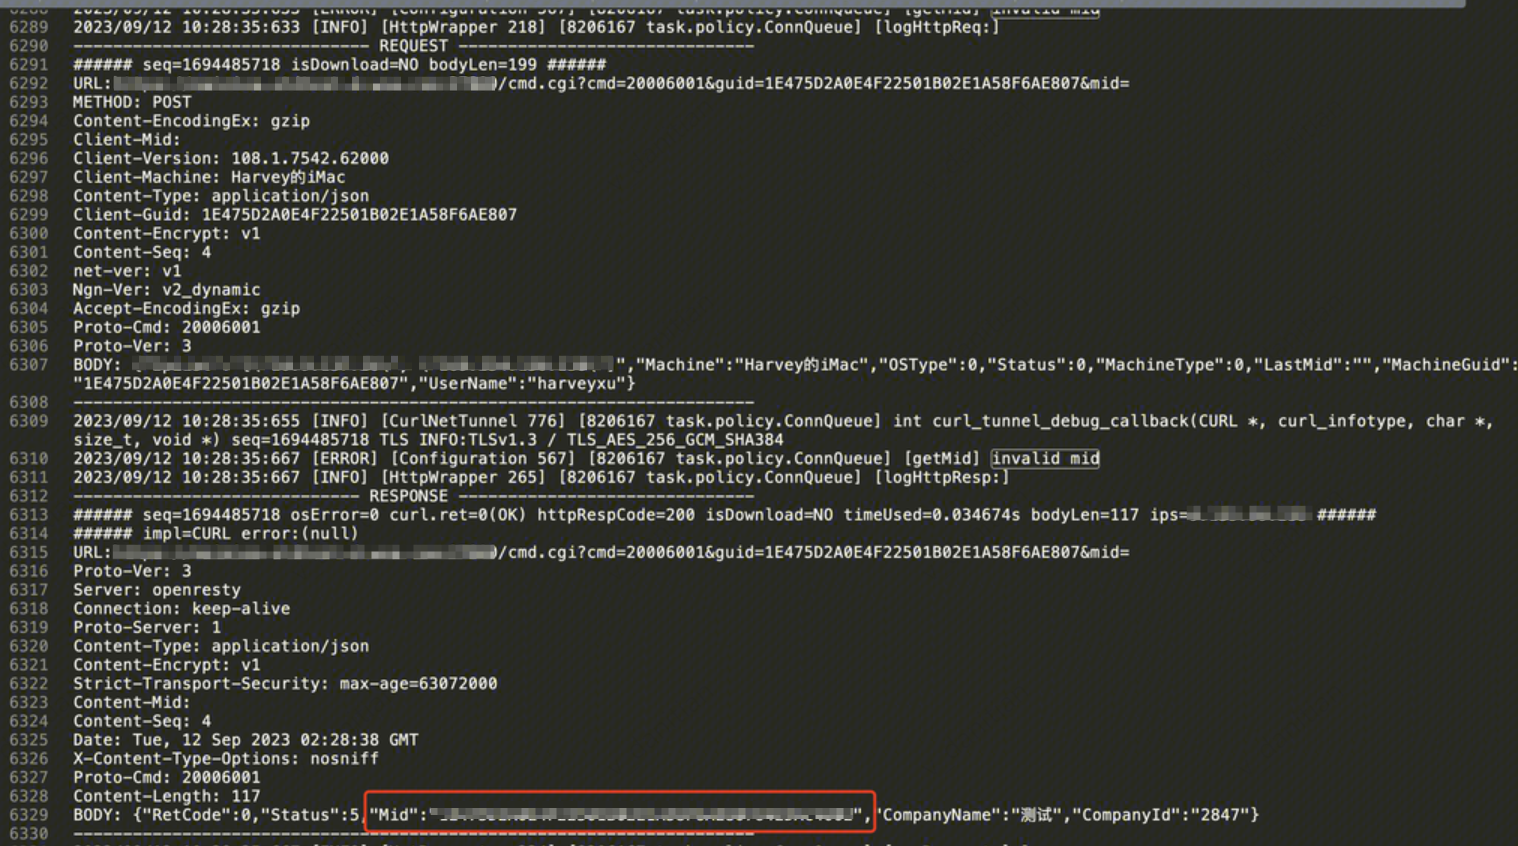
7. Restart iOA and record the time. Observe that network requests in the network service do not contain the mid value, and the lastmid field in the 6001 request is empty, which indicates that the mid value has been deleted successfully.