Dedicated IP
Operation Scenario
When you need to use a dedicated IP, you can activate the dedicated IP value-added service through the Email Push console and configure a dedicated IP for your email sending. This article explains how to configure a dedicated IP.
Prerequisites
Before using the service, please ensure the following requirements are met:
1. The Sinple Email Service must be activated.
2. At least one sending domain must be configured.
A verified sending domain is required to begin sending emails.
Steps
Step1:Activate the Service
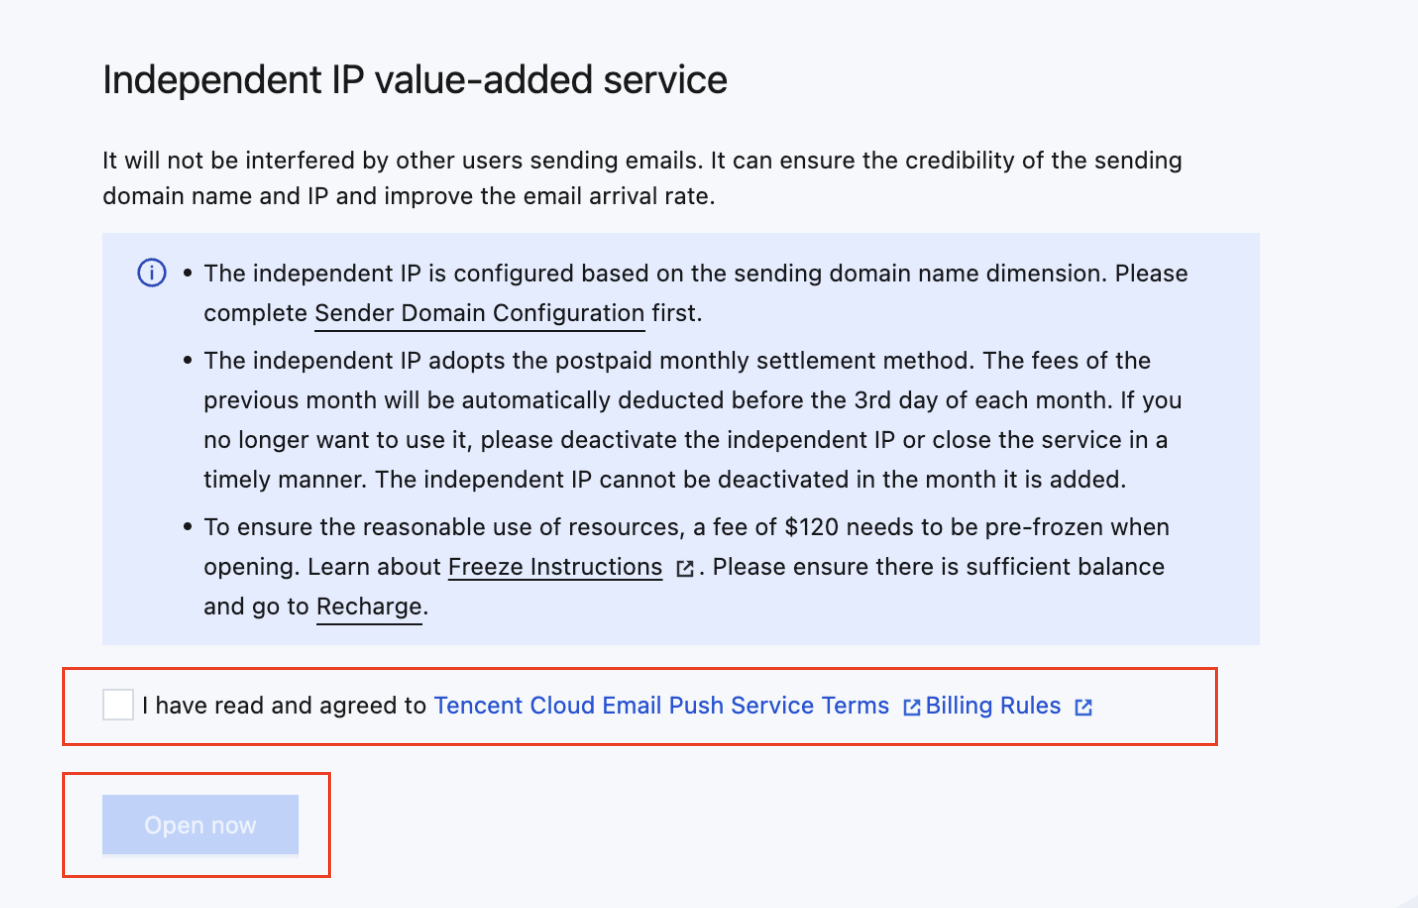
Log in to the SES Console, select Configuration > Dedicated IP, navigate to the "Dedicated IP" page, check the agreement box, and click Open now.
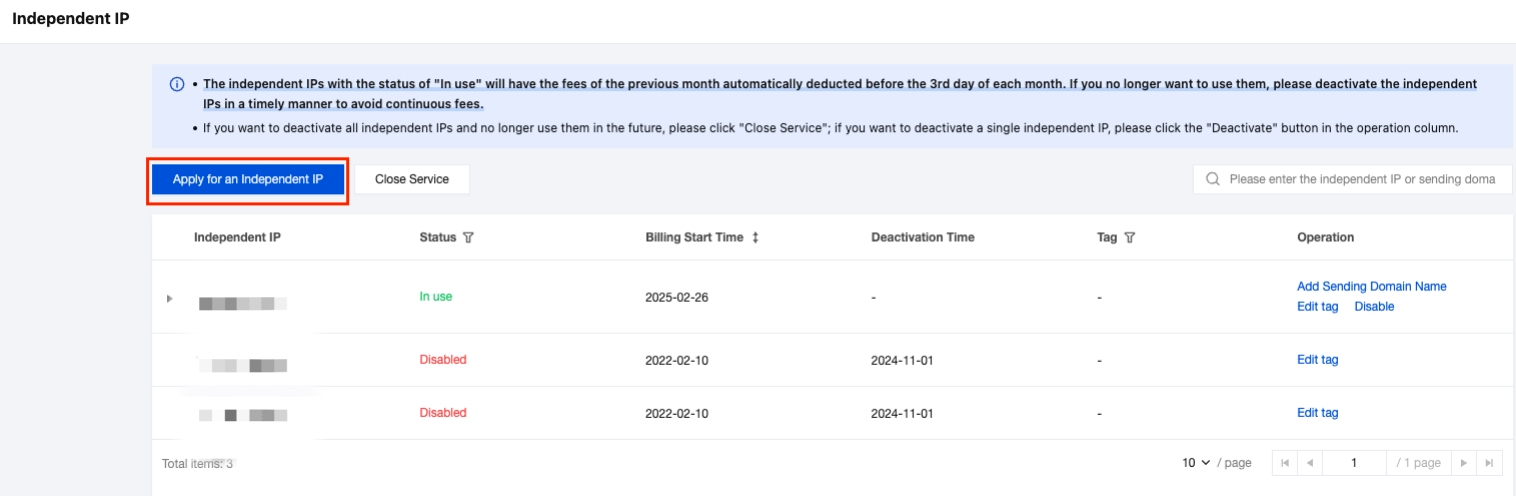
Step2:Apply for a Dedicated IP
Click Apply for an Dedicated IP to enter the application page. Specific steps are as follows:
Determine the number of dedicated IPs → Configure sending domains for the dedicated IP → Click Apply → The system automatically allocates → Application successful, billing starts.
Note:
The number of dedicated IPs should be determined based on your sending scenarios and QPS requirements.
1. Each sending scenario(e.g., transactional, notifications, marketing) should have at least one dedicated IP. For redundancy, allocate at least two per scenario.
2. The exact number of dedicated IPs required per scenario depends on your daily sending QPS.
Currently, each Tencent Cloud IP can safely handle up to 30 QPS. If your daily sending QPS is 200 and you want all emails to use dedicated IPs, you will need 200/30 ≈ 7 IPs.
For example, if you have three sending scenarios(e.g., transactional, notifications, marketing) and your sending QPS is 200:The recommended number of dedicated IPs is: 3 × (200/30) + 3 = 24.
Step3:Use Dedicated IP
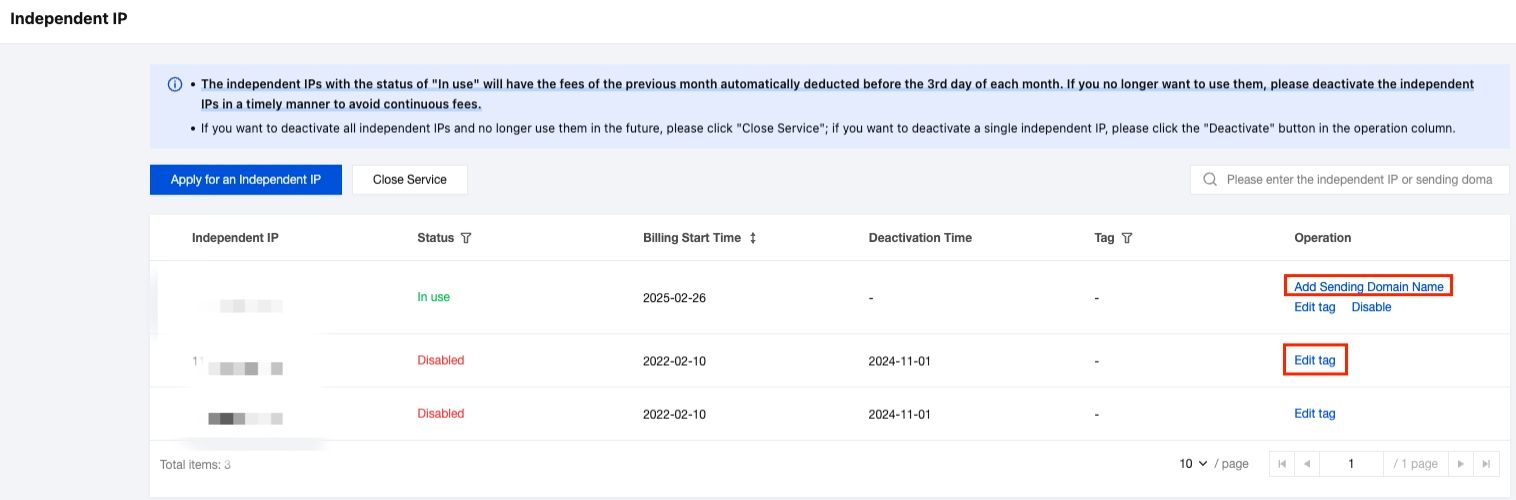
Add Sending Domain: Assign more sending domains to the dedicated IP. Emails from these domains will be sent through the dedicated IP.
Edit Tag: Assign tags to different sending domains for access control and cost tracking. For more details, refer to: Tag Overview
Note:
Sending domains should be categorized by scenario(e.g., transactional, notifications, marketing). Dedicated IPs should also be allocated accordingly.
Avoid using the same sending domain for both marketing/transactional emails and marketing emails, as this may harm domain reputation.
Similarly, avoid configuring a dedicated IP for both marketing and notification emails.
Other operations
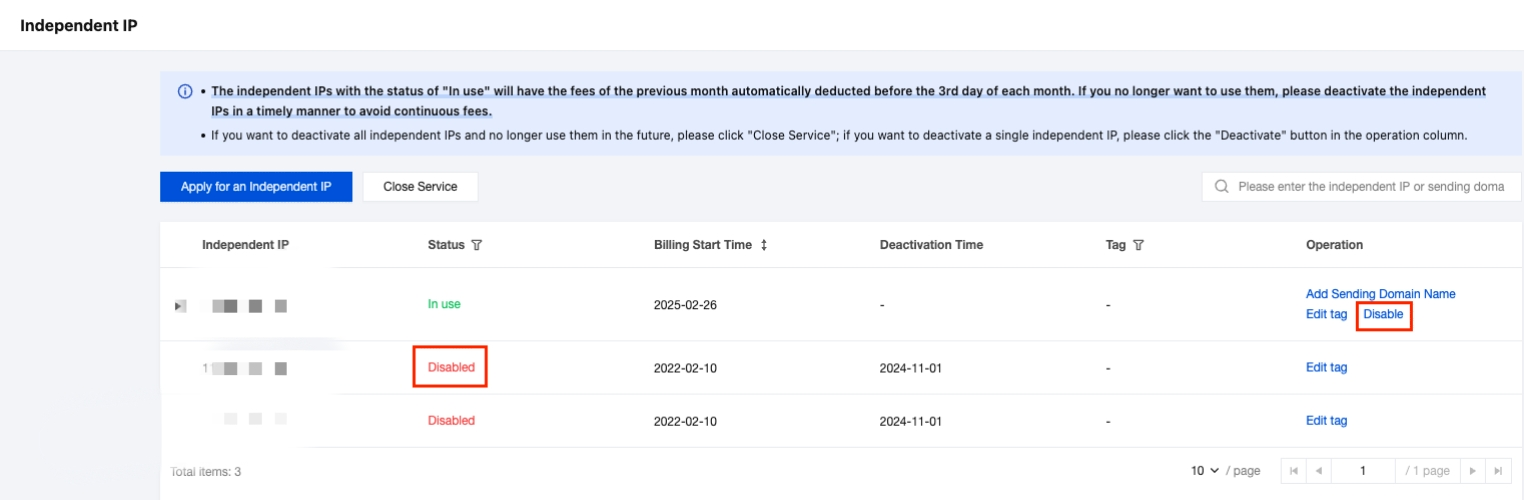
1. Disable Dedicated IP
If you no longer need to send emails or use a specific dedicated IP, disable it promptly to avoid ongoing charges.
Disabling a dedicated IP will delete all associated sending domain configurations. The system will switch to shared IPs for sending, which may affect performance.
Disabled dedicated IPs will be recycled and reallocated after warm-up. Reapply if you need dedicated IPs again later.
Charges for the current month will be prorated based on actual usage and reflected in the bill on the 1st of the following month.
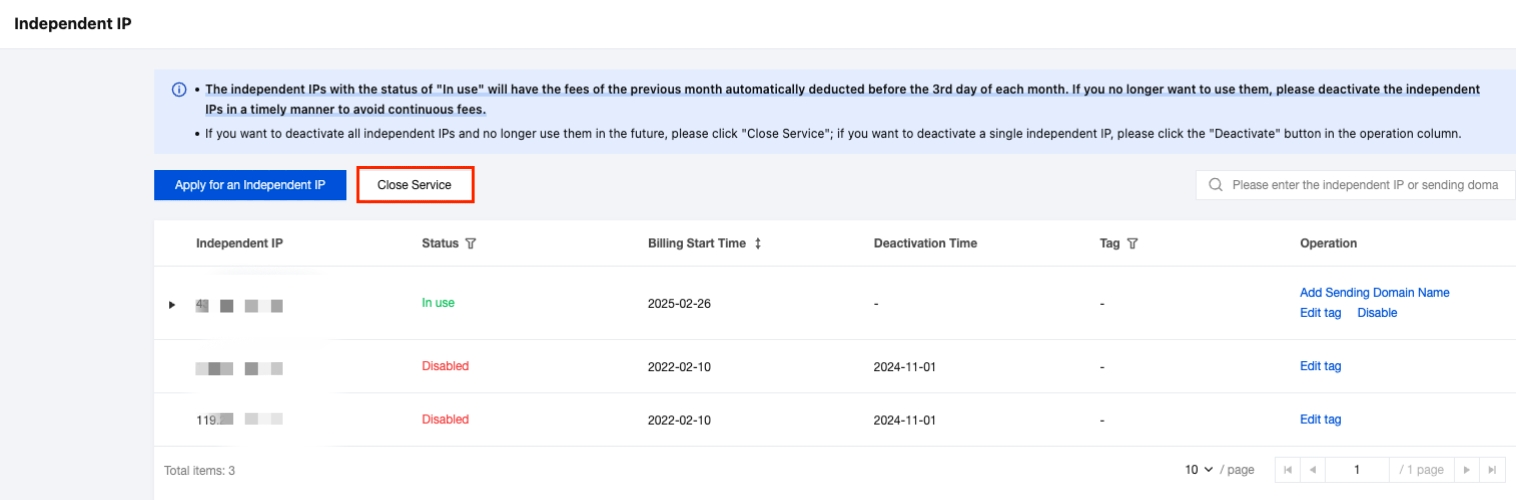
2. Close Service
To disable all dedicated IPs and permanently stop using the service, click Close Service.
Note:
If you need to use the service again later, you must reactivate it.
After deactivation, any pre-frozen funds will be automatically returned to your account by the 3rd of the following month, after deducting prorated usage fees. You can view details under Console > Billing Center > Billing Details.
Help and Support
Was this page helpful?
You can also Contact sales or Submit a Ticket for help.
Help us improve! Rate your documentation experience in 5 mins.
Feedback