Traditional VPNs use static access permissions and grant access once user authentication succeeds. If an employee account is stolen or compromised, it poses a significant information security risk. Dynamic access control based on a terminal access risk model can dynamically detect risks, respond to and remediate risks, and reduce access permissions.
Note:
This feature supports only tunnel-type resources.
The terminal access risk model uses a combination of comprehensive risk factor assessment and dynamic access control policies to effectively control user access to resources. As shown in the preceding figure, the risk factors used for assessment include application processes, network locations, access time, and device compliance levels. The device compliance level assessment factors include security baselines such as password strength, network ports, system services, system processes, and application software. Dynamic access control policies include restricted access, access after challenge authentication, and denied access.
Policy Rule Description
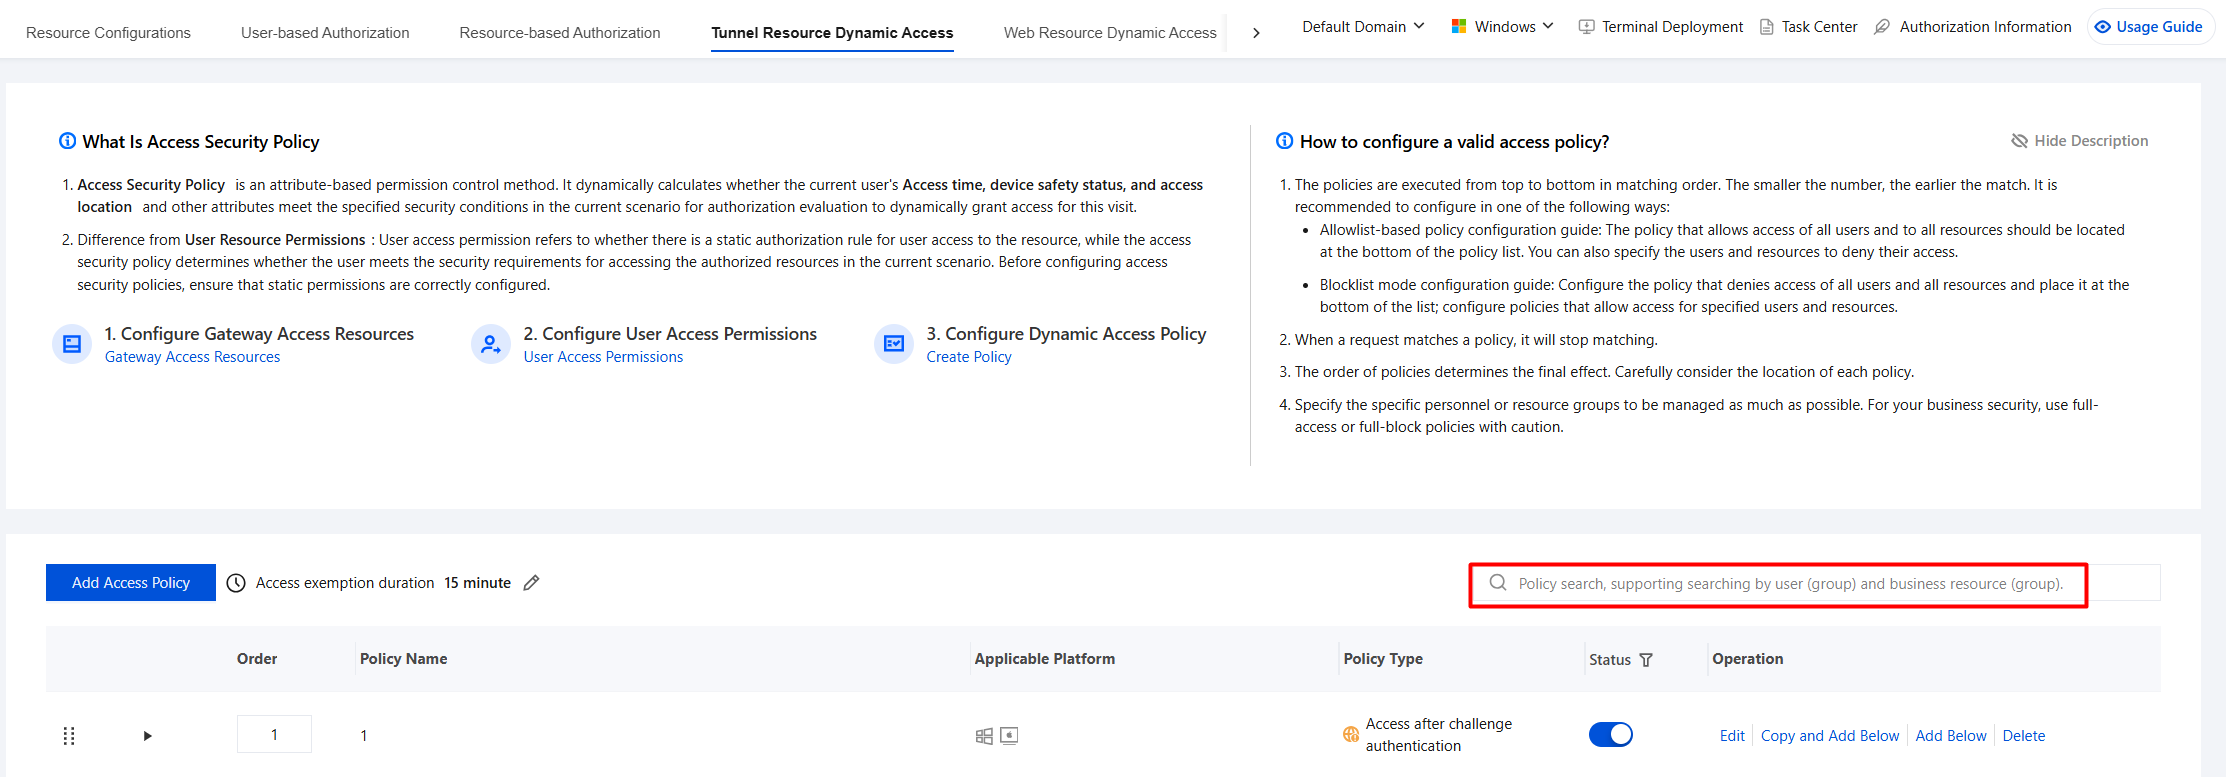
Policies are matched from top to bottom, with smaller numbers matched first.
When a request matches a policy, no further matching is performed.
The order of policies determines the final policy effect, so the specific positions of policies must be carefully considered.
Specify the specific users or resource groups to be controlled whenever possible. For business security, exercise with caution when using policies that allow all or deny all.
2. On the Tunnel Resource Dynamic Access page, you can view all policy permissions under a user or user group, facilitating tracing, troubleshooting, and identifying policy conflicts.
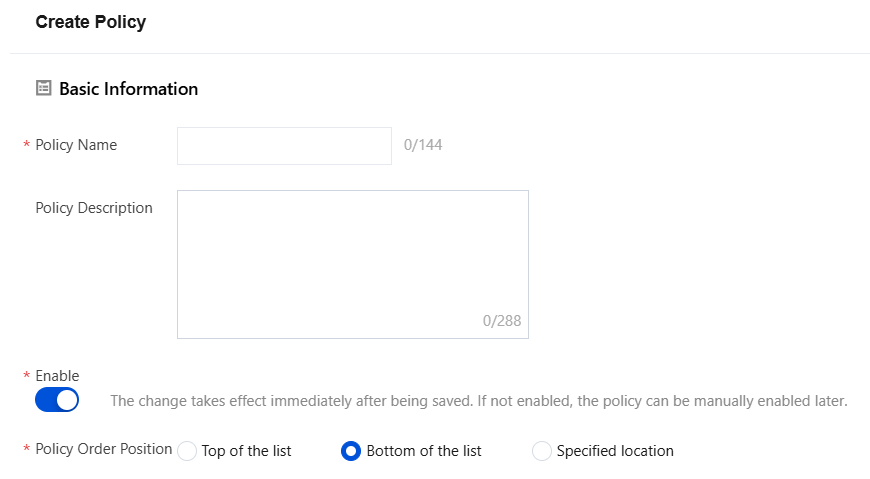
2. On the Create Policy page, configure the relevant parameters and click Save.
2.1 Basic Information: Enter parameters such as the policy name and policy description.
2.2 Applicable scope: The corresponding access actions are executed only when a person in the user card attempts to access the specified resources.
2.2.1 Select the applicable platforms. Access actions are executed only when access is initiated from a terminal on the corresponding platform.
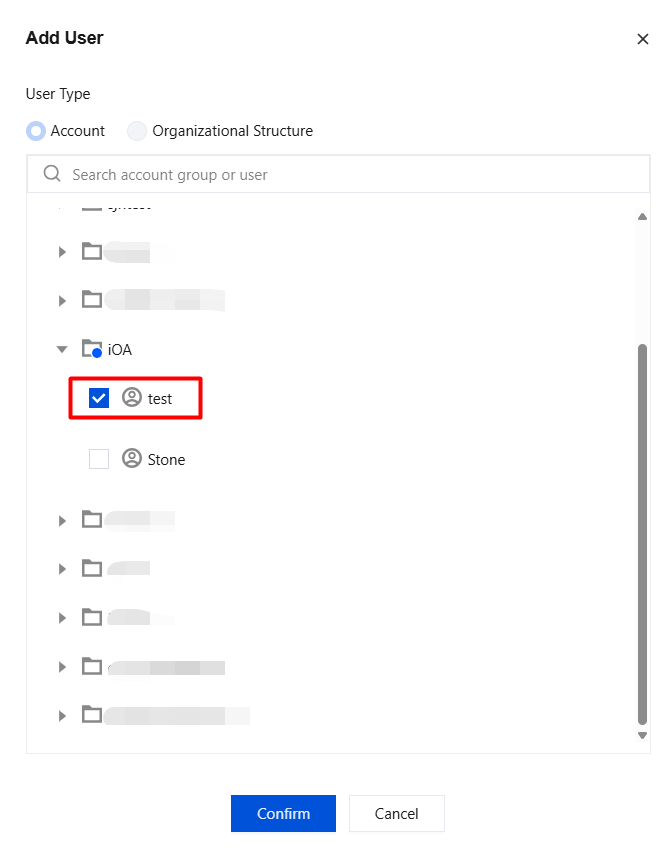
2.2.2 Click Add User, select the account/organizational structure to which the policy applies, and click Confirm.
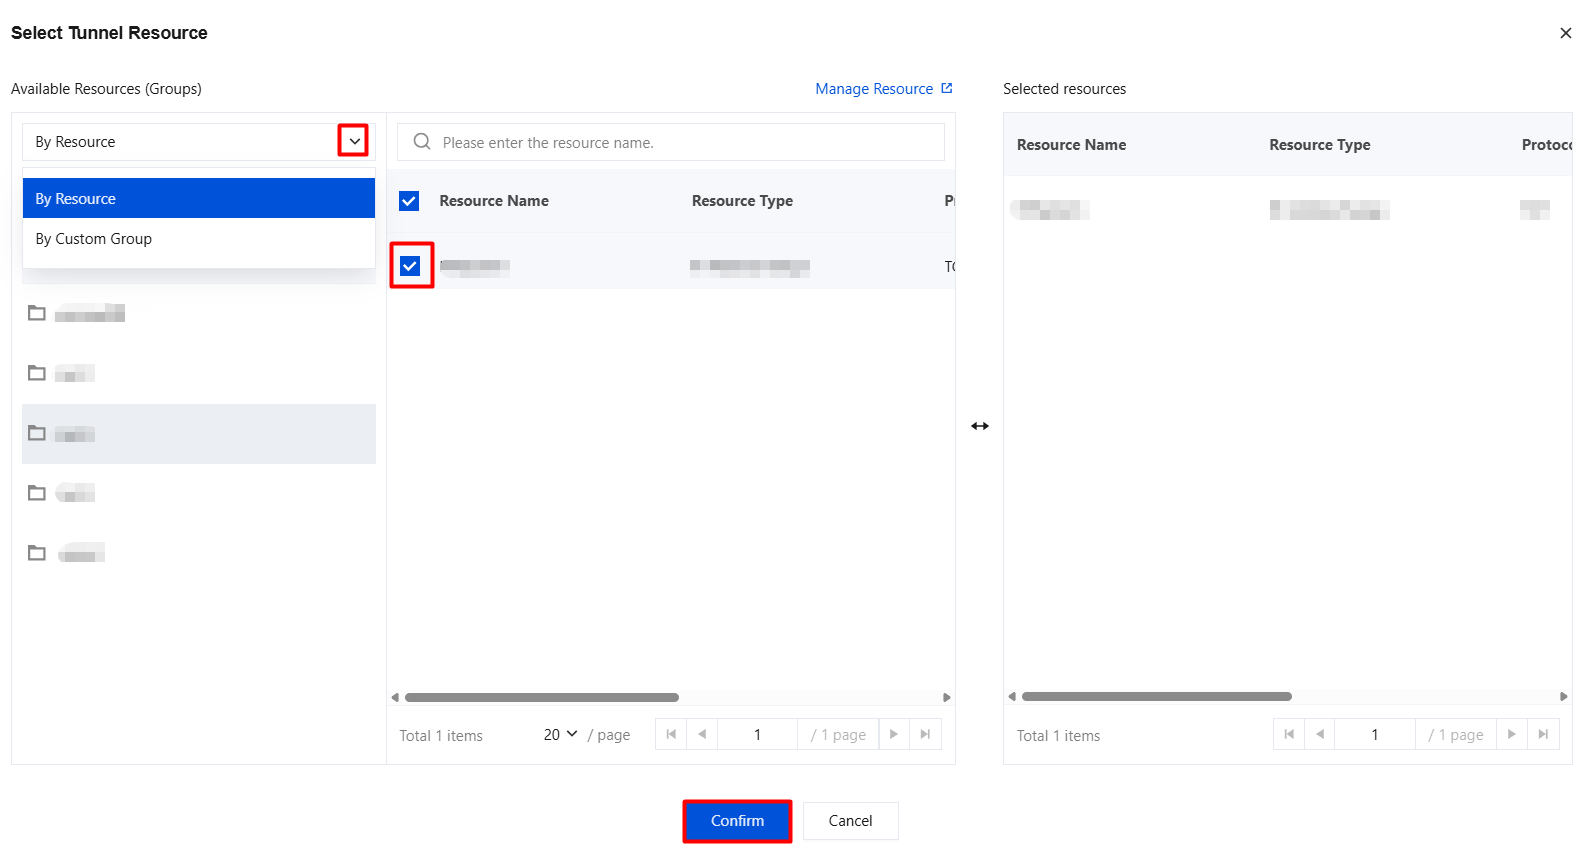
2.2.3 Click Add Tunnel Resource, select a single resource/resource group as needed, and click Confirm.
2.3 Access actions: Specify the action type for access requests that match the applicable scope to meet your management requirements.
Access denied: Users are prohibited from accessing business resources.
Access after challenge authentication: Users can access business resources after completing challenge authentication.
Allow access: No action is taken, and access is directly allowed.
Attention:
You must first select challenge authentication for the user/user group in the authentication policy settings.
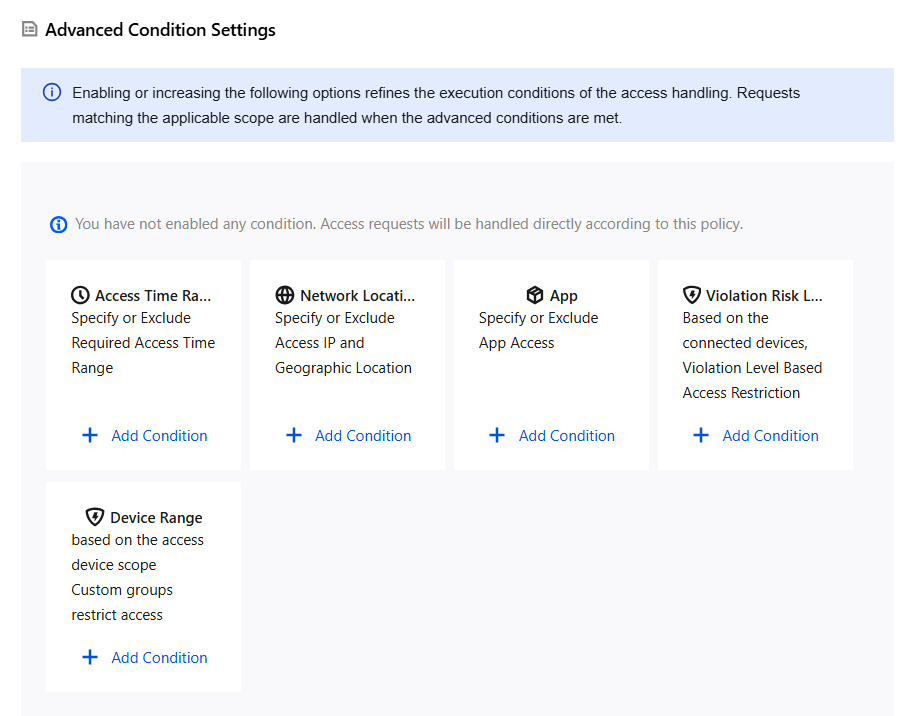
2.4 Advanced condition settings: Click Add Condition. Adding the following options refines the execution conditions for access actions. Requests that match the applicable scope will be subject to the corresponding actions when the advanced conditions are met.
Feature Name
Description
Access Time Range
During the selected access time period, the policy response action is executed within the scope. Access is blocked when it falls outside the coverage of the access time period.
Click Restrict Specified Access Time, and the time settings will automatically pop up.
Based on precise time periods/days of the week/dates (AND relationship).
The time point is precise to the minute.
Specified network location
Access under specific conditions can be implemented by specifying a network. Any region means the network environment where the terminal resides is not verified.
IP group: Associates an IP group. Fuzzy search by IP group name is supported, and select all is supported.
Geolocation: Select the corresponding region. The backend has a built-in national standard IP address library, which changes infrequently and is periodically updated by the backend when changes occur (similar to a virus database).
Applications
Currently, only Windows and macOS are supported.
It is associated with Trusted Apps - Group Details. Select based on the actual situation.
Program access link
Currently, only Windows is supported, and only OpenClaw can be configured.
Example of achievable effect: Employee A can access the OA system, but Employee A cannot access the OA system when using OpenClaw, achieving separation of human and machine access permissions.
Violation risk level
When a terminal initiates service access, the system detects the match between the latest compliance detection result and the dynamic policy.
Customize the detection period. The lower limit can be set to 5 minutes.
Set the violation level for this compliance item when adding compliance detection.
High violation level: At least one high-severity violation item is matched.
Medium violation level: No high-severity violation items are matched, and at least one medium-severity violation item is matched.
Low violation level: No high-severity or medium-severity violation items are matched, and at least one low-severity violation item is matched.
Path for configuring the violation level of detection items: Asset Management > Terminal Control > Compliance Detection (inside any detection item).
2. In the confirmation dialog, click OK to delete the policy.
Attention:
A deleted policy cannot be recovered. Ensure that an appropriate replacement policy is configured.
Adjusting Policy Order
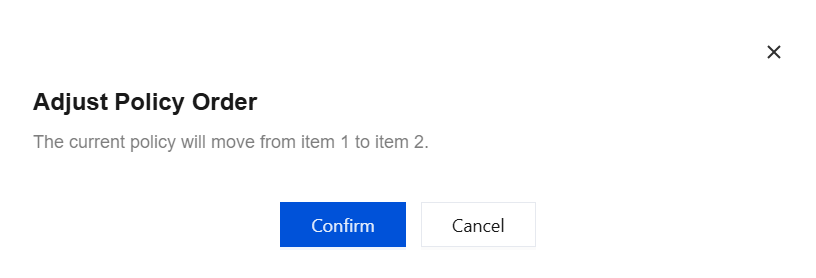
1. On the Tunnel Resource Dynamic Access page, click the order box, enter the corresponding number, and click a blank area.
2. In the confirmation dialog, click Confirm to adjust the order.
Changing the Authentication Method
To change the account authentication method (for example, from password authentication to SMS verification code authentication), see the following steps:
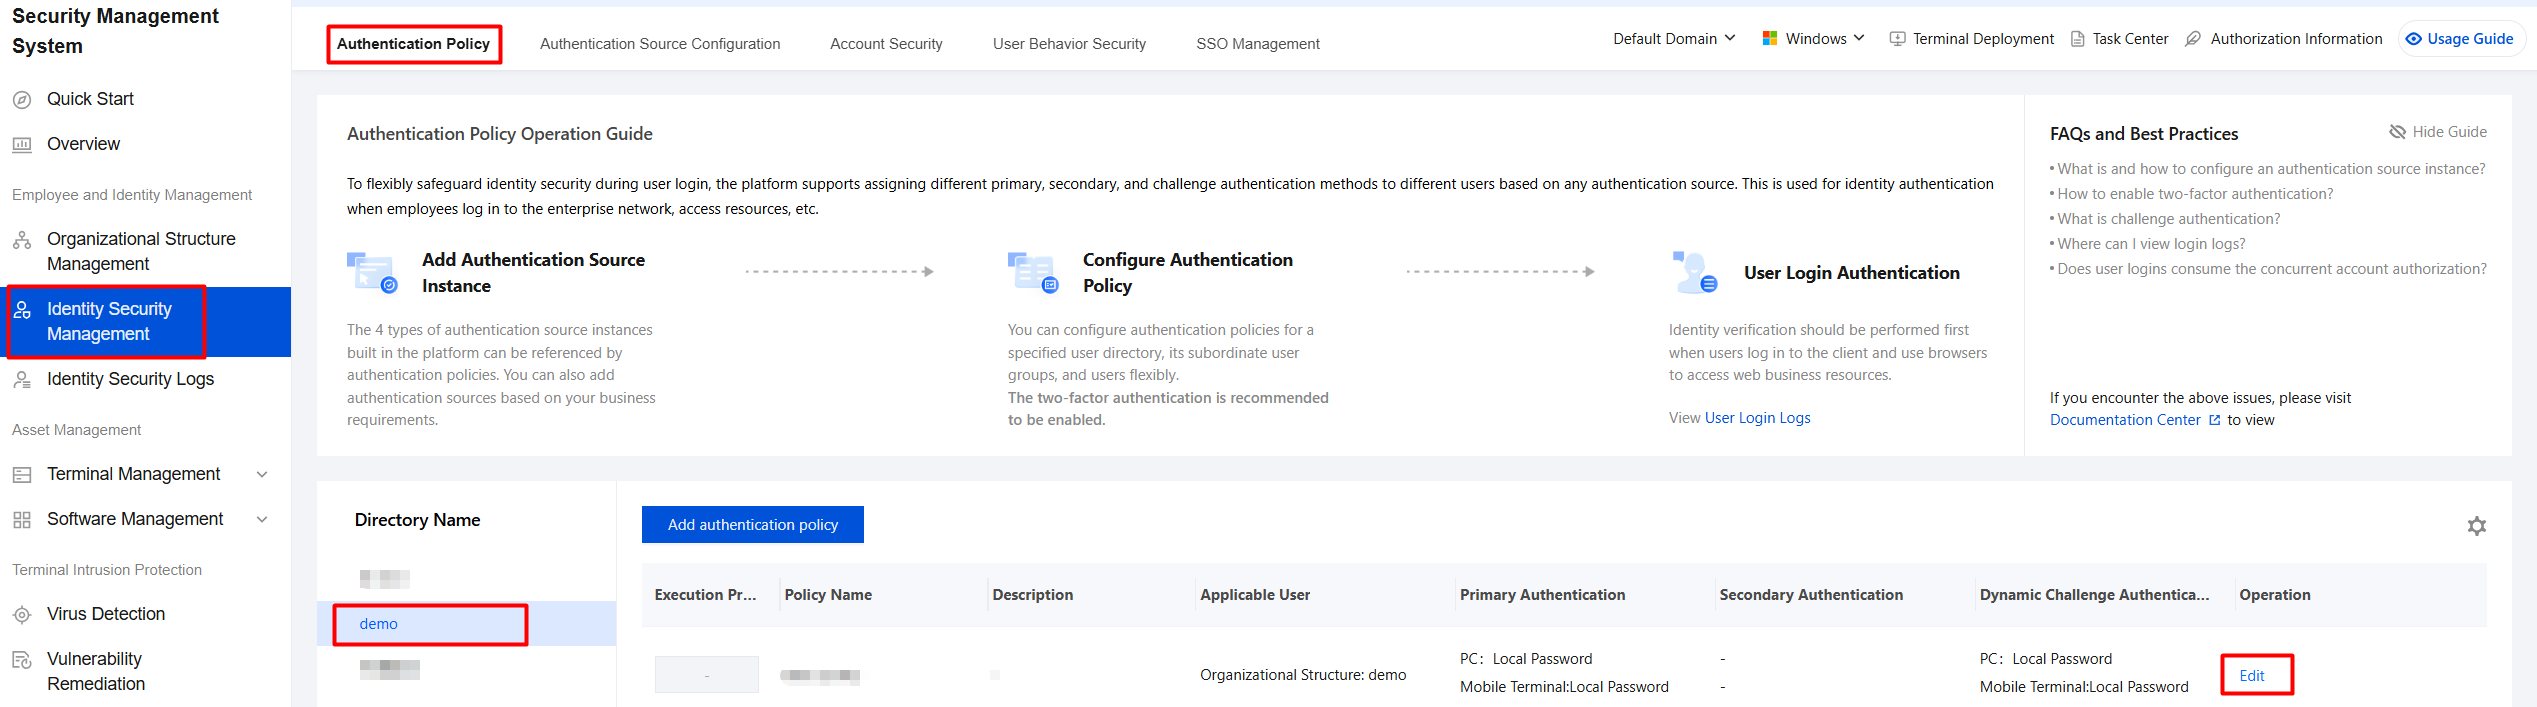
2. On the Authentication Policy page, select the desired directory, select the policy name whose authentication method you want to modify, and click Edit.
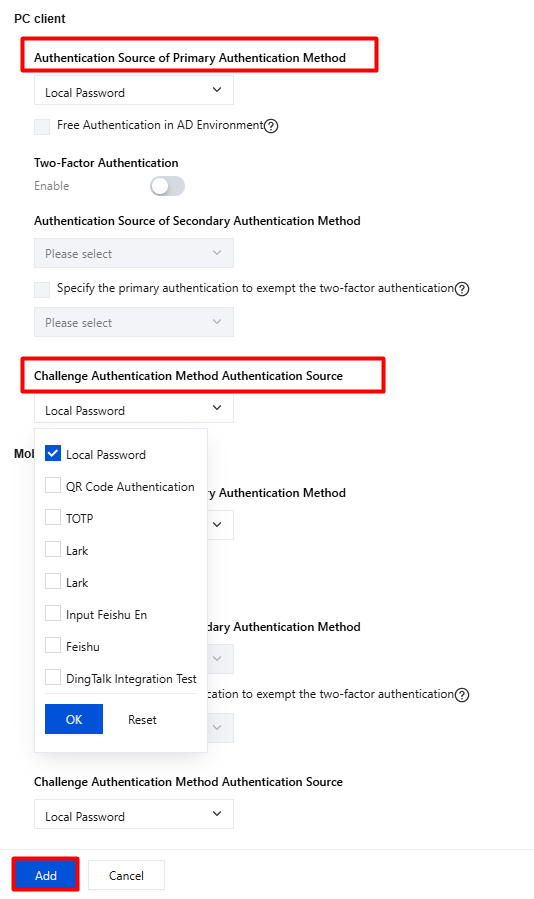
3. On the Edit Authentication Policy page, modify the authentication method (for example, select SMS verification code) and click Add to complete the modification.
Note:
The primary authentication method for a single directory is determined by the basic policy. To adjust the primary authentication method, modify the authentication source of the primary authentication method in the basic policy.