A scaling group contains a collection of CVM instances that follow the same rules and have a shared purpose. This document introduces how to create a scaling group in the Auto Scaling console.
Directions
Creating a scaling group
1. Log in to the Auto Scaling console and click Scaling group in the left sidebar.
2. On the Scaling groups management page, click Create.
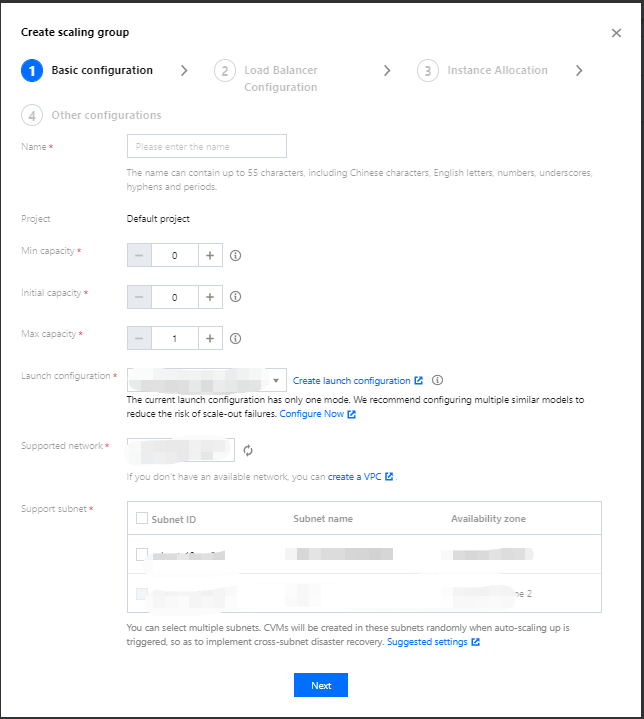
3. On the Create scaling group page that pops up, enter the basic information of the scaling group (fields marked with * are required).
Name: Set the name of the scaling group.
Min capacity: The minimum number of instances allowed in a scaling group.
Initial capacity: The number of instances when the scaling group is created.
Max capacity: The maximum number of instances allowed in a scaling group.
Note:
The current number of CVM instances in the scaling group will be maintained between the minimum and the maximum scaling group capacities.
Launch configuration: Specifies the launch configuration to scale out CVM instances.
Supported networks and availability zones: Select networks and availability zones based on your needs.
4. Click Next.
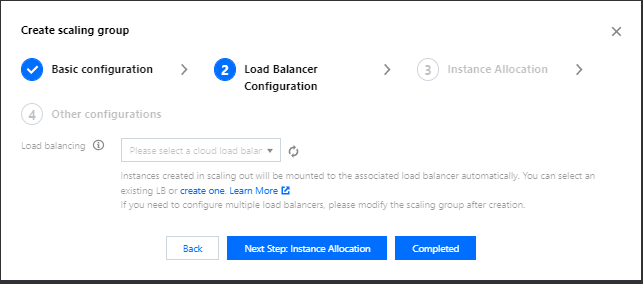
5. (Optional) In the Load balancer configuration, associate an existing load balancing policy or create a CLB, and click Next step: Instance allocation.
6. (Optional) In Instance allocation, configure the spot instance allocation policy. You can also click Next step: Instance allocation to skip this step.
Note:
Only when you specify that the billing mode of the launch configuration is pay-as-you-go, you can create a scaling group with both pay-as-you-go and spot instances.
Enable Spot instance allocation.
Pay-as-you-go base capacity: The minimum number of required pay-as-you-go instances in a scaling group. These instances have higher priority in auto scaling.
Pay-as-you-go above base: Controls the percentage of pay-as-you-go instances for the additional capacity beyond the base capacity. Valid range: 0-100
Spot instance creation policy: The policies for spot instance creation in a multiple-model lunch configuration.
Capacity optimized: First selects the most available spot instance model to make the best use of spot instance resources.
Lowest price: First launches spot instances at the lowest core price among the specified availability zones to minimize costs.
Capacity rebalancing: Enable it to replace a spot instance before it's terminated, thus maintaining the capacity and pay-as-you-go percentage of the scaling group.
Spot fallback to pay-as-you-go: Enable it to create pay-as-you-go instances when spot instances of the configured models are out of stock.
7. In the “Other configurations” step, refer to the following information to set the removal policy and instance creation policy.
Removal policy: When the scaling group wants to reduce the number of instances and has multiple choices, it determines which instances to remove according to the removal policy. The options Remove the oldest instance and Remove the latest instance are supported.
Instance creation policy:
Preferred availability zones (subnets) first: Based on the sequence of availability zones (subnets) configured, the system first selects configuration items higher in the sequence. If a failure occurs, the system automatically retries in sequence. This mode is suitable for scenarios with one primary availability zone and other secondary availability zones.
Multiple availability zones (subnets) distribution: During scale-out, the system will select availability zones (subnets) with relatively few instances in which to create new instances. This mode is suitable for architectures where instances need to be evenly distributed.
8. Click Completed. You can view the created scaling groups on the Scaling groups page.
Adding instances (optional)
1. Go to the Scaling group page and select the ID of the target scaling group to enter its details page.
2. Select the Associated to tab, click Add instances.
3. In the Add instances window that pops up, select the instance to be bound and click OK.
Note:
If you cannot add or remove a CVM instance to or from the list, check the maximum and minimum capacity values specified for the scaling group.