When a terminal accesses the private network, it is prohibited from accessing the public network. When it accesses the public network, it is prohibited from accessing the private network.
Terminals belong to the private network by default.
Note:
When configuring a network, you can set it to blocklist mode or allowlist mode. A network can be in only one mode.
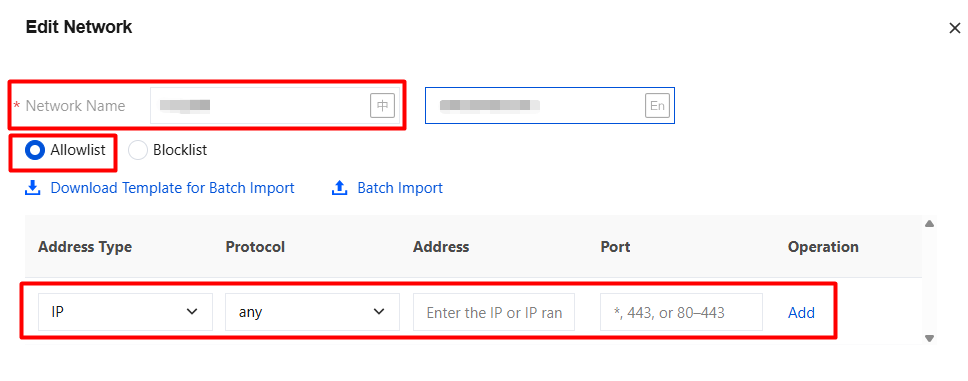
Allowlist mode: In this network, terminals can access only addresses within the allowlist. Addresses outside the allowlist are denied access.
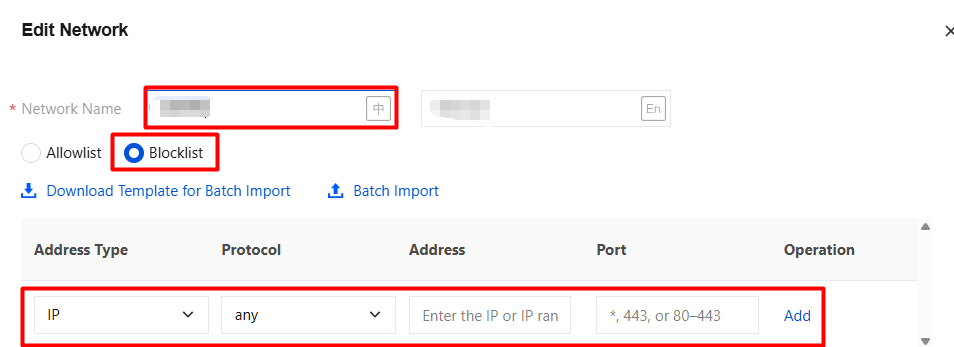
Blocklist mode: In this network, terminals are prohibited from accessing addresses within the blocklist. They can access IP addresses outside the blocklist.
Configuration approach: First, define IP address range A for one network named the private network, and the other network as the public network. Configure the private network in allowlist mode with IP address range A, and configure the public network in blocklist mode with the same network range A. The following describes the specific configuration process. (For other scenarios, you can configure flexibly based on the blocklist and allowlist principles described above.)
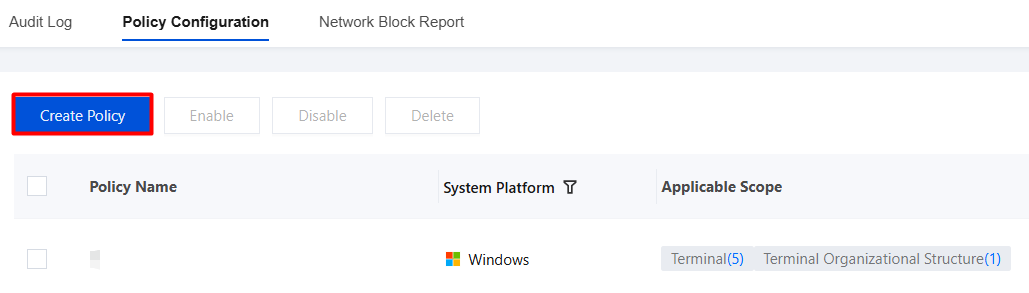
2. On the client policy page, select Module Customization and click Create Policy.
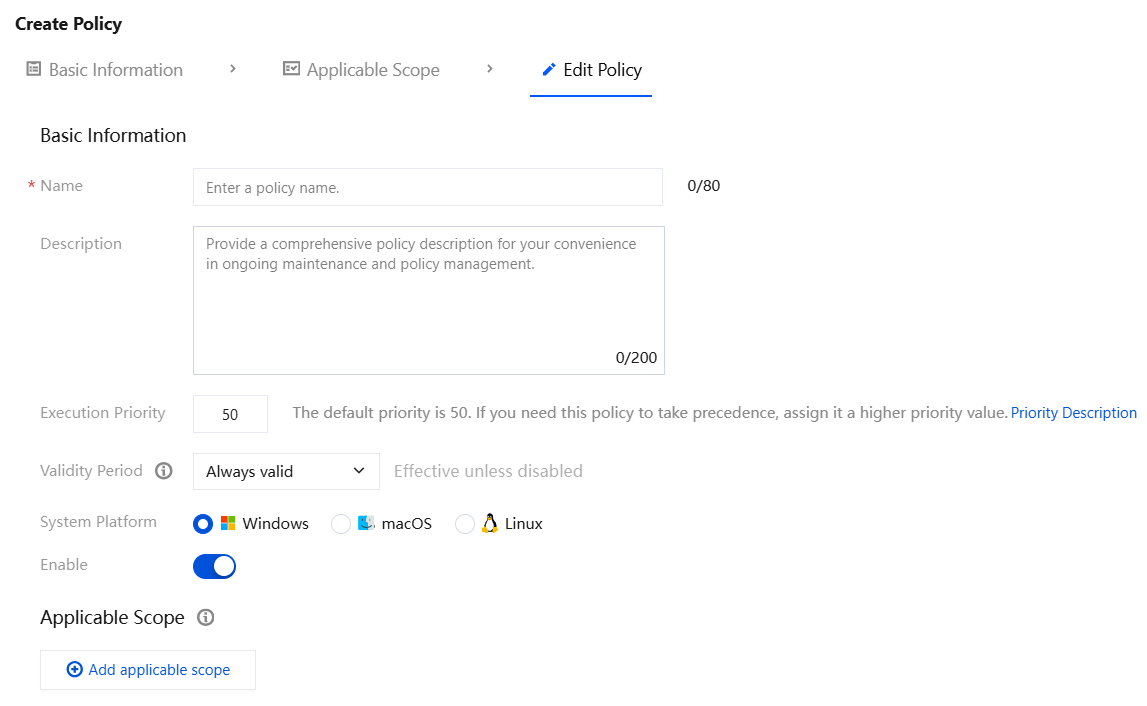
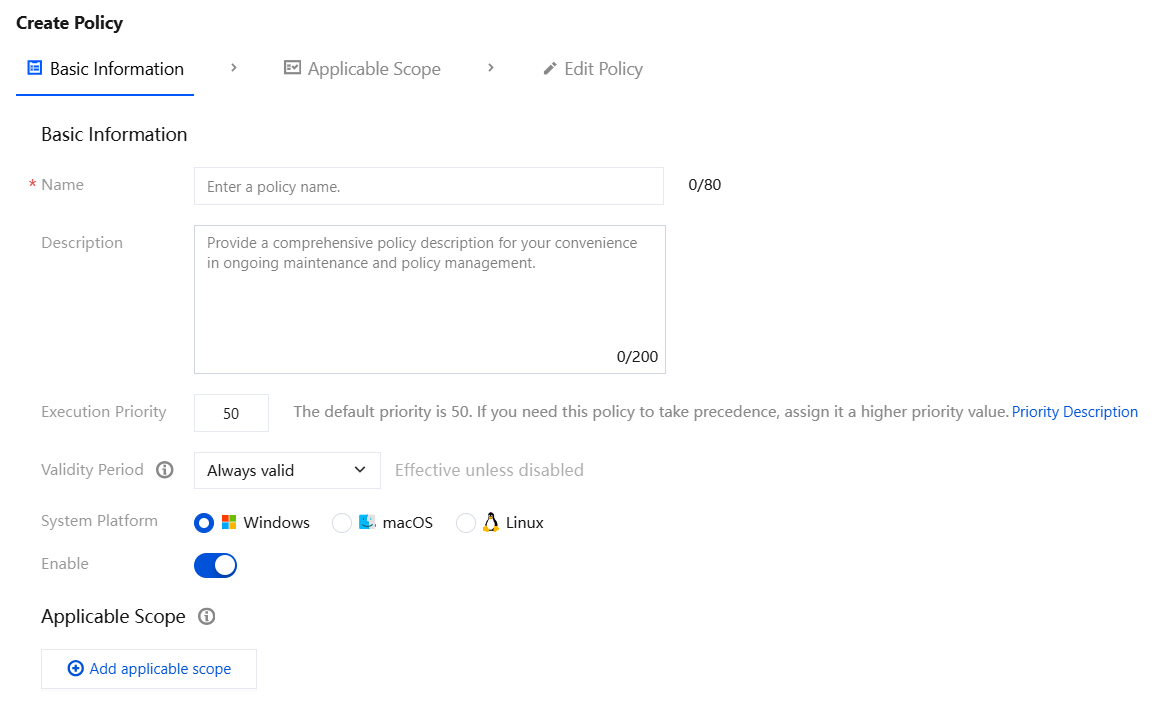
3. On the Create Module Customization Policy page, enter the basic information, applicable scope, and edit policies.
3.1 Basic information: Enter the policy name and policy description, and choose whether to enable the policy.
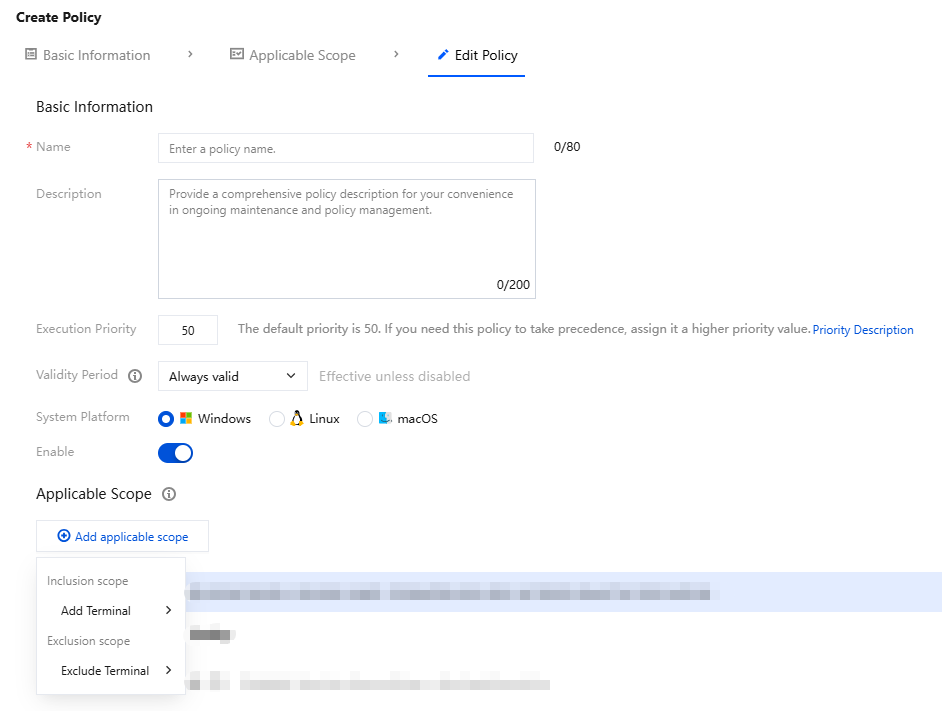
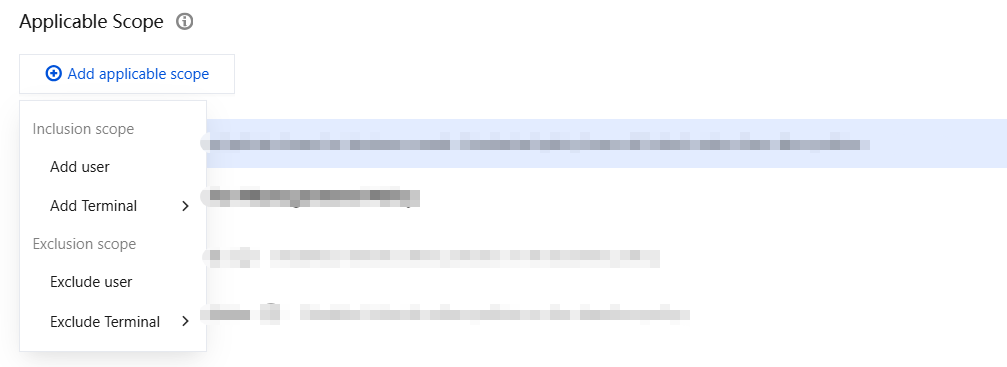
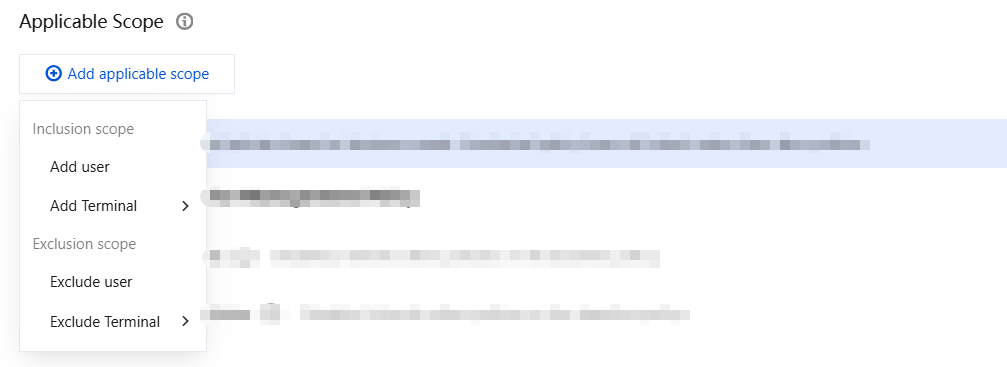
3.2 Applicable scope: The object scope within which this policy takes effect. Click Add Applicable Scope. You can add or exclude terminals to configure a refined control scope.
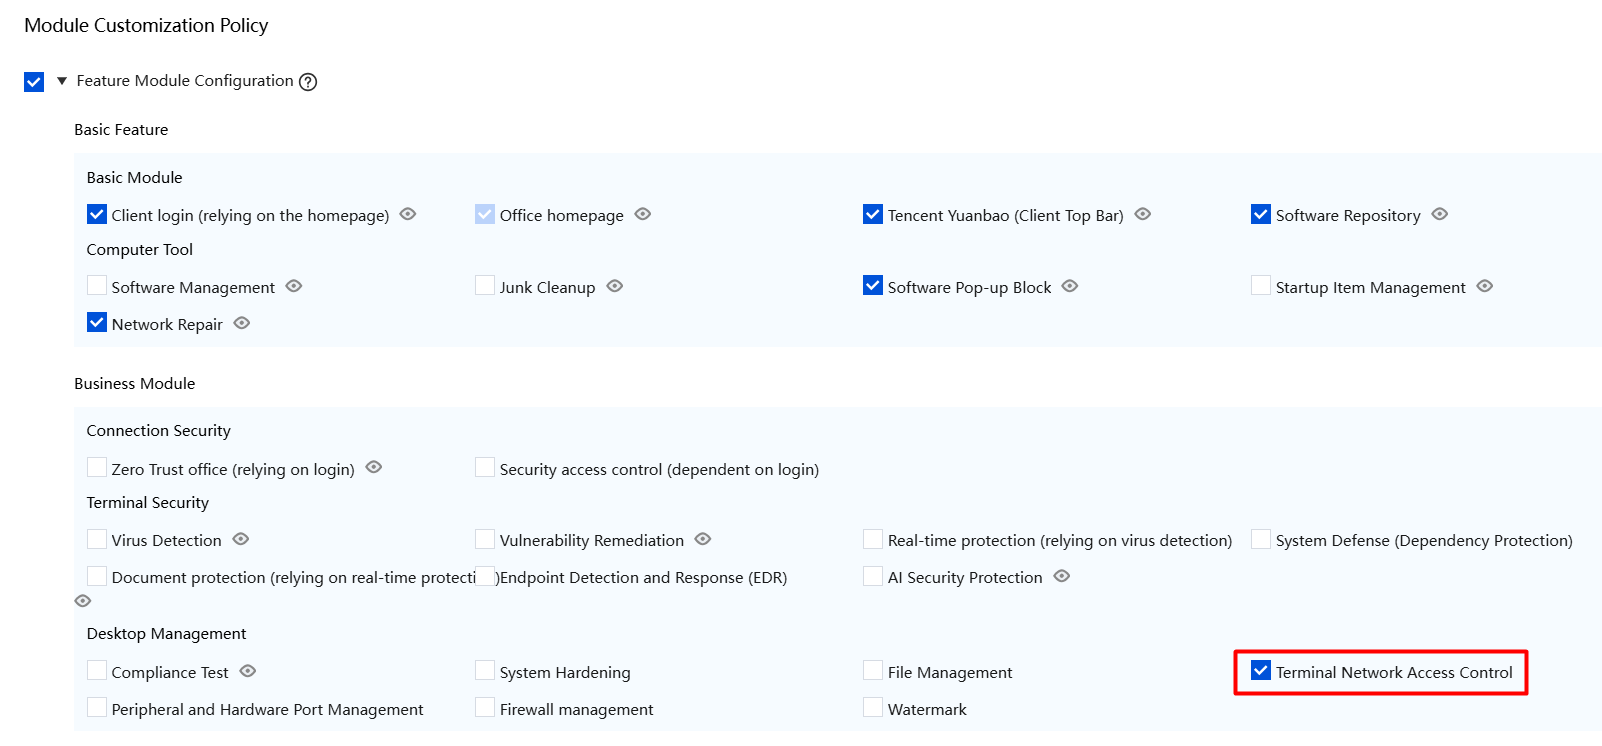
3.3 Edit policy: Configure the feature module parameters, select Terminal Network Access Control, and click Save.
3. On the Create Policy page, configure the basic information: Enter the policy name and policy description, and choose whether to enable the policy.
4. Applicable scope: The object scope within which this policy takes effect. Click Add Applicable Scope. You can add or exclude users, organizational structures, custom user groups, and terminals to configure a refined control scope.
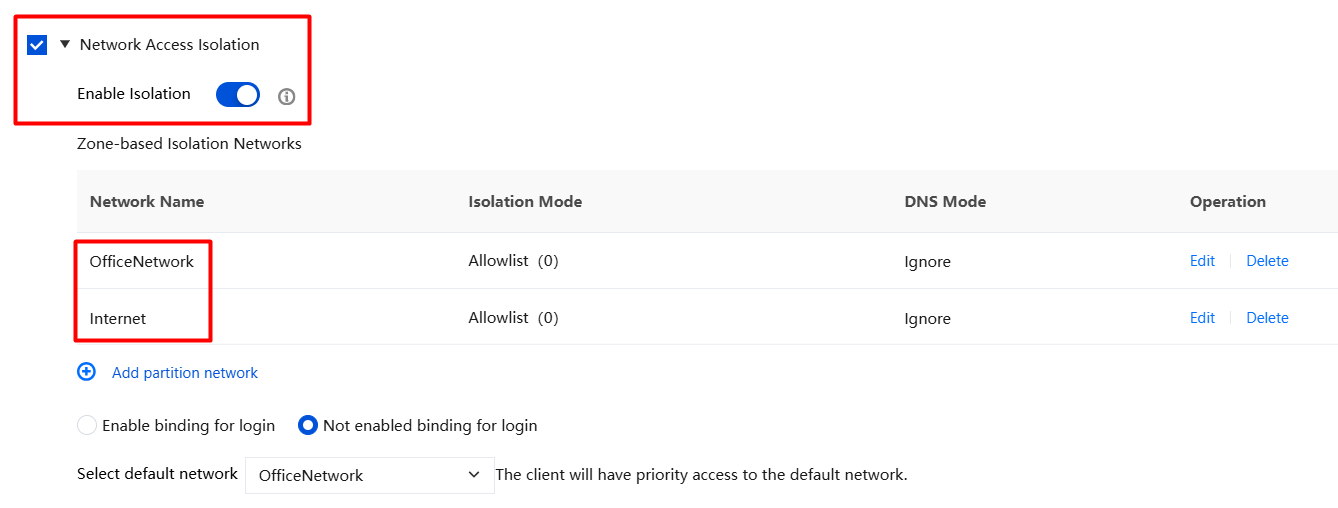
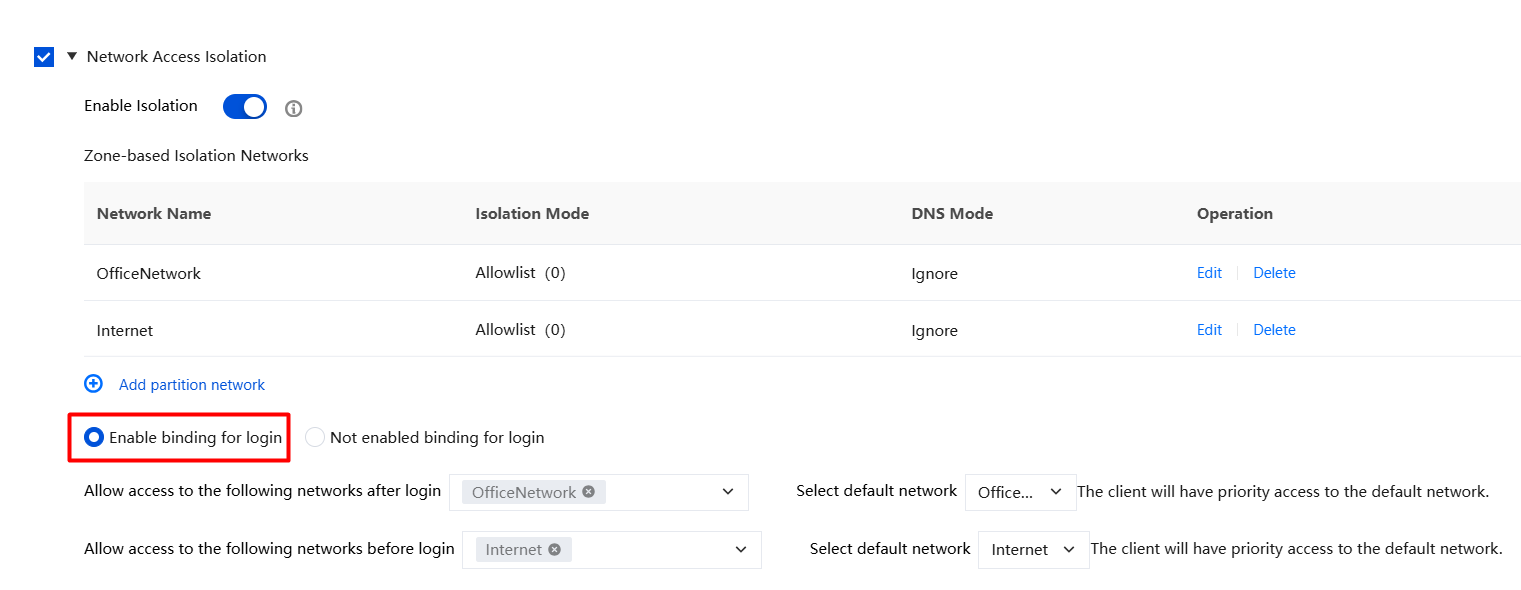
5. Select Network Access Isolation, enable the Enable Isolation switch, and click Edit to set Office Network or Internet.
Office Network: Select Allowlist mode, set the address to Private Network IP Range, and configure other parameters as needed.
Parameter Name
Description
Exempt specified targets
Typically configured as the IP address that needs to be accessed under both networks. Both networks (office network & internet) need to be configured.
Attention:
Add all internal and public IP addresses related to the iOA server (including the LB at the server frontend) to the exemption IP list for both private and public networks to prevent terminal disconnection caused by policy configuration errors.
Configure DNS management
Automatic retrieval: The client automatically obtains the DNS address from the network.
Use delivered address: After the network is switched, set the DNS to the delivered address.
Attention:
If a delivered DNS address is configured, ensure that terminals can access the delivered DNS address. It is recommended to use the same DNS configuration method for both private and public networks.
If the private network is configured to deliver DNS while the public network is configured to ignore it, the device will retain the DNS address delivered by the private network when switching from the private network to the public network. If this DNS address cannot be accessed in the public network environment, network exceptions will occur.
Internet: Select Blocklist mode, set the address to Private Network IP Range, and configure other parameters as needed.
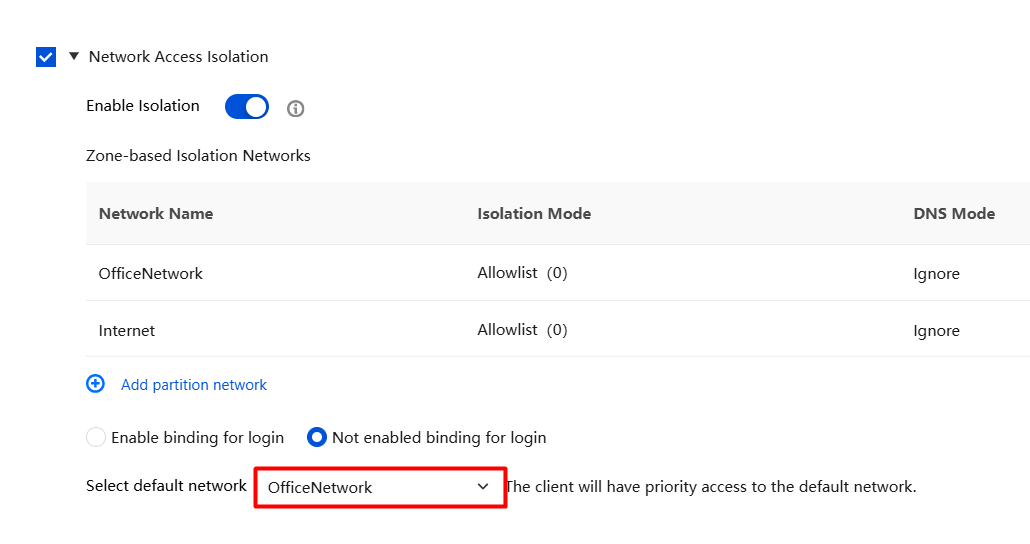
7. The default network is set to Office Network. Click Save.
Step 3: Effect Verification
Note:
For a better user experience, we strongly recommend that terminals enable the client pop-up feature to notify users of the current network status and prevent service inaccessibility caused by network switching. If a user accidentally clicks "Do Not Remind", no reminder pop-up will appear. The user can restore pop-up reminders by uninstalling and then reinstalling the client. Overwrite installation alone cannot resolve this issue.
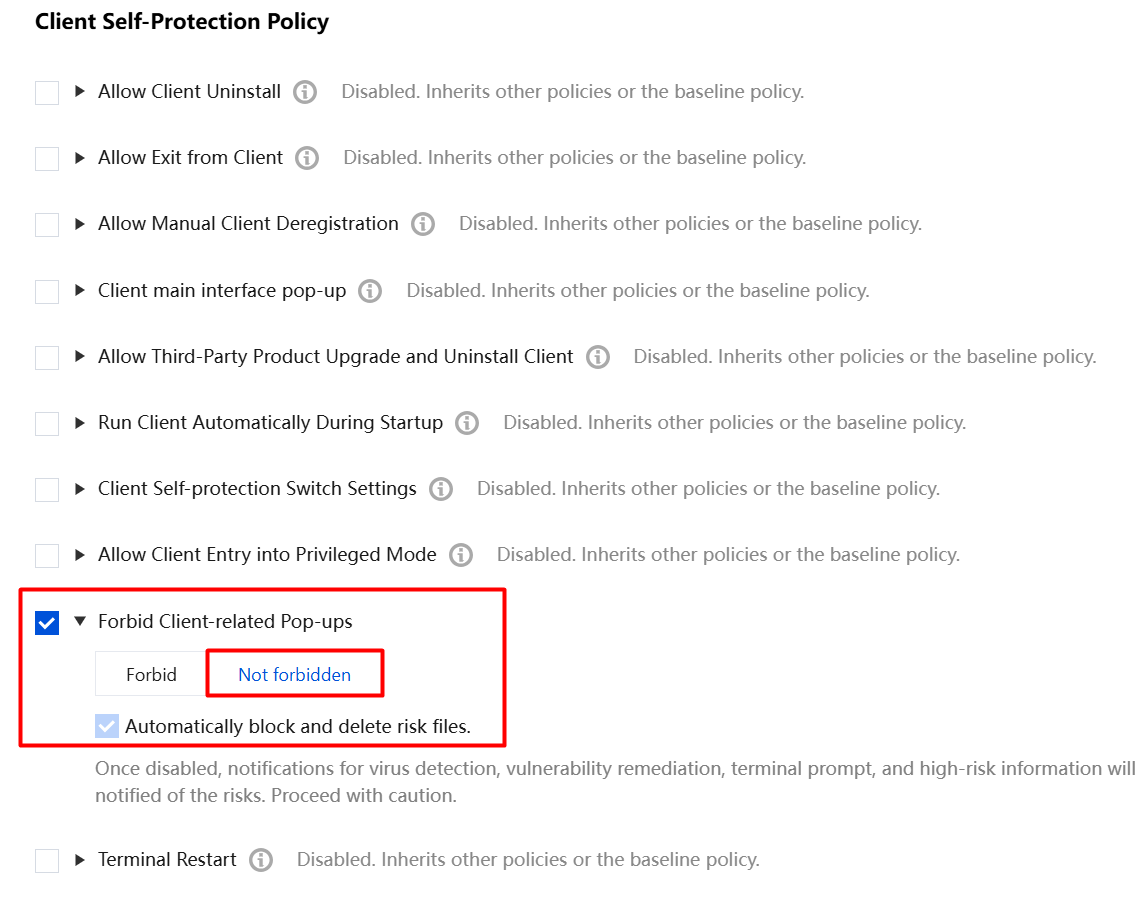
Windows Pop-Ups Are Controlled by the Console Pop-Up Switch
3. On the Create Client Self-Protection Policy page, fill in the basic information, applicable scope, and edit the policy.
3.1 Basic information: Enter the policy name and policy description, and choose whether to enable the policy.
3.2 Applicable scope: The object scope within which this policy takes effect. Click Add Applicable Scope. You can add or exclude terminals to configure a refined control scope.
3.3 Select Block client-related pop-ups, and choose Not forbidden.
3.4 After configuration, click Save.
4. In Step 2, you can configure login binding scenarios:
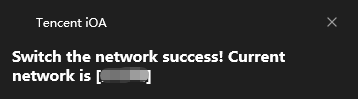
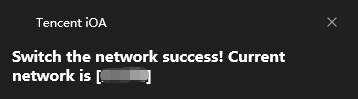
Enable the login binding scenario. After logging in to NGN, the user is prompted to switch to the private network. The terminal can access addresses within the private network range normally, but cannot access addresses outside the private network range.
After logging out of NGN, the user is prompted to switch to the public network. The terminal cannot access addresses within the private network range, but can access addresses outside the private network range.
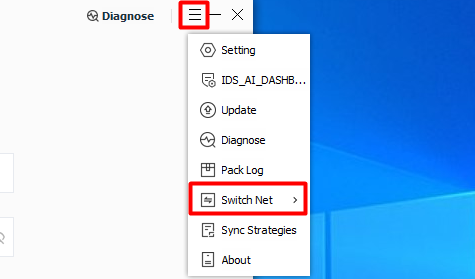
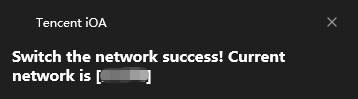
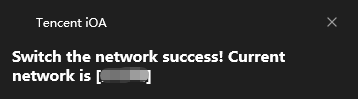
Scenario with login binding disabled: The behavior on Windows is shown in the following figure.
For macOS, You Can Enable This in System Notifications
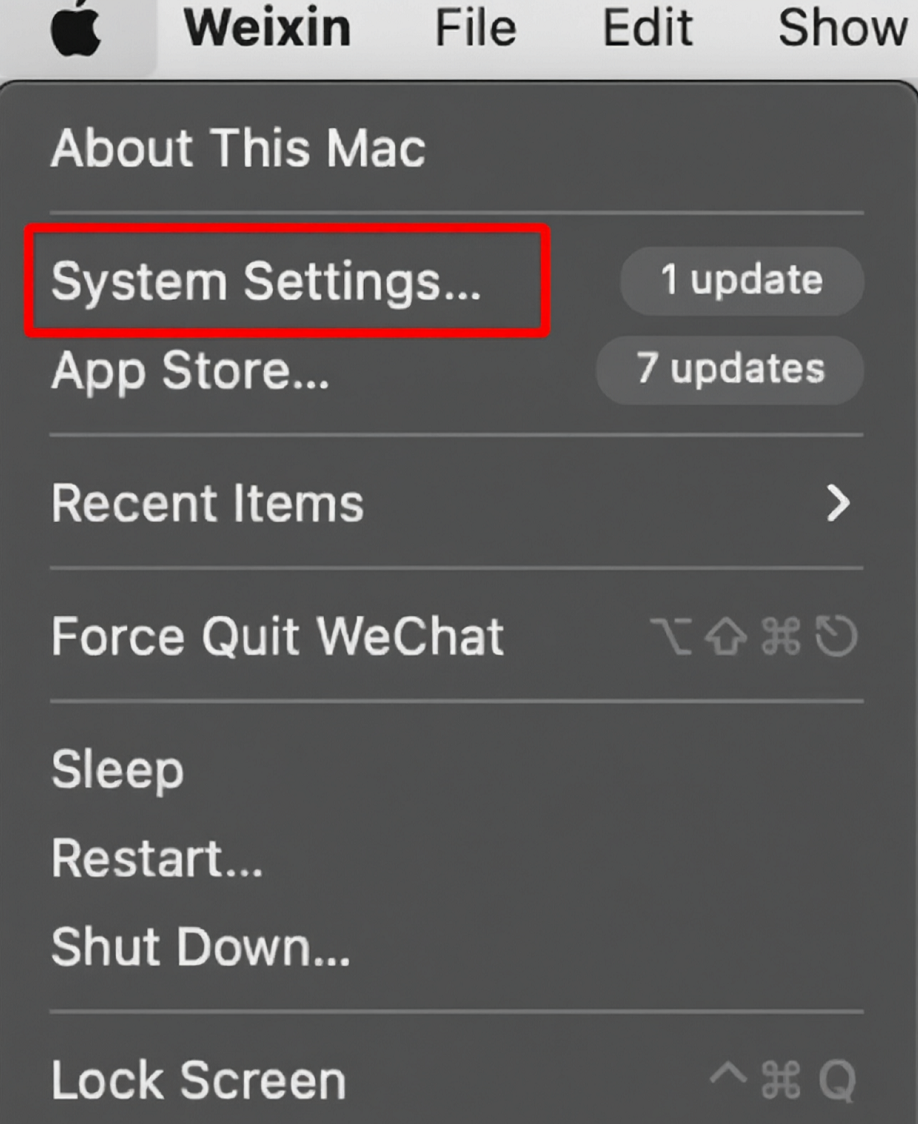
1. On macOS, select System Settings.
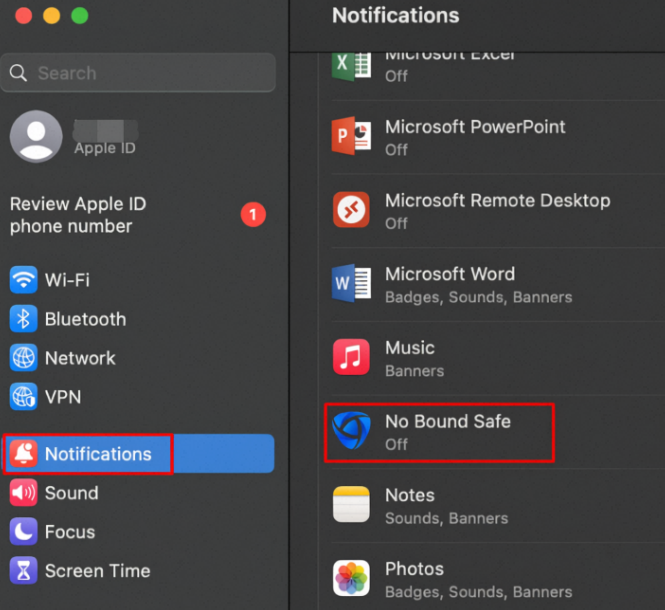
2. On the Notifications page, select Tencent iOA.
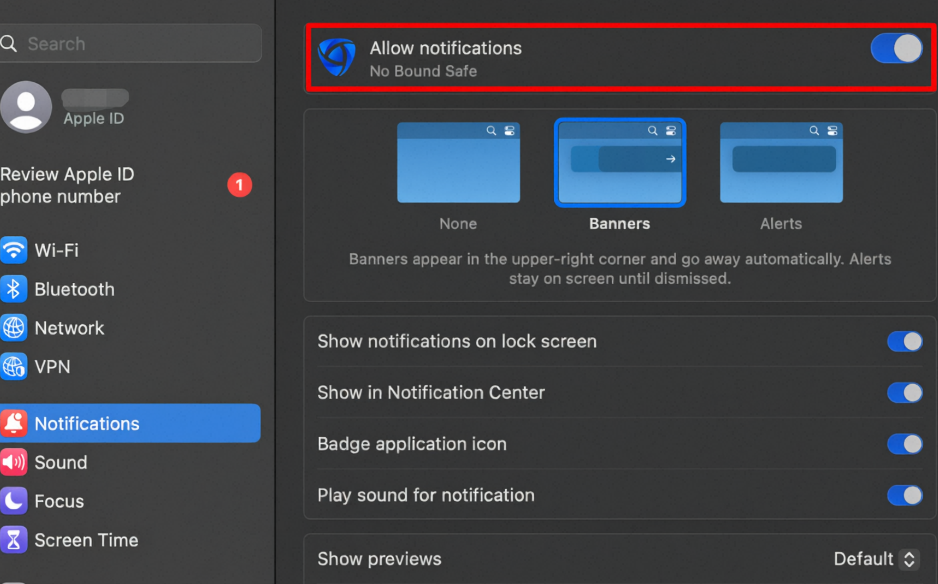
3. Enable the Allow Notifications toggle.
4. In Step 2, you can configure login binding scenarios:
Enable the login binding scenario: After logging in to NGN, the user is prompted to switch to the private network. The terminal can access addresses within the private network range normally, but cannot access addresses outside the private network range.
After logging out of NGN, the user is prompted to switch to the public network. The terminal cannot access addresses within the private network range, but can access addresses outside the private network range.
Scenario with login binding disabled: On macOS, switching the network displays the private/public network.