Configure the client's self-protection policy to prevent the client software from being maliciously uninstalled or disabled in scenarios such as uninstallation or exit, ensuring the continuous operation of security protection features.
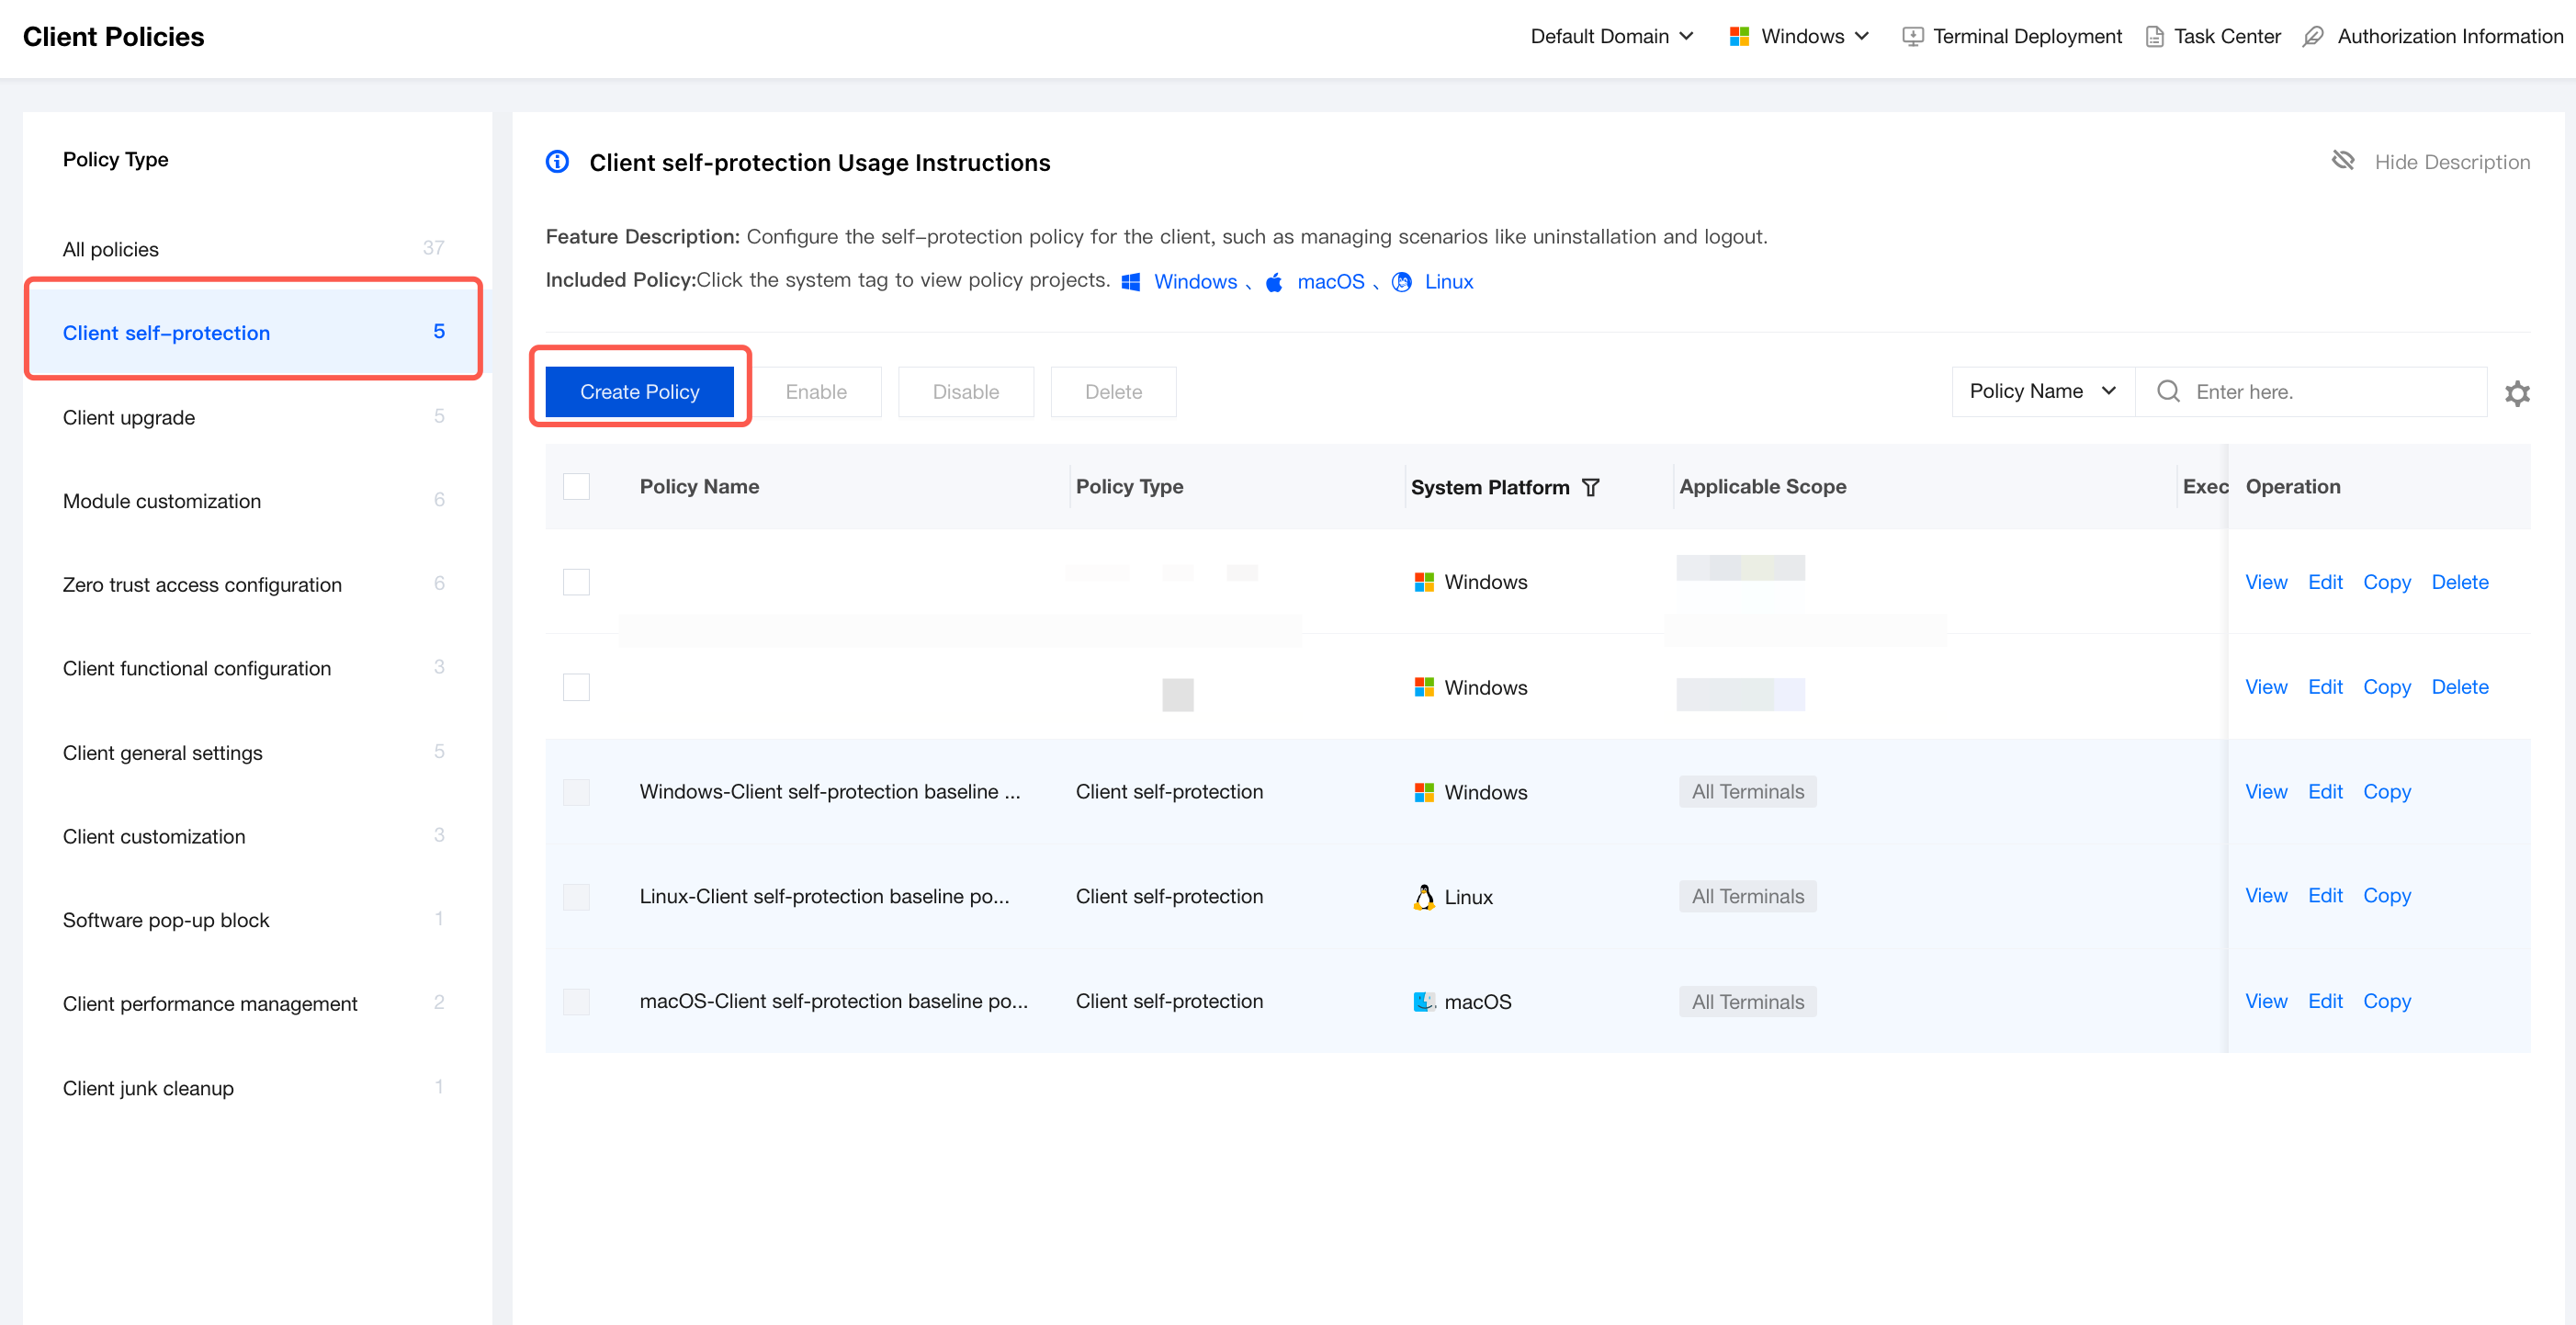
2. On the Client Management page, select Client Self-Protection and click Create Policy.
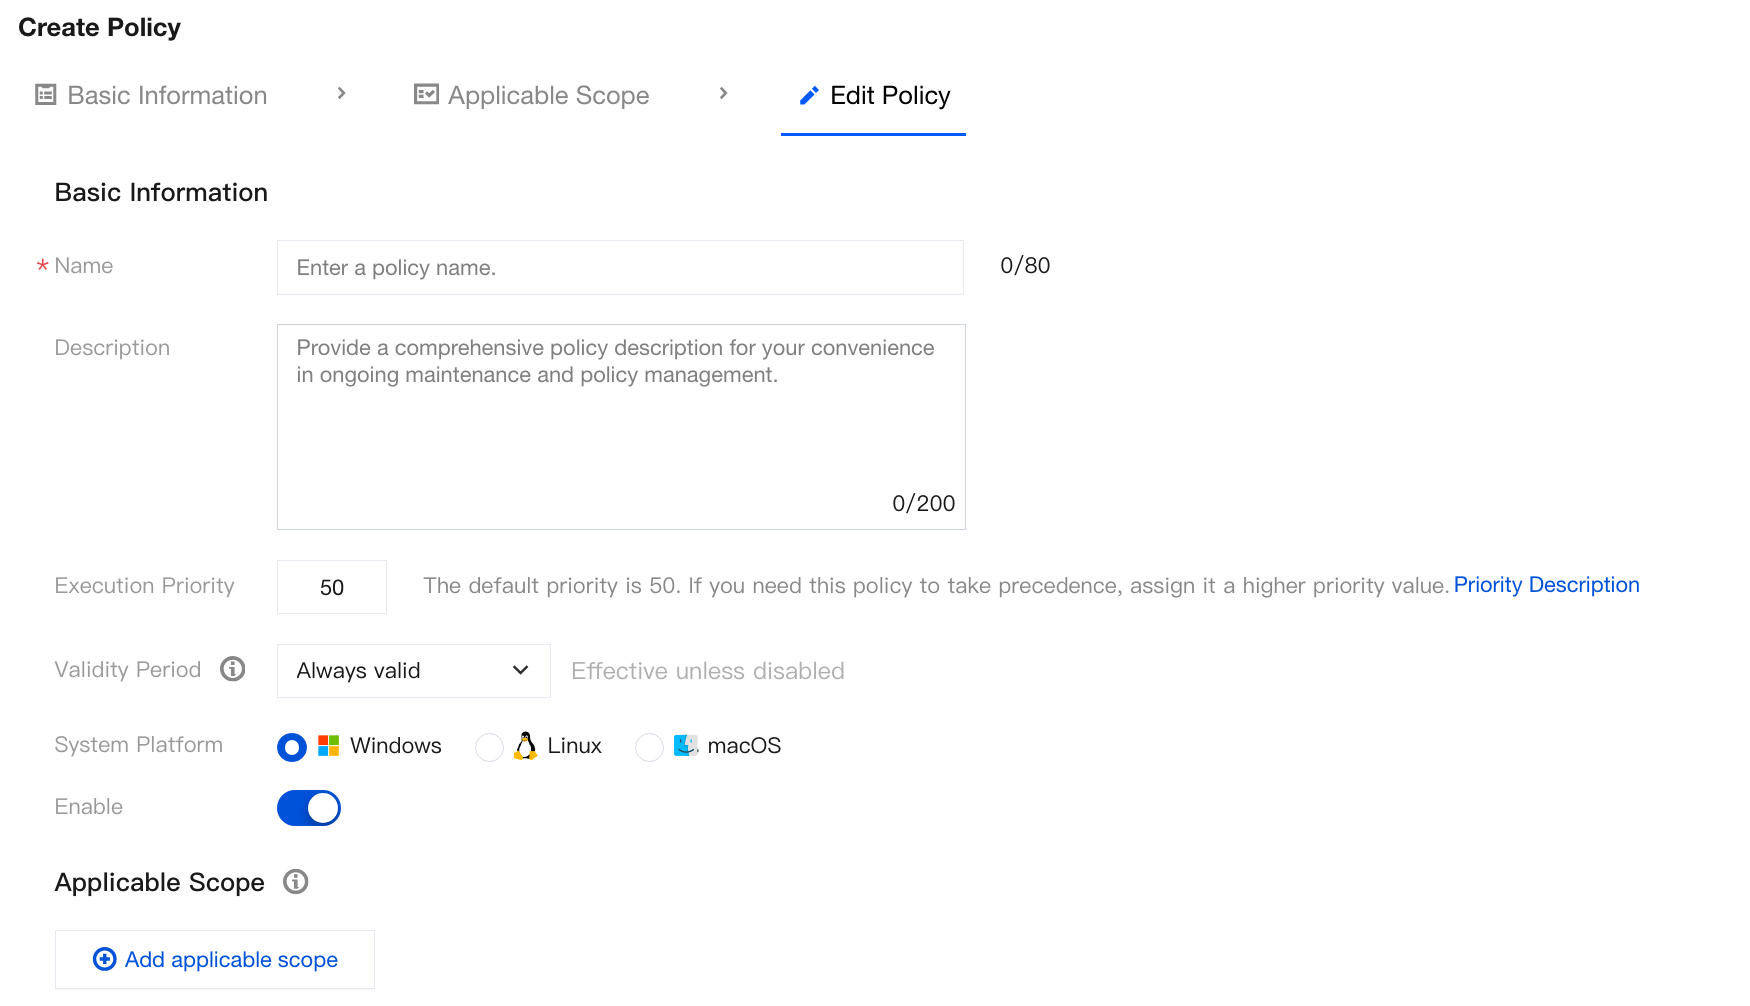
3. On the Create Client Self-Protection Policy page, configure the relevant parameters.
3.1 Enter the policy name and other parameters such as the policy description.
3.2 Click Add Applicable Scope, select the terminal names to be controlled/excluded, and click OK.
4. Select the following client self-protection policy based on your actual needs.
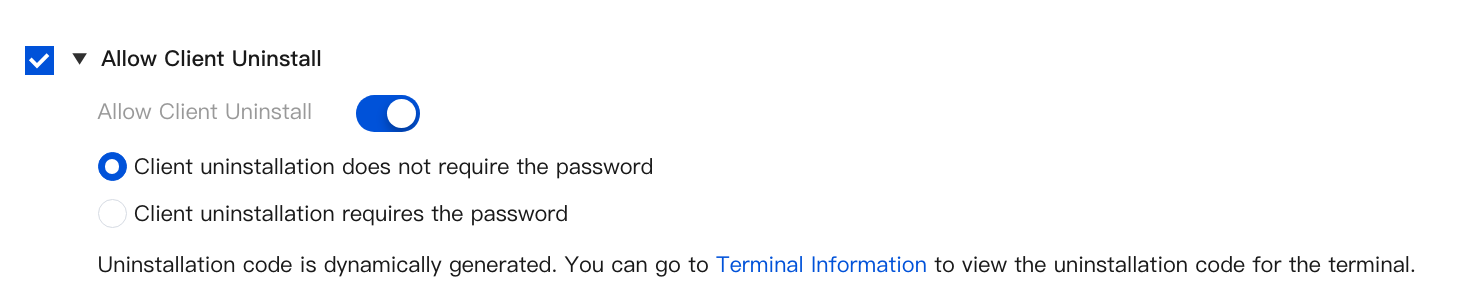
Allow Client Uninstallation
Require a password to uninstall the client.
1. Select Allow client uninstallation and click
to enable it.
2. Select Client uninstallation does not require the password or Client uninstallation requires the password, and click Save after configuration.
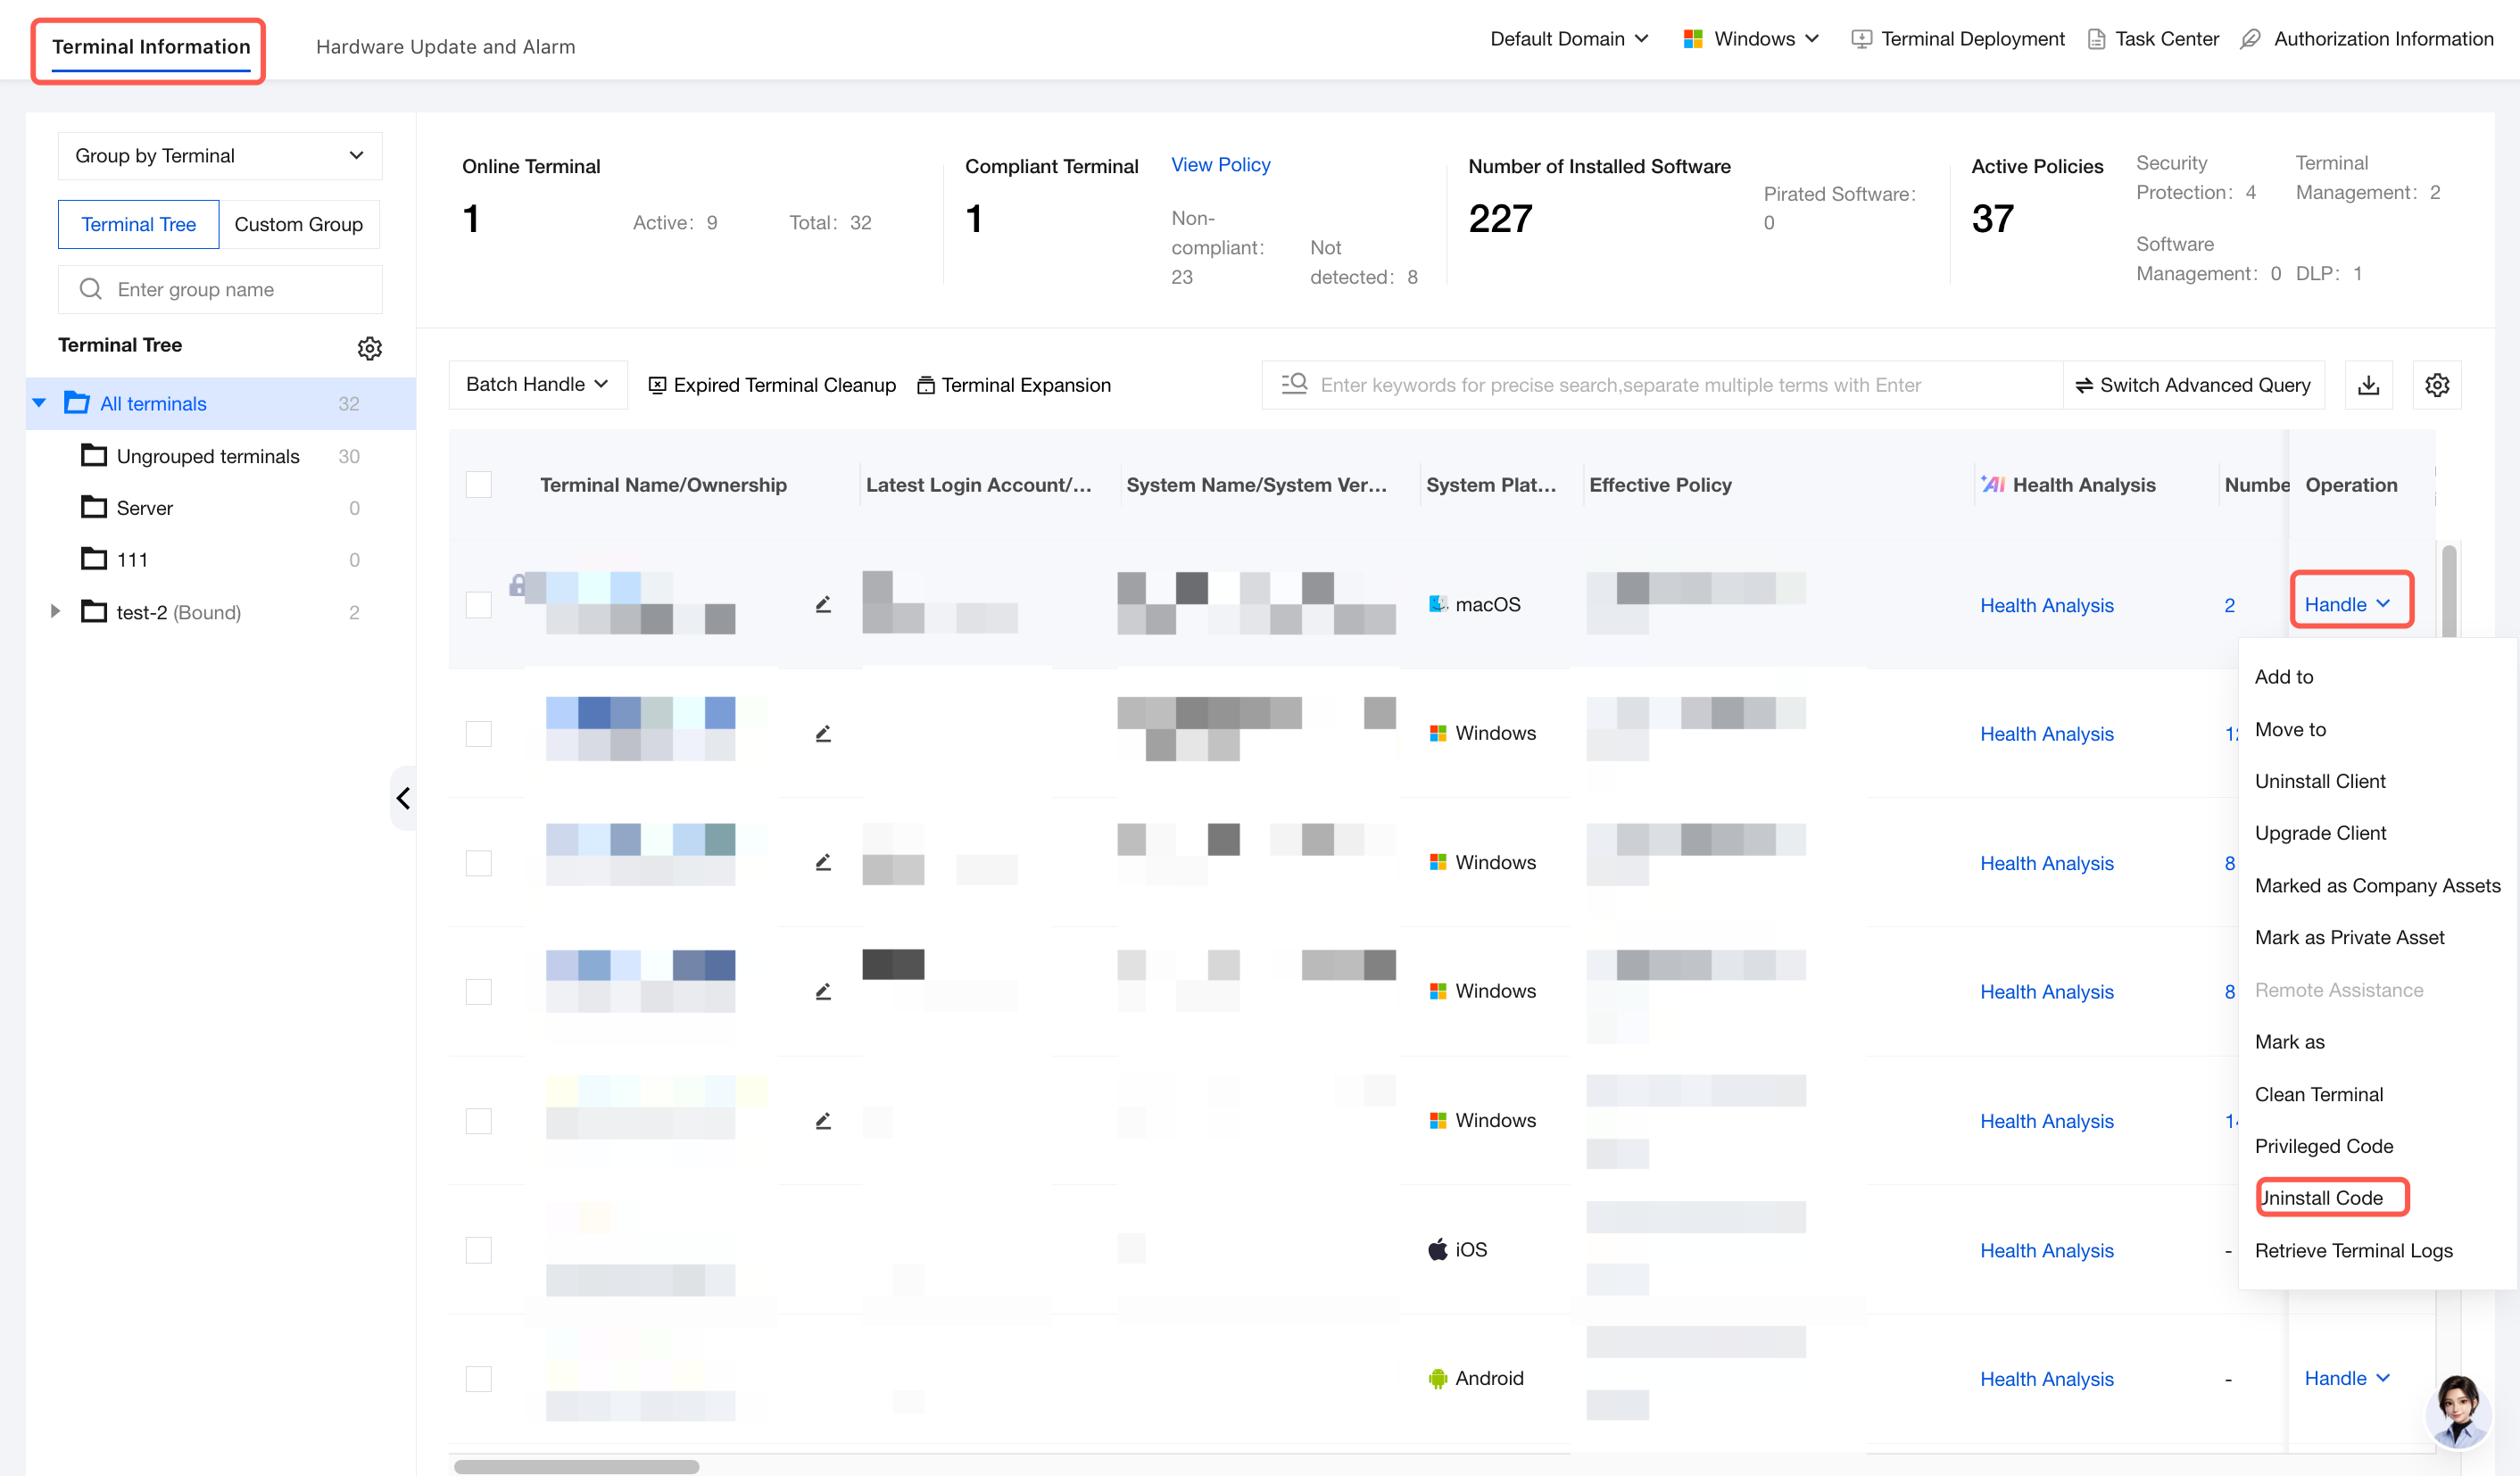
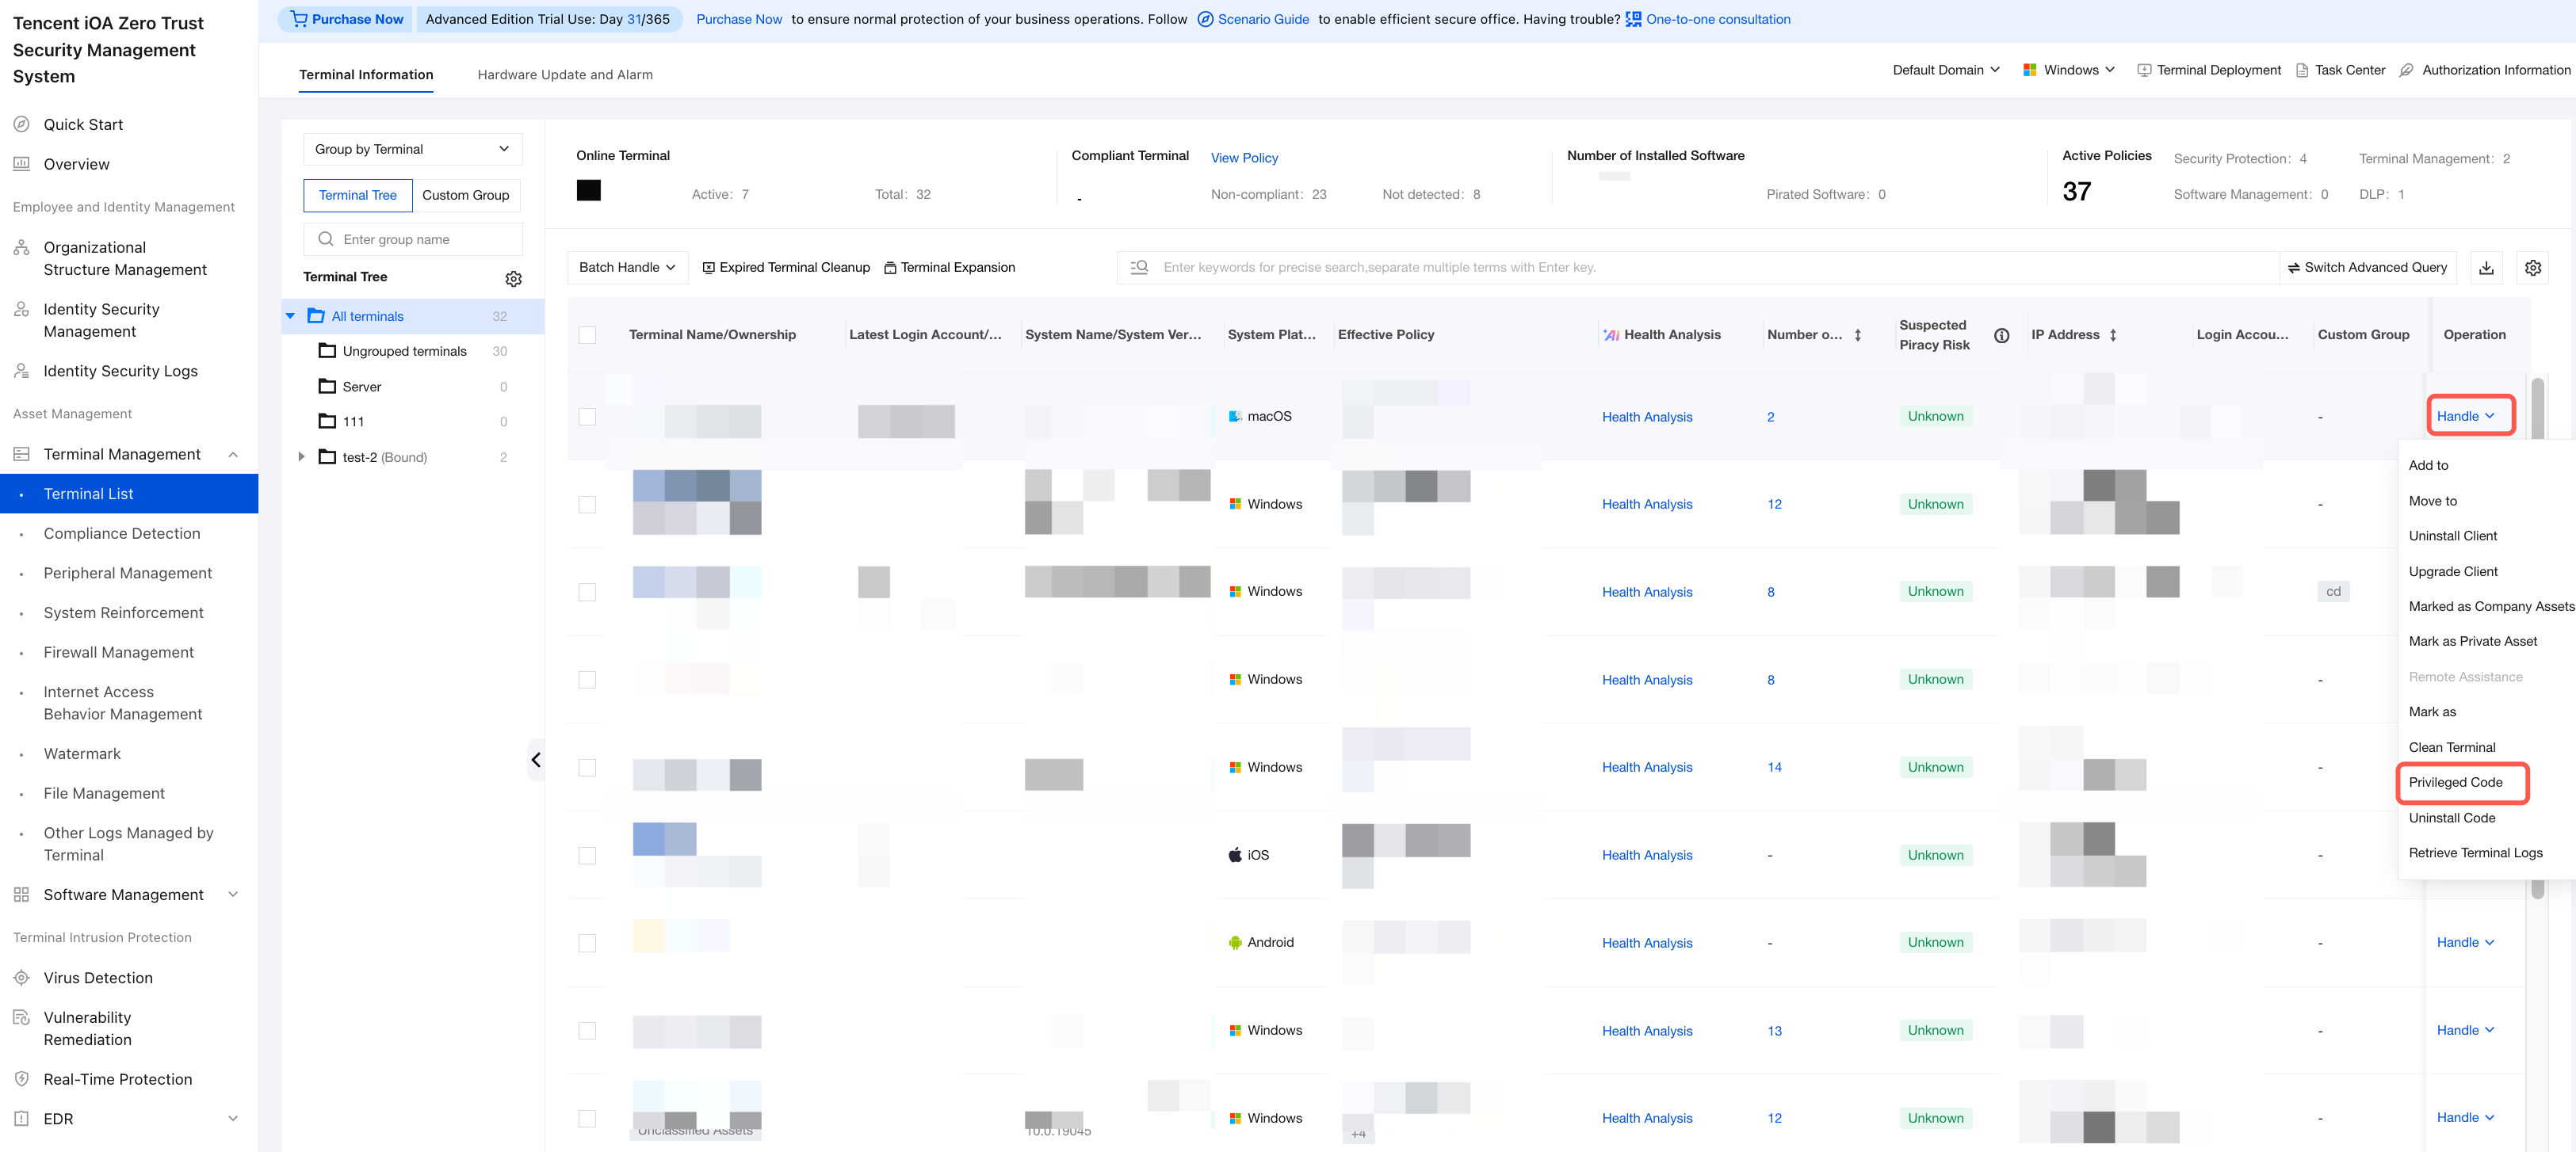
3. Go to Terminal Control > Terminal List > Terminal Information, select the target computer, click Handle, and obtain the uninstallation code.
Note:
The uninstallation code is valid only for that device on the same day.
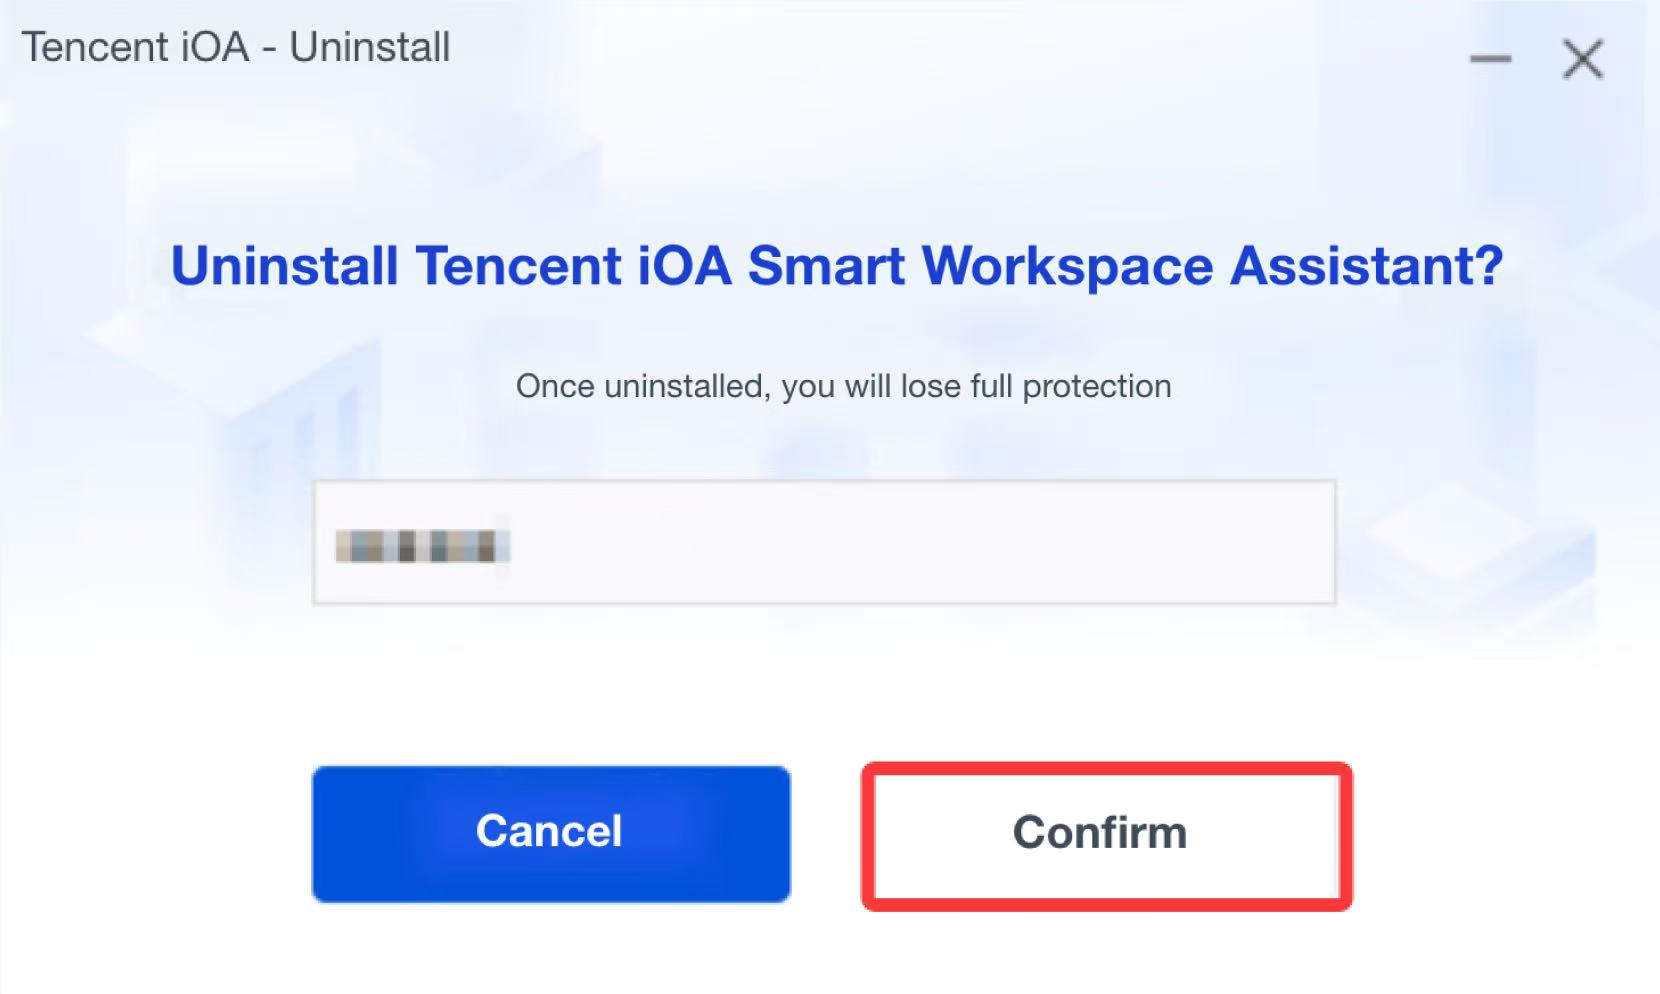
4. Enter the uninstallation code on the client uninstallation page and click Confirm to complete the uninstallation.
Allow Exit from Client
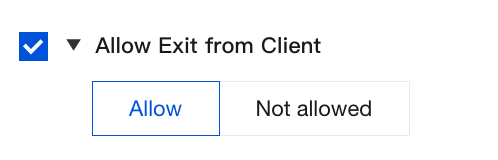
1. Select Allow Exit from Client, and then choose Allow or Not allowed.
2. After configuration, click Save.
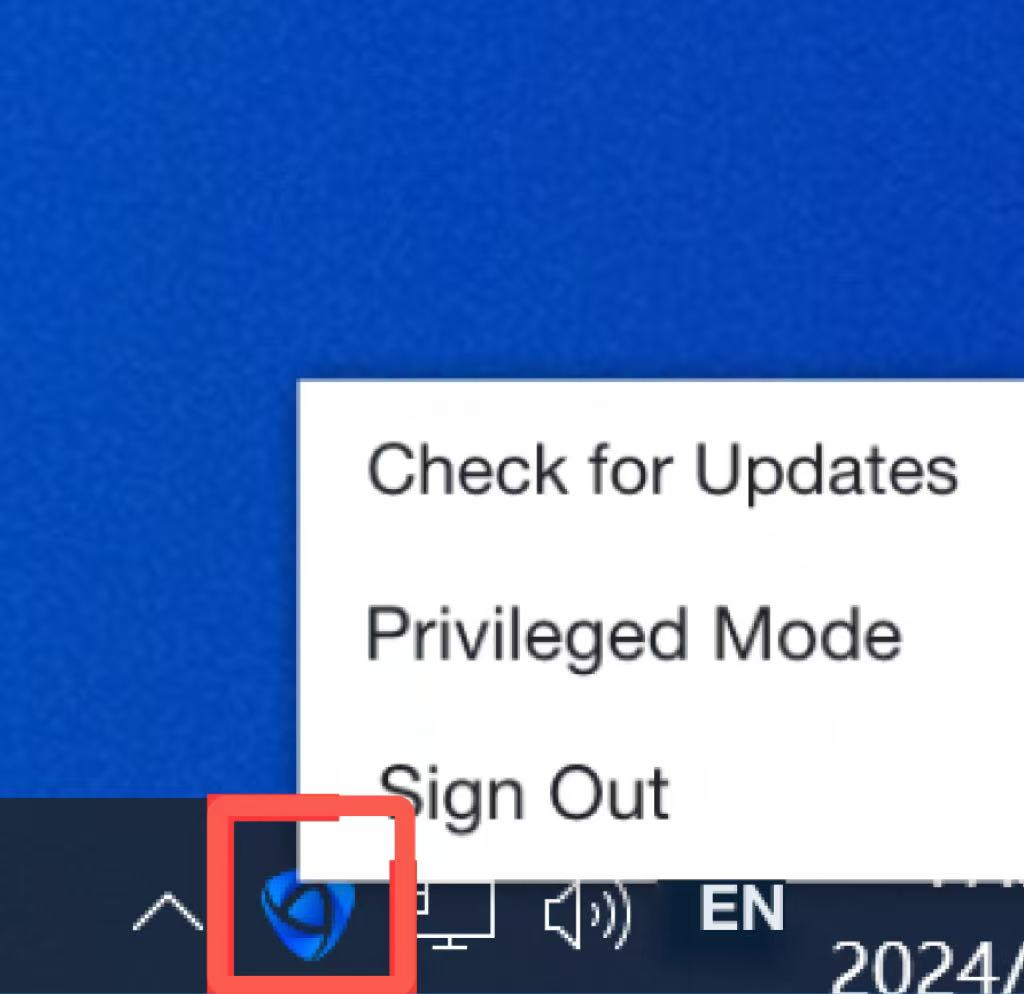
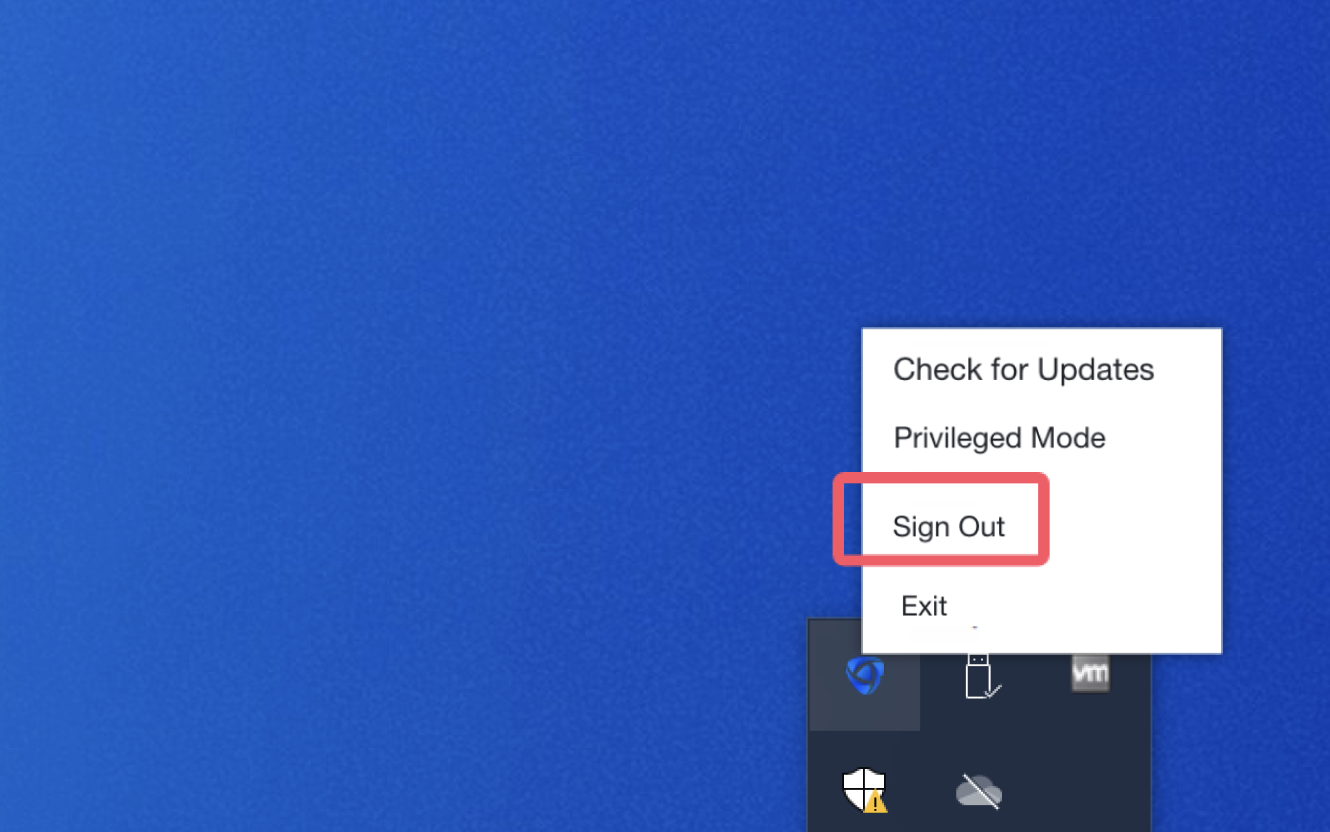
Allow: Right-click the iOA icon in the desktop taskbar, and the user's terminal can exit the client.
Disallow: After right-clicking the iOA icon in the desktop taskbar, no exit option is available, and the iOA client cannot be exited.
Allow Manual Client Deregistration
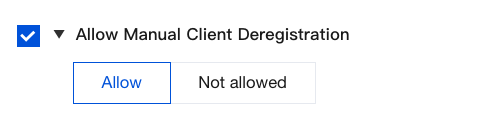
1. Select Allow Manual Client Deregistration, and then choose Allow or Not allowed.
2. After configuration, click Save.
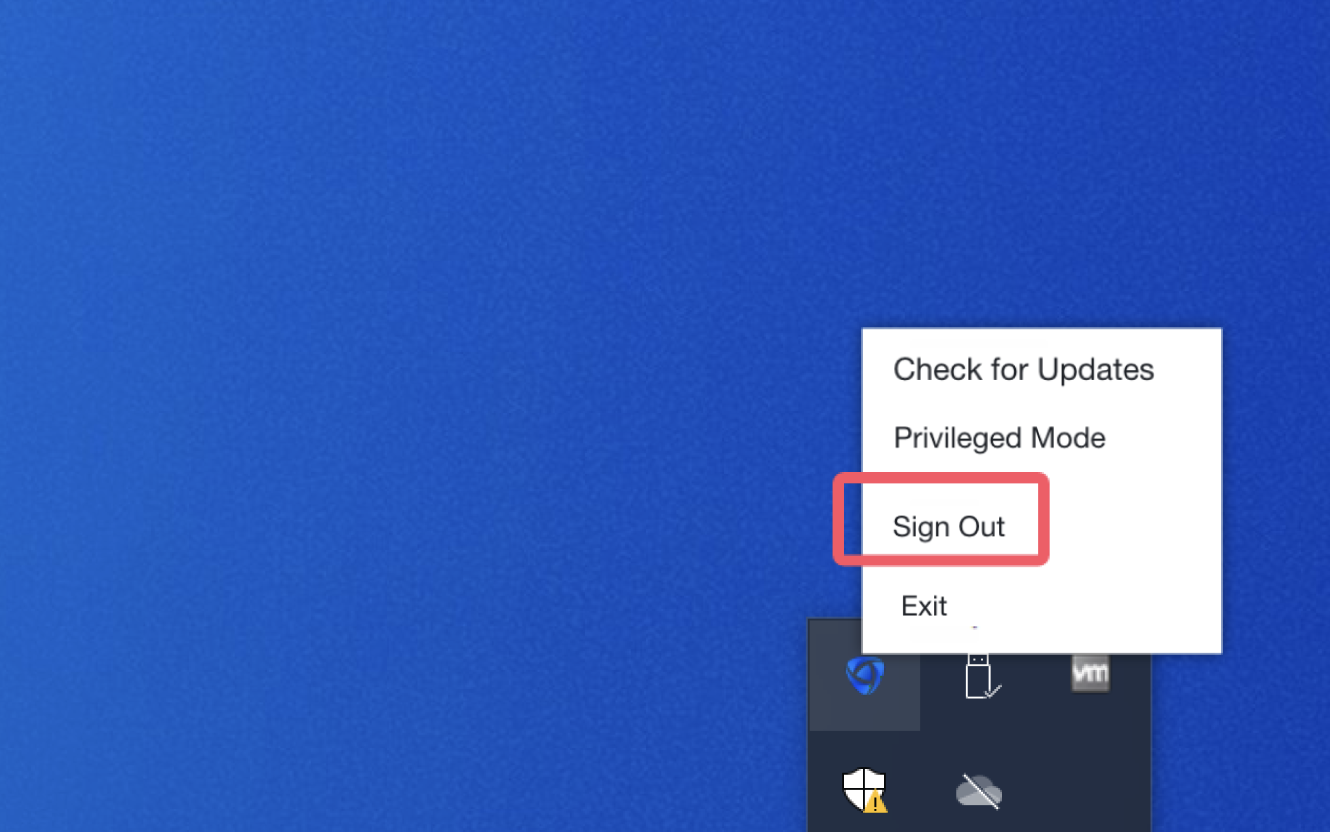
Disallow: After right-clicking the iOA icon in the desktop taskbar, the user's client does not display the logout option and does not support account logout.
Allow: Right-click the iOA icon in the desktop taskbar, and the user's client displays the logout option and supports account logout.
Client Main Interface Pop-up
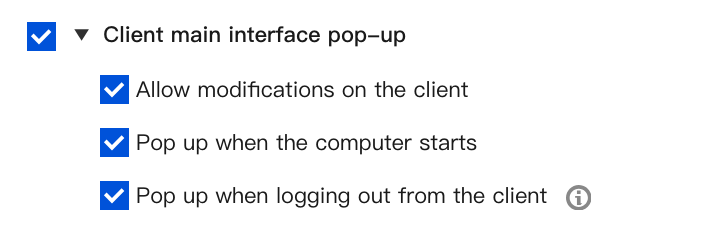
Select Client main interface pop-up to configure the policies that allow the client to modify settings/pop up after the computer starts/pop up after the client logs out. After configuration, click Save.
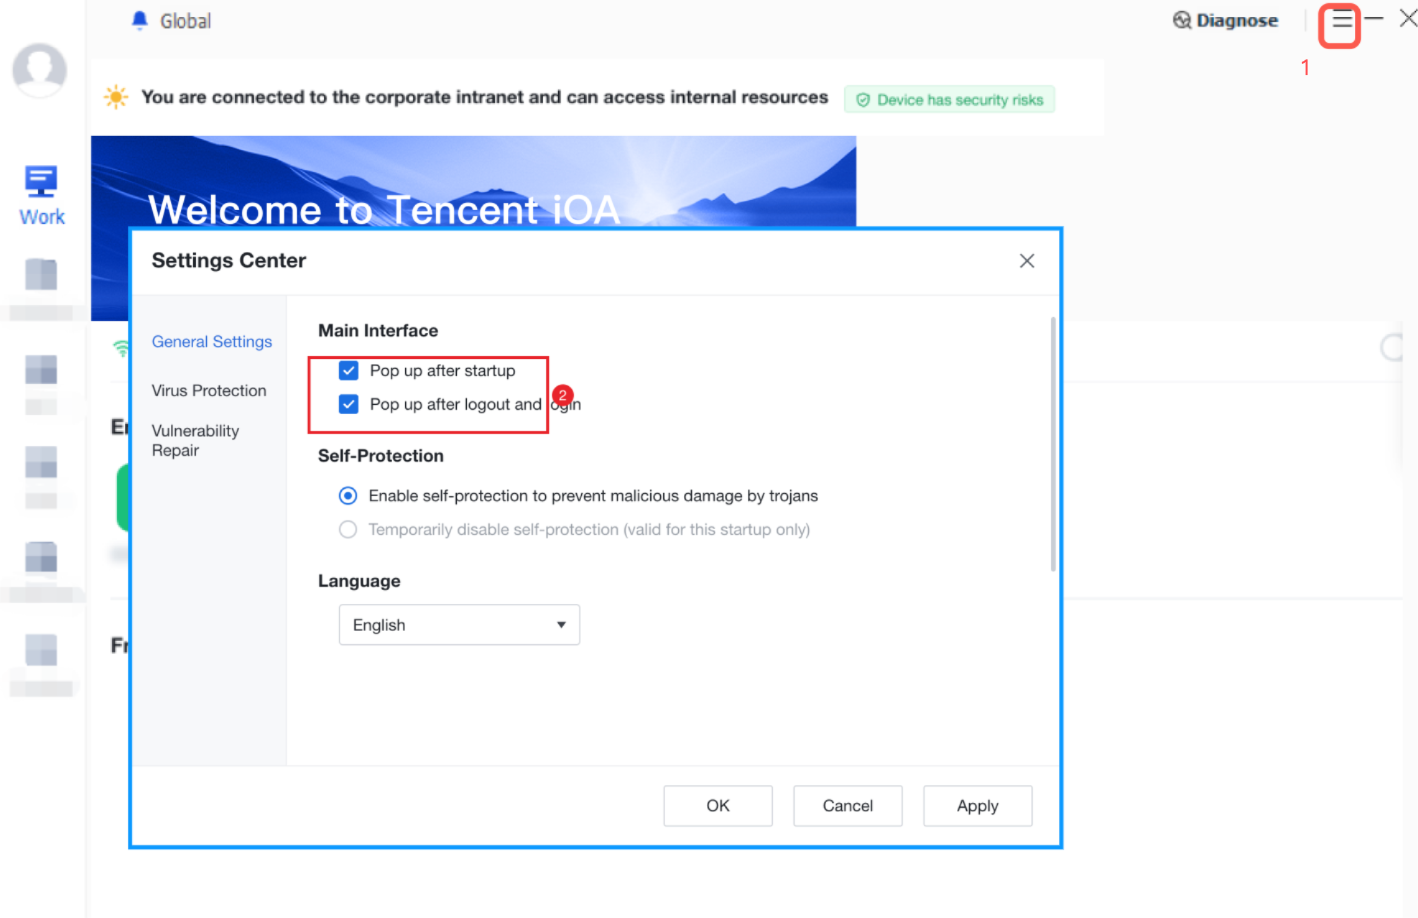
Select Allow client to modify settings: Go to Client Settings > General Settings. The client supports modifying the main page configuration, and it can be set to pop up after the terminal starts or after the client logs out.
Pop up after the computer starts:
When the option is selected, the main page pops up when iOA starts automatically after the computer is powered on.
When not selected, the main page does not pop up when iOA starts automatically after the computer is powered on.
Pop up after the client logs out:
When the check box is selected, choose Log Out. The main page of the iOA client UI is displayed during logout, and the main page pops up after logout.
Not selected: After the client logs out, the iOA client UI main page is not displayed, and the main page does not pop up after logout.
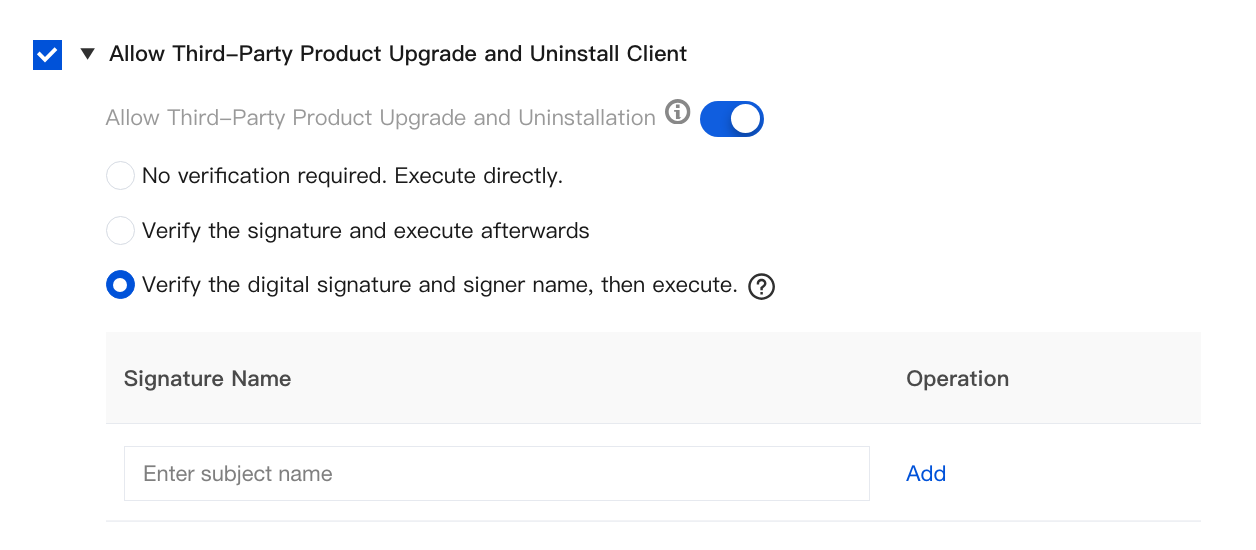
Allow Third-Party Product Upgrade and Uninstall Client
Logging out of third-party products during upgrade or uninstallation can cause execution failure.
Both upgrade and uninstallation are performed silently.
1. Select Allow Third-Party Product Upgrade and uninstall Client, and click
to enable this feature.
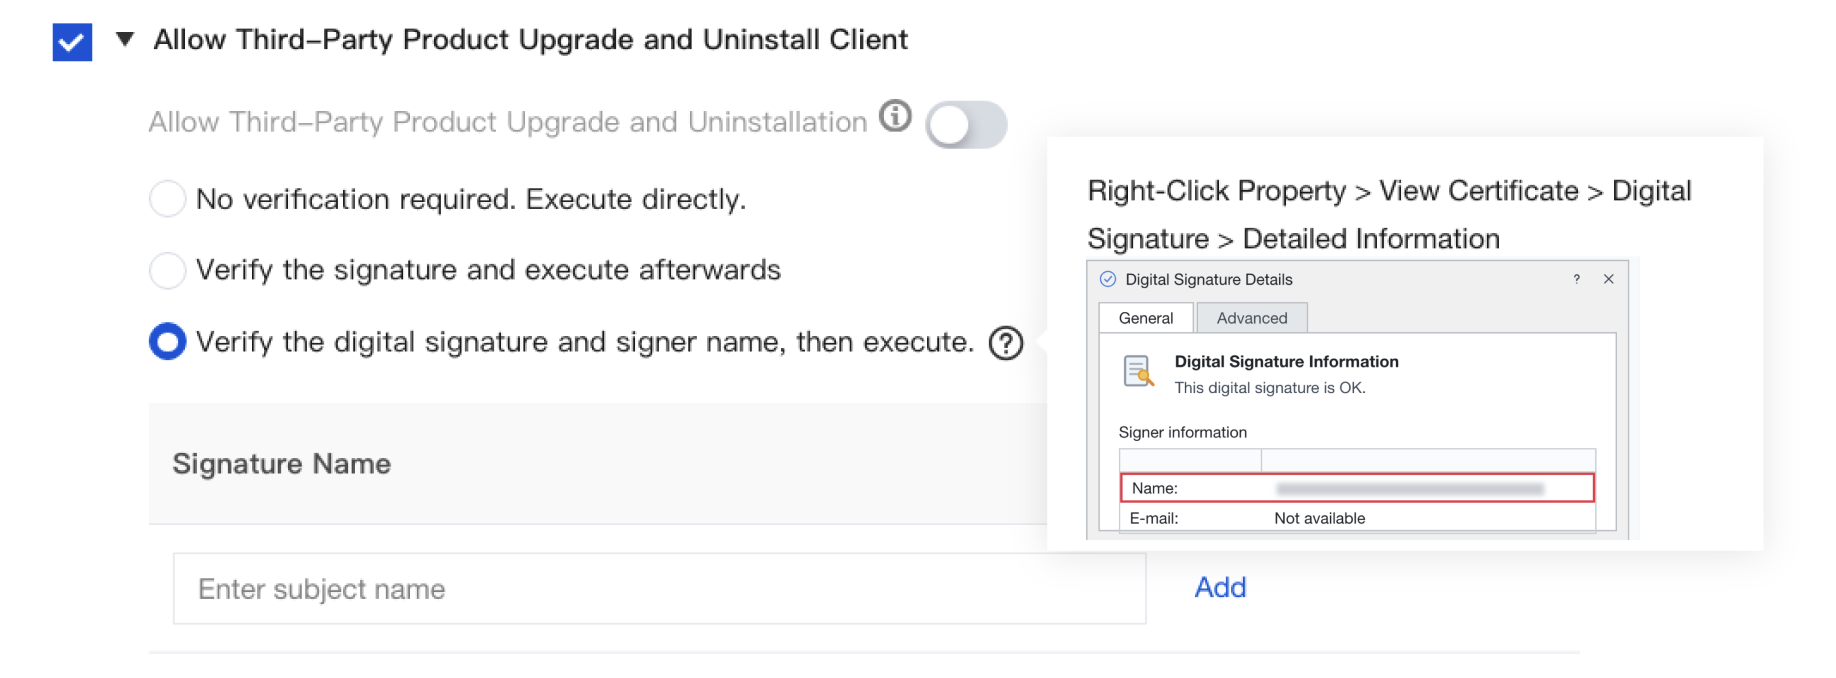
2. Execute after configuring the signature verification and signature name.
3. After configuration, click Save.
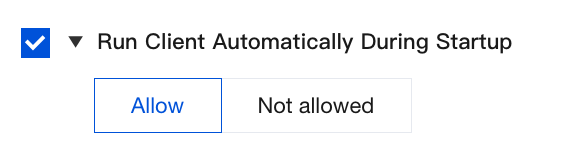
Run Client Automatically During Startup
Select Run Client Automatically During Startup.
Allowed: Automatically run the client when the computer starts, so that employee computers can be protected immediately.
Not allowed: The client cannot run automatically after the computer starts.
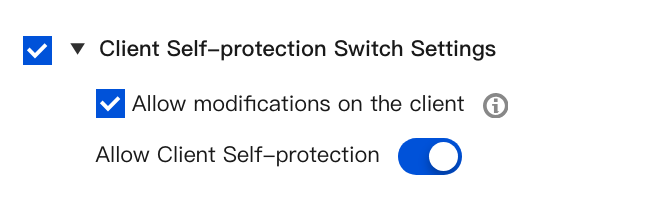
Client Self-Protection Switch Settings
Note:
This feature protects the client software from damage. For example, it automatically prevents files in the iOA client installation directory and certain other configuration files from being modified.
Under normal circumstances, do not disable the client self-protection switch.
It is recommended to disable the client self-protection switch only for troubleshooting.
1. Select Client Self-Protection Switch Settings, and click
to enable client self-protection.
2. Select Allow the client to modify settings. After this option is selected, the self-protection settings follow the settings on the client.
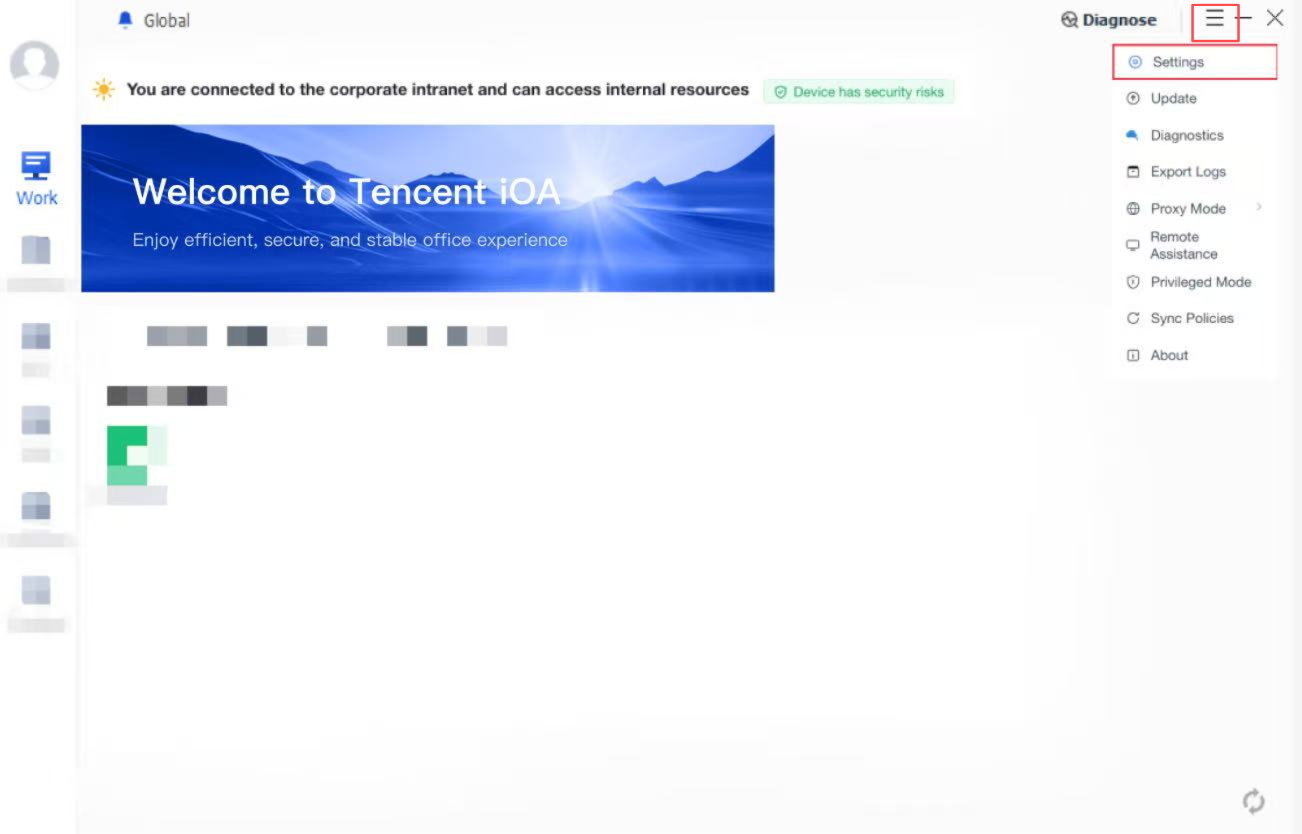
3. On the client page, click Settings in the upper-right corner.
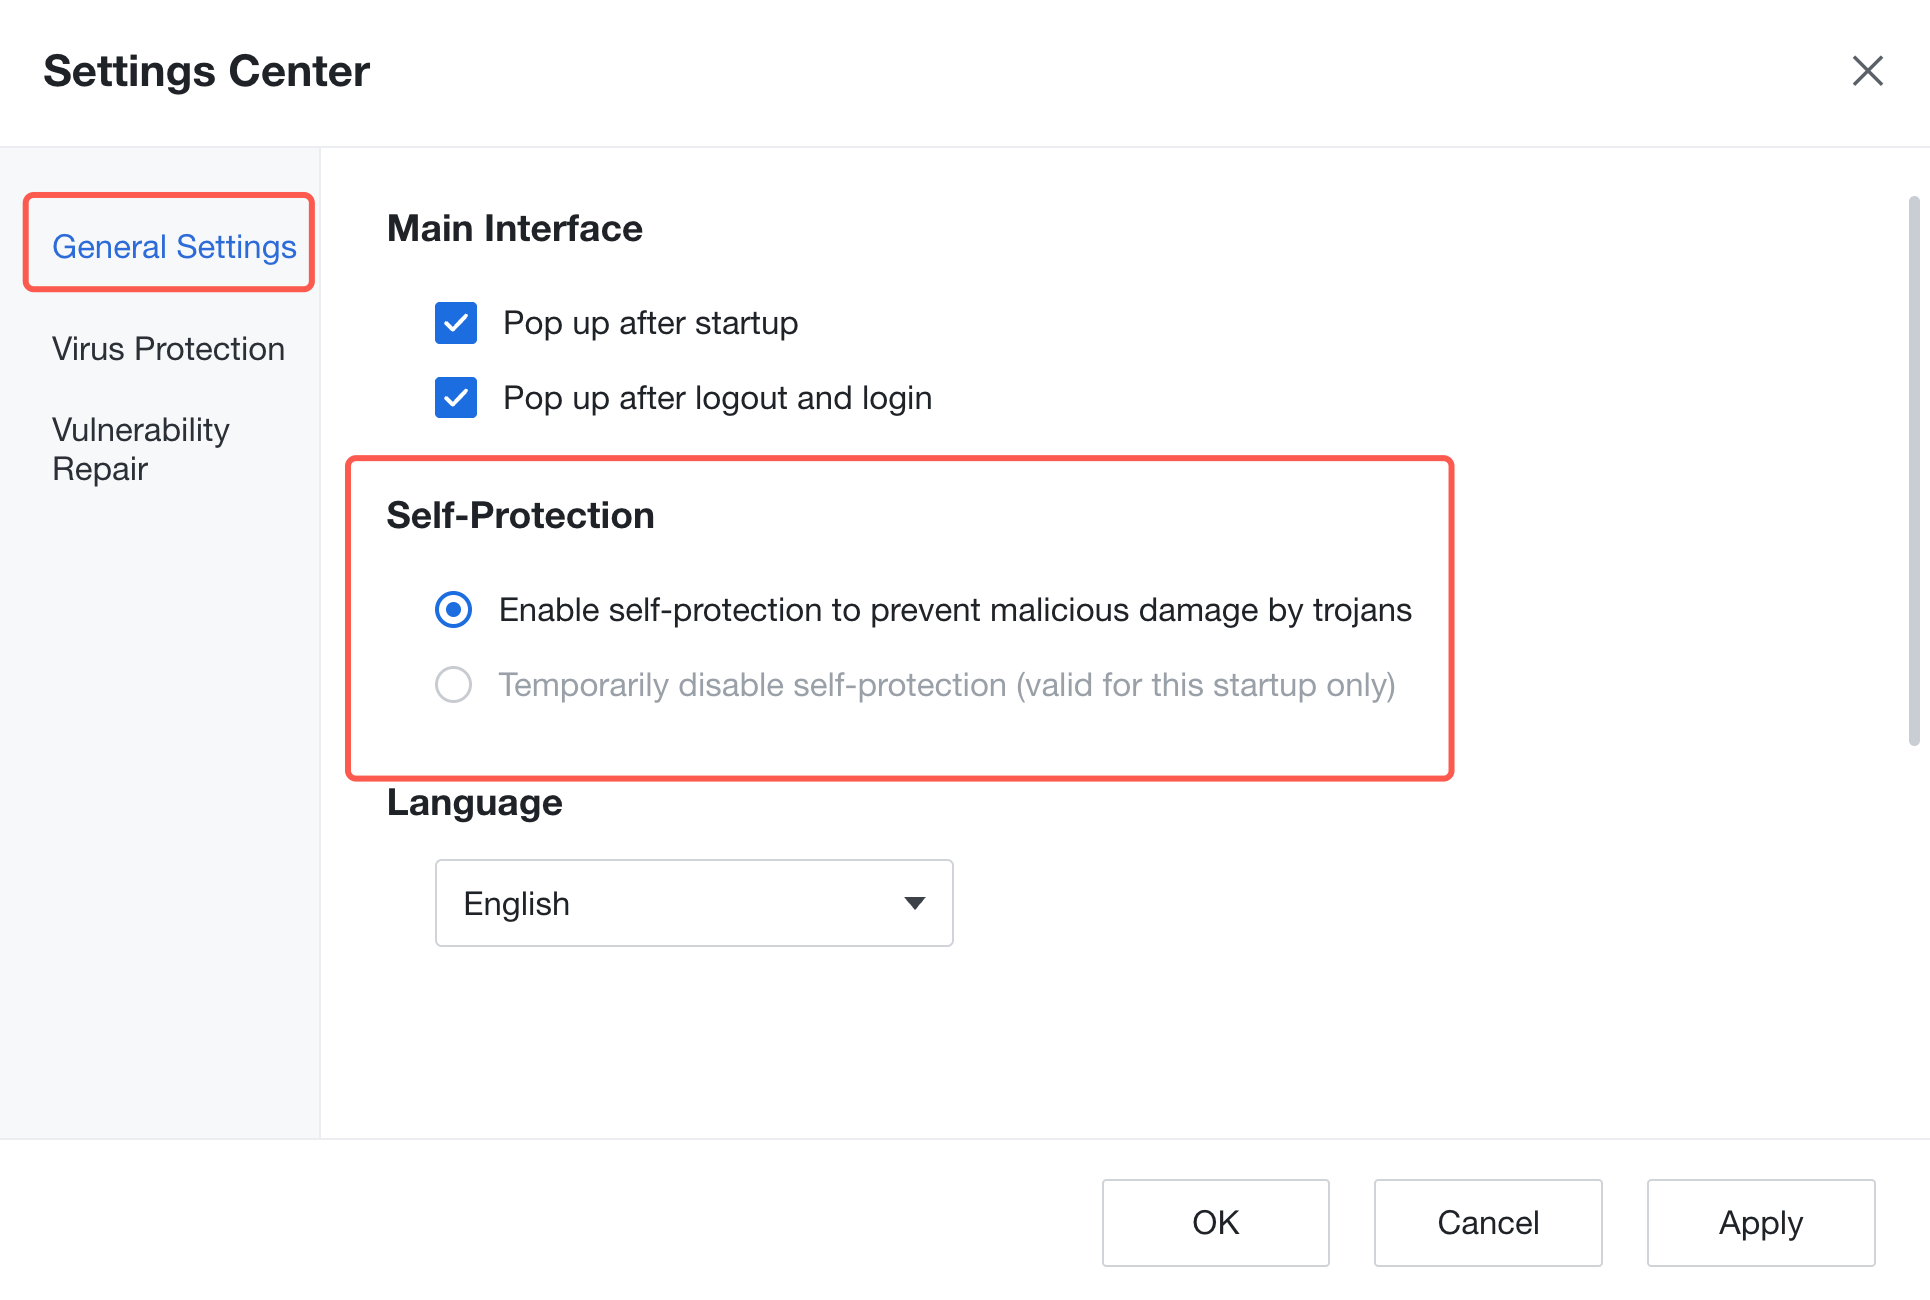
4. On the General Settings page, the client allows you to change the setting to enable self-protection or temporarily disable self-protection.
Allow Client Entry into Privileged Mode
Attention:
Entering privileged mode will completely block all security, management, and access control policies to simulate an uninstalled environment for troubleshooting. This mode carries significant risks and hidden dangers. Use with caution.
1. Select Allow Client Entry into Privileged Mode, choose Allow, and set the time range.
2. Go to Terminal Management > Terminal List > Terminal Information, select the target computer, choose Handle > Privilege Code, and obtain the privilege code.
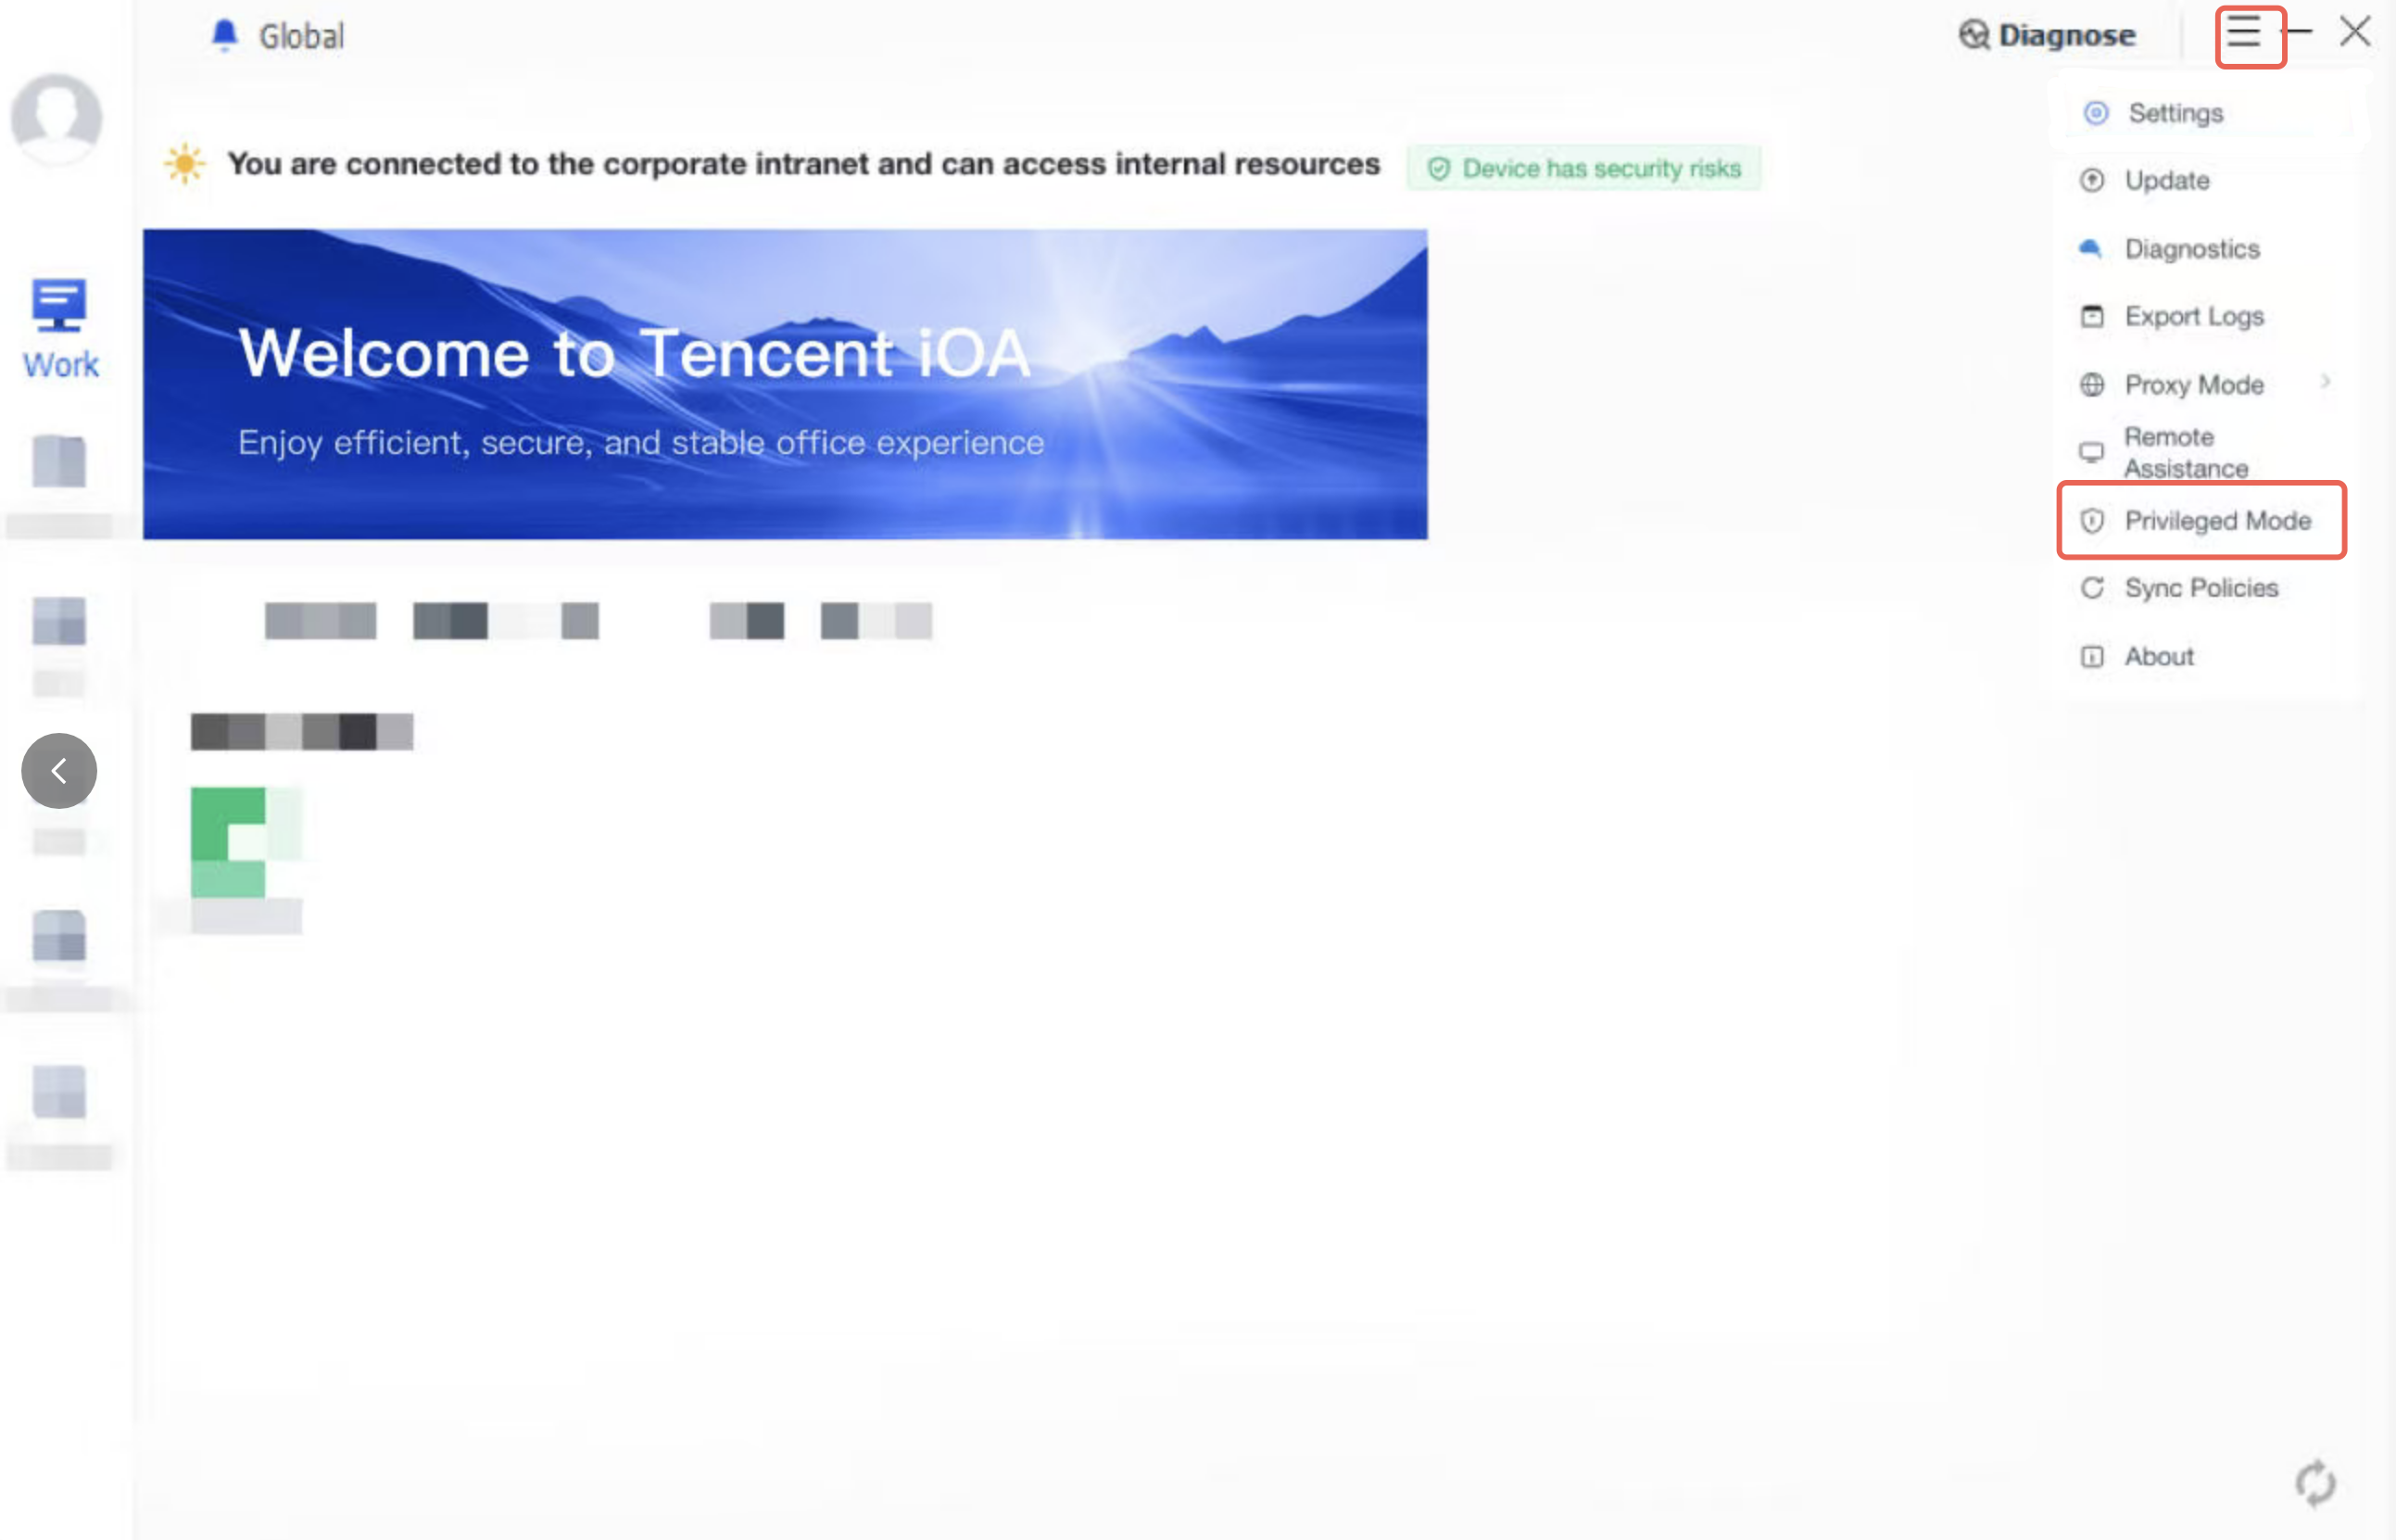
3. On the client page, click Settings in the upper-right corner > Privileged Mode.
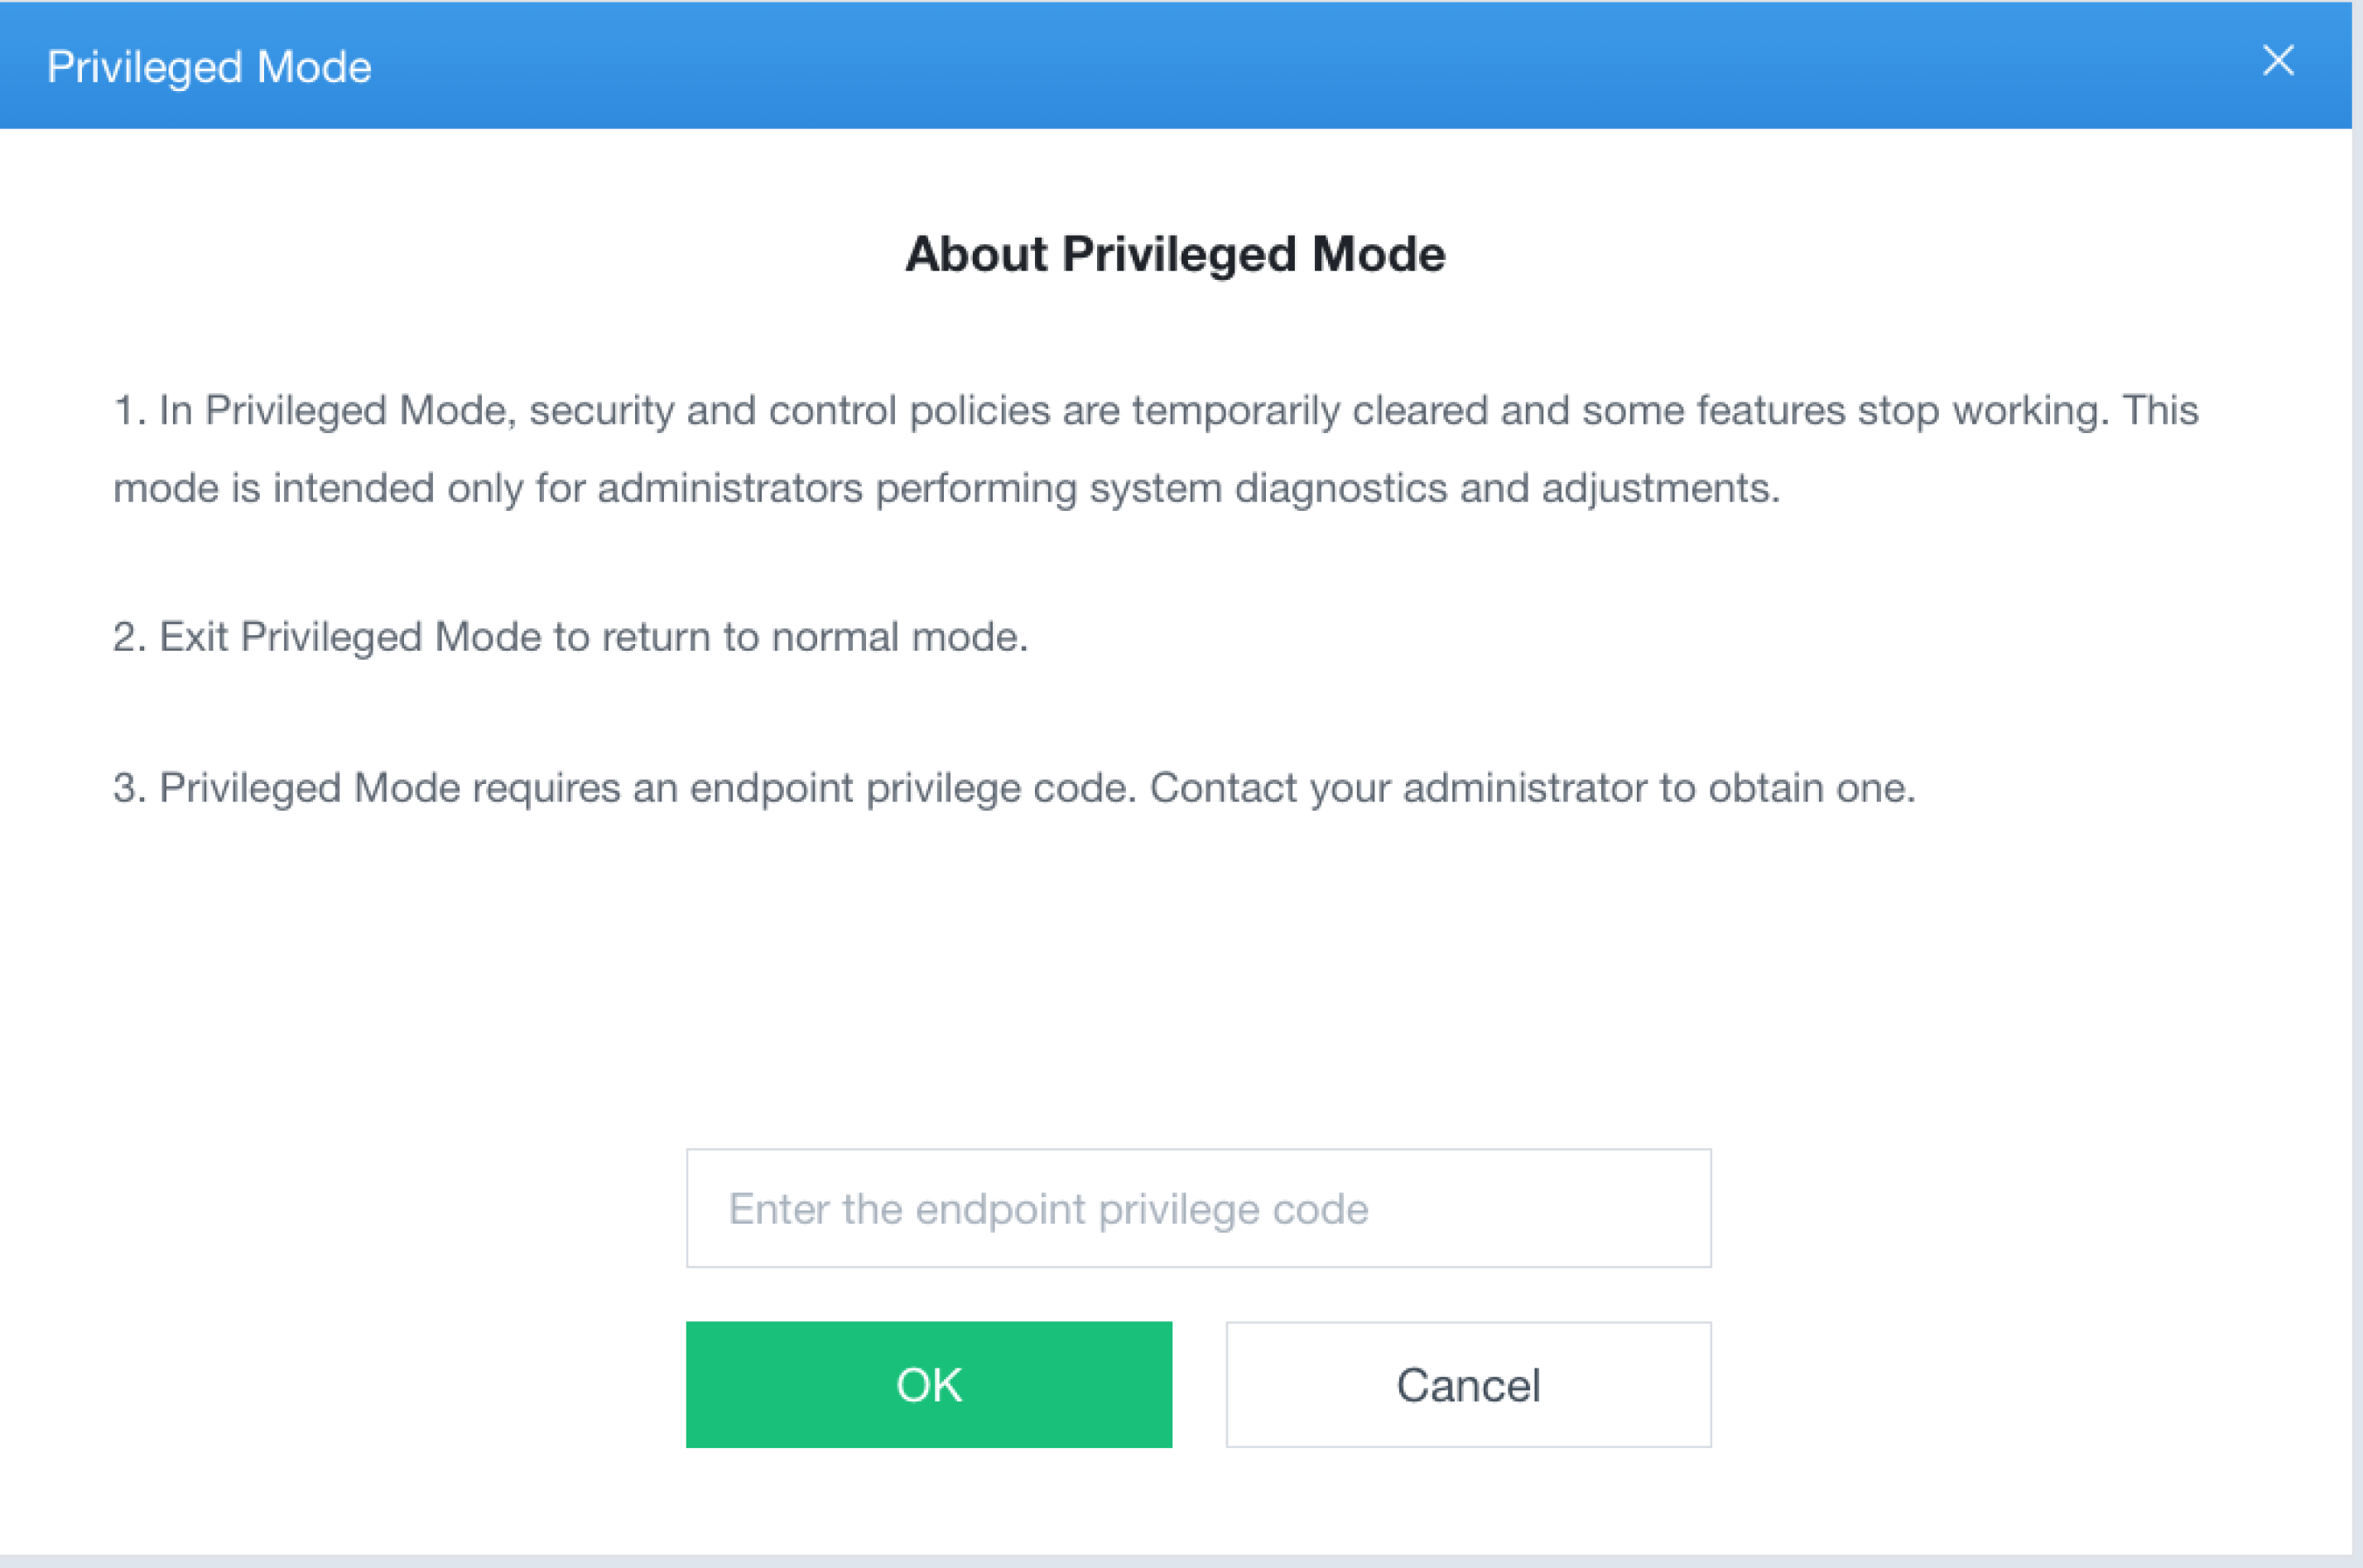
4. When prompted to enter the terminal privilege code, enter the generated privilege code here.
Forbid Client-related Pop-ups
Select Forbid Client-related Pop-ups. After client-related pop-ups are blocked, pop-ups for virus detection, vulnerability remediation, terminal notifications, and high-risk information will no longer appear, and risks may not be notified in a timely manner. Exercise with caution.
Terminal Restart
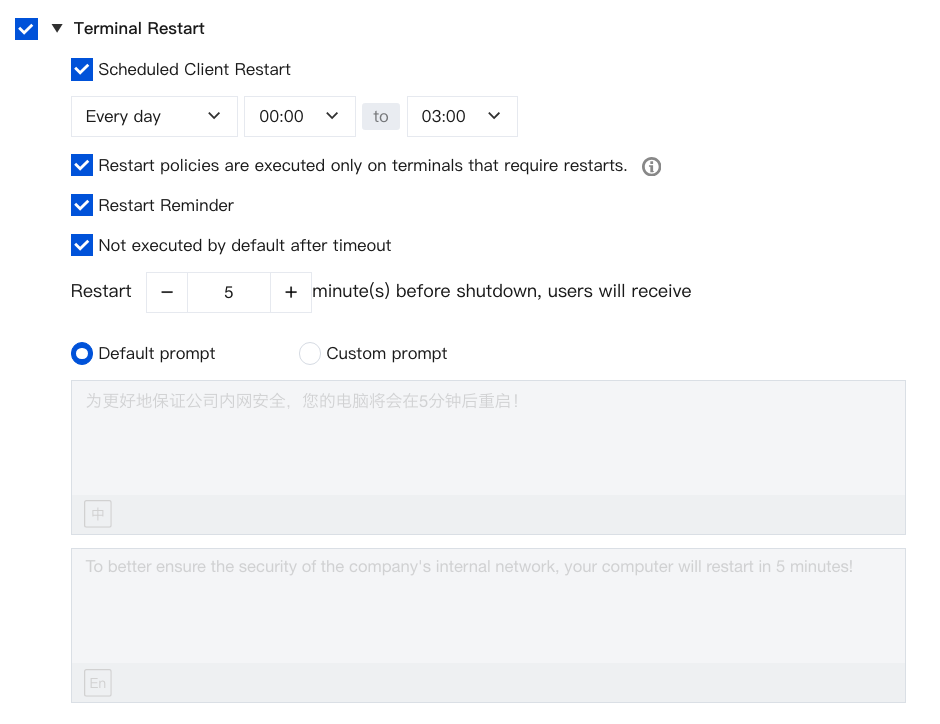
Select Terminal Restart and Scheduled Client Restart, set the time range, and click Save.
Execute the restart policy only on terminals that require a restart: when this option is selected, a restart occurs only if the terminal has viruses that require a restart for removal or patches that take effect after a restart. Otherwise, no restart occurs.
Restart reminder:
Select: a tip will pop up for the user to choose.
If not selected, the terminal restarts directly.
No action is taken by default after a timeout: when this feature is used with the restart reminder, the timeout occurs when the countdown ends after the tip is displayed.
Select: no restart occurs after a timeout.
If not selected, a forced restart occurs directly after a timeout. A reminder message y is displayed x minutes before the restart: x minutes is the countdown duration of the tip, and message y is editable with a default value.
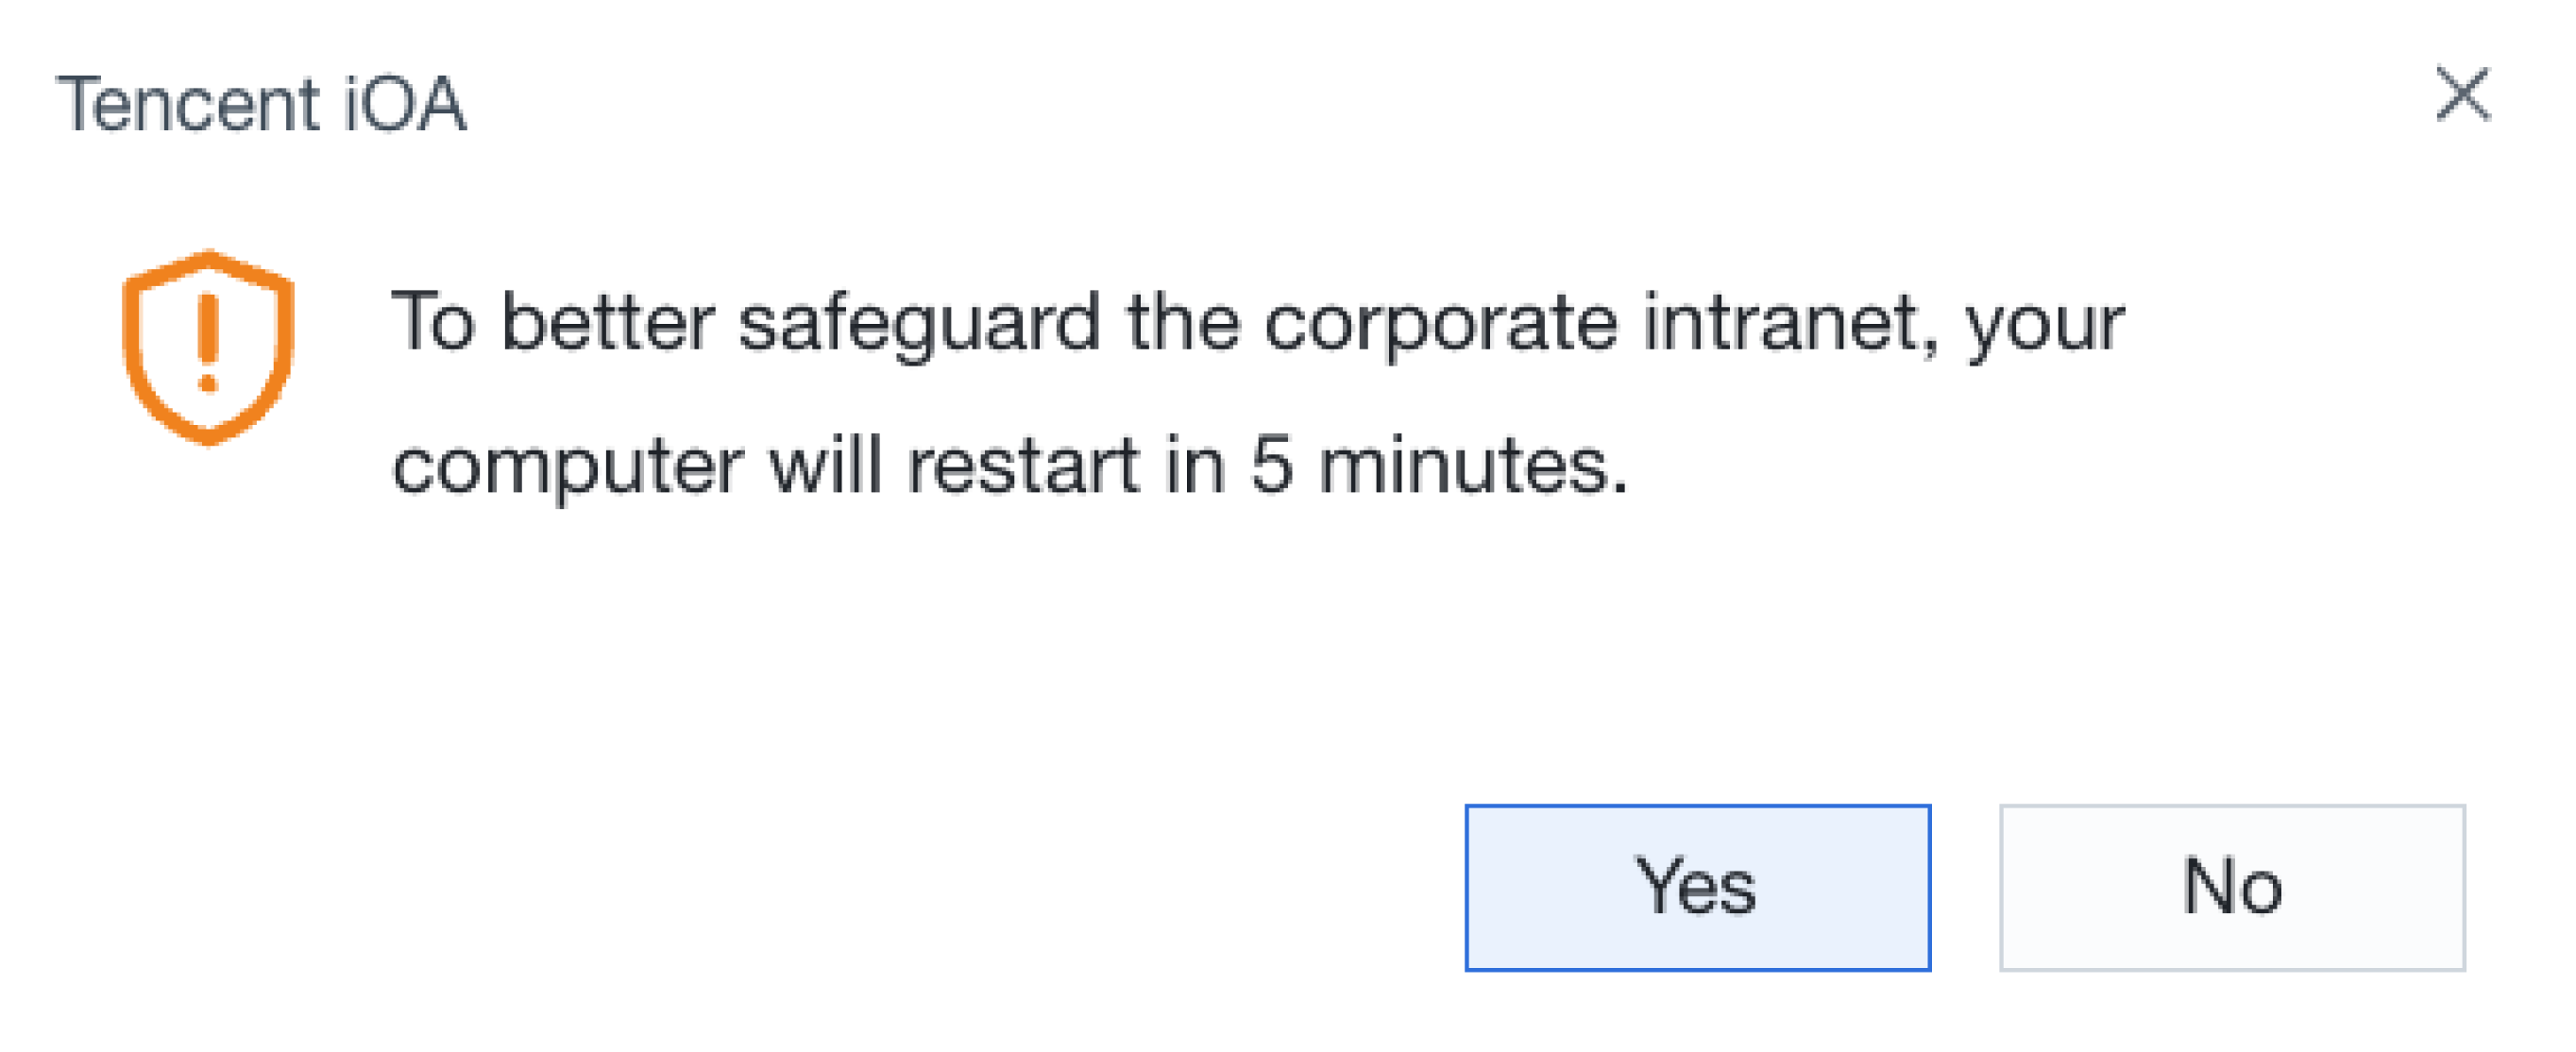
After a terminal restart policy is configured, iOA displays a restart notification when the scheduled restart time arrives.