Dumb terminal devices of an enterprise can connect to the office network environment through the enterprise wired network. After they are connected, you can view the information about the dumb terminals and manage their access permissions in the admin console.
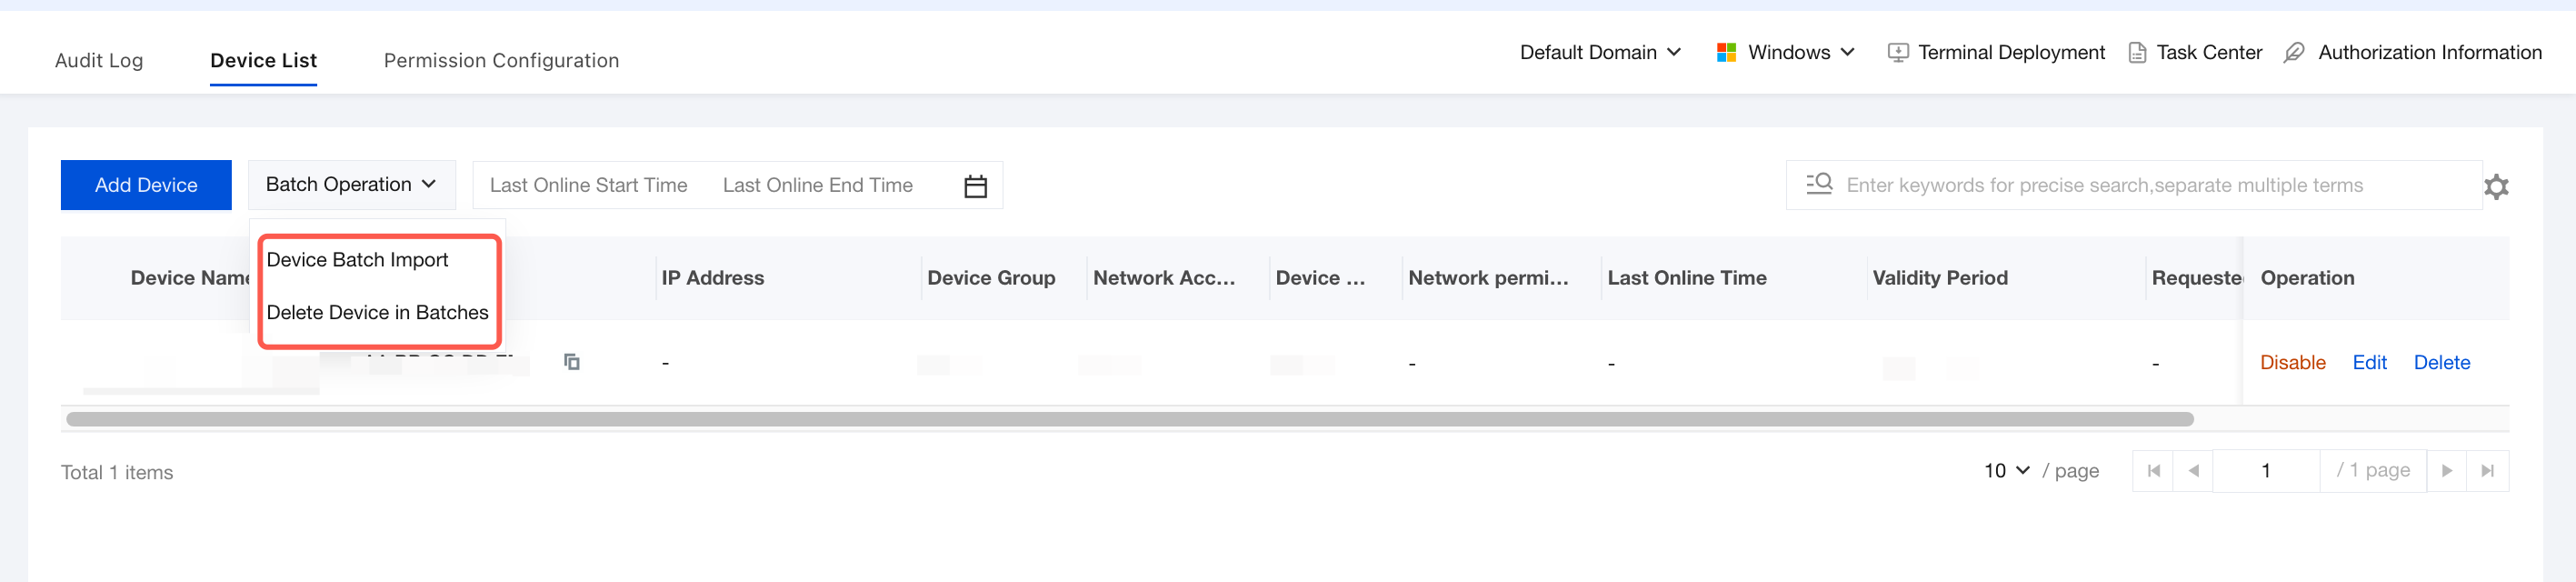
2. On the Device List page, you can add dumb terminals individually or import them in batches.
Adding a Single Dumb Terminal
1. On the Device List tab, click Add Device.
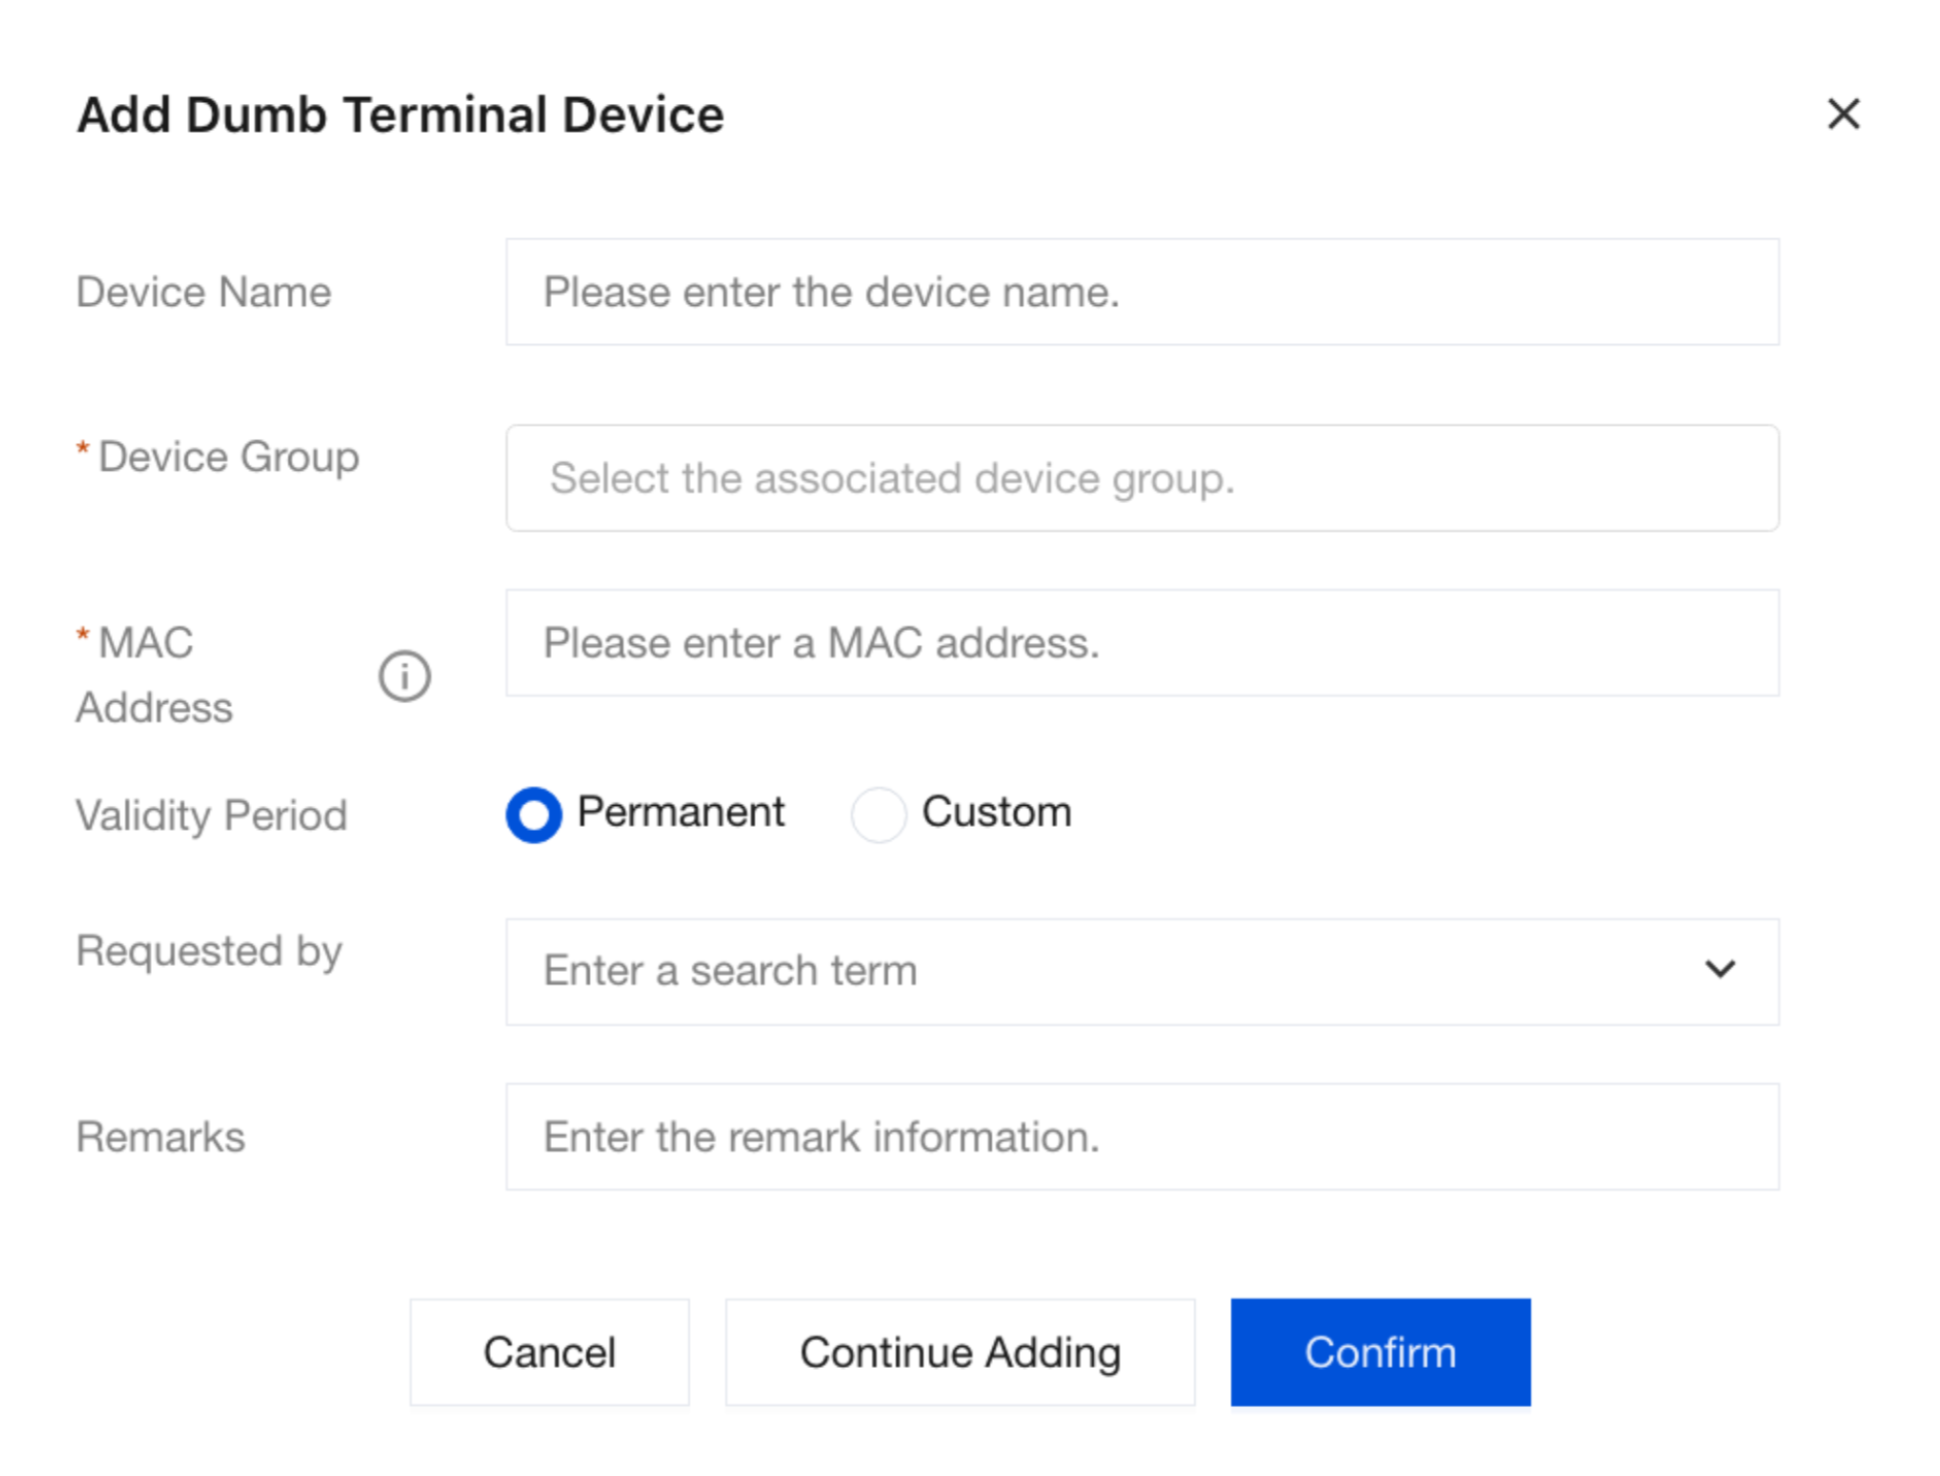
2. In the Add Dumb Terminal Device dialog box, configure the parameters and click Confirm to save.
Parameter Name
Description
Device Name
Customize the name based on the actual situation of the dumb terminal.
Device Group
Select the group to which the device belongs from the drop-down list.
MAC Address
Enter the MAC address of the dumb terminal device.
A single MAC address or a MAC address range is supported (for example, AA:BB:CC:00:00:00-AA:BB:CC:FF:FF:FF).
Validity Period
Permanent: The device remains valid for a long time and is suitable for fixed deployment.
Custom: You can set a start date and an end date (for example, 2026-01-30 to 2027-01-30). This option is suitable for temporary devices such as exhibition devices or test machines.
Applicant
Enter the employee name/job ID to search and select, and identify the owner of the device.
Remarks
Customize supplementary information (such as "Legacy model requiring regular restart", "Connected to the finance server", and "Located on the east side of the third-floor meeting room") to facilitate troubleshooting and asset inventory.
Batch Importing Dumb Terminals
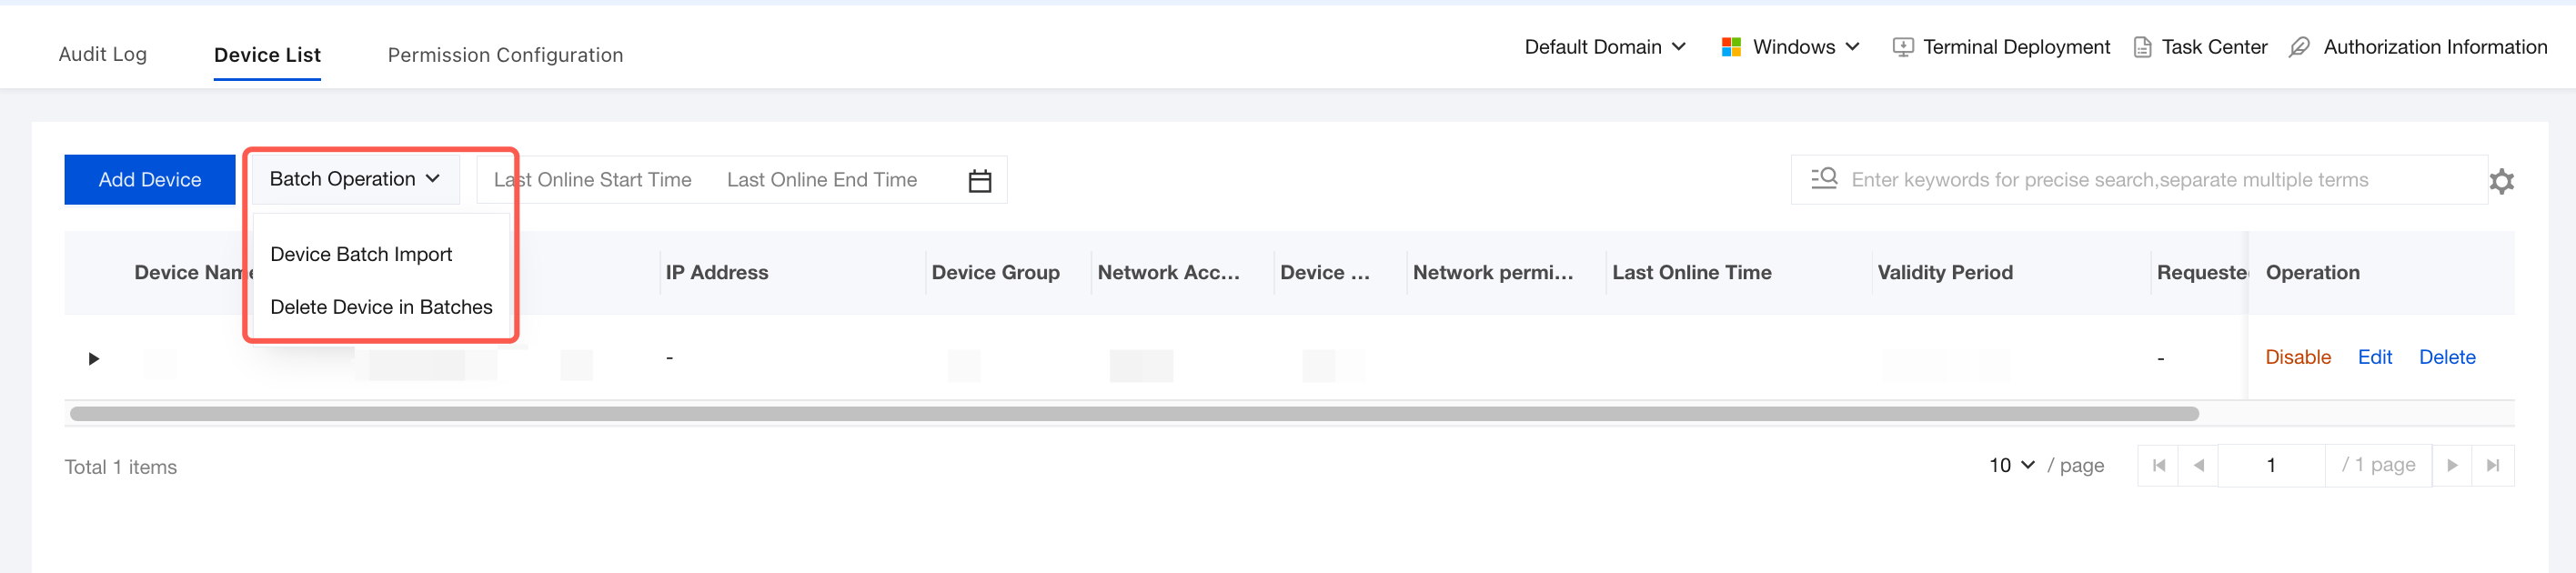
1. On the Device List page, click Batch Operation to import dumb terminals in batches.
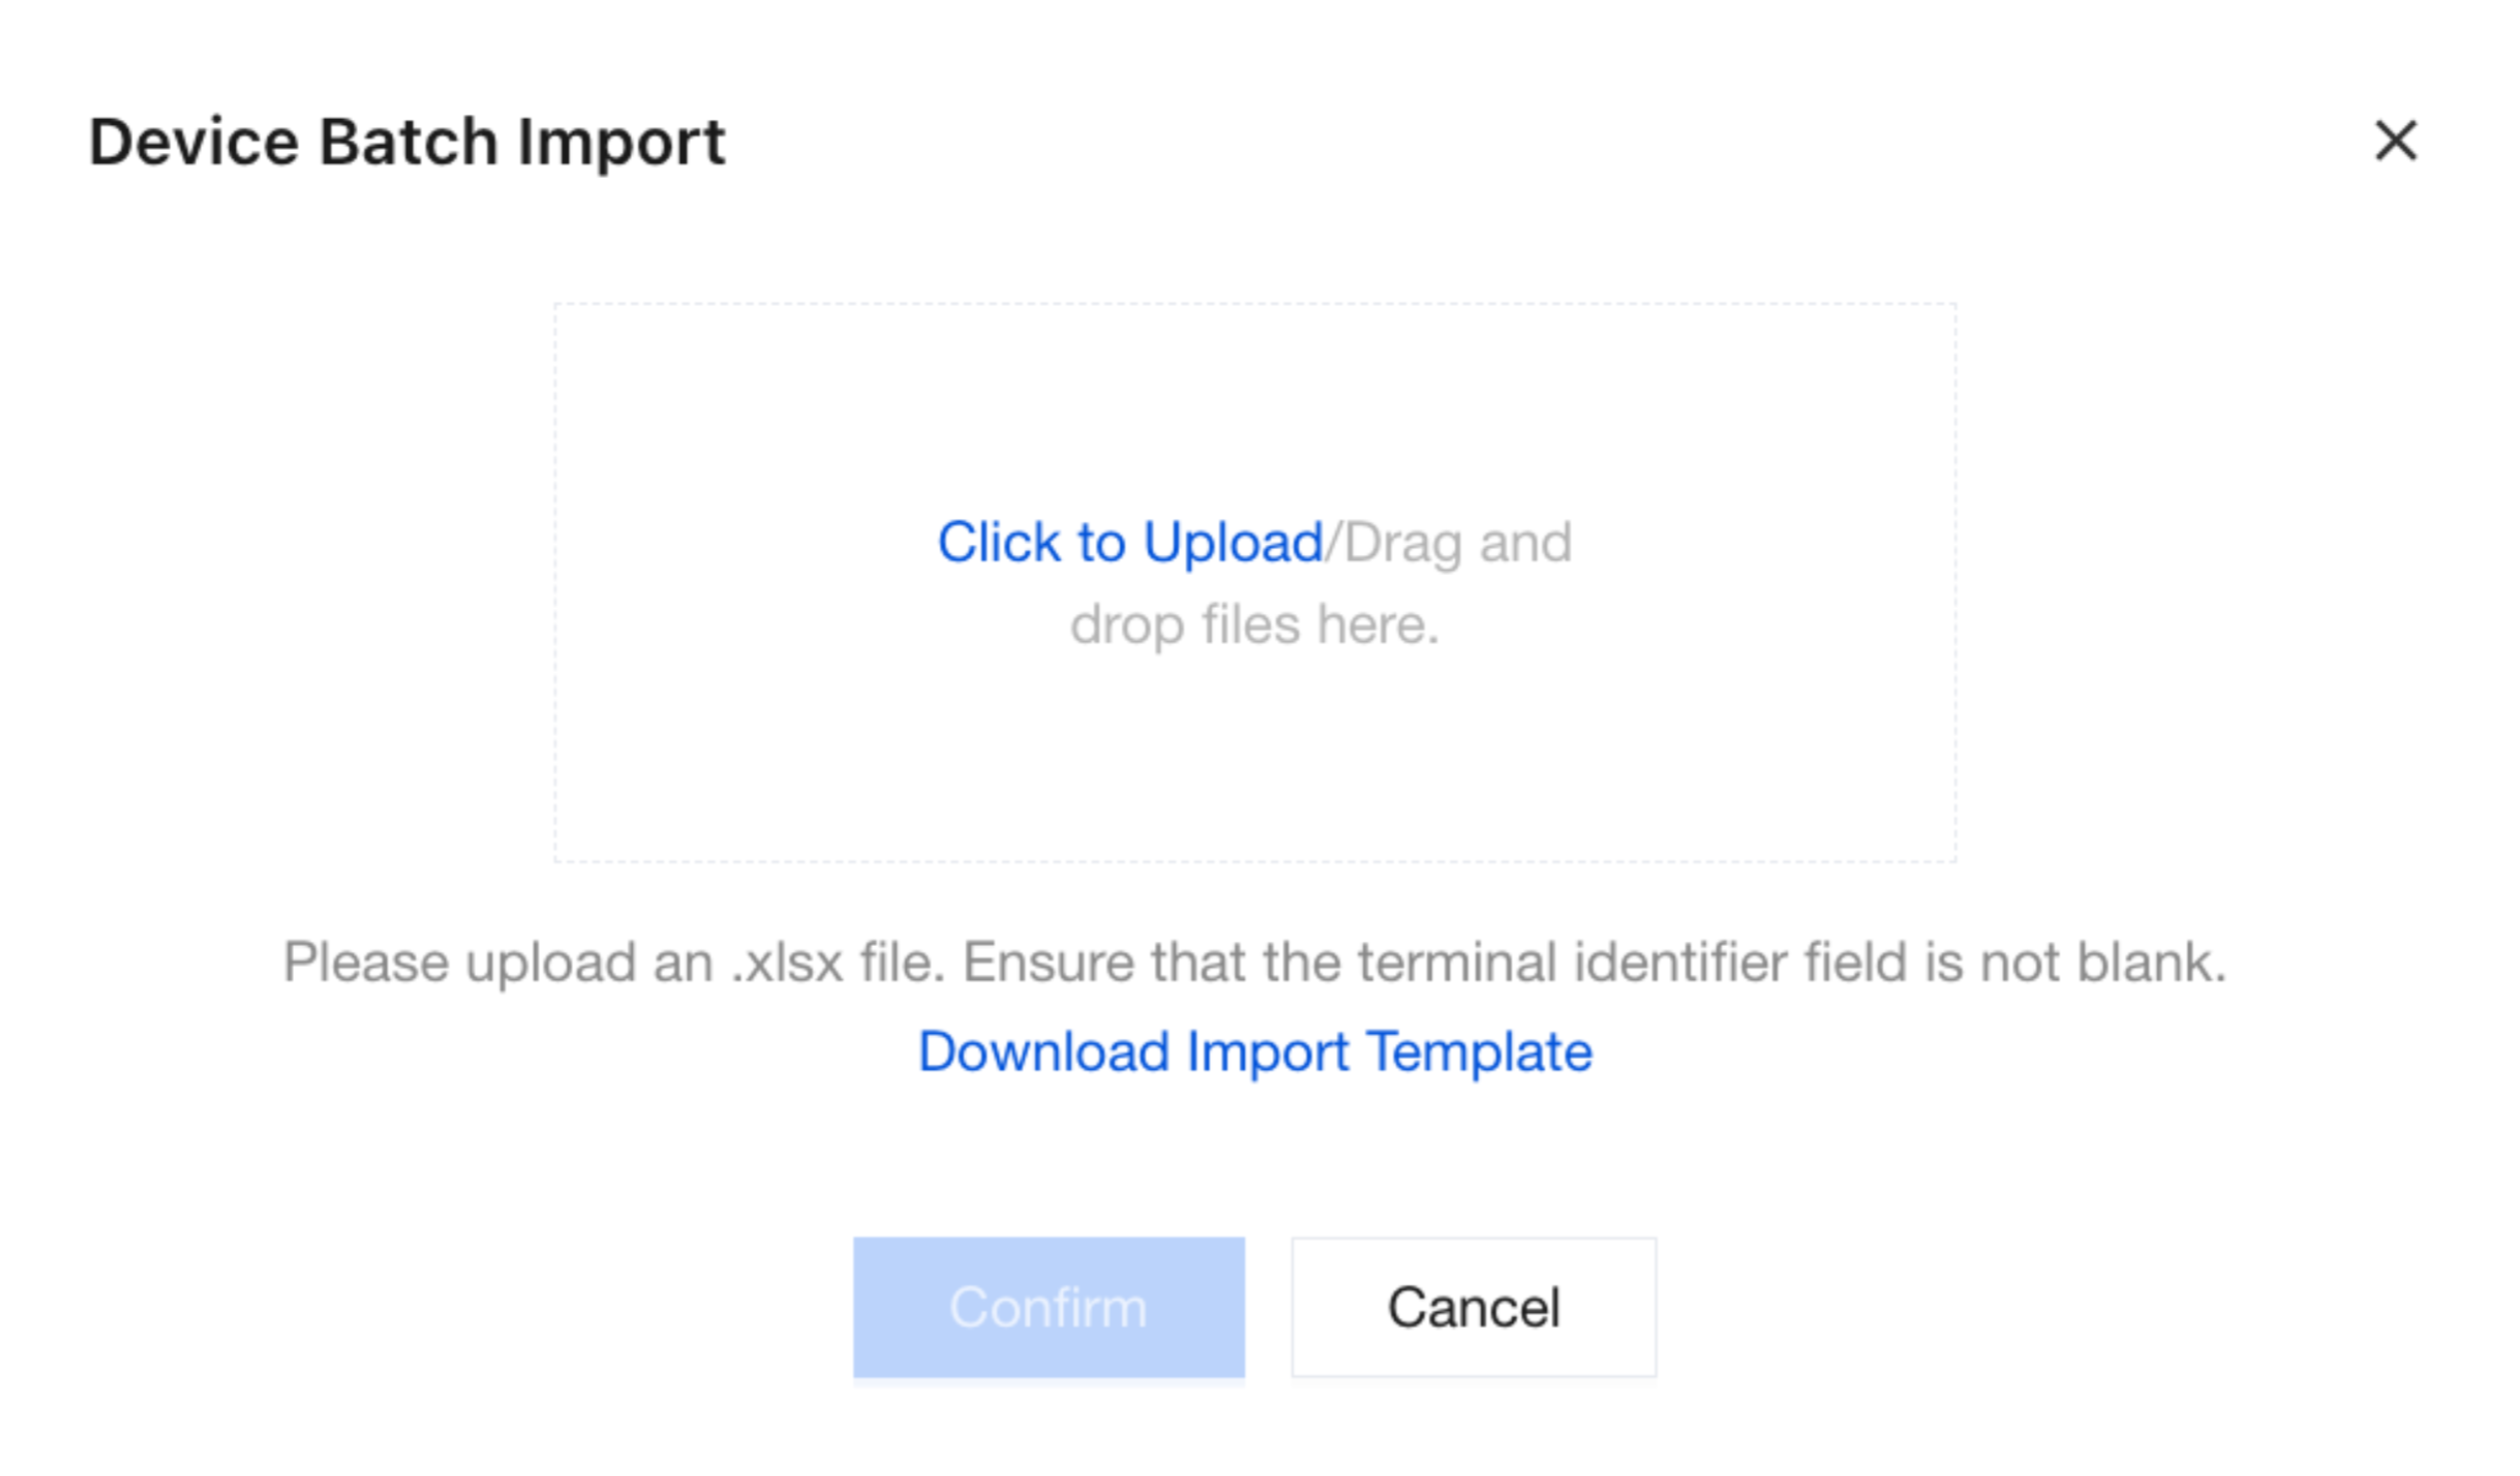
2. Click Download Import Template and configure the device name, device type, MAC address, effective time, applicant, and other information for the dumb terminals. After completing the entry, upload the .xlsx file and click Confirm to complete the batch import of devices.
Deleting a Dumb Terminal
Attention:
After deletion, the device information cannot be recovered.
Deleting a Single Dumb Terminal
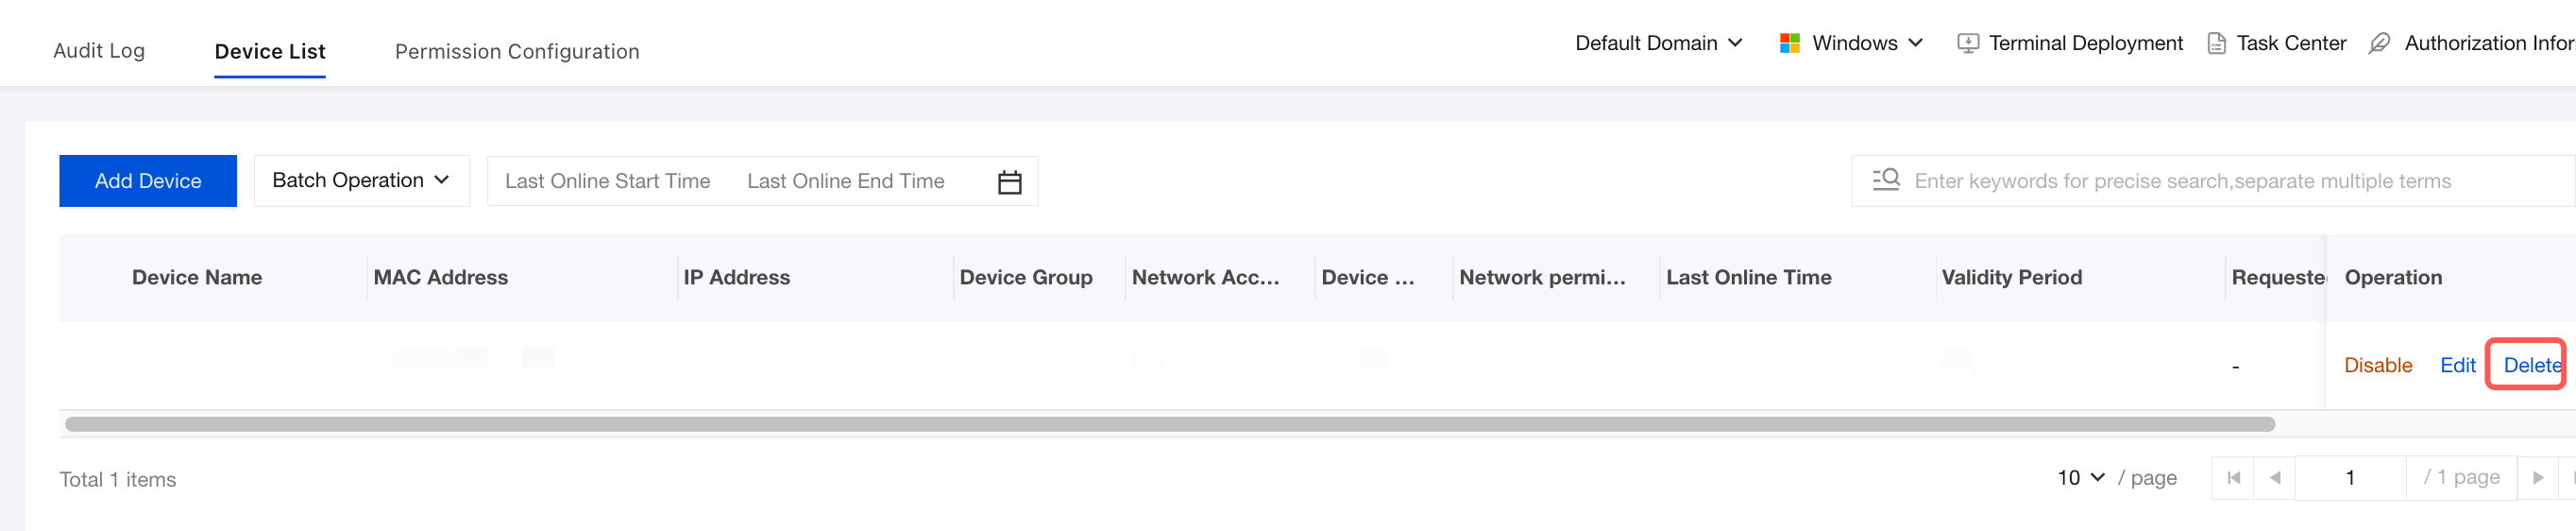
On the Device List page, select the devices to delete and click Delete. Confirm the operation to delete the devices.
Batch Deleting Dumb Terminals
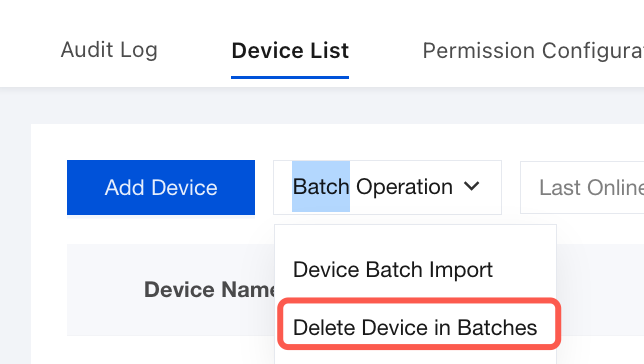
1. On the Device List tab of the Dumb Terminal Network Access page, click Delete Device in Batches.
Attention:
Modifying the MAC address of a dumb terminal may affect its normal network access. Please proceed with caution.
After a dumb terminal is deleted, it will be disconnected from the enterprise wired network. The deletion cannot be restored, so proceed with caution.
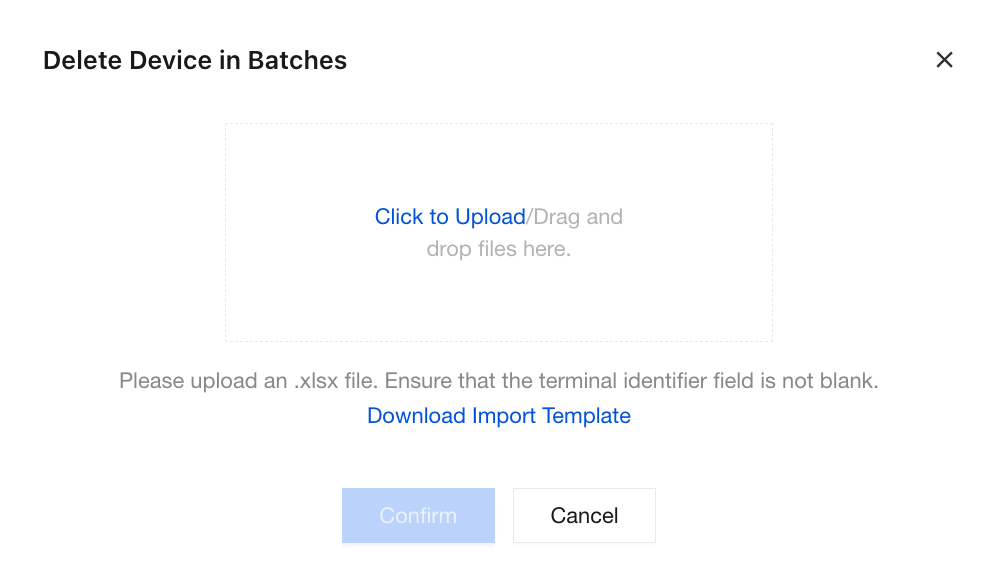
2. On the Batch Delete Devices page, click Download Import Template and configure the MAC address information for the dumb terminals. After completing the entry, upload the .xlsx file and click Confirm to complete the batch deletion of devices.
3. After the upload, iOA matches dumb terminal devices based on the MAC addresses in the device deletion Excel file. If any dumb terminals are not matched, you can modify their MAC addresses and upload the device deletion Excel file again. Dumb terminals that remain unmatched will fail to be deleted.
Dumb Terminal Permission Configuration
Permission configuration is the core policy control layer of the dumb terminal network access system, used to define access boundaries, behavior rules, and execution priorities for different devices or device groups on the network. Through the combined model of "policy name + network permissions + target objects + effective conditions + validity period", it implements refined, dynamic, and automated zero trust access control, ensuring that each dumb terminal can only access the resources required for its business and preventing lateral movement and unauthorized access.
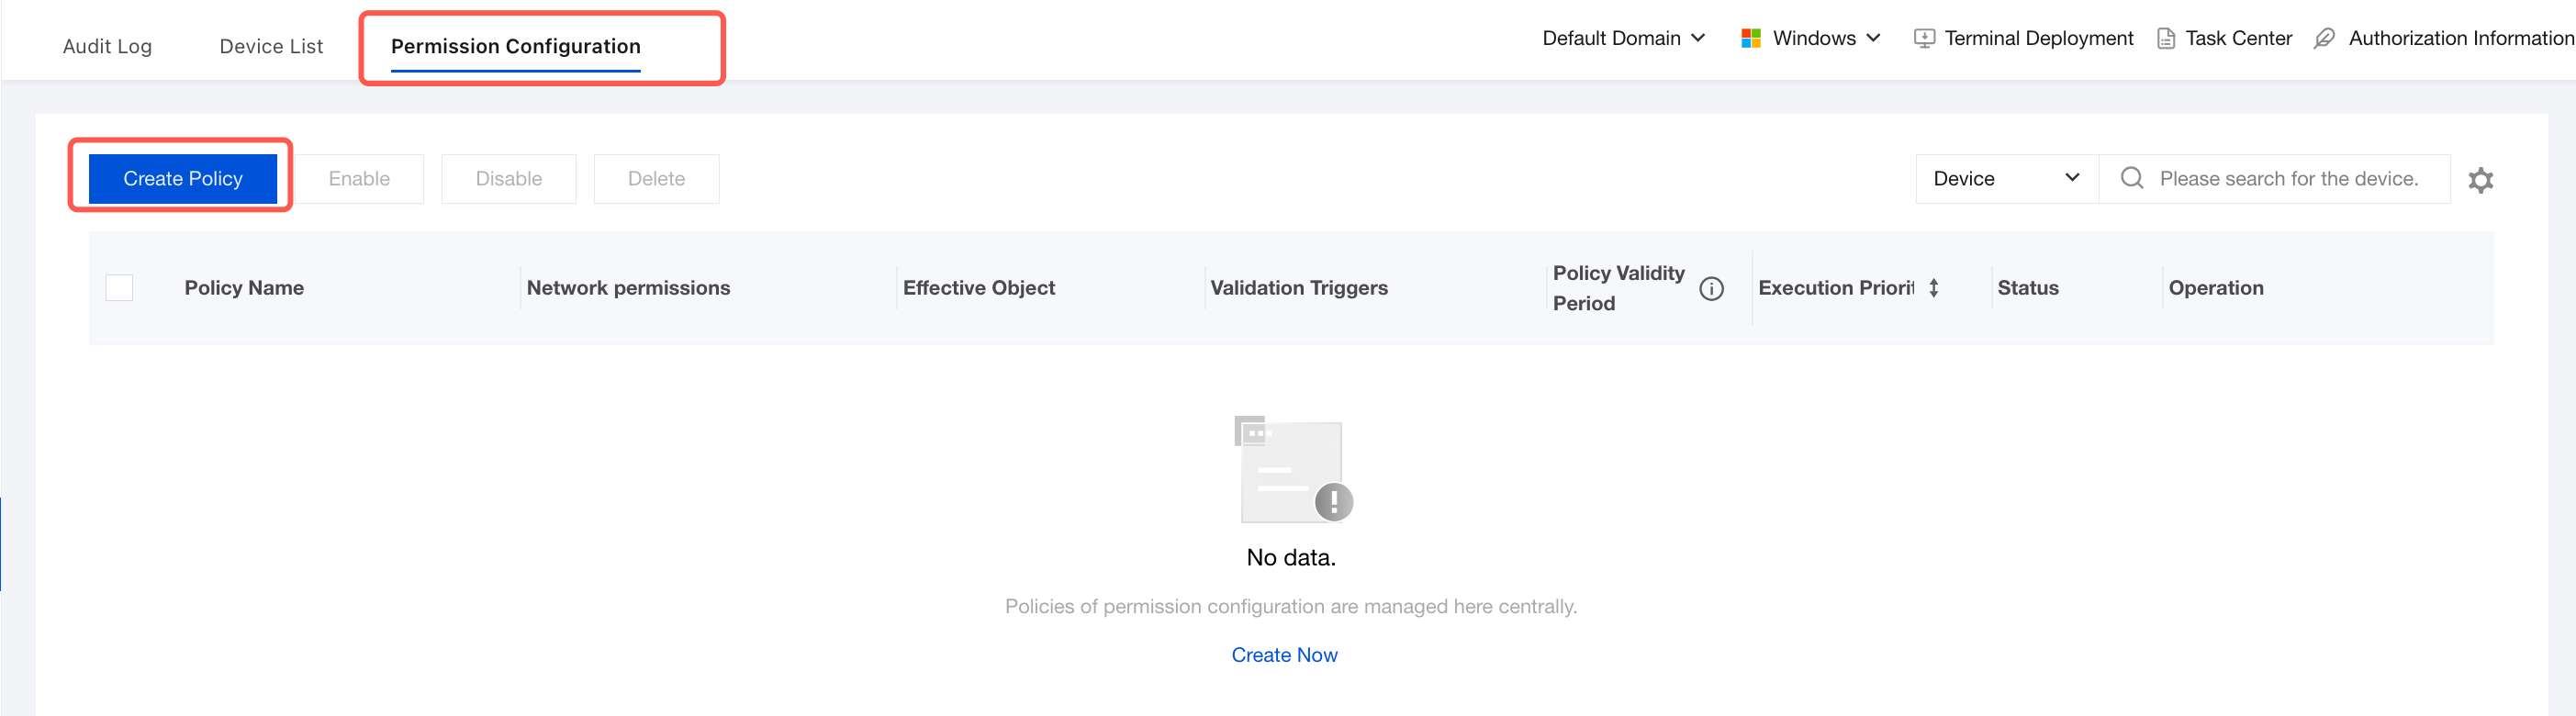
2. On the Permission Configuration page, click Create Policy.
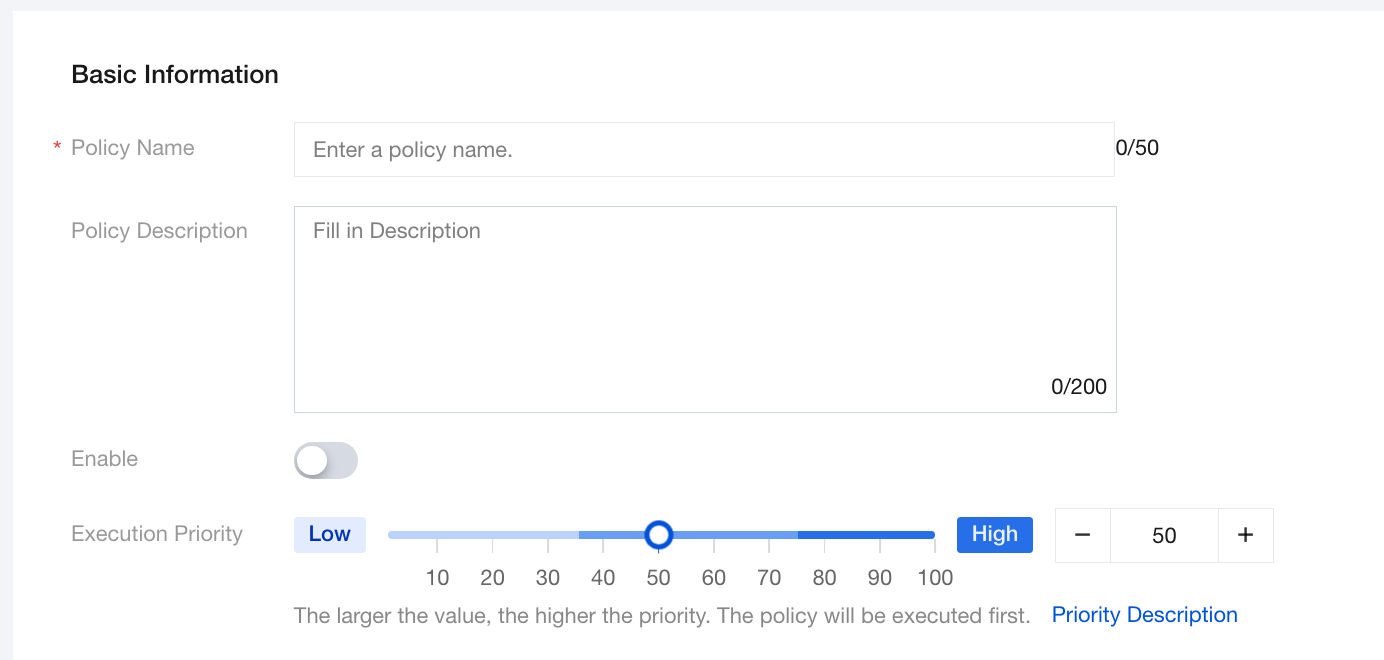
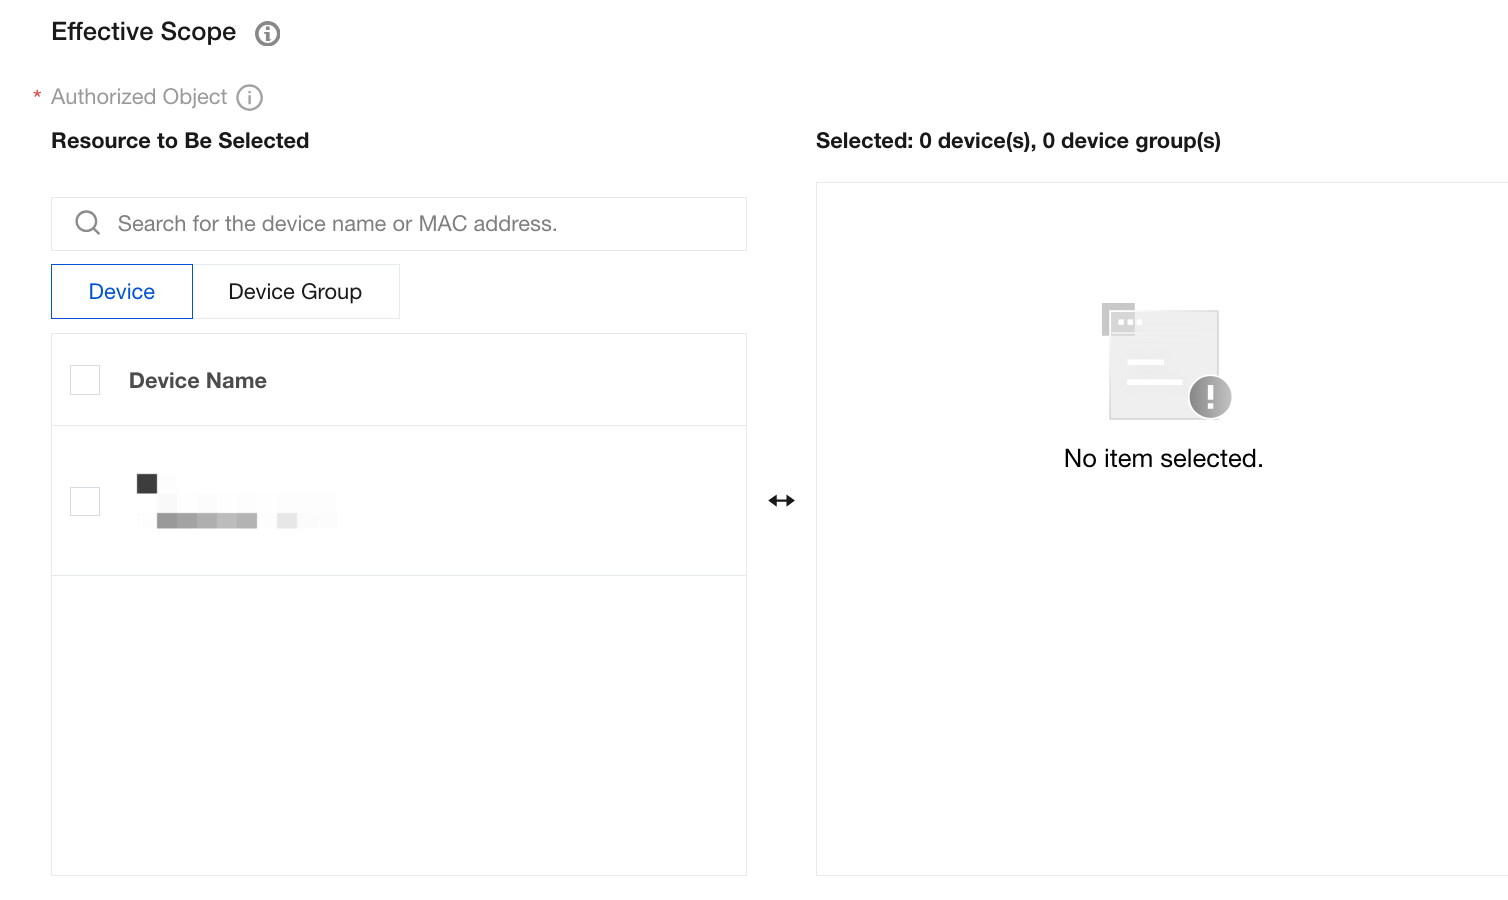
3. On the Create Policy page, configure the relevant parameters.
3.1 Enter the policy name and other parameters such as the policy description.
3.2 Configure the effective scope and select devices/device groups as the authorized objects.
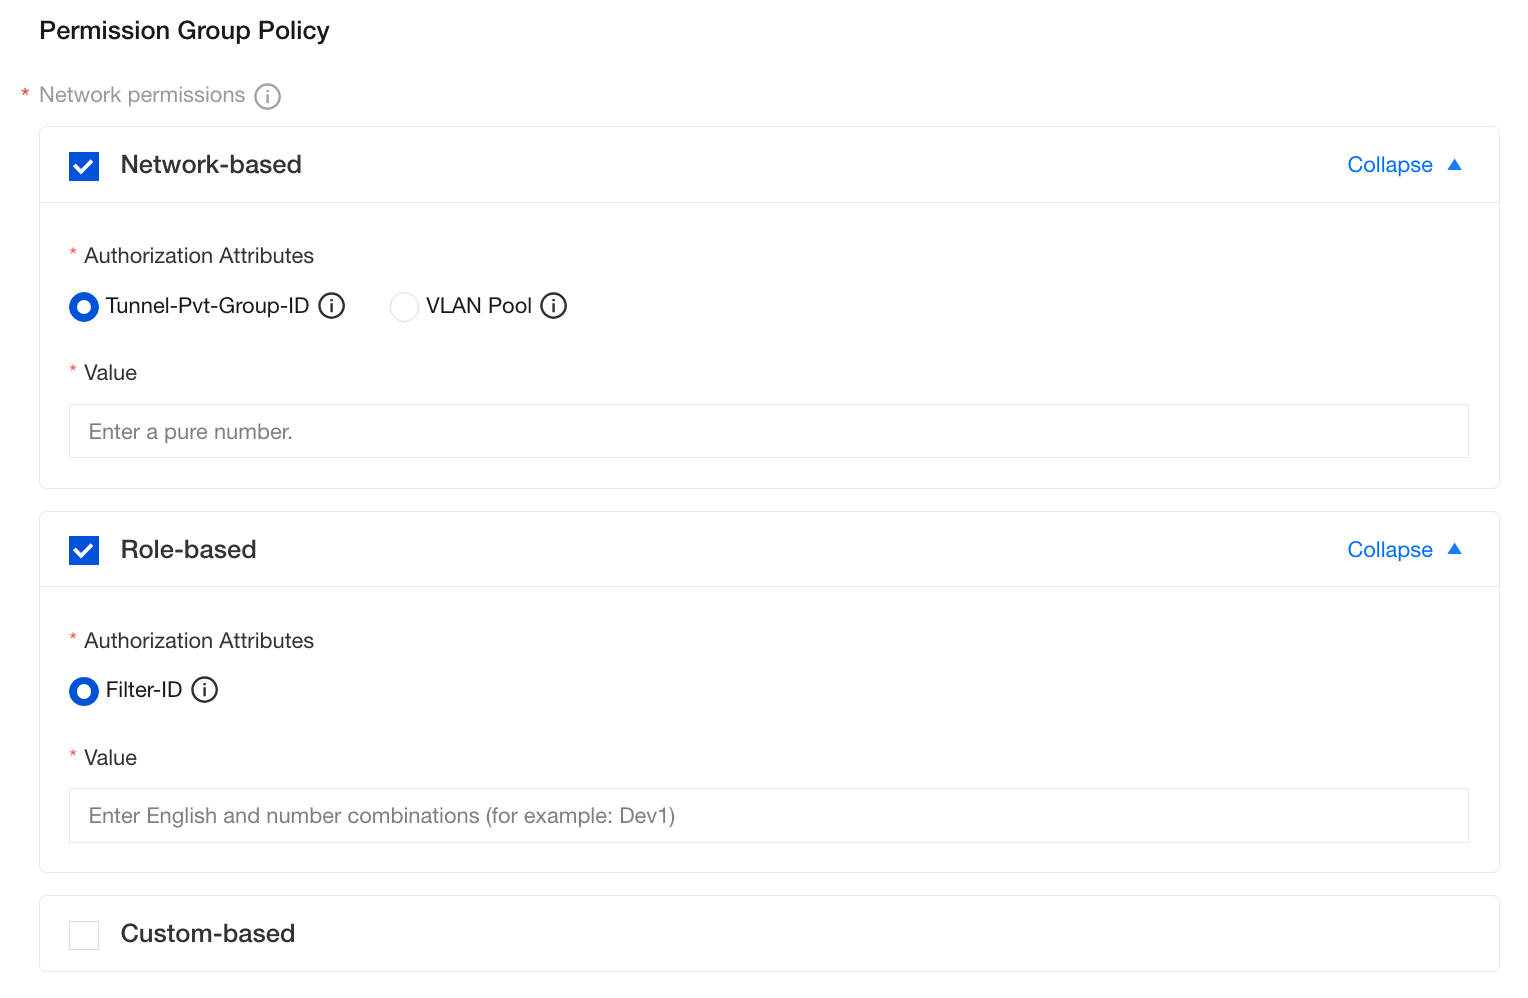
3.3 Configure network permissions to authorize dumb terminals for network access. Three authorization modes are supported (network-based/role-based/custom), and multiple modes can be enabled simultaneously.
Parameter Name
Description
Network permission
network-based
Network-based authorization: optional authorization attributes Tunnel-Pvt-Group-ID or VLAN Pool:
Tunnel-Pvt-Group-ID: This attribute typically corresponds to the VLAN ID of a routing device. Enter a numeric value only.
VLAN Pool: The VLAN Pool attribute specifies a VLAN pool.
Role-based
Role-based authorization:
Filter-ID: Corresponds to a preset role, user template, or ACL on the network device.
Filter-ID must be a combination of letters and digits (for example, Dev1). If it contains only digits, it can correspond to an ACL ID.
Custom-based
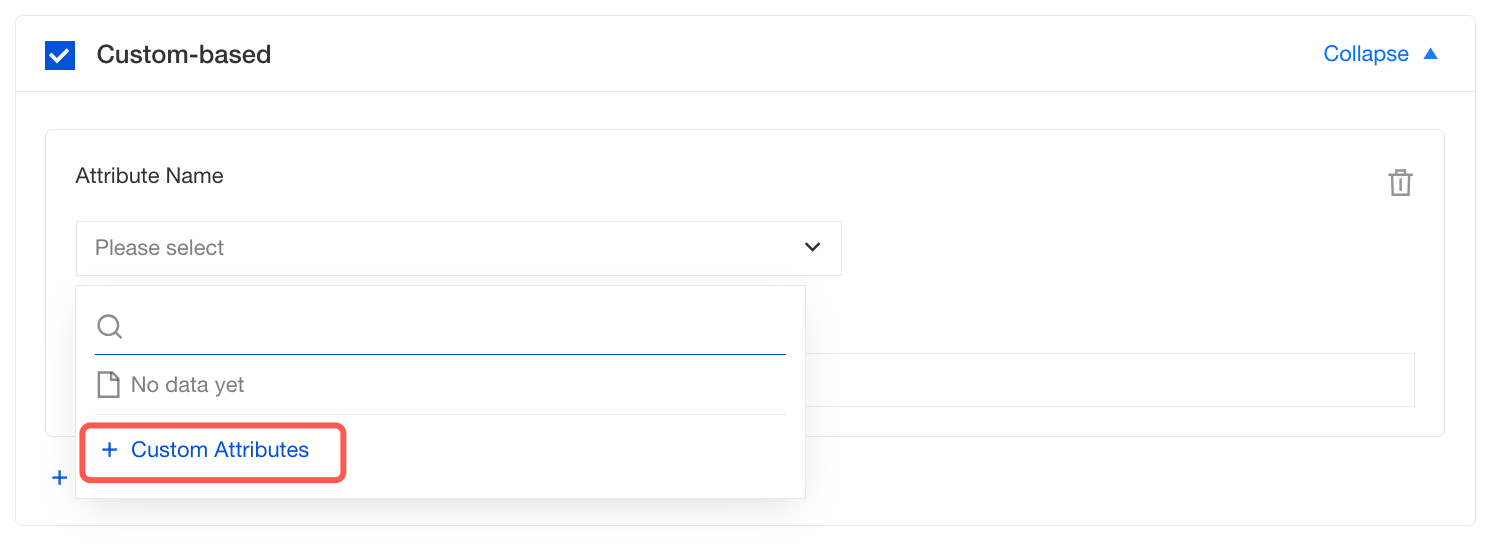
Custom-based authorization: To use other network authorization methods, customize the authorization attributes. After you select custom-based, you can set the attribute name and attribute value.
1. In the Custom-Based Module, click Add Custom Attribute.
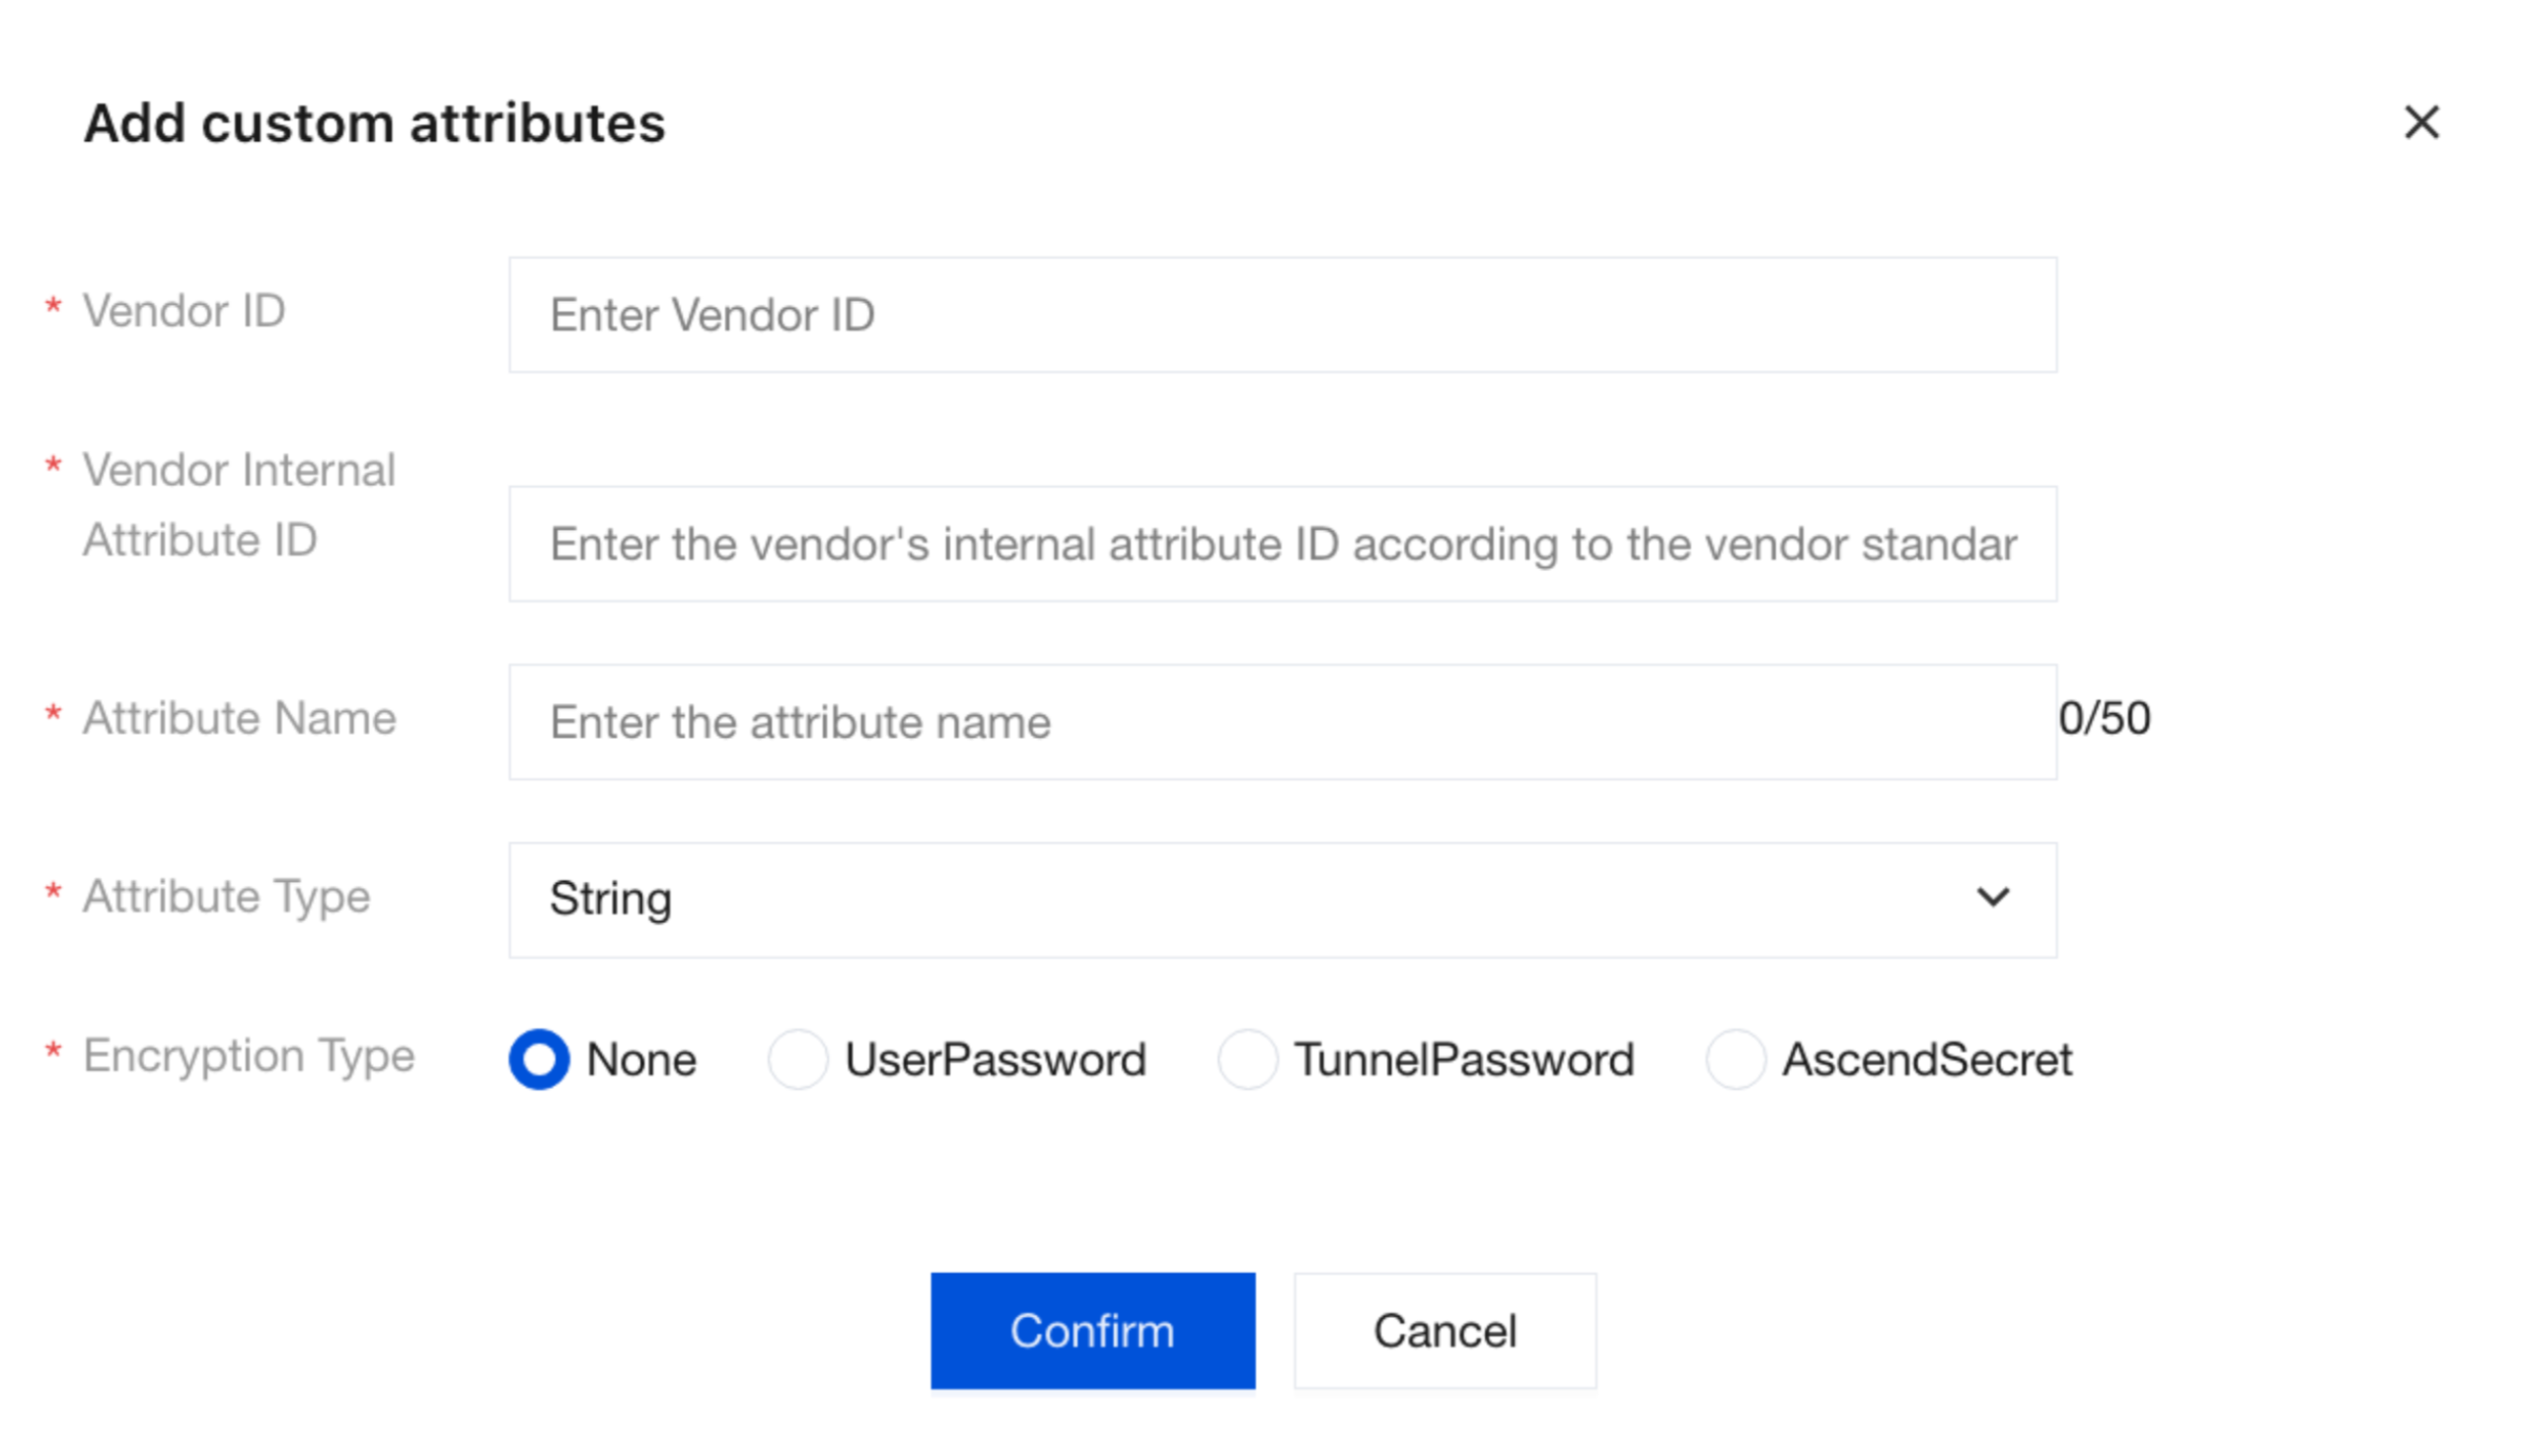
2. In the Add Custom Attribute window, configure the following parameters and click OK to save.
Vendor ID: Enter the vendor ID of the network device.
Vendor Internal Attribute ID: Enter the internal attribute ID of this custom attribute in the vendor's system.
Attribute Name: Enter the name of the custom attribute.
Attribute Type: Enter the type of the attribute value. The iOA client will validate attribute values based on this rule.
Encryption Type: Select whether RADIUS authentication packets are encrypted and the encryption type based on your actual requirements. Options include None, UserPassword, TunnelPassword, and AscendSecret.
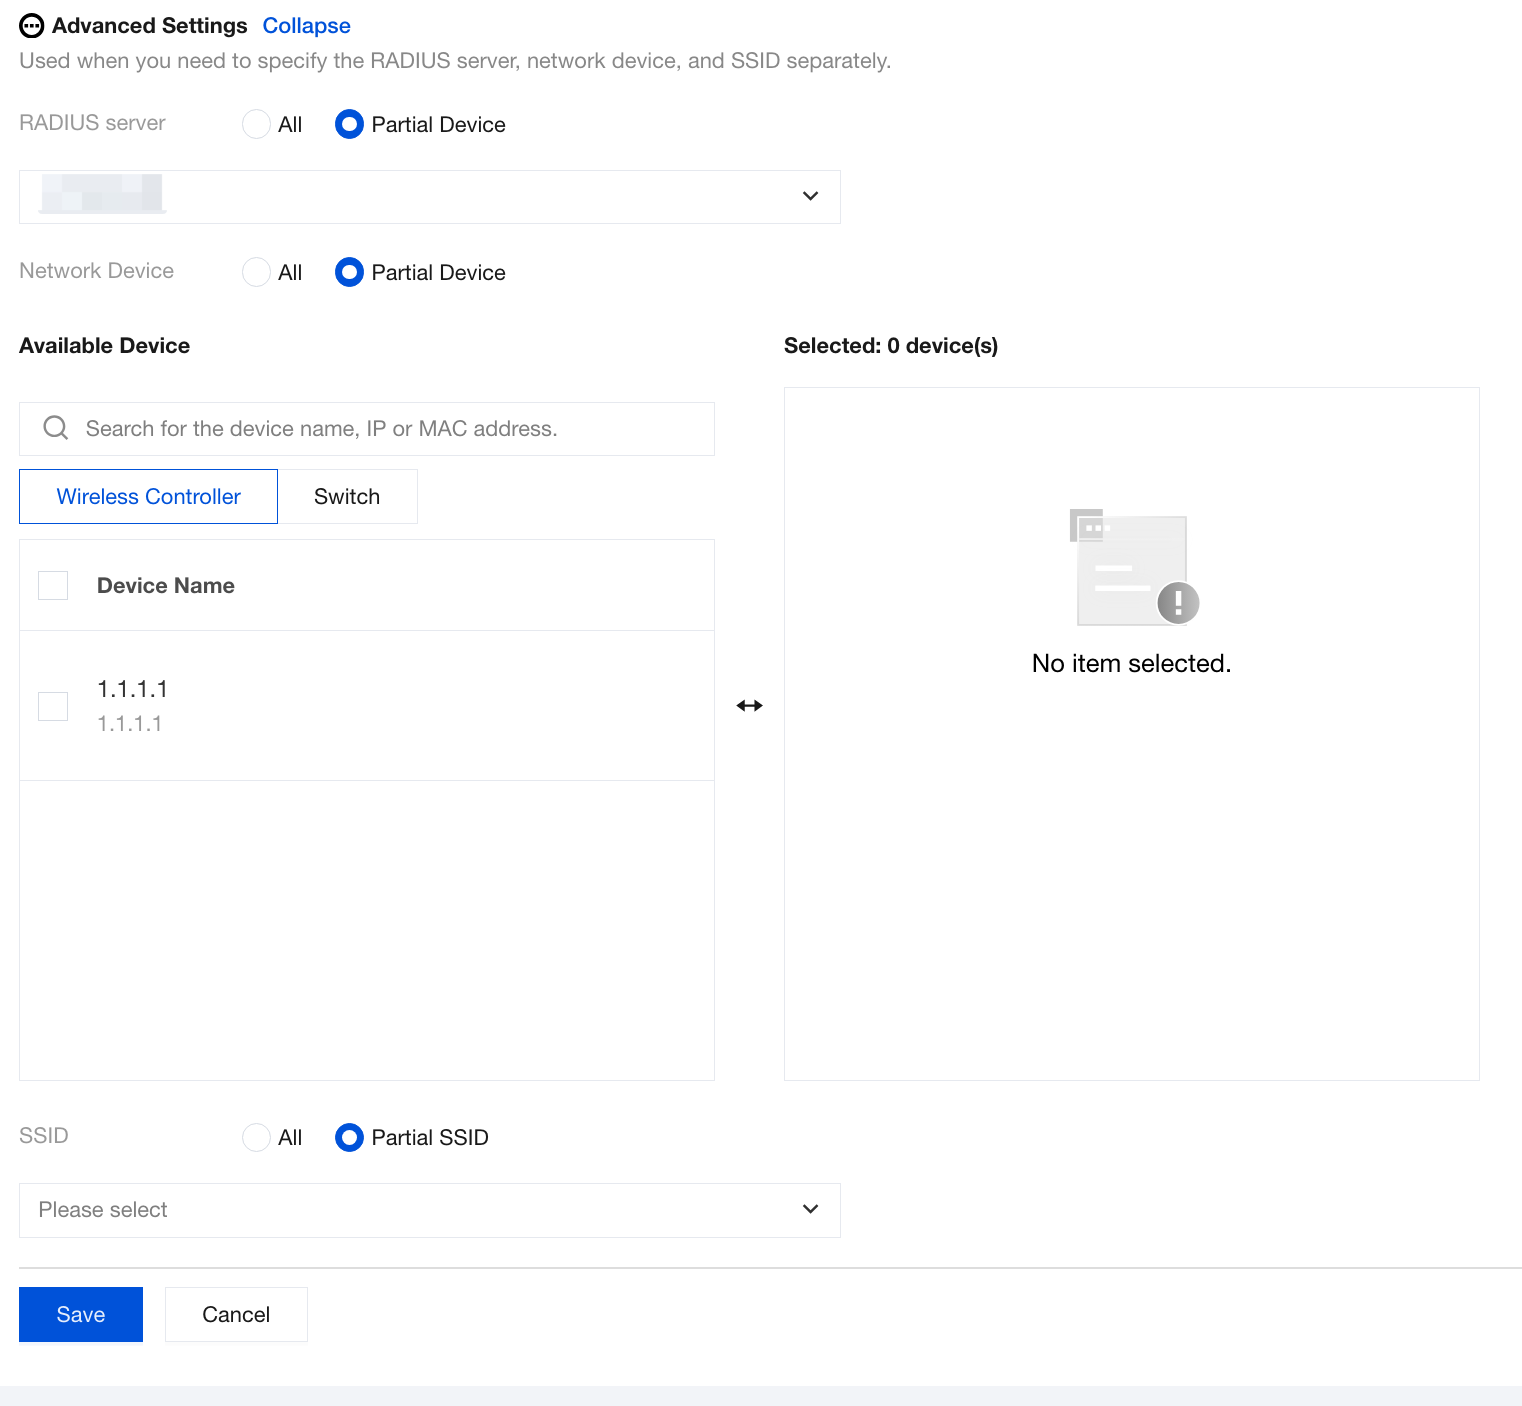
3.4 Configure advanced settings (optional) to specify the RADIUS servers, network devices, and SSIDs that this permission group applies to. By default, it applies to all devices. You can also select specific devices and configure one or more RADIUS servers, network devices, and SSIDs for this permission group.
Parameter Name
Description
RADIUS server
All: The policy takes effect on all RADIUS servers.
Specific Devices: The configuration takes effect only on specified RADIUS servers (for example, a specific server in a primary/secondary cluster).
Network device
All: The policy takes effect on all access devices (switches/APs).
Specific Devices: The policy takes effect only on specific switches or wireless controllers (for example, only the switches on the third floor apply this policy).
SSID
All: The policy takes effect on all SSIDs.
Specific SSIDs: The policy takes effect only on specific wireless networks (for example, only Guest-WiFi or IoT-Network).
4. After completing the configuration, click Save.
Enabling or Disabling a Dumb Terminal
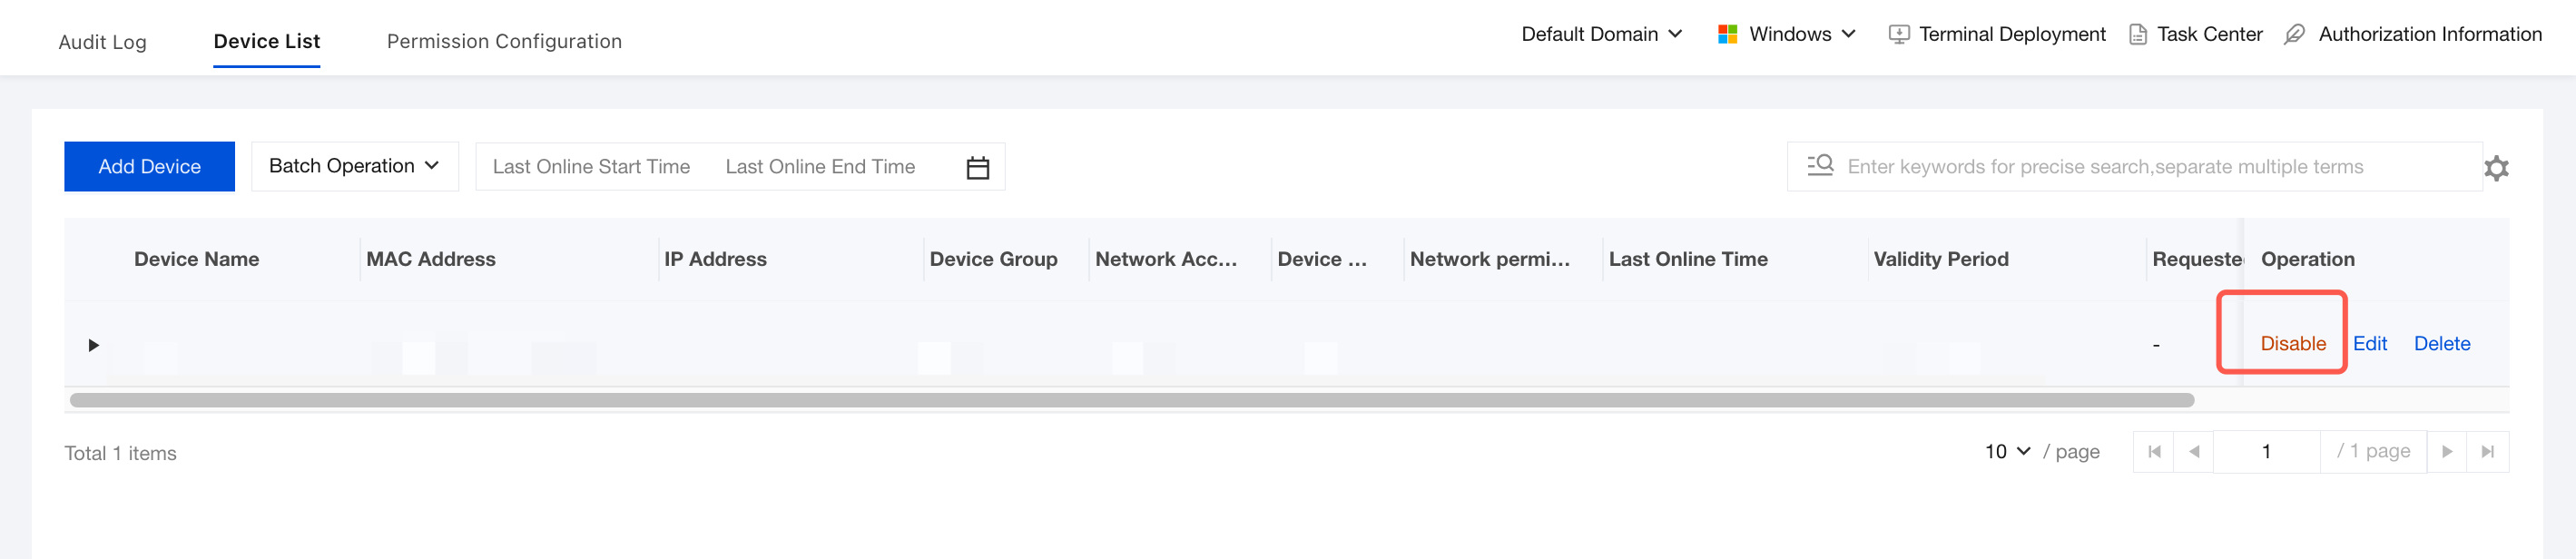
On the Device List page of the dumb terminal network access page, you can click Disable in the Operation column of a specified dumb terminal or enable the availability status of the dumb terminal. After a dumb terminal is disabled, it is no longer available within the enterprise network.
Audit Log
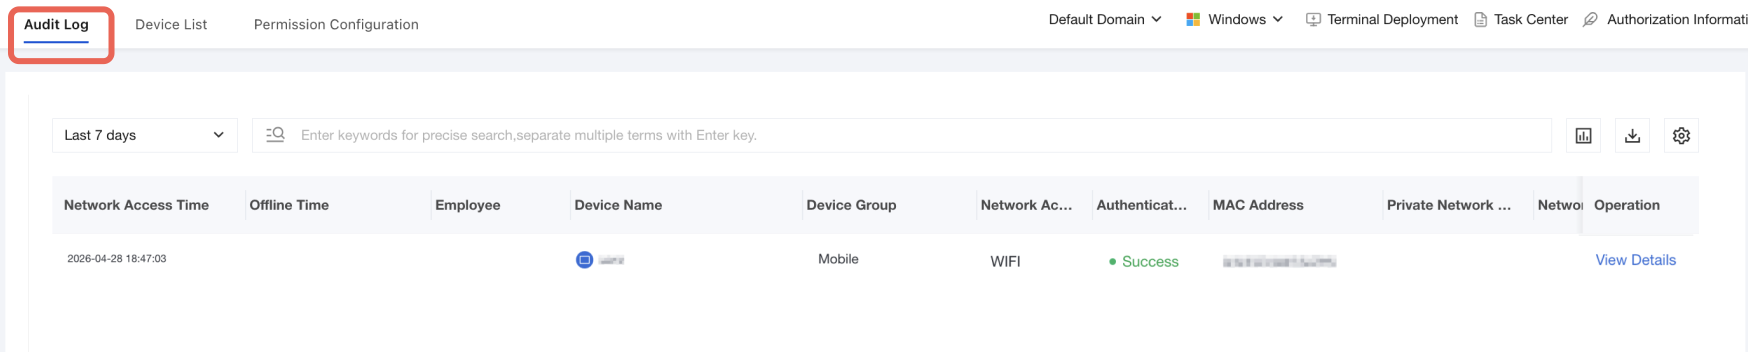
Dumb terminal network access audit logs are a recording and tracing system designed specifically for devices without an operating system or user interaction capabilities, such as printers, cameras, IP phones, industrial computers, and smart access control systems. They do not rely on usernames and passwords. Instead, authentication and control are performed based on hardware fingerprints such as MAC addresses, terminal identifiers, and group policies, ensuring that the network activities of these devices can be monitored, audited, and blocked.
2. You can query by time range, including today, the last 7 days, the last 14 days, the last 30 days, or a custom range. You can query by status, including all statuses, success, or failure. For authentication method, you can query all methods, Wi-Fi, or wired connections.
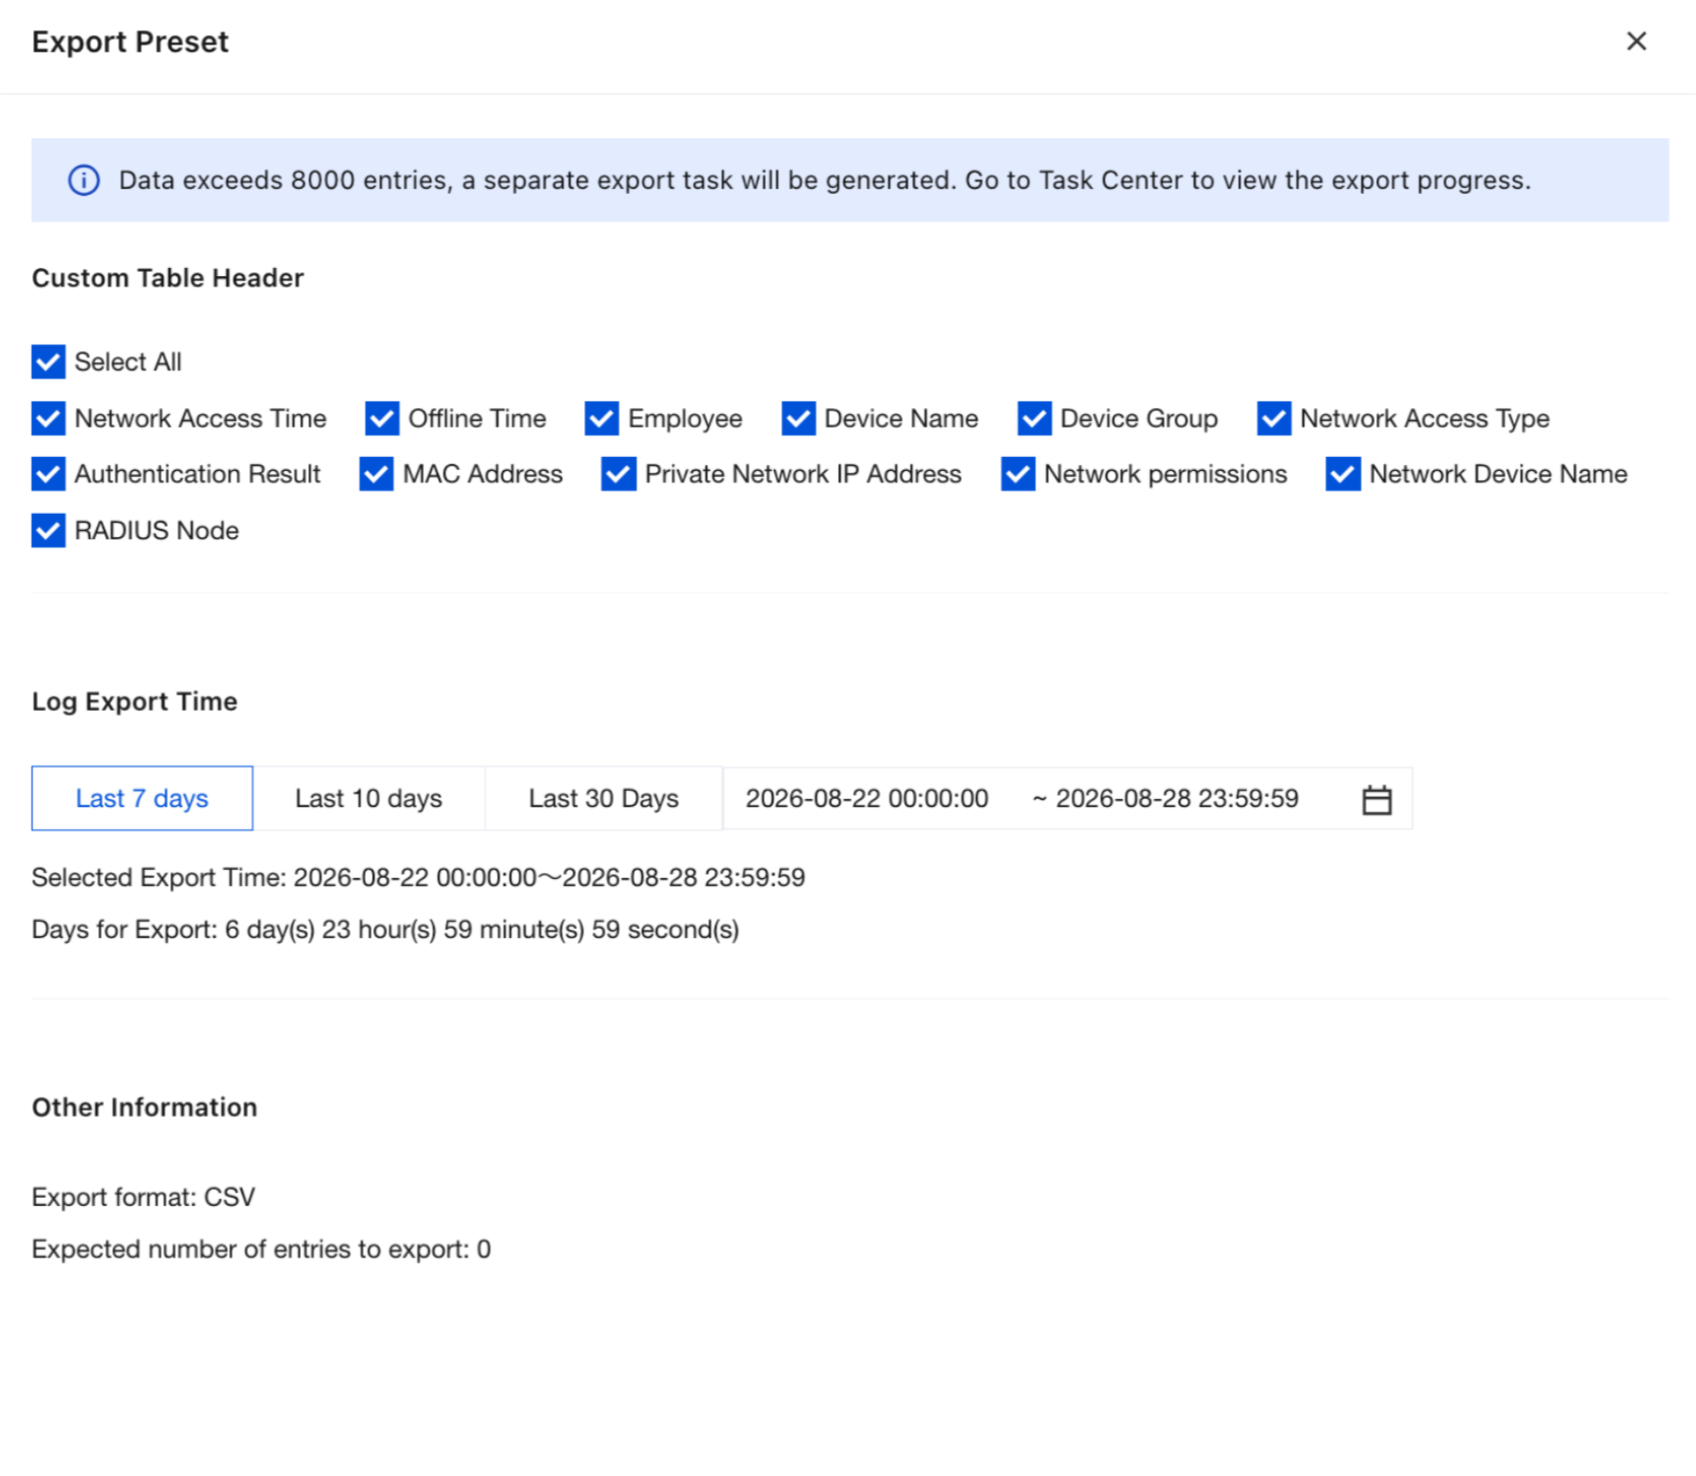
3. Click
to export the current filtered results in Excel or CSV format for archiving or secondary analysis.
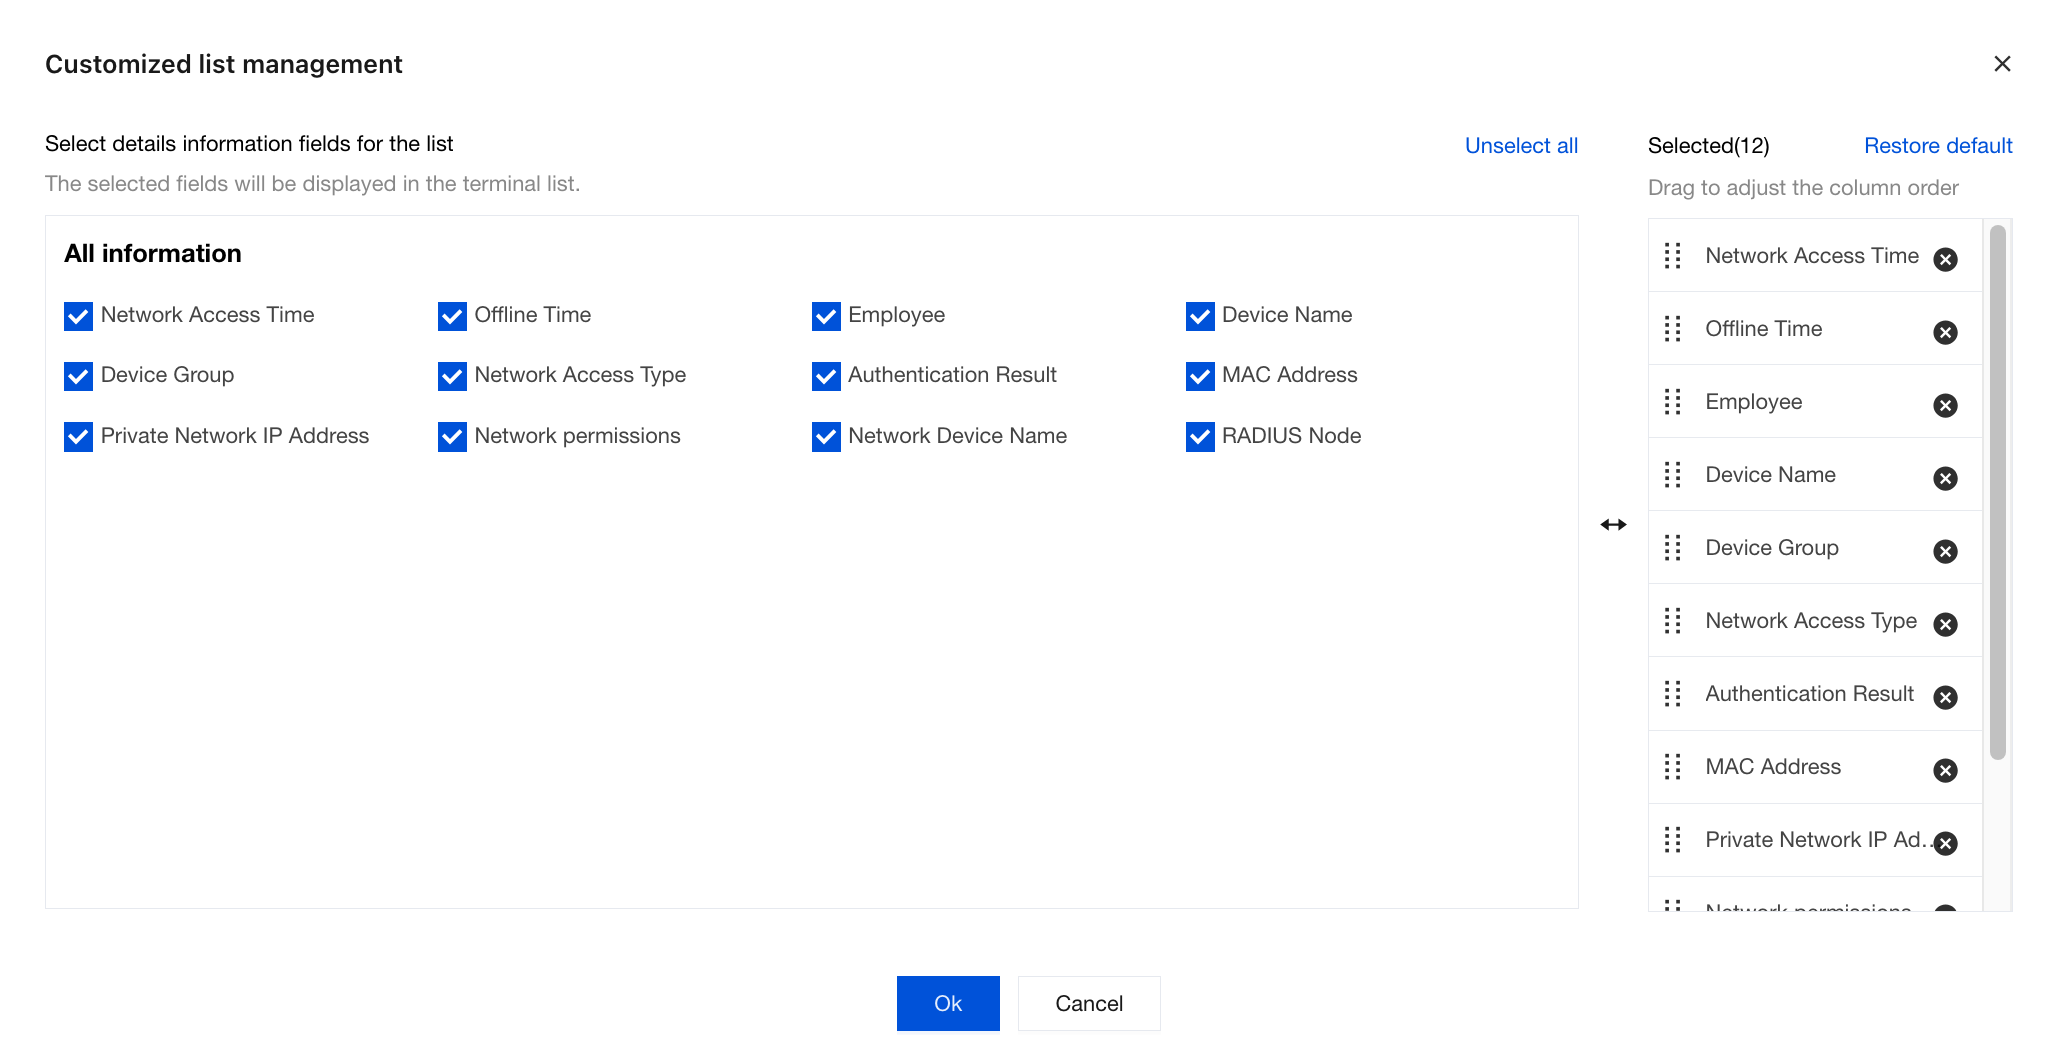
4. Click the settings
icon in the upper-right corner of the list to customize the fields displayed in the list. After you select a field, it is displayed in the audit log list. If you clear the selection, the field is hidden. By default, all fields are displayed.
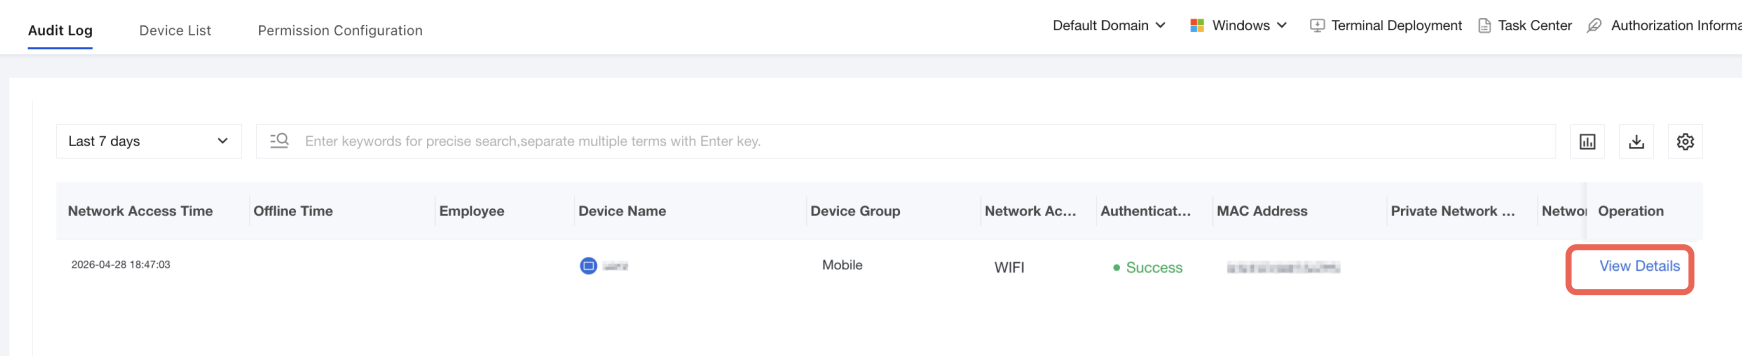
5. Click View Details to view basic device information, network connection information, network device information, and RADIUS information.