Batch Applying for and Downloading Free Certificates Using Python-based API Calls
Download
Focus Mode
Font Size
Overview
This document describes how to batch apply for and download certificates using Tencent Cloud APIs.
Preparations
Create a sub-account and authorize it with all permissions associated with cloud APIs and SSL certificates.
Install the latest version of Python. Download the package via here if necessary.
Install the latest version of PyCharm. Download it via here if necessary.
Note:
To keep your account and cloud assets under it secure, properly keep and regularly update
SecretId and SecretKey.Create a sub-account as instructed in Creating and Authorizing Sub-account.
Directions
1. Open the command prompt window and view the Python script with the following command:
python -V
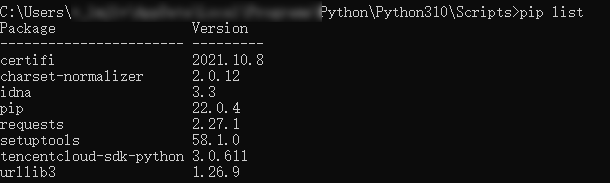
2. View installed third-party modules for Python with the following command:
pip list
Note:
For example, if
requests is missing, install it with pip install requests.3. Use pip to install Tencent Cloud Python SDK with the following command:
pip install -i https://mirrors.tencent.com/pypi/simple/ --upgrade tencentcloud-sdk-python
4. Download the latest code from Github repository or Gitee repository and decompress it.
5. Open PyCharm, import the latest code file, create a new .py file under the
tencentcloud-sdk-python/tencentcloud/ssl directory, such as apply.py, add the following code in the file and run.import json,base64from time import time,sleepfrom tencentcloud.common import credentialfrom tencentcloud.common.profile.client_profile import ClientProfilefrom tencentcloud.common.profile.http_profile import HttpProfilefrom tencentcloud.common.exception.tencent_cloud_sdk_exception import TencentCloudSDKExceptionfrom tencentcloud.ssl.v20191205 import ssl_client, modelsstart = time()#SecretId: Your API SecretID; SecretKey: Your API SecretKey.cred = credential.Credential("SecretId", "SecretKey")httpProfile = HttpProfile()httpProfile.endpoint = "ssl.tencentcloudapi.com"clientProfile = ClientProfile()clientProfile.httpProfile = httpProfiledomain_name = []while True:domain = input('the domain for which a certificate is applied')#Enter the domain to be bound with the certificate you are applying for; if you don’t want to continue, press Enter.if domain == '':breakelse:domain_name.append(domain)for i in range(len(domain_name)):client = ssl_client.SslClient(cred, "", clientProfile)try:req = models.ApplyCertificateRequest()params = {"DvAuthMethod": "DNS_AUTO","DomainName": domain_name[i]}req.from_json_string(json.dumps(params))resp = client.ApplyCertificate(req)response = json.loads(resp.to_json_string())print('domain: {0}material submitted, auto-verification in 5s'.format(domain_name[i]))certid = response['CertificateId']sleep(5)try:req1 = models.CompleteCertificateRequest()params1 = {"CertificateId": certid}req1.from_json_string(json.dumps(params1))resp1 = client.CompleteCertificate(req1)response1 = json.loads(resp1.to_json_string())print('doman: {0}verified successfully. Prepare to download the certificate'.format(domain_name[i]))try:req2 = models.DownloadCertificateRequest()params2 = {"CertificateId": certid}req2.from_json_string(json.dumps(params2))resp2 = client.DownloadCertificate(req2)response2 = json.loads(resp2.to_json_string())# print(response2['Content'])content = response2['Content']with open("{0}.zip".format(domain_name[i]), "wb") as f:f.write(base64.b64decode(content))f.close()except TencentCloudSDKException as err:print(err)except TencentCloudSDKException as err:print(err)except TencentCloudSDKException as err:print(err)end = time()print('This code execution takes', round(end - start, 2), 's')
Result display
1. Apply for certificates in batches.
2. Download certificates.

Help and Support
Was this page helpful?
You can also Contact sales or Submit a Ticket for help.
Help us improve! Rate your documentation experience in 5 mins.
Feedback