Setting Custom Scale-Out
This document introduces operations related to setting custom scale-out.
Prerequisites
The computing specification of the instance before the CPU elastic scaling feature is enabled should be less than or equal to 32 cores.
Your Tencent Cloud account should have a sufficient balance to support CPU scale-out.
Billing Instructions
Enabling Custom Scale-Out
Note:
After custom scale-out is enabled, there is a very low probability of failing to initiate scale-out during the time period or cycle. The backend will retry multiple times until the initiation succeeds.
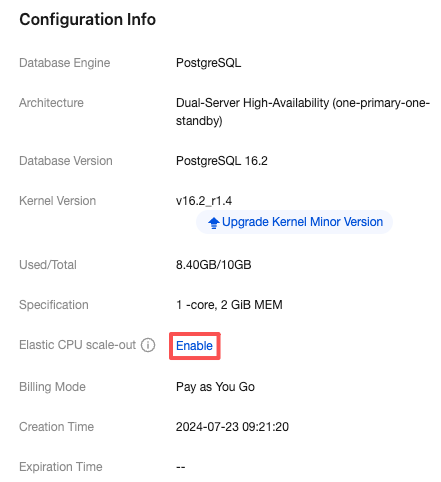
1. Log in to the PostgreSQL console. In the Instance List, click Instance ID or Manage in the Operation column to enter the instance details page.
2. Choose Instance Details > Configuration Info > Elastic CPU scale-out, and click Enable.
3. In the Elastic CPU scale-out window, set the scale-out method, number of cores for scale-out, and scale-out time, and then click OK.
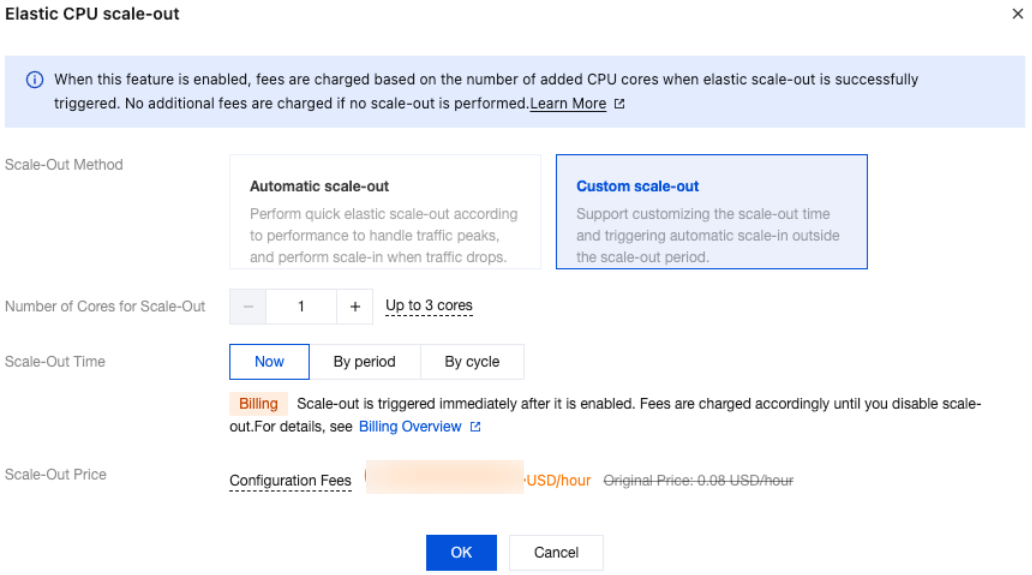
Scale-Out Method: Automatic scaling and custom scaling are supported. Select Custom scale-out here.
Automatic scale-out: Perform a quick elastic scale-out operation based on performance to adapt to traffic peaks, and perform scale-in when traffic drops.
Custom scale-out: Perform scale-out during a custom time period or cycle, and automatically perform CPU scale-in during other periods.
Number of Cores After Scale-out: Set the number of additional CPU cores to be added. Scale-out by 1 core increments is supported, with the maximum number of additional cores being 1 times the number of cores of the current CPU specification. For example, an instance with 8 cores and 16 GiB of memory can be scaled out to a maximum of 8 additional cores.
Scale-out time: supports Now, By period, and By cycle. Select one for configuration based on actual needs.

Scale-out time: Select Now to trigger scale-out immediately after the feature is successfully enabled. After scale-out, automatic scale-in is not supported. You need to manually disable scale-out, then it can immediately scale-in to the original CPU core number.
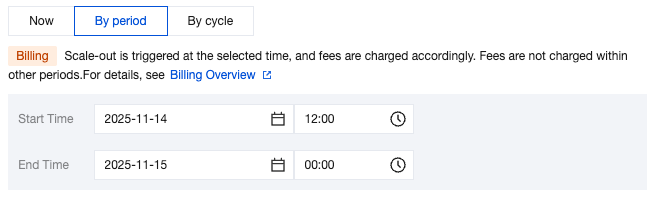
Scale-out time: Select By period to enable and trigger scale-out during the selected period, with automatic scale-in to the original CPU core number outside the time period.
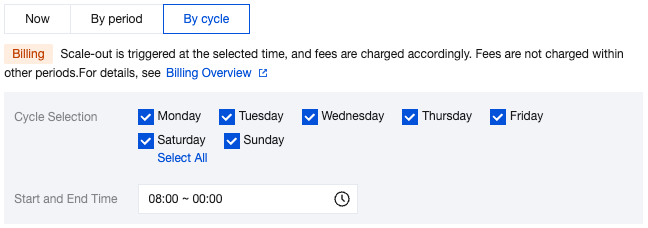
Scale-out time: Select By cycle to enable and trigger scale-out based on the selected time cycle, with automatic scale-in to the original CPU core number outside the time period.
4. When the instance status changes from Modifying to Running, the feature is enabled successfully.
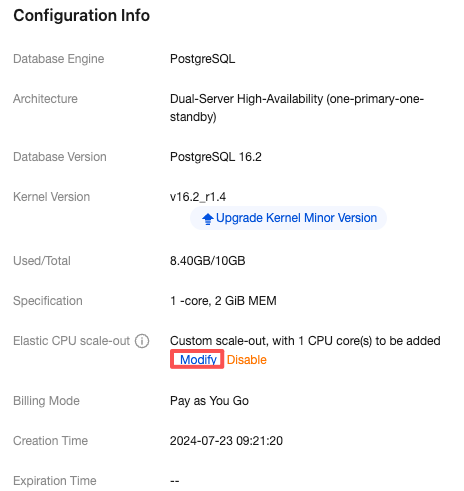
Modifying the Elastic Scale-Out Policy for CPU
After CPU elastic scaling is enabled, the CPU elastic scaling method and corresponding policy can be modified. The modifications take effect immediately, and the system will execute according to the new CPU elastic scaling policy.
1. Log in to the PostgreSQL console. In the Instance List, click Instance ID or Manage in the Operation column to enter the instance details page.
2. Choose Instance Details > Configuration Info > Elastic CPU scale-out, and click Modify.
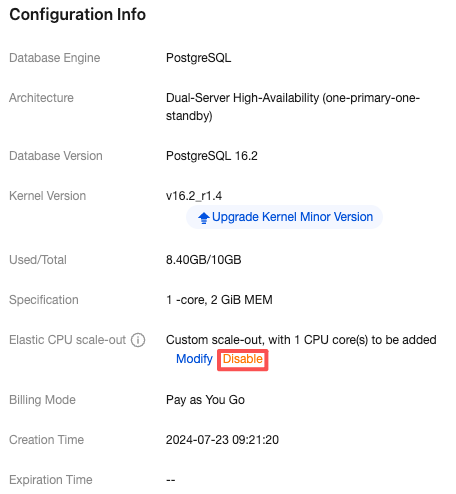
Disabling Custom Scale-Out
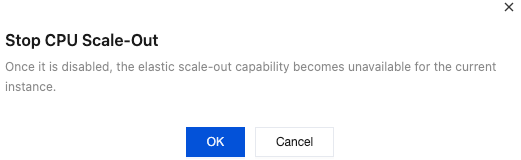
Note:
Once the feature is disabled, the elastic scale-out is unavailable for the current instance.
1. Log in to the PostgreSQL console. In the Instance List, and click Instance ID or Manage in the Operation column to enter the Instance Details page.
2. Choose Instance Details > Elastic CPU scale-out, and click Disable.
3. Click OK in the pop-up window of Stop CPU Scale-Out.
Help and Support
Was this page helpful?
You can also Contact sales or Submit a Ticket for help.
Help us improve! Rate your documentation experience in 5 mins.
Feedback