Configuring a Switch
Unduh
Mode fokus
Ukuran font
Adding a Switch
1. Log in to the Tencent iOA Zero Trust management platform console, and in the left sidebar, choose Basic Settings > Network Device.
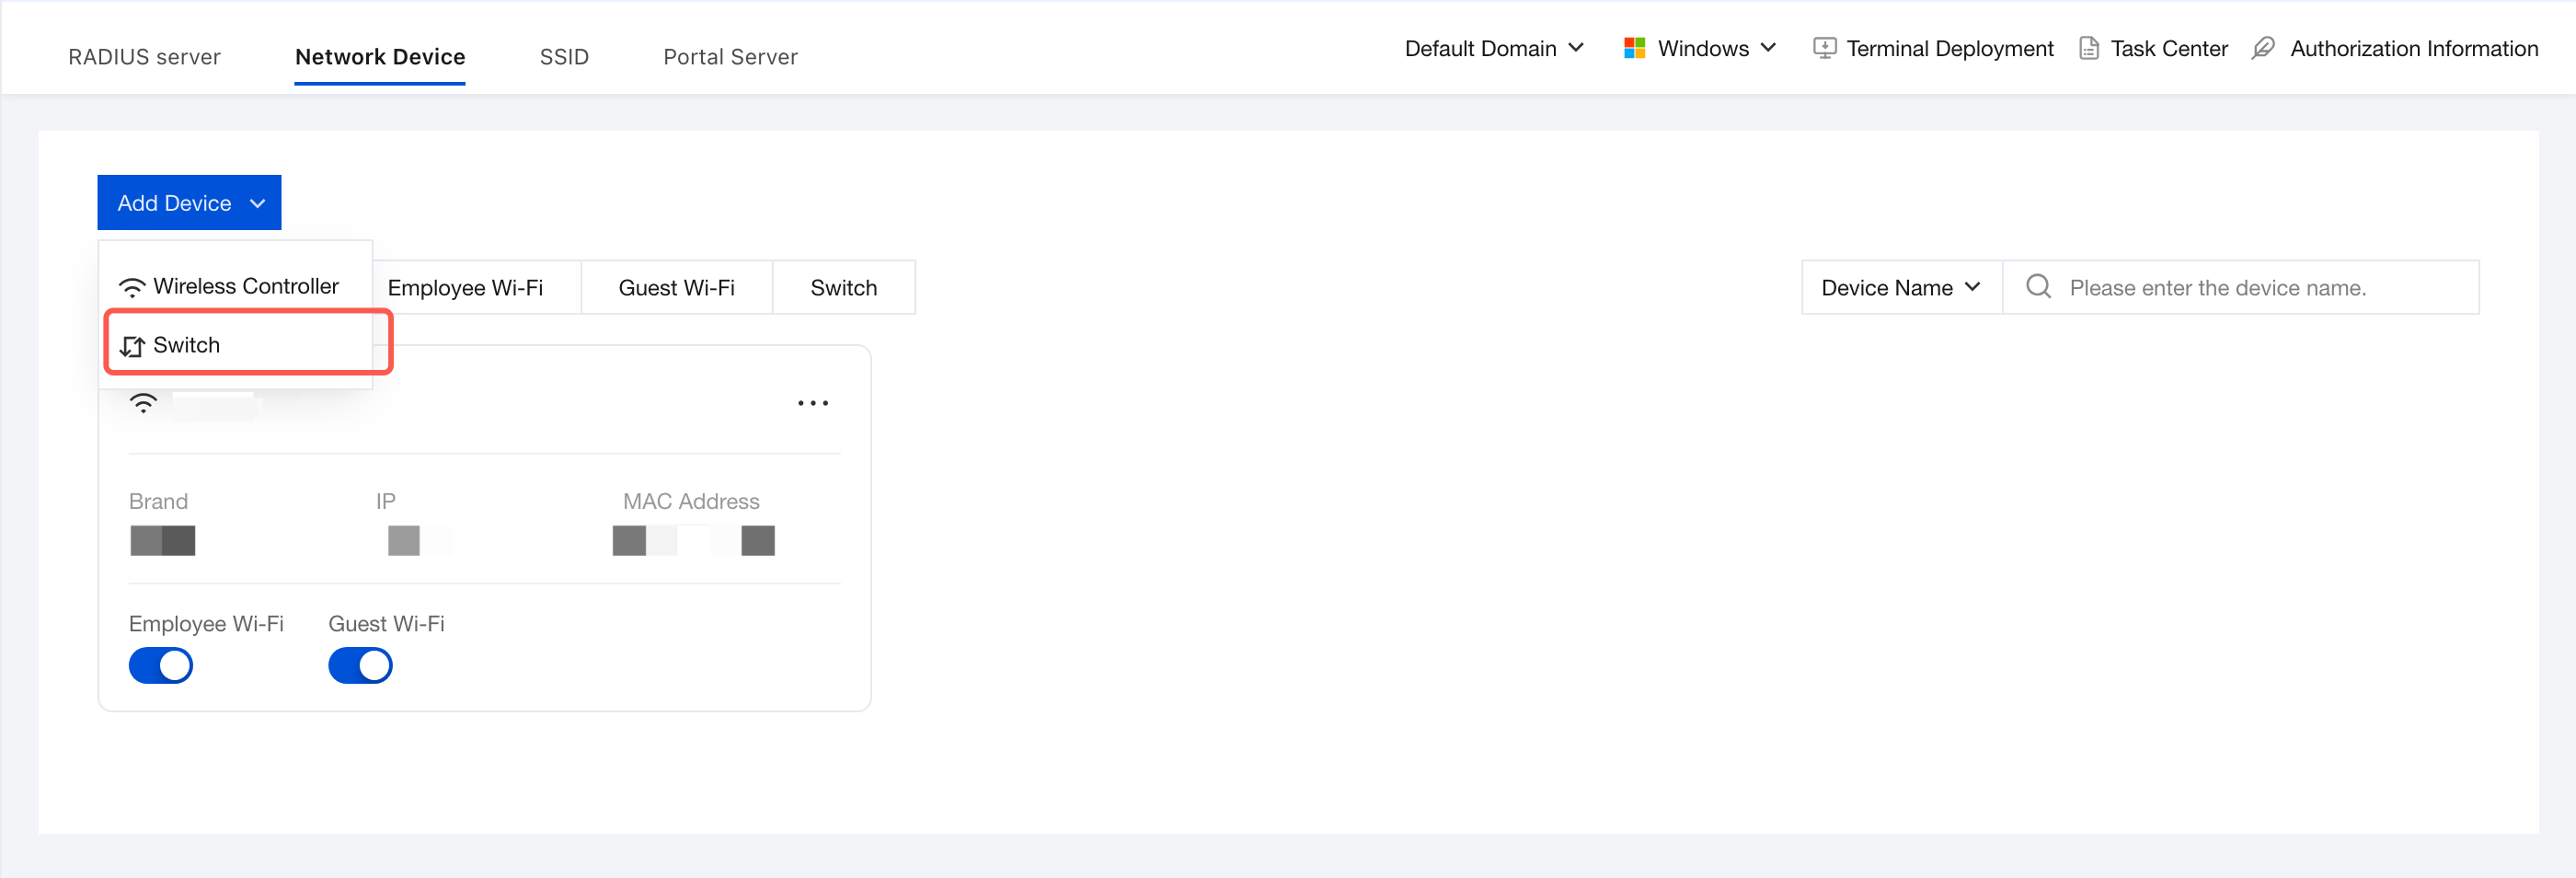
2. On the Network Devices page, click Add Device > Switch.
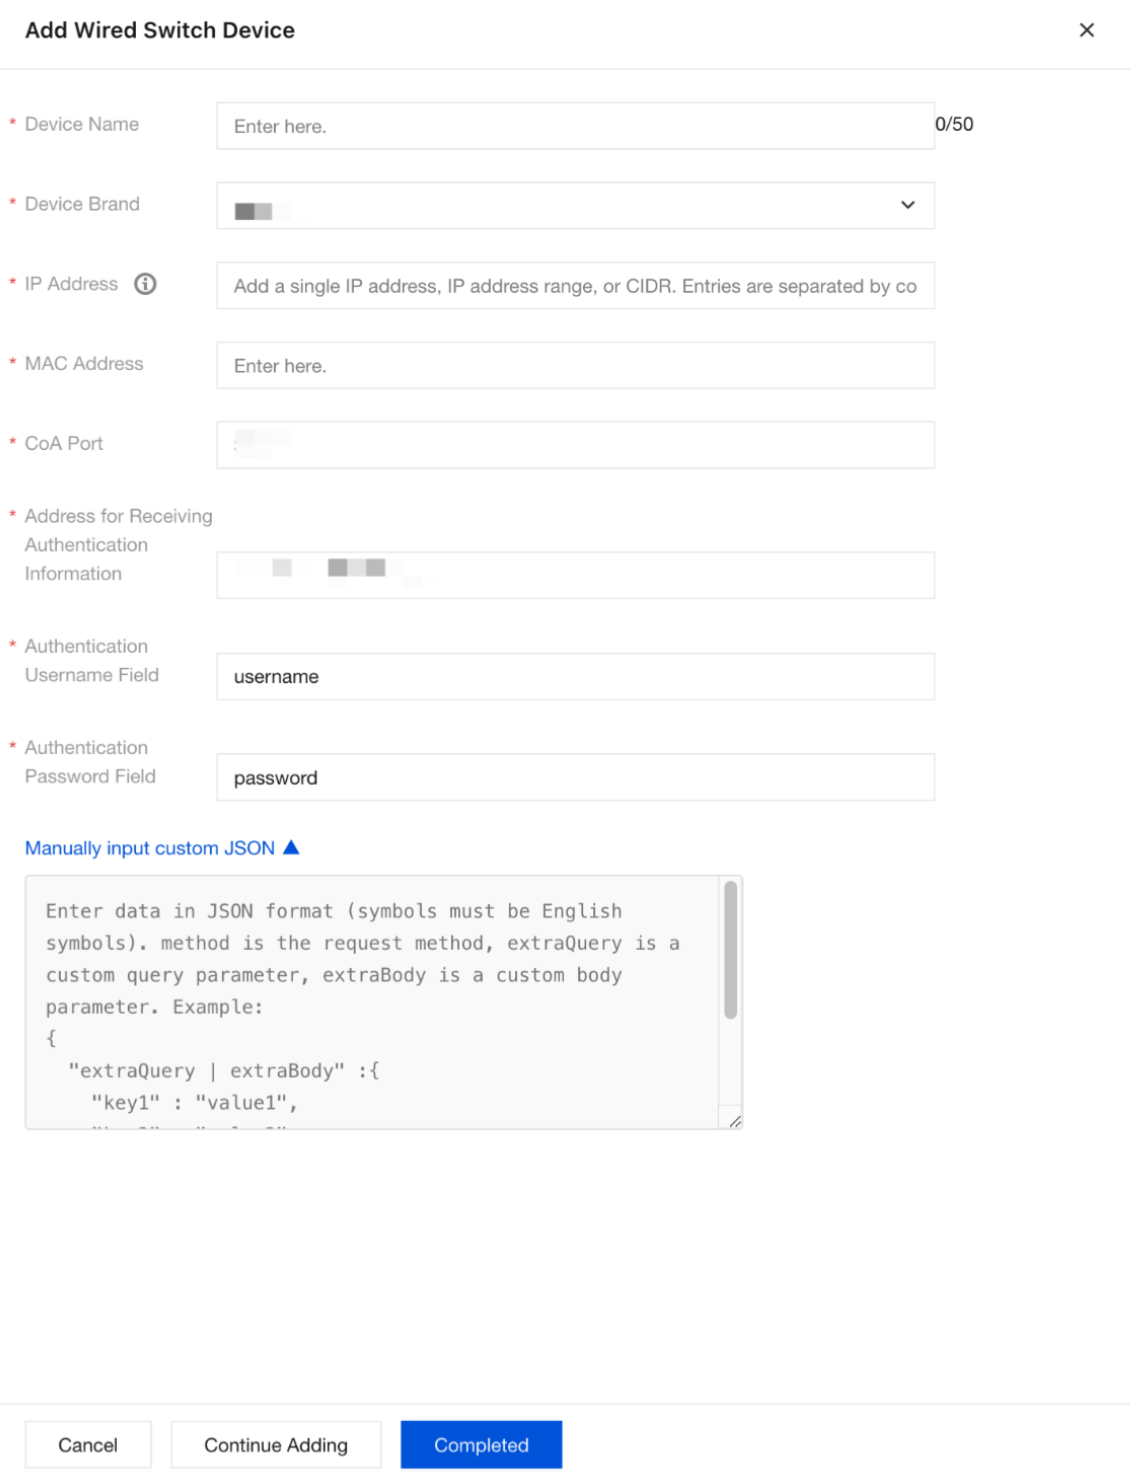
3. In the Wired Switch Device window, configure the switch name and other information, and then click Completed to save the configuration.
Parameter Name | Description |
Device Name | Enter the switch brand name. |
Device Brand | Select the switch vendor, such as Huawei, H3C, Cisco, or Ruijie. The system automatically loads the corresponding CLI command templates and RADIUS attribute dictionaries based on the brand. |
IP address | The Management IP address of the switch. Single IP addresses, IP address ranges, and CIDR blocks are supported. When adding multiple entries, separate them with commas or spaces. Attention: This IP address must have network connectivity with the management platform (routable). For stacked switches, enter the management IP address of the Master switch. Business VLAN interface IP addresses are not supported. The IP address must be an out-of-band or in-band management VLAN IP address. |
MAC Address | The physical address of the switch management interface serves as a unique device fingerprint for anti-spoofing detection, asset inventory, and destination addressing of CoA (Change of Authorization) packets. How to obtain: Log in to the switch and run display device (Huawei/H3C) or show version (Cisco) to view the Base MAC address. |
CoA Port | The Change of Authorization port. When an administrator disables a dumb terminal on the platform, the system sends a command to the switch through this port to immediately disconnect the terminal from the network without waiting for session timeout. This configuration must be consistent with the CoA port on the wired switch. The default value is 3799. |
Authentication Information Receiving Address | Destination address to which the switch sends authentication requests, that is, the IP address of the RADIUS server. Attention: The IP address entered here must be consistent with the IP address registered in the RADIUS server. Otherwise, the switch cannot locate the authentication source. |
Authentication Username Field | Enter the RADIUS User-Password field. |
Authentication Password Field | Enter the RADIUS password field. |
Enter Custom JSON. | Enter custom JSON to inject additional parameters for specific scenarios. |
Editing or Deleting a Switch
1. Log in to the iOA Zero Trust management platform console, and in the left sidebar, choose Basic Settings > Network Device.
2. On the Network Devices page, select the switch you want to modify. The following edit/delete operations are supported.
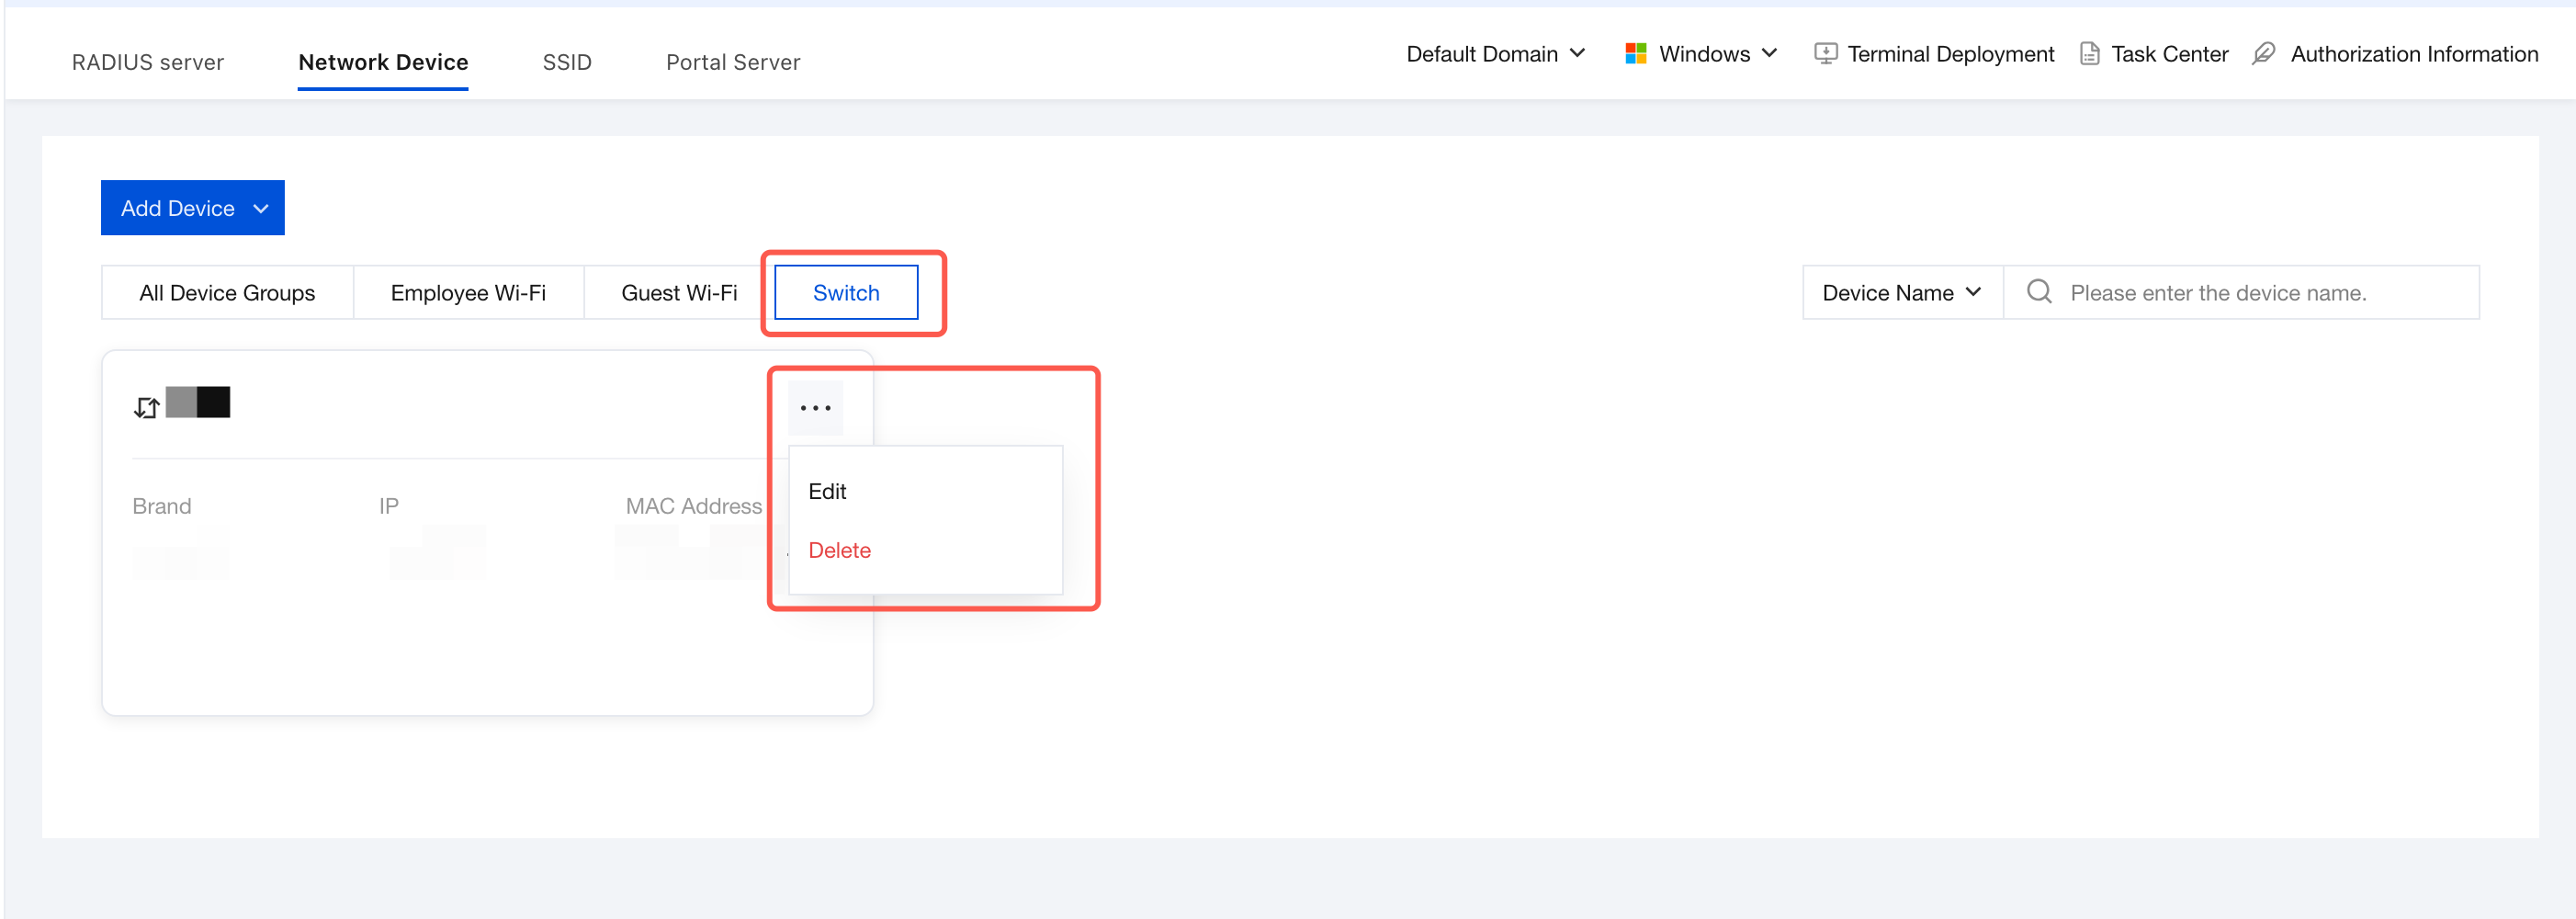
Click Edit, and in the Edit Wired Switch Device dialog box, manually modify the device name, brand, IP address, and CoA port.
Click Delete: This deletes the current switch, and the wired network will be automatically disconnected after the deletion.
Attention:
After deletion, the wired network will be automatically disconnected. Please proceed with caution.
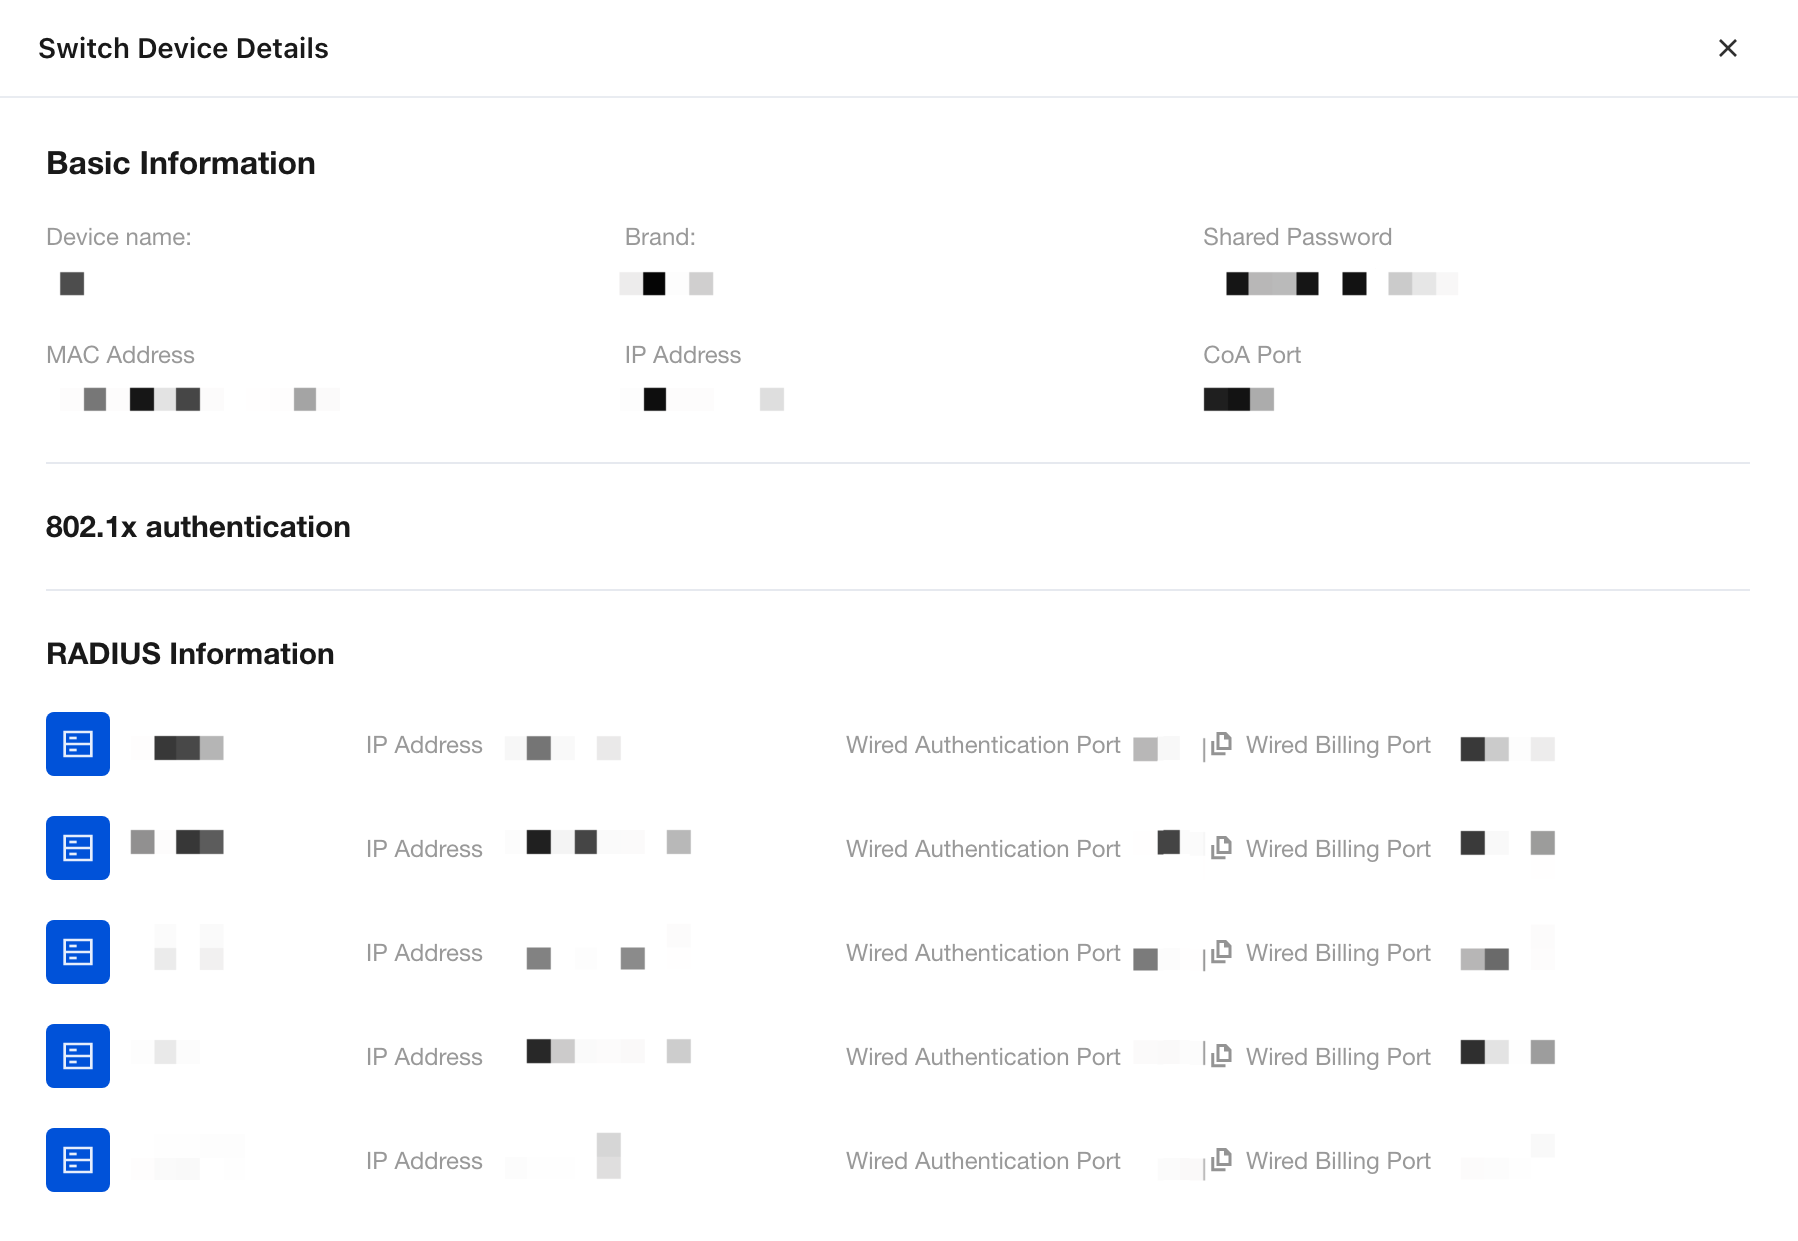
3. On the Network Devices page, click the switch card to go to its details page, where you can view basic information, 802.1X authentication, and more.
Displayed Item | Description |
Device Name | Displays the name of the configured switch. |
Brand | Brand name of the switch. |
Shared key | A shared key verifies the legitimacy of an identity by checking whether the other party has the same password. In this context, the shared key refers to the one generated when the device creates a RADIUS server, which is randomly generated by iOA. |
MAC Address | MAC address of the switch. |
IP address | Source IP address of the switch |
CoA Port | After employees successfully connect to the network and pass authentication, you can use the RADIUS server to dynamically modify their network access permissions or perform re-authentication. This configuration must be consistent with the CoA port of the local switch, with a default value of 3799. |
Bantuan dan Dukungan
Apakah halaman ini membantu?
Anda juga dapat Menghubungi Penjualan atau Mengirimkan Tiket untuk meminta bantuan.
masukan