Managing 802.1x Authentication for Employee Network Access
Unduh
Mode fokus
Ukuran font
Terakhir diperbarui: 2026-09-08 20:33:39
Diterjemahkan oleh AI
Employee network access primarily relies on the 802.1x protocol. Terminals access the network by obtaining certificates or account credentials, and network admission is achieved by connecting to the customer's network devices (ACs and switches).
Prerequisites
The employee network access service has been enabled through the 802.1x authentication protocol.
Wi-Fi or wired networks have been configured in the iOA admin console. See RADIUS Server.
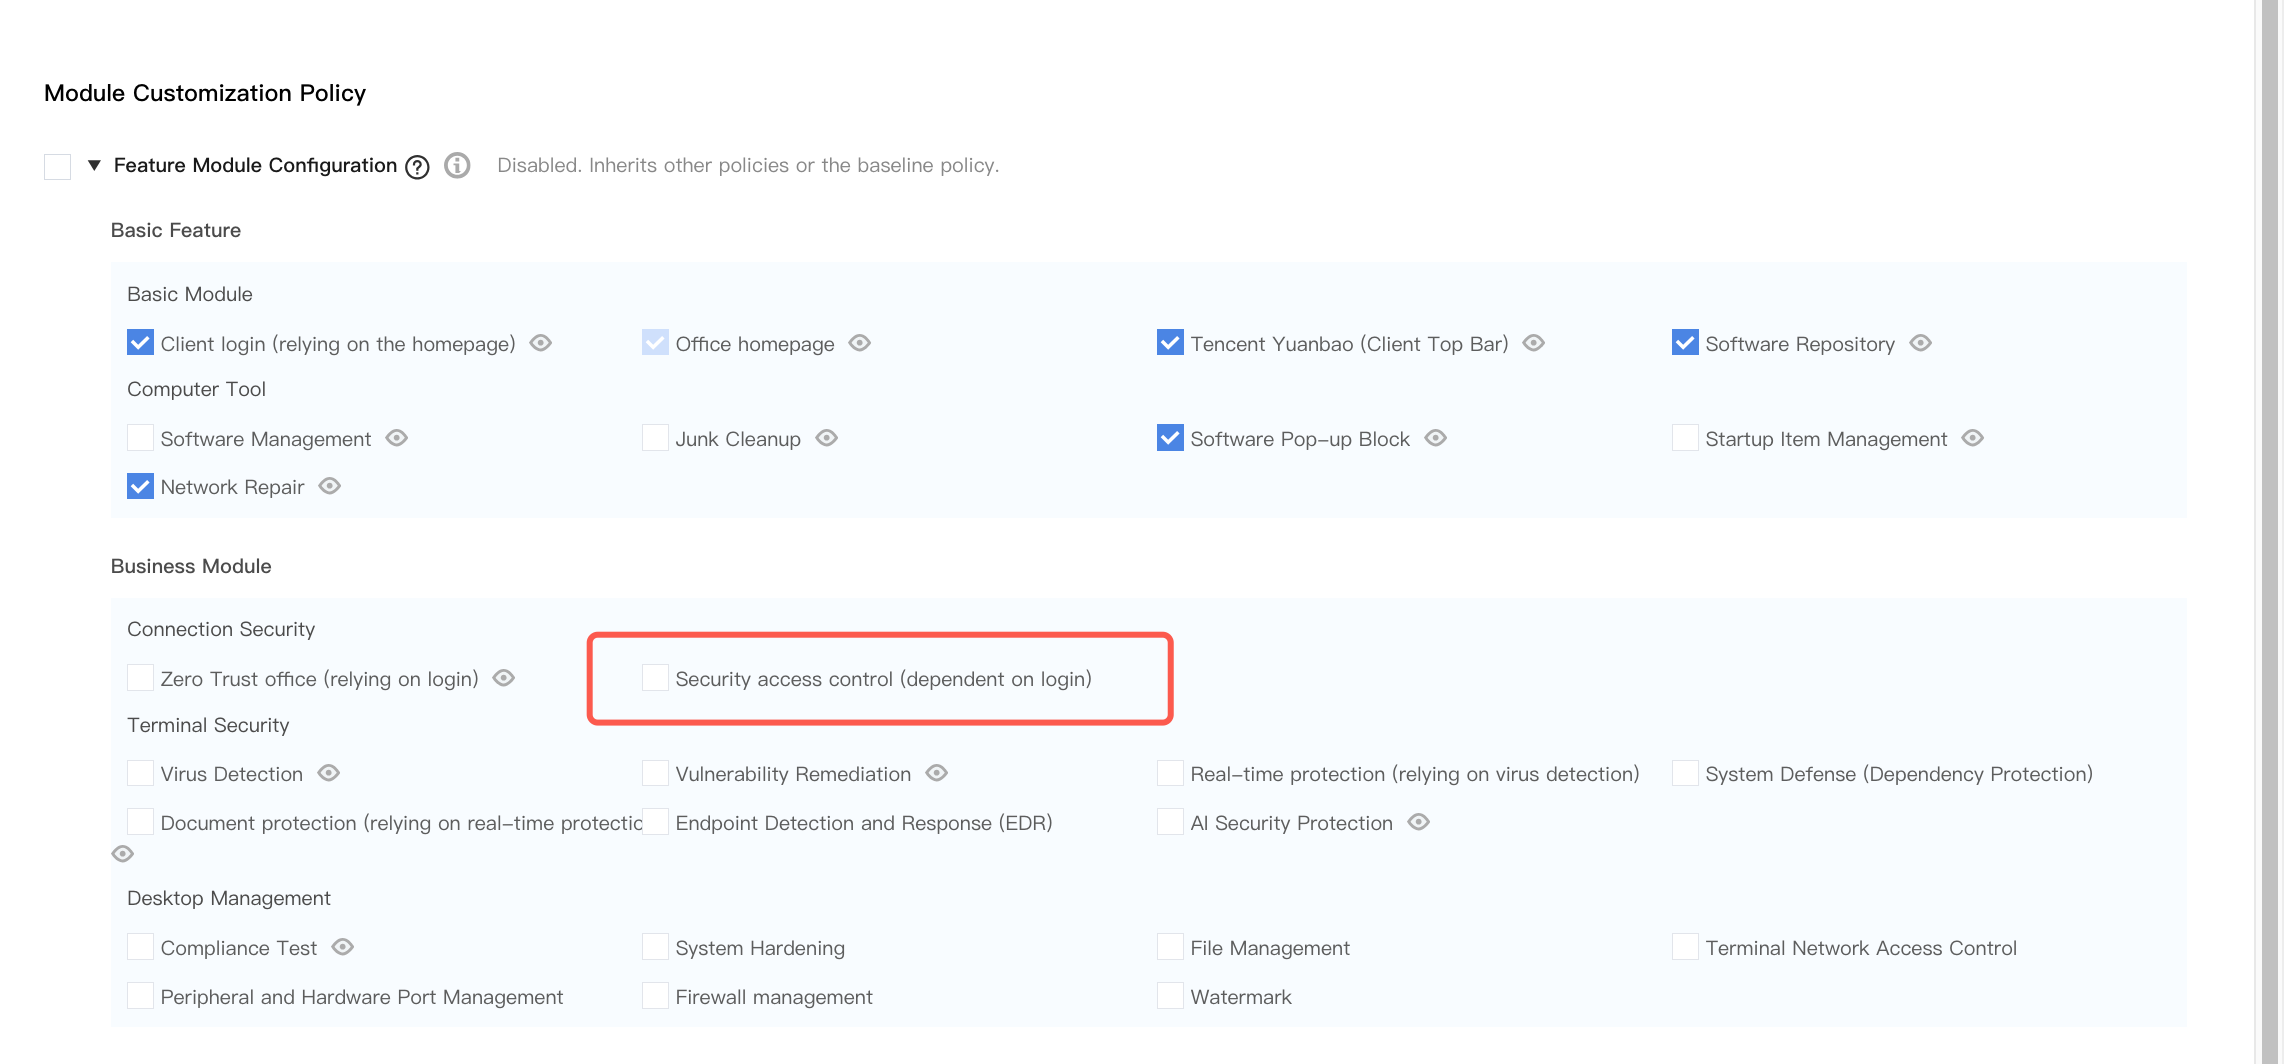
Enable Security Admission in General Management Policy > Client Policies > Module customization. After enabling, the iOA client displays the Network module on the left side.
Employee Network Access Details
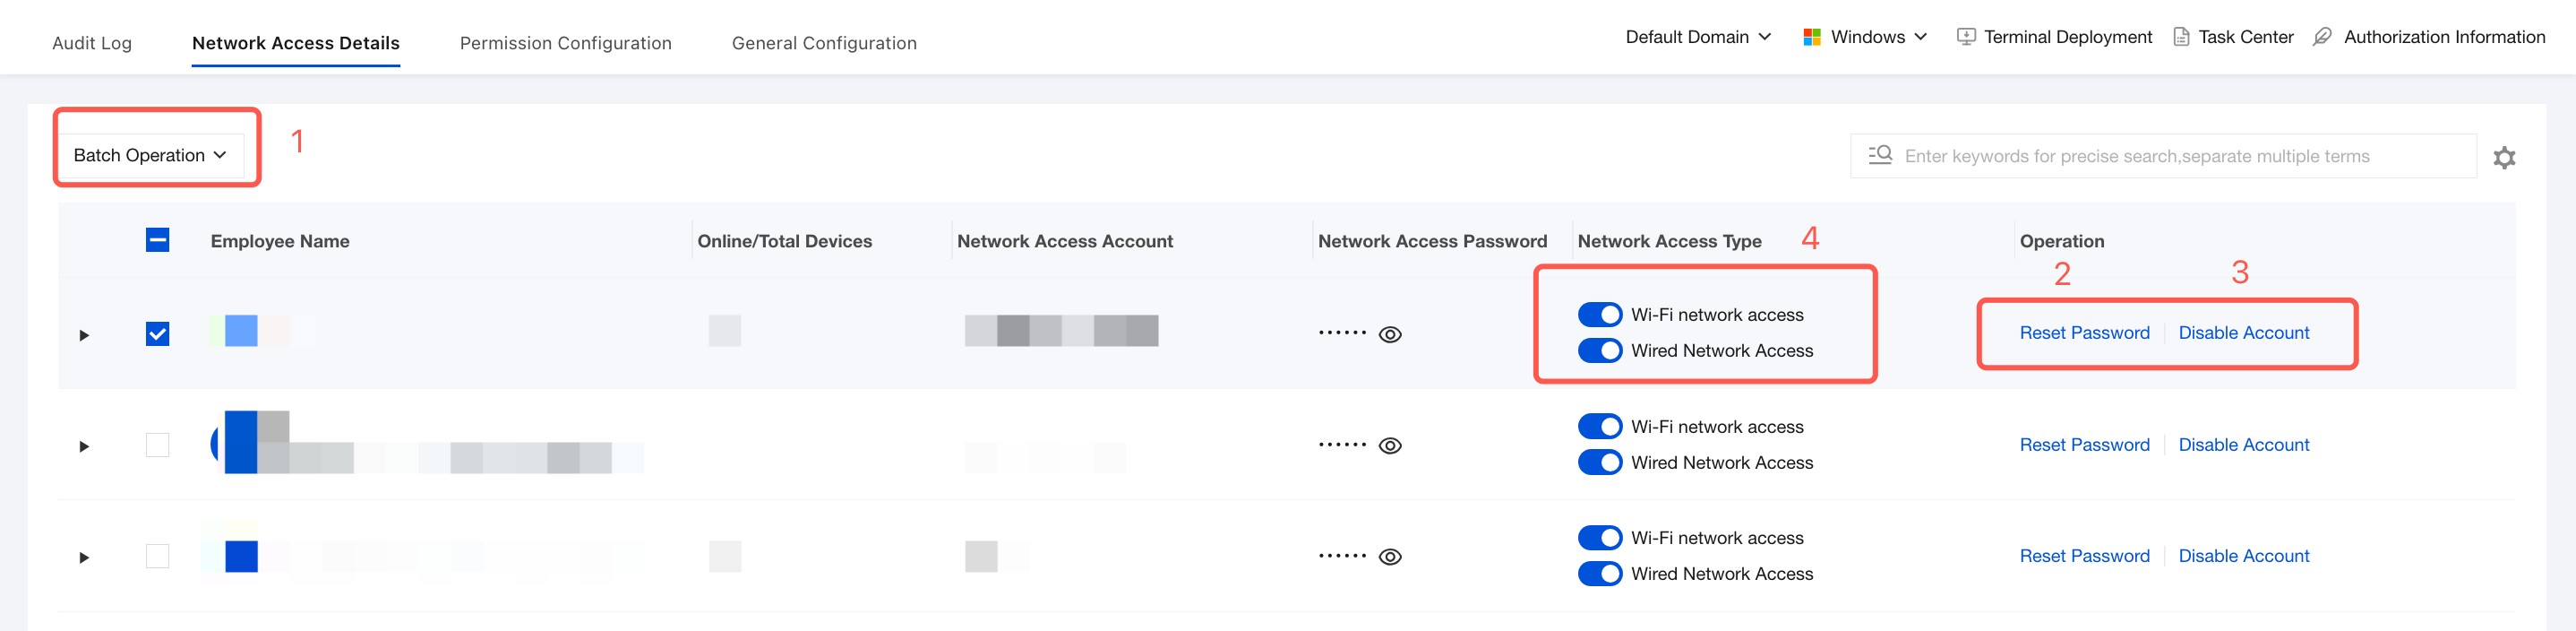
The Network Access Details page centrally manages the network access account information of all employees and displays their basic configurations, online device status, and network access permissions.
2. On the Network Access Details page, administrators can view employee network access account details, manage network access permission switches, and perform operations such as enabling/disabling accounts and resetting passwords, thereby achieving unified control over employee network access.
① Batch operations: After selecting multiple employees, you can perform operations such as enabling/disabling accounts and resetting passwords in batches.
② Reset Password: Reset the employee's network access account password. After resetting, notify the employee to log in again.
③ Disable Account: Disable the employee's network access permission. After disabling, all devices of the employee will be unable to access the network.
④ Network Access Type Switch: Controls whether employees are allowed to access the network via Wi-Fi or wired connection.
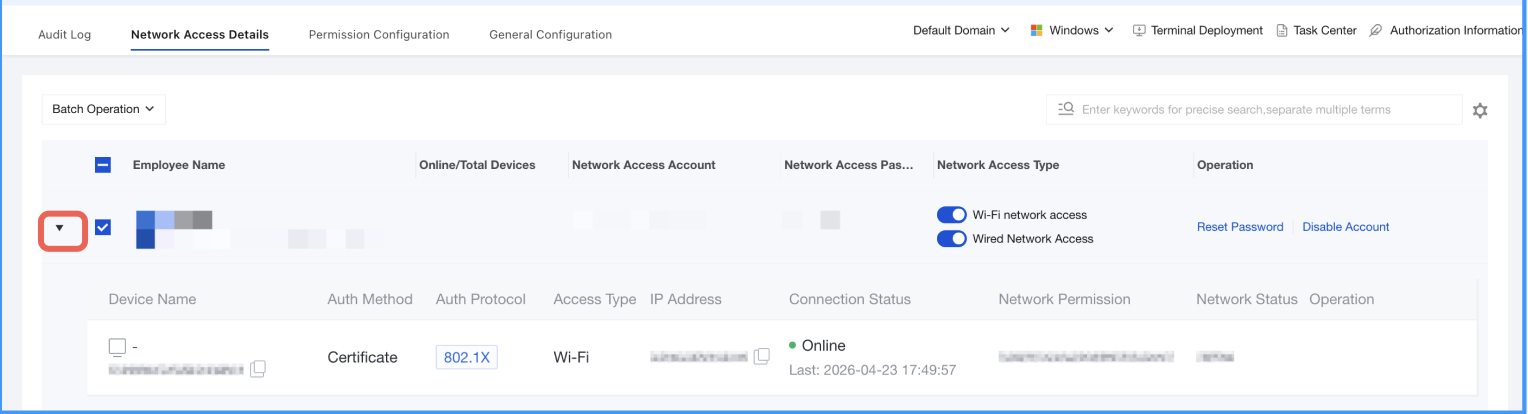
3. To the left of the corresponding employee name, click the
icon to view the account's historical device login information, including device name, authentication protocol, access type, IP address, device connection status, and network permissions.
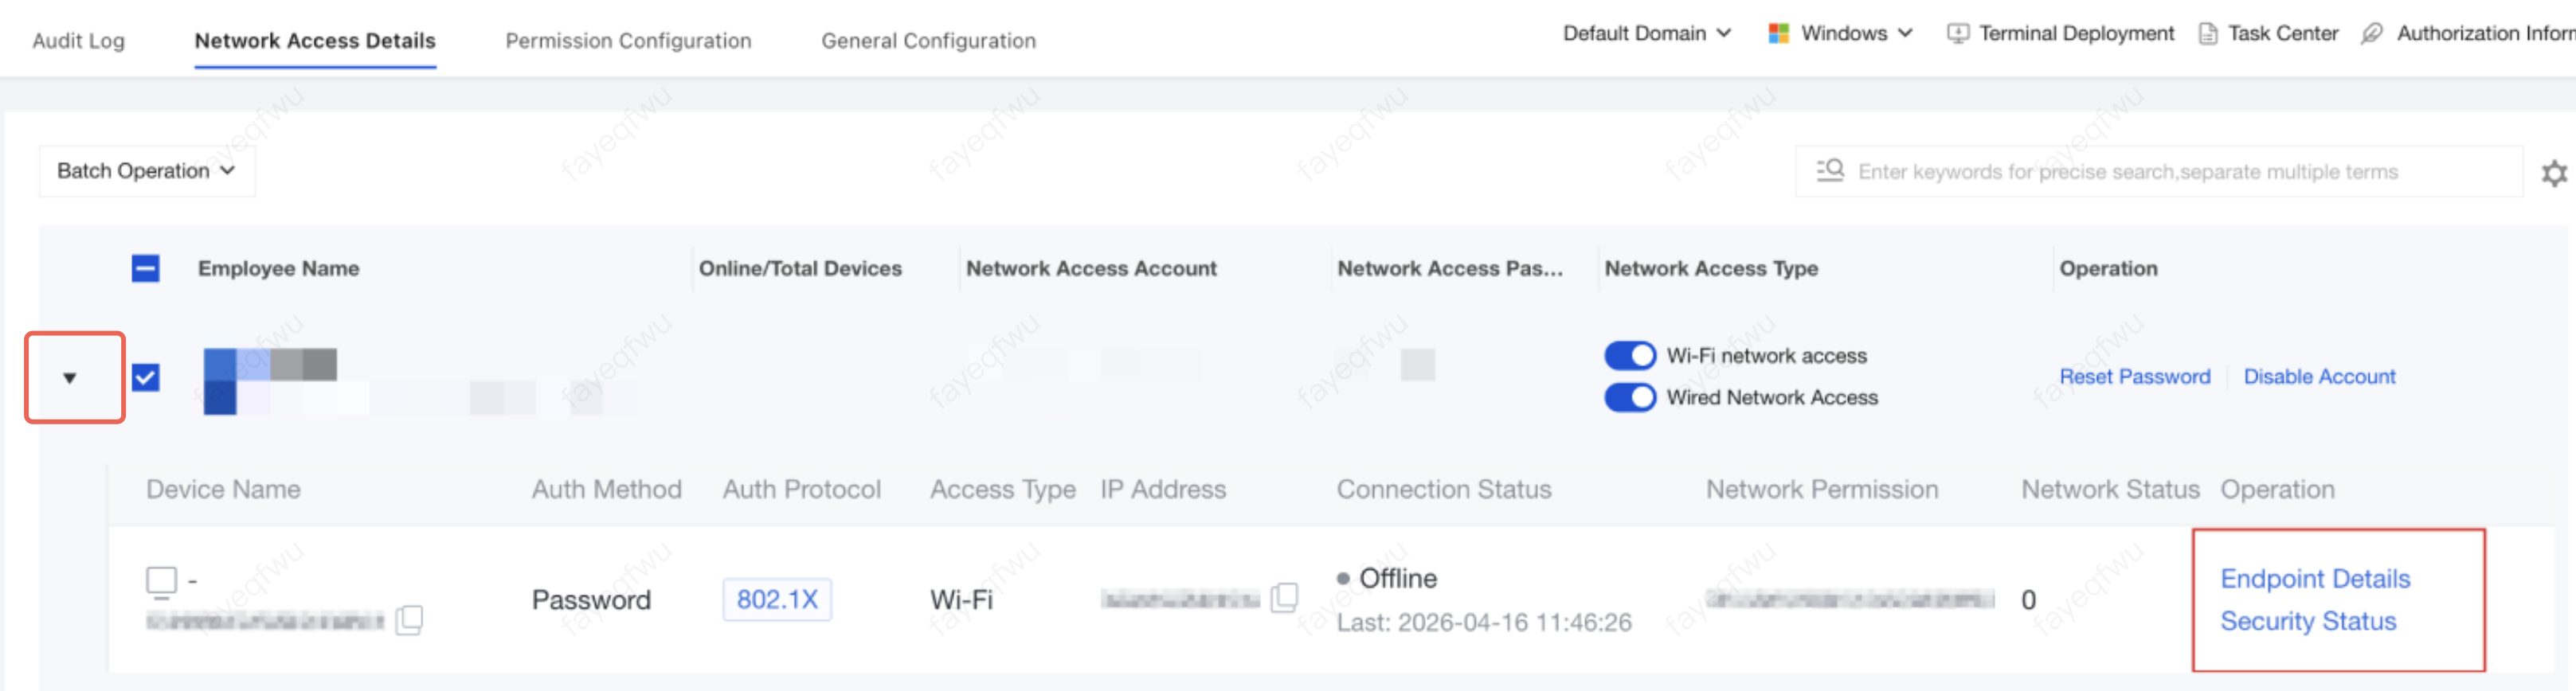
4. In the Operation column of the corresponding historical device login information, you can view terminal details or security status:
Terminal Details: Provides detailed information about network access terminals, associated with Terminal Details > Basic Information.
Security Status: Provides security information about network access terminals, associated with Compliance Detection > Risky Terminals.
Adjusting General Configurations
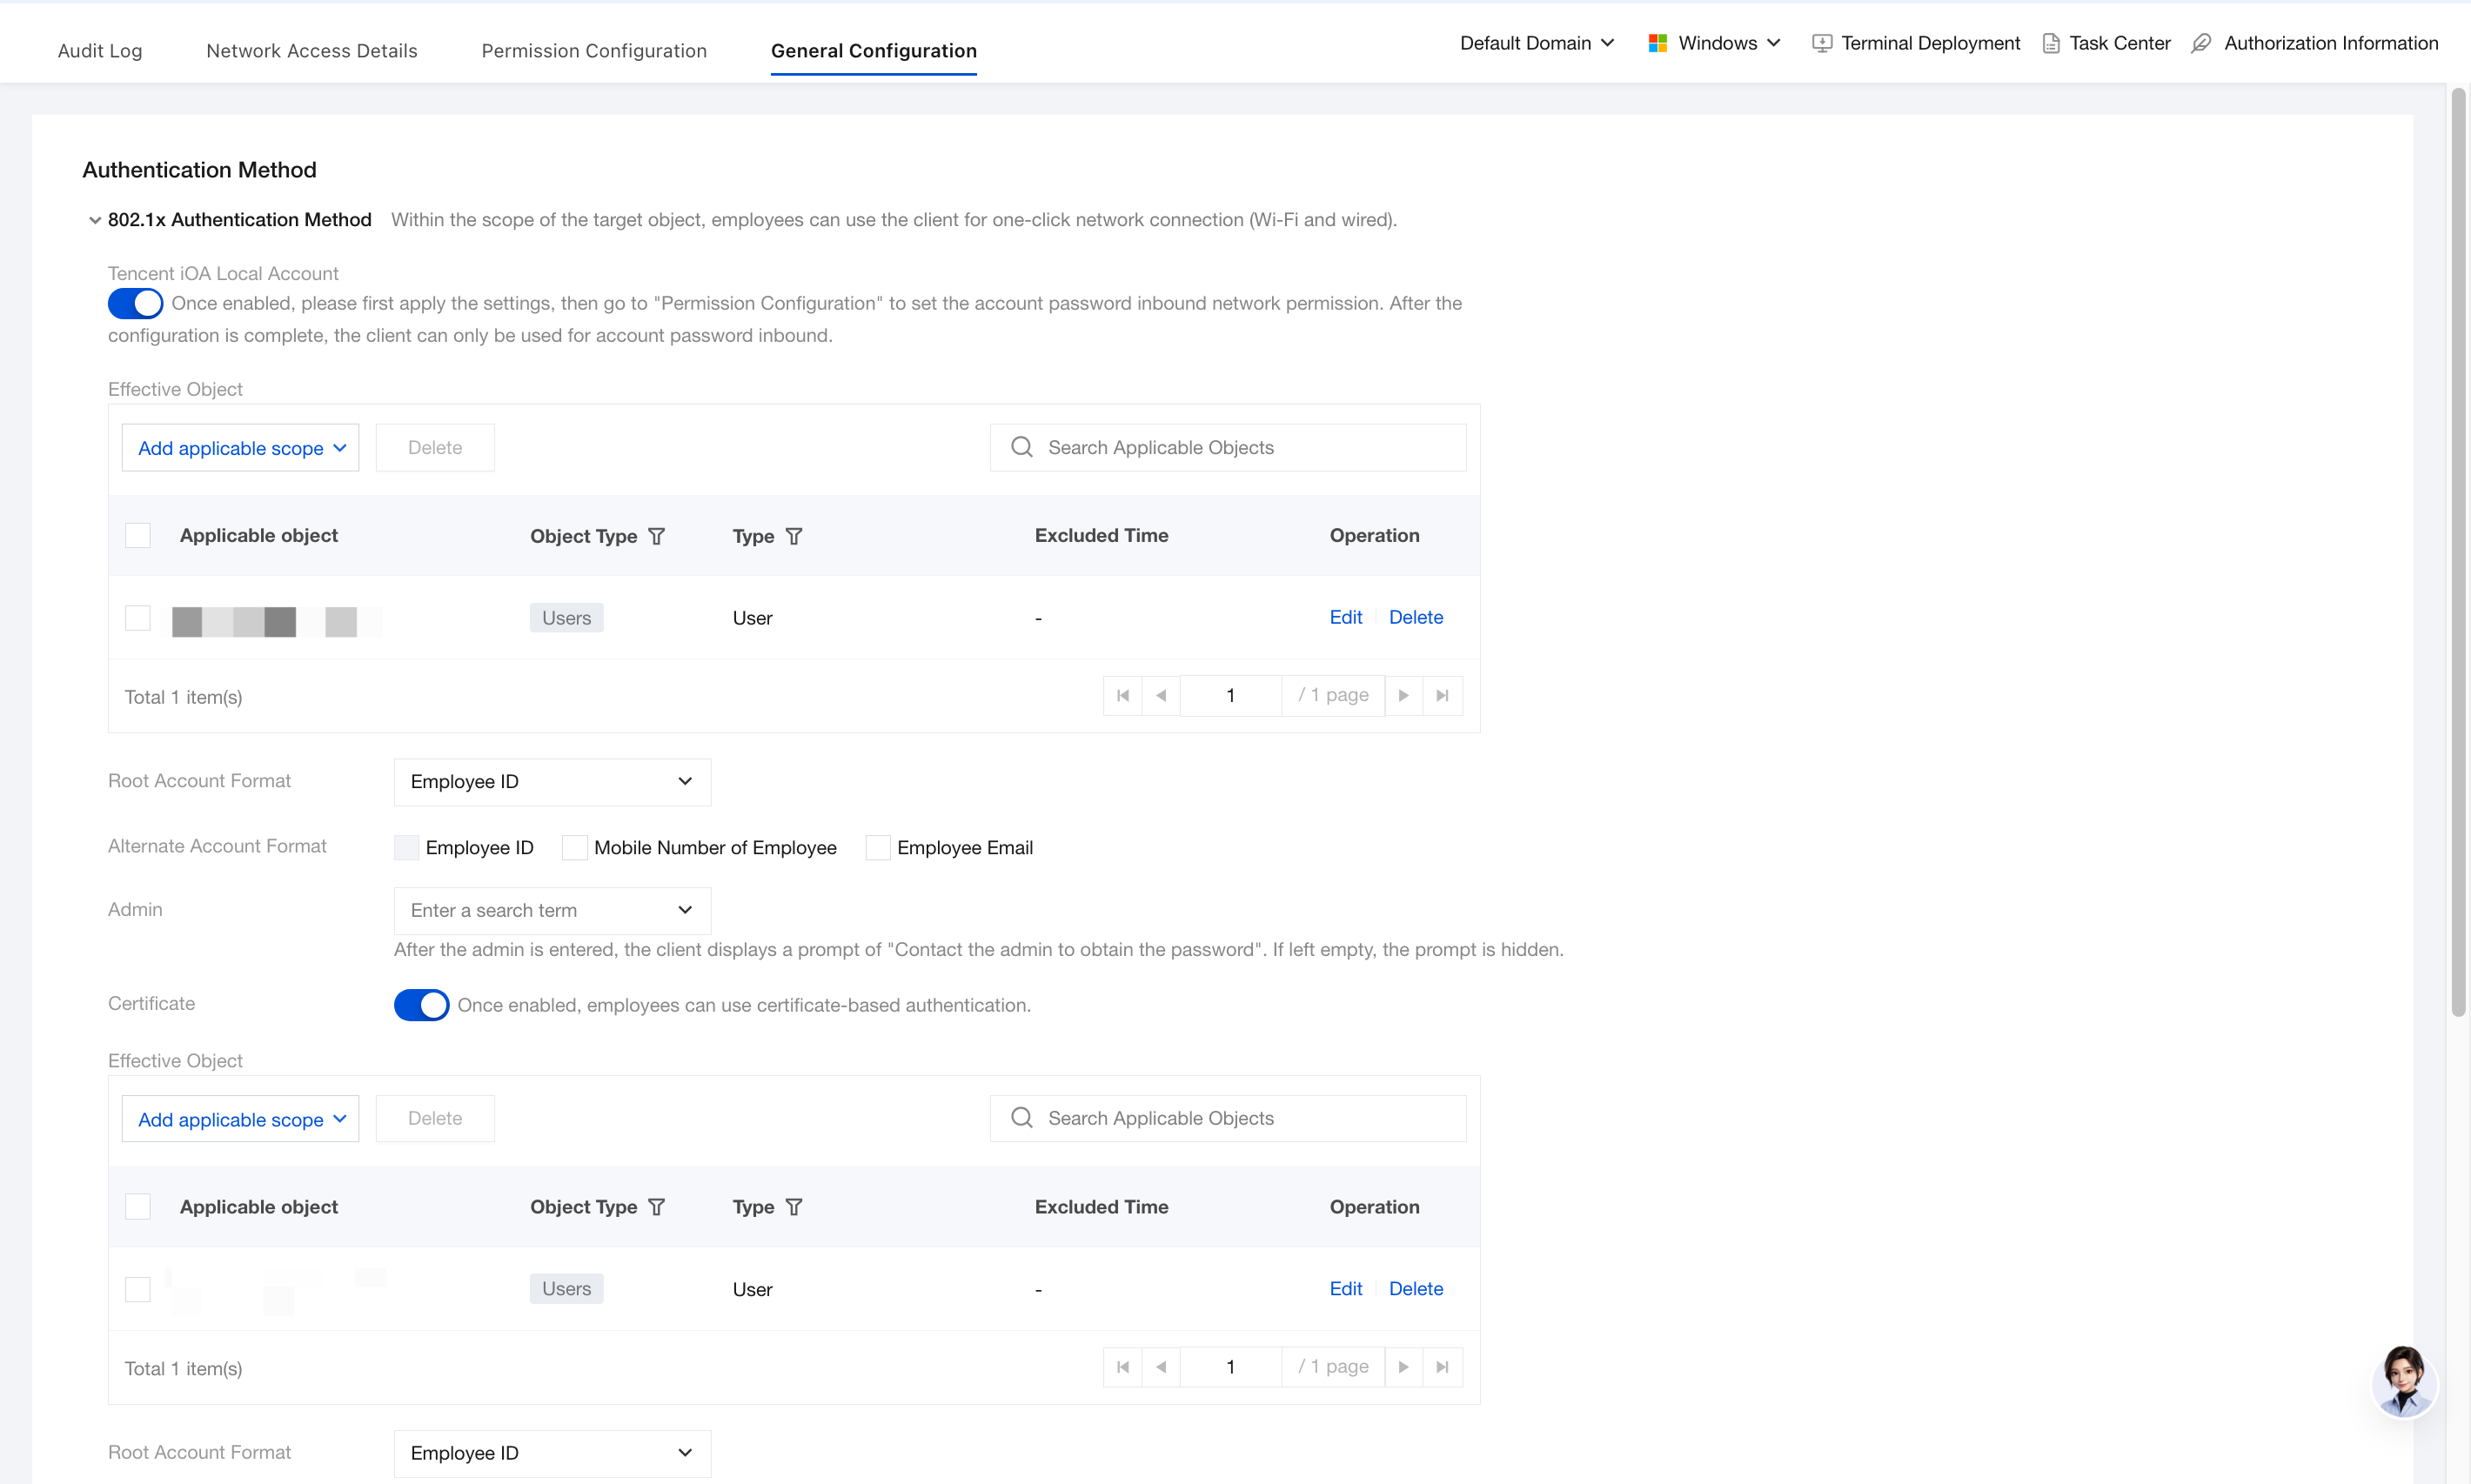
General Configuration is the global behavior control center for employee network access policies, covering authentication methods, security reinforcement, and terminal experience optimization. It does not directly define permissions. Instead, it determines how employees connect to the network, whether secondary verification is required, and which operations the client automatically performs, thereby improving access efficiency and user experience while ensuring security.
2. On the General Configuration page, configure the authentication method.
2.1 Authentication Method Configuration (802.1x Authentication): Configures the identity credential type used by employees when they connect to the network with one click through the client.
Parameter Name
Description
Effective Object
Click Add Applicable Scope and select the users/user groups to be controlled or the users/user groups to be excluded.
Root Account Form
Customize the selection of employee ID, employee phone number, and employee email.
Alternative Account Form
In addition to the root account form, you can select multiple backup login methods (such as allowing login with both phone number + email) for enhanced flexibility.
Admin
Once enabled, Wi-Fi and wired network passwords for employees will be hidden. You can contact the admin for passwords.
Certificate.
After it is enabled, employees can use digital certificates for password-free login.
It must be used together with the certificate network access policy in Permission Configuration to take effect.
Effective Object
Click Add Applicable Scope and select the users/user groups to be controlled or the users/user groups to be excluded.
Network Access Permission Configuration
Permission configuration centrally manages permission policies for employee network access and supports defining access control rules by user/terminal, authentication method, network device, and other dimensions.
2. On the permission configuration page, flexibly assign VLANs or custom RADIUS attributes to implement fine-grained network admission control, ensuring security isolation and resource authorization for different roles/scenarios.
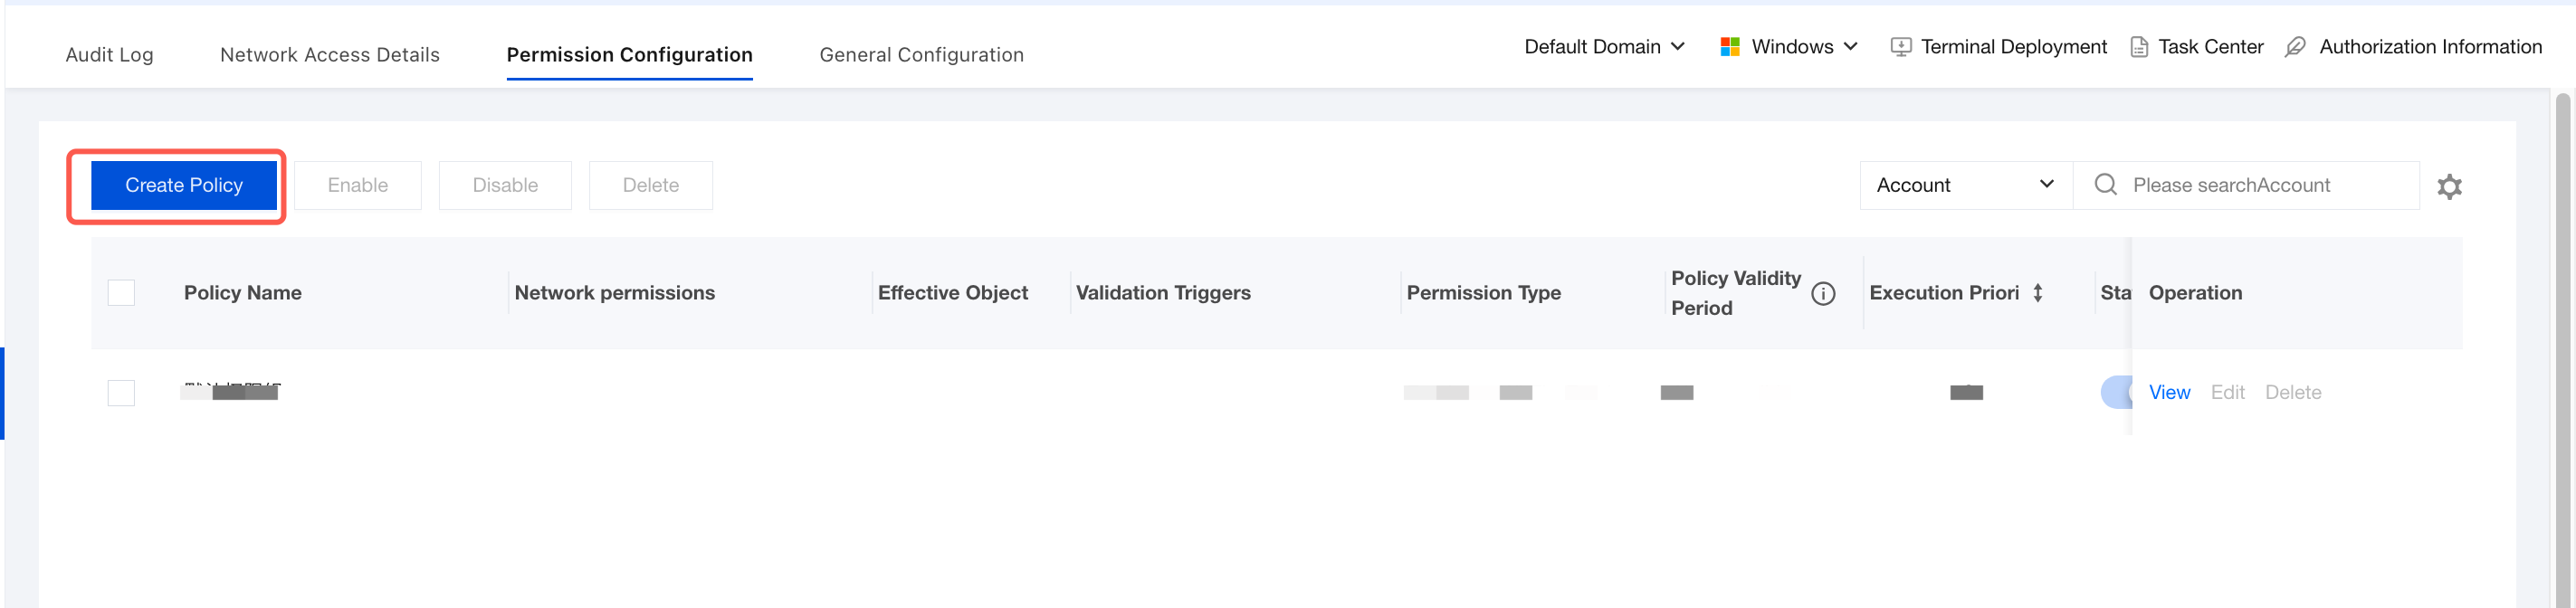
3. On the Permission Configuration page, click Create Policy.
Note:
If a newly created or edited permission group takes higher priority over the original permission group and covers the scope of existing target objects, employees within that scope will be assigned the content of the new permission group when they reconnect to the network.
4. On the Create Policy page, configure the relevant parameters.
4.1 Enter parameters such as the policy name and policy description.
4.2 Configure the employee permission type and authentication method, click Add Applicable Scope, select the user/terminal names to be controlled/excluded, and click OK.
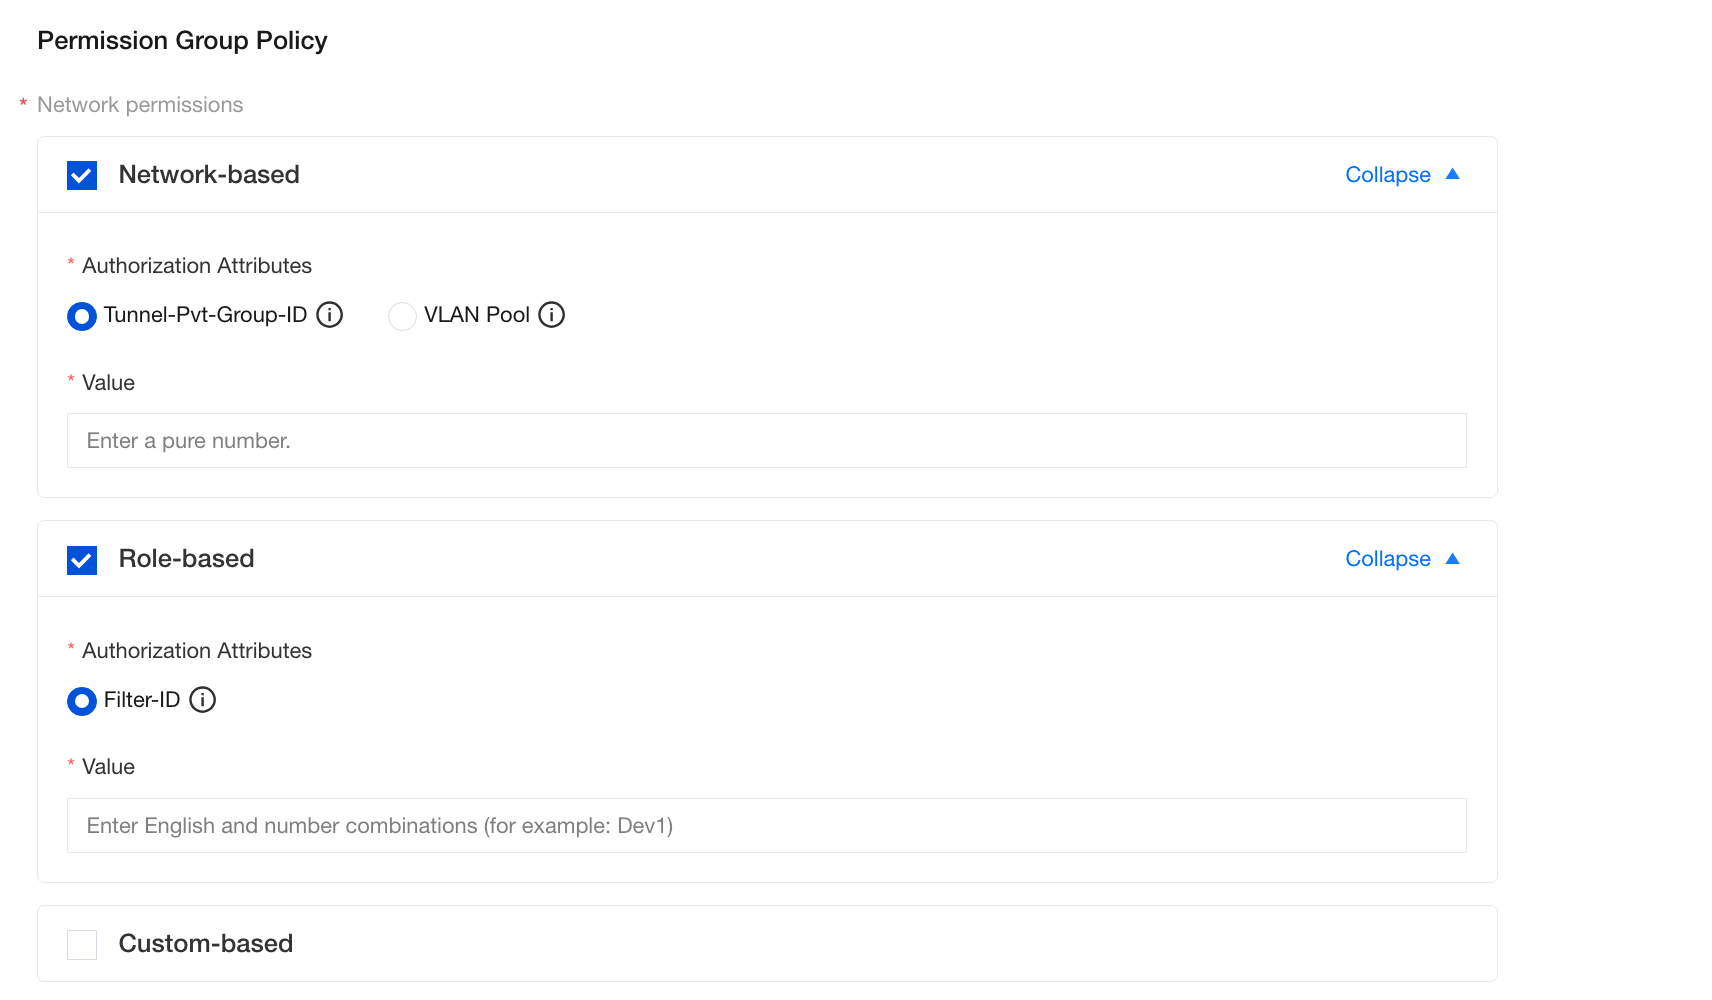
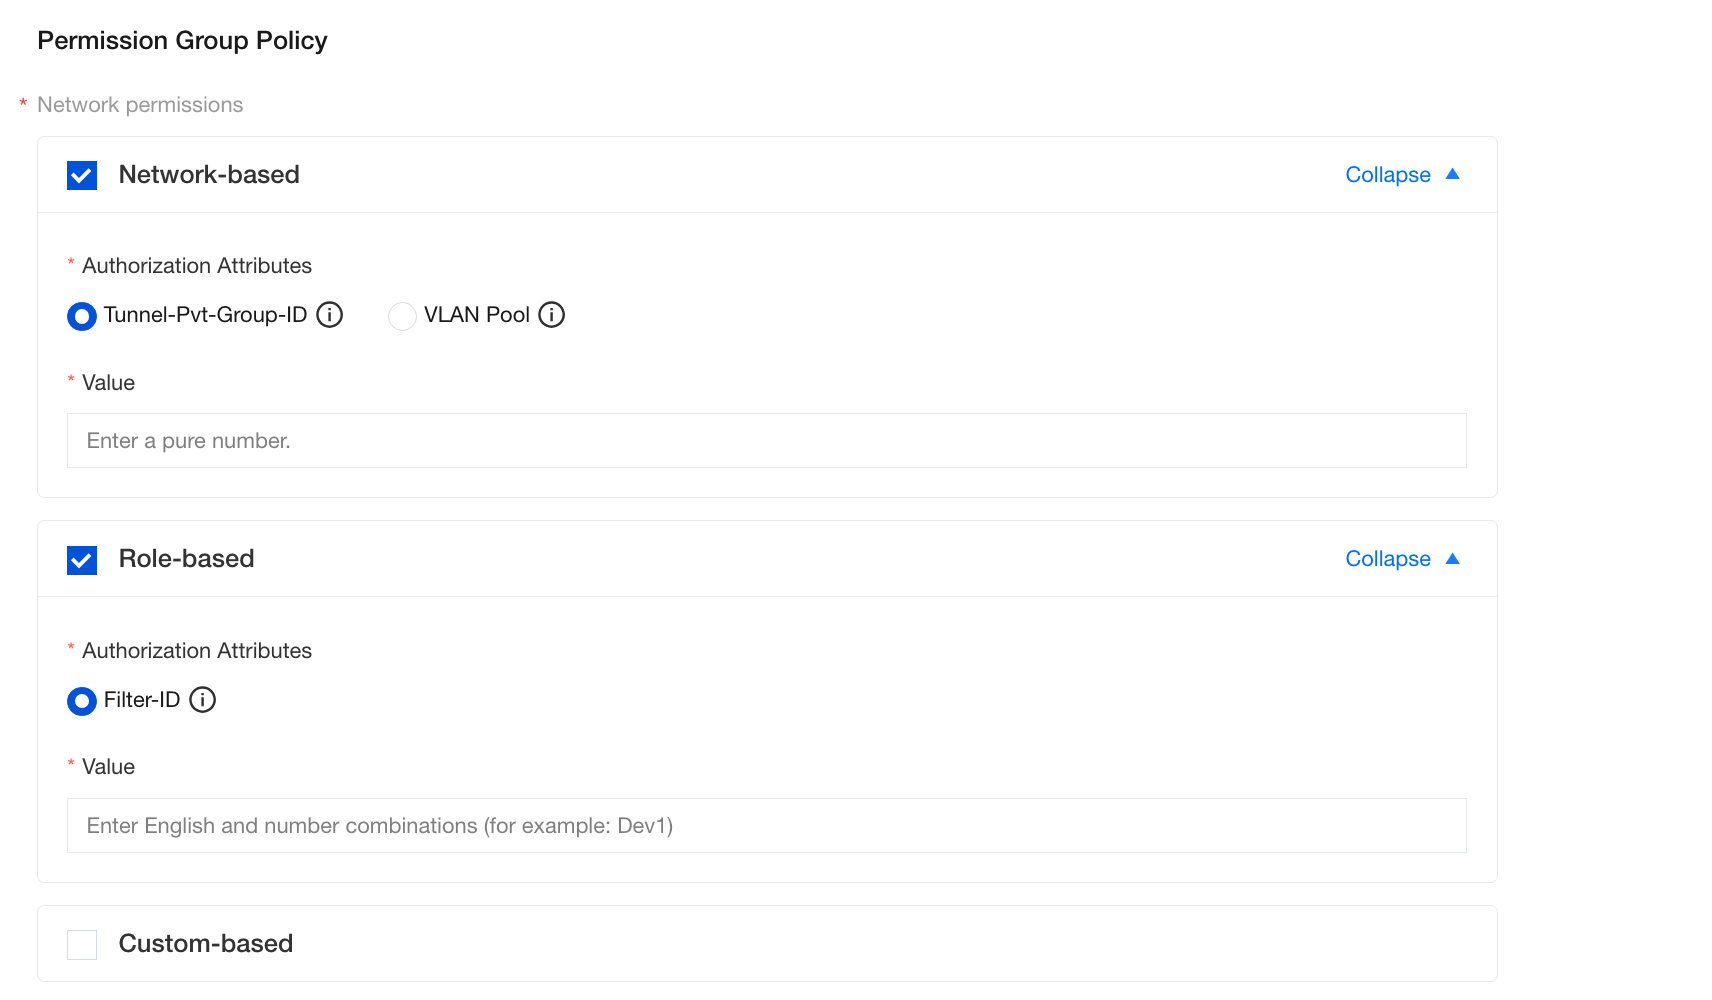
5. Configure network permissions. Three authorization modes are supported (network-based/role-based/custom), and multiple modes can be enabled simultaneously.
Parameter Name
Description
Network permission
network-based
The authentication service delivers permission identifiers to router devices to implement different network access permissions. By default, Tunnel-Pvt-Group-ID is selected, and VLAN Pool is also supported. After you select network-based, you can choose authorization attributes:
Tunnel-Pvt-Group-ID: generally corresponds to the VLAN ID of a network device, in a numeric format, for example, 97.
VLAN Pool: a pool of VLANs in an alphanumeric format, for example, Dev1. iOA distributes VLANs evenly based on the capacity weight ratio configured for each VLAN.
To perform network authorization based on user groups or ACLs, select role-based and set the authorization attribute Filter-ID.
For user group-based authorization, enter the user group name in Filter-ID. The name must be alphanumeric, for example, Dev1.
For ACL-based authorization, enter the ACL ID in Filter-ID. The format must be numeric only.
Role-based
To perform network authorization based on user groups or ACLs, select role-based and set the authorization attribute Filter-ID.
For user group-based authorization, enter the user group name in Filter-ID. The name must be alphanumeric, for example, Dev1.
For ACL-based authorization, enter the ACL ID in Filter-ID. The format must be numeric only.
Custom-based
To use other network authorization methods, customize the authorization attributes. After you select custom-based, you can set the attribute name and attribute value. Add up to 10 attributes.
iOA provides multiple common attributes. If the desired attribute is not available in the built-in attribute names, click Custom Attribute at the bottom of the attribute name list to add a custom attribute. The parameters are described as follows:
Vendor ID: Enter the vendor ID of the network device.
Vendor Internal Attribute ID: Enter the internal attribute ID of this custom attribute in the vendor's system.
Attribute Name: Enter the name of the custom attribute.
Attribute Type: Enter the type of the attribute value. The iOA client will validate attribute values based on this rule.
Encryption Type: Select whether RADIUS authentication packets are encrypted and the encryption type based on your actual requirements. Options include None, UserPassword, TunnelPassword, and AscendSecret.
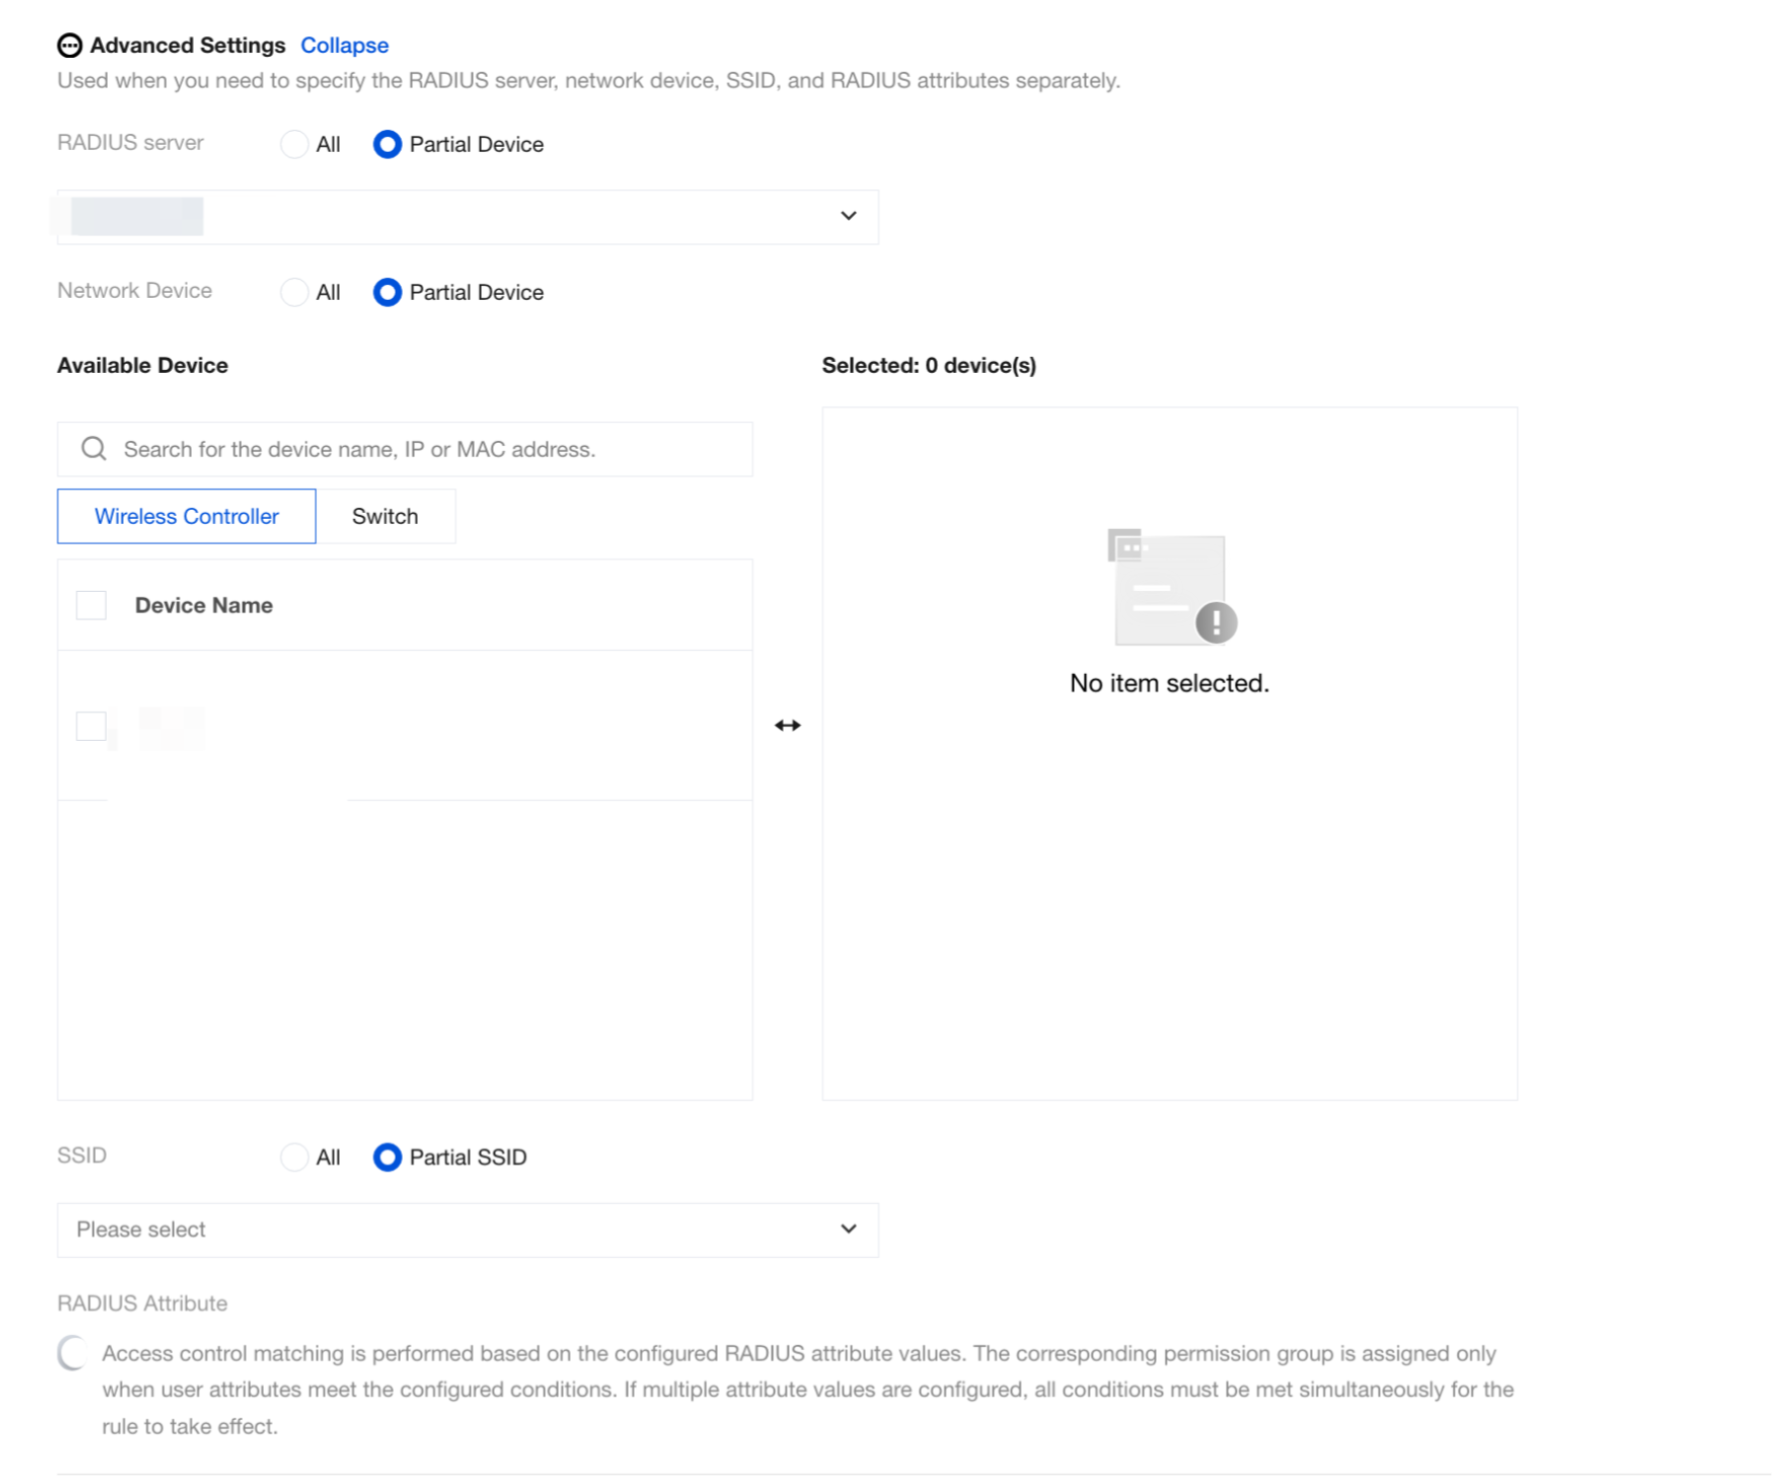
6. Configure advanced settings (optional) for complex deployment environments. Specify the RADIUS servers, network devices, and SSIDs to which this permission group applies as needed. By default, the group applies to all devices. You can also select specific devices and configure multiple RADIUS servers, network devices, and SSIDs for this permission group.
Parameter Name
Description
RADIUS server
All / some devices: Select a specific RADIUS server.
Network device
All / some devices: Select a wireless controller or switch.
SSID
All / some SSIDs: Limit the policy to specific wireless networks.
RADIUS Attribute
After enabled, this policy is delivered only when the user carries the specified RADIUS attribute. Multiple conditions must be met simultaneously.