新規サブユーザー作成
Download
フォーカスモード
フォントサイズ
操作シナリオ
管理者権限(AdministratorAccess)またはCAMフルアクセス権限(QcloudCamFullAccess)を持つサブアカウントであり、Tencent CloudでCVM、VPC、COSなどの複数のクラウドリソースを購入した場合、1つ以上のサブアカウントを作成し、チームメンバーに提供でき、彼らがあなたのクラウドリソースにアクセスすることを許可できます。
このタスクは、管理者アカウントを使用してCAMコンソールでサブユーザーを作成し、権限ポリシーを紐付けることをガイドします。
説明:
作成方法 | 適用シーン | 説明 |
クイック作成 | 管理者ユーザーを作成する | デフォルトでAdministratorAccess権限を所有しており、変更可能です。 |
カスタム作成 | 一般サブユーザー、メッセージ受信者 | 必要に応じてポリシー権限を紐付けます。 |
前提条件
操作ガイド
コンソールでの作成
説明:
以下のタブをクリックして、異なるタイプのサブアカウントの作成および権限付与方法を確認してください。
未実名認証メインアカウントは24時間内に最大10個のサブアカウントを作成できます。
1. Tencent Cloudコンソールにログインし、ユーザーリストに移動し、新規ユーザーをクリックして、新規ユーザーページに移動します。
2. 新規ユーザーページで、クイック作成をクリックすると、クイック作成ユーザーページに移動します。
3. クイック作成ユーザーページで、「ユーザー情報設定」欄にユーザー名を追加入力します。その他のオプションは必要に応じて調整できます。
説明:
新規ユーザーをクリックすると、一度に最大10ユーザーを作成できます。
4. 「パスワードリセット要否設定」欄で、実際のニーズに応じて、サブユーザーが次回ログイン時にパスワードリセットが必要かどうかをチェックして設定します。
5. ユーザー作成をクリックすると、ユーザー作成成功のページに移動します。
6. ユーザー作成成功のページで、以下の2つの方法でサブユーザー情報を取得できます。
メールアドレス情報を補充し、送信をクリックすると、システムが完全なサブユーザー情報をメールアドレスに送信します。
コピーをクリックし、ローカルにペーストして保存します。
1. CAMコンソールにログインし、左側ナビゲーションバーでユーザー > ユーザーリストを選択し、ユーザーリスト管理ページに移動します。
2. ユーザーリスト管理ページで、新規ユーザー作成をクリックして、新規ユーザーページに移動します。
3. 新規ユーザーページで、カスタム作成をクリックして、ユーザータイプ選択ページに移動します。
4. ユーザータイプ選択ページで、リソースにアクセス可能かつメッセージを受信またはメッセージ受信専用をクリックし、次へをクリックしてユーザー情報を入力します。
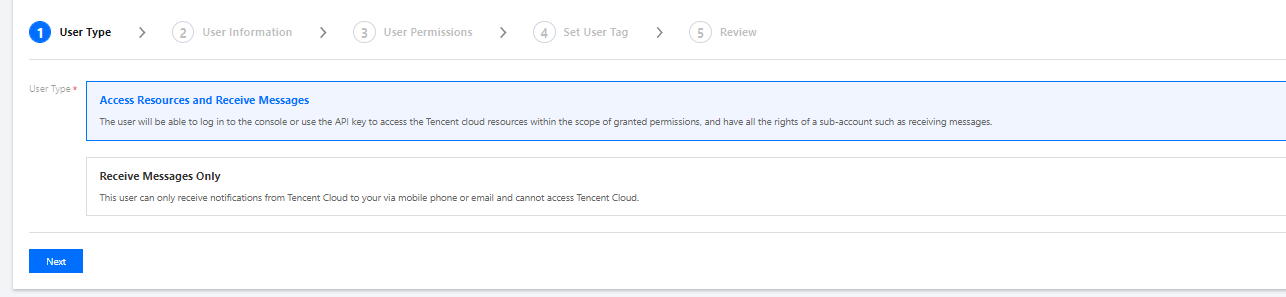
5. ページの指示に従って情報を入力・確認し、完了をクリックして、カスタムサブユーザー作成操作を完了します。
リソースにアクセス可能かつメッセージを受信を選択した場合、新規サブユーザー作成成功のページが表示されます。
メッセージ受信専用の場合、ユーザーリストページが表示されます。
APIによる作成
関連ドキュメント
ユーザーグループによるサブユーザーのグループ分けと権限付与について知りたい場合は、ユーザーグループへのユーザー追加/削除、ユーザーグループへのポリシー追加/解除を参照してください。
サブユーザーに関連するポリシーの追加・削除について知りたい場合は、サブユーザー権限設定を参照してください。
サブユーザーのログイン方法について知りたい場合は、サブユーザーログインを参照してください。
サブユーザーのキー再設定方法について知りたい場合は、サブユーザーログインパスワード再設定を参照してください。
サブユーザーのメッセージ購読方法について知りたい場合は、サブユーザーメッセージ購読を参照してください。
フィードバック